| Today |
| UM Home |
| Stuff to do |
| Things to make |
| Places to go |
| Contact Us |
Unaccompanied Minors...
|
||
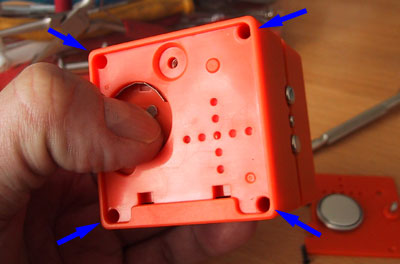
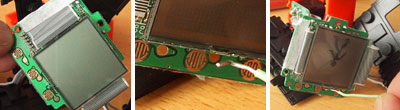
To get the inside we first had to remove the back and battery. Four phillips head screws anchor the back of the case to the front. We had to use a pretty small jeweler's screwdriver, but the screws came out pretty easily.
The magnets on the perimeter are well attached so there was no problems with them falling out all over the place. However, we had to take care in pulling on the back cover since there was not much length to the wires.
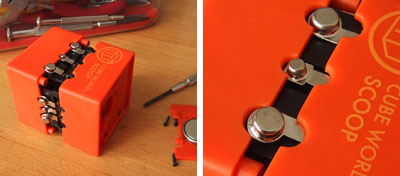
We got the rear cover off, but there was not much room to maneuver. We finally realized if we rotated the rear cover and untwisted the main wire bundle, it gave us a lot more length to work with.
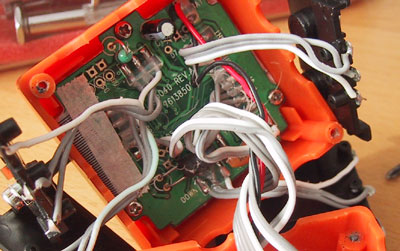
Once we had more space, it was relatively easy to remove the four side panels holding the magnets. We did uniquely mark the locations of the sides and the panels so we could reassemble everything later. Removing the four side panels showed the three screws securing the LCD circuits to the front half of the case. We replaced the battery and the back cover to see if we could fire up the Cube.
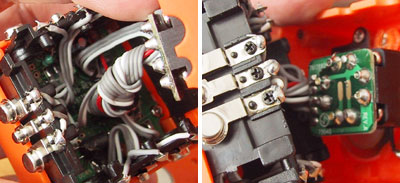
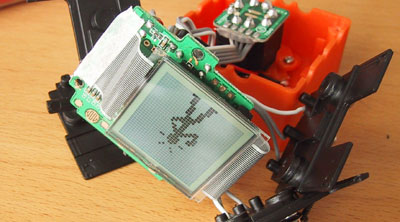
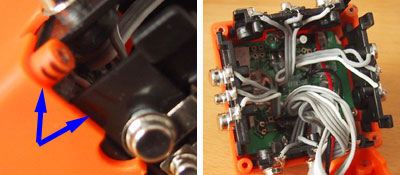
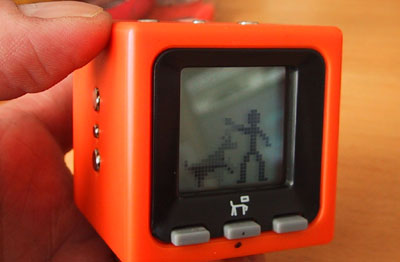
To get it powered up, we used a piece of wire to make contact (middle photo). Once proper contact was made, Stick Guy popped onto the screen and did the usual warm up routine :-)
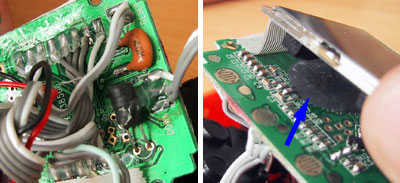
We are not sure what all the parts are yet, but we show them here just in case some of you do. The programmed chip (blue arrow) appears to be underneath the LCD. It is sealed...so reprogramming it may be a bit difficult. We didn't want to take it apart just yet. We wanted to open it up, take a look around, close it up, and see if everything still worked.
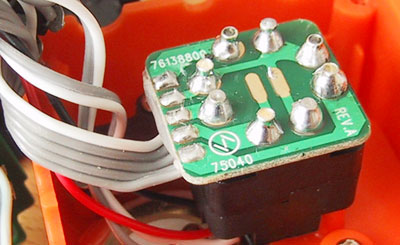
The module above deals with power. It seemed to be pretty well glued on. We are not sure not to get the circuit board off yet, but we probably won't mess with it too much.
We marked the screw posts and magnet panels with unique matching marking so we would know which panel went on which side when it was time to put everything back together.
We also marked how the LCD panel should be oriented withe the front case by a black dot. When we put everything back together and pushed the Power button...we were greeted with Stick Guy and his dog SCOOP :-) Our next task is to open it up again and figure out how to get at the programmed chip. If you know, tell us...we'll make it worth your while, especially if you can show us how to reprogram it with new graphics! |
Radica Cube World |
|
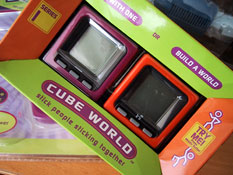
A new crop of Tech Toys just came in to the RainyDayMagazine office today. All work grinded to a halt as folks gathered around the UPS guy (btw...we call him "Santa Bob") to see what was hot at ToyFair 2006...it was not like we didn't already HAVE enough diversions in our office. The instant hit with the bunch at the office was a package from Radica containing a couple of cubes. For those who were caught up in the Tamagotchi craze, you may want to be a little careful with these.
In the FirstLook review, we'll check out these Cube World modules and how they works. In the FirstPlay review, we'll set up four-cube "world" and videotape the interaction! Reviews: 1. First Look 2. Look Inside 3. First Play
Review Summary: Initial Impression- Addictive!!! Usability- Magnetic attraction Durability- Test in progress Price- $30 for pkg of two
Other TechToys 3. 20Q |
||