RainyDayScience's content can now be licensed for your print magazine or web site. Please contact us directly here. If you want to see something reviewed, then drop us a note with a link and we'll be happy to take a look.
Dec 11,2007
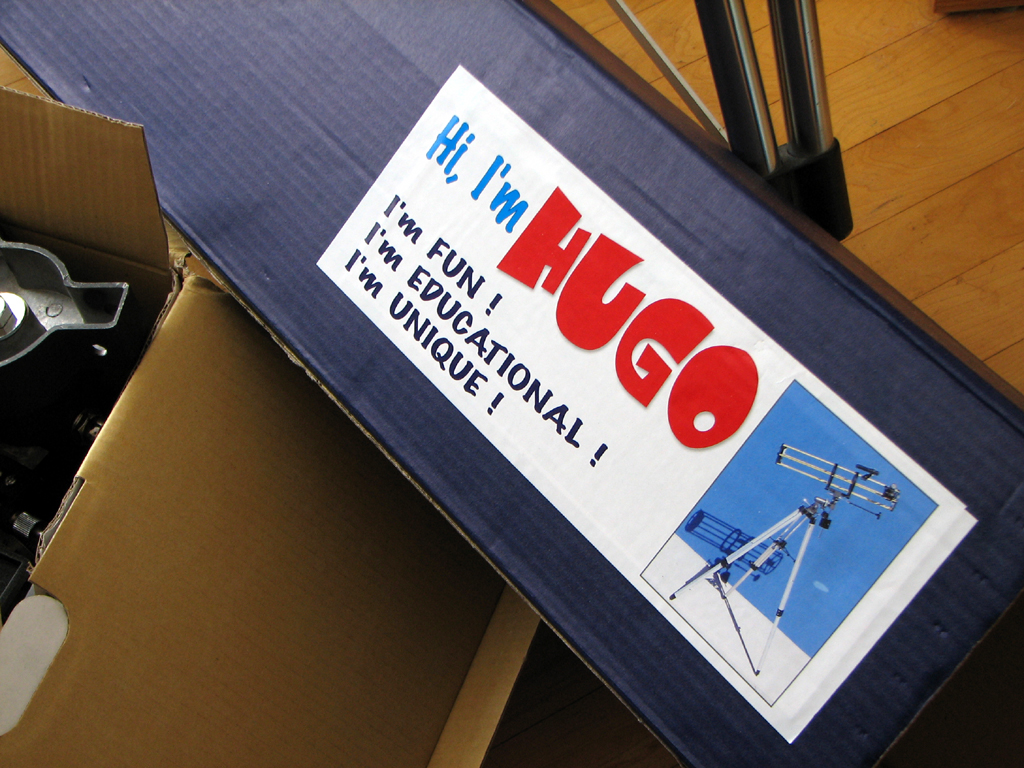
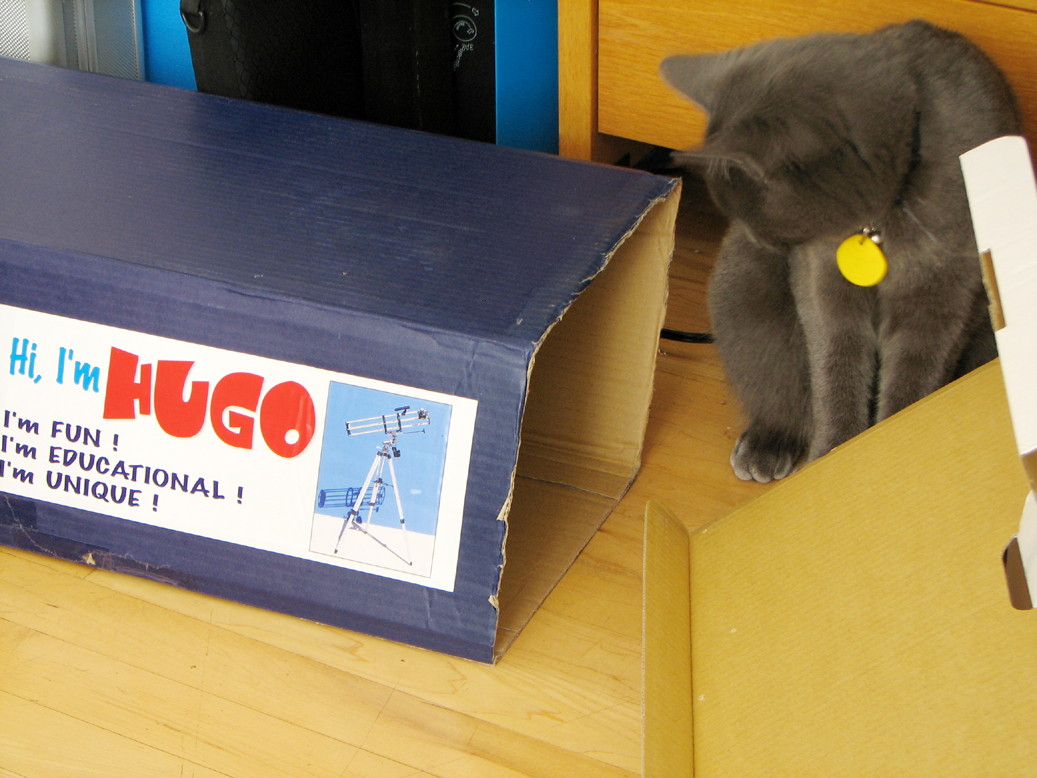
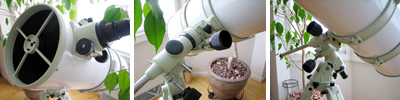
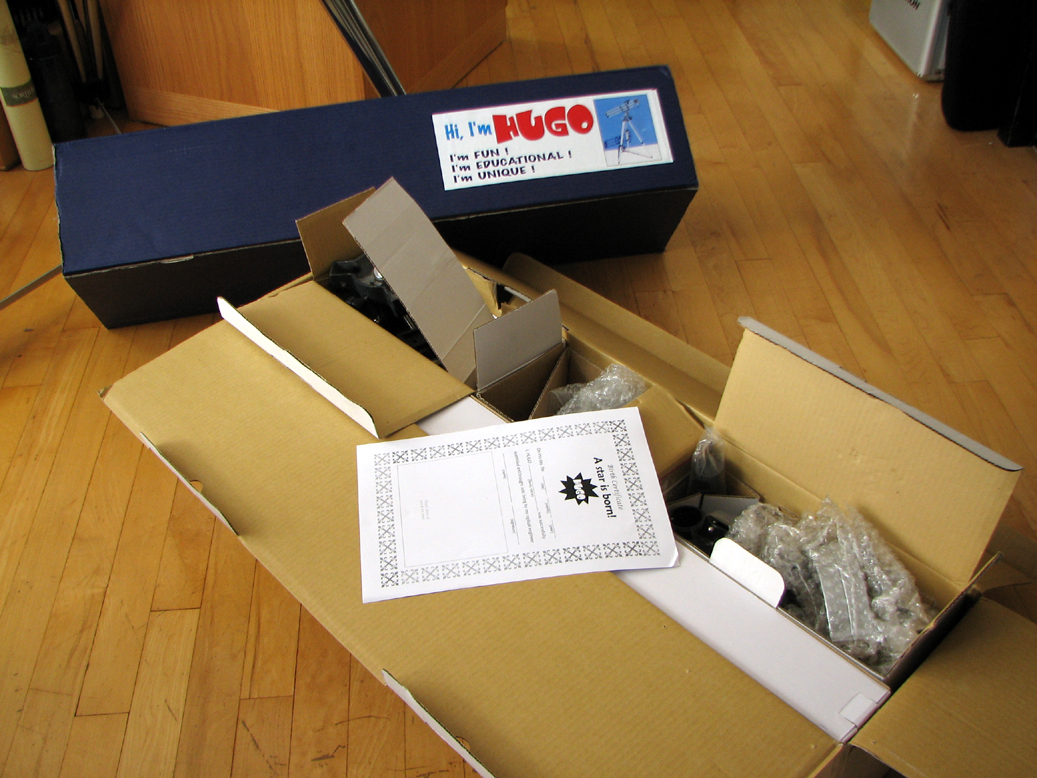
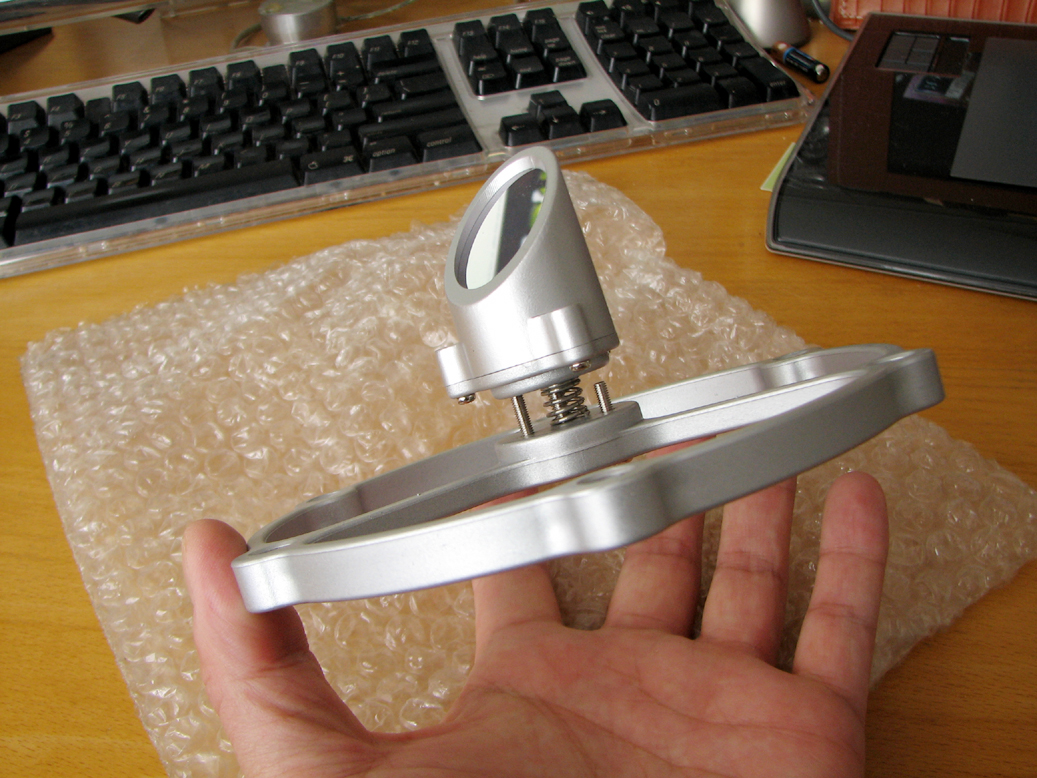
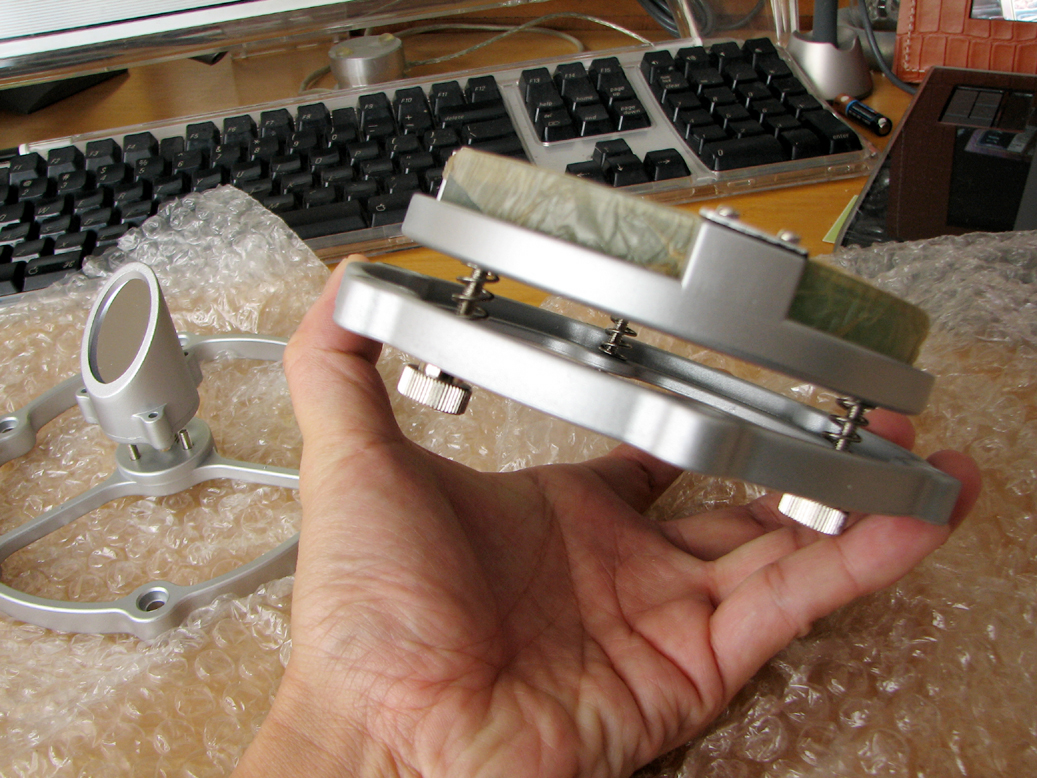
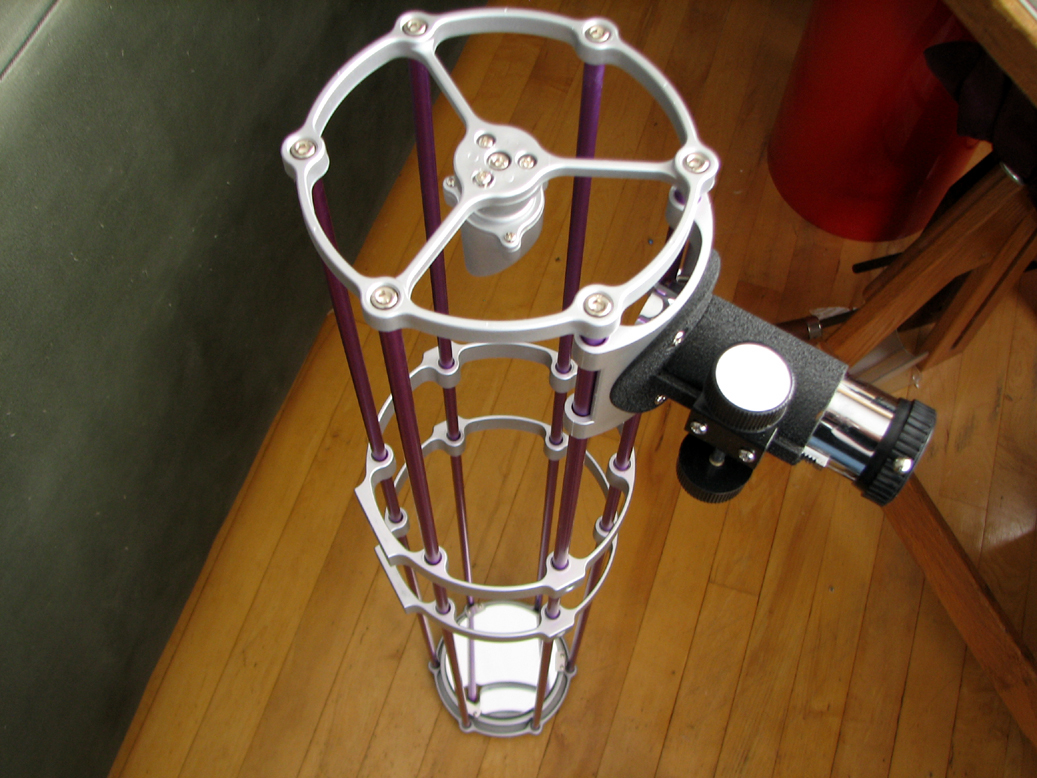
In the course of prepping for RainyDayScience's Astronomy section for 2008, the crew here has checked out quite a few suggestions from our readers. One of the more interesting tips was a pointer to an Australian company selling a product called the HUGO.
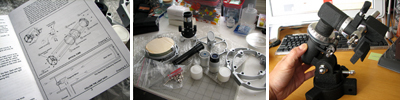
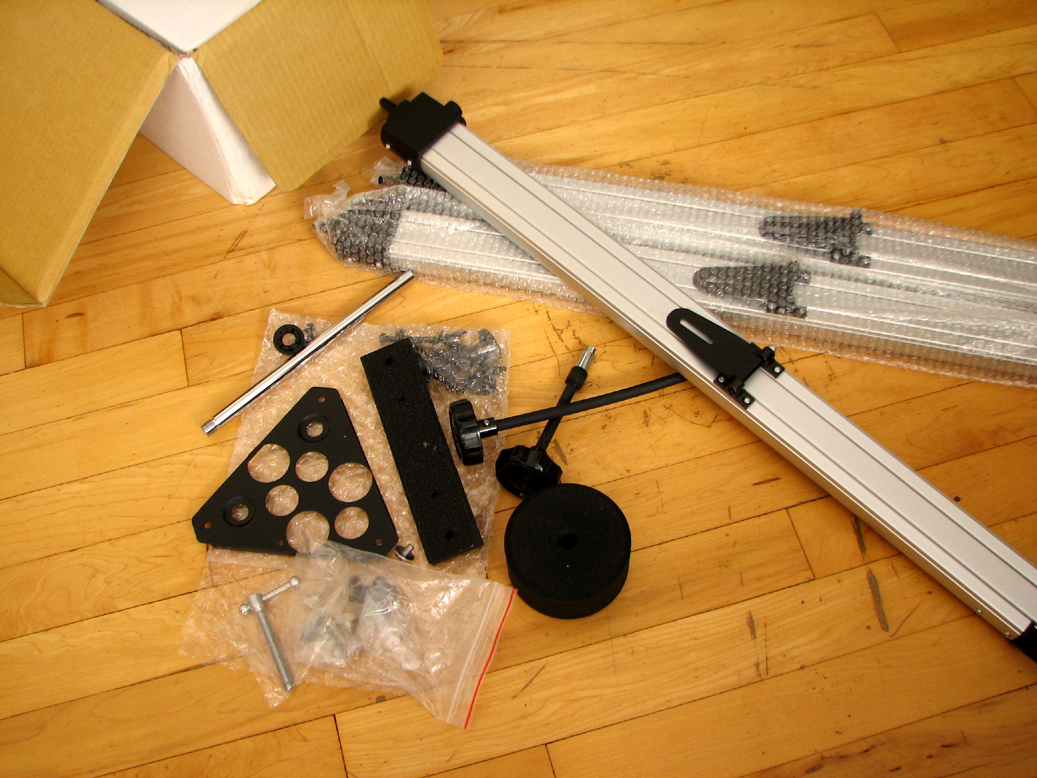
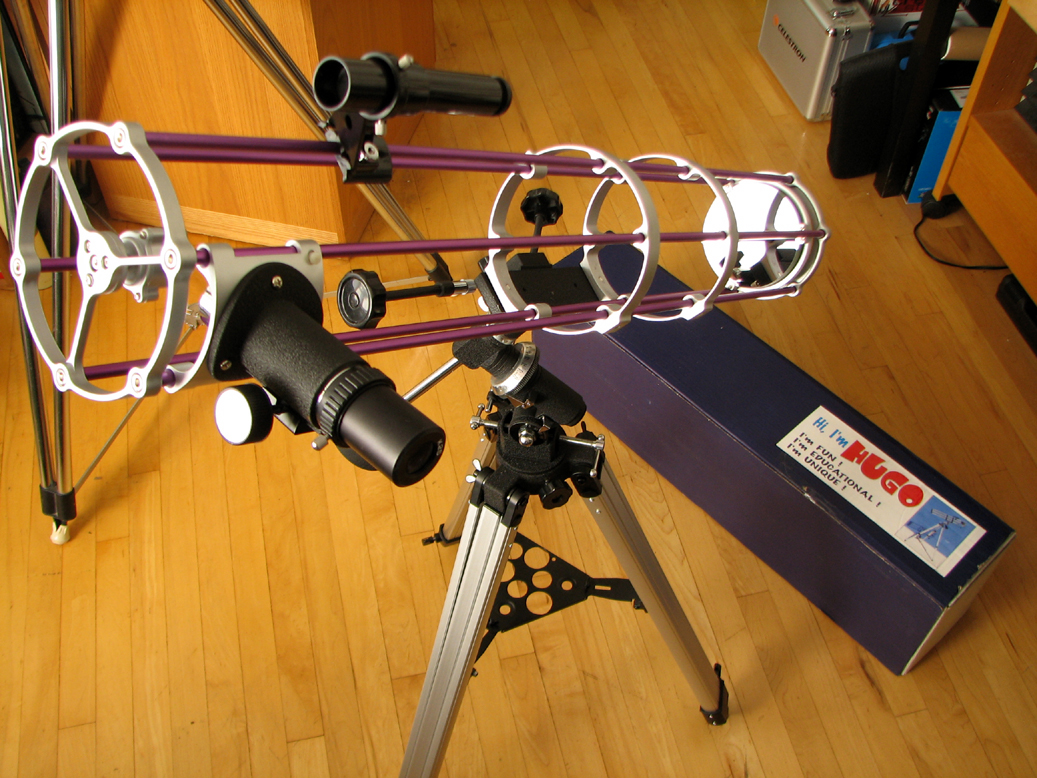
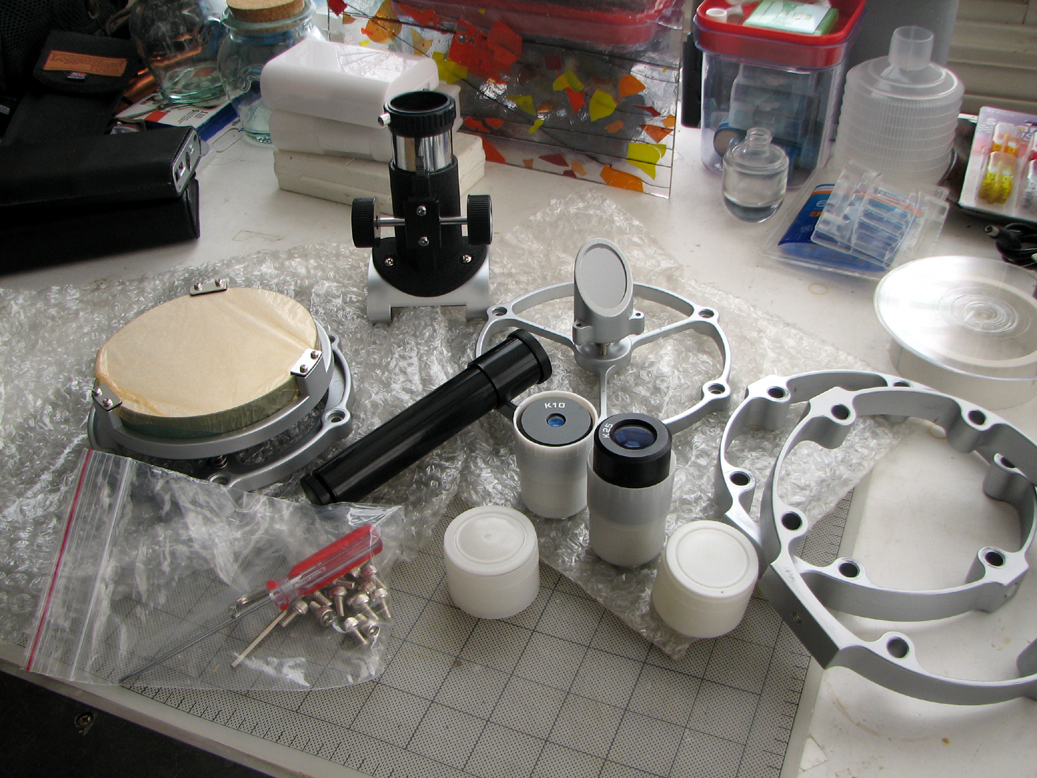
The HUGO is a telescope based on the Newtonian reflector design. The uniqueness of the HUGO is that it comes disassembled. Part of the fun is the construction of the telescope. It is also very educational to see how a telescope works by assembling it from the ground up.
Unlike astronomers of previous generations, builders of this telescope will not have to grind the mirror or build a mount from scratch. All of the major components (mirror, tube, tripod) are supplied and ready for assembly.
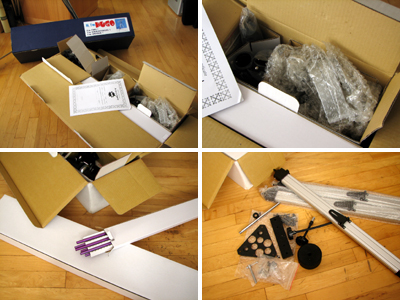
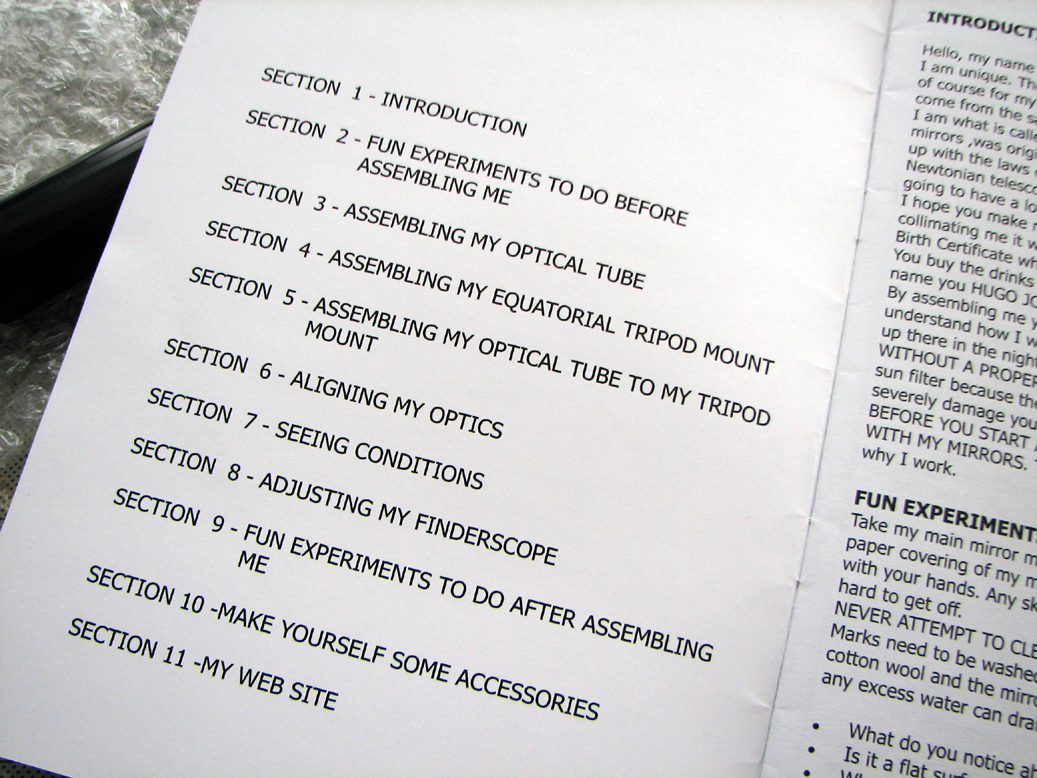
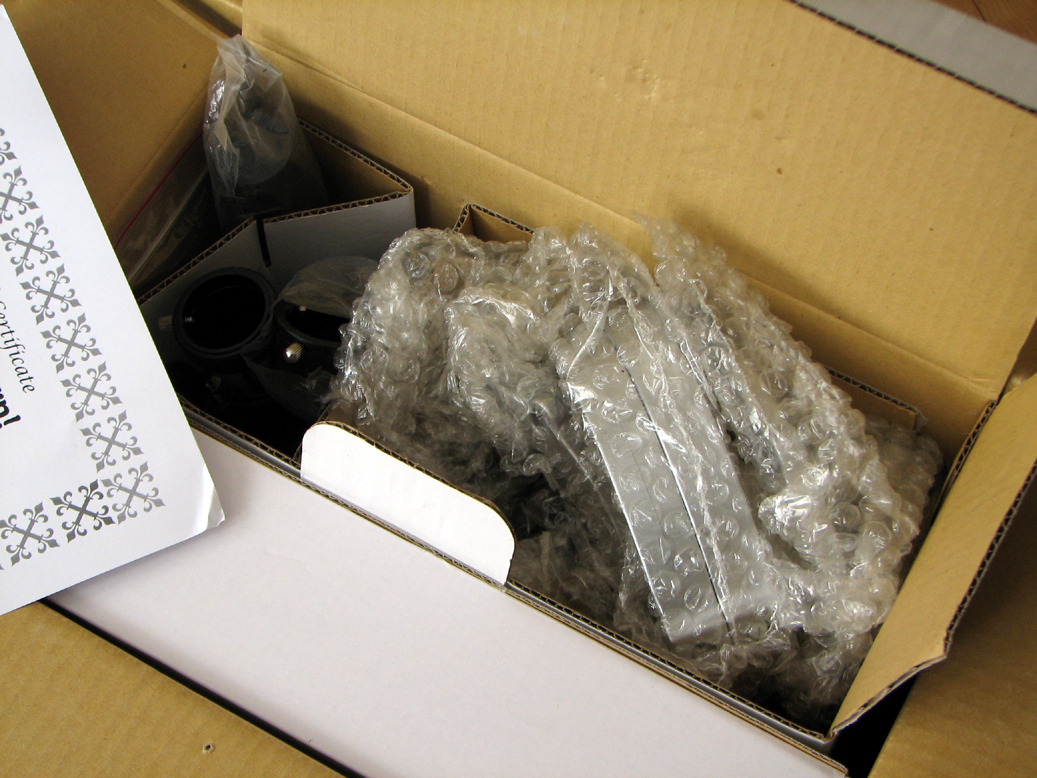
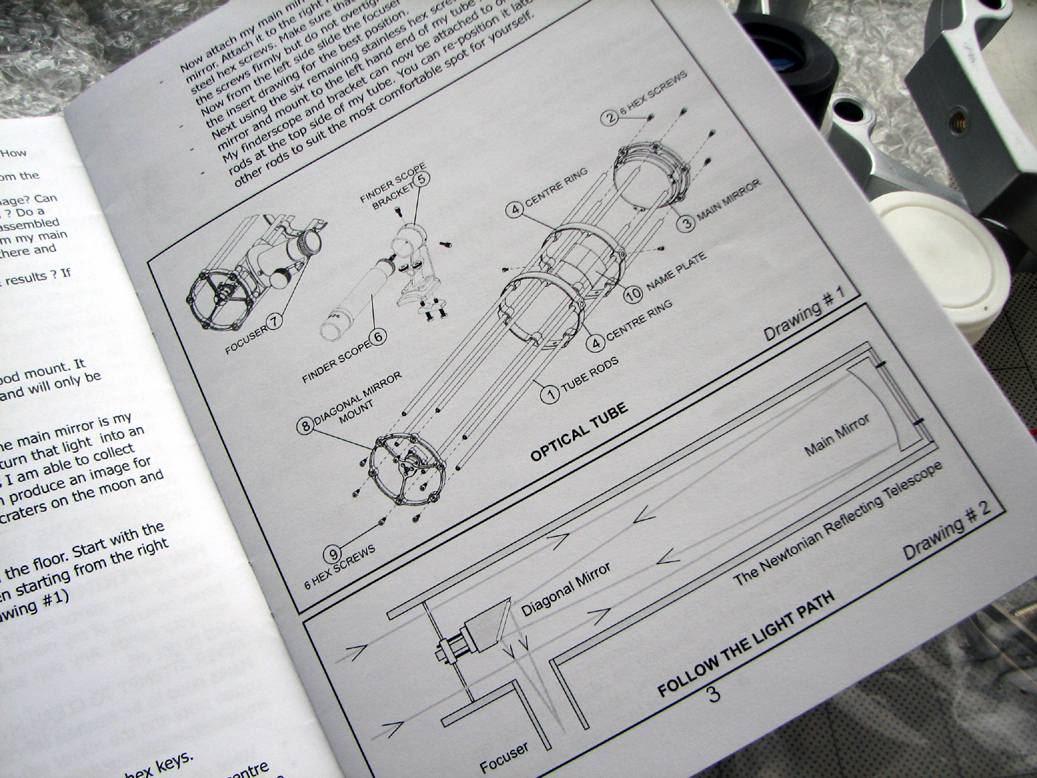
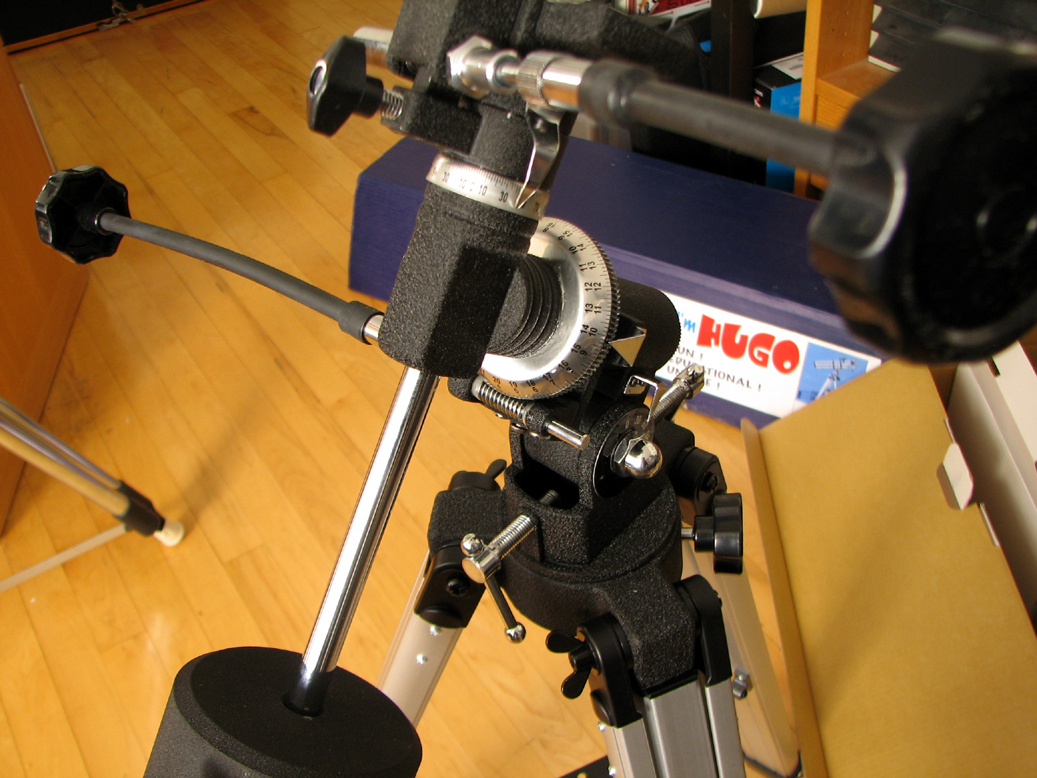
Even though Eliot looked a little worried, the assembly instructions of the HUGO were very well written. The entire unpacking, assembly, and calibration process was thoroughly diagrammed and described. RainyDayMagazine will, of course, provide the usual photo documentation of the various steps along the way:-)
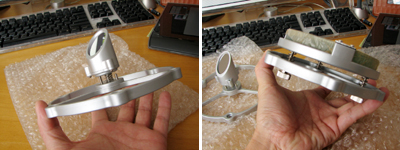
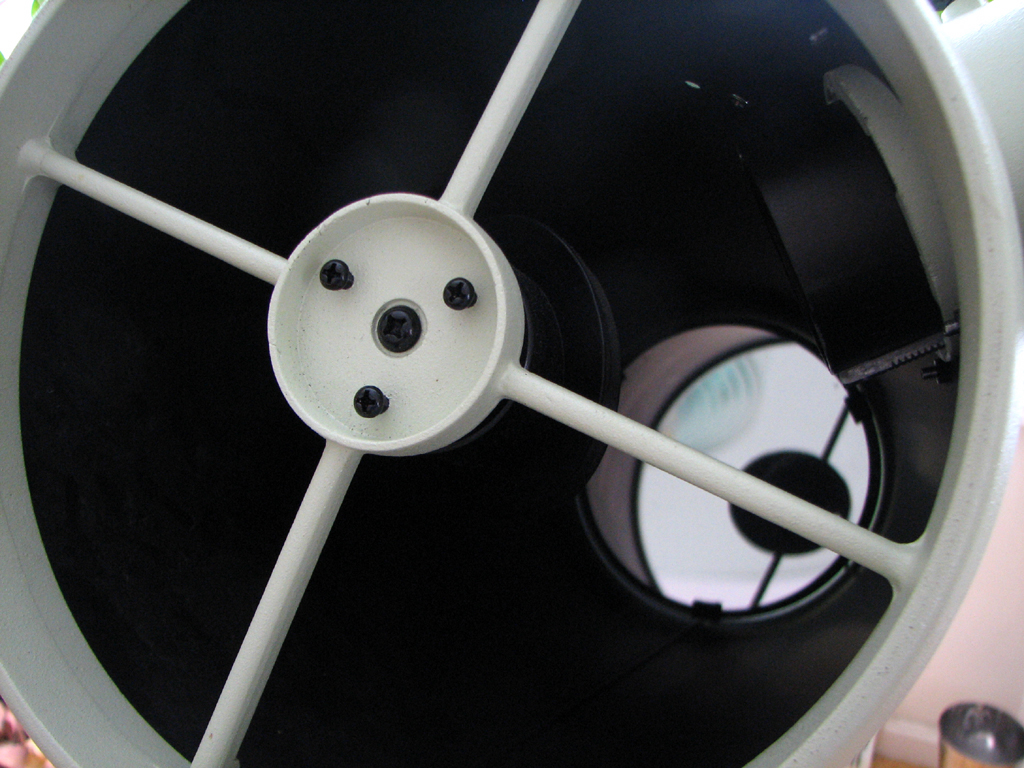
The mirrors (diagonal, primary) have been pre-mounted. Once the telescope has been assembled, they have to be properly aligned and calibrated for optimal performance.
In January we'll complete this series on the construction of the HUGO. RainyDayMagazine's furry intern will then walk readers through the entire assembly process of the tube, tripod, and scope.
Eliot, don't look so surprised...we talked about this on your last performance review. - Wan Chi Lau (permalink)
Dec 9,2007
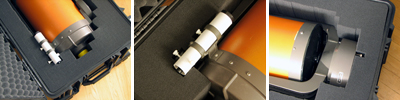
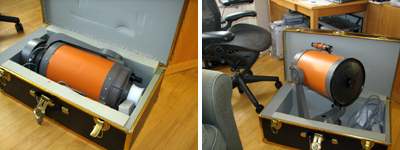
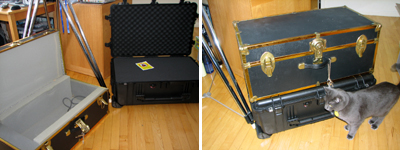
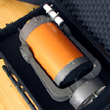
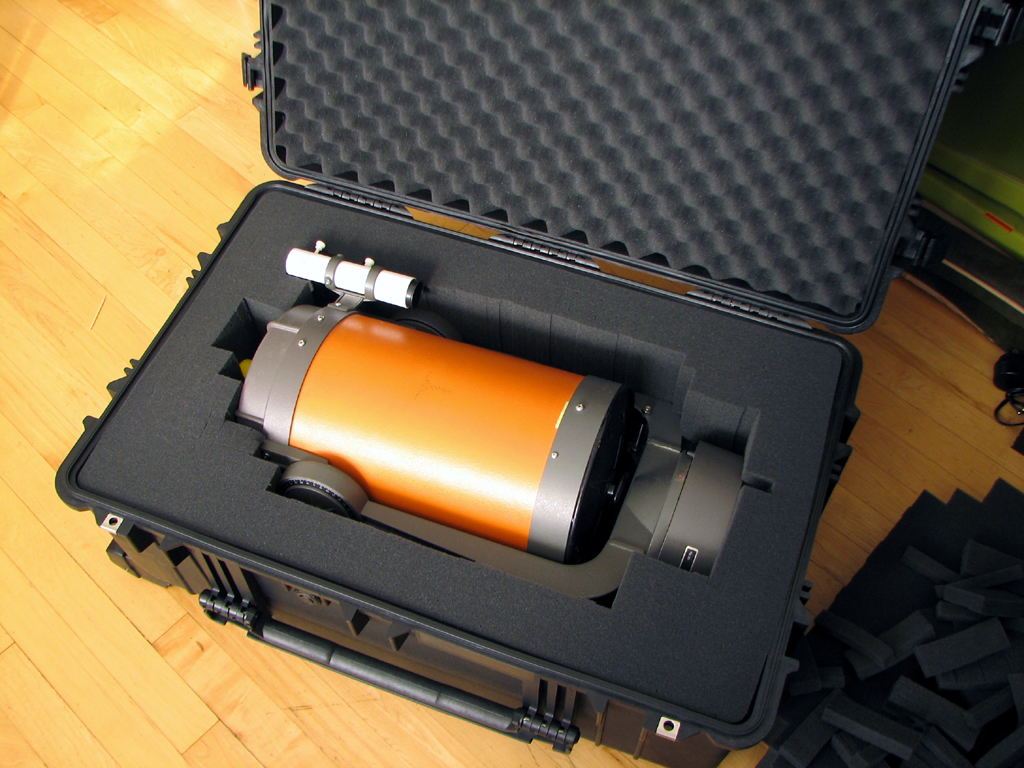
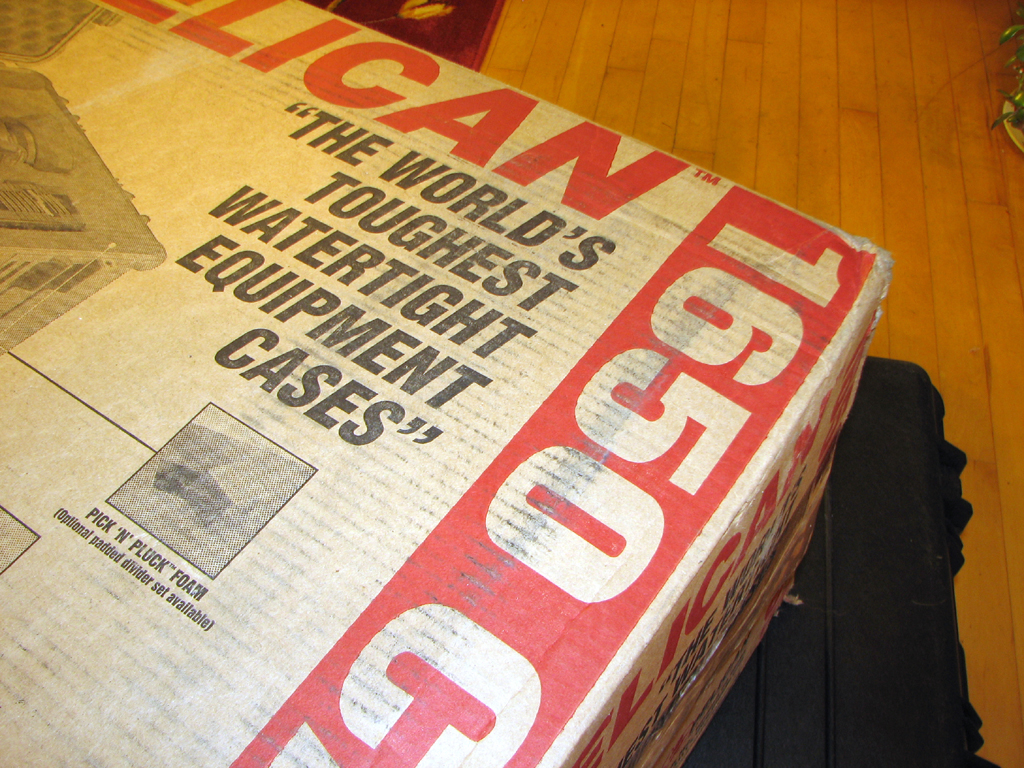
Yesterday we showed you how we "plucked" the bottom layer of the Pelican 1650 case's two layers of protective foam to conform to the telescope we want to store in it. Today, we'll finish this project.
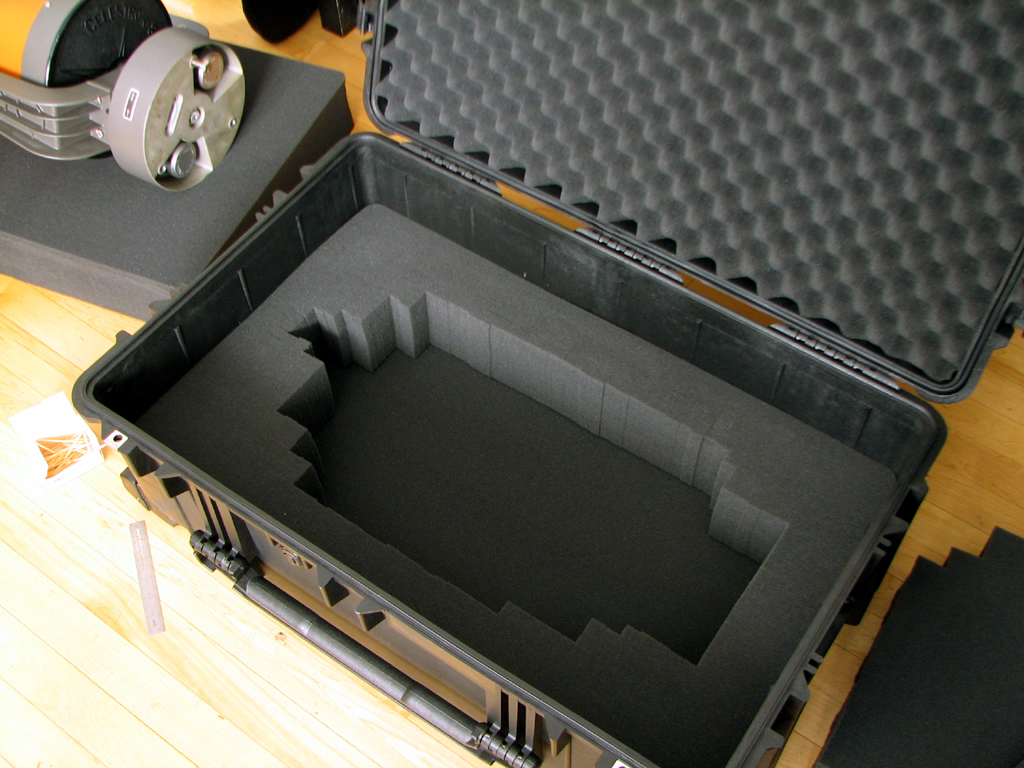
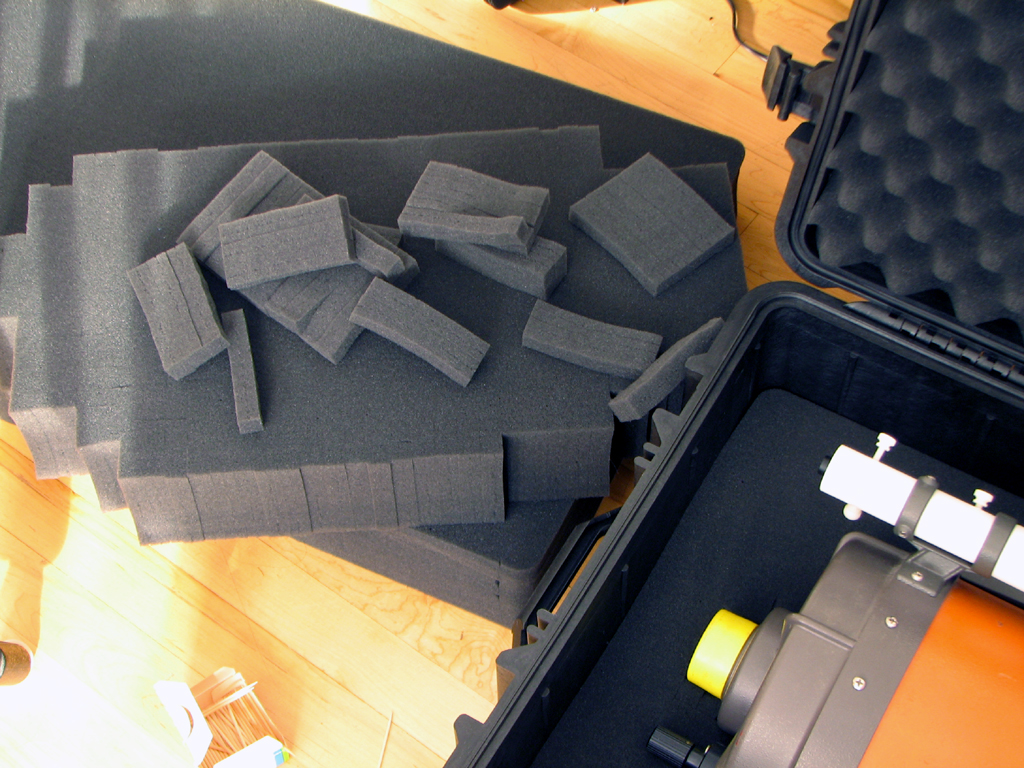
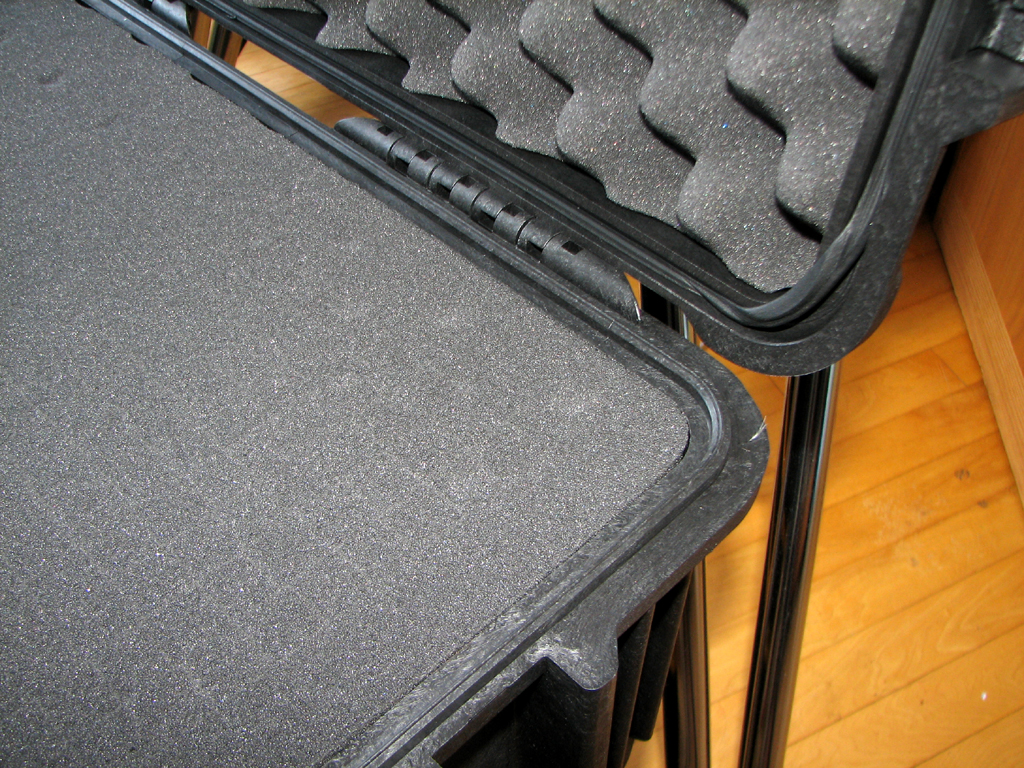
Using the outline from the bottom layer as a guide, we were able to quickly remove the foam to create a rough outline for the top layer.
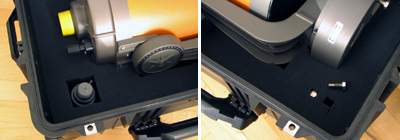
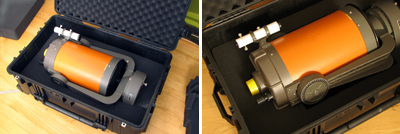
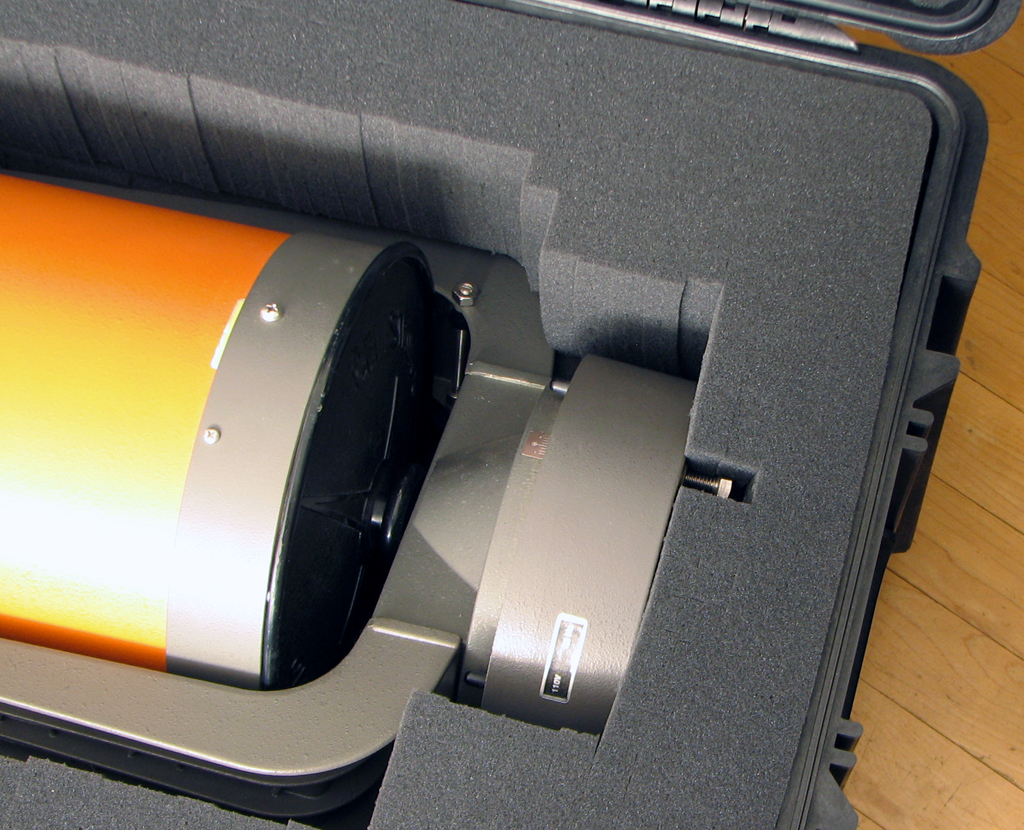
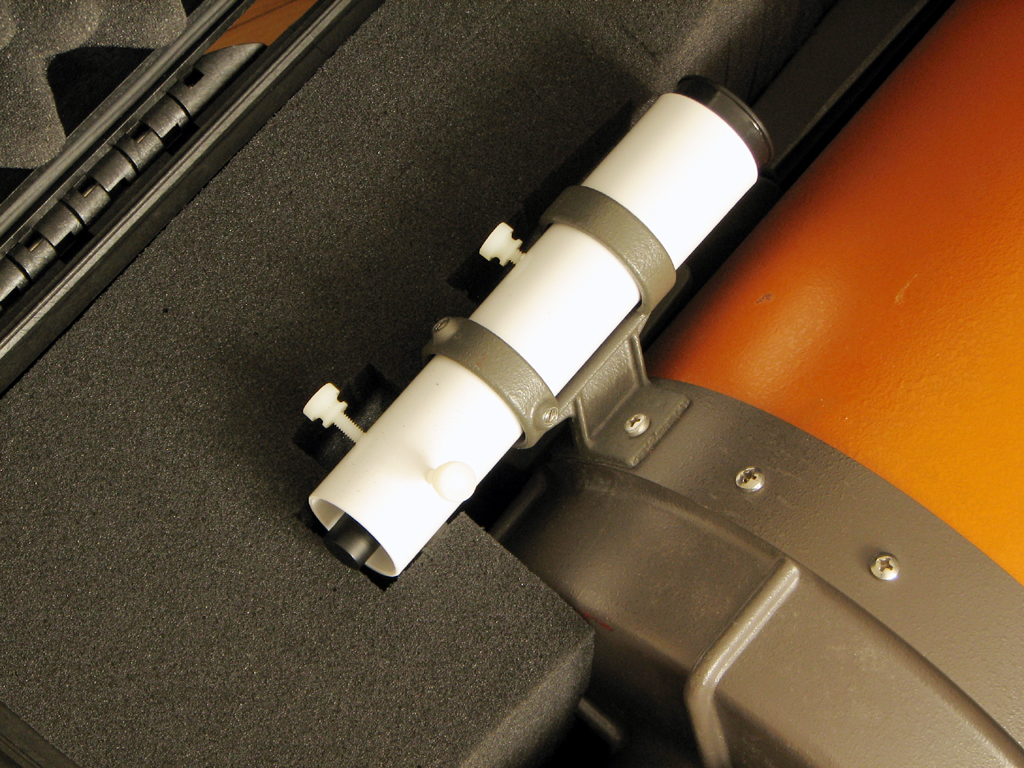
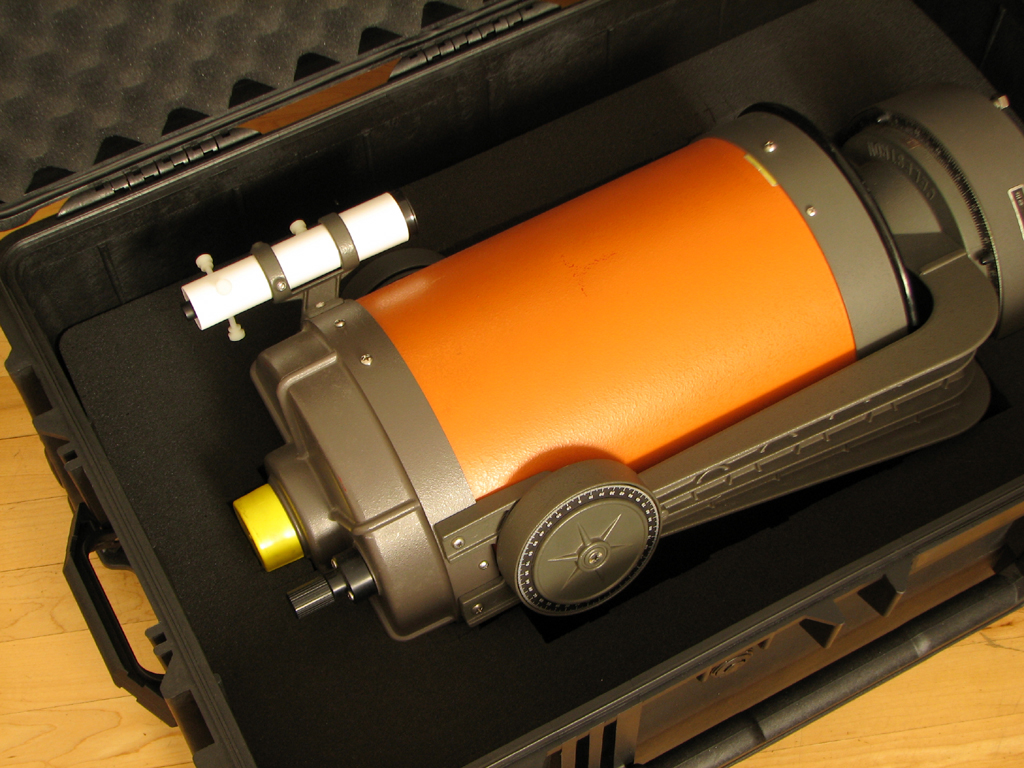
To finish the fitting, we placed the C8 scope in the case and fitted the top layer in place to see where additional foam needed to be removed. The fit was almost right. A few pieces needed to be removed to accommodate the fine focus knob and some of the screws on the finder and the base.
We are thoroughly impressed with every aspect of this Pelican case: the build quality is superb, the Pick'N'Pluck foam was easy to use, and the entire package is easy to transport around (the office at least) when fully loaded.
If you have something important you need protected, get a Pelican and you'll be covered. We'll have a FirstUse update when we use this case to take the C8 out in the field. - Wan Chi Lau (permalink)
Dec 8,2007
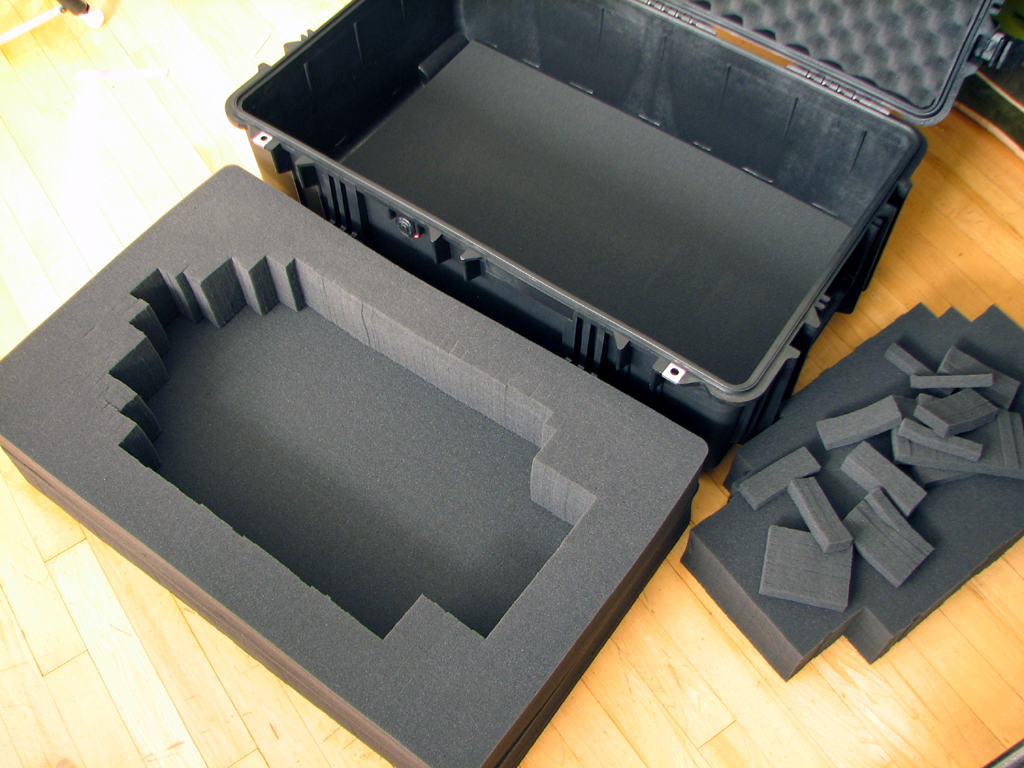
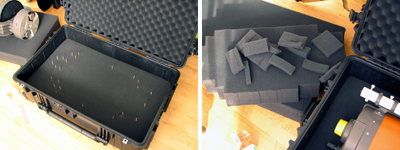
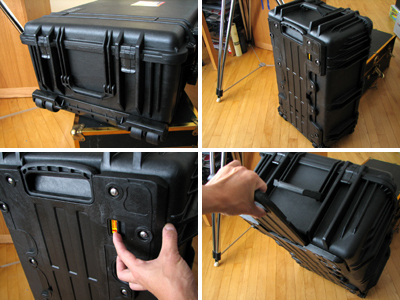
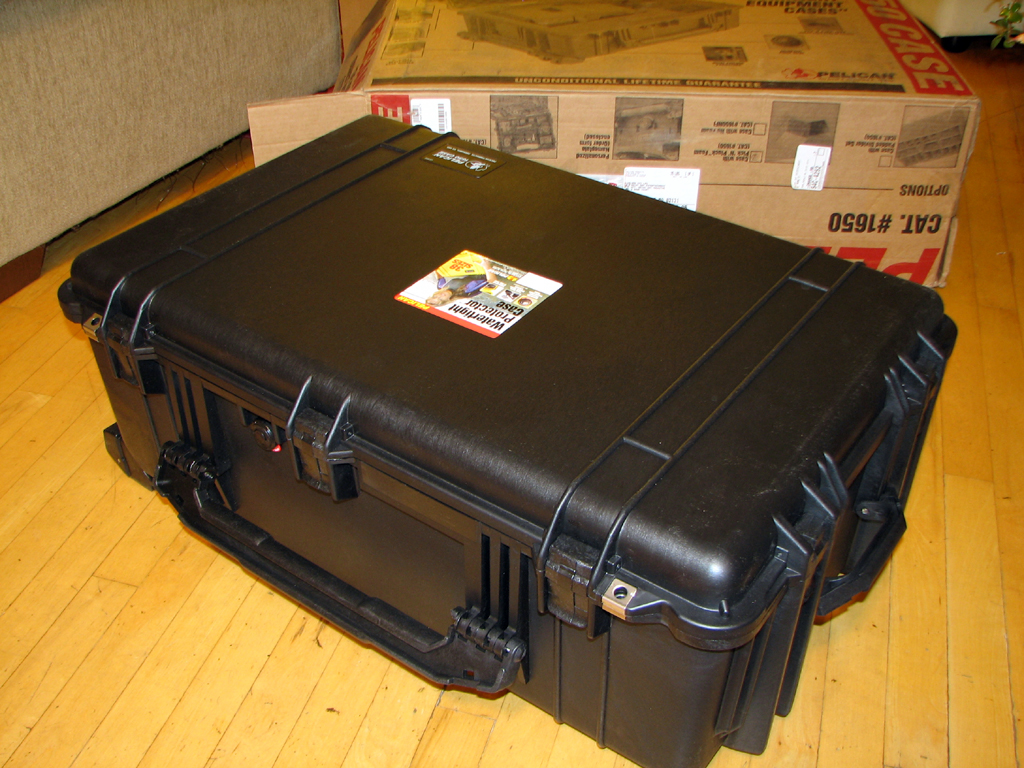
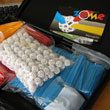
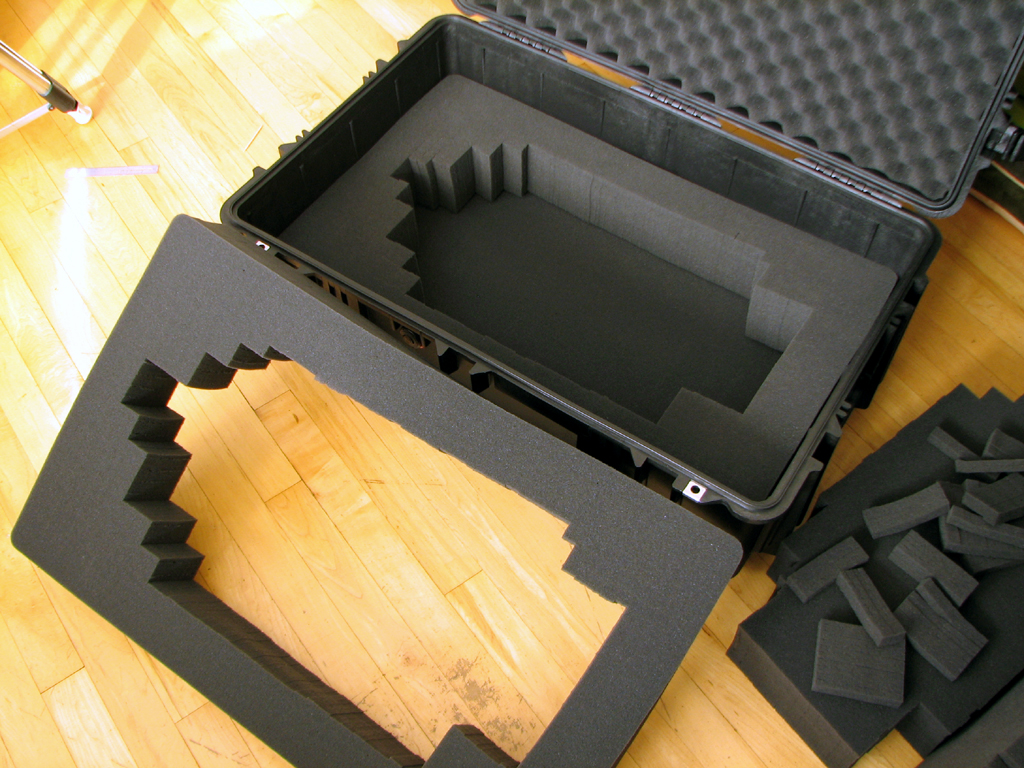
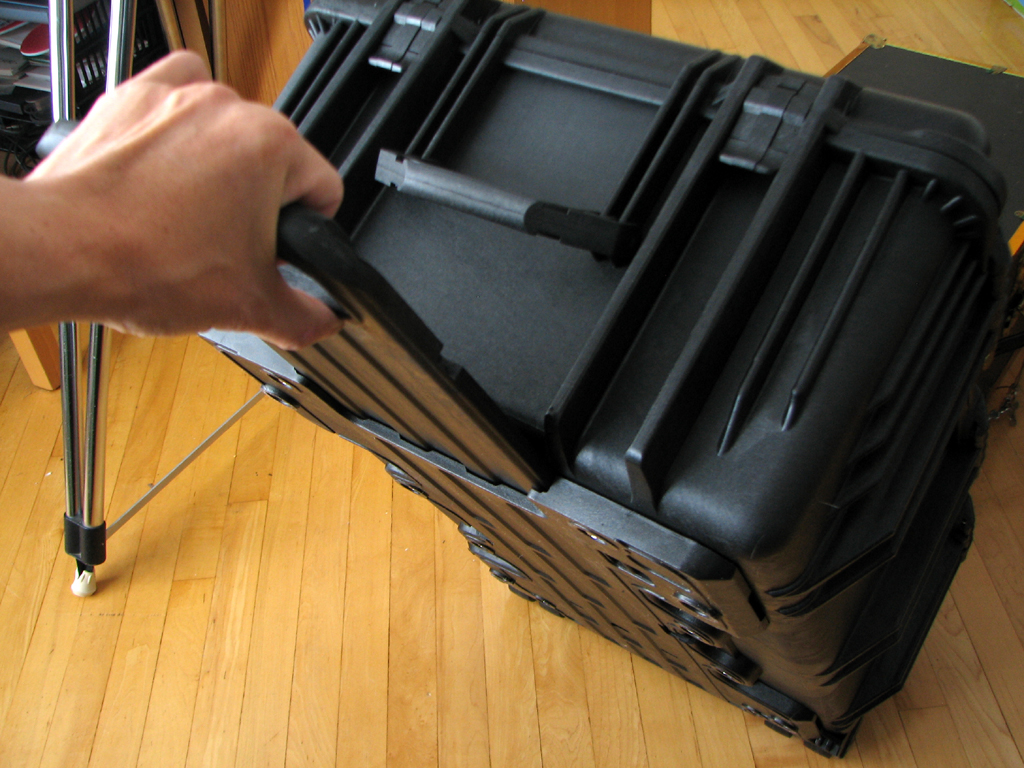
The interns were VERY excited about the new Pelican 1650 case when it showed up. We thought the newness would wear off in a few days, but apparently it did not. Today, we started the "fitting" process. Eliot stood watch over the project the entire time!
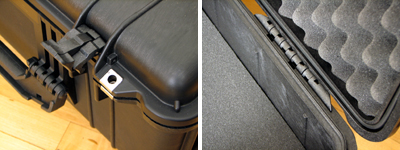
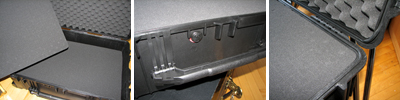
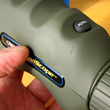
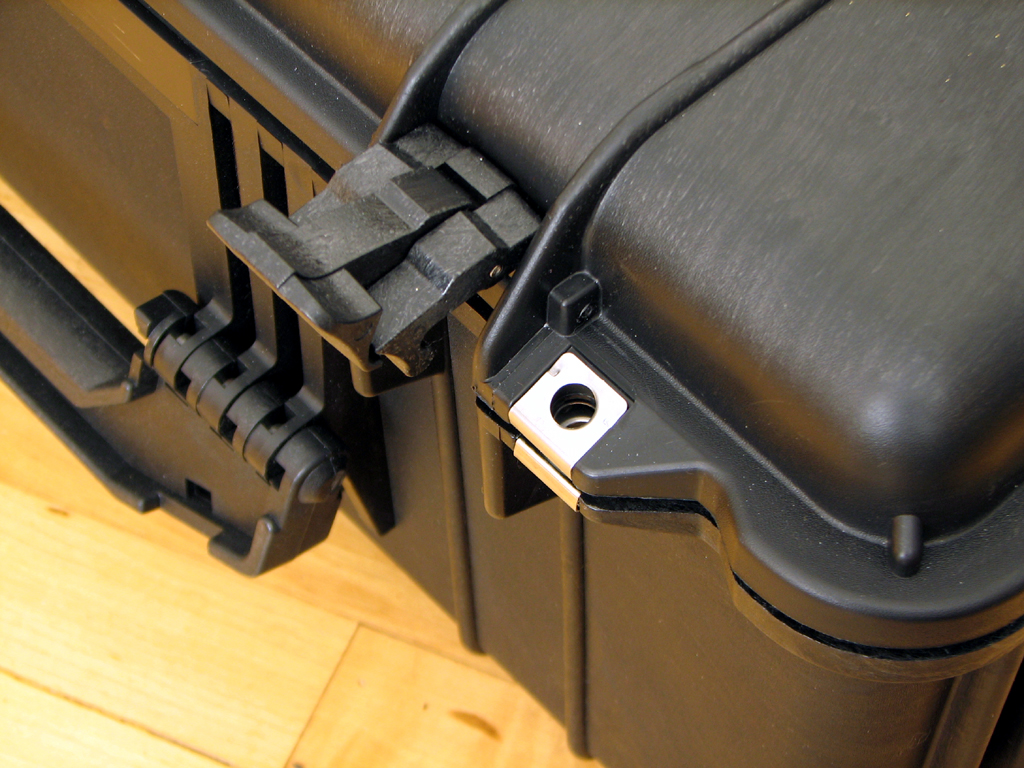
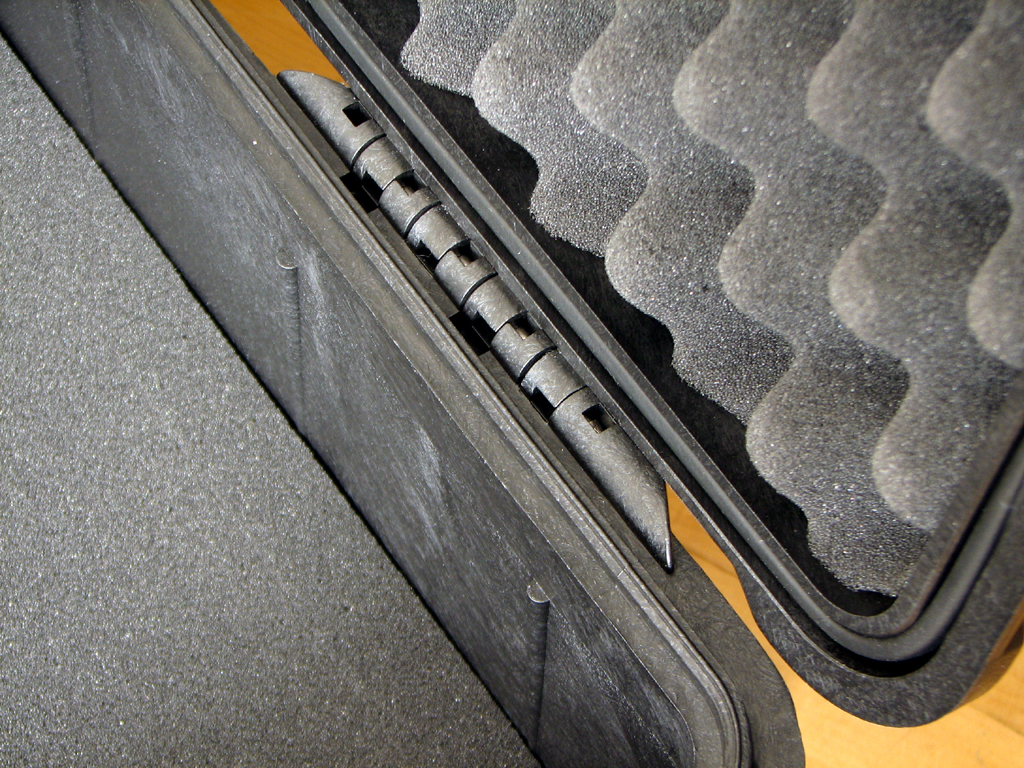
Before we start, we would like to answer some reader questions regarding the 1650 case. The case IS lockable. The locking tabs are reinforced by steel covers. There are three hinges along the back, not one long one.
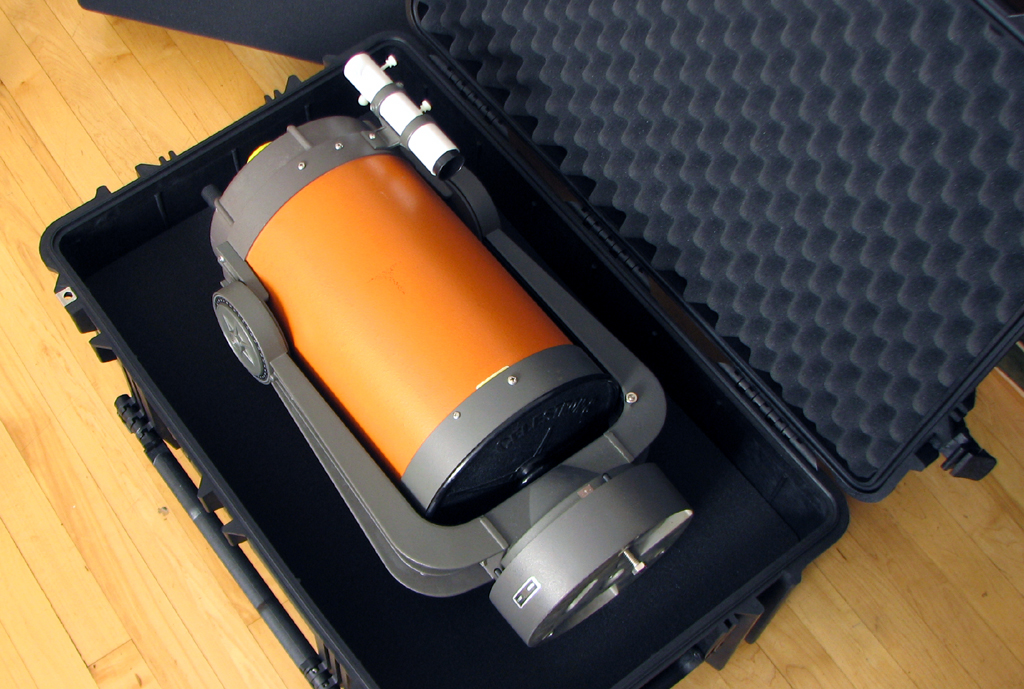
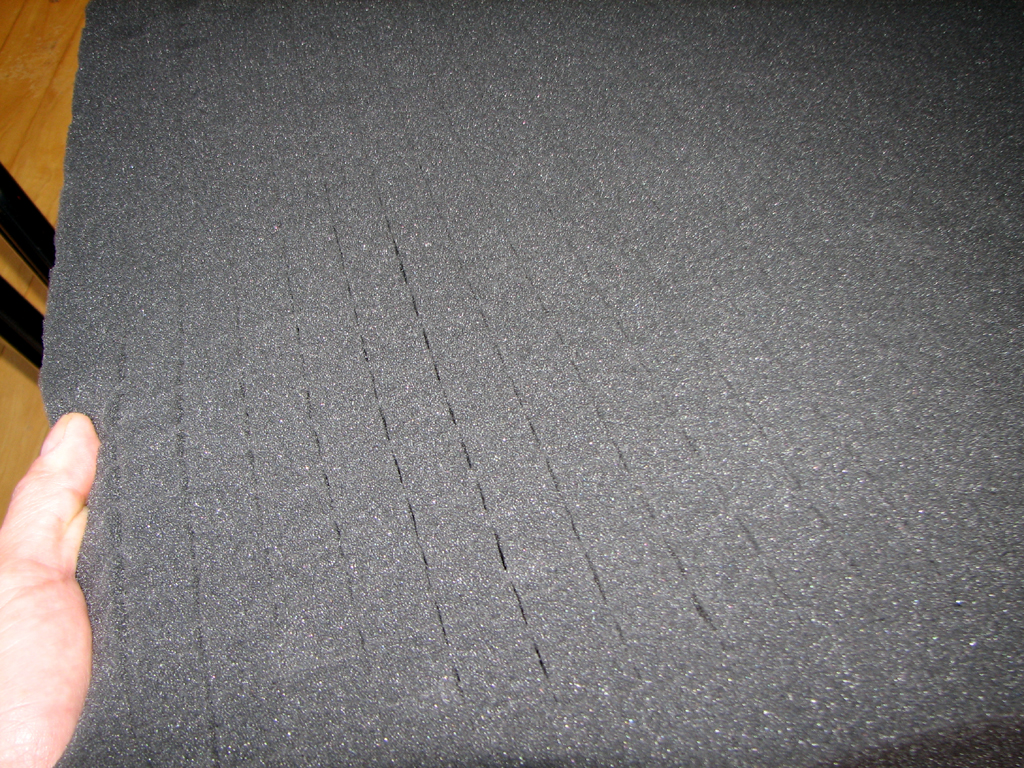
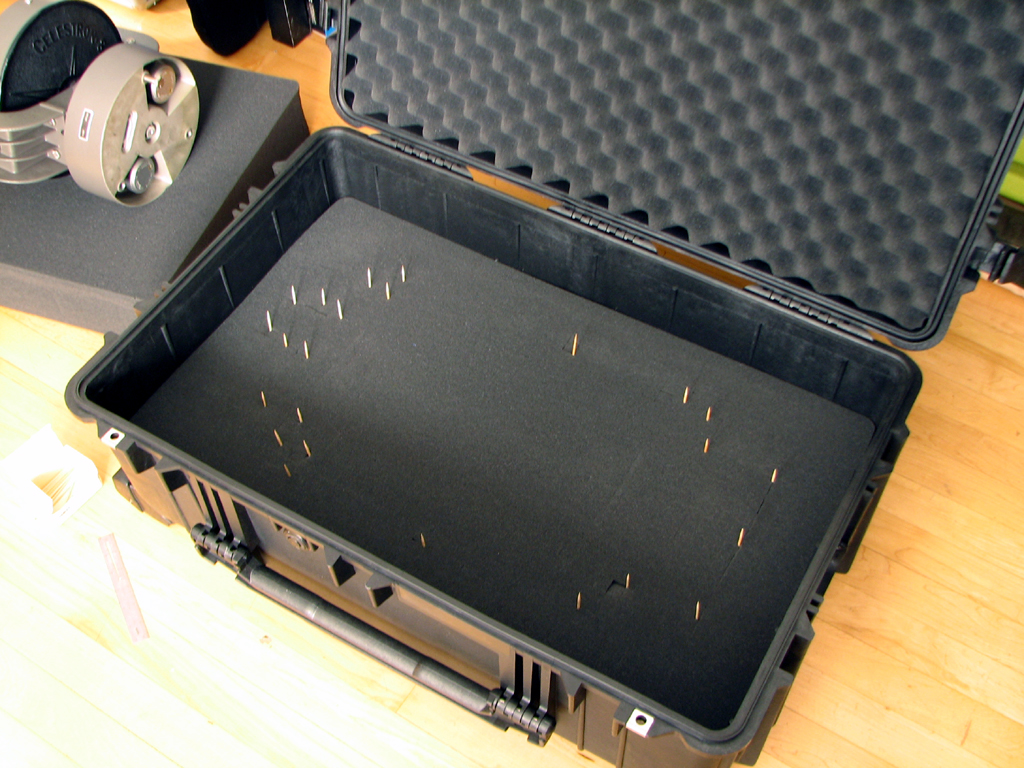
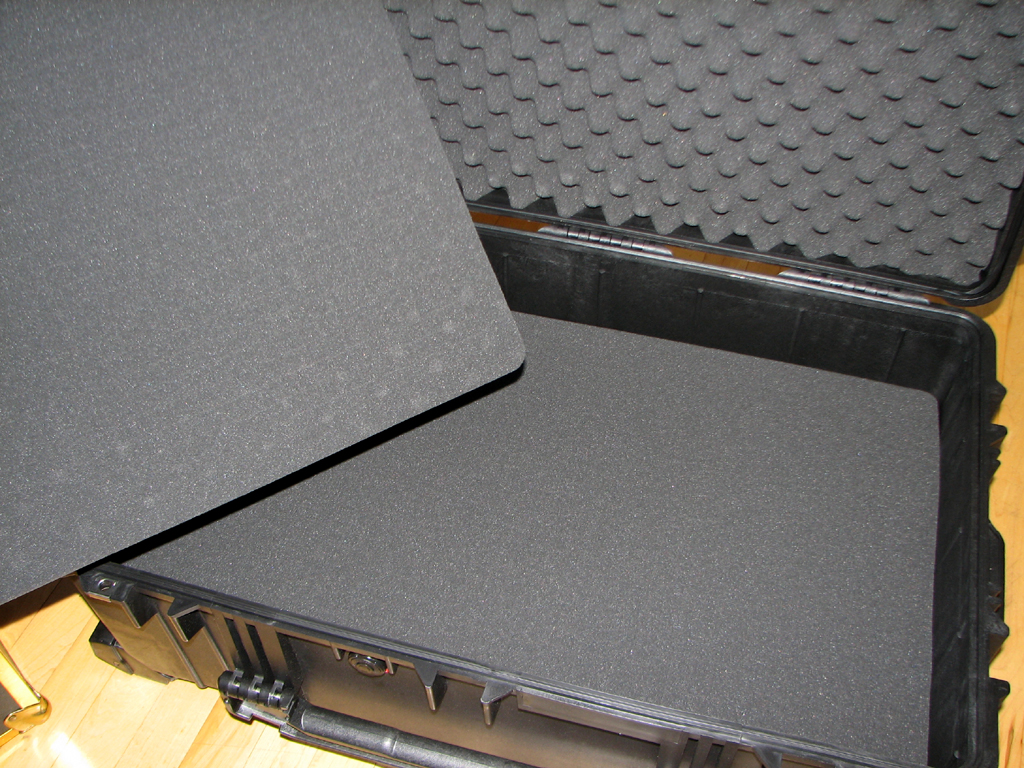
To offer maximium shock protection, the best way is to "sandwich" the item between the layers of foam. The best way to custom-fit the Pick'N'Pluck foam to the C8 scope is to work on the bottom layer first, then the top layer.
With the top layer removed and the scope centered, we marked the outline using toothpicks. It is best for things to be a little snug, so we decided to be conservative in our markings and remove additional foam as needed.
The Pick'N Pluck foam is easy to rip. We took out the center chunk in one large block because we want to save some foam for a future project :-)
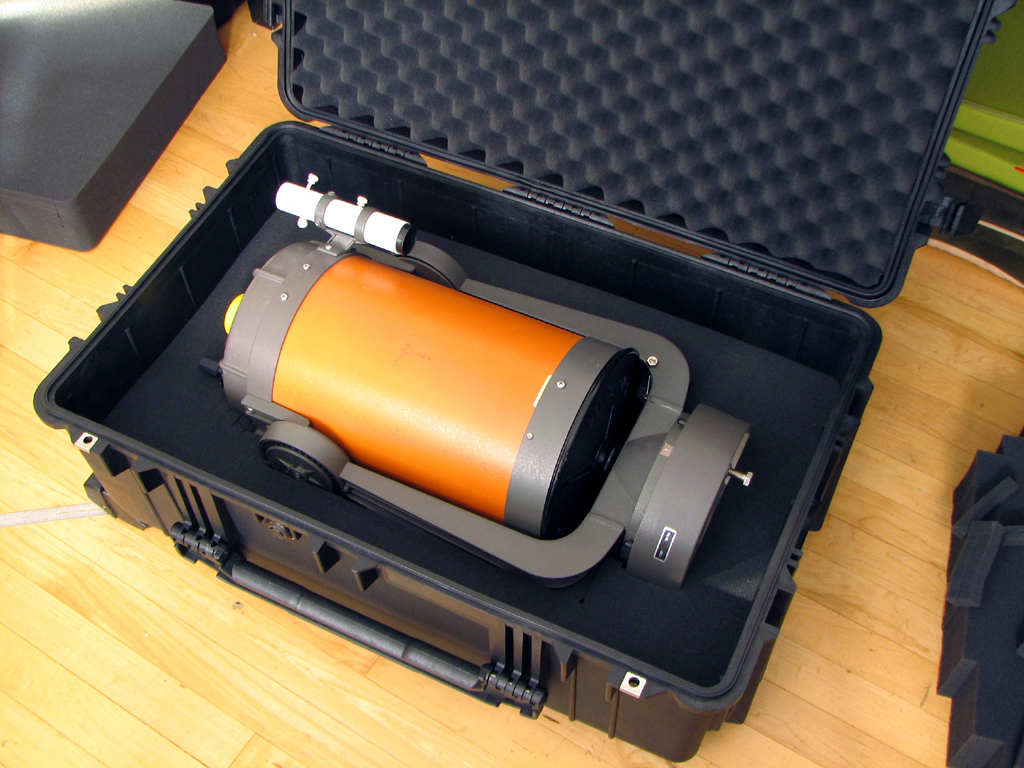
Note in the outline above the depth of one layer of foam. Since scope is tubular, there will be some free space on the curve part on both sides. The space is just right for storing cables and other such items. There is also extra space in the corners for additional smaller items such as oculars and filters.
The test fitting of the bottom layer showed the outline matched the scope perfectly and wrapped it snugly. It took us about 20 minutes to trace the outline, layout the tooth picks, and rip the foam. This was a LOT quicker than when we had done this in the past for our Olympus OM camera system. - Wan Chi Lau (permalink)
Dec 7,2007
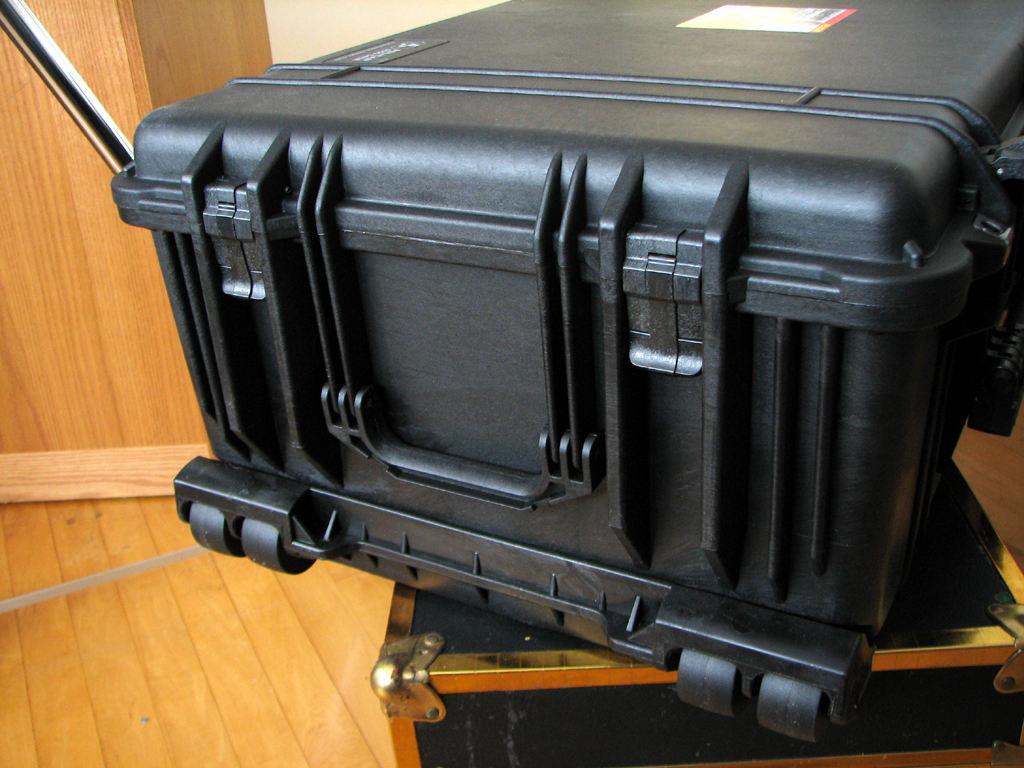
Eliot was quite intrigued by the new Pelican case. Maybe it was the new smell or the grey color of the foam, but he insisted on hovering around as we checked out the various features of the 1650.
The molded Pelican case is built to take the rigors of travel without excessive bulk. There are handles on three sides of the case. Seven double-throw latches secure the lid to the container. Four polyurethane wheels and a retractable handle is built into the bottom of the case. We expect these wheels will roll quiet and smooth even when loaded because of their stainless steel bearings.
Interior protection consists of four layers of foam: 1 egg crate layer on the lid, 2 PickNPluck layers in the middle, and 1 smooth layer at the bottom. There is a pressure relieve valve built into the case to automatically equalize the internal pressure at different altitudes. An O-ring is fully integrated around the edge to provide a watertight seal.
The foam used in the Pelican cases is the open-cell structure variety. The advantage of this type of foam is that it is soft and form-fits to the gear. The PickNPluck foam layer is precut. To create a custom layout for any piece of gear, all that is needed is to trace the outline and take out the unnecessary pieces.
We'll show you how easy it is in our next segment. Alternatives (organizer, divider) to foam pads specifically designed for photographers are also available from Pelican for this case. Those wanting to pack a lot of small items (filters, cables, etc...) may want to consider this option. - Wan Chi Lau (permalink)
Dec 6,2007
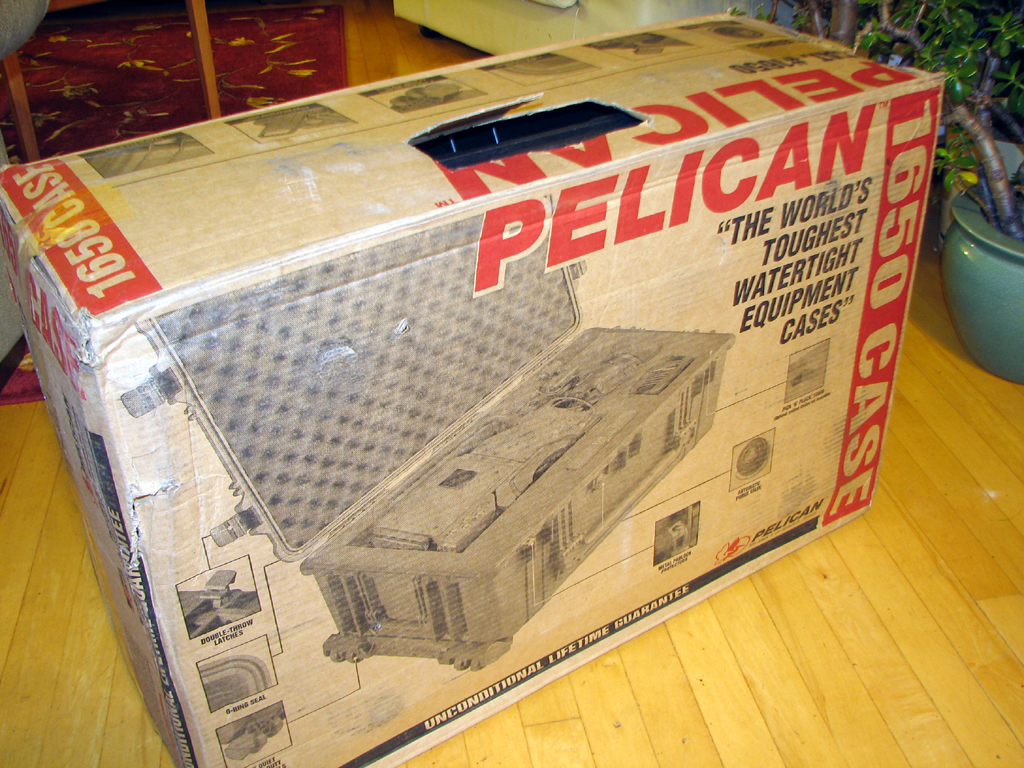
When we purchased our Celestron C8 telescope for the upcoming RainyDayScience section (look for it in 2008), it came in the original storage trunk. The trunk is in perfect condition, but we knew we needed to upgrade it if we wanted to take the C8 out in the field.
After checking around the various forums, the majority of the recommendations were for us to check out the Pelican line of water-tight cases. We did and found the Pelican 1650 to be the perfect size upgrade for our original case.
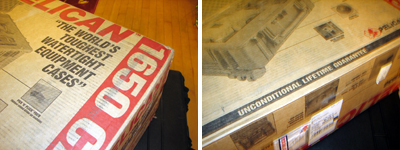
Pelican's reputation for toughness is well known, and they don't just talk the talk. This Pelican case is backed up with an "Unconditional Lifetime Guaranee." A company cannot be any more confident about their products than that!
We'll have a detailed look at the features of this Pelican 1650 case in the FirstLook review. We'll also show you how to layout and custom fit the Celestron C8 and accessories using the PickNPluck foam. - Wan Chi Lau (permalink)
Dec 3,2007
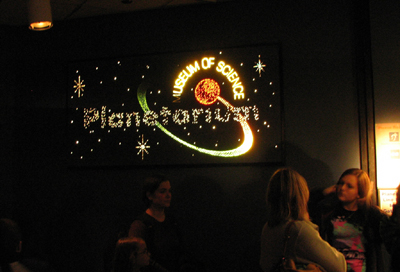
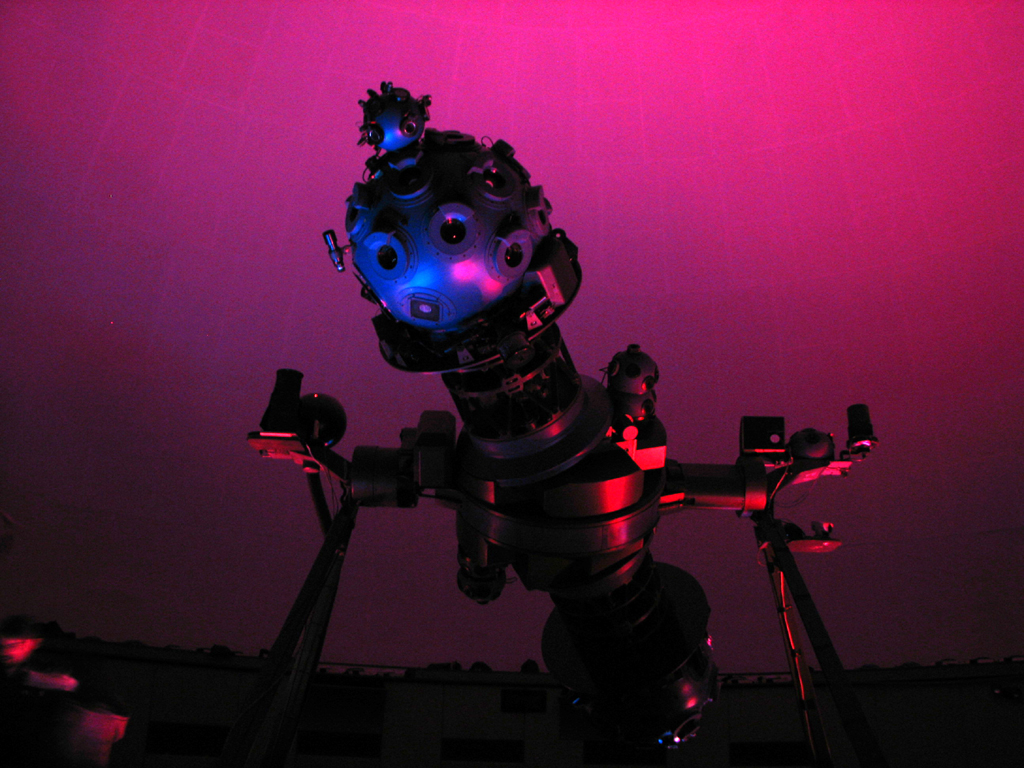
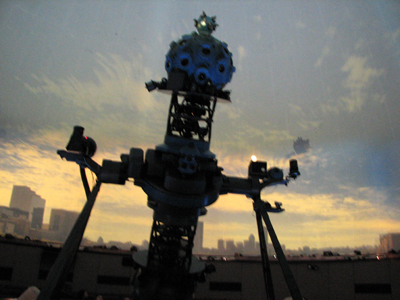
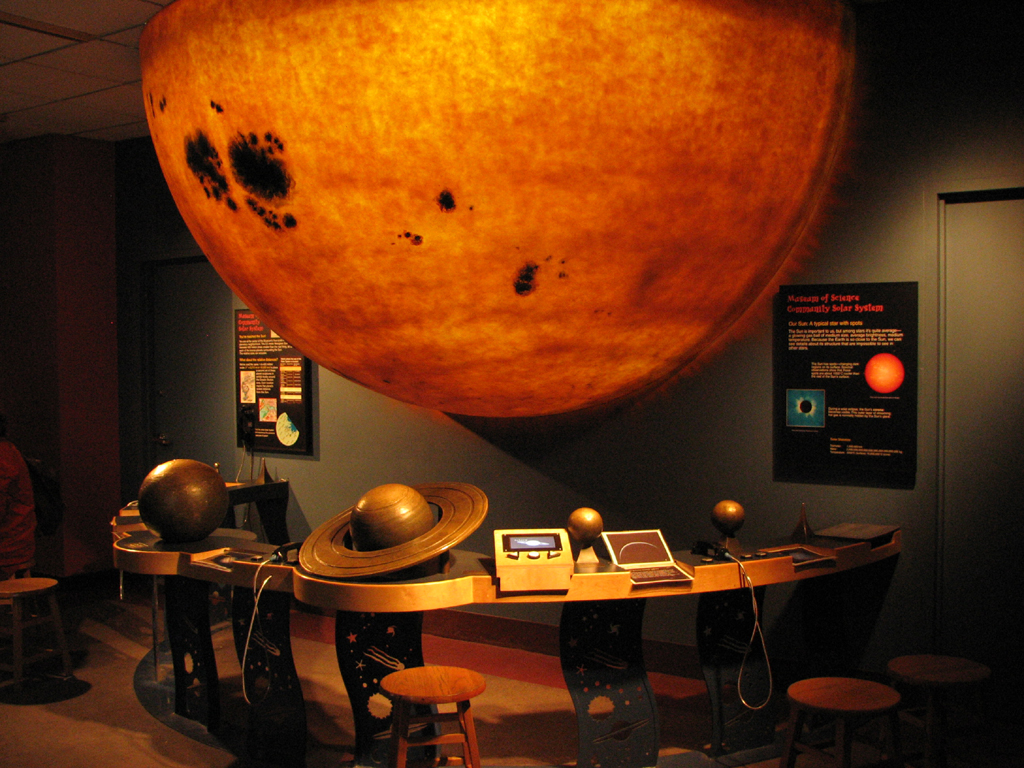
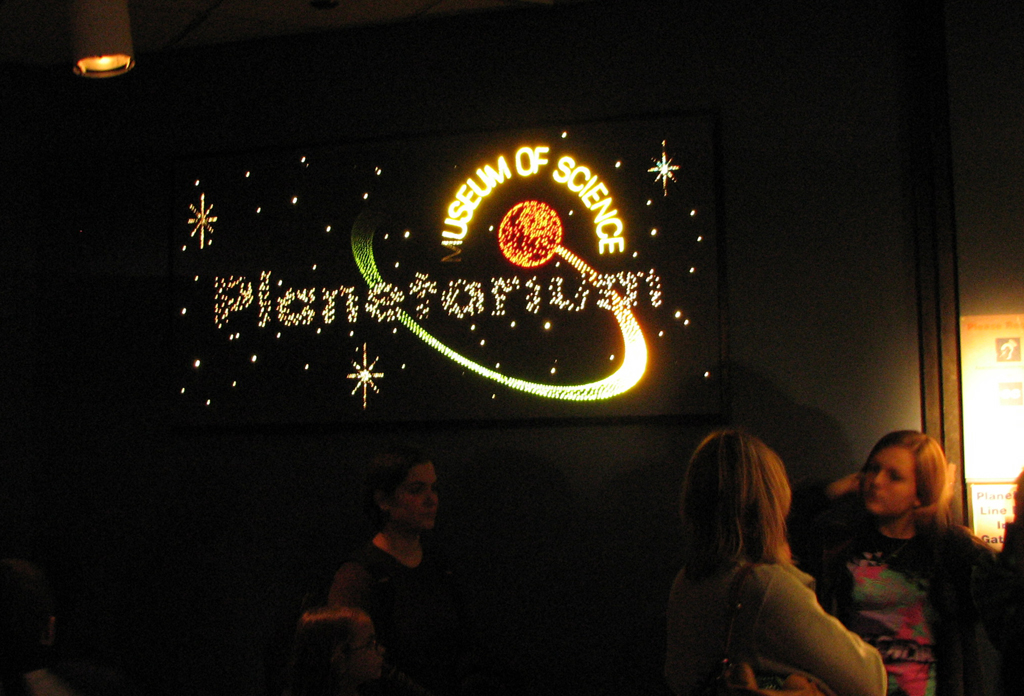
The Museum of Science in Boston is the home to the Charles Hayden Planetarium. The Planetarium's centerpiece is the $2,000,000 Zeiss Star Projector, one of the few in the world. And when a telescopically/astronomically-obsessed managing editor wants to go, whaddya gonna do?
The projector is capable of projecting over 9,000 stars and 29 constellations. RainyDayMagazine spent a few hours at the Planetarium this weekend exploring the night sky in indoor comfort. The Planetarium has different shows running all day long. Check out their schedule here.
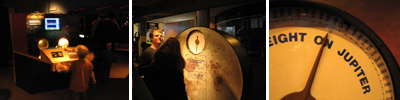
The seating is very comfortable and has just enough recline to allow everyone in the theater to see everything. The two narrators (one for each of the TWO shows we went to) were very knowledgeable and got the kids (and some managing editors) into the Planetarium groove by asking them questions and having them shout out the answers (apparently the North Star is NOT the brightest star in the sky, it is the Dog Star).
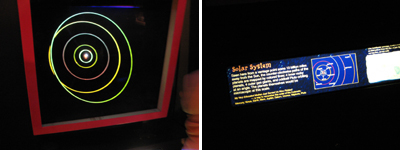
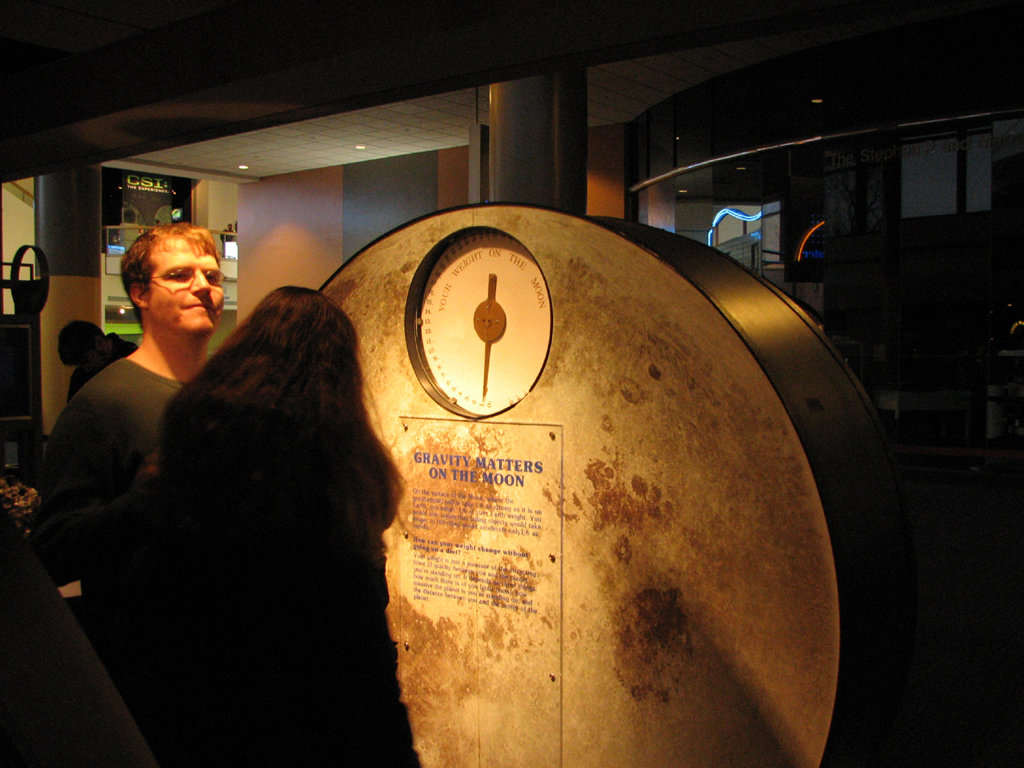
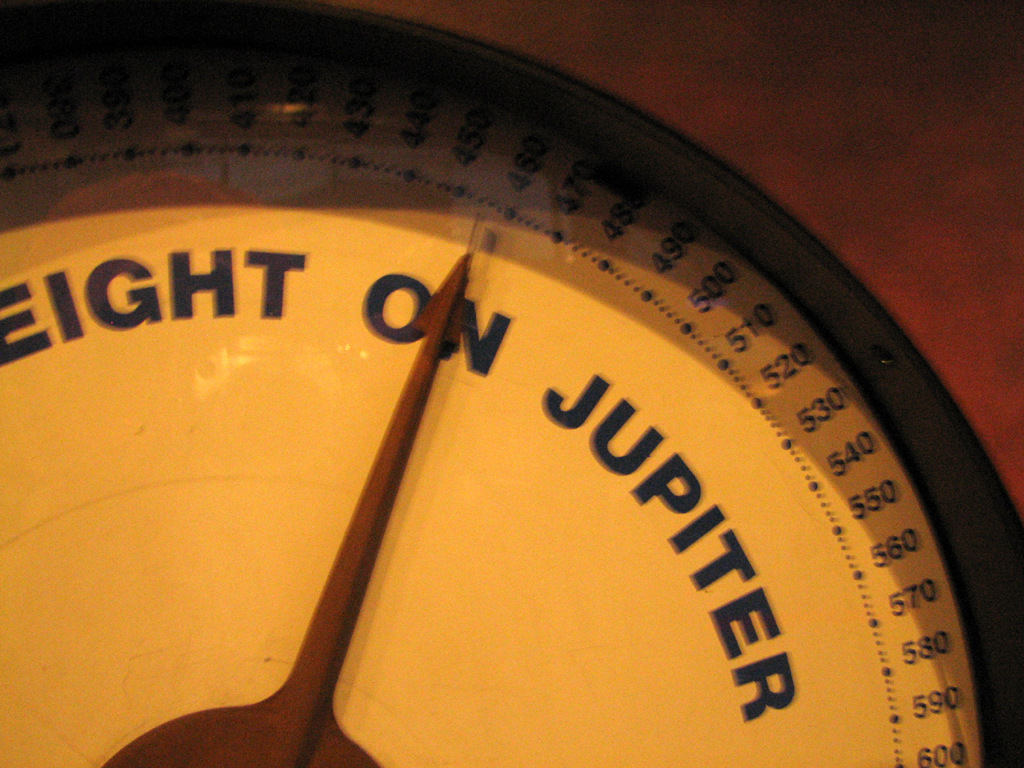
While waiting for the show to begin, visitors can check out the many interactive exhibits. You can see how much you would weigh on the moon or on Jupitor (ladies will rather want to stick with the moon scale, since one of us would weigh 440 pounds on jupiter), learn about spectral analysis, or see the relationship of the earth to the rest of the planets (hey, we really ARE the third rock from the sun!).
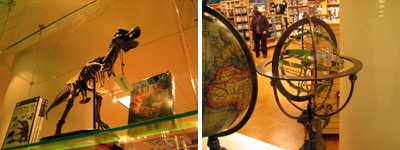
We spent a bit strolling through the Museum Store getting ideas for the more "discovery-minded" folks on our Holiday list. The Store has items for all ages and interests (but why it's not just filled with dinasaur kits and freeze-dried ice cream one of us just cannot fathom, since EVERYBODY likes those).
We had a great time at the Boston Museum of Science this weekend. If you are in Boston, this is one of the stops you must make. The skys are always clear in the Charles Hayden Planetarium :-) - Wan Chi Lau and Carolyn Donovan(permalink)
Nov 20,2007
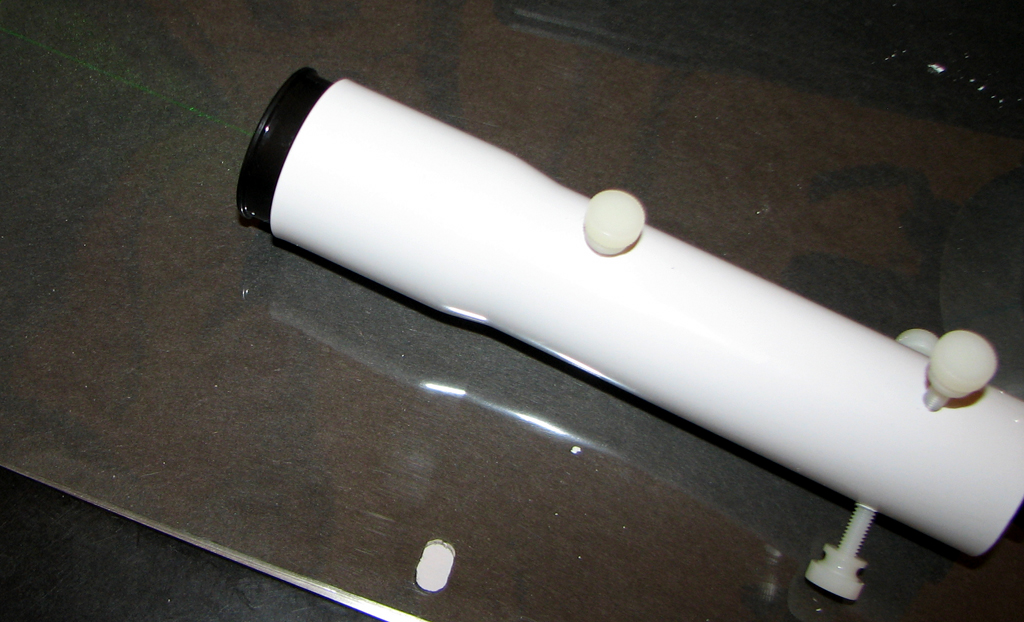
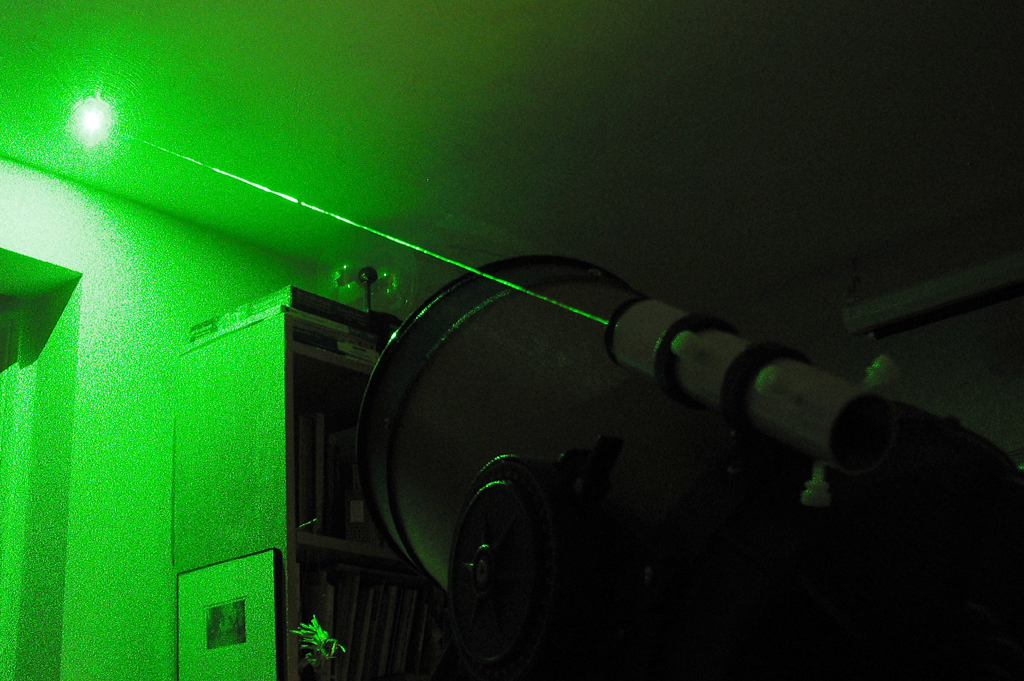
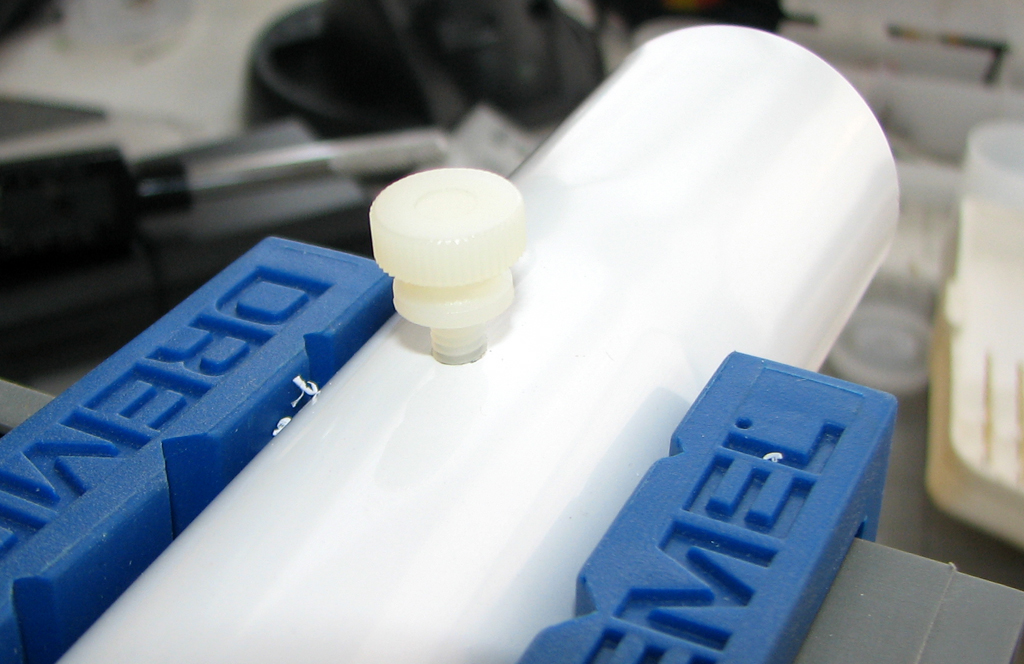
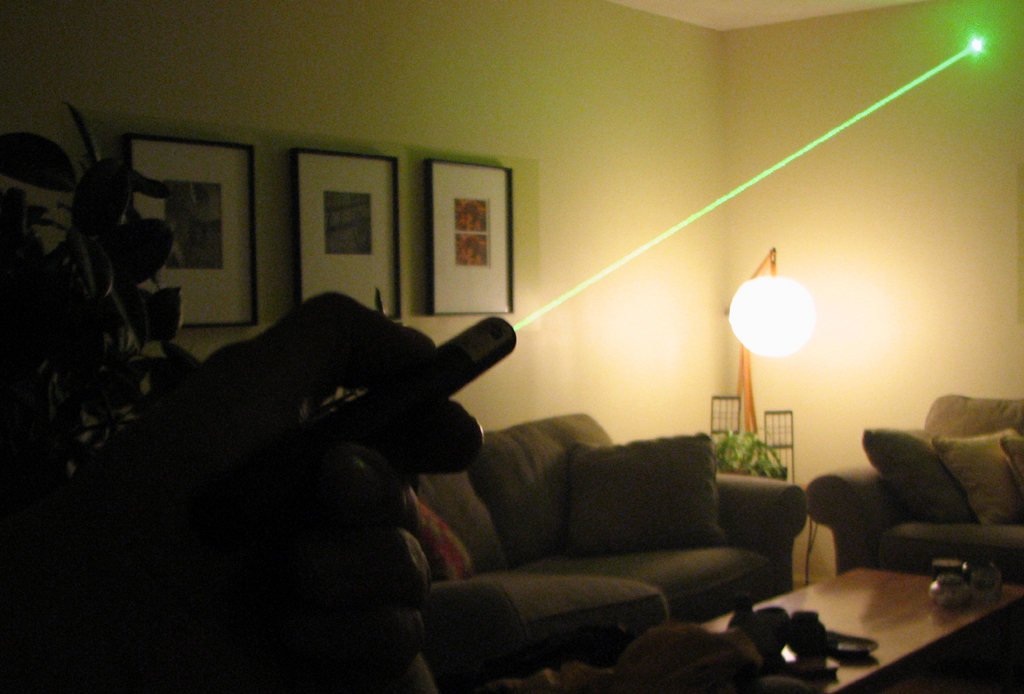
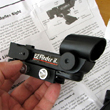
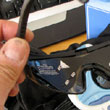
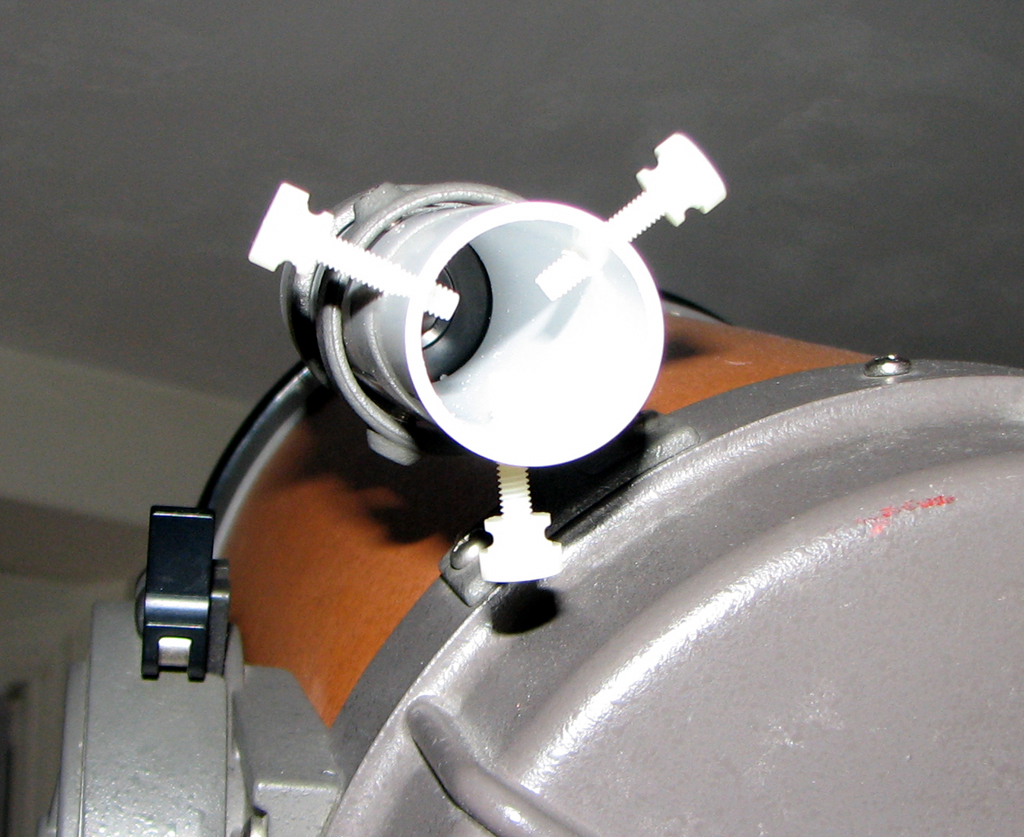
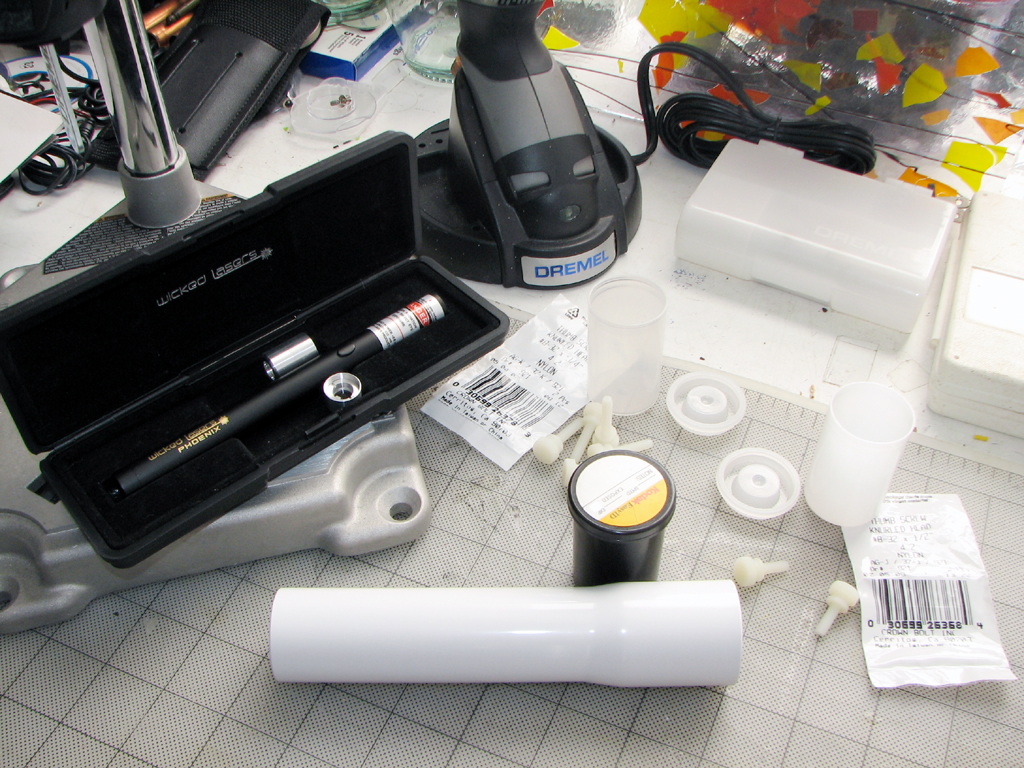
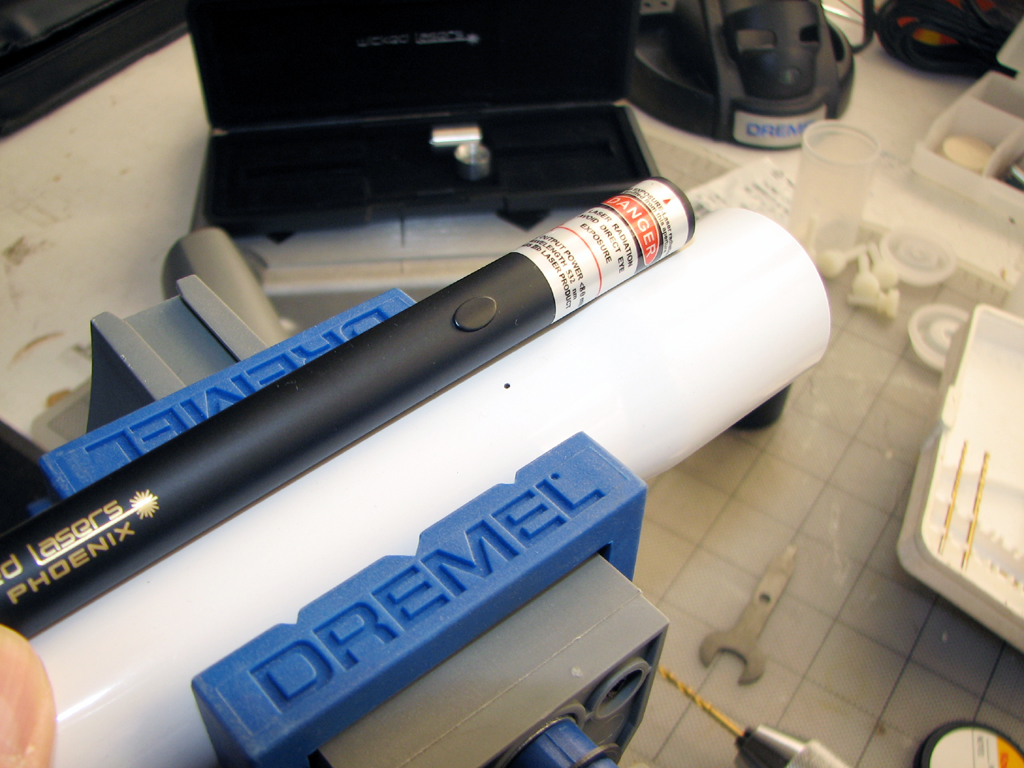
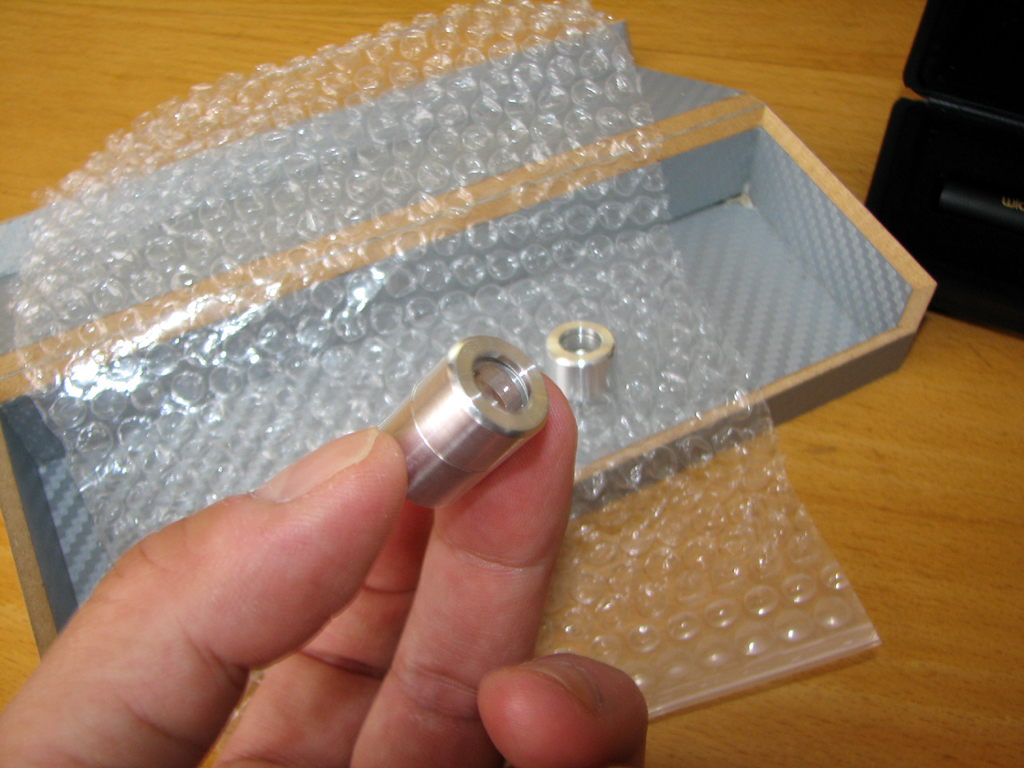
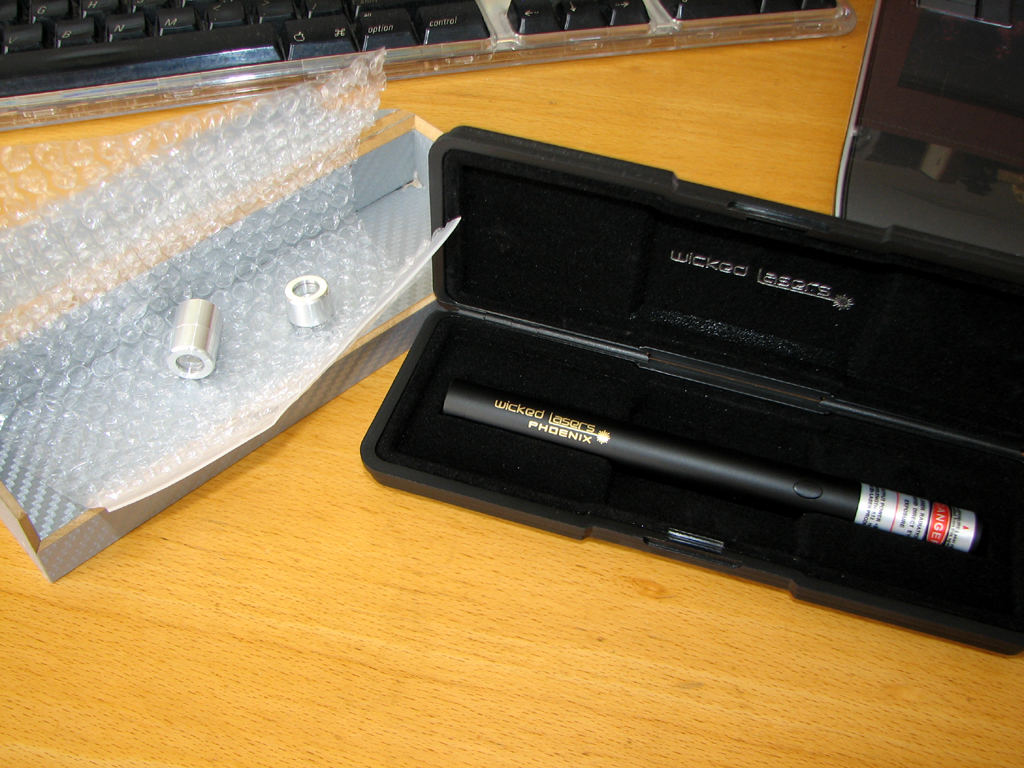
After a few revisions of the original design, we finished the laser sight project from this weekend. The changes simplified the construction and made the mount more stable.
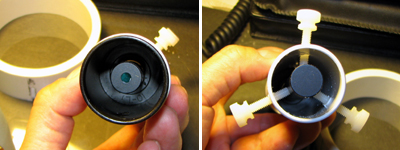
Instead of using thumbscrews in the front and the rear to hold the Phoenix, we made a 0.5" hole in the film canister and used it to support the front of the pointer. The rear is held in place by the three thumb screws.
The front thumb screw is positioned to hold the trigger down for continous pointing. According to the technical folks at Wicked Lasers, the Phoenix may be held in the "on" position for about 2 minutes with a 1 minute cool down before the next cycle.
In this first mounting, we realized because of the position of the thumb screws, we would have to put the laser in AFTER we put the mount on the scope. While not a big deal when doing it inside, this is not practical out in the field. We will have to work on the overall design a bit more to make it easier to attach to the scope.
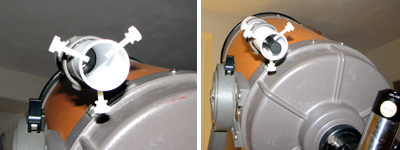
With the pointer mounted on the Celestron, we are eager to get this rig outside on a clear night to see how it performs! Unfortunately, the forecast for the next few days does not look promising. Perhaps we'll have better luck over the weekend. In any case, this $3 Laser mount was a fun project. We hope it will inspire you to give it a try and perhaps improve upon our design. - Wan Chi Lau (permalink)
Nov 19,2007
When we announced that we were going to cover Astronomy as our first RainyDayScience topic in 2008, we had not counted on the amazing amount of enthusiasm for this subject! A BIG "thank you" to all of the readers who have pointed us to the various subjects (Questar, sights, observatories, etc...) we should cover in this topic!
What we have also discovered is the enormous pool of DIY talents that is part of the amateur astronomy fraternity. Making your own gear is definitely part of the fun in the pursuit of this hobby. To that end, we have started our first RainyDayScience DIY astronomy project this weekend.
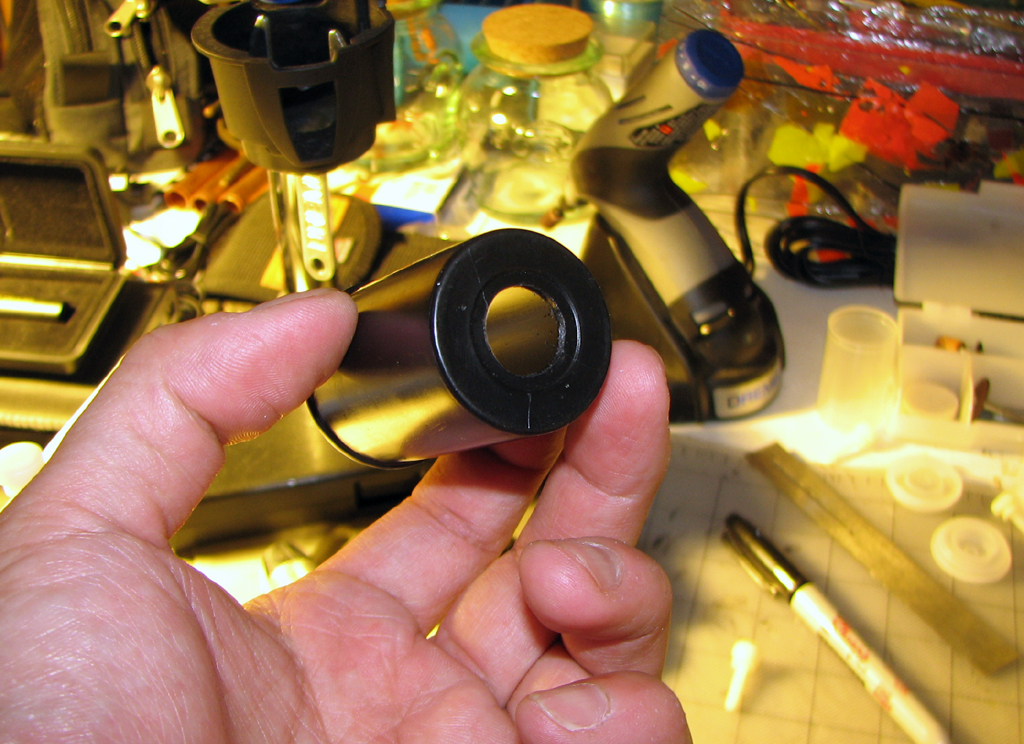
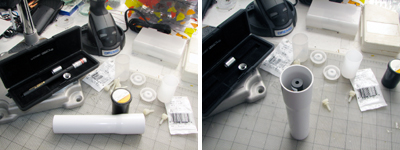
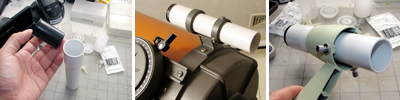
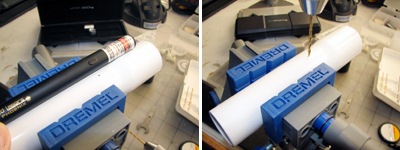
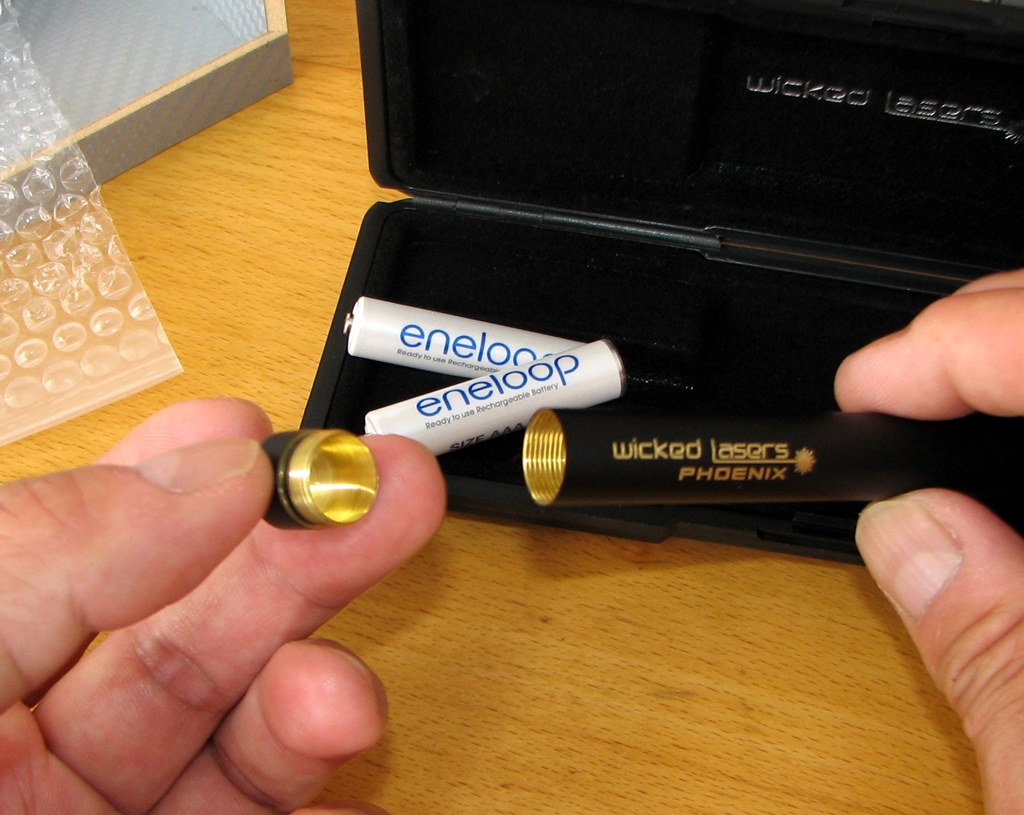
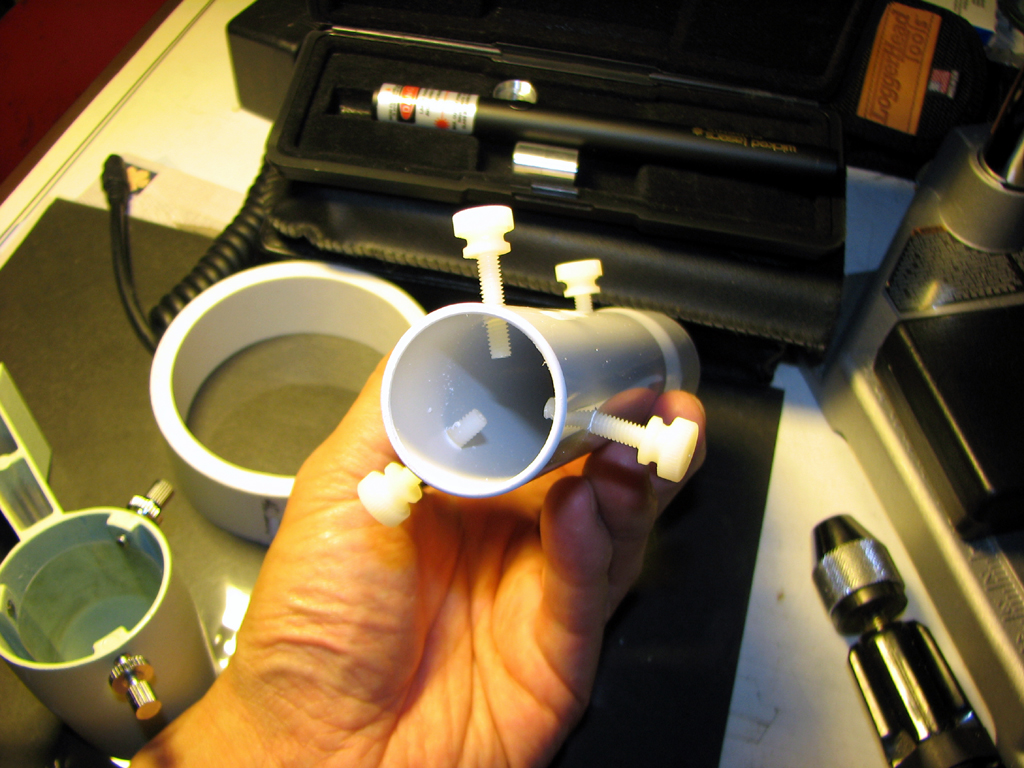
Last month, we got a green laser from Wicked Laser. As many readers have written, a laser pointer is a really useful way to orient the scope to objects in the sky. To attach the laser pointer to the telescope, there are many possible options (velcro, commercial mount, homemade mount). After looking around, we decided to construct one out of a PVC pipe and some nylon thumb screws.
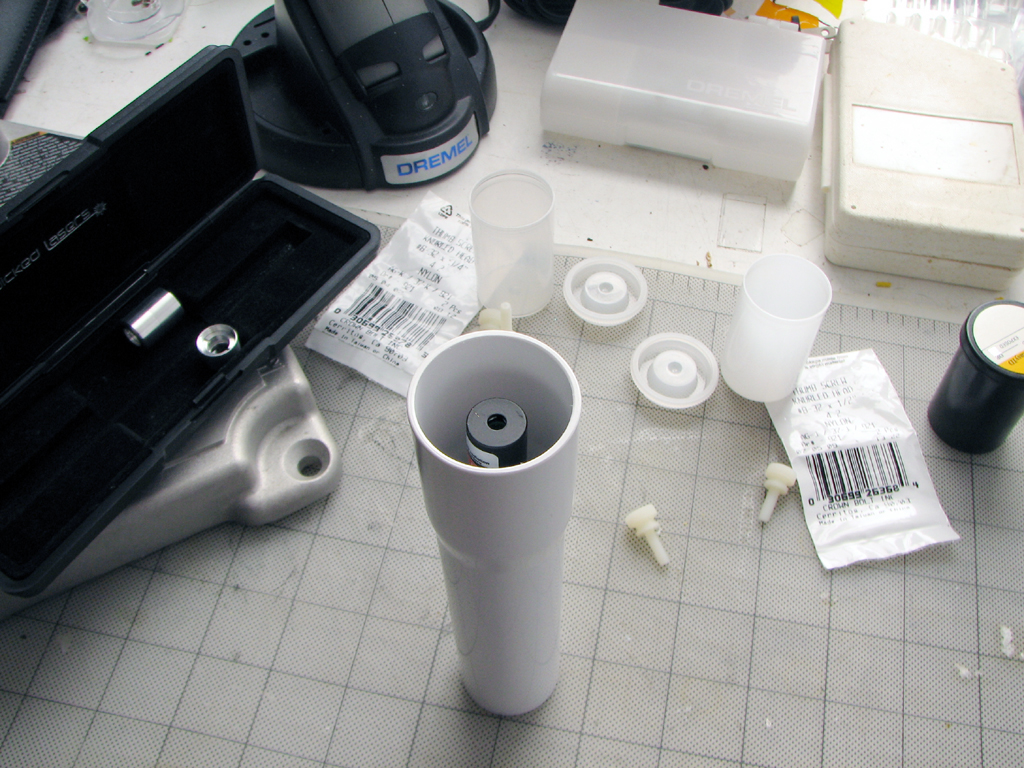
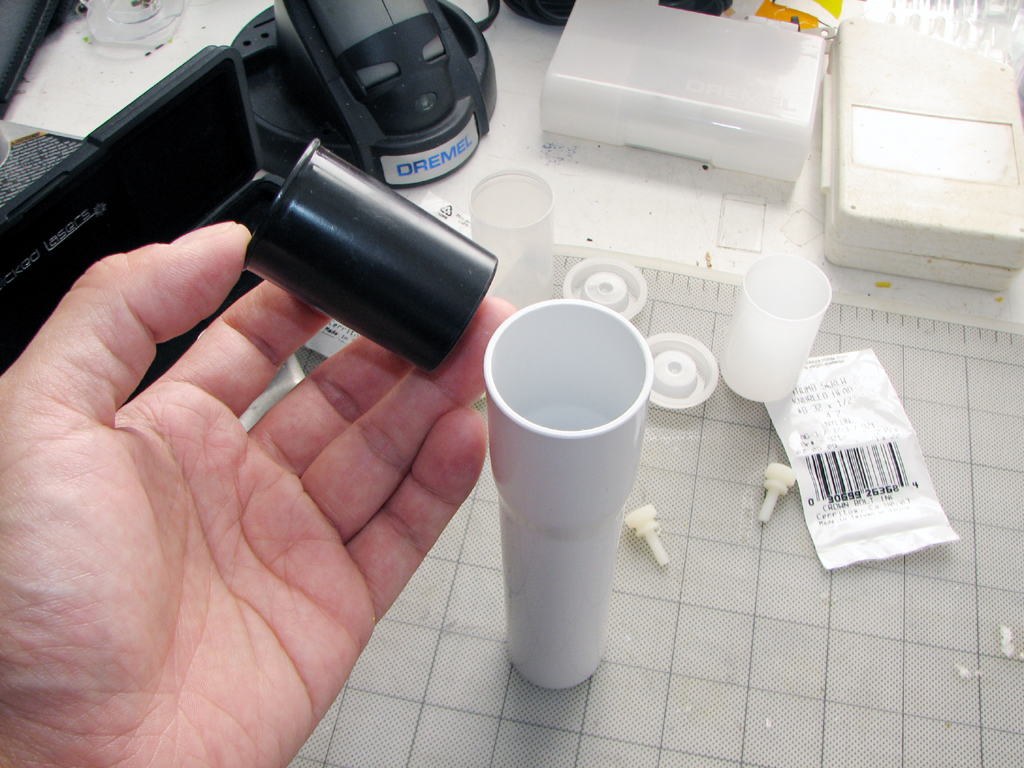
There is a 6" PVC extender (Home Depot: $1.06) which is perfectly sized for this application. It has a flare at the end which is just big enough to accept a film canister. The purpose of the film canister will be clear further into the project.
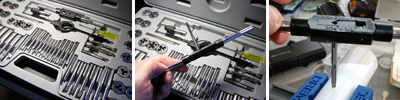
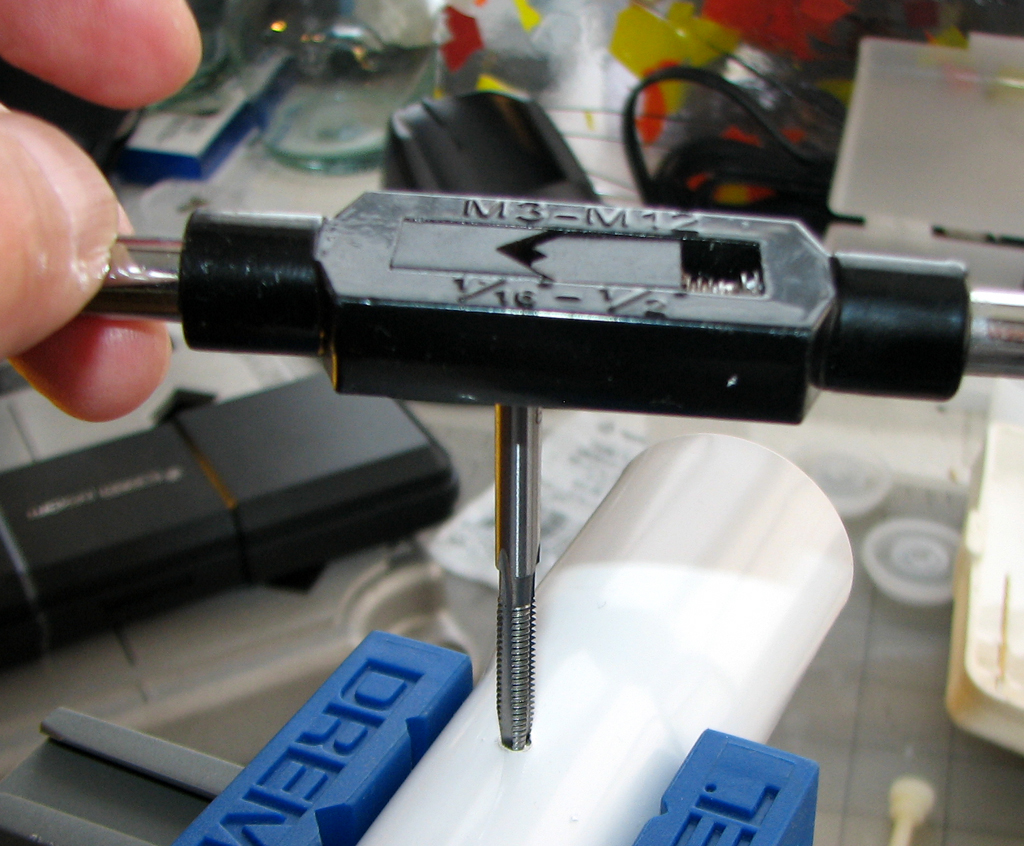
We'll be using the nylon thumb screws to hold the laser barrel. Since the Phoenix has a "push on/release off" button, we decided to add a "continous on" feature to the sight. This step also enabled us to test out how difficult it is to tap the PVC pipe.
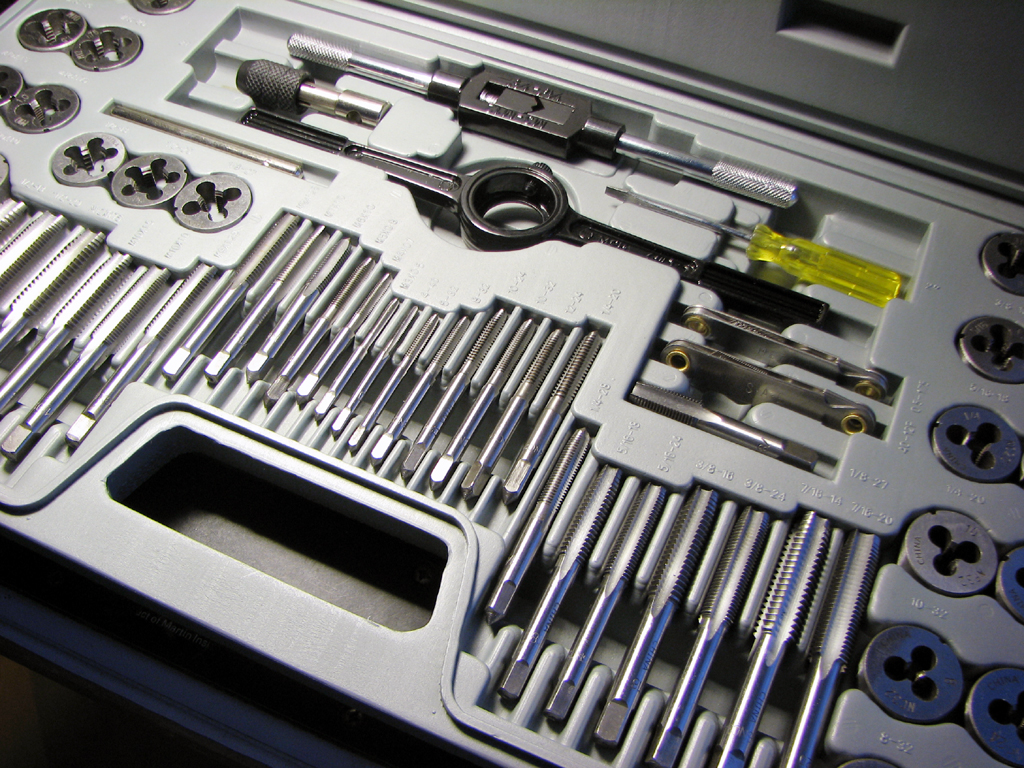
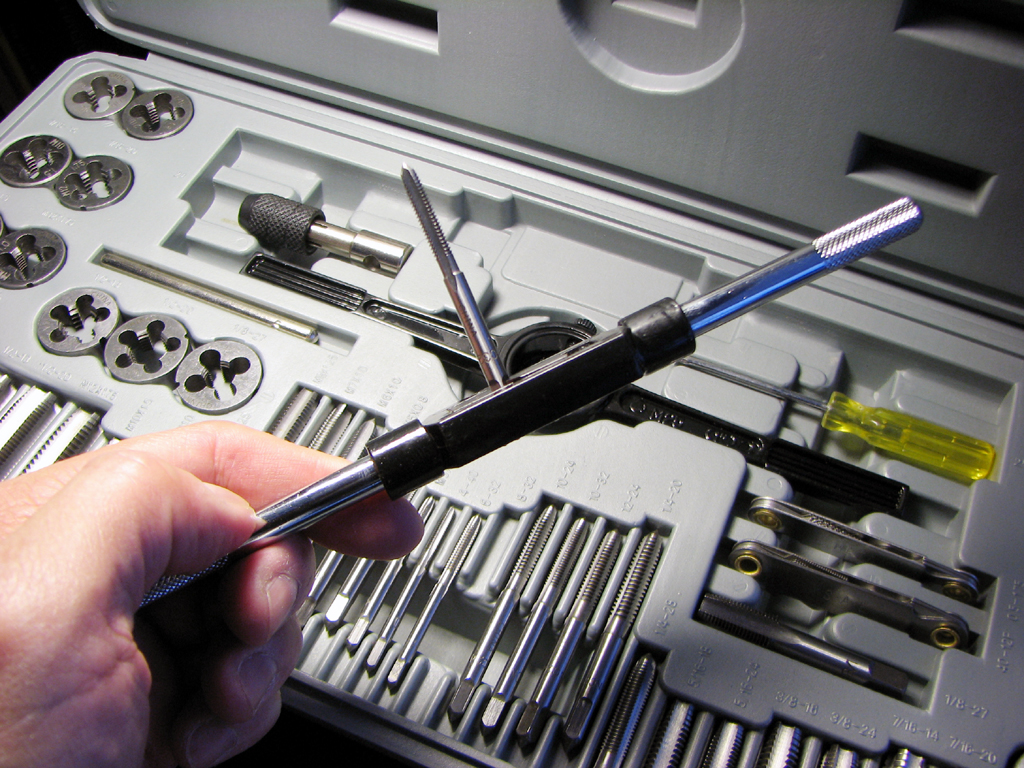
We understand the theory behind using a Tap and Die set, but we have never actually threaded a hole before :-) The tool looked simple enough to use: select the right thread size (#8-32), attach the bit, thread the hole. The PVC was sufficiently soft that tapping the hole was really easy. A quick test with the thumb screw showed that we were successful with our first attempt.
Now that we have successfully tapped our first hole, we'll have to repeat this six more times to set the front and rear positioning screws. Those will require more precise alignment as they will be used to make fine adjustments to the position of the laser barrel. Making your own gear is a lot of fun and an excellent way to spend a rainy afternoon. We'll have more updates as we make further progress on this project. - Wan Chi Lau (permalink)
Nov 7,2007(WowUsWednesday)
Some readers wrote that they are having trouble seeing Comet Holmes where they live because of all the light pollution from street lamps and other urban light sources. Others were complaining that it gets really cold just standing around at night.
We can't help with the first problem (bb gun... cough, laser...cough cough), but we can pass along this "how-to" to help readers stay warmer when performing their nocturnal heavenly observatory activities.
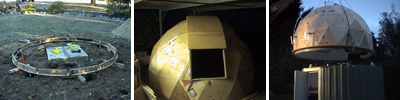
Barry Armstead of Australia built this wonderful observatory in his backyard from locally available parts and a keen eye on budget, usability, and practicality. This project will "WowUs" any day of the week! - Wan Chi Lau (permalink)
Nov 6,2007(CometTechTuesday)
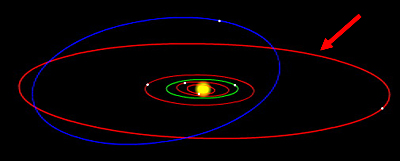
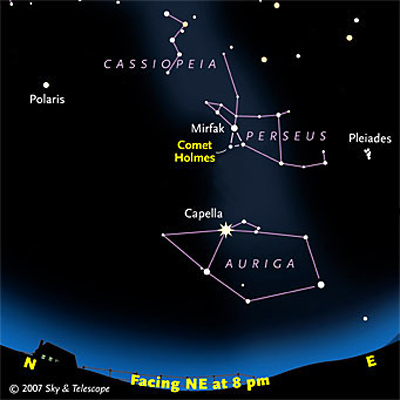
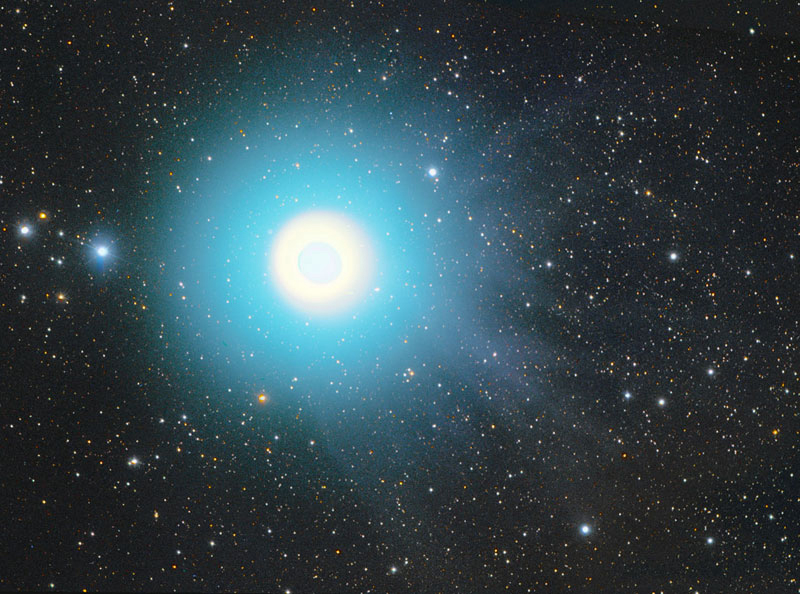
Comet Holmes was discovered by Edwin Holmes on October 6, 1892. This comet's orbit is about seven years. Because its orbit is relatively short, it has been well studied. In order to see it, you have to have a pretty good telescope. Even then, the view is fairly dim.
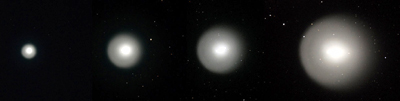
This past October 24, Comet Holmes suddenly got about a million times brighter. So bright that, if you knew where to look, you could see it with the naked eye! Astronomers and night sky enthusiasts around the world have been buzzing with the news of this event.
The current theory of how this happened is that the comet must have had an interior with cavities filled with ice. When the comet got close enough to the Sun, the melting of the ice built up enough pressure to cause the comet to explode. It is unclear what the appearance of this comet will look like in the coming weeks as it continues to expand.
If you have clear skies and want to get a peek at Comet Holmes over the next few weeks as its appearance changes, look toward the NE from around 8PM on. Truely a once in a lifetime event! - Wan Chi Lau (permalink)
Nov 2,2007
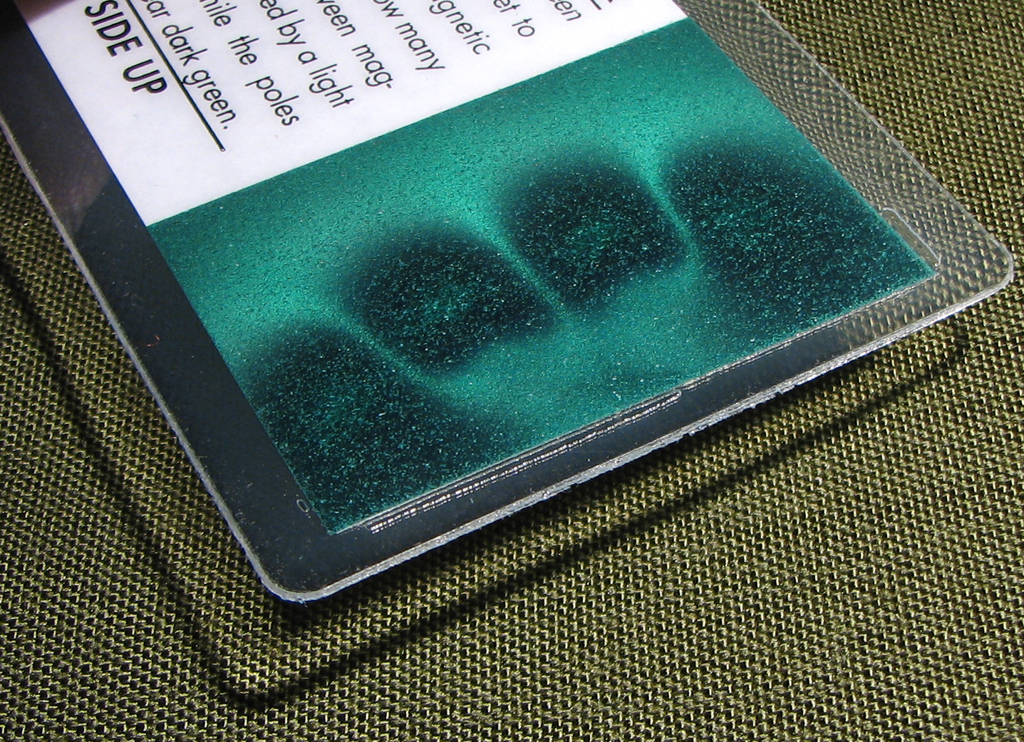
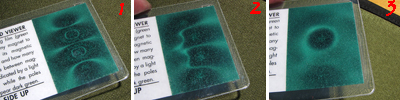
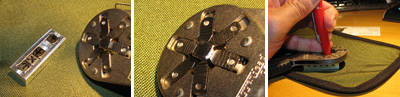
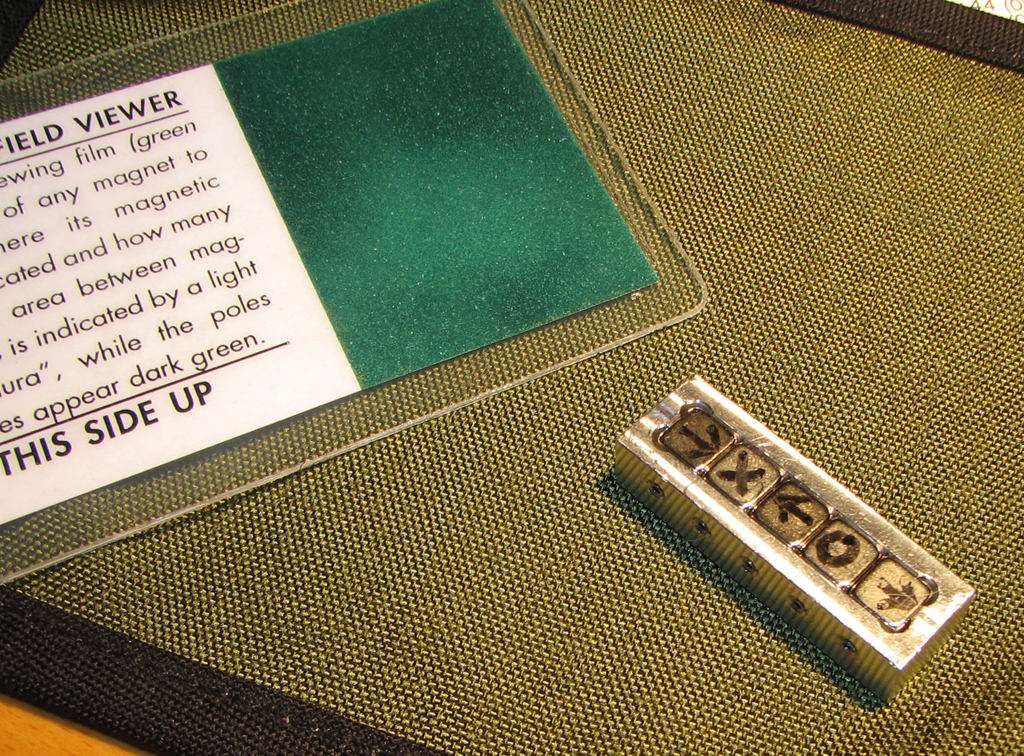
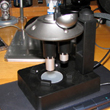
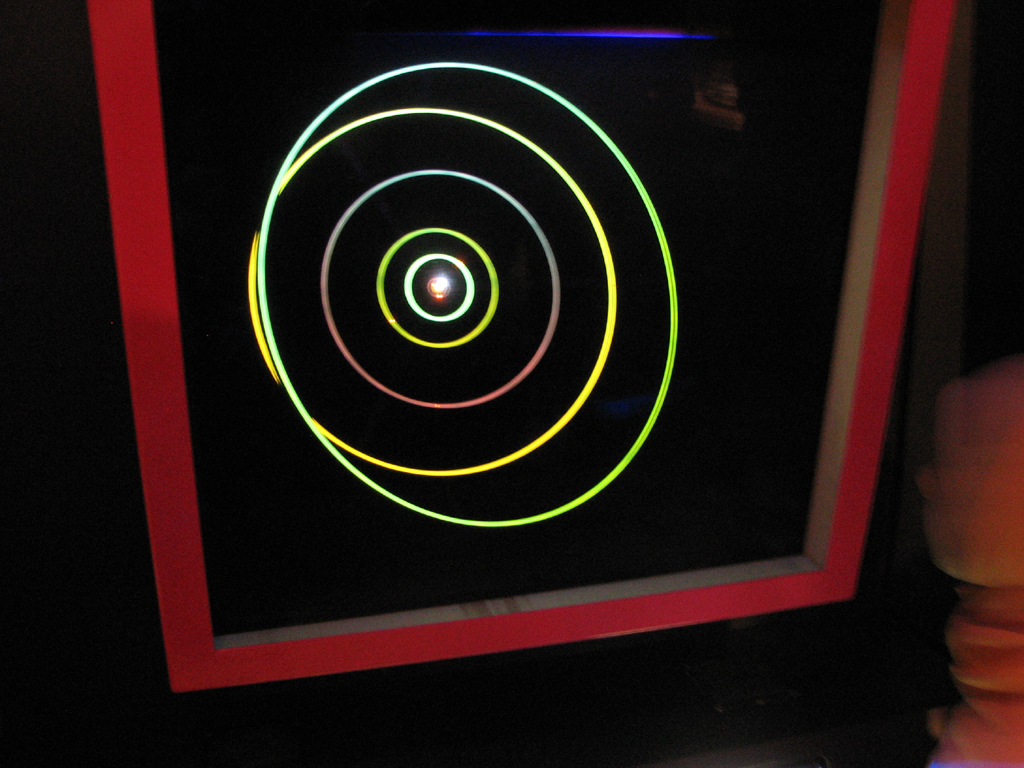
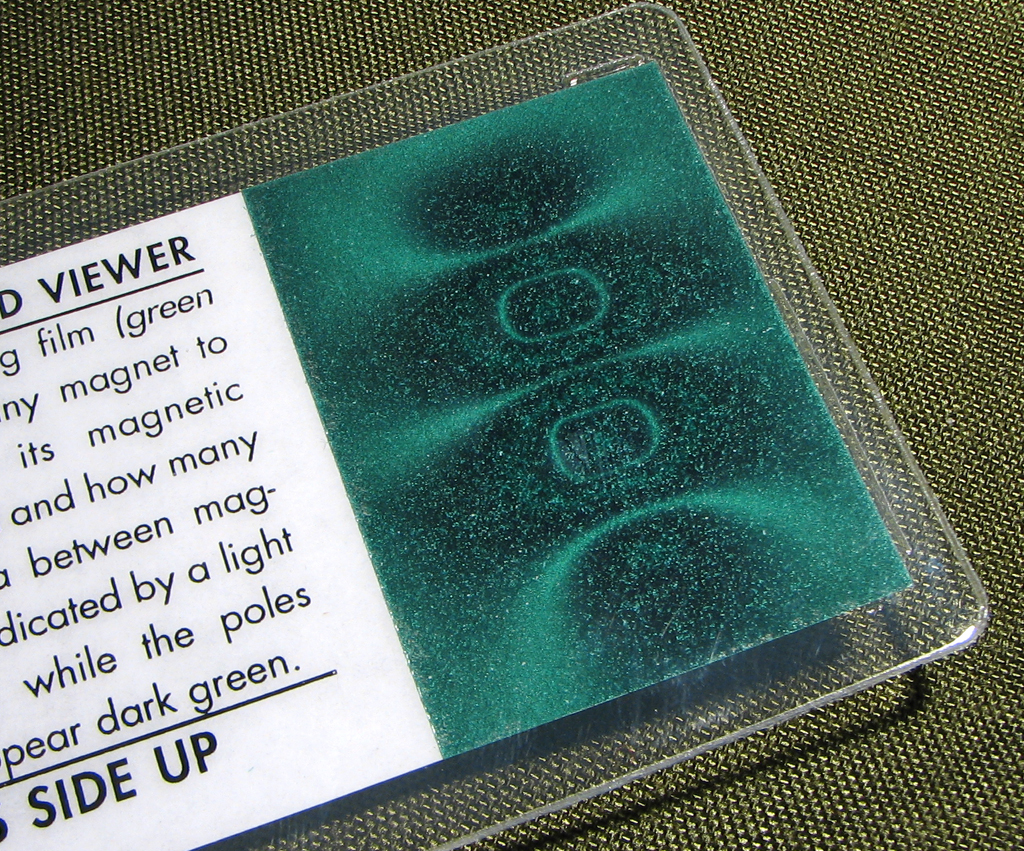
With the Halbach Array successfully assembled, it was time to... "Uhh...how do you know it was put together correctly?" asked one of our smart-ass interns. In truth, we don't know. The only way to know is to somehow "see" these invisible magnetic fields.
The kit came with "viewer." It is a thin layer of oil encased in plastic. In the oil, there are millions of magnetic particles which, when exposed to a magnetic field, will orient itself to reveal a pattern.
The contest is to match up the field with the orientation of the magnets. If you think you know, send us your answer in an email with the subject line "Outstanding in the field!" First reader with the correct sequence will get something from our pile of goodies. - Wan Chi Lau (permalink)
Nov 1,2007
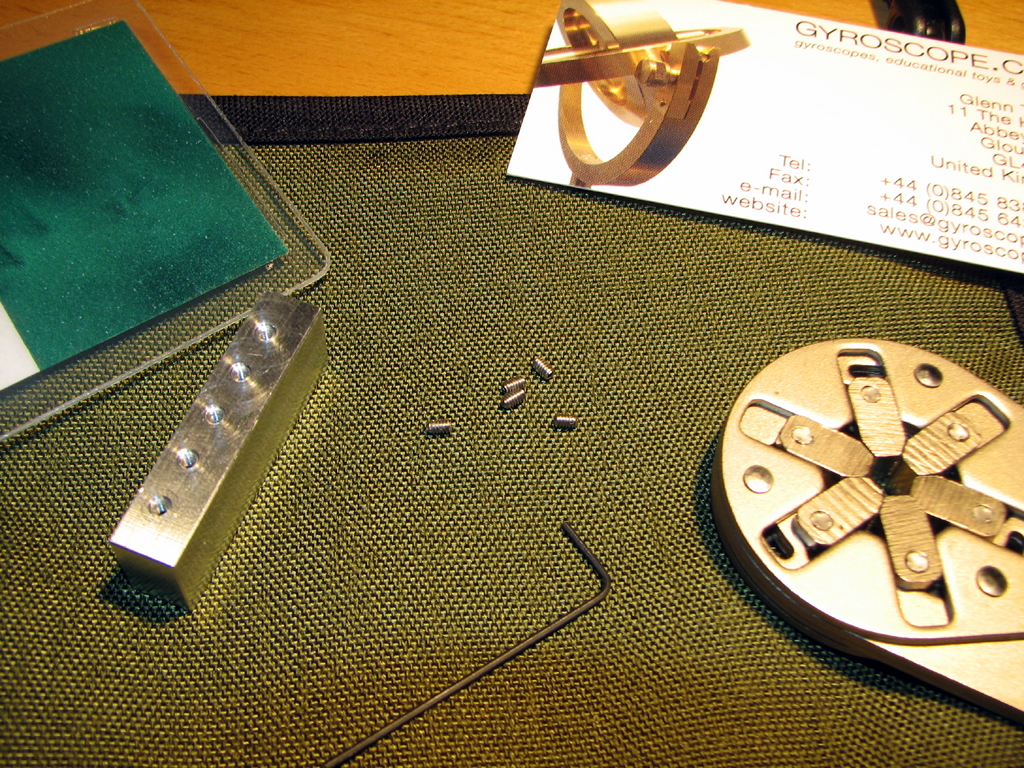
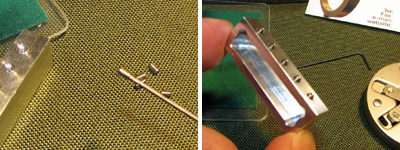
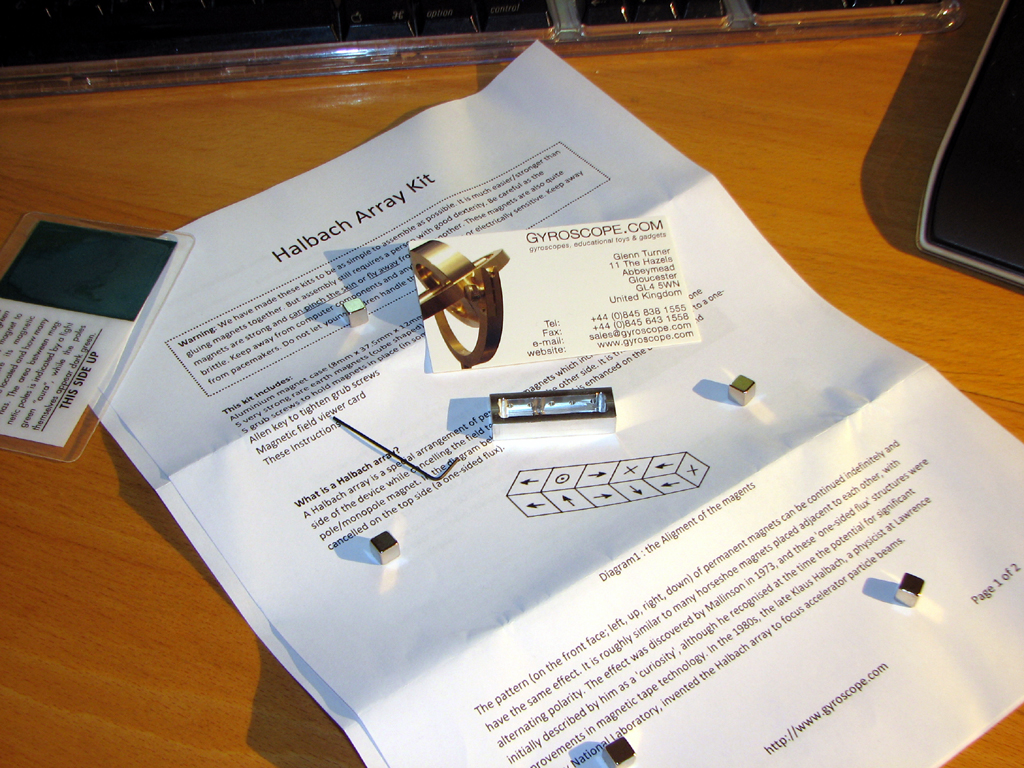
Assembling the Halbach Array was an interesting introduction to the strength of magnets and magnetic fields. We are not speaking in reference to the demostration of any scientific principles, but from experiencing directly the power of the fields themselves.
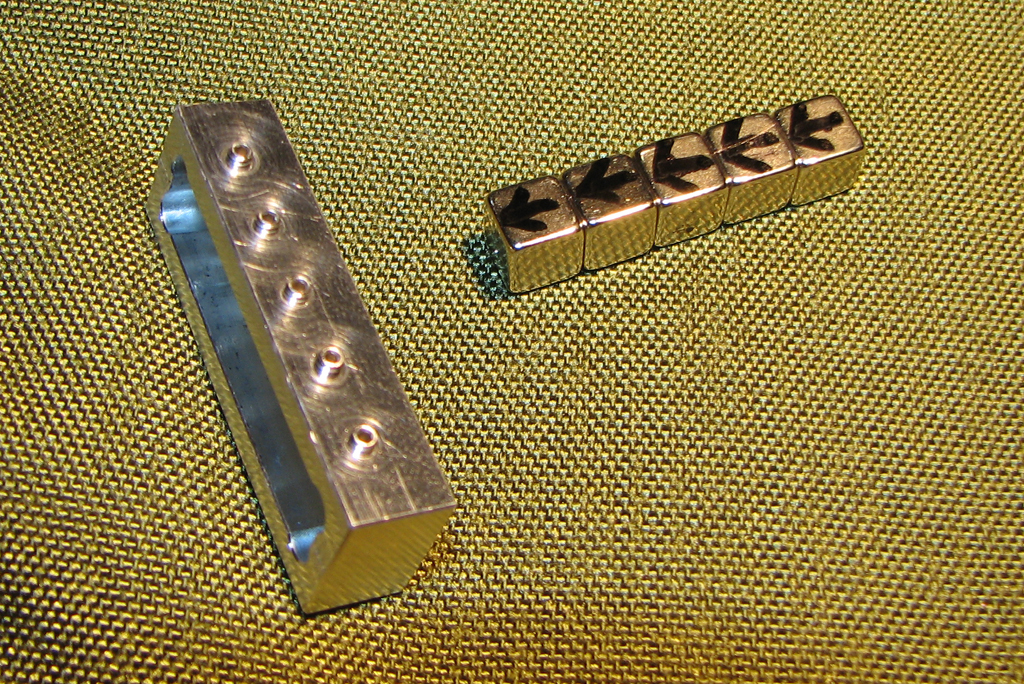
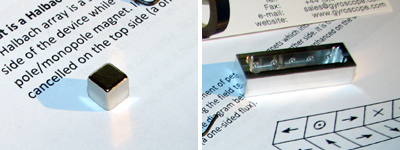
The kit from Gyroscope.com came with all the parts needed to construct the Halbach Array: c-channel container, retaining screws, hex key.
To properly orient the five magnetic fields, we marked the magnets with arrows. It is not important whether they are pointing North or South, just that they are all marked the same way.
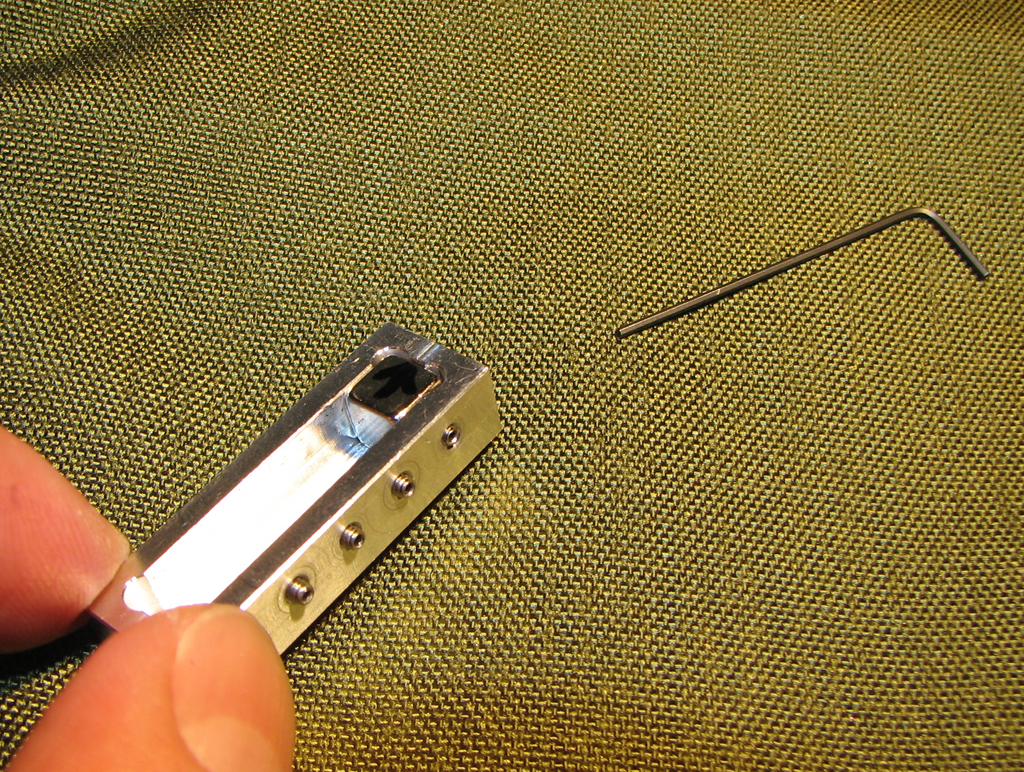
Because of the orientation of the magnetic fields, we found it EXTREMELY difficult to put in the last magnet. It felt as if we were trying to push on an invisible spring. The magnet kept popping out.
While possible to do by hand, we found that it was much easier if we gripped the magnet with something and pushed it into the remaining spot.
The Immix was the perfect tool for the last and most difficult step of this project. The magnet attached itself to the teeth. We gripped it about midway so it protruded out. This allowed us to feel our way acros the top of the array for the opening. Once aligned, we pushed it home with a plastic pen and tightened the retaining screw.
Tomorrow, we will post some pics of the magnetic fields generated by this Halbach Array. There will also be a contest to match up the field with the orientation of the magnets. We'll have something fun for the reader with the first correct answer. - Wan Chi Lau (permalink)
Oct 30,2007
Is it possible to have a magnet with just one pole? Monopoles are theoretical, but for readers who have heard about Halbach Arrays, then you know that it is possible to "assemble" one with permanent magnets.
Glenn Turner of Gyroscope.com has created just such a kit for interested readers who want to learn more about this fascinating phenomenon. We'll assemble this kit to see if we can actually get it to do the "monopole" thing.
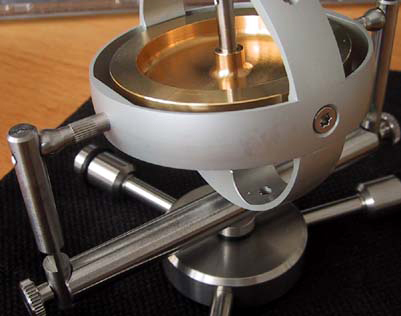
Readers may remember Gyroscope.com as the place where we got the beautiful stainless steel and brass gyroscope a few years ago. We still play with this all the time.
If you are looking for something out of the ordinary to entertain you during some of the less engaging conference calls, point your browser to Gyroscope.com. They have what you're looking for :-) - Wan Chi Lau (permalink)
Oct 24,2007
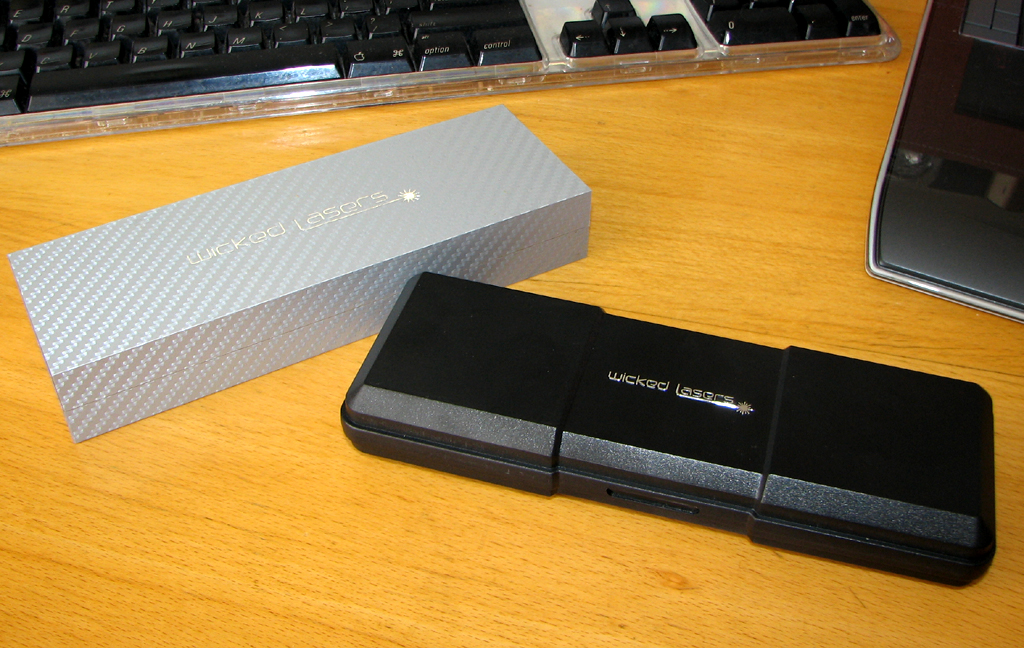
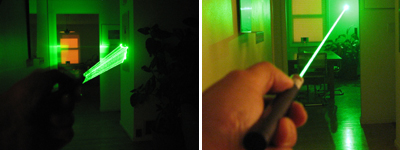
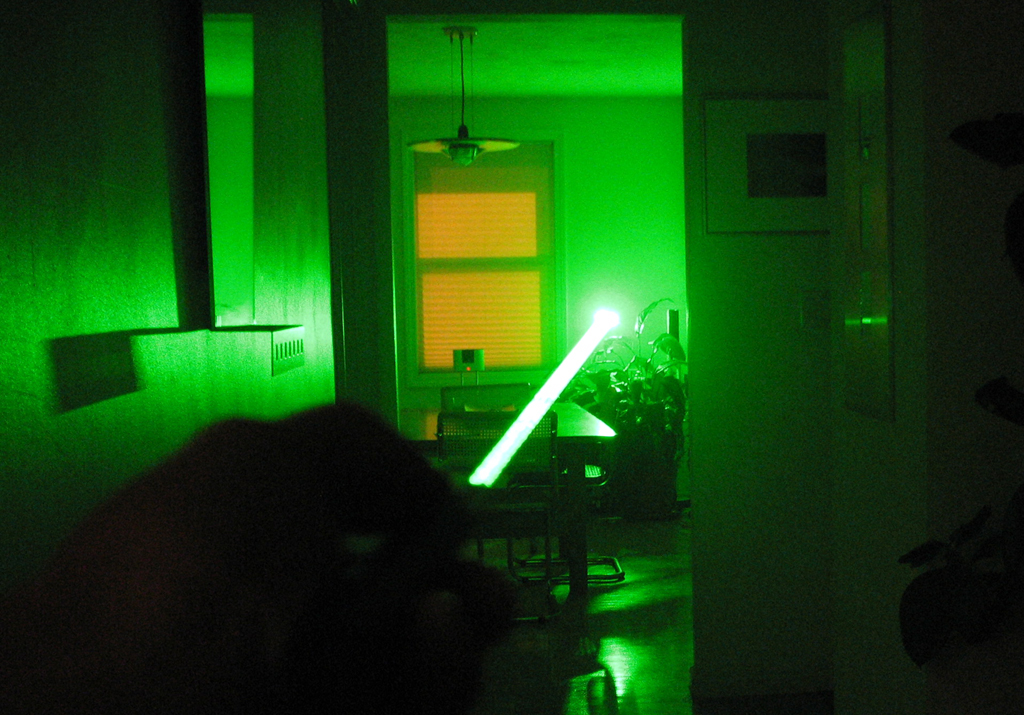
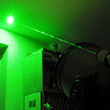
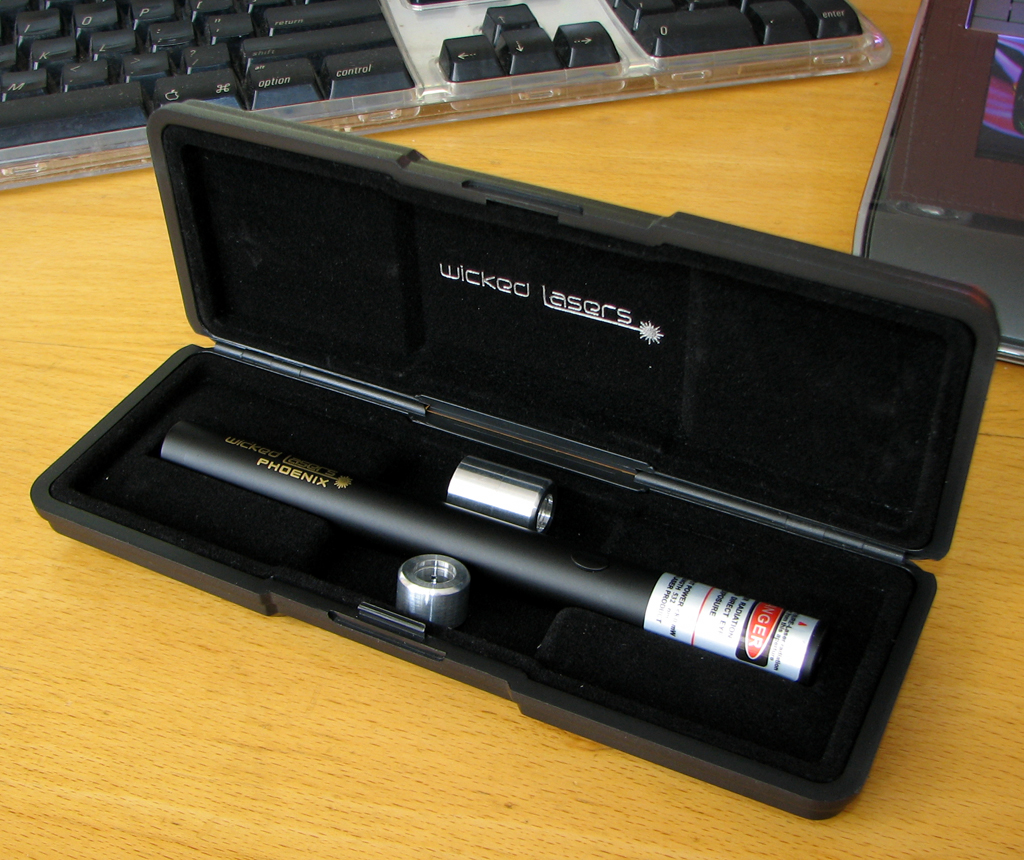
We received a lot of recommedations and ideas for telescopes and Astronomy related gadgets. One suggestion stood out from the rest and it was something we didn't even know was possible... using a laser to point at the stars in the night sky!
Of couse, not just any laser pointer would work. Most of the links we were sent "pointed" to lasers from Wicked Lasers. The first thing these suggestions mentioned was that this is NOT your father's laser pointer, but more about that later. We were intrigued to say the least. We HAD to check these recommendations out. We were not disappointed!
Our experience with laser pointers has been mainly with PowerPoint presentations (if we could stay awake). When we powered on the Phoenix, we understood why they named the company Wicked Lasers!
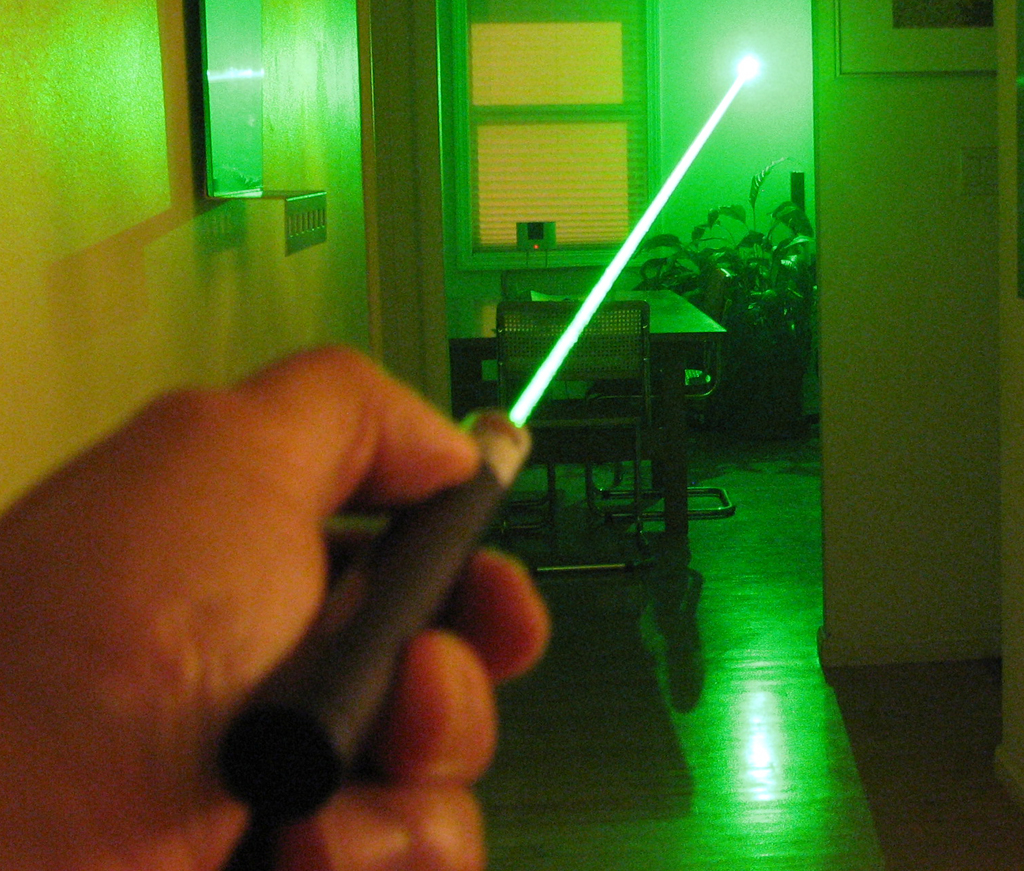
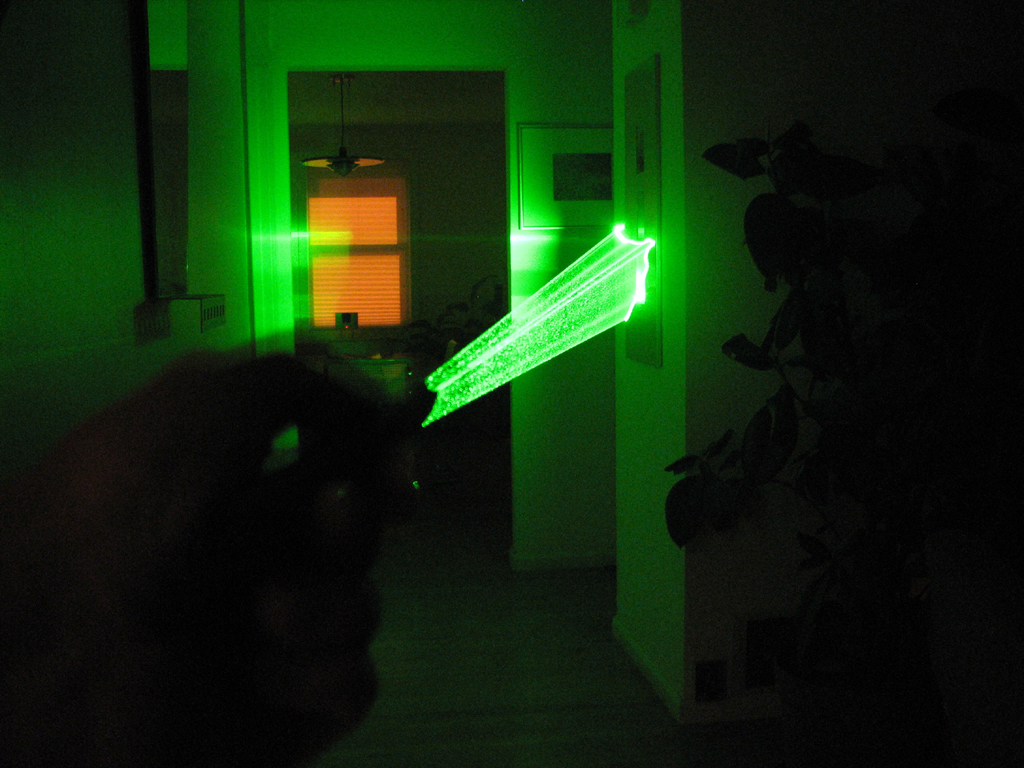
We know what you are thinking...these images had to have been "photoshopped." Instead, somebody happend to have been grilling something in the RainyDayKitchen. We just took advantage of the smoke to diffuse the laser beam enough to create these photos :-)
We also took some photos of the laser moving and with the two different lens attachments (focus, diffuse). The beam with the diffuser was noticeably thicker.
We can't wait to try this outside on a clear night to see if we can really use this to point at the stars. Of couse, one has to be responsible when using a laser this powerful outside. We wouldn't want to get a visit from Homeland Security for pointing a laser at something we shouldn't. - Wan Chi Lau (permalink)
Oct 18,2007
We were amazed to discover that so many of our readers are into Astronomy! We thank you for all of the interesting pointers to cool gear and gadgets we should consider for our upcoming articles on telescopes and stargazing.
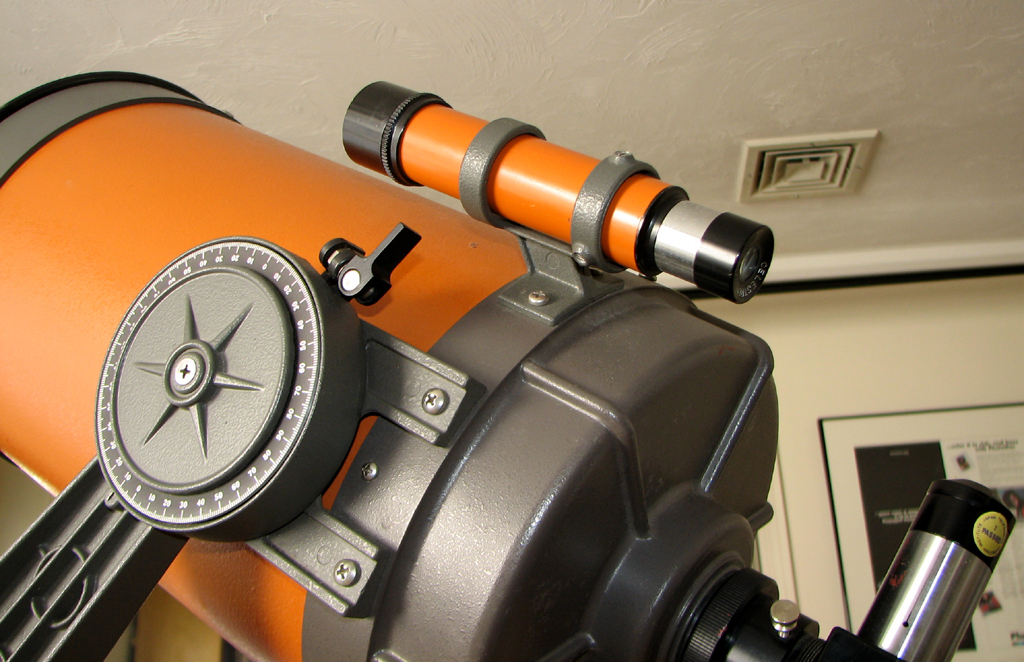
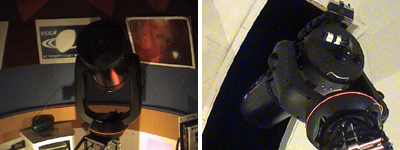
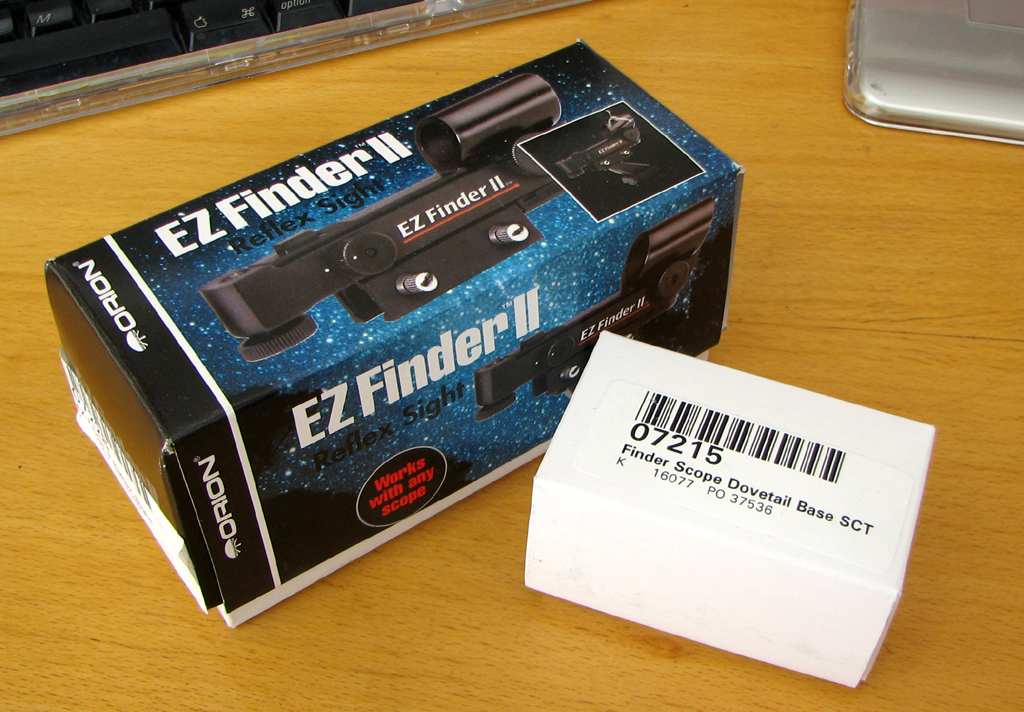
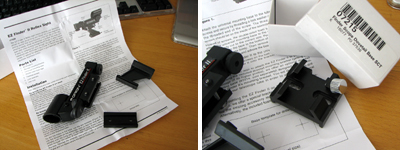
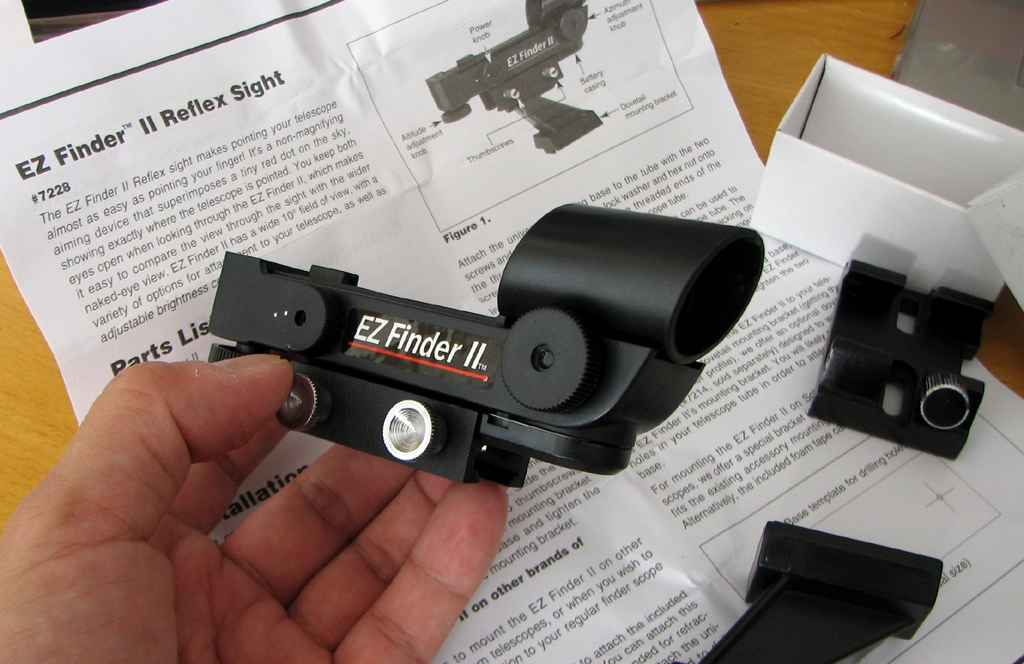
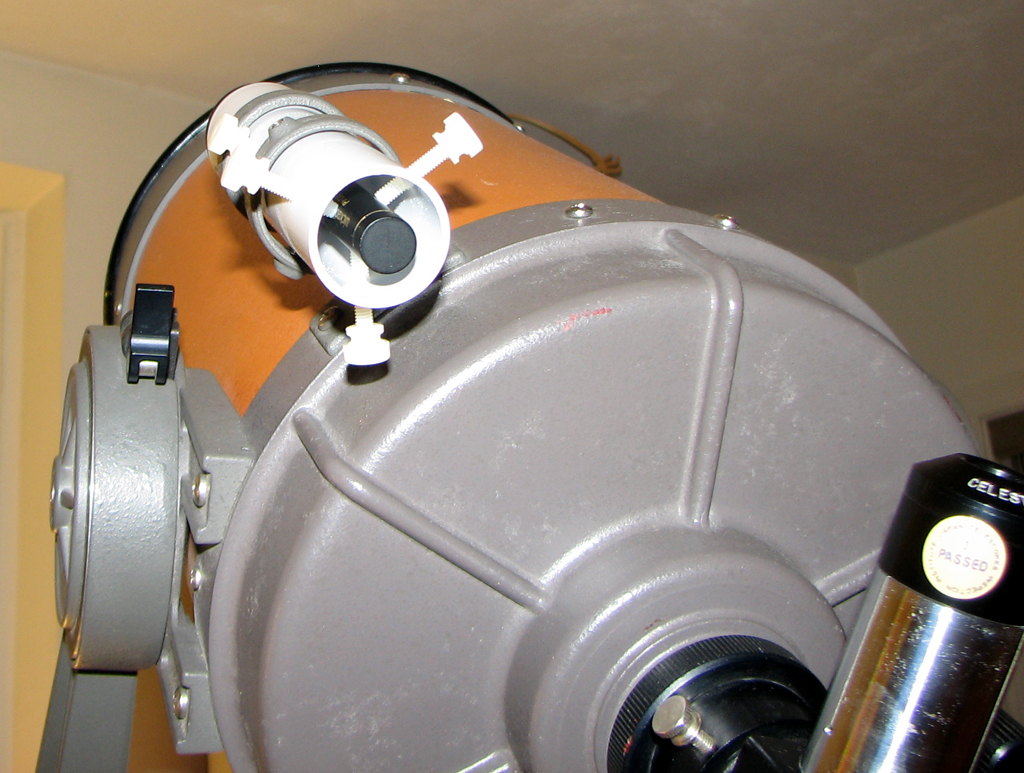
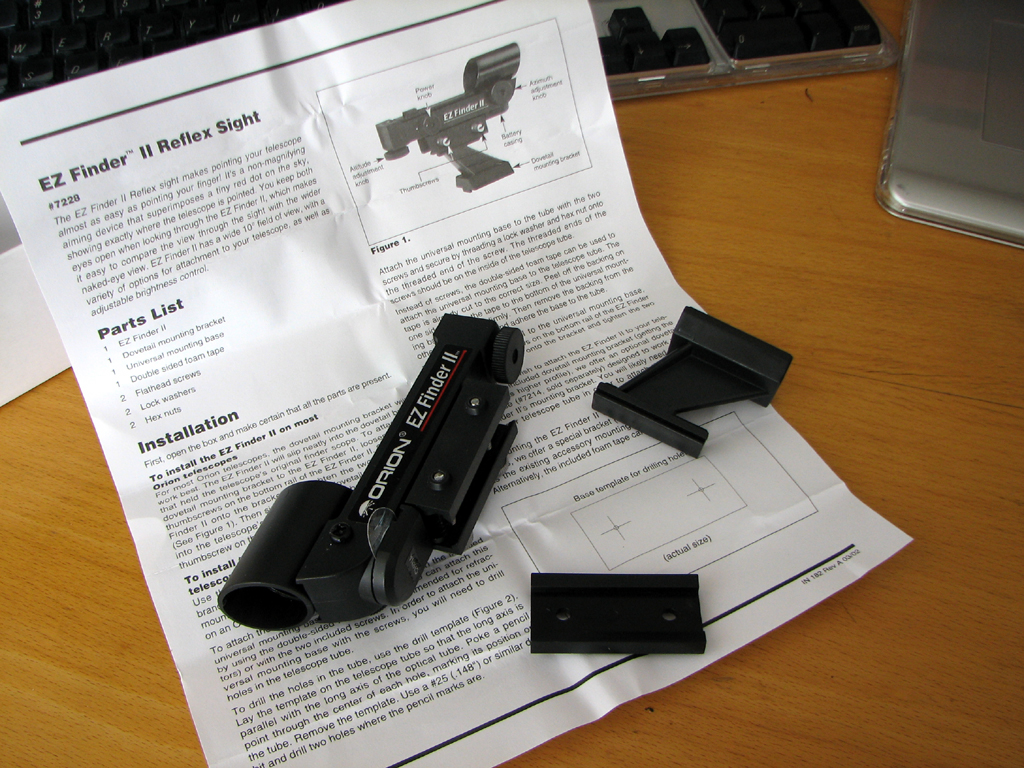
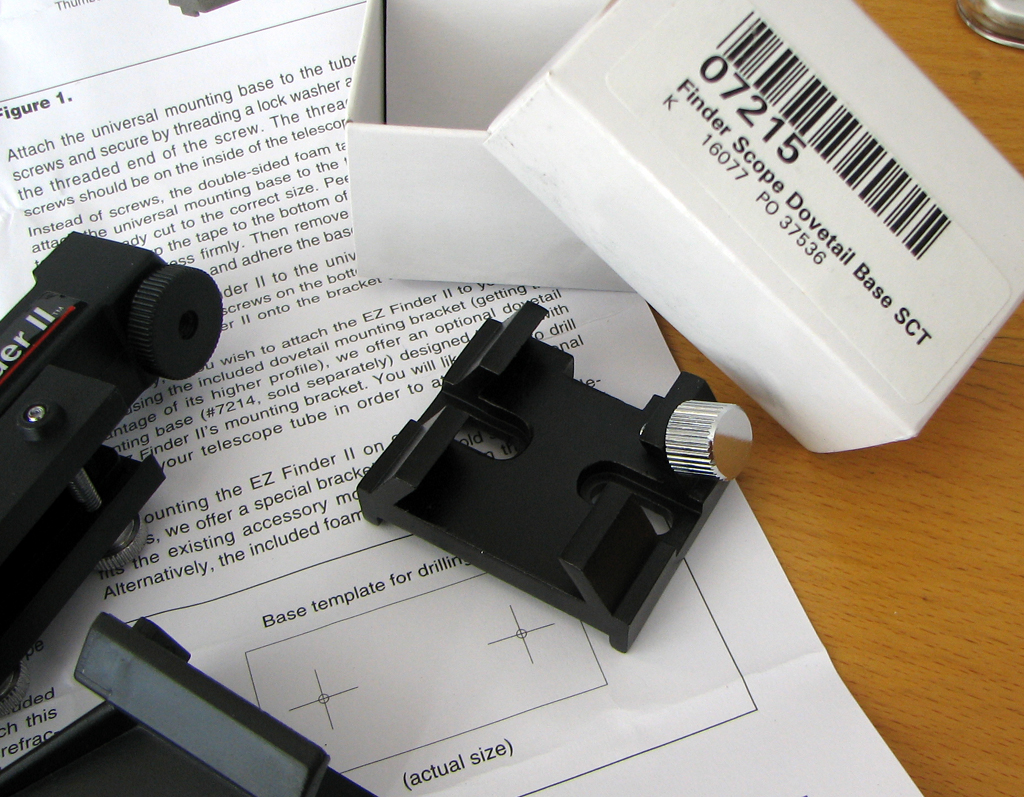
Quite a few of you have pointed us in Orion's direction, especially toward the Orion EZ Finder. We acquired a unit last week and will be adding it to our Celestron C8 scope sometime this Winter.
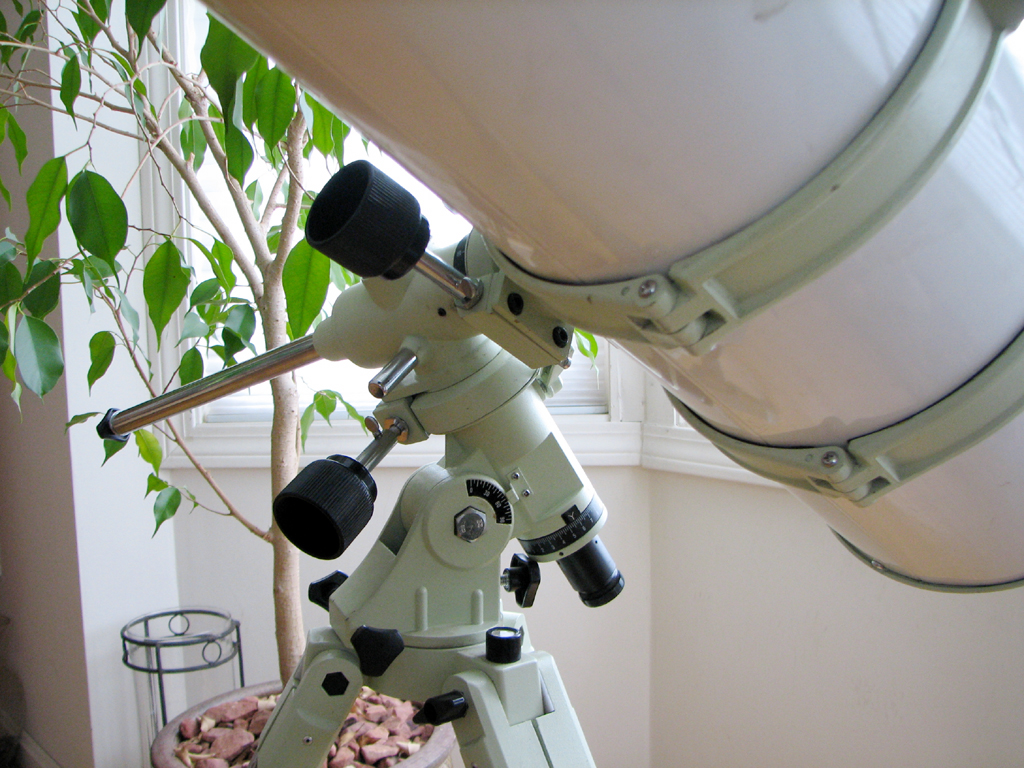
The basic unit comes with all the parts needed to attach it to most telescopes. There are additional mounts for different types of types scopes such as the SCT.
The Orion EZ Finder is a sighting device which uses a red dot to help align the telescope. There are a lot of advantages to this finder, our readers claim. We'll see how it compares to a standard finder and the Telrad unit.
The two telescopes we'll mount our new finders on are the 8" Newtonian and the 8 " SCT. The Telrad will be attached to the Newtonian and the Orion EZ Finder will go on the Celestron C8.
It appears we are pretty well set for "pointing" our telescopes once we get these red dot finders on them. It'll be fun to see how they perform InTheWild. We should have the Installation articles ready sometime this Winter and the FirstUse articles shortly after. - Wan Chi Lau (permalink)
Oct 17,2007(WowUsWednesday)
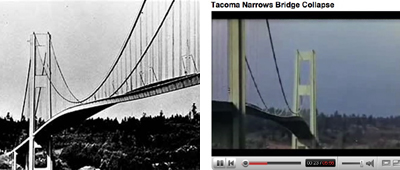
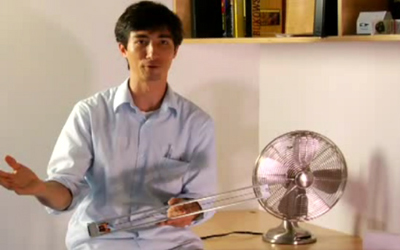
A little over a month ago we told you about John Kanzius and his water-burning invention. To day we are going to share with you something just as potentially revolutionary...a micro turbine which will cost a few dollars to make and can change the way we generate electricity for powering all kinds of things.
This invention was inspired by a video which most of us have seen in our high school physics class. The video is the Tacoma Narrows Bridge twisting itself to pieces from high winds.
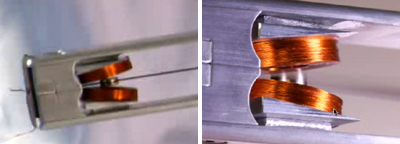
Shawn Frayne, a MIT grad, saw the video and had an inspiration... could the vibrational energy be converted to something more useful? The result of his work is the micro turbine pictured below.
The key to the conversion is the movement of a magnet passing through the two coils when the membrane vibrates, thus generating electricity. Brilliantly simple in concept, parts, and ease of maintenance. Check out this awesome video describing the device and showing it in action. This is going to change things!
If the price of crude oil makes you depressed, take heart that people like John Kanzius and Shawn Frayne are counter-balancing some of the "brain trusts" we have running things (into the ground). - Wan Chi Lau (permalink)
Sept 12,2007
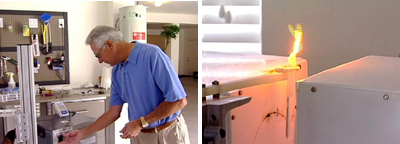
In 1989, Pons and Fleischmann announced they had produced "cold fusion" in their laboratory. The excitement generated by that claim reverberated around the world. Unfortunately, Pons and Fleischmann's experiments were not successfully replicated elsewhere.
Eighteen years later, an inventor by the name of John Kanzius may have accidentally discovered a way to generate energy which may be just as revolutionary, but unlike "cold fusion", Mr. Kanzius' approach appears to be easily reproducible!
The idea is ingenious: the proper radio frequency will weaken the molecular bond of water, separating the hydrogens and oxygen molecules. Add a spark to create the combustion. Energy is released from the burning of the hydrogen and oxygen gasses. This is not "FREE" energy (something has to power the RF generator), just a way of extracting energy from water instead of fossil fuel. The Kanzius technique is totally novel and definitely worthy of a mention in "WowUsWednesday."
Of course, there is a difference between a technology demonstration and a working "salt water" engine. And, we are not quite sure of the implication of using up all our water for running our air conditioners and powering our SUVs. One thing is certain, if this technique is commercialized, it will certainly have an impact on our politics in the Middle East. - Wan Chi Lau (permalink)
Oct 9,2007
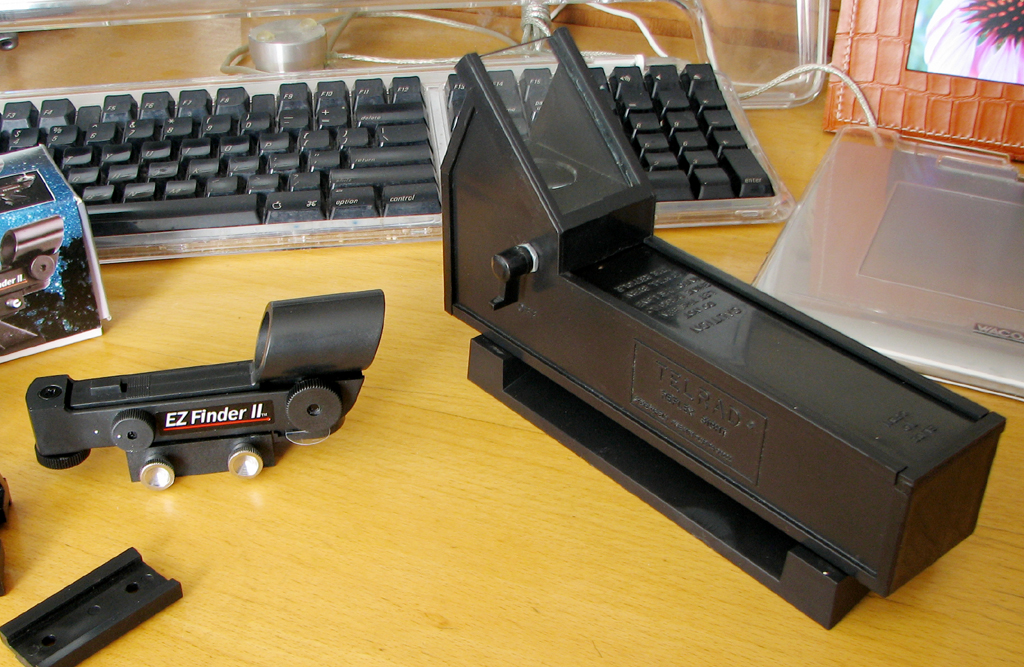
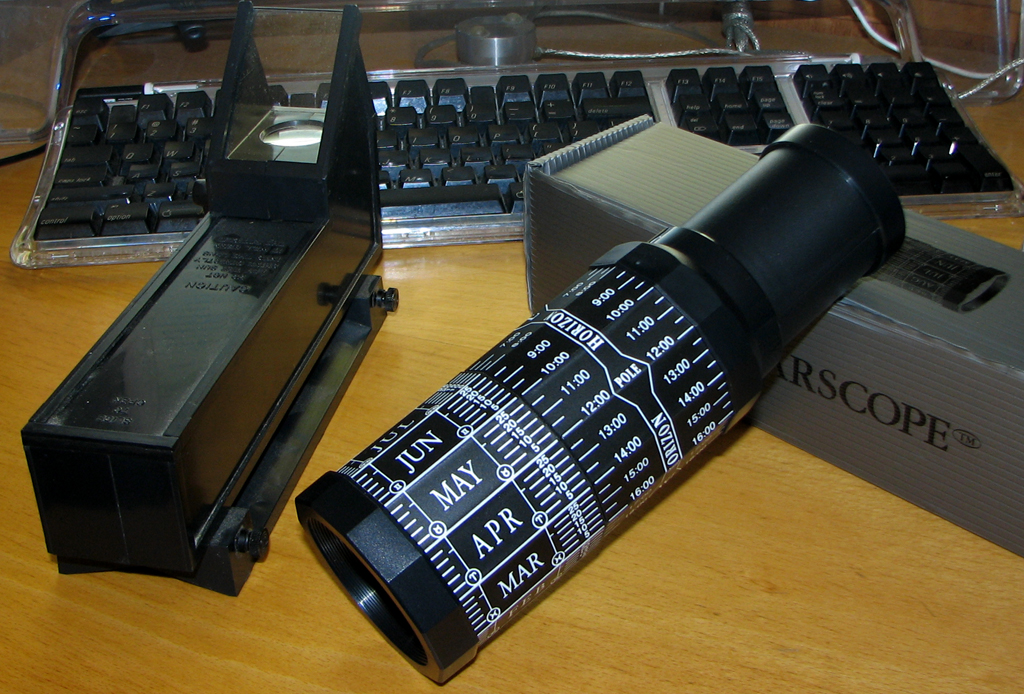
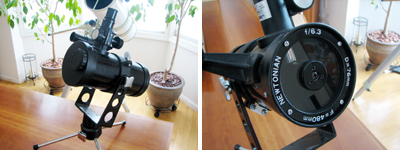
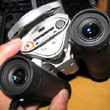
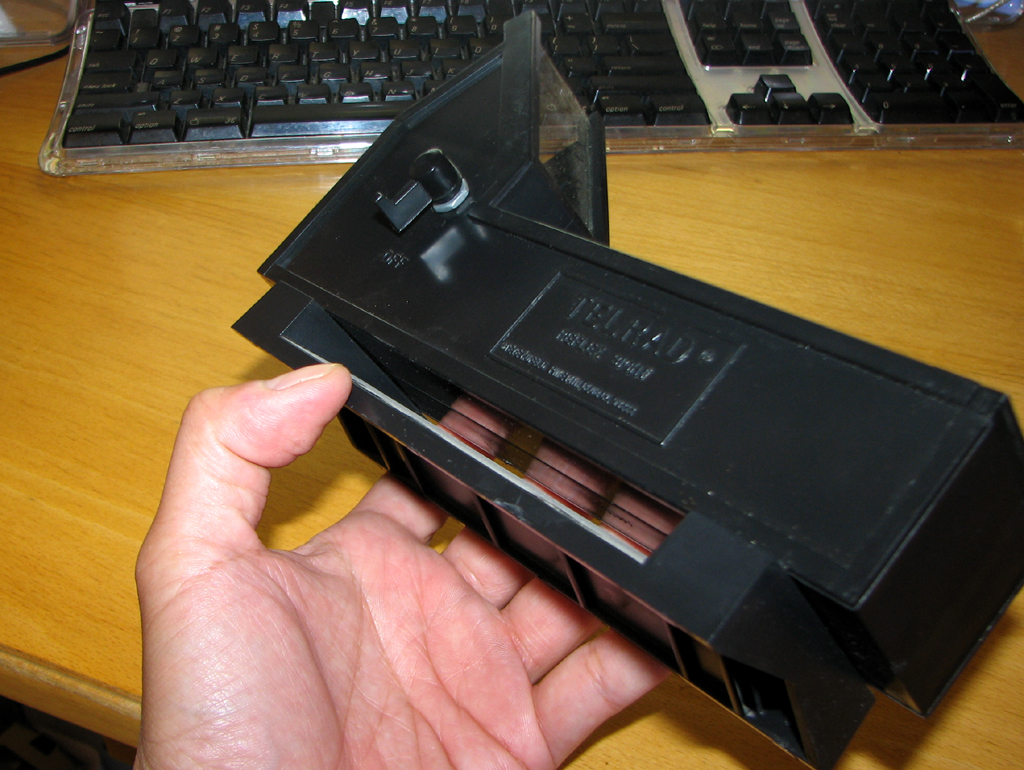
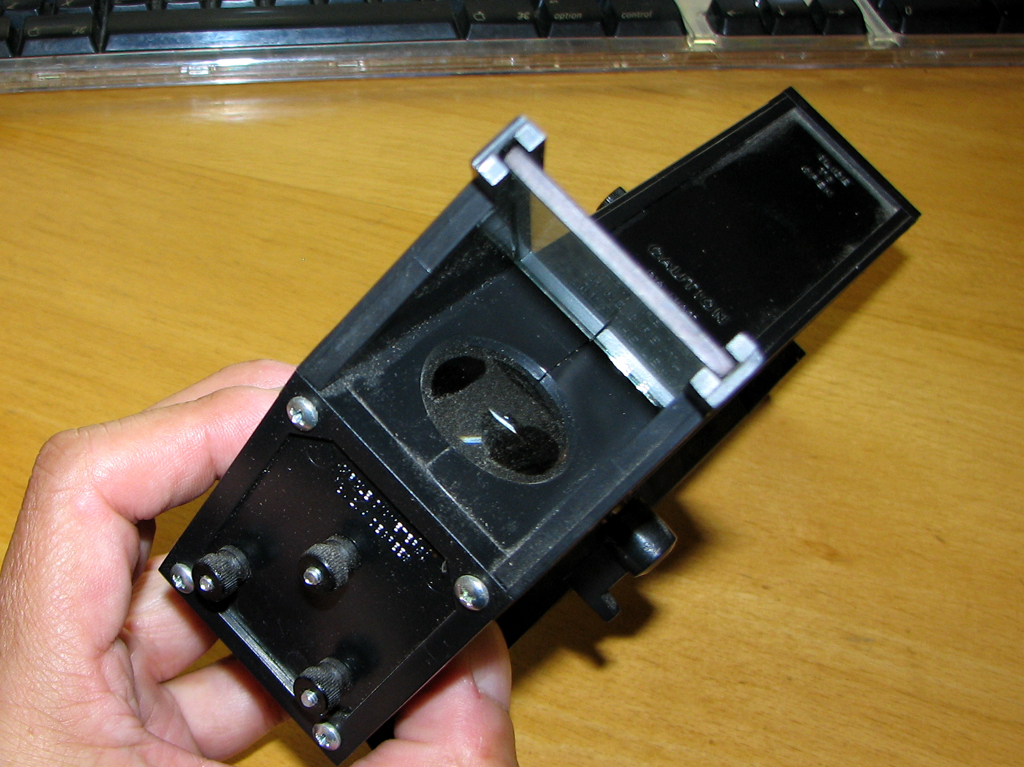
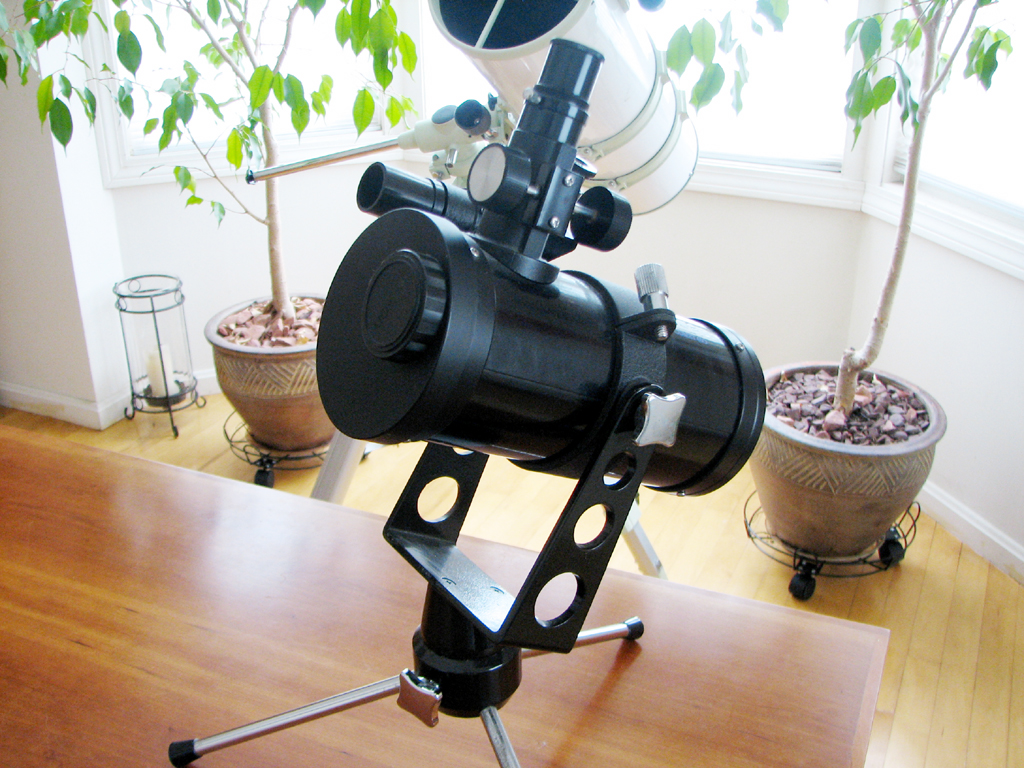
When we purchased our 10" Newtonian telescope it was missing the finder scope. After a bit of research, it was determined that a red-dot finder would be a suitable replacement. While bidding on the replacement finder, we also came across another interesting "finder." We managed to acquire both on EBay.
The "red-dot" finder we purchased is the Telrad sight. It was designed to enable users to quickly align telescopes with celestral objects by lining up a projected "red-dot" with what they see in the finder.
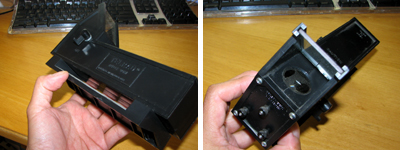
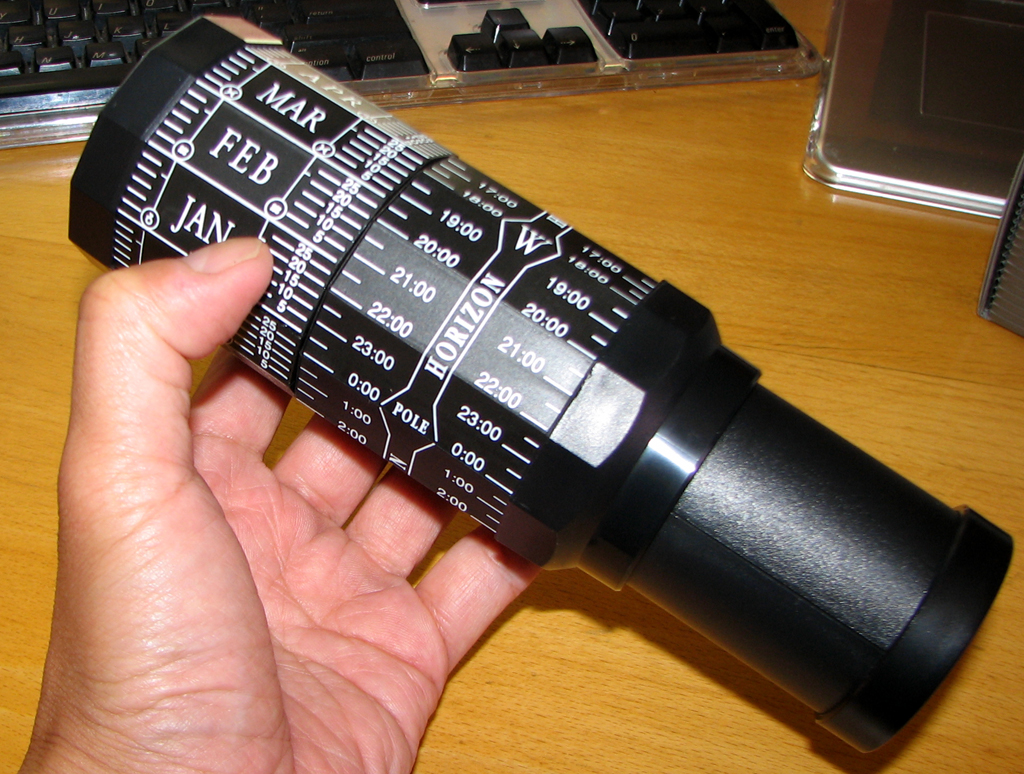
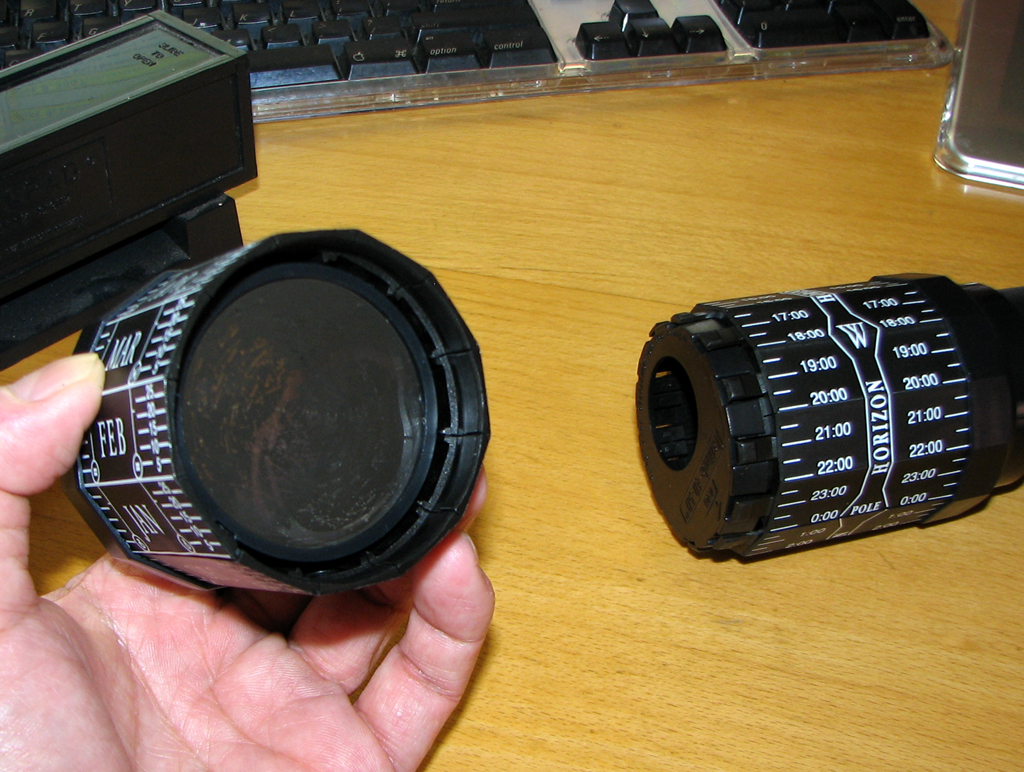
The other "finder" is the Stellarscope. This gadget is a tool designed to help user identify constellations and other celestrial objects in the night sky through out the year.
We have not had much experience using either "finders" yet. Look for a review of the Telrad and the Stellarscope once we've had a chance to learn how to use them properly. - Wan Chi Lau (permalink)
Oct 8,2007
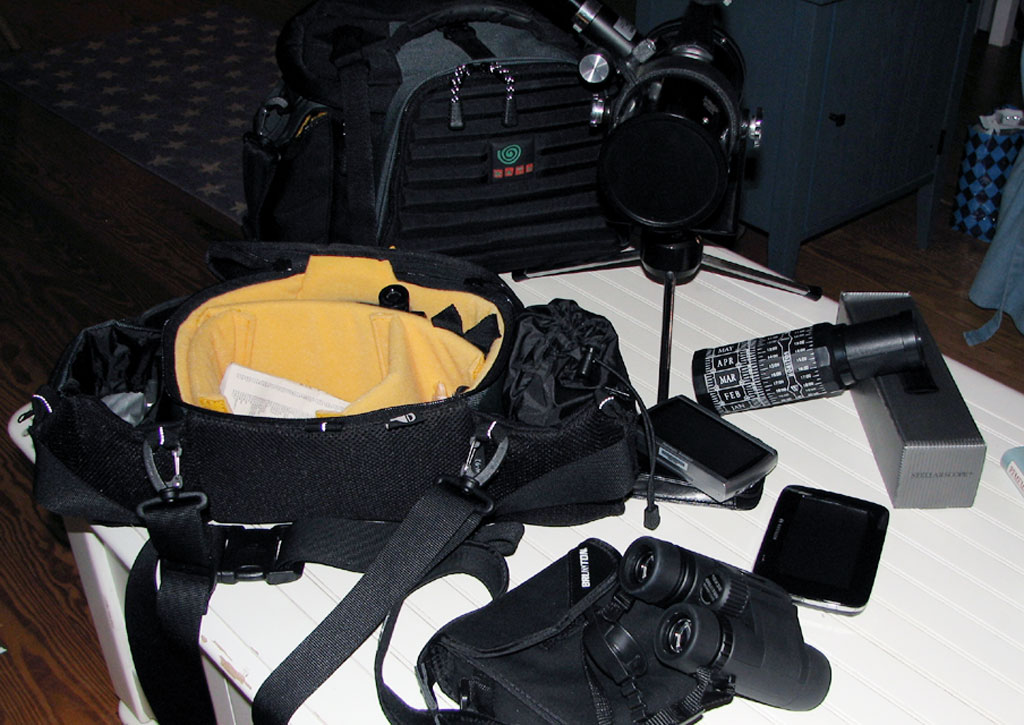
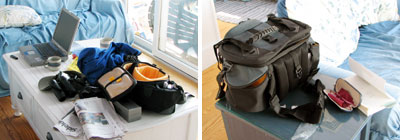
Every year we bring a few pieces of gear with us to Maine for some field testing. This year was no exception. We brought with us two GPS units (HK GPS-500, Navigon), a pair of binoculars, the Jason 3" portable telescope, a Stellarium, and two Kata camera bags (WS-604, W-92). We picked the Kata bags because we had a lot of optical gear and we wanted to make sure they made the trip safely. The adjustable internal compartments and padded pockets make it easy to adapt the bags to whatever we wanted to protect (telescope, cameras, binocular).
On this trip, we used the Kata WS-604 for the Jason 3" Newtonian. The internal compartment was large enough to handle the entire scope. The various accessories (finder scope, legs, filters) were stowed in the side pockets.
The first night we were in Maine we tried using the telescope to look at the constellations. Unfortunately, there was just too much light pollution to see anything well. We thought we would have better luck look at the sun during the day.
Some people say "never to look at the sun with a telescope." This, of course, is nonsense. The proper warning is "never look at the sun with a telescope without the use of the proper FILTER." Since we DO have the proper filter, we are going to look at the sun for a while before heading back to Boston. - Wan Chi Lau (permalink)
Oct 1,2007
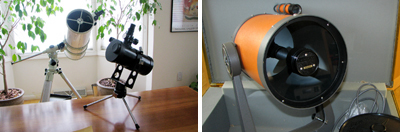
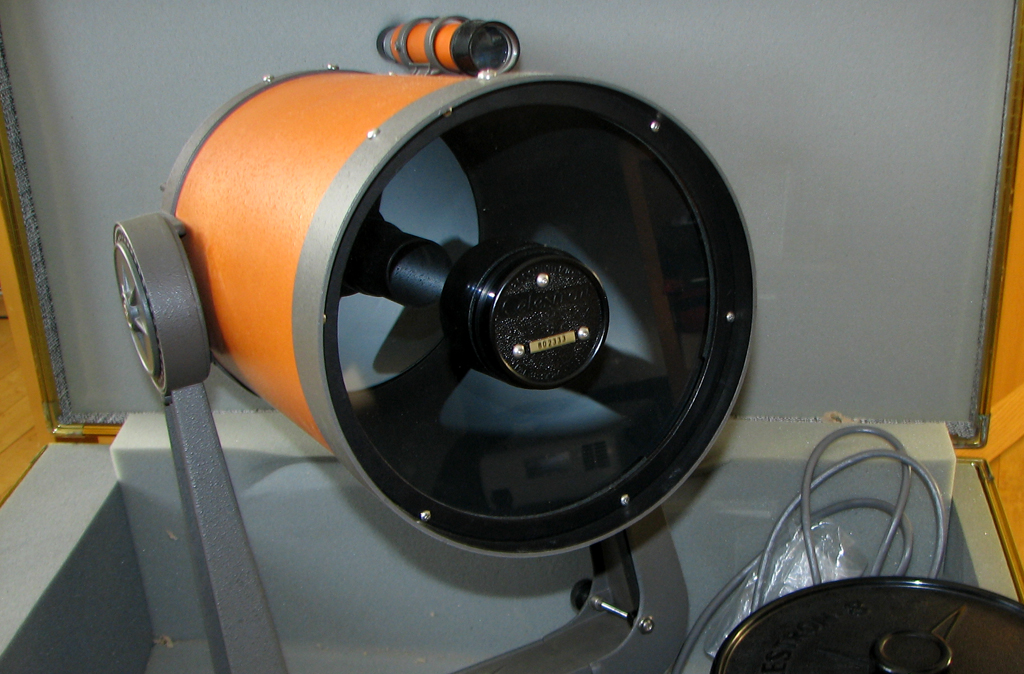
We found our last piece of astronomy gear for our upcoming RainyDayScience section. Originally we were looking for a high quality scope with "goto" capability. However, we didn't have much left in our budget for both a good scope and a "goto" mount.
Fortunately for us, Len T of Woburn MA came to the rescue! Len had a mint condition Celestron C8 which he had purchased back over 20 years ago in storage. He wanted to find it a good home and sold it to us for pennies on the dollar.
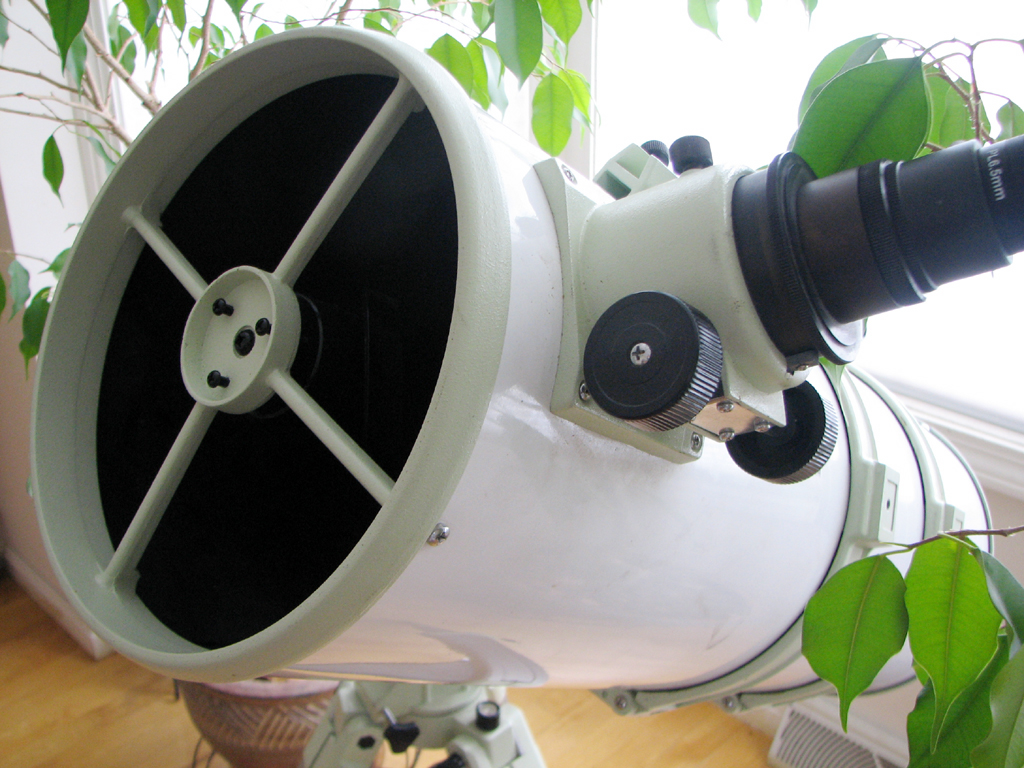
The Celestron C8 is a Schmidt-Cassegrain Telescope (SCT). We'll cover the details of the various telescopes in our collection next year. It will take a while for us to learn how to use this scope. Fortunately for us, assembling it will be easy as Caltech has a tutorial on how to setup this exact scope. How great is that?
We want to thank Len for helping us complete our telescope search. Anyone out there with a GoTo unit capable of driving this beast? If you do, you know where we live :-) - Wan Chi Lau (permalink)
Sept 10,2007
Every year around the start of Fall, the editorial staff reviews the list of ideas for new sections. We have decided on and are currently developing a section for next year called RainyDayScience.
Areas where technology and science intersect are obvious topics for this section. We plan to highlight gadgets and projects that give us a better understanding of the wonders around us.
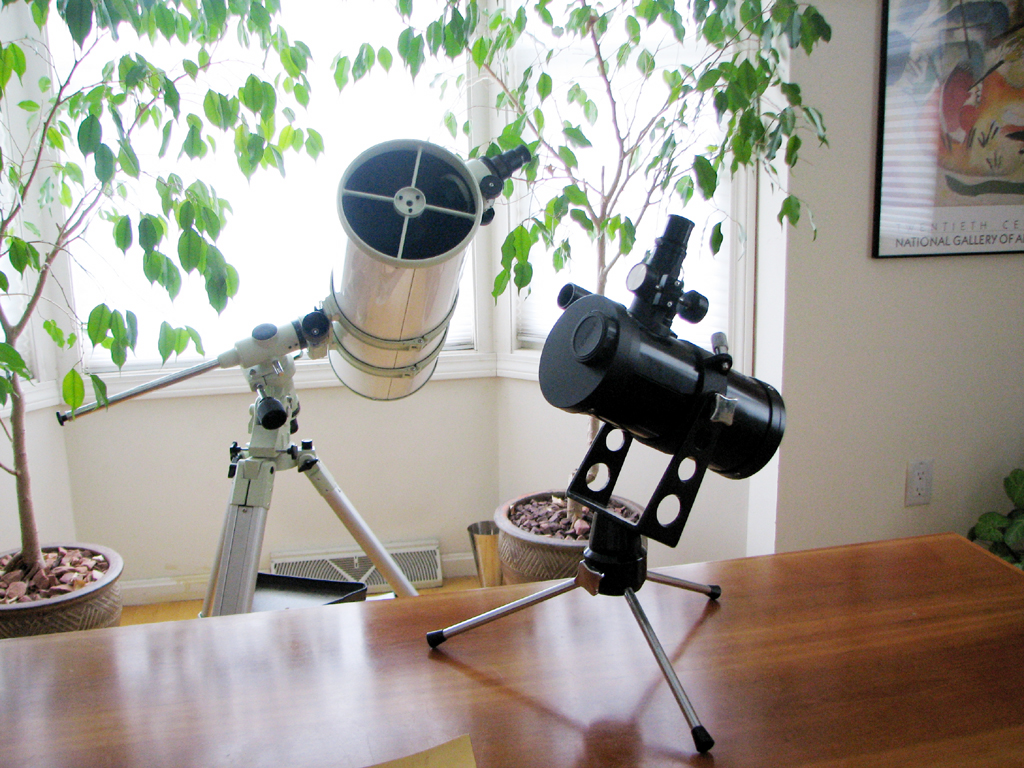
The first RainyDayScience topic will be Astronomy. This weekend, we scoured Craigslist for telescopes. Fortunately, Boston and its surrounding areas are well populated with sci-tech folks. Consequently, high quality used telescopes are relatively plentiful. We were able to pick up two used telescopes over the weekend for pennies on the dollar.
The small one above is a 3" Jason catadioptric reflector. It is a relatively powerful unit given its table top size. We were able to purchase this unit for $10. It even came in its original box!
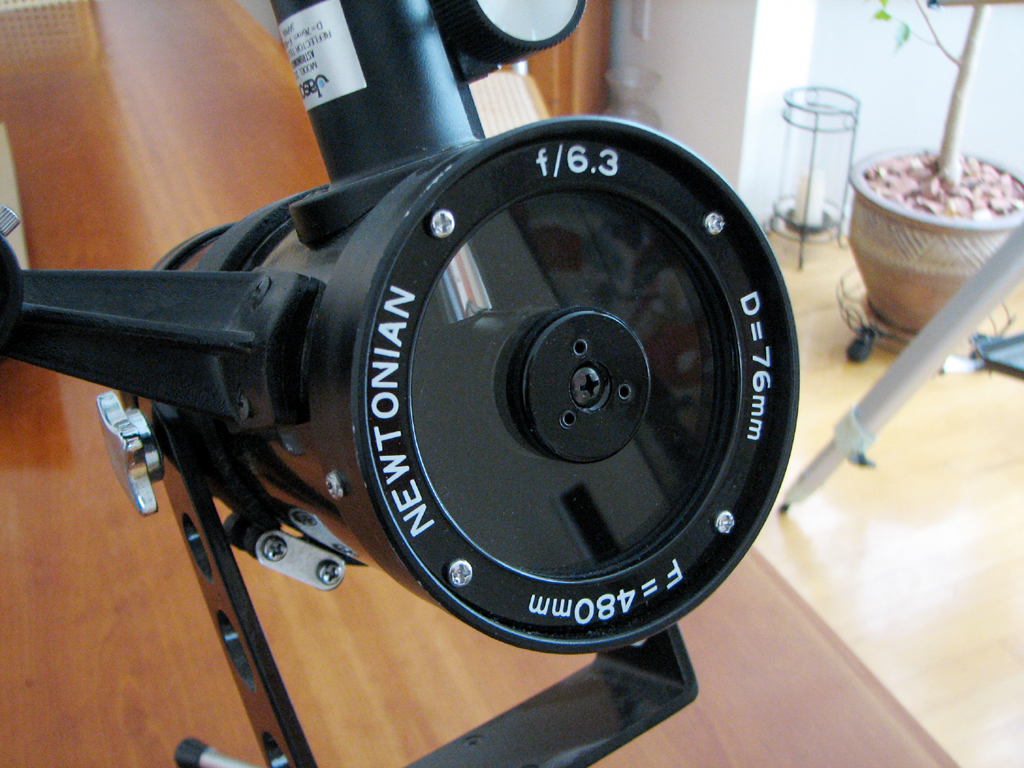
The second unit is Newtonian reflector with a 10" mirror and a metal German Equitorial Mount (GEM). According to the owner, its original cost was $800. The asking price was $200, but our crack negotiator was able to make a deal at half that price.
So, for less then the price of an iPod, we got ourselves two very capable telescopes. Our first tasks will be to do some cleaning, checking the alignments, and getting the scopes ready for a FirstUse. We are eager for a clear night so we can take them outside and see what we can see. - Wan Chi Lau (permalink)
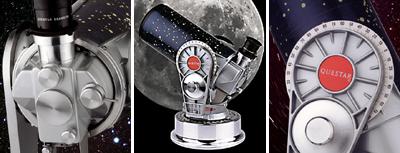
The Questar was selected because: our research showed that this privately owned company is universally regarded as a maker of the best product of its kind in the world; the Questar 3.5" telescope is a product which can expand its user's knowledge of the world around them; and finally, because the Questar is built to last and be passed on for generations. It also fits in perfectly with today's topic...hey, it always pays to be lucky :-) - Wan Chi Lau (permalink)


