| Today |
| Carolyn's World |
| Gear & Gadgets |
| Garage |
| Garden |
| Kitchen |
| Unaccompanied Minors |
| Workshops |
| Contact Us |
| Index |
Gear & Gadgets...
|
||
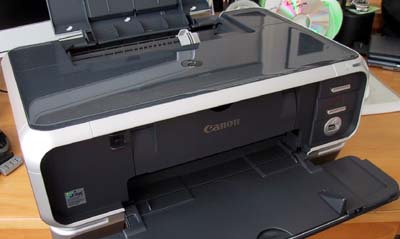
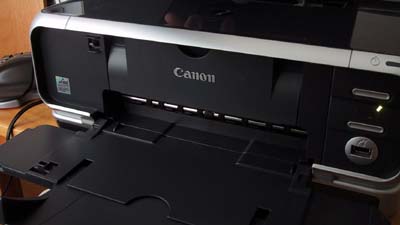
When we took this printer out of the box, we noticed a few things right away. First, the printer is a completely rectangular box when all the covers are closed. Second, the controls and buttons are all in the front of the printer. Somebody at Canon had been listening to a focus group :-)
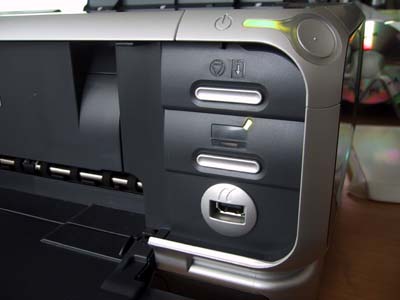
It is such a convenience to have all the buttons in one place. The power button is on the upper right corner. The sheetfeed button is the top one on the panel. The second button is the lower tray selector. The last one is not really a button, but a camera connector for printing photos directly from a Canon digital camera without involving the computer.
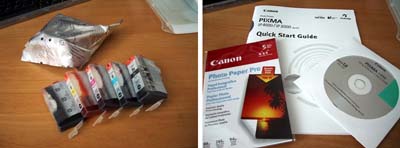
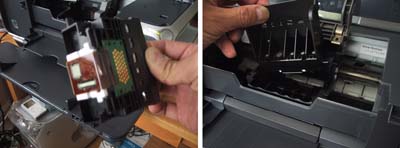
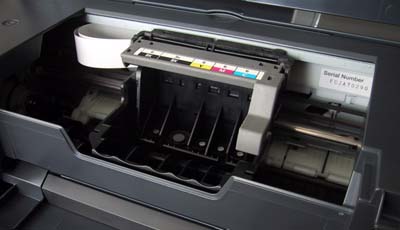
In order to use the printer, we did have to do a little bit of "setup". The two things we had to do were: install the print head and install the 5 ink cartridges. Have a separate printer head is a huge innovation. In the past, if the print head got clog or damaged, the printer was basically shot. With a removable print head...well, you see the solution.
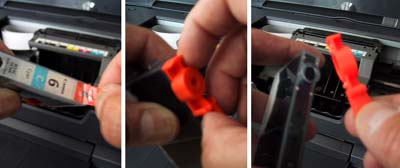
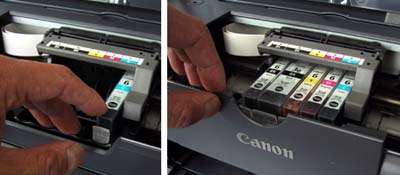
Installing the print head was simple. Just take it out of the package and snap it into place. The print head is also the reservoir for the ink cartridges. To get the ink cartridges ready for installation, just strip off the little plastic covering the hole, twist off the orange cap, and pop the cartridge into the color coded slot.
Having separate ink cartridges is also a great feature. Now when one color runs out, just replace that color...not the entire 4-color cartridge!
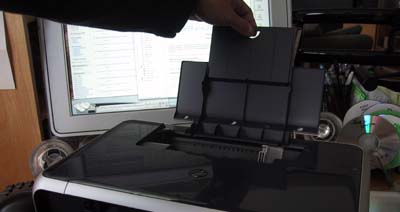
There are two ways to get paper into the printer, the top slot and the bottom tray. We use the top slot is for the every day paper and the bottom tray for the glossy photo paper. The glossy photo paper should be stored away from light... the completely enclosed bottom tray is perfect for that.
The bottom tray is also for odd sized paper, envelops, etc. It is also a convenient way to use the printer if you need to put it somewhere which makes access to the top of the printer difficult. In our FirstUse review, we'll check out the output quality of this Canon IP4000 inkjet photo printer. Check it out here. |
Canon iP4000 Color Photo Printer |
|
We don't print out too many images because most of everything we shoot here at RainyDayMagazine end up online. However, every once in a while it is nice to get our hands on a hardcopy...just to remind ourselves what it was like back in 1990 :-)
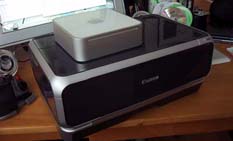
In 1990, we were using Kodak's dye-sublimation digital color printers for photographic quality output. The printer was $6000, each print was $3, and took about 20 minutes per 8x10 print. Fast forward to 2005. We just got this Canon IP4000 inkjet printer for free with our Mac Mini computer purchase. From reading the specs...it has a higher output resolution than the old Kodak printer and it retails for $150!. In this review, we are going to take our FirstLook at the Canon IP4000 from box to setup. In the First Use review, we'll calibrate the printer and print a glossy photo. If all goes well, our friend Kathy will get her framed present in time for her birthday. Reviews: 3. In The Wild Report
Review Summary: Initial Impression- Individual inks! Usability- 15 minute setup Durability- Test in progress Price- Amazing quality for $150, even better since we got it free with a Mac Mini computer purchase.
|
||