| Today |
| Carolyn's World |
| Gear & Gadgets |
| Garage |
| Garden |
| Kitchen |
| Unaccompanied Minors |
| Workshops |
| Contact Us |
| Index |
Gear & Gadgets...
|
||
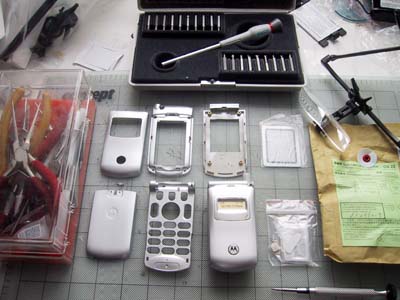
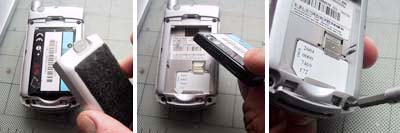
The $25 package included ALL the plastic pieces for the phone (no screws or electronic components of any kind) and express shipping from China. The fit and molding of the pieces were very clean... a good sign that the piece we needed would fit :-) For this repair, we needed to remove the frame with the broken hinge. This was the frame surrounding the keypad. The only way to remove the frame was to disassemble the unit from the rear. We were pretty sure the phone would come apart easily... we just had to go slow and not force anything.
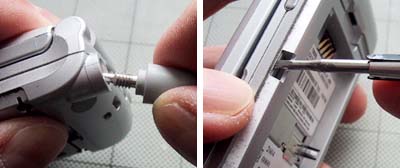
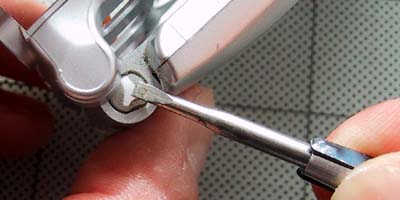
Once all the obvious pieces (back cover, battery, screws) were removed, we started looking for catches and other things that "clicked" into place. There was one on each side that held the frame in position. A gentle wedge using a flathead screwdriver freed the rear frame from the main body... and access to the guts was granted.
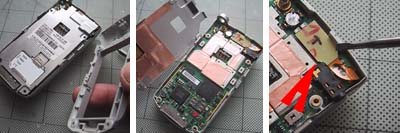
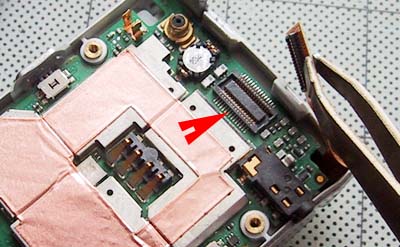
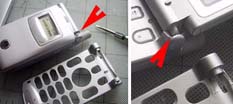
The most important connector we had to locate was the one connecting the LCD to the electronics (red arrows). Once disconnected, all of the circuit boards were easily removed from the casing.
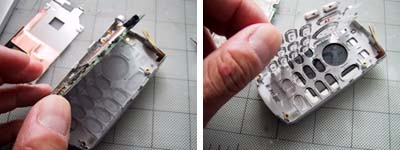
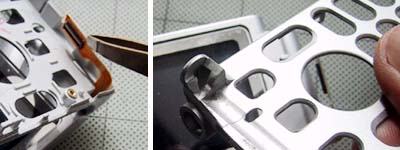
The keypad was in one piece and was easily lifted from the frame. We just had to be careful not to rip the LCD connector when removing the kepad frame from the main unit. The photo below shows a closeup of the broken hinge. It was now clear that the hinge broke due a stress fracture resulting from years of use... we saw a hairline fracture on the opposite hinge in the same location.
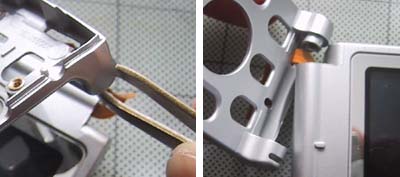
To re-attach the new keypad frame... we first threaded in the LCD connector, then slid the hinge into place. We had to push down the pin using a screwdriver, maneuver the hinge into position, and wiggle the frame until we heard the pin click into place.
We reassembled all of the components, replaced the battery, hit the power button, and held our breath. We then heard the familiar T-Mobile tone as the phone came to life... project completed. Like any project... we did end up losing something along the way. If you look closely, you will see something missing... |
Motorola T720i Repair |
|
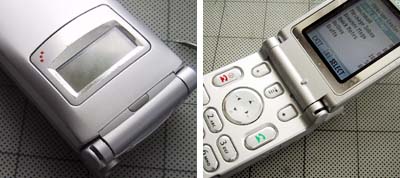
We have gone through a lot of cell phones here at RainyDayMagazine. Some because we switched carriers. Some because we wanted the newer technology (built-in camera, web access, etc...). Some because we just got tired of them. A few years ago, we got a few of the Motorola T720i phones with our T-Mobile service (...somebody here had a crush on Catherine Zeta-Jones) and have been pretty happy with them. A few weeks ago, for no apparent reason, the joint (see red arrow) on one of the phones totally disintegrated.
T-mobile was no help... they suggested we upgrade to the new RAZR phone (which amazingly enough, there was a one day special... how lucky for us!) We thought it was excessive to toss a completely good phone just because of a bit of broken plastic. So we did what any geek would do... got onto EBay to see what we could find. Lucky for us, there were about a hundred vendors selling phone housings in every imaginable style and configuration. We soon found a small vendor in China that sold a housing for our particular phone. We were pretty sure they were OEM parts... it said so in the ad :-) Reviews: 1. FirstLook 2. FirstUse 3. InTheWild
Review Summary: Initial Impression- Looked OEM Usability- perfect fit Durability- Test in progress Price- $25 including shipping. NOTE: We only used the keypad piece so we can't make any claims about the fit of the other pieces. However, we saw nothing that would make us think they would not fit perfectly. Also, if you have a different phone and want to find instructions on how to fix it... check out the amazing collection of instructions at Repair4MobilePhone! Related Reviews:
|
||