| TODAY |
| Workshops |
| Perennials |
| Annuals |
| Tools |
| Misc |
| Other Gardens |
| Contact Us |

| RainyDayGarden... |
||
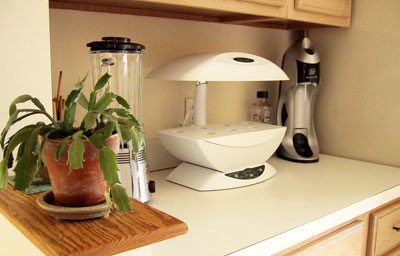
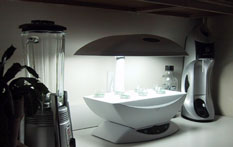
We cleared off one of the counters in the RainyDayKitchen for the AeroGarden. The spot we picked was far from a window, but close to an outlet. It is also out of any direct vents or draft. This location will also be easy for us to check on and document the garden's progress.
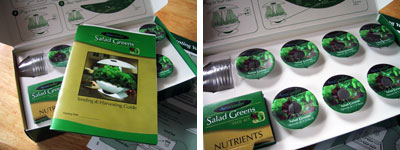
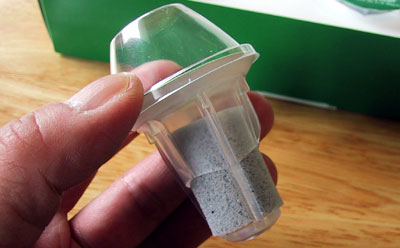
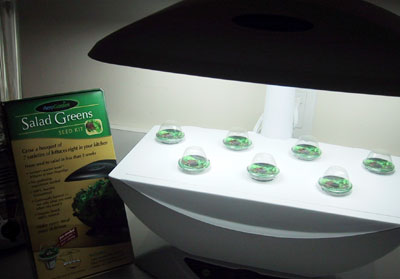
To plant the seed pods, all we had to do was to unpack the seed package. The seeds were already prepackaged in the spongy inserts in the pods. It pretty much impossible to do mess this up!
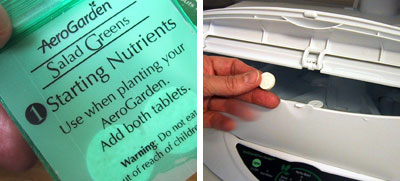
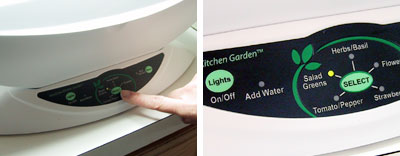
Each package of seed pods has the instructions clearly printed on the box: take the pod, put it in the bowl, select the appropriate button on the control panel, and wait.
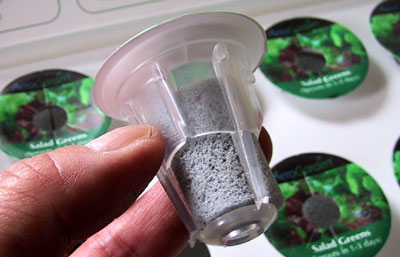
To help increase the moisture and to stimulate germination, each pod has a clear dome covering.
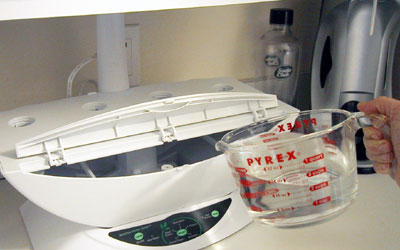
We filled the bowl with about 14 cups of water and added the two Starting Nutrient tablets. We are not sure what the tablets are made of, but it sure was easy :-)
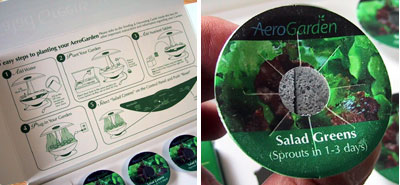
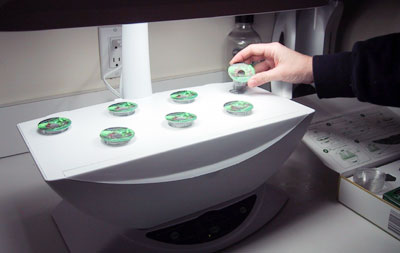
Next we placed all of the pods into the AeroGarden. The instructions on the seed package specifically stated that the pods should be placed into the AeroGarden exactly as they were arranged in the box. We are not sure why, but we did as suggested.
Once we had all of the pods inserted, it was time to turn the unit on. We selected the "Salad Greens" setting and hit the "Reset" button. The unit came on and it was BRIGHT! You definitely don't want this next to the bed :-)
The last thing we had to do was to place all of the little clear domes on the pods. The domes must be removed once the seedlings have started to grow. Check back with us in 3 days. Hopefully, we should have something peeking out by then! |
||
Hydroponic gardening has been around for a long time. Techniques and systems for growing plants in soil-less environments have been successfully created by amateur and professionals alike. While the concepts and equipment necessary for a hydroponic garden is pretty simple to set up, it is often quite industrial looking and definitely not something one would want in the kitchen. AeroGrow has created a system that is both simple and attractive.
The AeorGarden was quick to assemble, easy to plant, and looks great anywhere in the house. We will track the progress of the growth of the garden from planting (March 25th) to harvest. We'll post the updates and photos every Saturday. Reviews: 1. Assembly 2. Planting 3. Updates Week 1: March 25 - March 31 Week 2: April 1 - April 7 Week 3: April 8 - April 16 4. Cleanup Planting Summary: 1. Difficulty - easy 2. Time - 5 minutes 3. Tools - none 4. Cost - $150
|
||