| TODAY |
| RainyDayKitchen |
| Food & Drink |
| Gadgets |
| Recipes |
| Misc |
| Other Kitchens |
| Contact Us |
| RainyDayKitchen... |
||
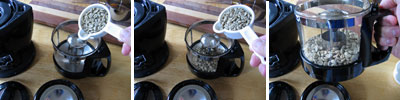
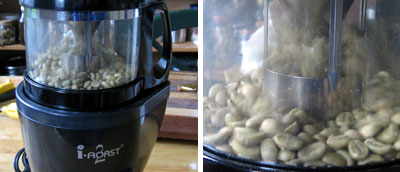
The pot will hold one cup of green coffee beans (two scoops) per roasting session. Just pour the beans into the pot. Everything will be automatically circulated.
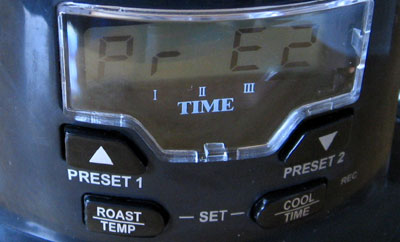
We decided on the the darker "preset 2" for our first roast. The roaster's time and temperature are programmable for each of the three roasting stages. The unit can also store up to ten different roasting curves. We'll experiment with the setting at another time.
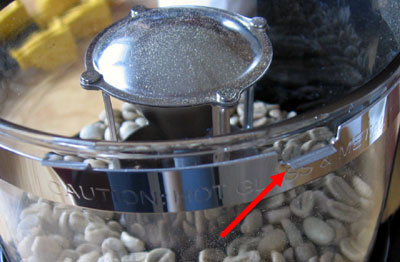
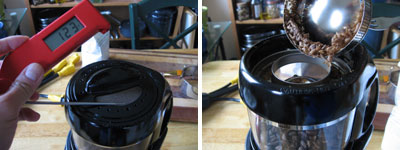
We made sure the chaff collector was properly assembled and the top lid locked. The entire assembly locks onto the roasting pot by aligning the slots to the locking tabs (red arrow) and turning until it the top is secured.
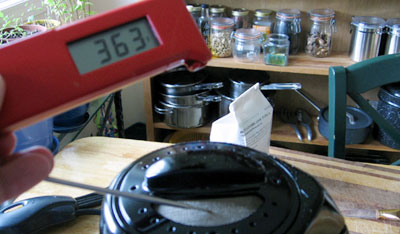
When we confirmed that the lid, pot, and heater had all been properly locked into place, we hit the "roast" button. The fan at the base unit whirled to life and beans inside the roaster began to circulate, almost like kernels in popcorn popper. The temperature of the air exiting from the top quickly rose to over 360º. The internal roasting temperature should be around 455ºF, but obviously there was no way for us to accurately determine that.
It was pretty cool to be able to watch the beans change colors. The entire roasting process took exactly 15 minutes. Cooling took another four minutes. By the end of the cooling cycle, the temp reading from the top has dropped to a mild 123ºF...about the same as the water temperature from the hot water faucet.
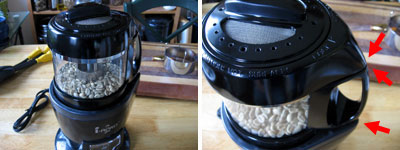
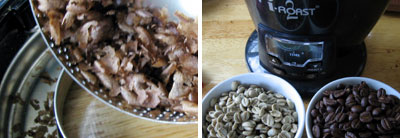
We made the mistake of twisting open the cap to the chaff filter instead of the lid to the roasting bin. However, it gave us a chance to show you that all the light fluffy chaff did get collected by the filter.
As can be seen in the photo above, the coffee acquired a rich dark color. The aroma of freshly roasted coffee was worth the effort alone. We can't wait to grind it up and brew our first cup!
The entire roasting process was incredibly simple. All of the chaff was cleanly collected by the filter. Just be careful and open the cap over a sink. Chaff can easily go airborne and get everywhere. Other than the chaff, there was no other tricky clean-up required. The process was not smoky at all, but it did generate enough to set off the detector out in the hall. So, if you can do the roasting near a vent, it may be best to do so.
We made a few short clips of the roasting, burr grinding, and brewing process so you can get an idea of the sound and times associated with the steps. We are working on how to share the smell, but the best way is to just go buy one and experience the aroma for yourself. |
i-Roast |
|
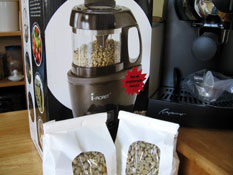
When we got the EspressoPRO, we also upgraded our coffee grinder. But what's the point of having a great brewer and grinder if the beans are second rate? We could go out and buy premium roasted beans, but why not roast our own??? We know nothing about roasting coffee. So we wanted to get a unit that was simple to use, but also allowed us to fine-tune the roast once we have gained some experience. The 4th generation i-Roast 2 seems to be just such a machine.
We'll take a closer look at this coffee roaster in this FirstLook report. We'll then roast some bean, make some espresso, and see if home roasting is any better than stuff we can get at the local coffee house. Reviews: 1. FirstLook 2. FirstUse
Review Summary: Initial Impression- Small Usability- 15 minutes to roast Durability- test in progress Price- $200
Other Coffee Reviews: 1. Simple Human 2. Tassimo 3. Keurig 4. EspressoPRO 5. Burr Grinder
|
||