| Today |
| Carolyn's World |
| Gear & Gadgets |
| Garage |
| Garden |
| Kitchen |
| Unaccompanied Minors |
| Workshops |
| Contact Us |
| Index |

| RainyDayProjects... |
||
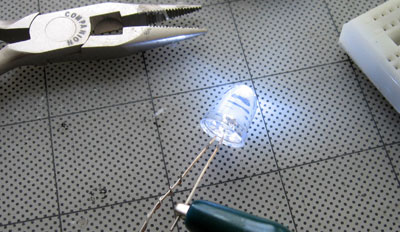
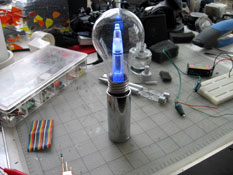
We know that not everyone is a pack rat like us and may not have a LED assembly laying about. In the this segment, we'll show you how to make your own switched LED unit for a few bucks. The LED will last about 10,000 hours...the battery will not.
Most LED will work for this LEDFlashlightBulb project. Your particular LED will determine what size battery and resistor you'll need. The diameter of the opening at the bottom of the bulb you are using will also determine the kind of switch you can use.
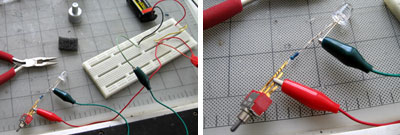
The parts we are using are just stuff we had around the shop. The switch was a sample from an electronics tradeshow we went to about 15 years ago. The LED and resistor were purchased on EBay recently. Both came as a bag of 100.
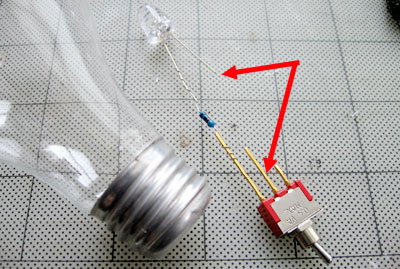
The battery will be attached somehow between the red arrows. We are not sure how yet, but we will in a few days.
The key is to make it so it is easy to switch the light on/off and to change the battery. We are going to find some batteries before we can finish up this project. Our goal is to have the entire assembly fit inside the bulb.
|
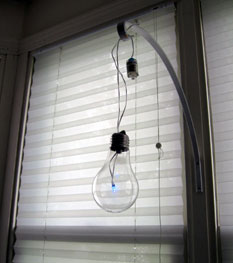
LED Light Bulb |
|
Some projects we do require a knowledge of electronics. Some just look like it does. We read about this great idea on MAKE about how to "clean out" a burnt out lightbulb and use it for various projects.
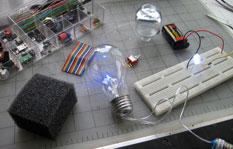
We thought it would be fun to clean out one of the broken bulbs we had around the office and replace the internal mechanism with an LED and make a freestanding LED light bulb.
LED Light Bulb Project: |
||