|
|
 |
RainyDayGarage's content can now be licensed for your print magazine or web site. Please contact us directly here. If you want to see something reviewed, then drop us a note with a link and we'll be happy to take a look.
|
| |
|
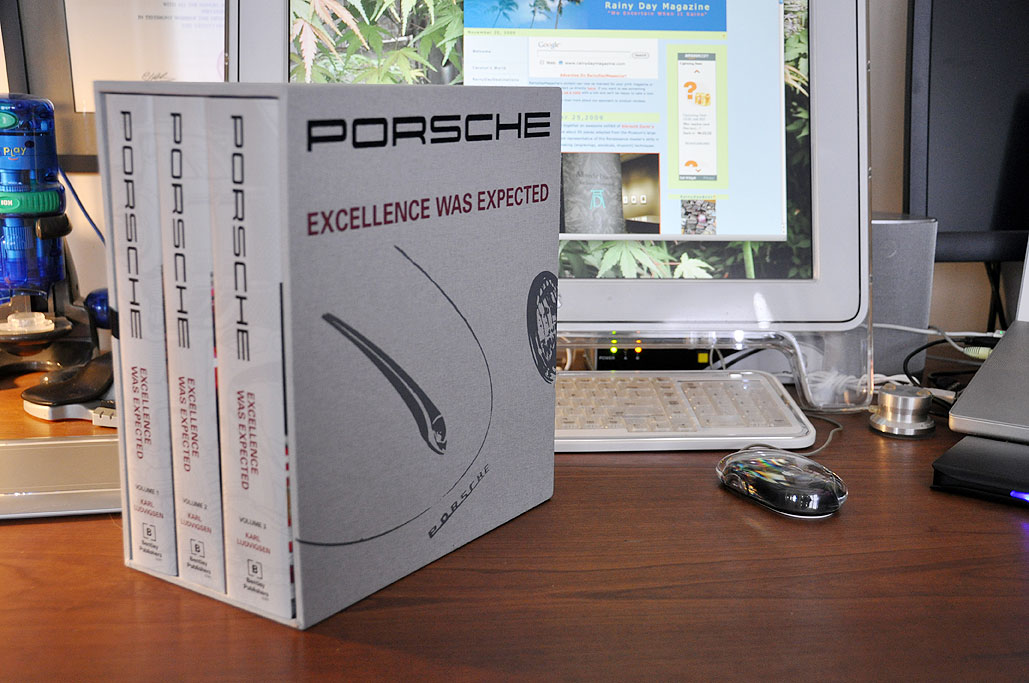
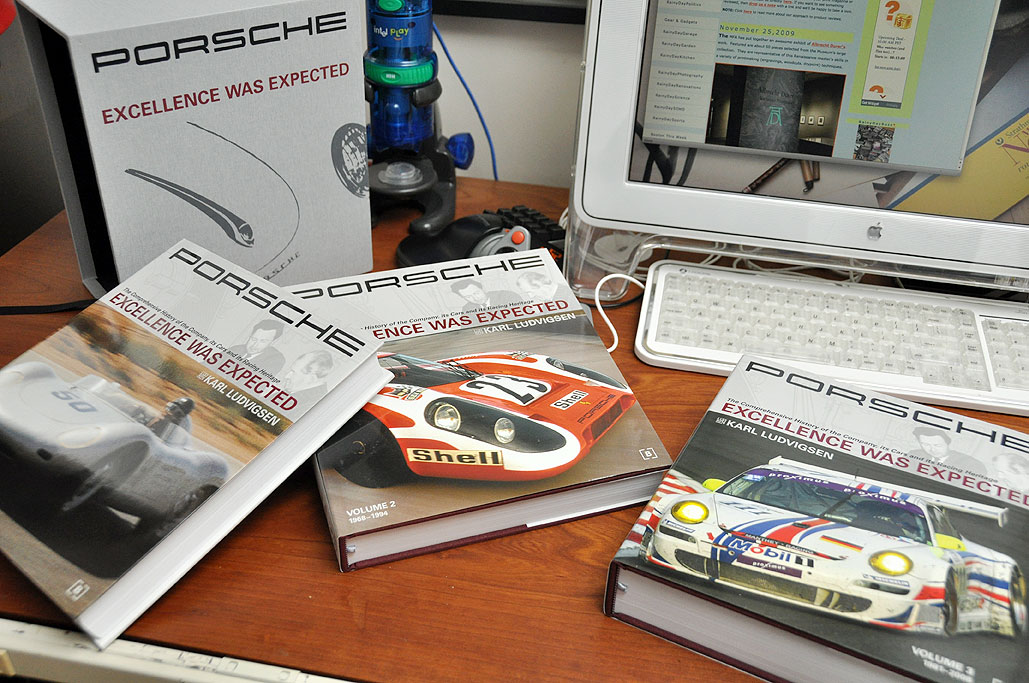
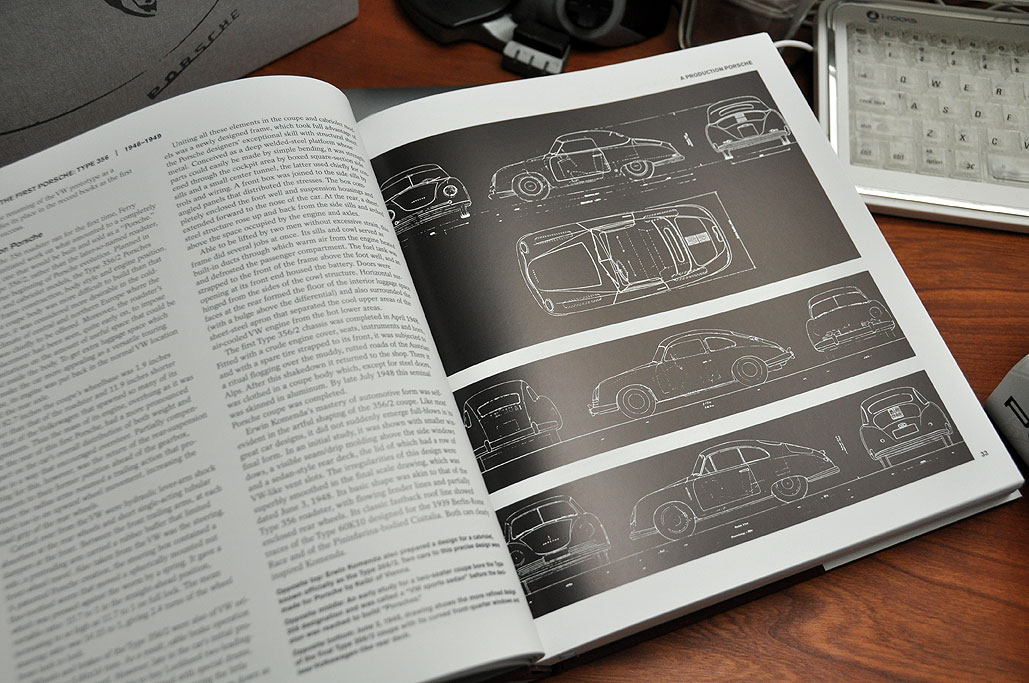
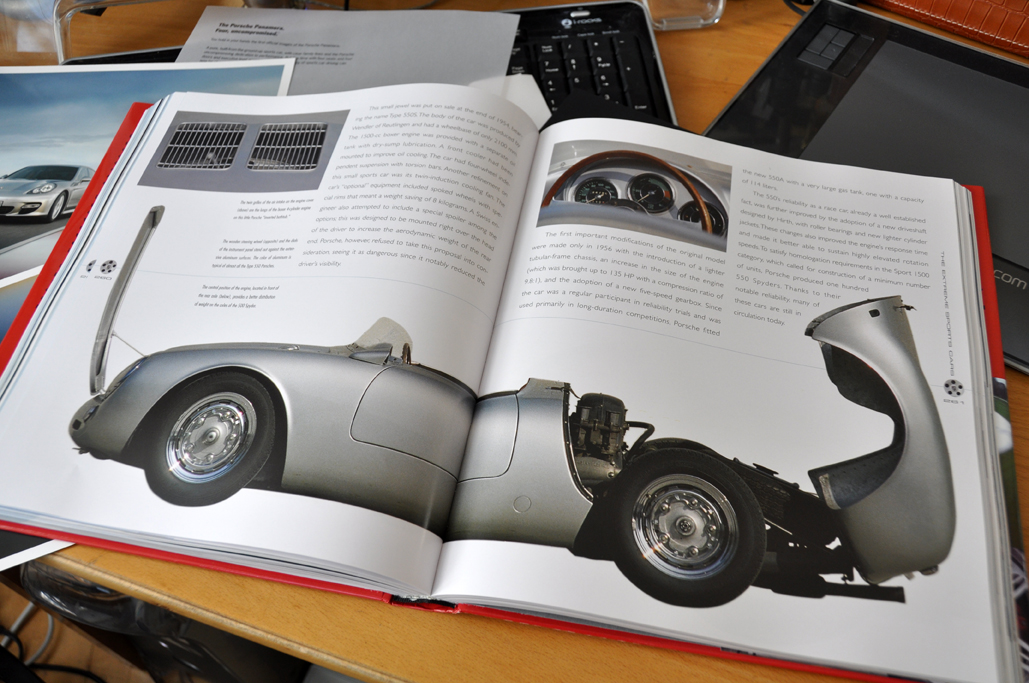
We first learned about Bentley Publishers when we went to a talk in 2005 about Porsches. It has always been on our "to do" list to take a closer look at Porsche historian Karl Ludvigsen's definitive 3-volume work, Porsche: Excellence Was Expected. Last week, we managed to put aside some time to do just that.
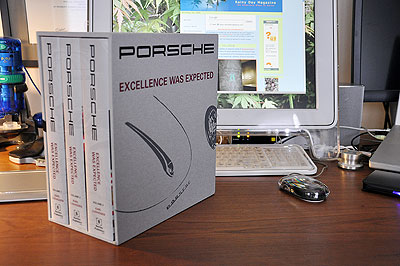
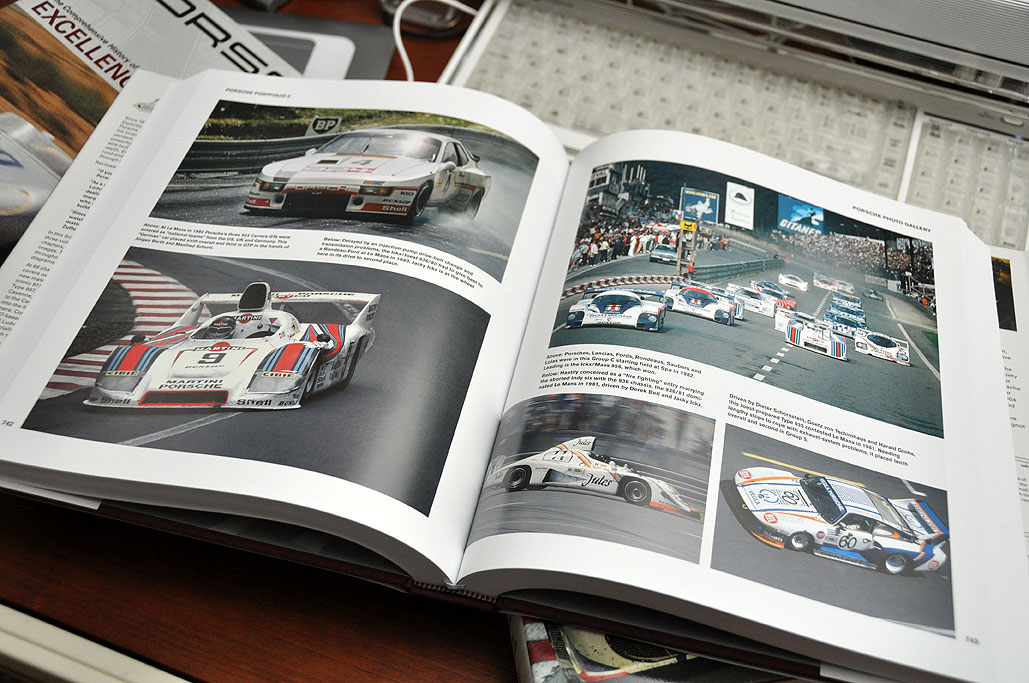
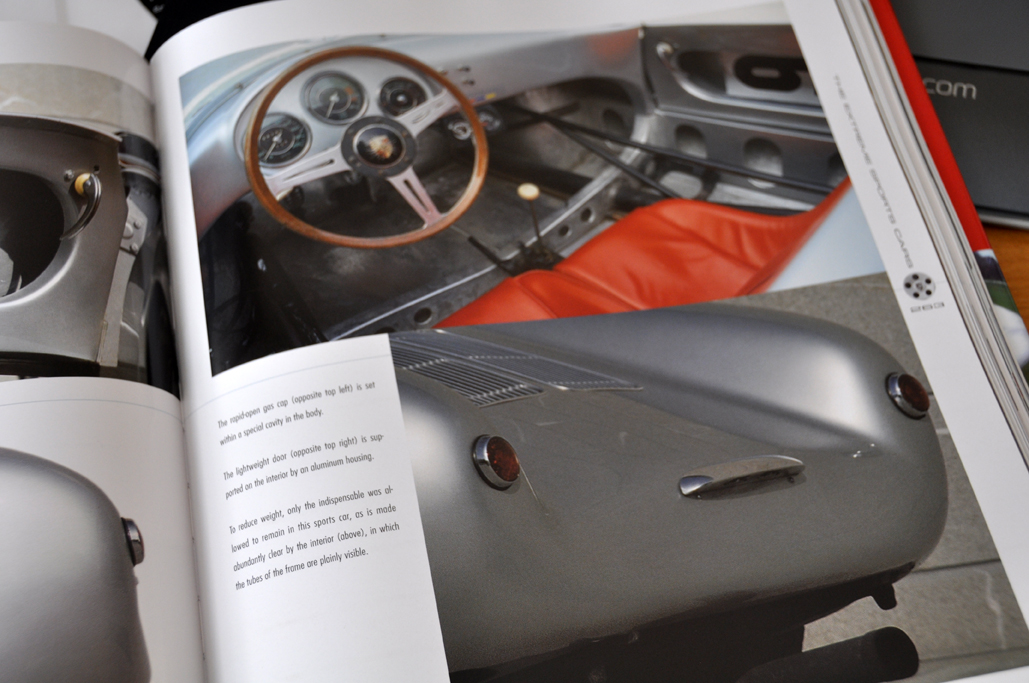
The amount of information in this 3-volume set was staggering. One could only guess at the amount of research necessary to create something like this. What is obvious is Karl Ludvigsen's love for the topic. His interest in telling the story behind the brand and all of the events which help shaped Porsche was what really brought its history to life.
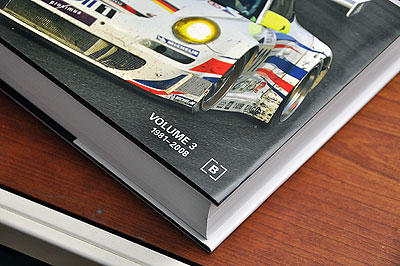
Leafing through this encyclopedic work was like having our very own Porsche history "time machine" spanning from the 1900 to 2008! The latest Panamera info was not part of this set, but the origin and prototypes were discussed. We were able to jump to any point in the Porsche timeline and see what was going on during that part of the company's history. Sometimes it was to witness the emergence of a key piece of automotive technology. Other times it was to see the winning of a race against crazy odds. Having spent a week with these books, we have only managed to scratch the surface. However, it is great to know that whenever we need a better glimpse of Porsche history, we can open up a volume of Excellence Was Expected, and travel back in time to get an "almost first-hand" look for ourselves.

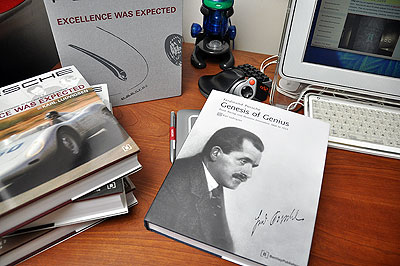
For readers interested in learning more about Ferdinand Porsche, the Genesis of Genius by Karl Ludvigsen is the recognized best of the lot. This book was originally published in 2008 as a collector's item (limited run, hand-numbered) and sold out quickly. Bentley Publishers has since released a general edition for all of us who missed getting one the first time around. We'll have a more detailed look at this book later in the month.
If you are a fan of things Porsche or if you have such a person on your Holiday gift list, then you need to check out Bentley Publisher's collection of Porsche literature. You will find more than just great manuals, you will discover books which will give readers a unique look at an iconic sports car and the man who made it so. [Permalink] -Porxche: Excellence Was Expected
|
|
|
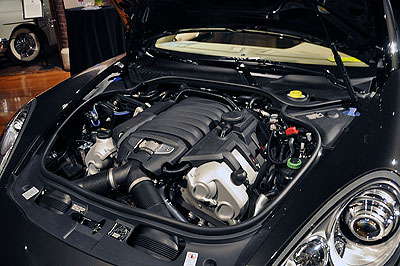
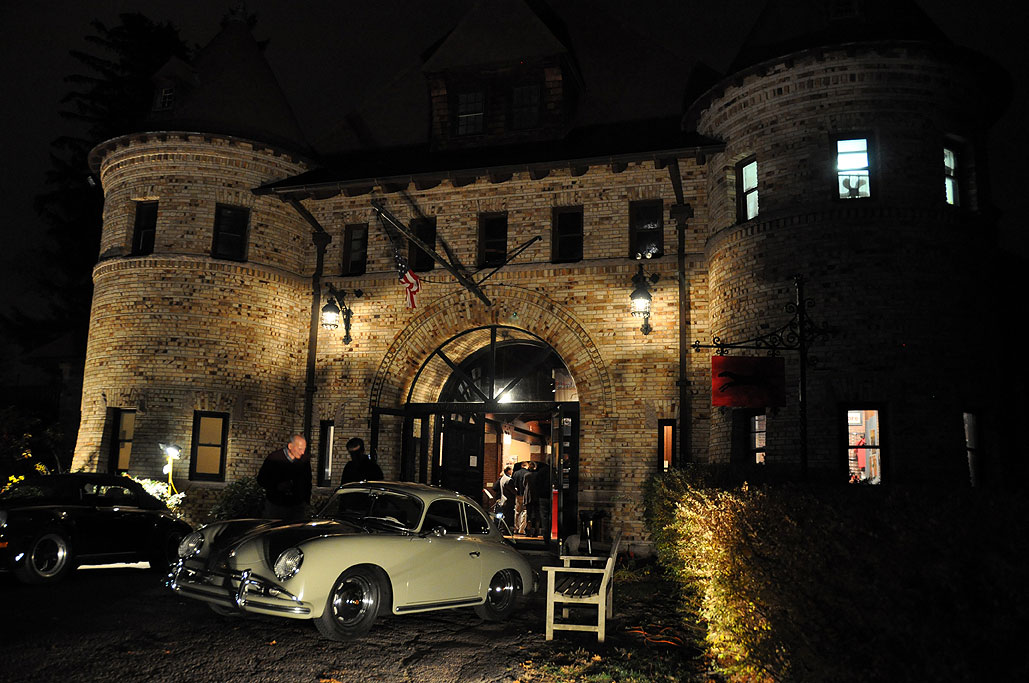
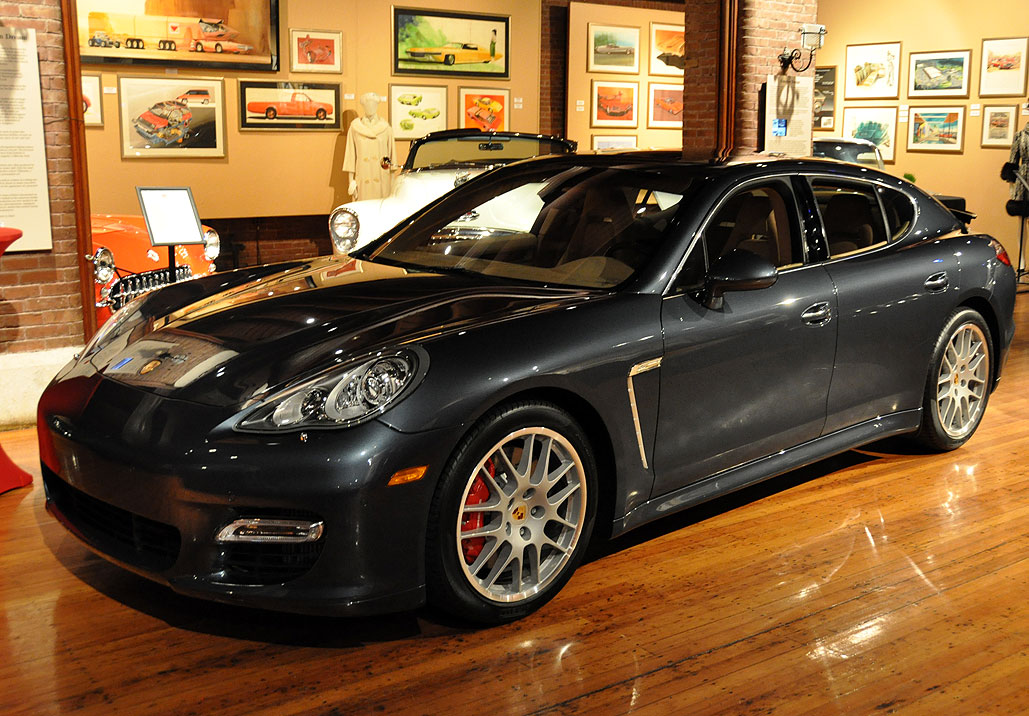
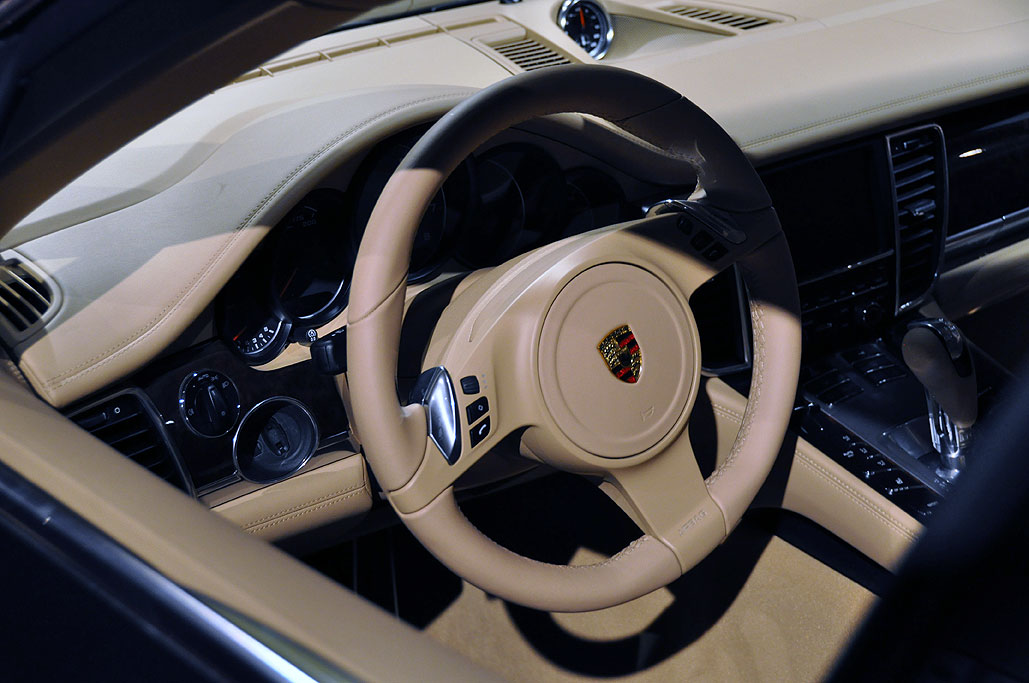
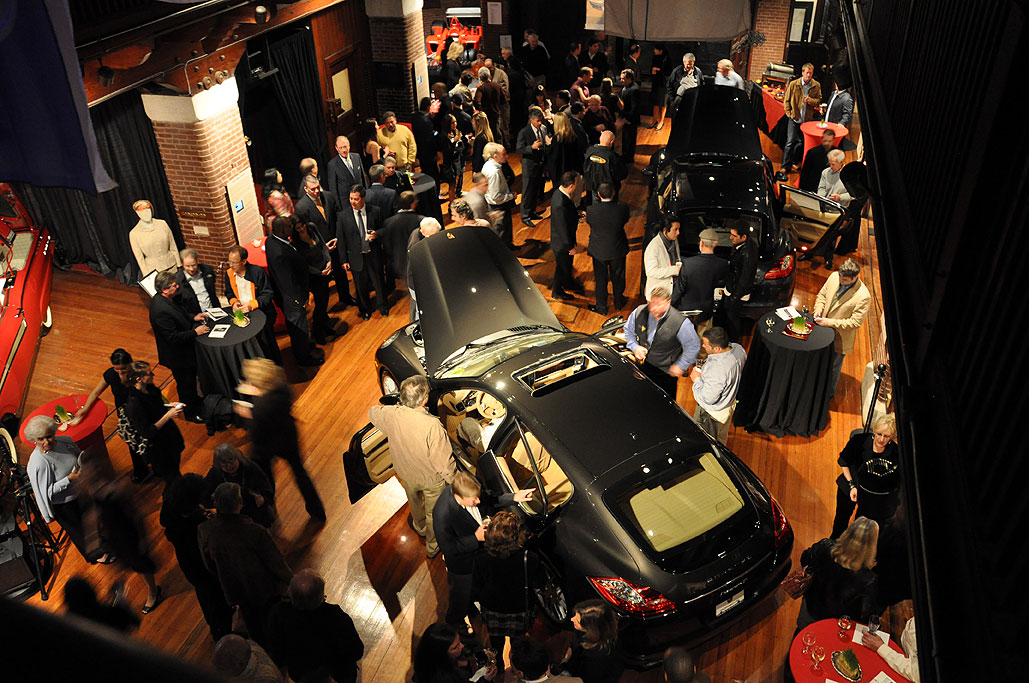
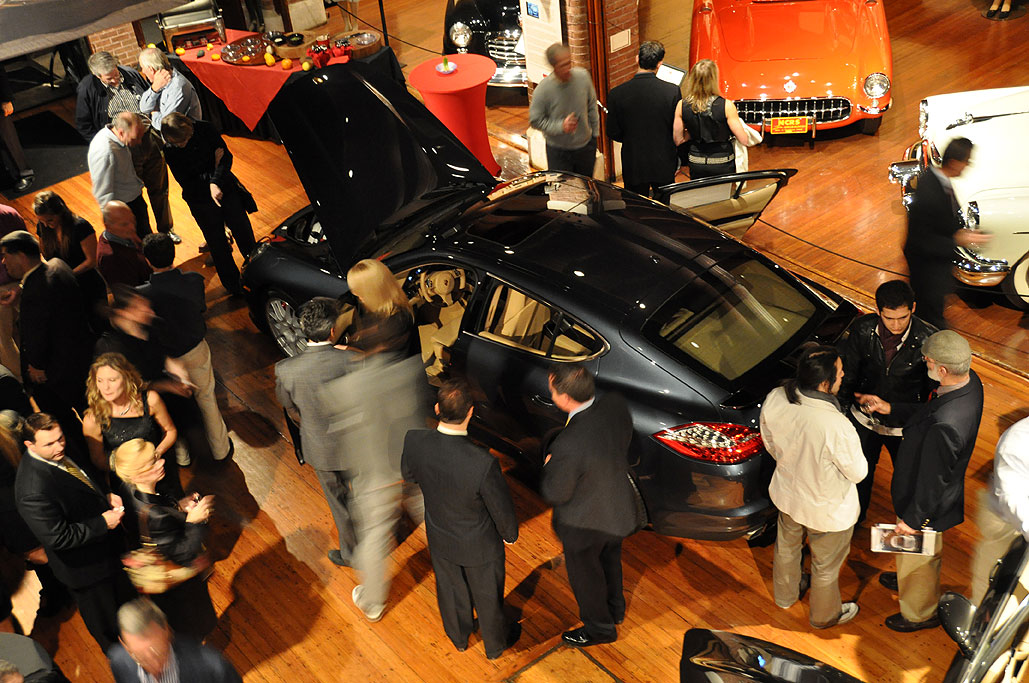
The 4-door Porsche Panamera was unveiled to an appreciative crowd at the Larz Anderson Auto Museum (LAAM) last night. Herb Chambers and the folks at the LAAM went all out. We got there a little early to get some shots of the car before the crowd.
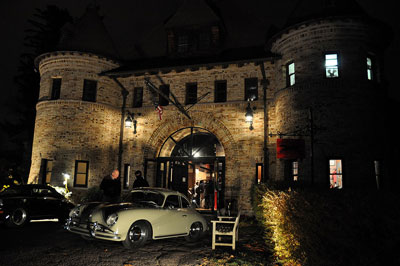
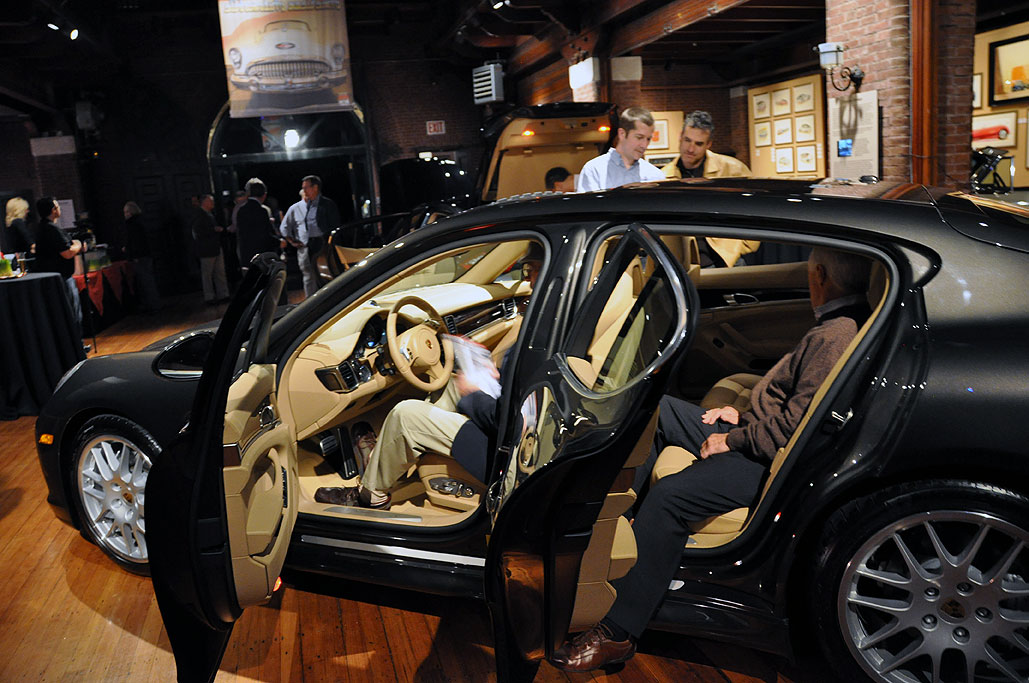
The Panamera is a big car! The wheelbase is 115 inches and the overall length is 195 inches. The Boxster compares at a much smaller 95/172 inches. While sized to carry four adults, the Panamera was shaped to move. The stance is low and wide, the wheels are 18", and Porsche's dedication to their form-follows-function approach was evident in the design decisions throughout the car.
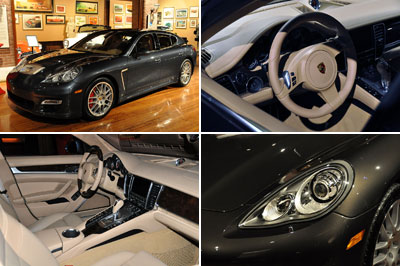
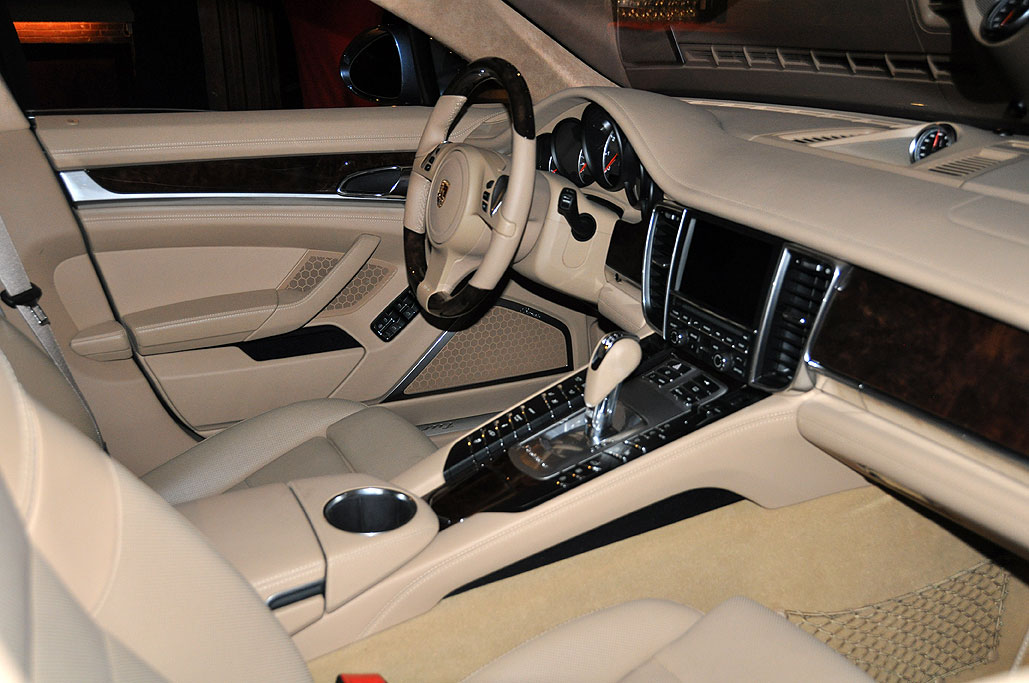
The interior, while designed to be comfortable, was laid out with driving ergonomics as the primary focus. Manual gear shifting can be done either with the controls on the three-spoke wheel or with the selector on the central console.
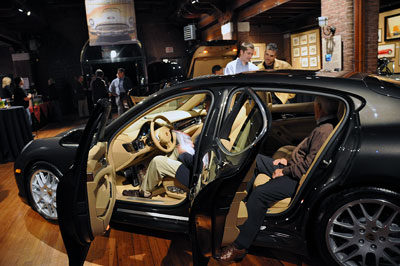
The most rethinking about this Porsche is obviously the full-size rear. The rear section has real leg and headroom, fold-down backrests for more storage, and top-hinged rear lid. This design not only carries more people, it also carries more gear...up to 1300lbs worth!
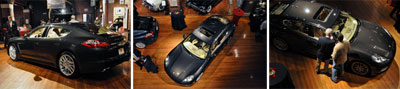
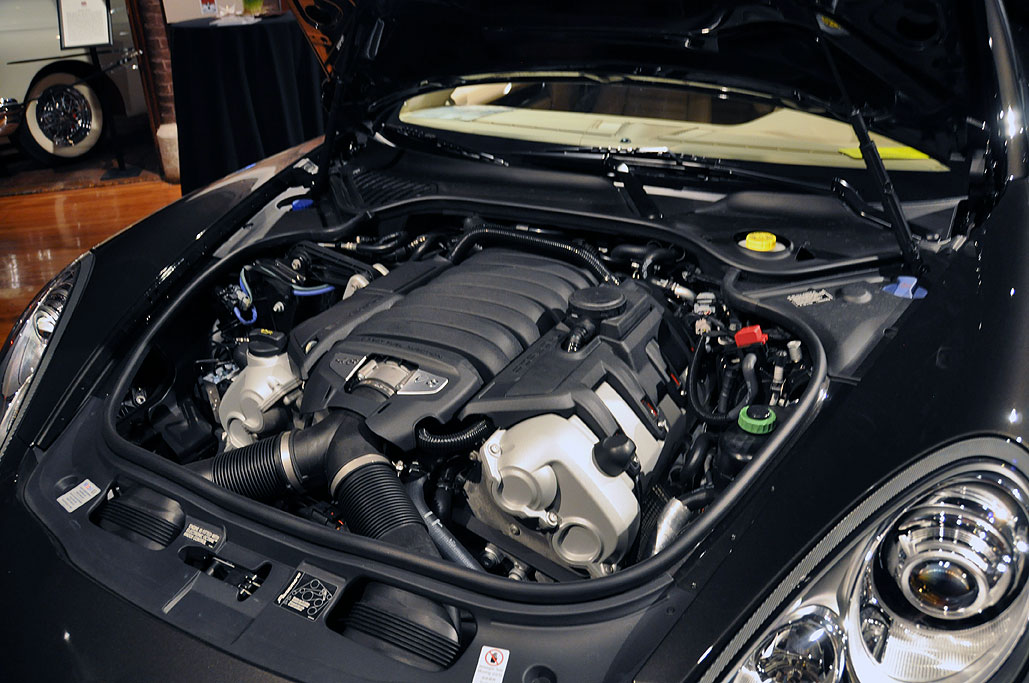
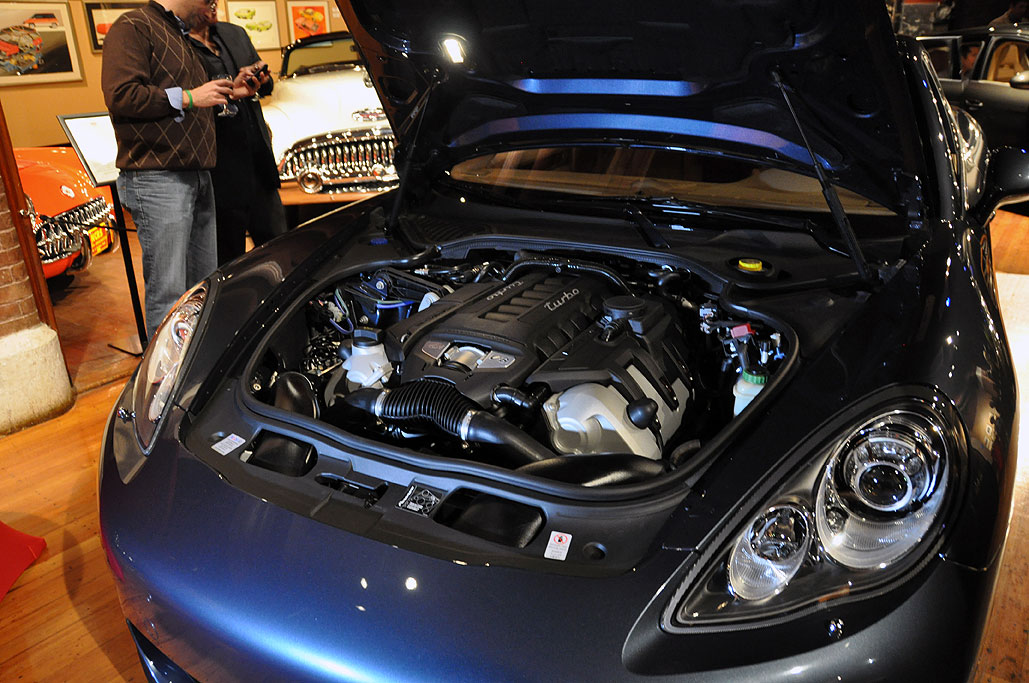
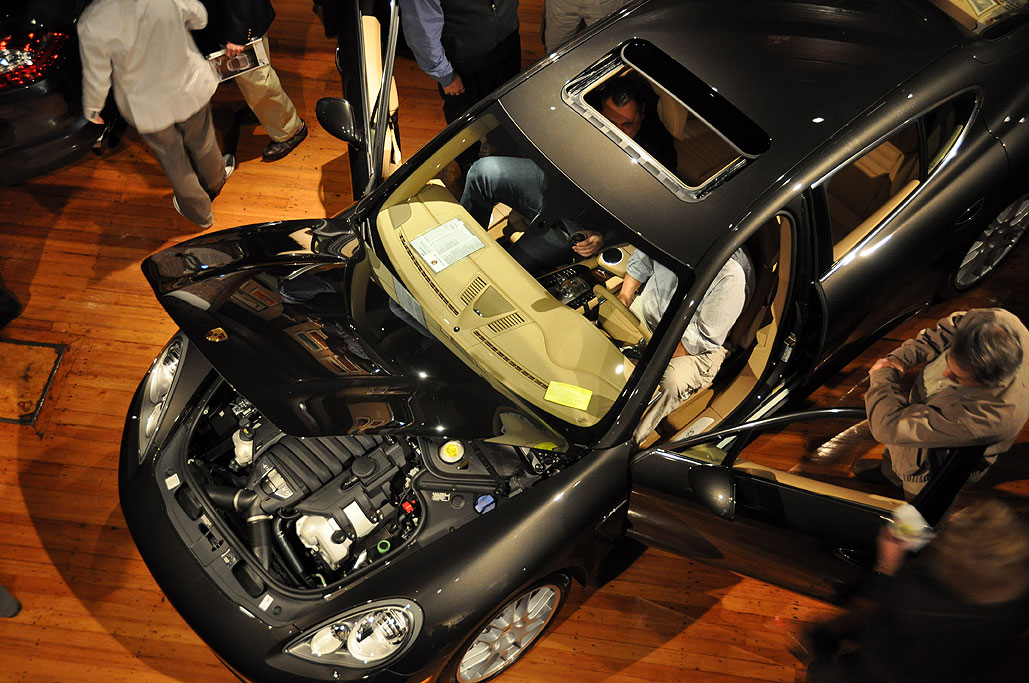
The heart of any Porsche is the engine and the Panamera sports a natually aspirated V8 with Direct Fuel Injection (DFI), VarioCam Plus and a variable intake manifold. What it all translates to is a block which is capable of putting out 400 horsepower at 6500 rpm, enough to move this 4-seater from 0-60 mph in a bit over 5 seconds. But enough with the spec...below are a few "engine porn" shots for those who did not get a chance to attend. Click on any of the images for a larger version.
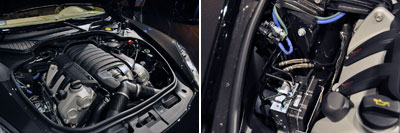
For folks wanting more performance, a twin-turbo engine is available. It will generate 500 horsepower and can throw you from 0-60 in just 4 seconds. Using the Launch Control overboast function, those who really need to hit 88 mph and get "back to the future" can shave another 0.2 seconds off the 0-60 time.

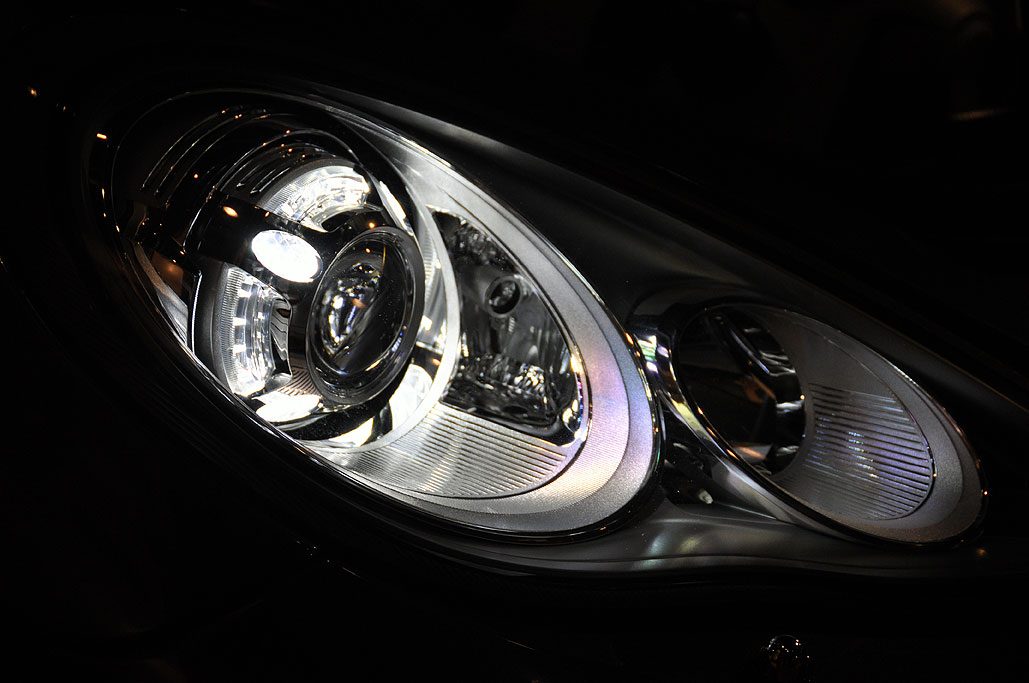
While waiting around for hors d'oeuvres, we managed to snap a few shots of the Bi-Xenon headlights in action. They are standard on all models. The lights have an automatic dynamic leveling function which throws more light on the road and less at oncoming traffic. To illuminate the road on turns, the lens will swivel toward the inside of the curve based on the steering action of the driver. How cool is that?
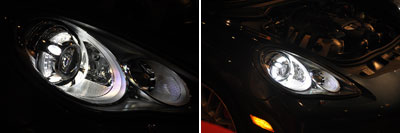
There is more to the lighting system (LED spotlights, speed-sensitive illumination, etc...), but best to let Porsche take those interested through the details.
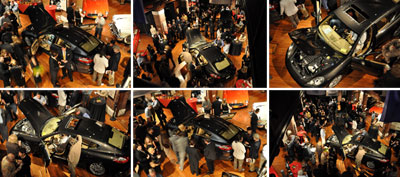
The Panamera unveiling event looks to have been quite the success. It was definitely interesting to see them live... to smell the new interior, to feel the smooth paint job, and to touch the knobs and buttons. However, the only way to evaluate a Porsche is to see how the car behaves on the open road. For that experience, we will have to wait a bit longer. [Permalink] - Porsche Panamera Unveiling Event
|
|
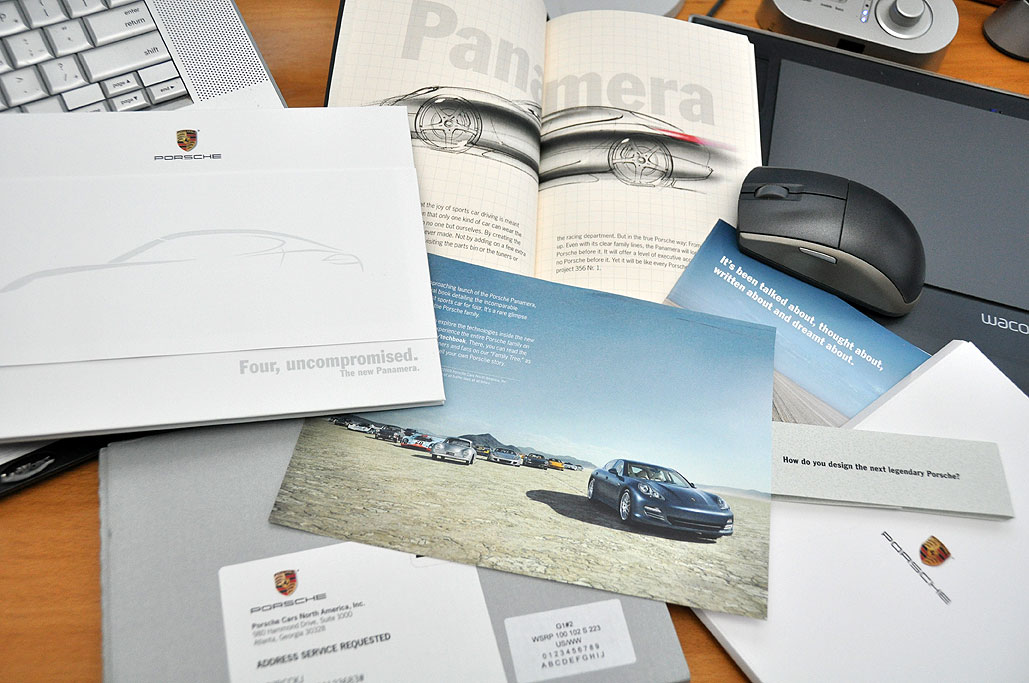
In 2005 we first told RainyDayGarage readers about Porsche's plans to deliver a four-door sports car by 2009. In the intervening four years, Porsche has been sending us a nice collection of updates and teasers. Earlier this year and true to their schedule, Porsche announced that they have started production of the Panamera with first delivery to customers in 2010.
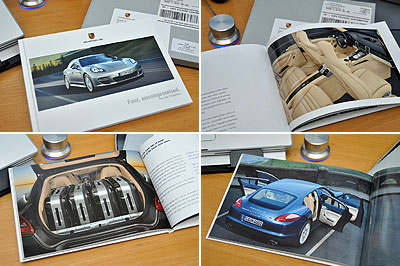
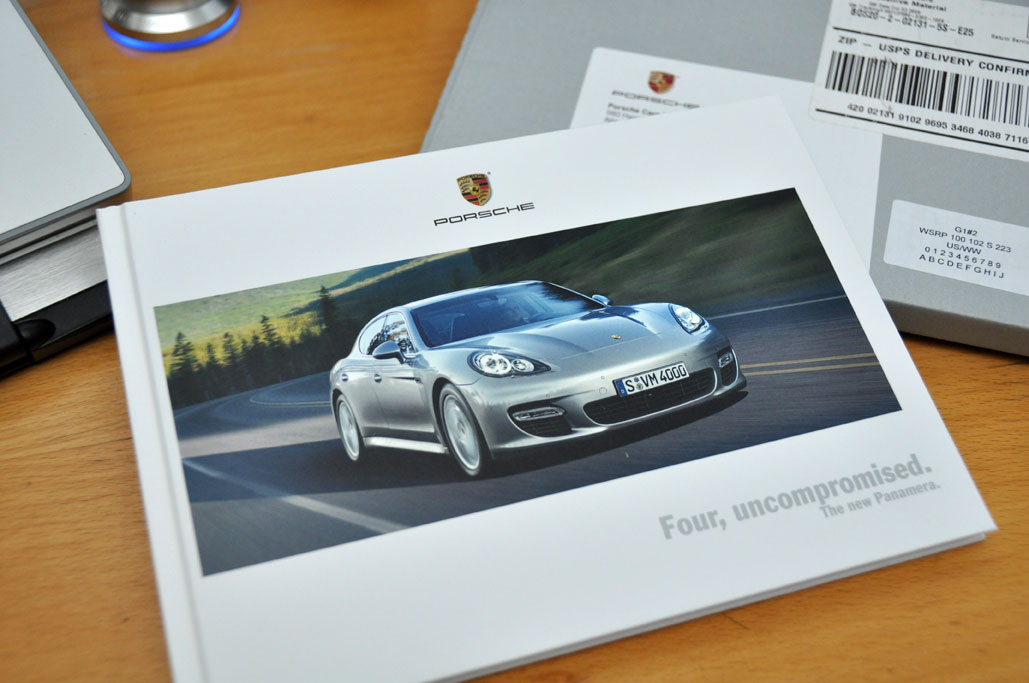
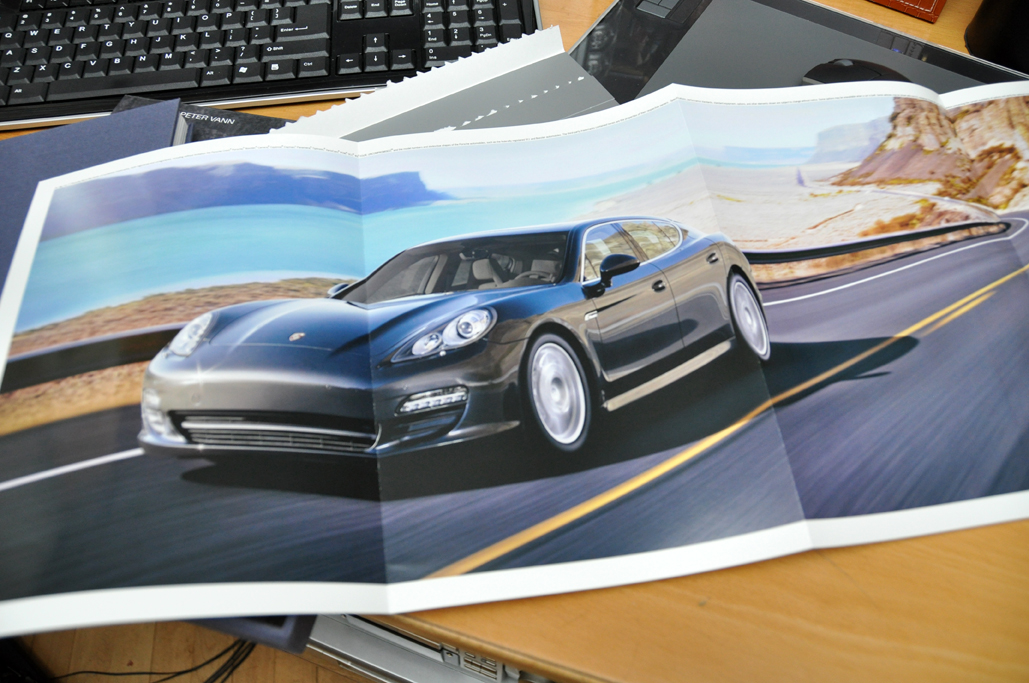
We have been receiving a steady stream of press materials from Porsche, now with actual photos instead of designer sketches of the Panamera. The slickest yet is the photo-book which came a little while back. It covered all of the new features of the Porsche with an obvious emphasis on the "four-seatedness" aspects of the car.
The Panamera has been shown at a few car shows around the world, but hands-on experience in Boston has not been available until now. The Larz Anderson Auto Museum and Herb Chambers Porsche will be hosting an event tomorrow night to unveil the Panamera to folks in Boston! Details are here.
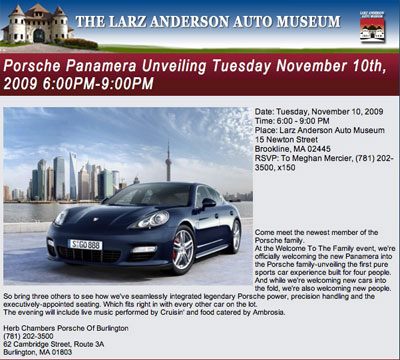
We have voiced our reservations about a 4-door Porsche since the beginning, but we remain open-minded about the car. Regardless, it will be a fantastic night because of the venue. So if you like to hit the road with friends, now it will be possible to do it in a Porsche :-) [Permalink] - Porsche Panamera Unveiling
NOTE: These LAAM events are VERY popular, so get there early. Look for us and say "Hi." We love meeting local RainyDayMagazine readers!
|
|
|
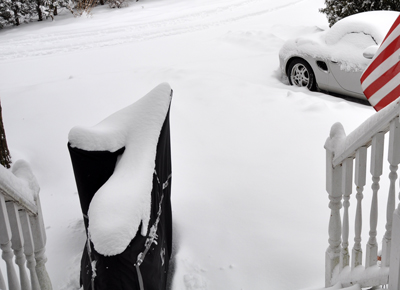
It snowed in Boston last weekend. Luckily for us, the snow tires were already on the Boxster last Tuesday. The RainyDayGarage guys had the foresight to anticipate the early storm! It would not have been a fun drive on Route 6 with Summer tires. Today, the temperature is in the 70ºs, and we don't have to worry about the Boxster we thought we had better start thinking about the Winter preparations/maintenance for the Vespa.
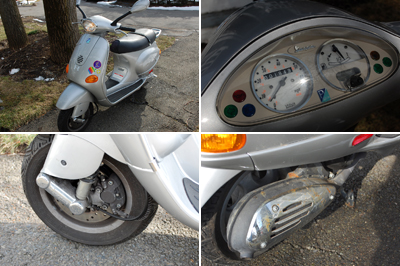
Last year, we left the Vespa outside all Winter. We didn't ride it at all, but the scooter started up with no problems in the Spring. This practice was probably not the best for the battery, especially since it has been acting up lately. This year, we thought we would try trickle-charging the battery to keep it "fresh" and ready for use over the Winter.
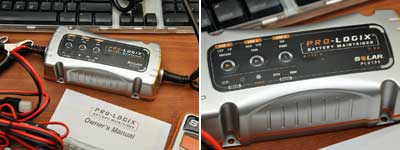
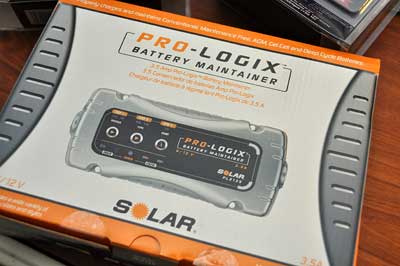
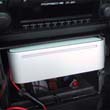
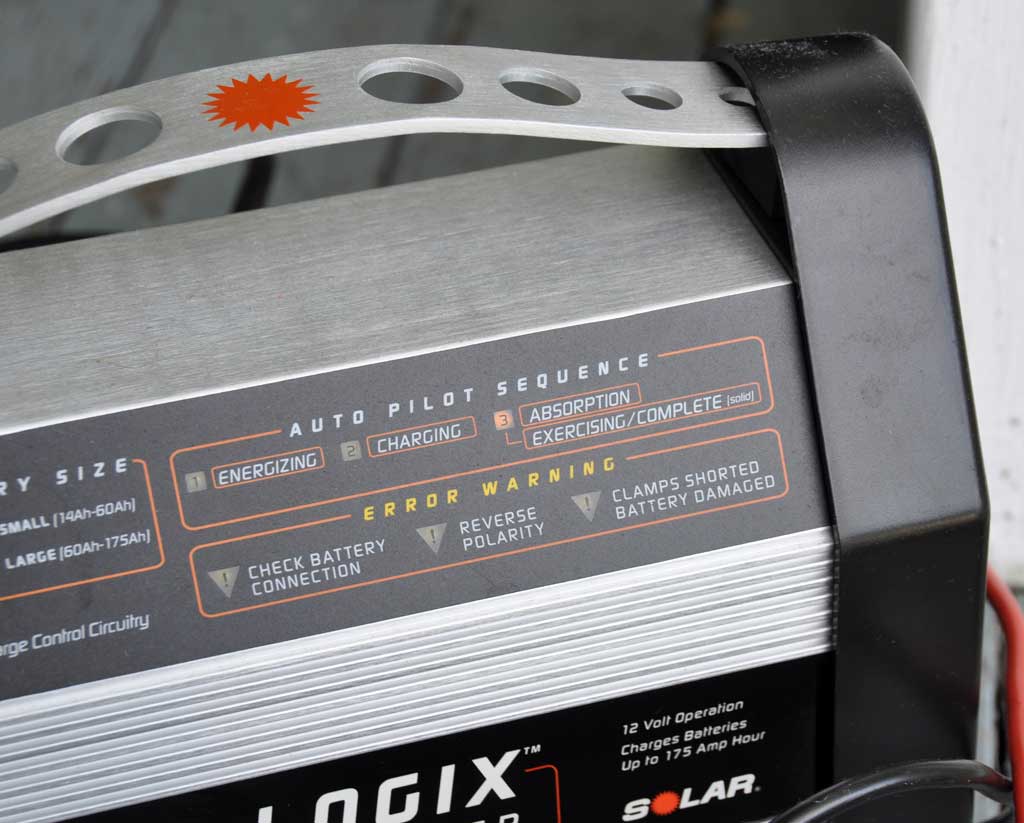
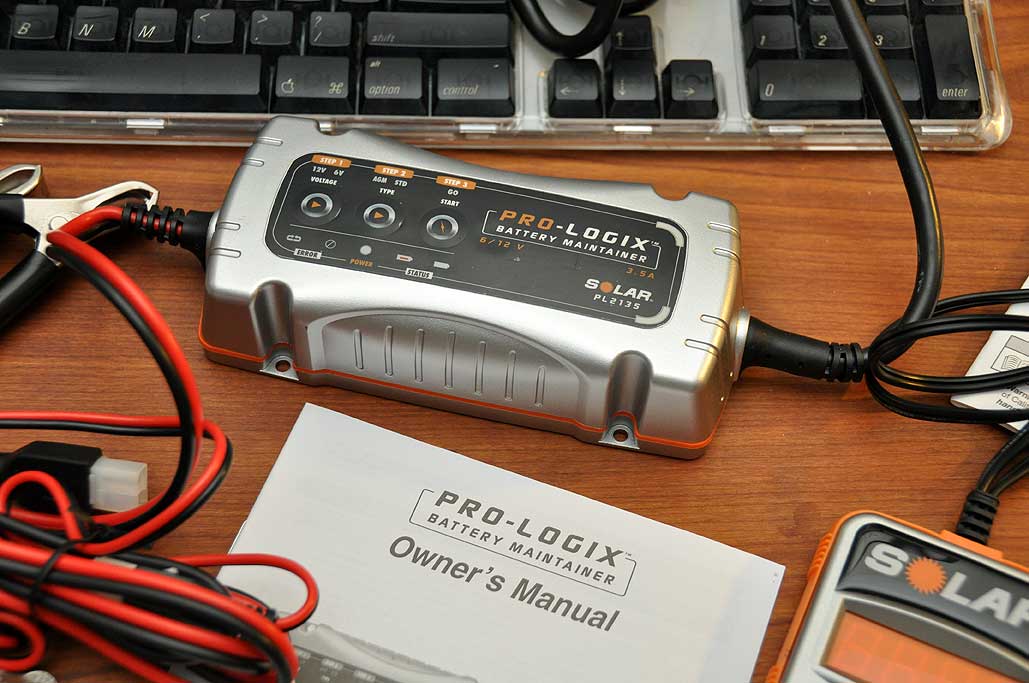
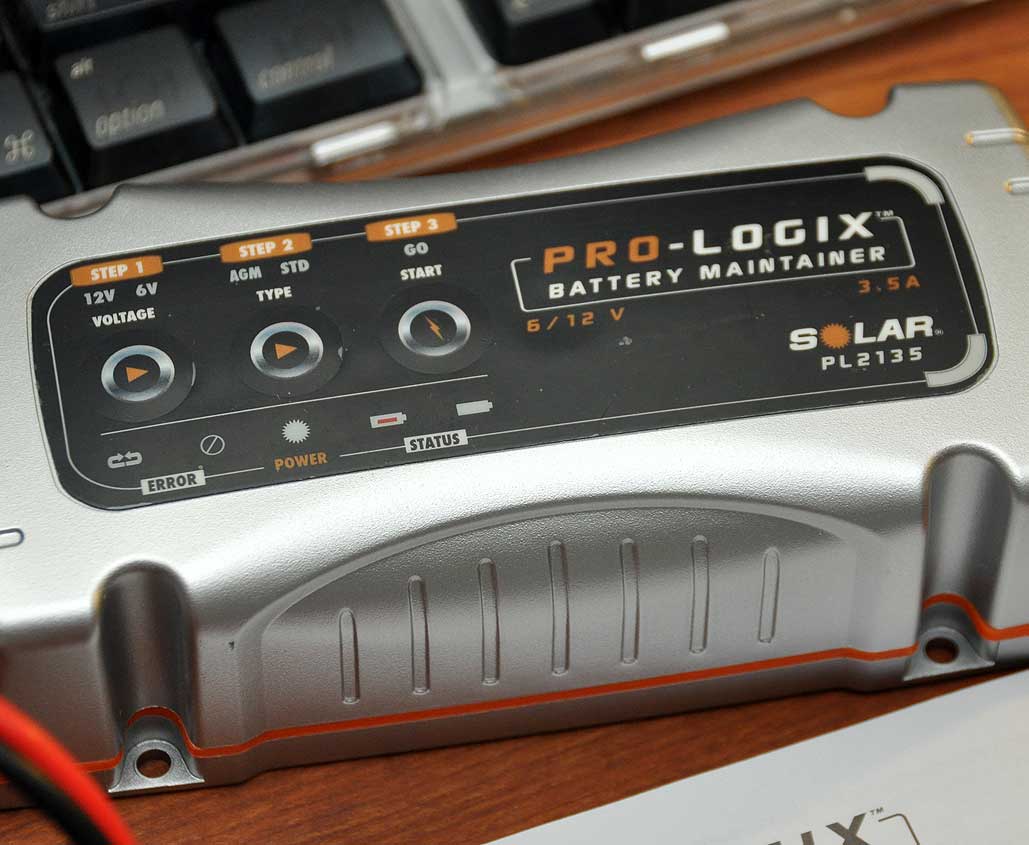
We checked out a few battery chargers and settled on the one from SOLAR. The SOLAR Pro-Logix battery maintainer, like other Pro-Logix gear we have used, is ruggedly designed, easy to setup, and runs automatically.
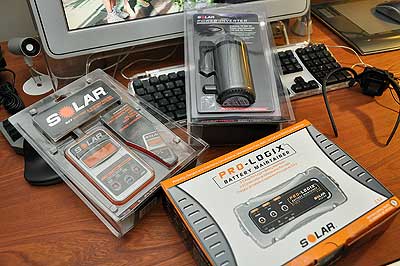
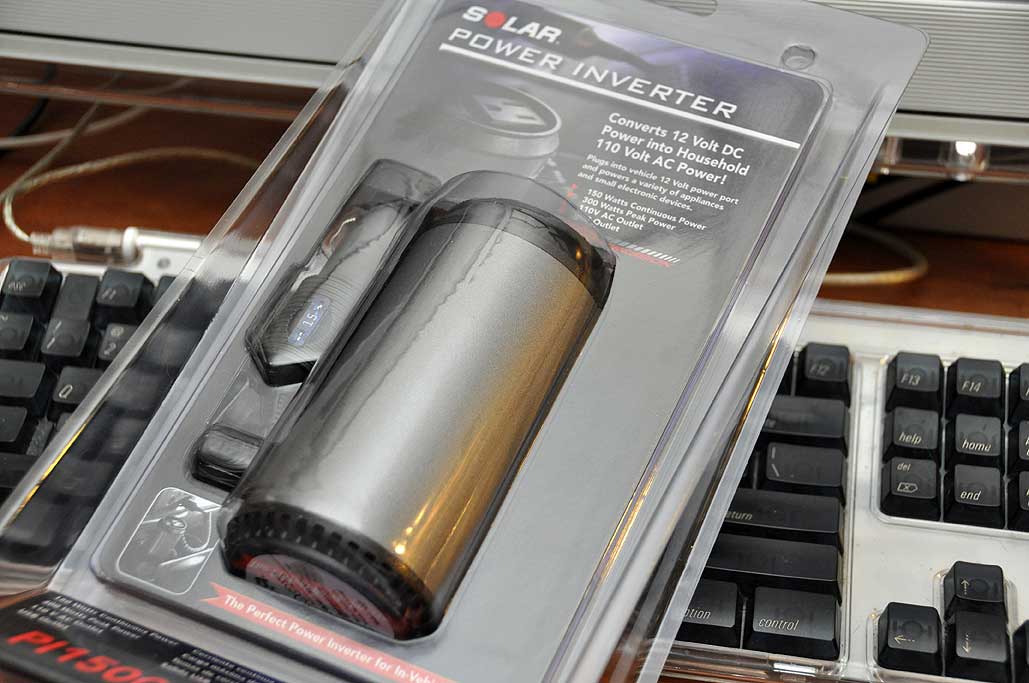
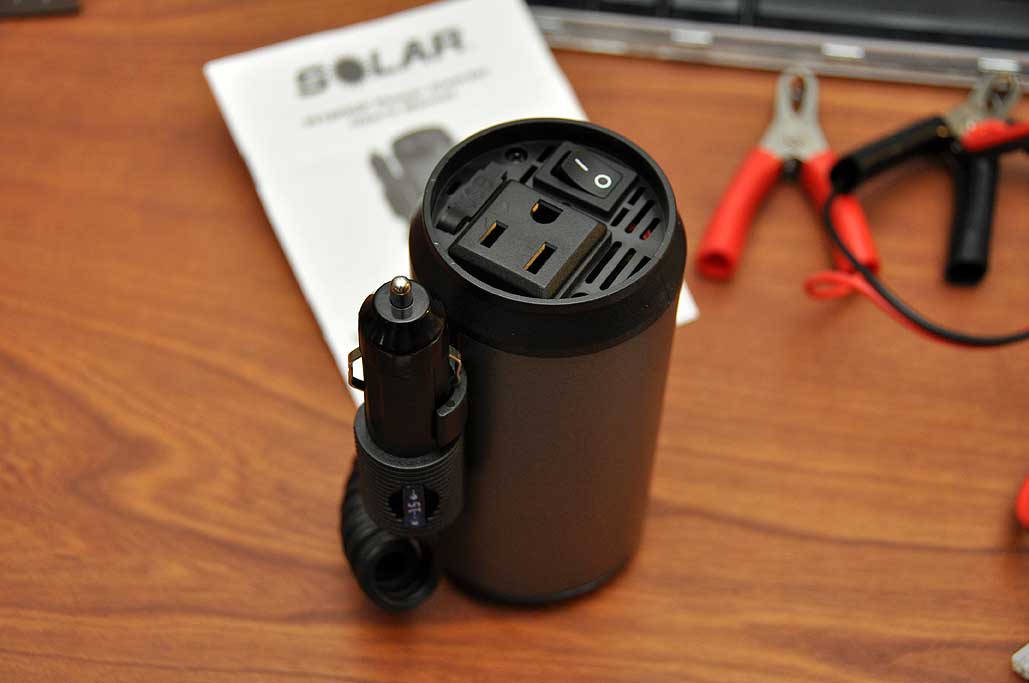
When we picked up the Pro-Logix battery maintainer, we also got two other pieces of SOLAR gear: 150W Power Inverter, Battery & System Tester. Both are useful to have on hand. An inverter is useful to have in a car for charging a laptop, camera batteries, or anything requiring an AC outlet. Care should be taken not to draw too much current, as in the end, one is tapping into the electrical system of a car!
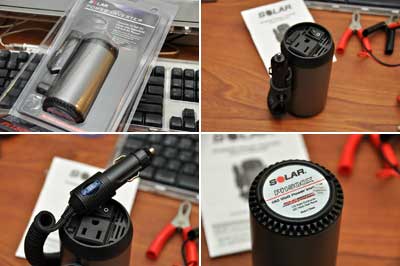
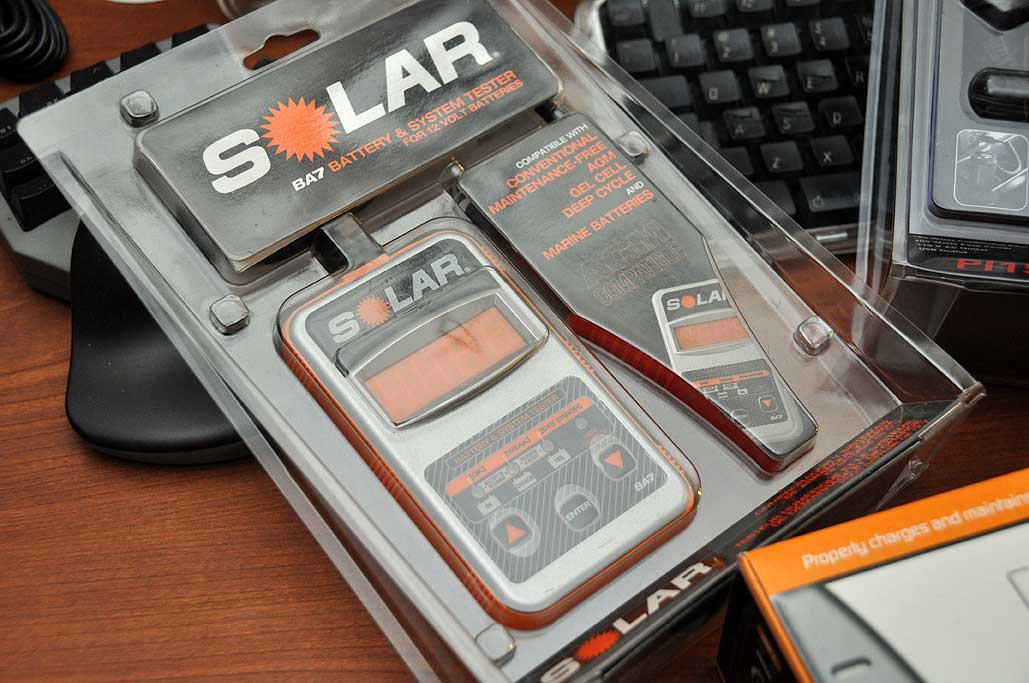
Problems in the electrical system of a car CAN be tricky to diagnose. The SOLAR BA7 Tester was designed to help the user track down battery and charger-related issues quickly.

We currently don't have any problems with the electrical systems of the car or the scooter, but we are now ready if any problems should arise! Still, we will use the BA7 to test some of the working batteries to get a baseline and to familiarize ourself with this tool. Look for the FirstUse write-up after we have completed the Winter prep. [Permalink] - Clore SOLAR gear
|
|
|
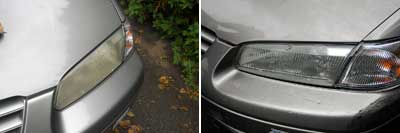
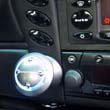
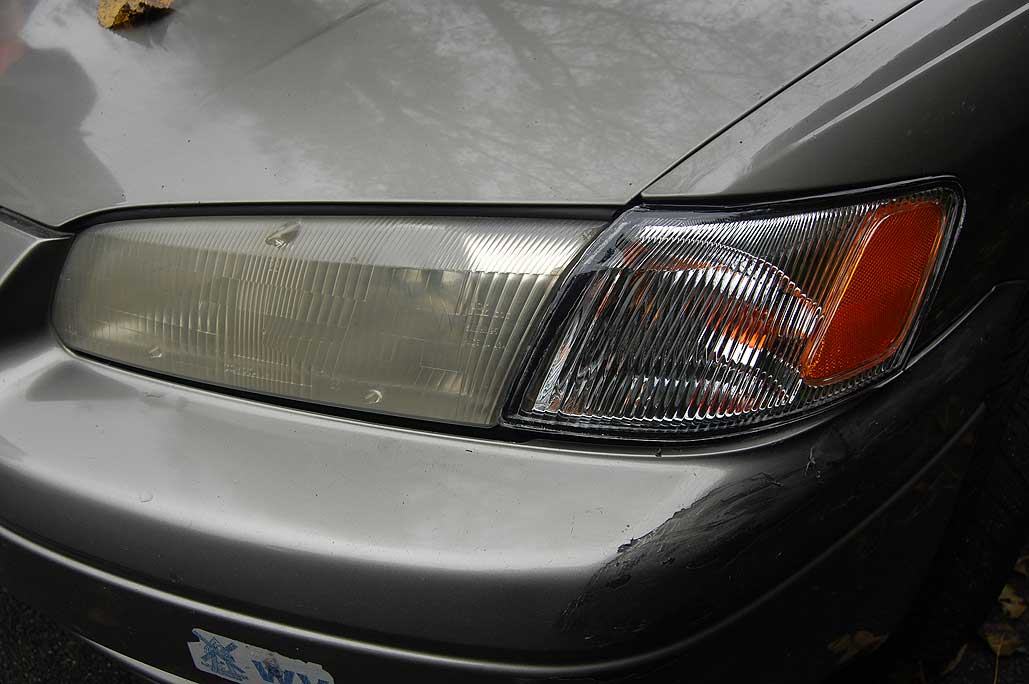
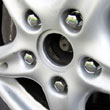
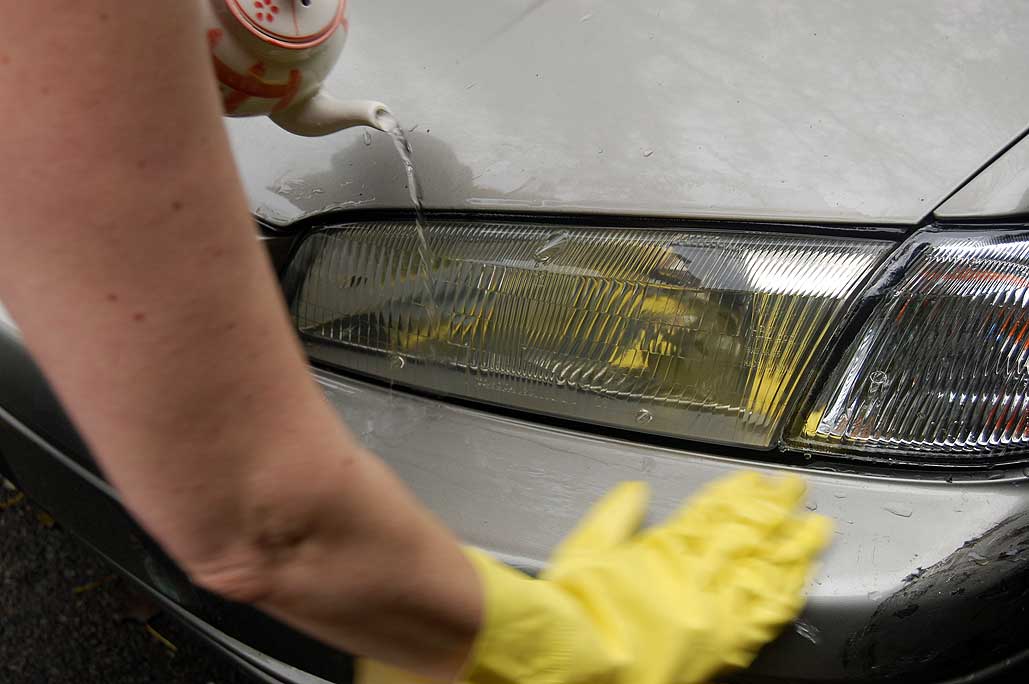
A staff member's car got nicked by a lady driving badly the other day. The driver-side directional light was damaged during the accident, but everybody was fine. The RainyDayGarage guys (and gals) found a replacement light online for $27 and replaced the broken one with no problems. But it made us notice the significant difference in clarity between the old headlight cover and the newly installed side light. Can you say RainyDayProject???

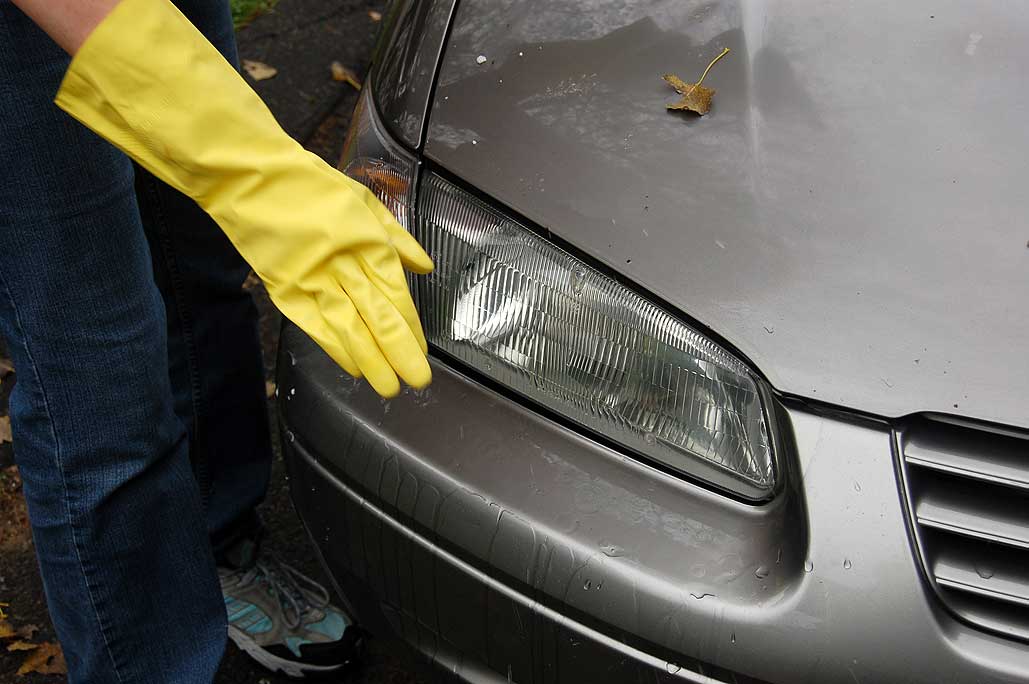
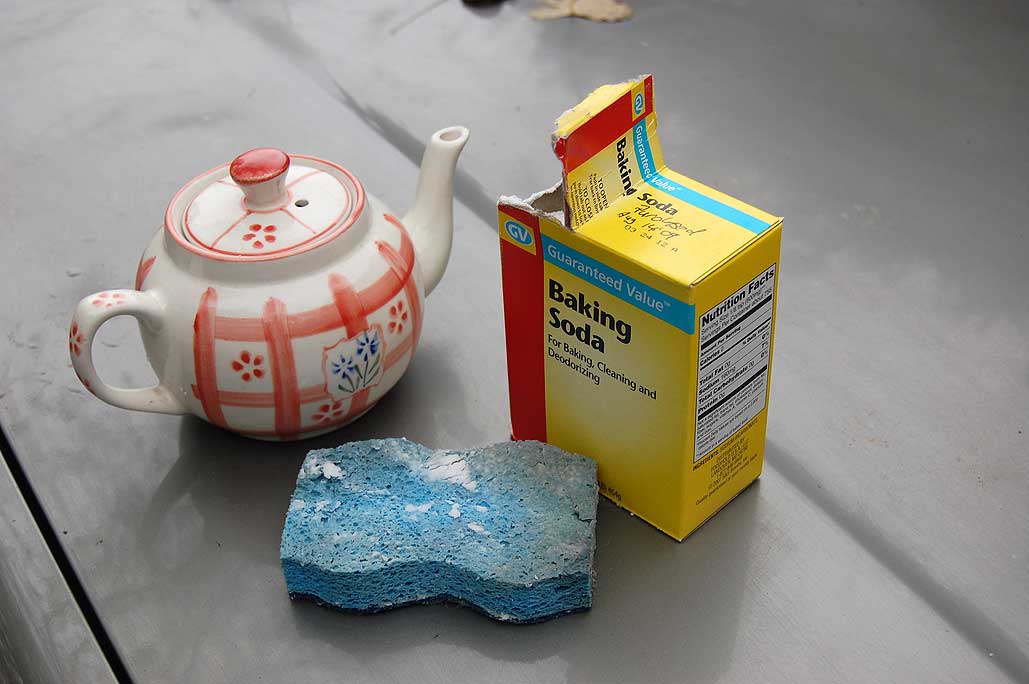
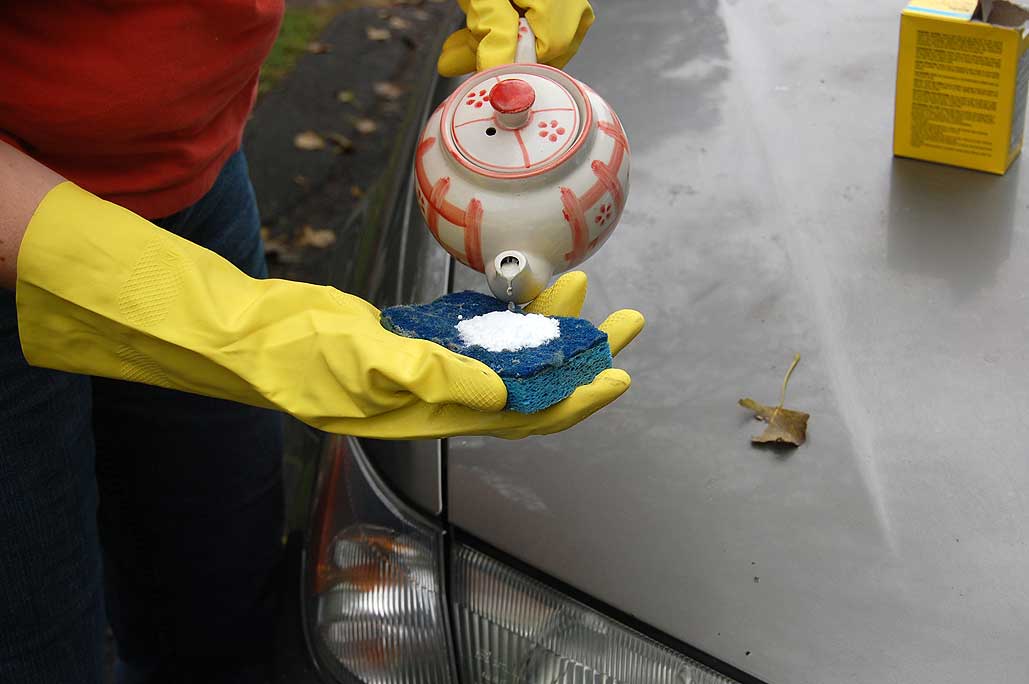
We did a few online searches for headlight-cleaning kits but one of our editors, Carolyn, mused thoughtfully, "I bet it will come clean with some baking soda and water and a little elbow grease." Some of us were a little skeptical, but hey...it's a DIY project :-)
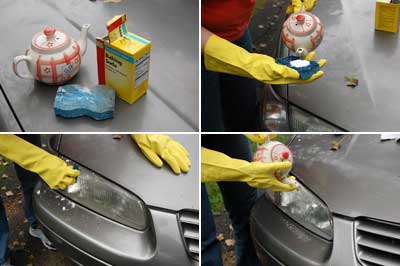
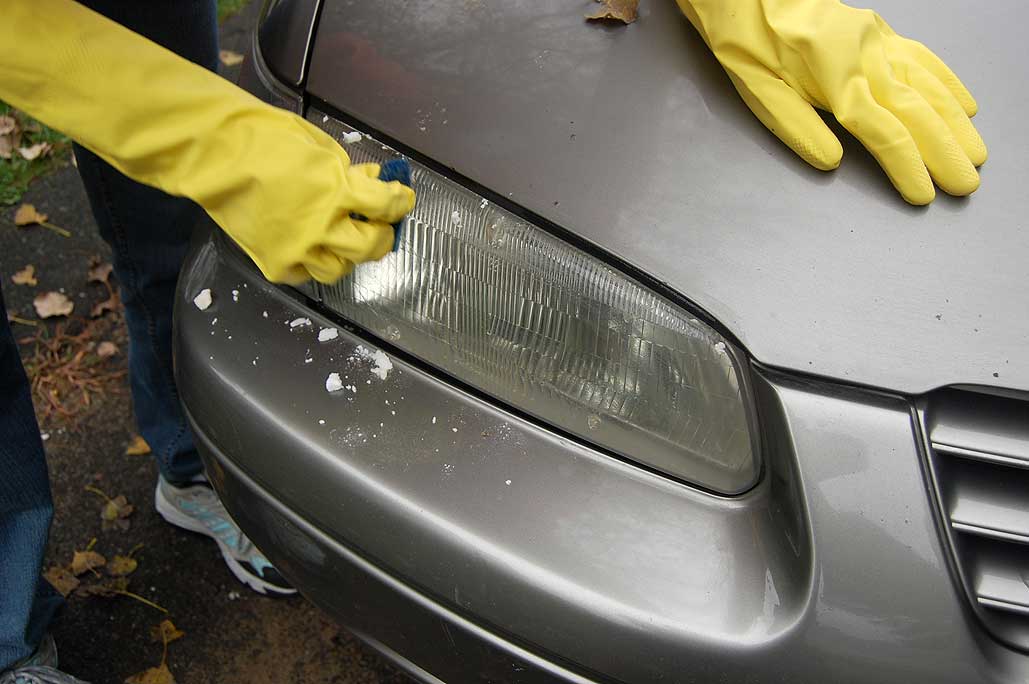
There was not much to the prep for this cleaning project. Some water (in the optional short and stout teapot), a box of baking soda, and a sponge were all that was needed. First step was to mix the baking soda with a little water to create a light paste. Wear gloves if you are a delicate flower :-) A little rubbing in a circular motion brought the dull yellow lens back to its clear shiny transparent self pretty quick.

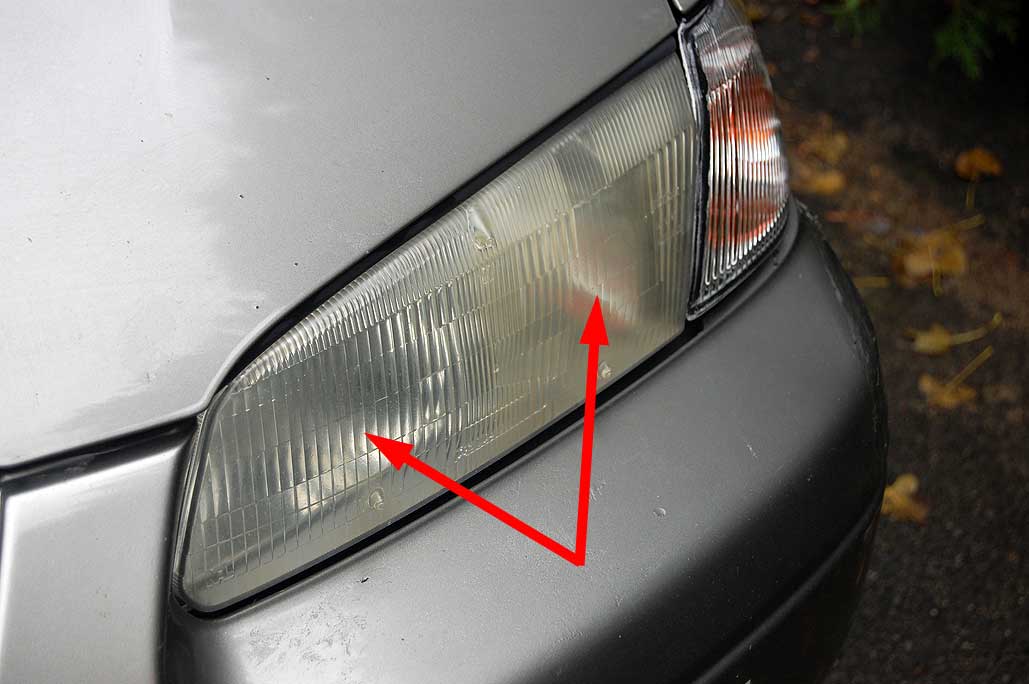
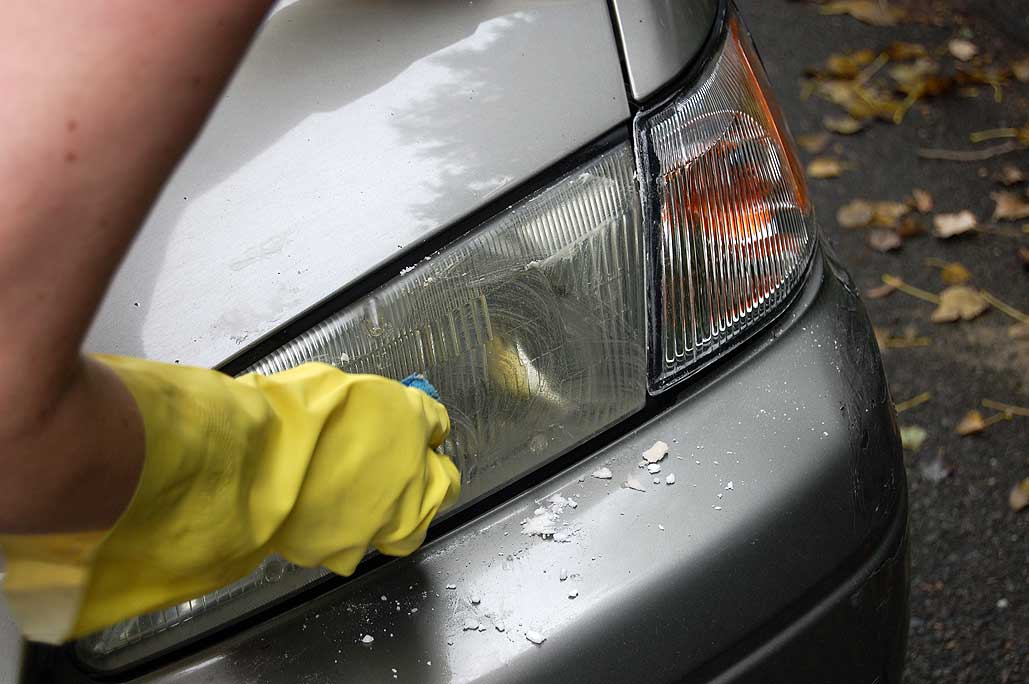
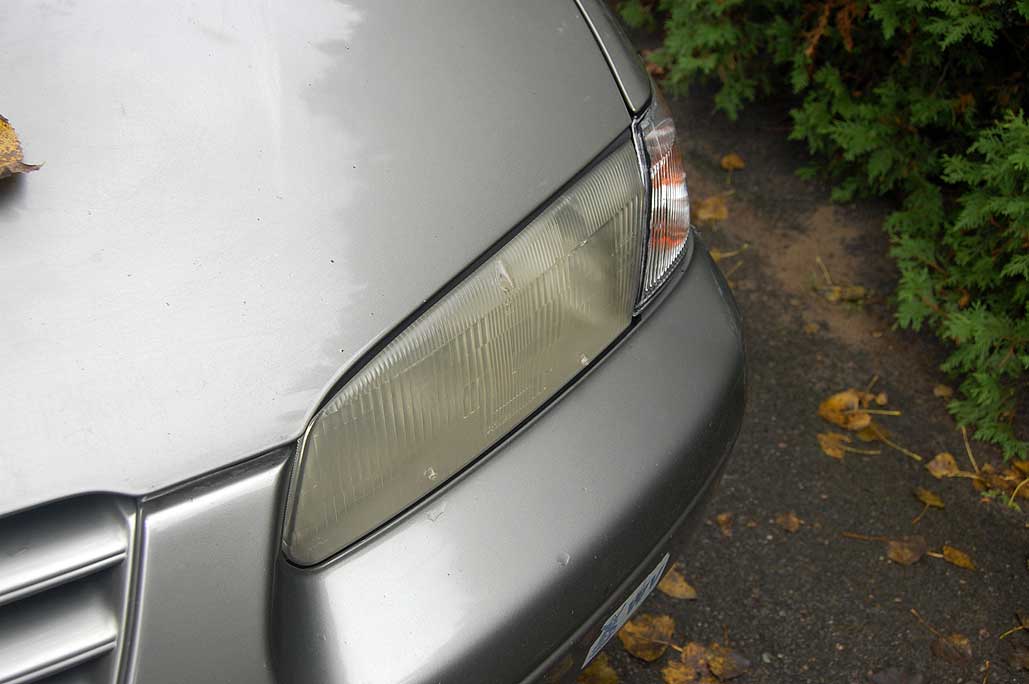
Unconvinced, we asked Carolyn to repeat the process with the other light. So that we could show our certain-to-be-sceptical readership the results more clearly, we asked her to clean just half of one cover. She took us up on the challenge. A vigorous swirling motion with the sponge, a good rinse, and the result was pretty obvious.
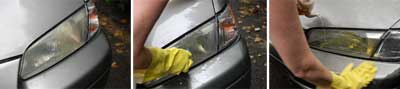
Here are the before and after photos of the cover. The baking soda/water cleanser worked amazingly well and our hats are off to Carolyn for this excellent cleaning tip! She says she has more, but won't share any details.
There are commercial headlight restoration kits available from $10 to $30, but we would be surprised if they work better than Carolyn's $0.50 solution. We may do a head-to-head test at some point. For now, we are happy with the results and will repeat as necessary. Got a good "home-brew" remedy for cleaning? Drop us a line! We'll be happy to share it with the rest of the readers! [Permalink] - Headlight Cleaning
|
|
|
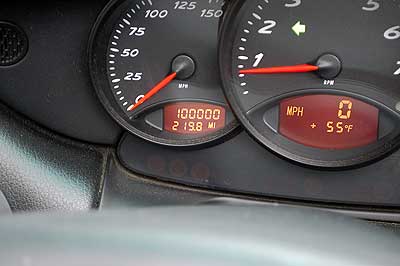
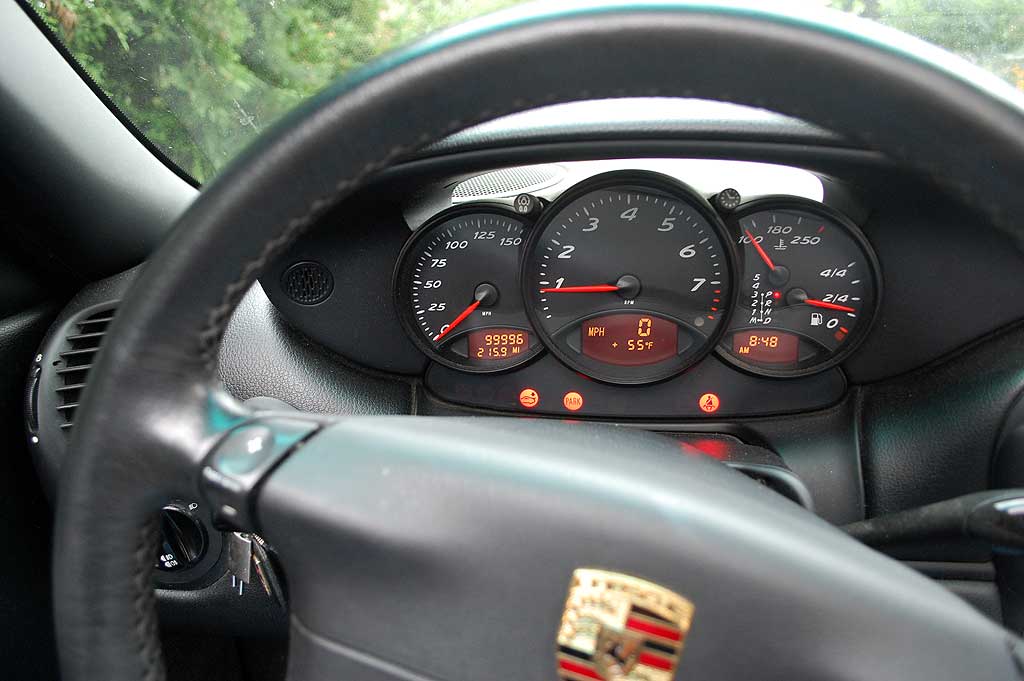
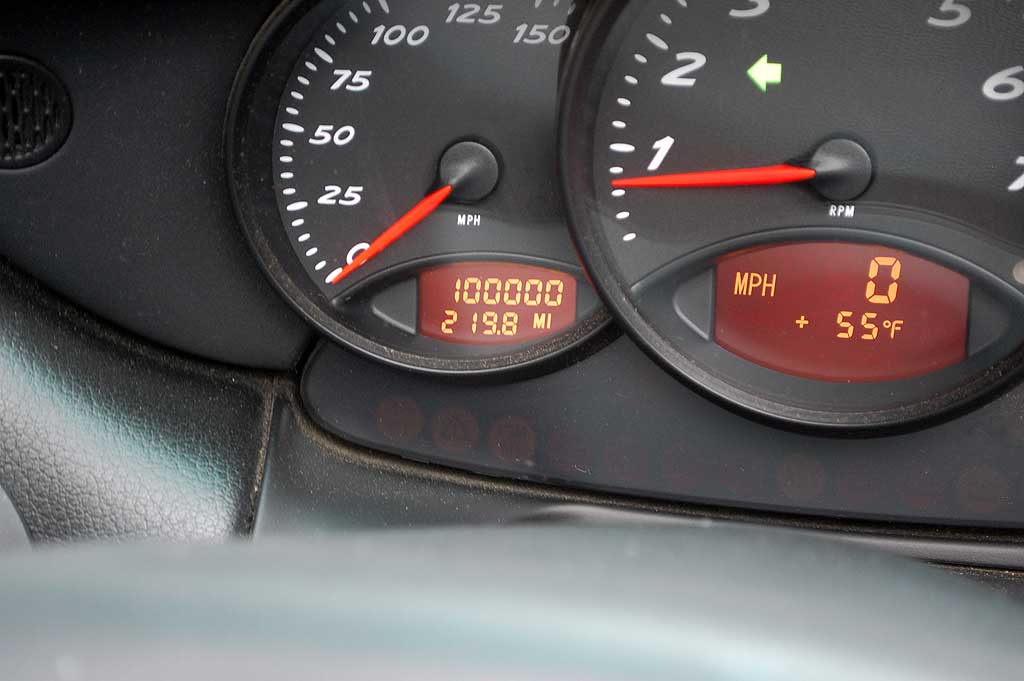
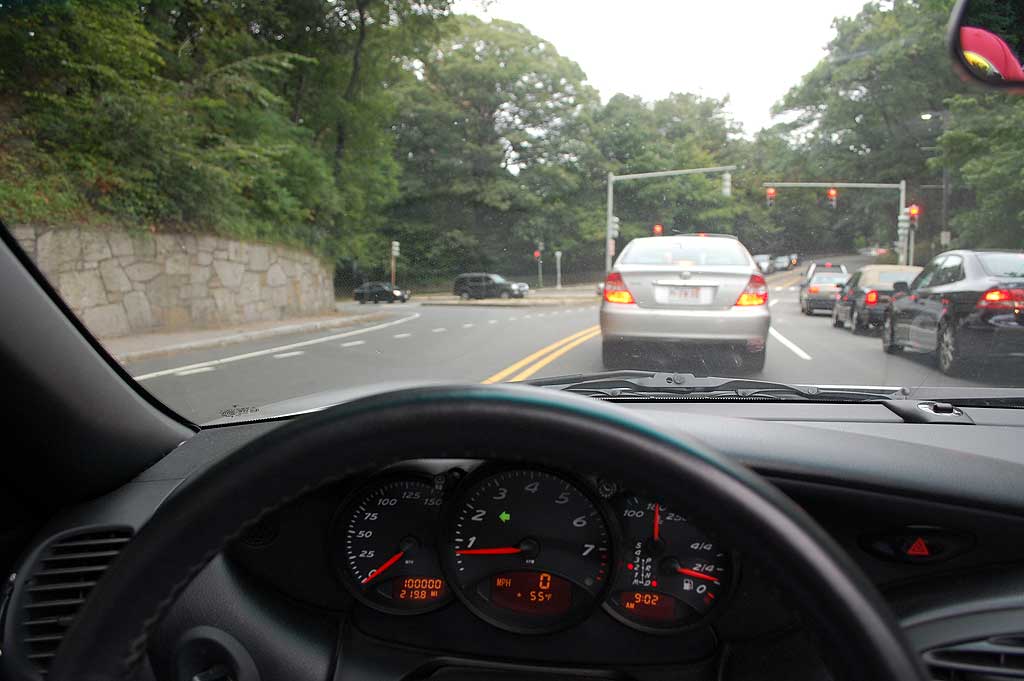
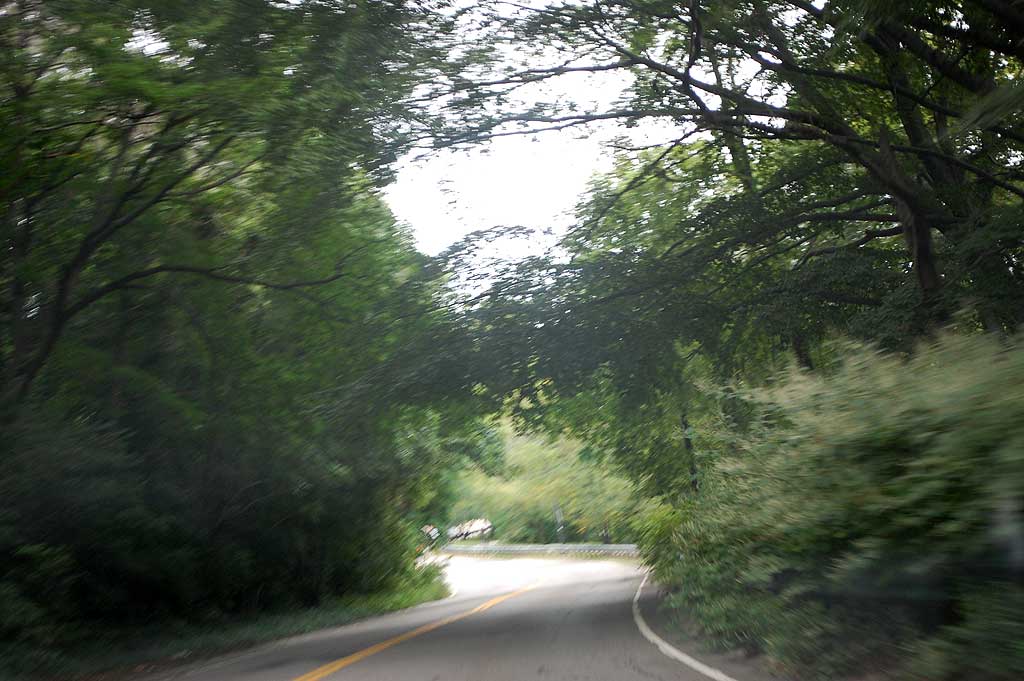
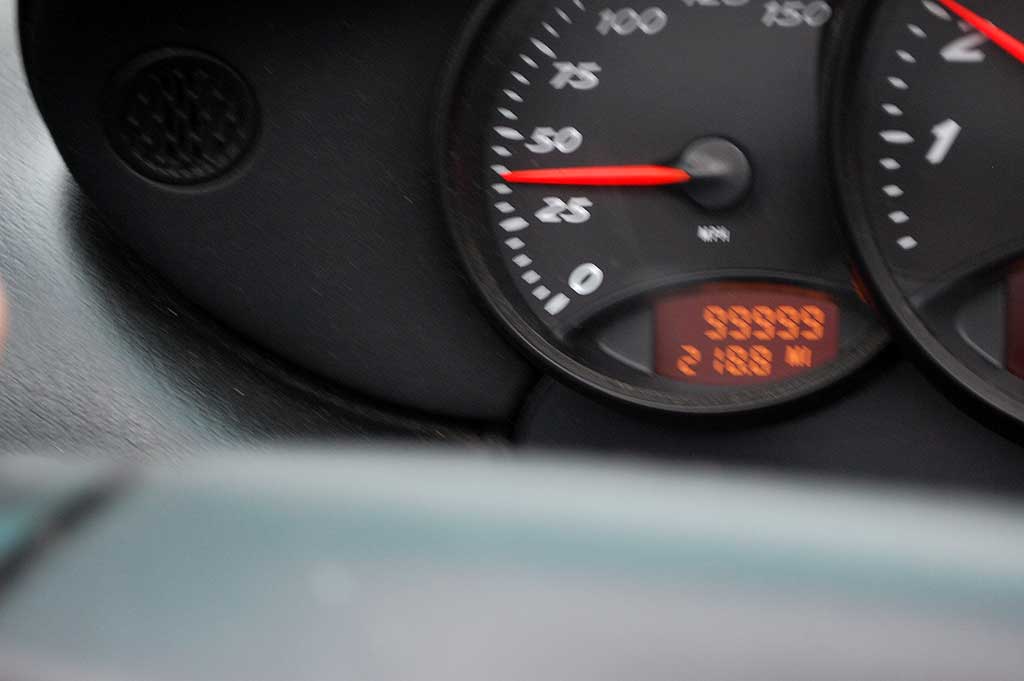
The guys at the RainyDayGarage are happy to announce that after eight fantastic years of top-down driving, the Boxster has joined the 100K club!
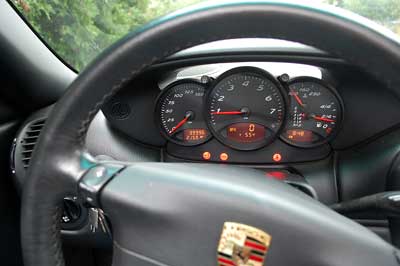
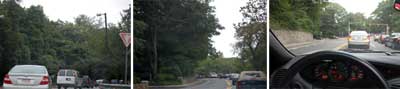
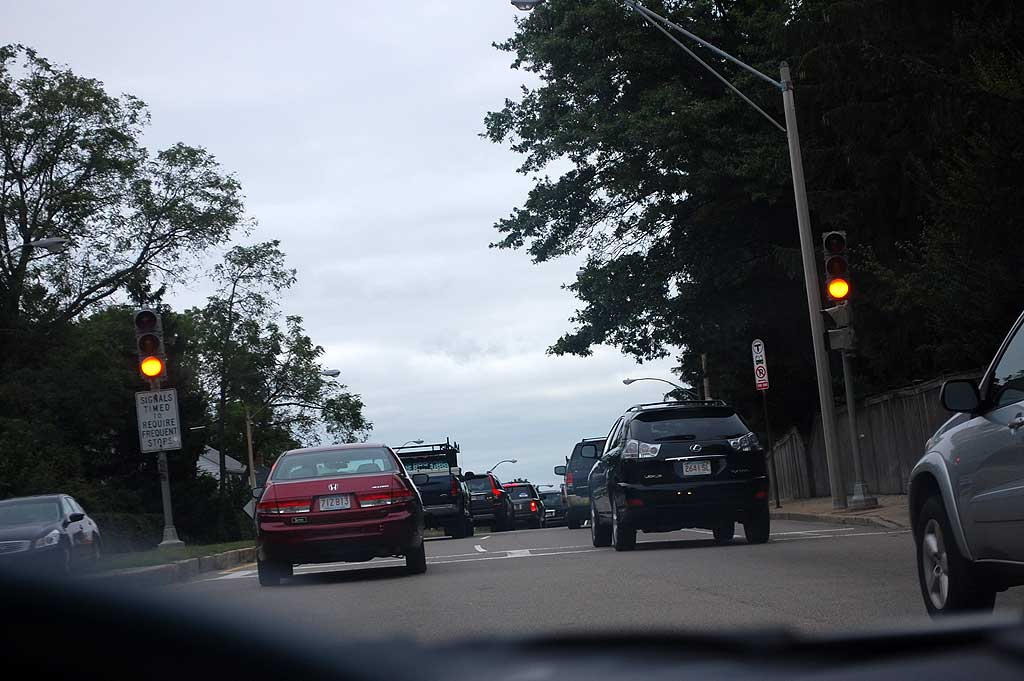
The day started like any other day. It was 55º out. We put the top down, fired up the Boxster, and cranked up the heat for our daily 7-mile commute to Kendall Square. The traffic is usually pretty light after 8:50 AM as most folks leave earlier so they can get to work by 9AM. There are parts of the commute where we can let the car "run" a bit. At one stretch there are even some twisties that last for more than a few seconds! However, today we had to keep an eye on the odometer so as not to miss the "big event."
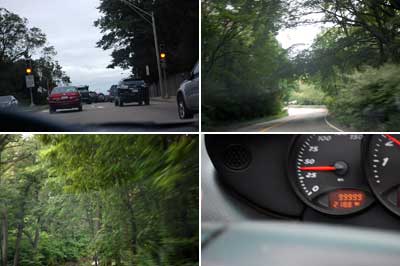
Fortunately, by the time we got close to the big 100K mark, the traffic had slowed us way down and getting a clear shot of the change from 099999 to 100,000 was not a problem.
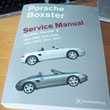
Porsches have a reputation for being expensive to buy, own, and operate, but it's somewhat of a myth. Porsches share many parts with Audi and Volkswagen, so if you are handy and like to do some of your own maintenance, they are really not more expensive to maintain then any other car. The best place to hang out and talk about all things Boxster is Porsche Pete's Boxster Board. The best owner's manual is the one by Bentley Publishing. Our Boxster has been and continues to be a pleasure to own, drive, and look at...even after 8 years and 100K miles! We would bet most can't say that of their daily drive.
The truth is, before owning the Boxster, we didn't really much care about cars one way or another. Cars were just something that got us from point A to point B. In fact, we were in Boston for 10 years before we even got a vehicle. They are right when they say "Porsche, there is no substitute" because now that we have spent some time with the Boxster, we just can't imagine driving anything else. [Permalink] - 100K Bxxster
|
|
|
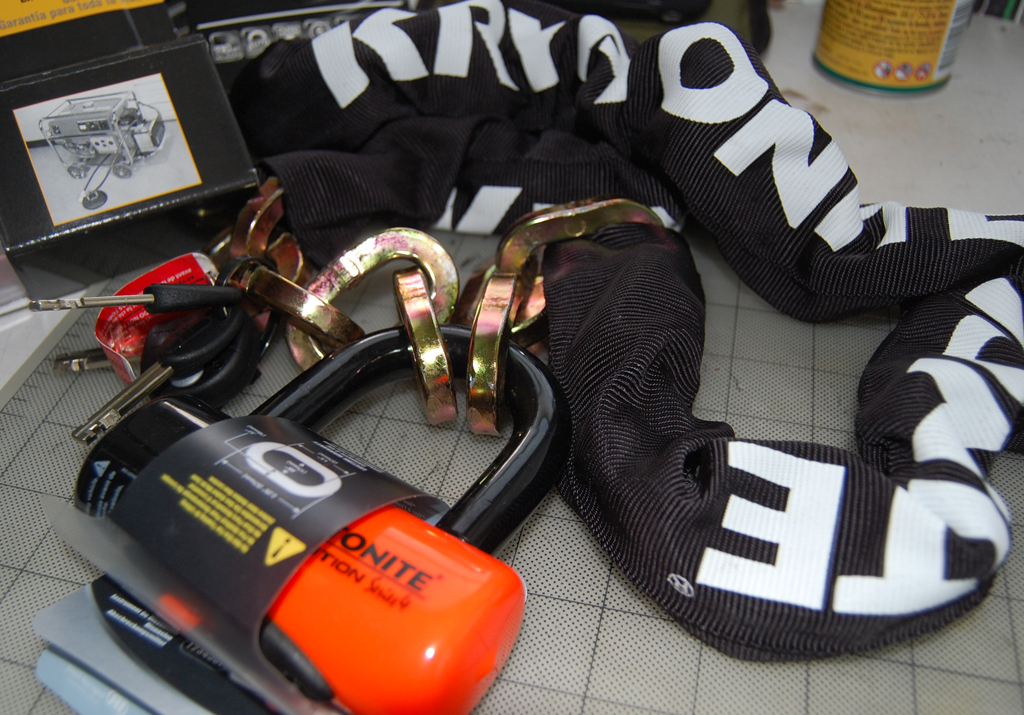
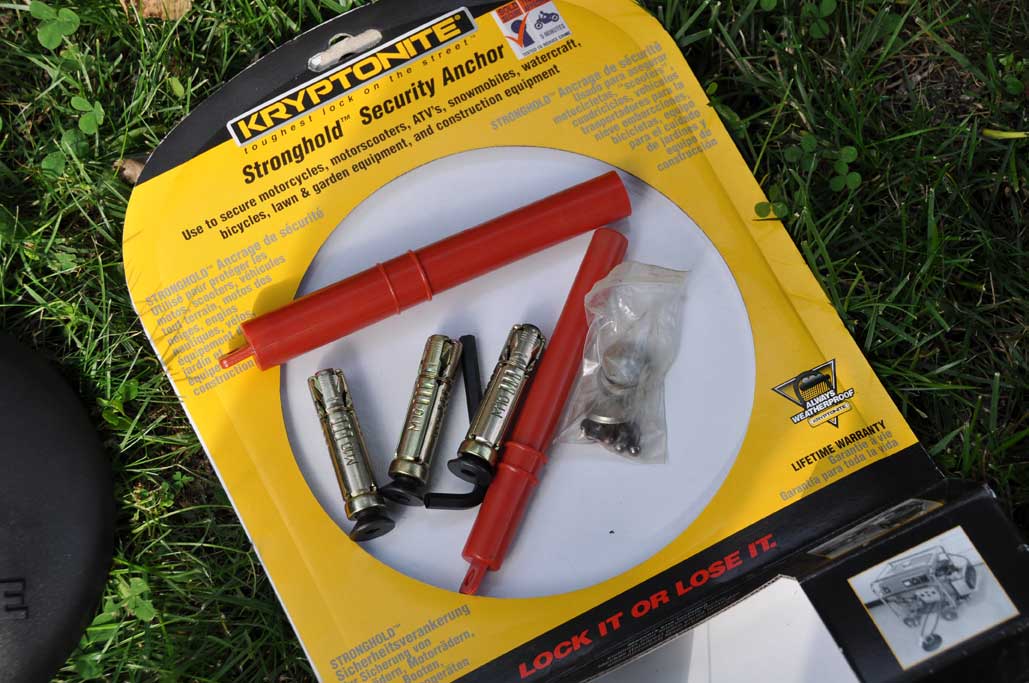
Last September we got the Kryptonite lock and anchor when we got our Vespa. We have been using the Evolution chain and lock daily and it has held up to the New England elements extremely well. Both the lock and chain were outside all winter. Even with the constant exposure to elements (sun, rain, and snow), the lock opens easily every time. One thing we never got around to was installing the anchor. Chaining the Vespa to the railing worked just fine, but it was a bit inconvenient. Since today was such a nice day, we decided to get off our butts and install the Kryptonite Stronghold anchor.
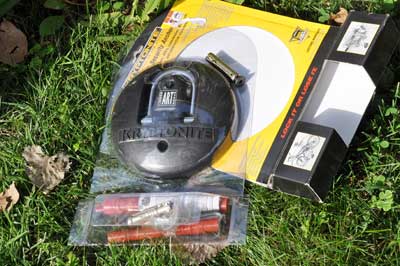
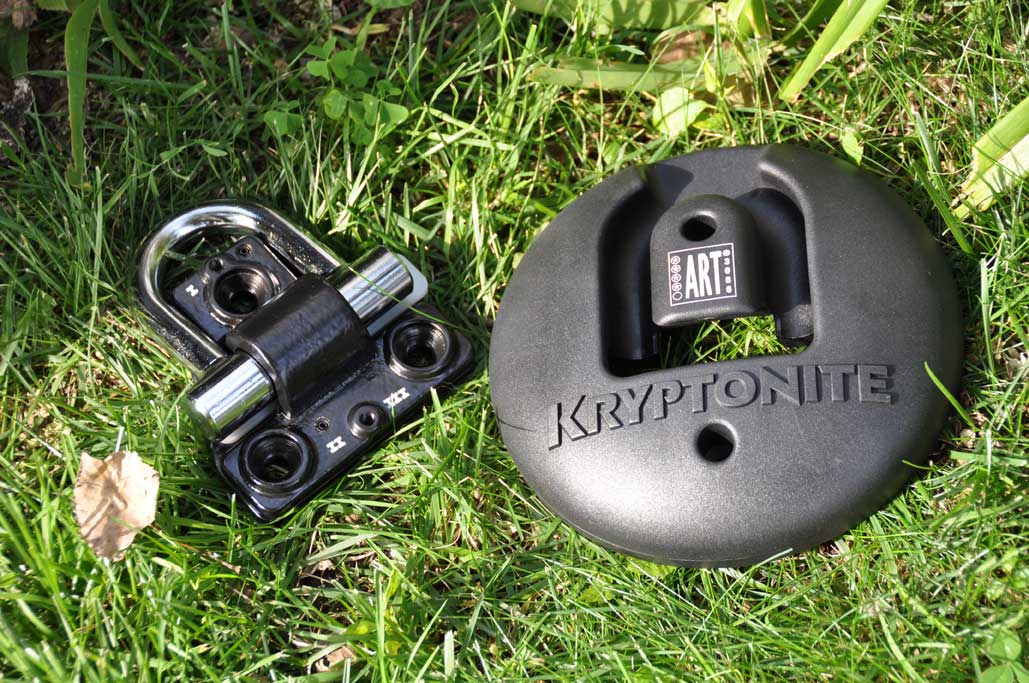
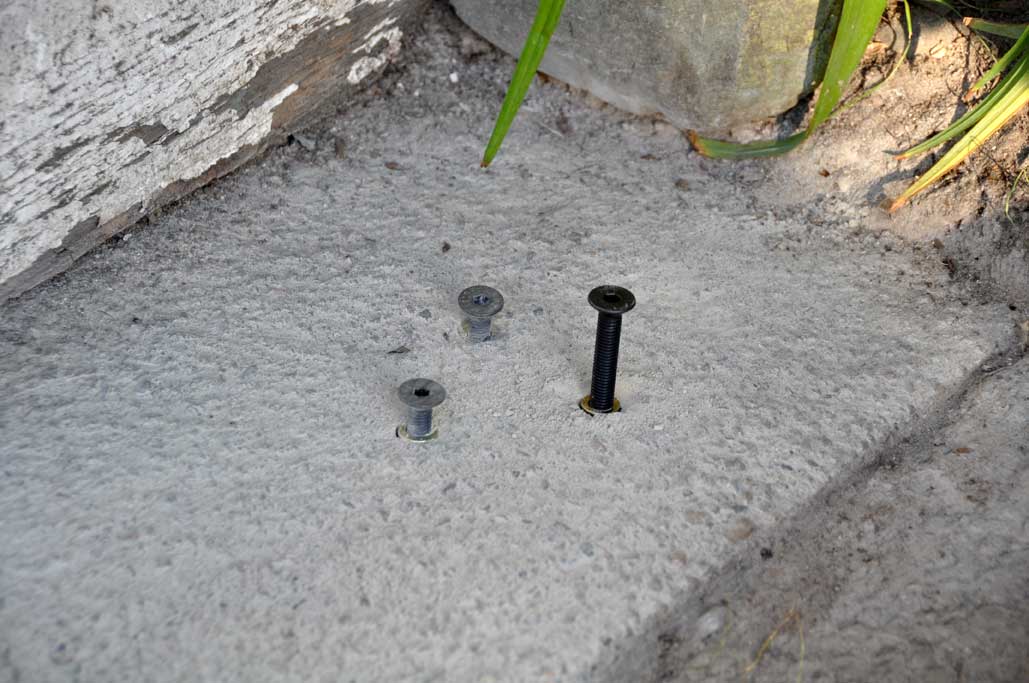
The Stronghold anchor comprised of three pieces: hardened steel base, resin cover, anchor bolts. The anchor is locked down by three expanding bolts. The cover both protects the anchor and acts as additional security to prevent tampering. The StrongHold is suitable for garage or driveway installation because the curved cover can be driven over without damage to it or to the tires.
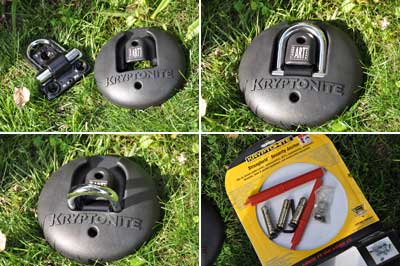
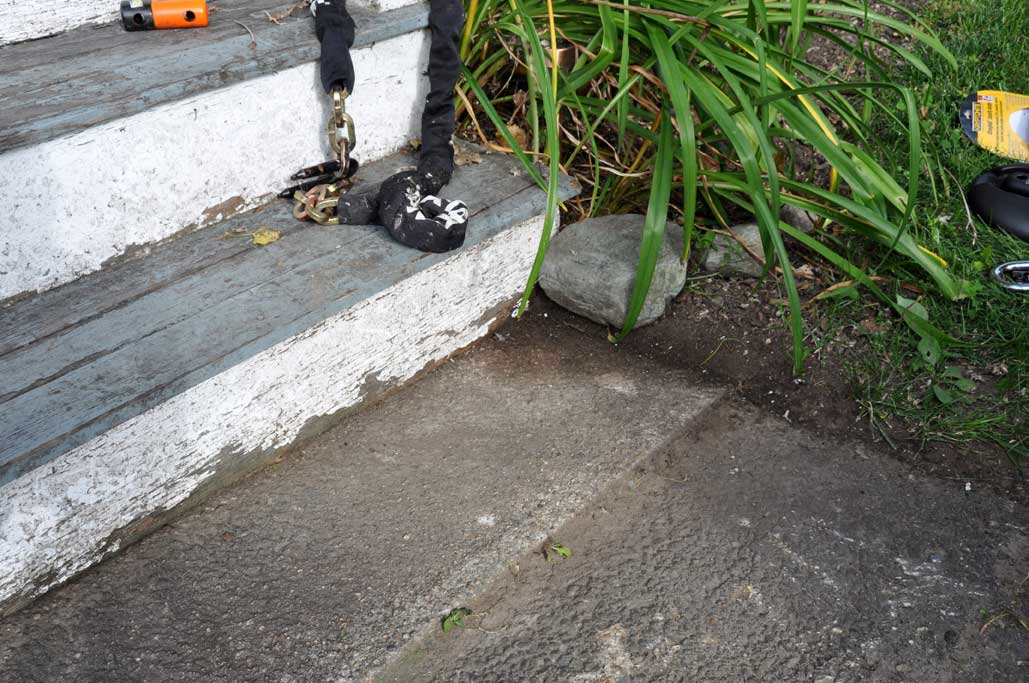
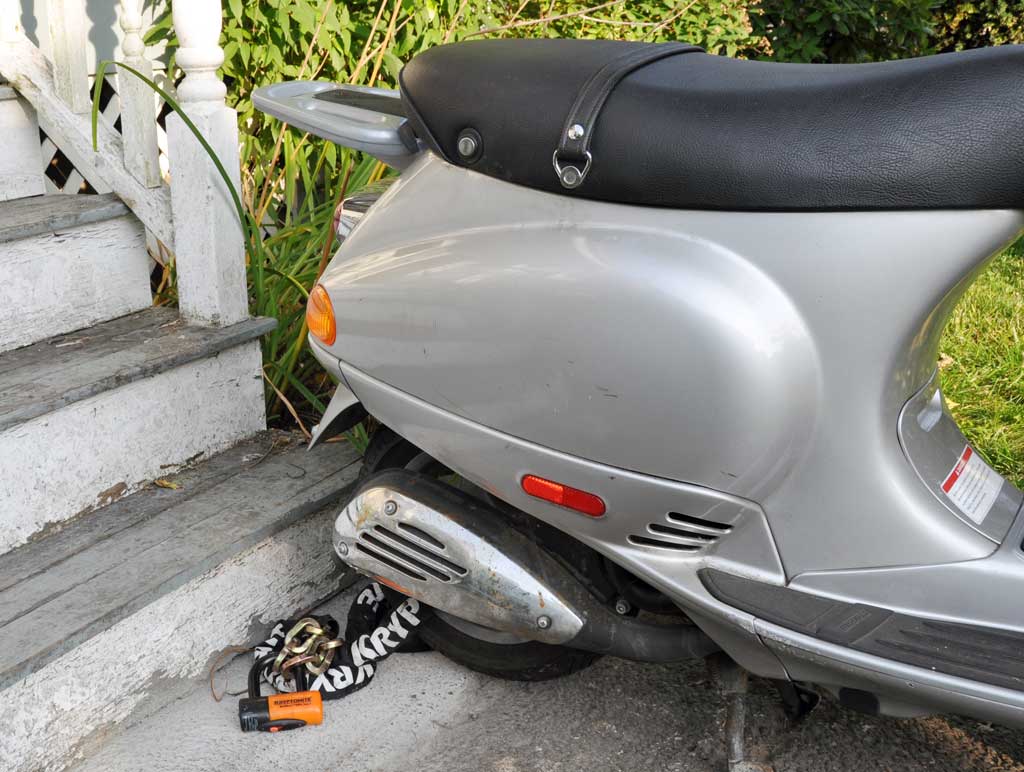
The anchor works best on cement or concrete. Mounting in asphalt is not recommended as it is too soft to allow for a secure fix. We affixed the Stronghold to a concrete slab at the bottom of the front steps to our office.
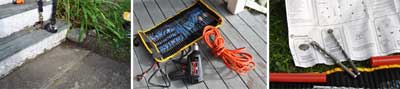
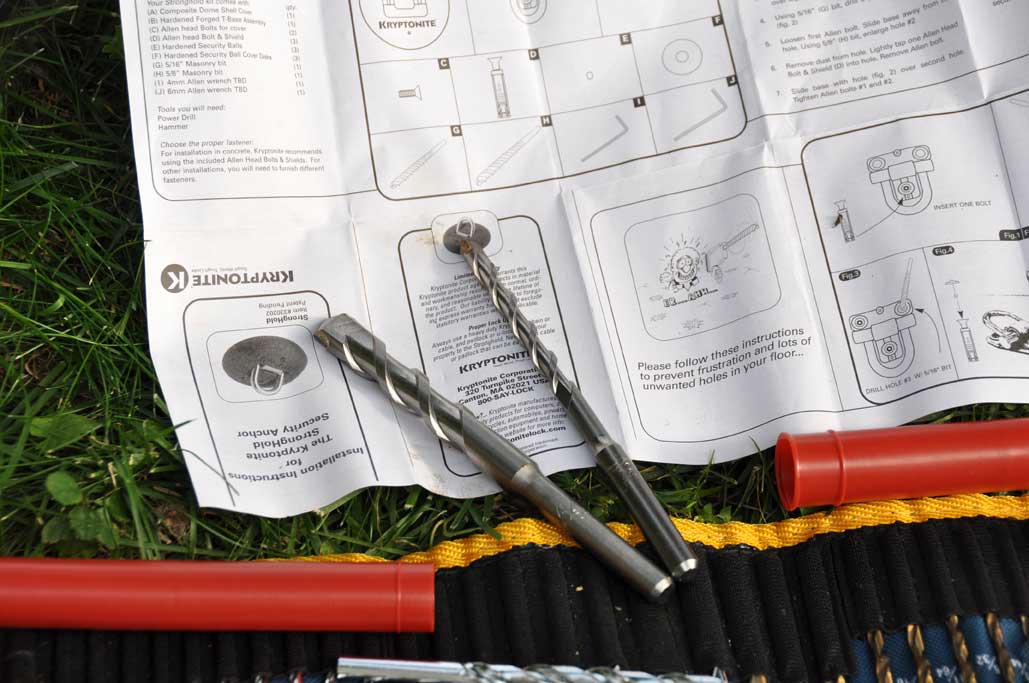
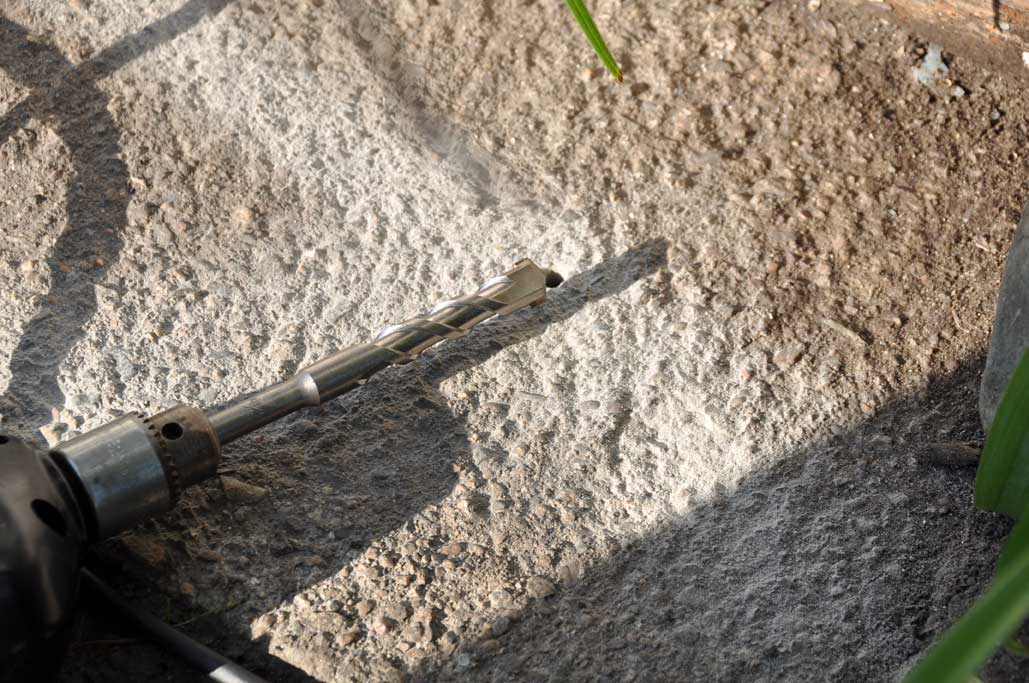
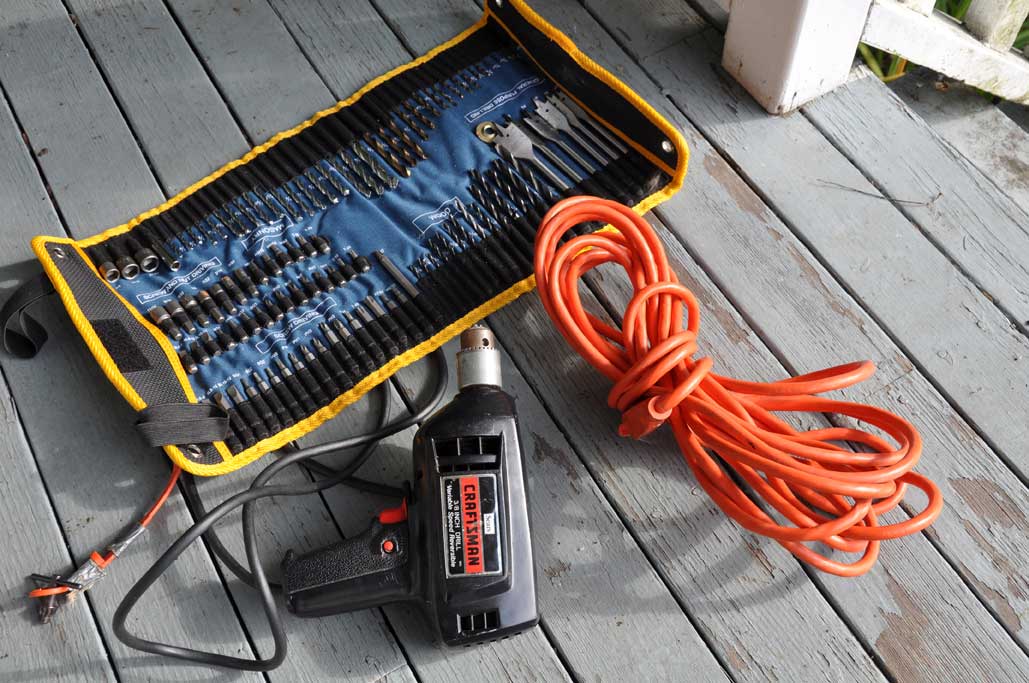
The kit came with the two masonry bits for drilling the holes. The smaller bit was for drilling the pilot hole. The larger bit was for enlarging the hole to accommodate the expanding bolt. The key to making the holes is a good solid drill. Don't try it with any wimpy cordless drills, it won't have enough torque. Even though our Sears 3/8" reversible drill was 20 years old, it was still up to the task. Note that drilling through cement is difficult and care must be taken to not burn out the motor.
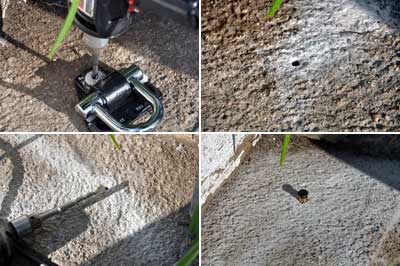
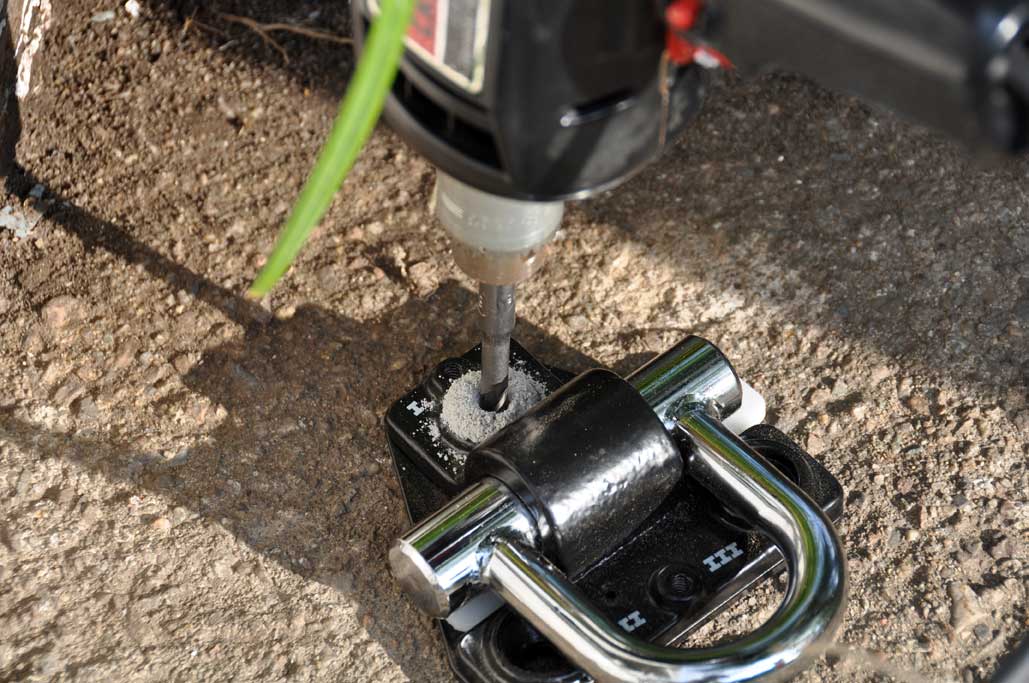
Using the holes in the anchor as a guide, we made three holes in the concrete slab. The drilling was a lot more difficult than we had thought. It took us about 15 minutes to drill the three holes. The drill got fairly hot, as did the drill bit, but they got the job done. Once the bolts are in, tightening the black screw will expand the bolt and lock them in the cement.
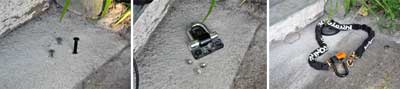
The anchor puts the Vespa further away from the stairs, making it much easier to chain up the scooter. Looping the chain through the anchor is also easier than getting it around the handrail post.
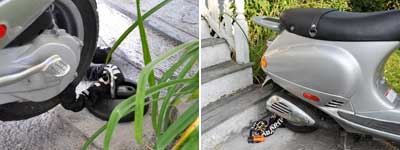
Everyone knows that Kryptonite locks are great for protecting two-wheeled vehicles. It makes sense that they would also have a great product for anchoring them as well. The Stronghold achor is not going anywhere once installed, so be sure it is in a good spot. For readers looking for a low profile option to secure their bikes or Vespa, the Kryptonite Stronghold anchor is a great solution. [Permalink] - Kryptonite Anchor Installation
|
|
|
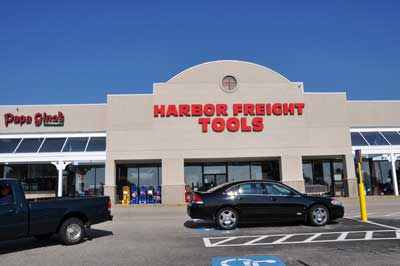
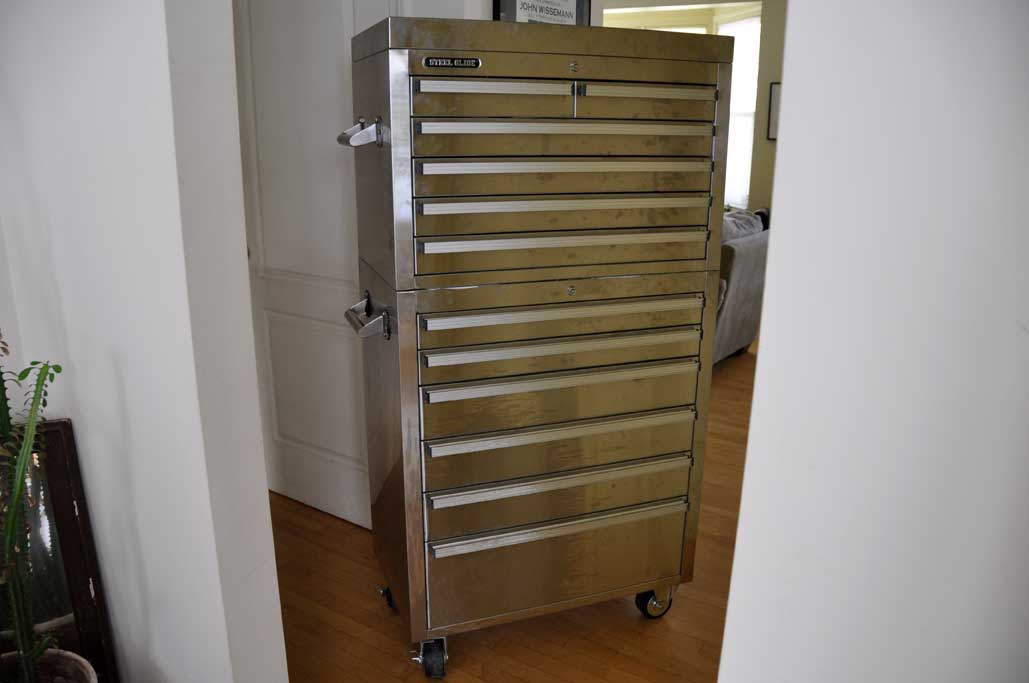
You gotta love Craigslist. We drove for an hour South to Attleboro yesterday to Harbor Freight Tools to check out a tool cabinet. Unfortunately, it did not work out. Today, we drove an hour and a half up North and found exactly what we were looking for and at almost 80% off! Getting it back to the office was an adventure, but that is a story for another time.

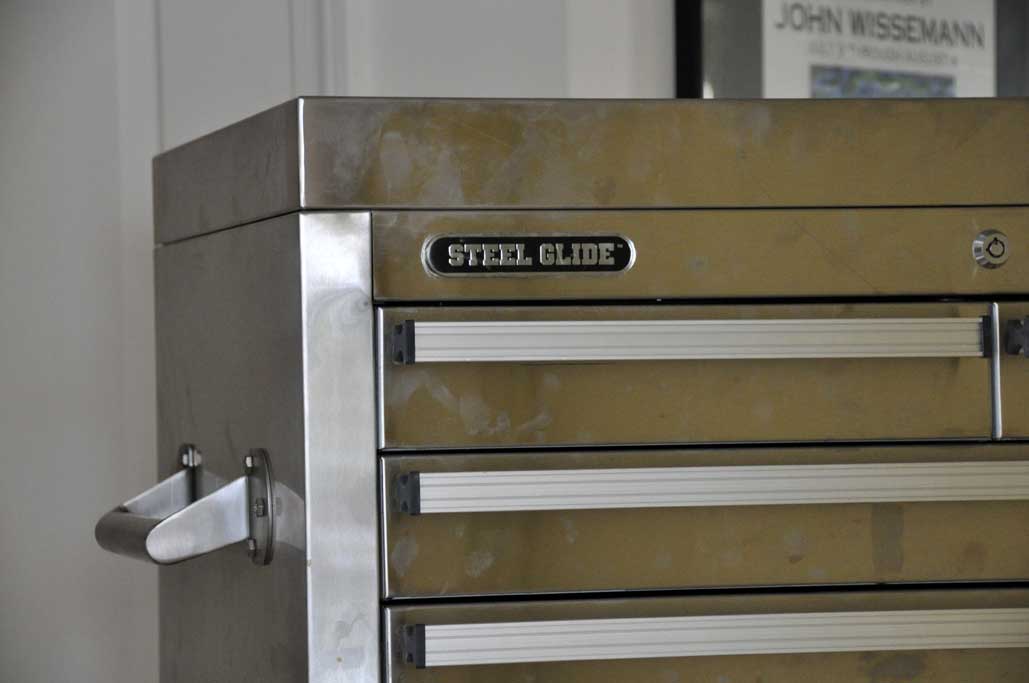
This Steel Glide tool cabinet was purchased new by the seller at Sam's Club. The seller had purchased it, put some tools in it, and never opened it again. He was doing some clean up and realized that he would rather have the room and the extra cash. We saw his ad on Saturday and had the deal completed by Sunday.
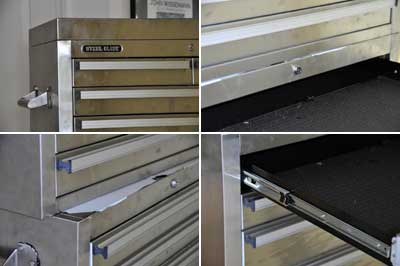
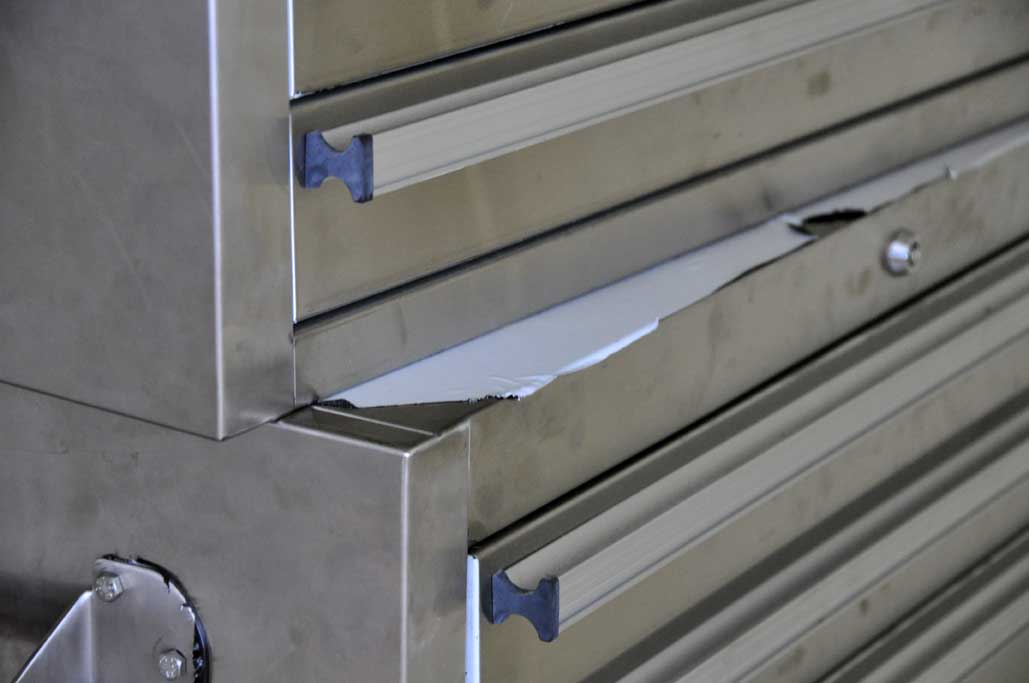
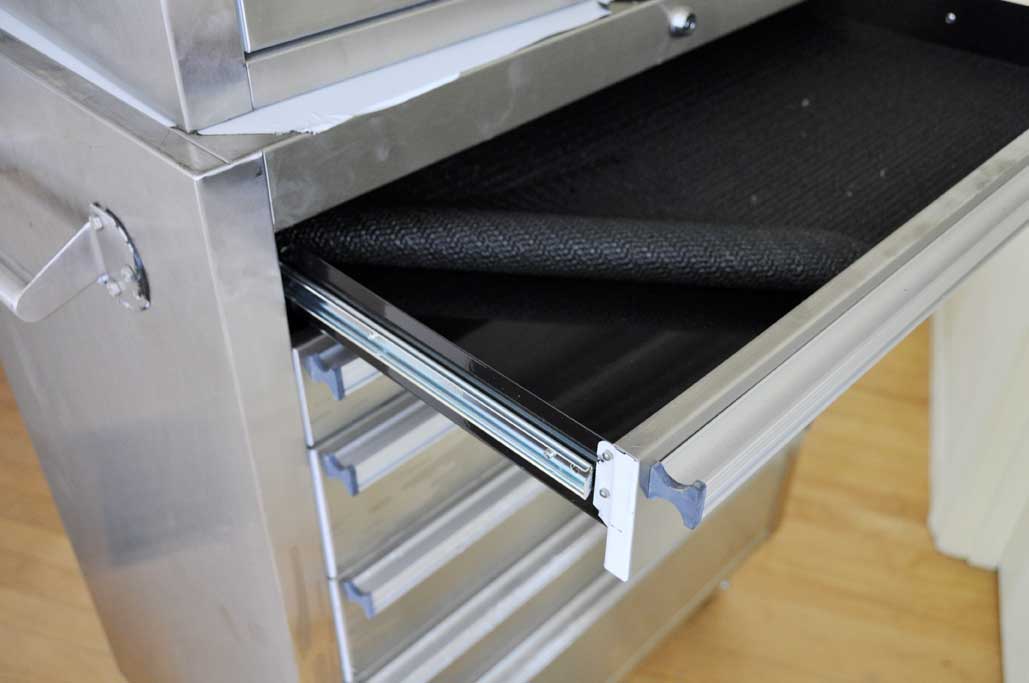
We were not disappointed. The unit was so new that most of the protective plastic wraps were still on unexposed surfaces. The materials used were heavy guage stainless steel. The glides were the extensible kinds which can support the drawers even when fully extended.
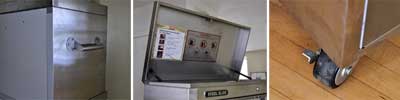
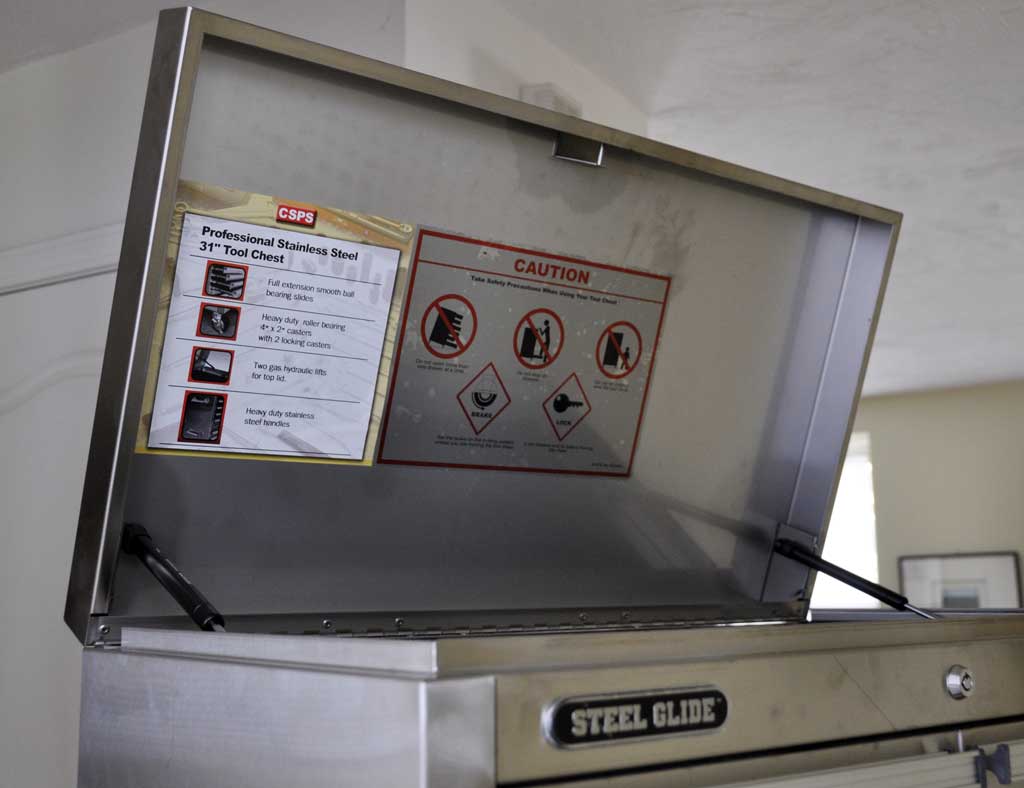
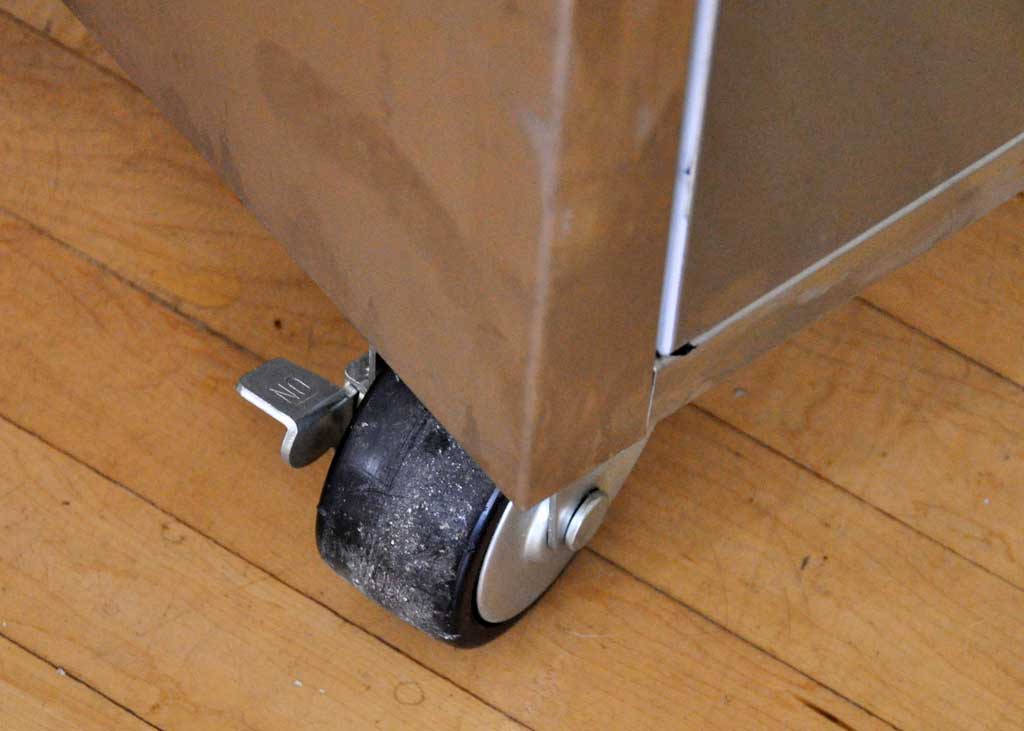
This twelve drawer unit came in two separate pieces. There are heavy-duty handles on the side, a gas-shock hinged lid on top, and locking casters on the bottom.
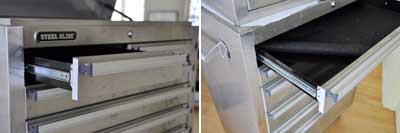
All of the drawers have non-slip tool liners and both units are lockable. This toolchest is a welcomed addition to our workshop. We'll need to do some reorganization before we can find a spot for it. [Permalink] - Steel Glide Tool Cabinet
|
|
|
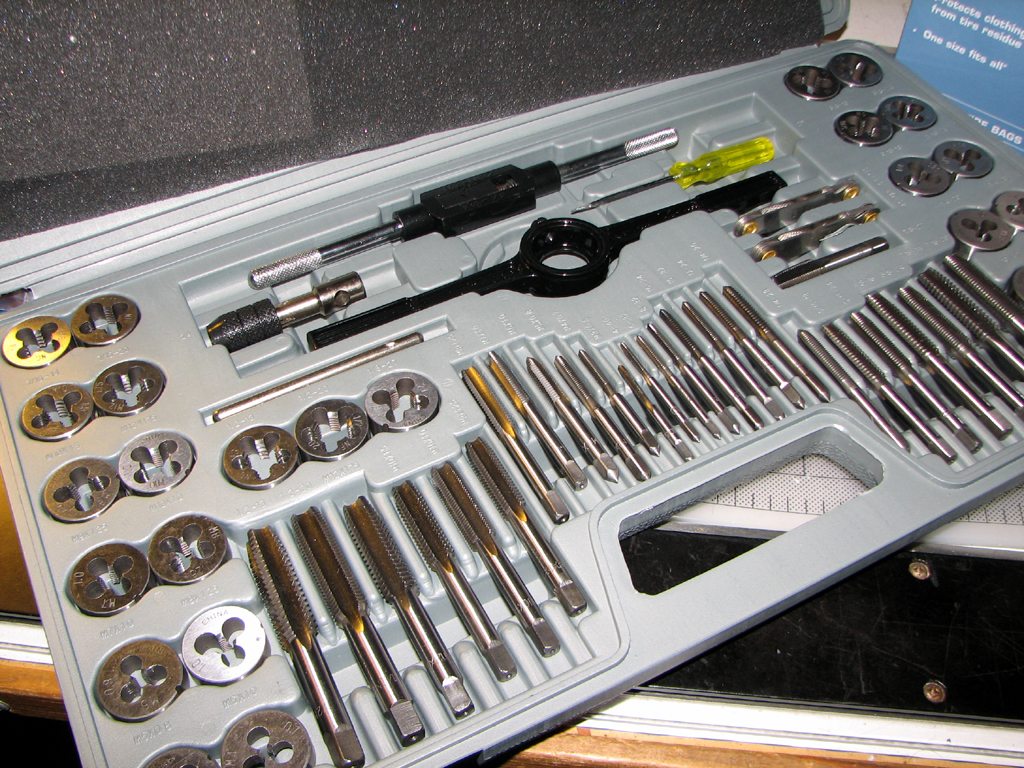
We have purchased many tools (jack, tap&die, caliper) from the folks at Harbor Freight, but all of the transactions were from their website. When we learned they have a store in Attleboro MA, we knew we would have to take a drive and check it out. Attleboro is about an hour outside of Boston, so we needed a good reason to make the drive.
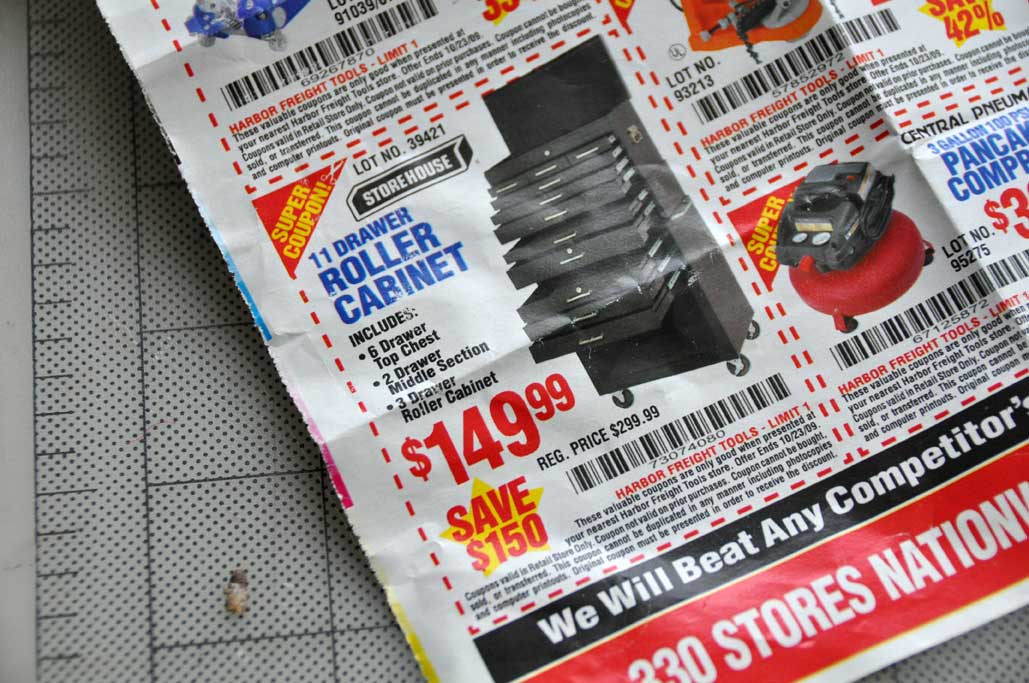
Harbor Freight sends out a lot of fliers and we always see stuff which we "need" for the office. One of the items is this 3-piece rolling tool cabinet. We have been tempted to buy it for a while now. We had purchased one on Craigslist about two years ago, but we can use another one for all of the small precision tools.
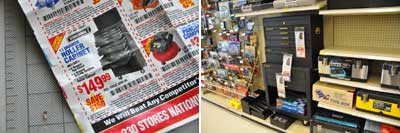
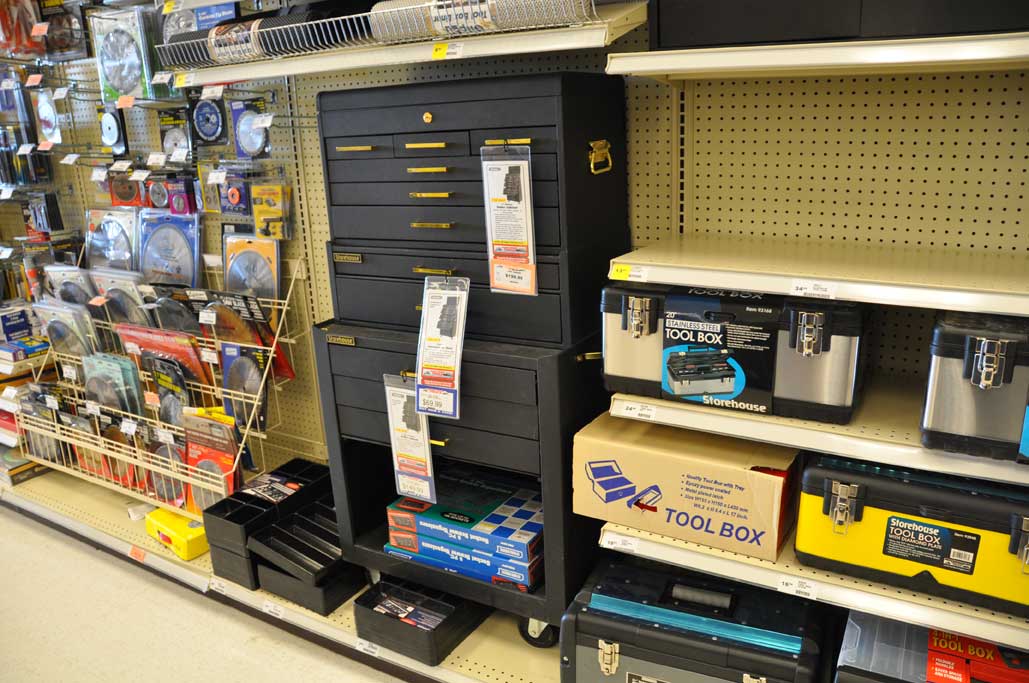
When we saw this ad for a 50% off sale (available only at stores), we knew this was our perfect excuse to go for a drive and take a first hand look at the unit. It was a good thing we did. As soon as we pulled out a drawer, we knew this unit did not have the kind of quality we wanted. We decided we may have to pay more if we really wanted a high quality 11- drawer cabinet. The trip was a not a total loss, we did look around.

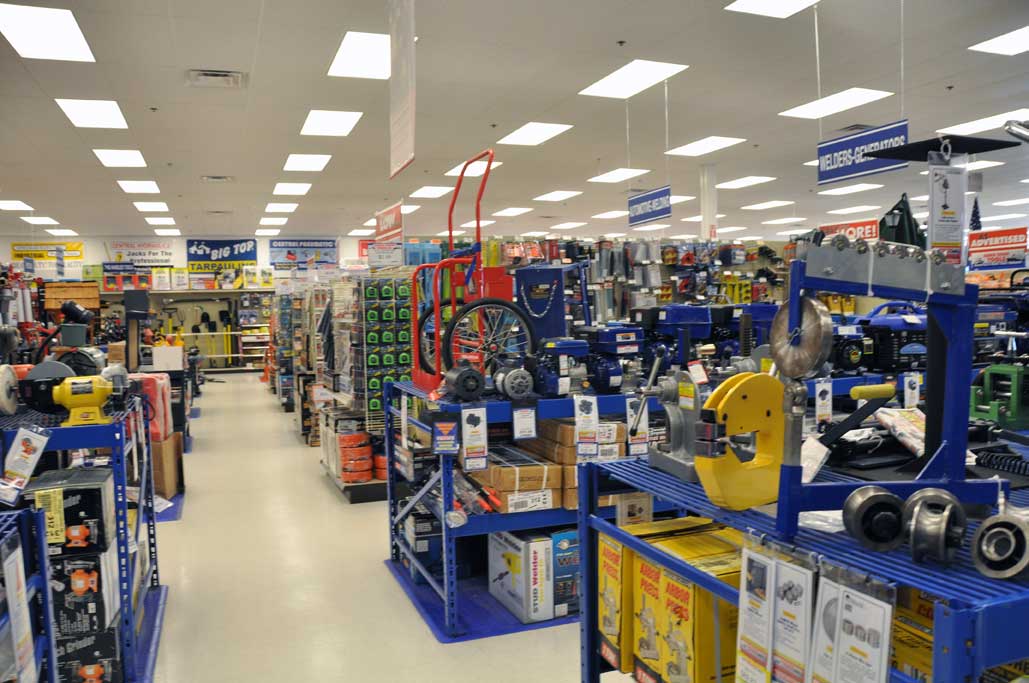
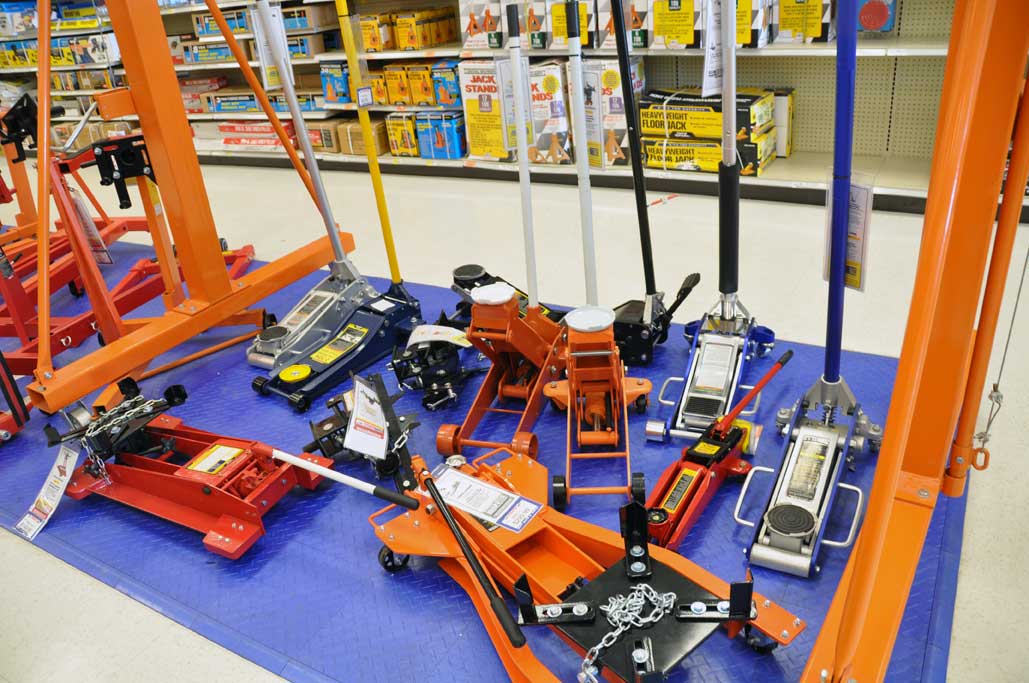
The store was just like their ads, chocked full of all kinds of cool tools. They certainly had a nice collection of hydralic car jacks. The one we had purchased a few years back was the one in the upper left. We also found a wrench for our "monster truck" project.
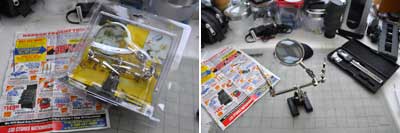
We came upon something we have always wanted. It was this "3rd-hand" tool and it only cost us $4.00! While it was a long way to go for such a little item, at least we did not leave empty-handed :-) If you are looking for industrial tools, you can find it at Harbor Freight. Just be aware that some of the "really good" deal may be of questionable quality. Still, we would go back in a heartbeat just to walk around. [Permalink] - Harbor Freight Tools
|
|
|
Just wanted to remind folks that this Sunday is the HUGE (some say the largest) Italian Car celebration in the Northeast. Join the RainyDayGarage guys and droll over 250+ exotic Italian cars and motorcycles at the annual Tutto Italiano lawn event at the Larz Anderson Auto Museum in Brookline MA. See the New Ferrari California Spider and a host of other rare Italian exotics. Again this year, the LAAM will be drawing the winning ticket for a new Ducati 1198 motorcycle!
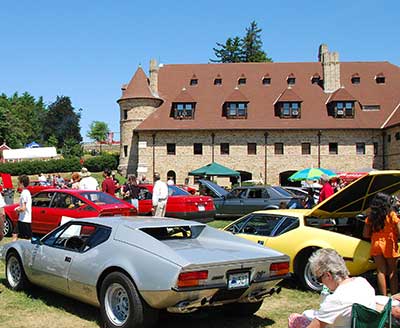
Show car registration is only $35.00. Motorcycles $10. Spectator admission is $10.00 for adults, $5.00 for seniors, students and children 6-12. Under 6 are free. There are plenty of free street parking near the Larz Anderson Auto Museum. VIP parking inside the museum grounds is just $5 (RainyDayTip...use the VIP parking). [Permalink] - LAAM Tutto Italiano Celebraion
|
|
|
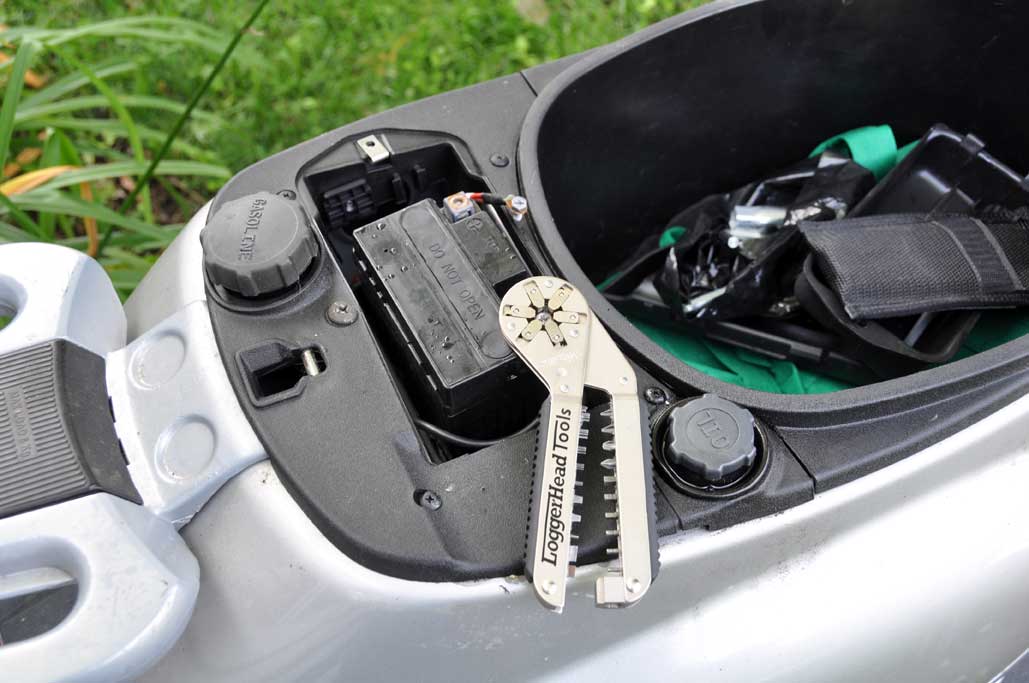
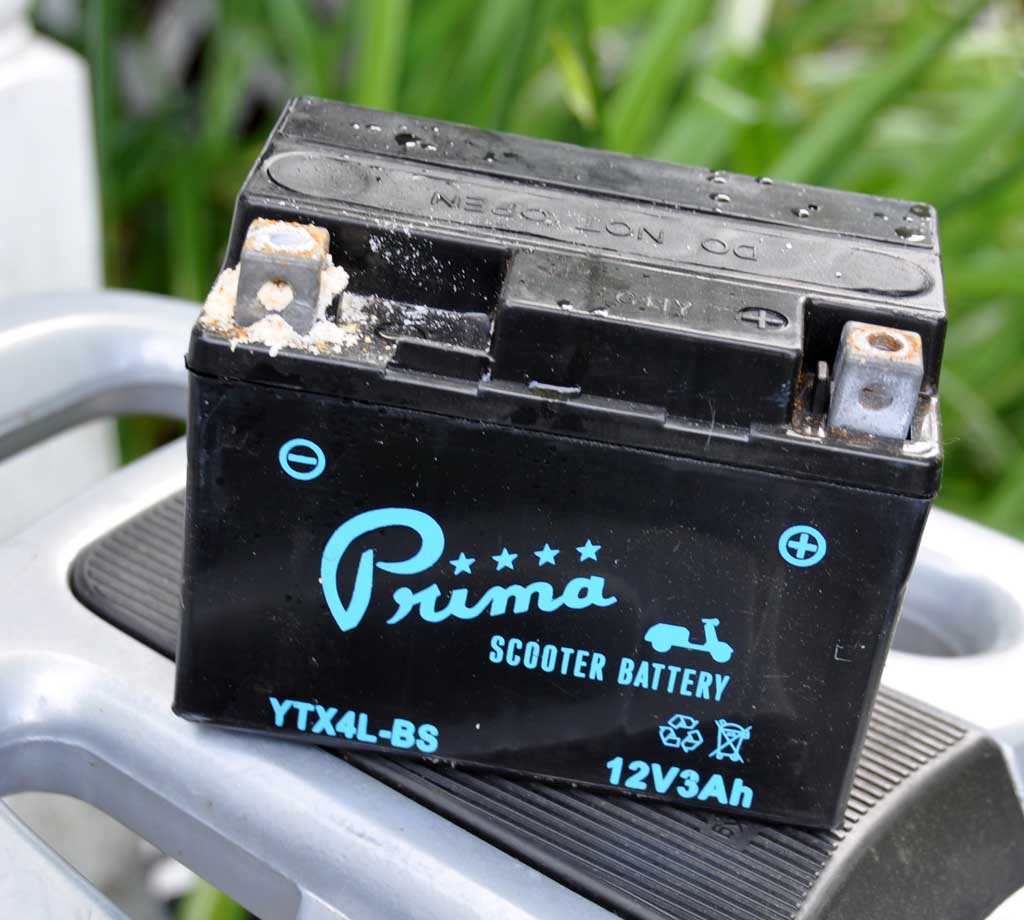
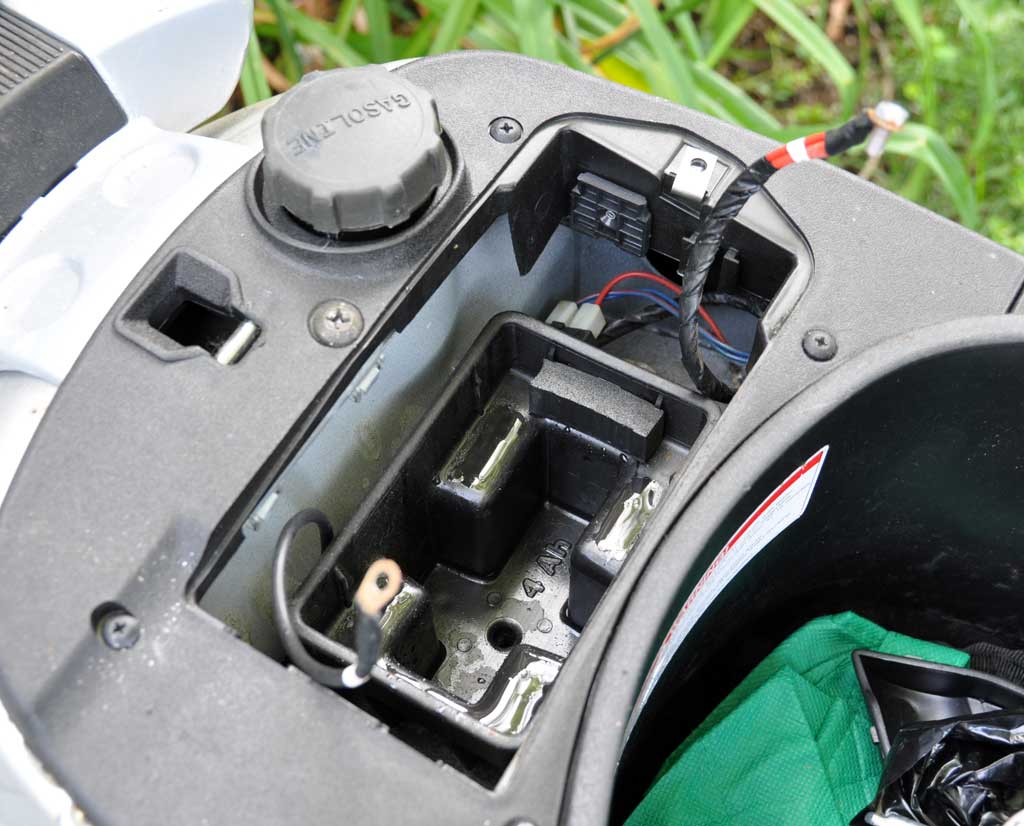
Our Vespa has been chained up for most of the Spring and some of the Summer due to the (rainy) weather. We tried to ride it as often as we could, but neither June nor July was good for riding. There was a break from the rain this past Saturday, but when we tried to start it up, the battery died before we could get the scooter going.

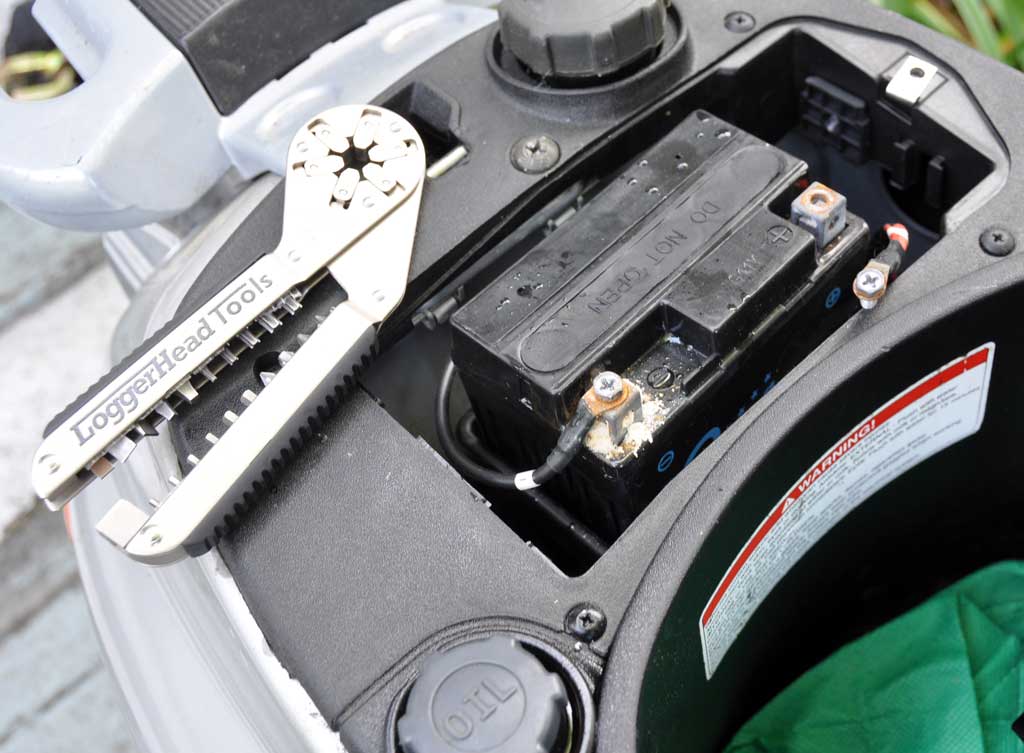
The battery compartment is located under a cover beneath the seat. When we opened the cover we found some moisture and a fairly corroded battery terminal, neither of which was unexpected, and both of which were clearly the cause of our electrical problem.
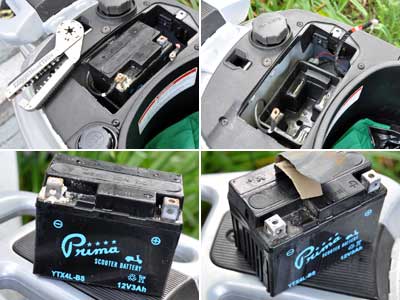
The terminal screw was fused and we were starting to ruin the head with the Phillips screw driver. Remembering that we had a small Loggerhead Tool, we decided to give that a go. We had to struggle a bit, but in the end we were successful in loosening the screw without ruining it. The Loggerhead Tool is now part of the Vespa kit.
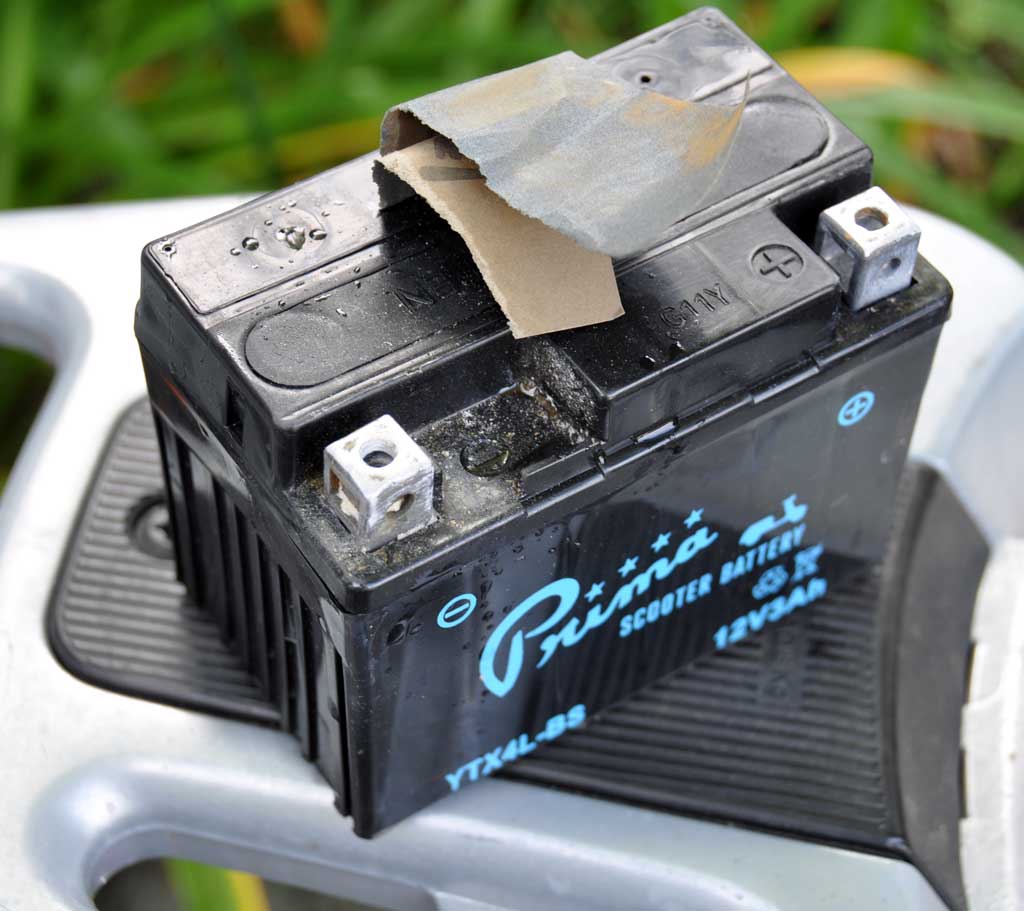
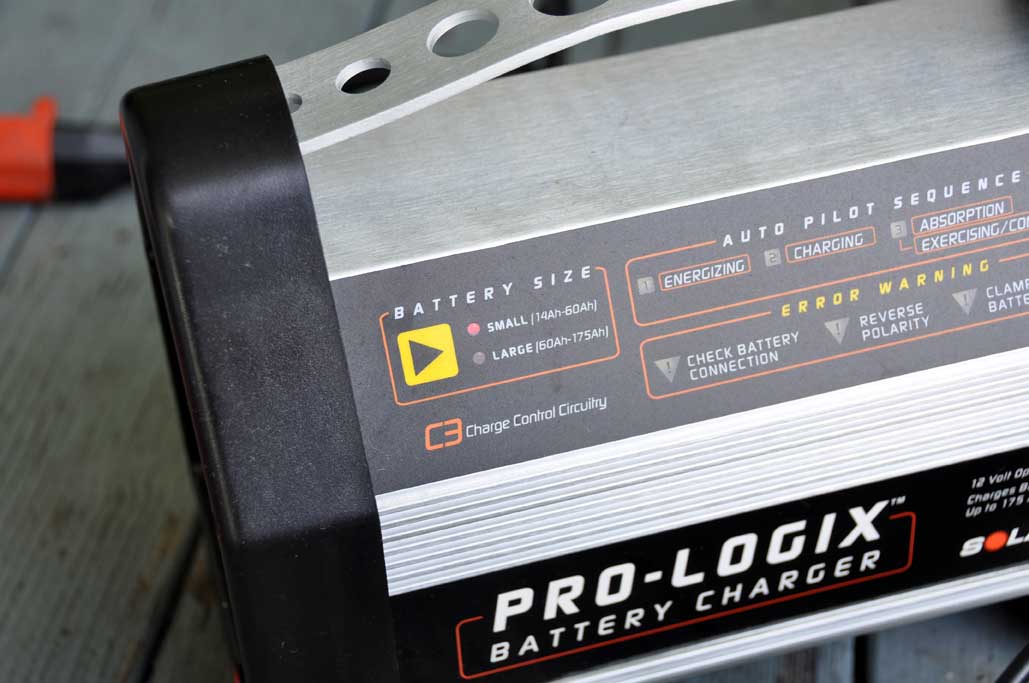
Cleaning terminal heads and contacts are fairly easy tasks. The best way is to use a wire brush or sandpaper. The key point is to make sure to clean down to some bare metal so that good contact can be made. Getting the battery charged up was equally easy, as we have the Pro-Logix Battery Conditioner from Clore Automotive. We have used this device on the battery of our 20 year old Pathfinder with great results.
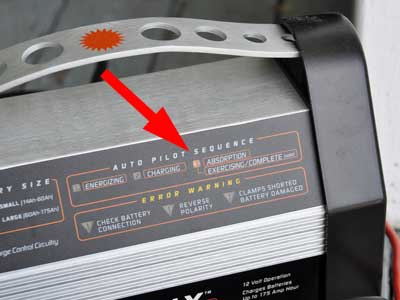
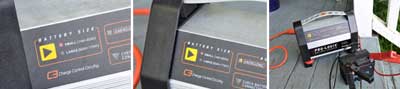
With the Pro-Logix charger, the unit will optimize its charging parameters automatically. All we had to do was set the size, hit start, and wait for the "Charge Complete" light to go on. It took about 5 minutes for the cycle to finish for our Vespa battery. We hooked it up and the Vespa came to life. It was a perfect day to scoot on down to the Roslindale Farmers Market for some fresh produce. [Permalink] - Vespa Battery Maintenance
|
|
|
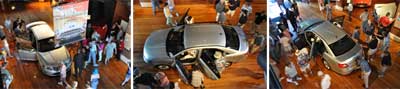
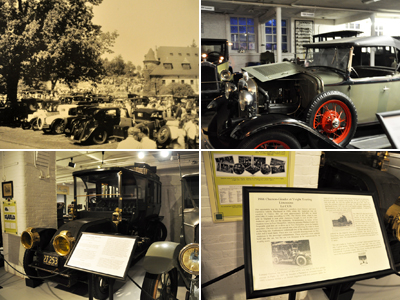
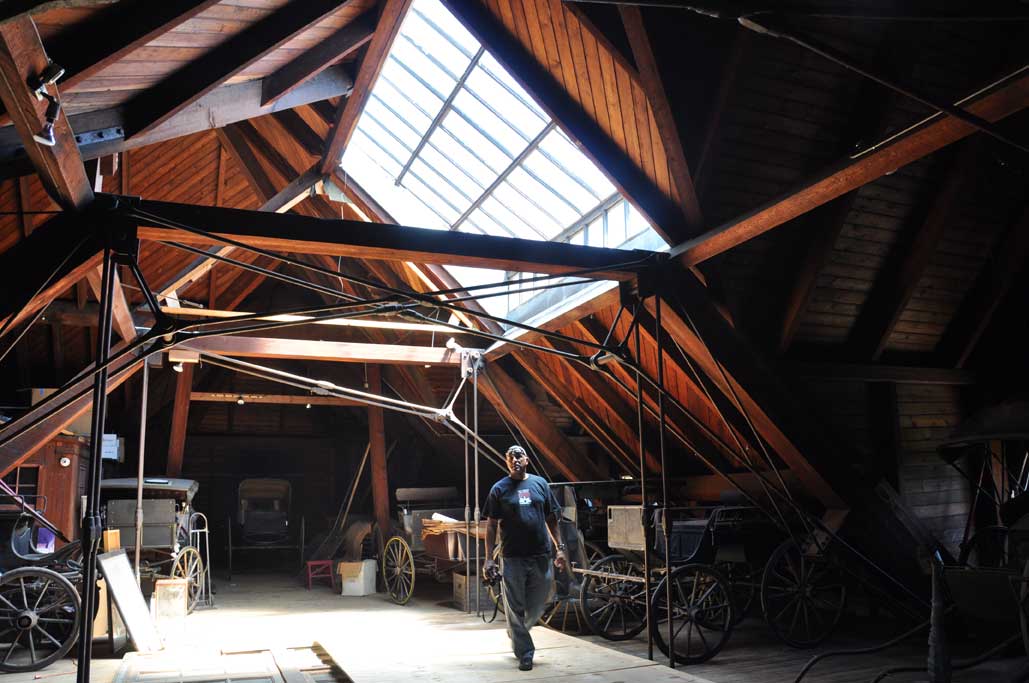
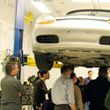
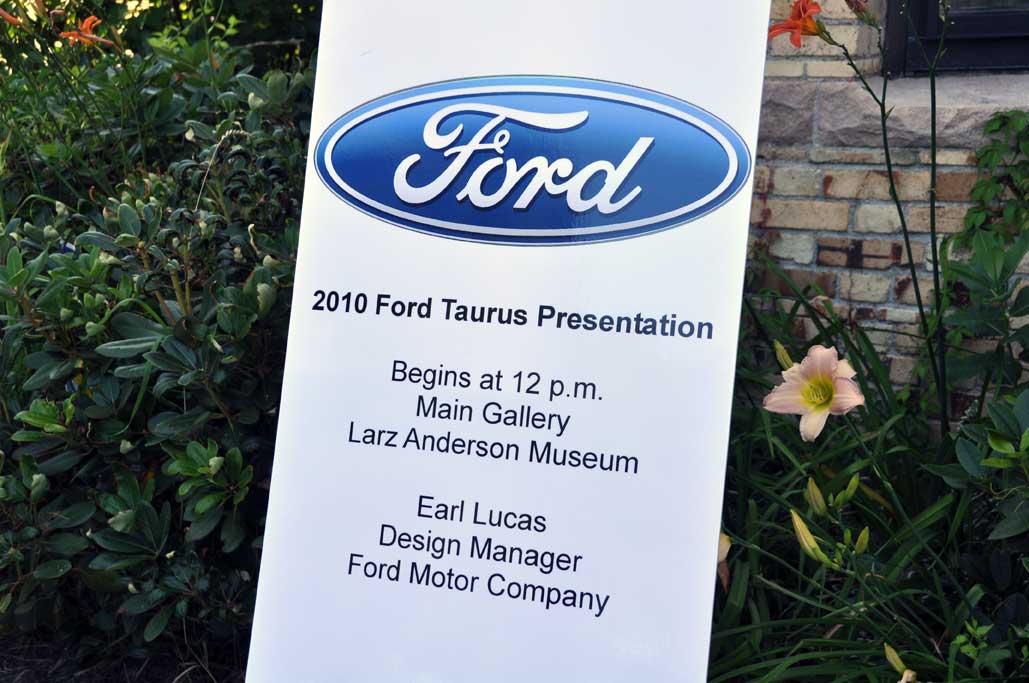
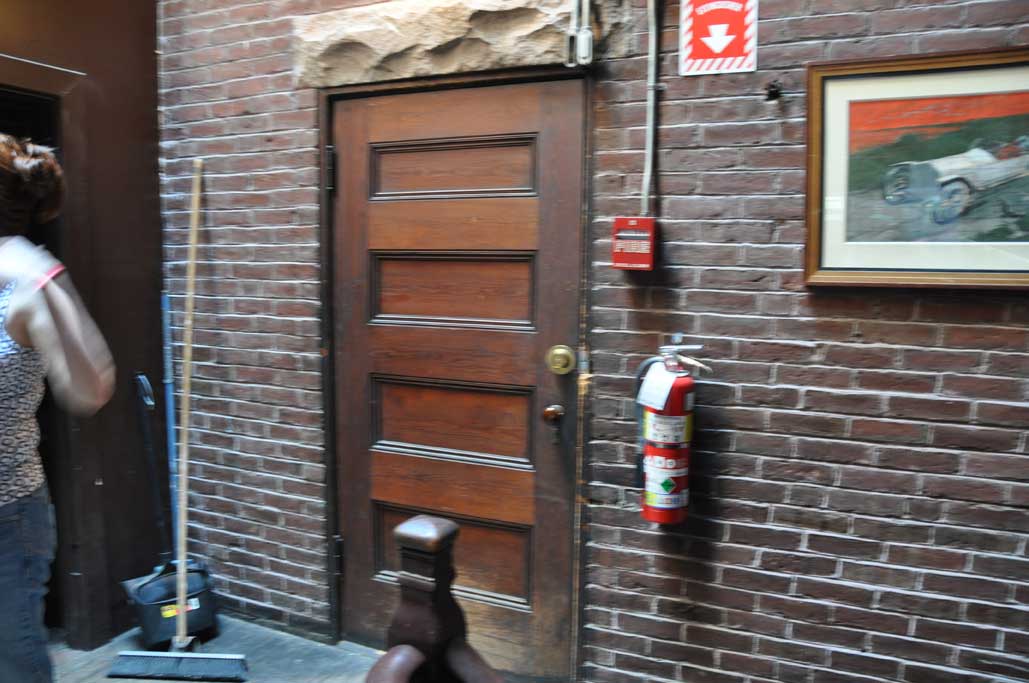
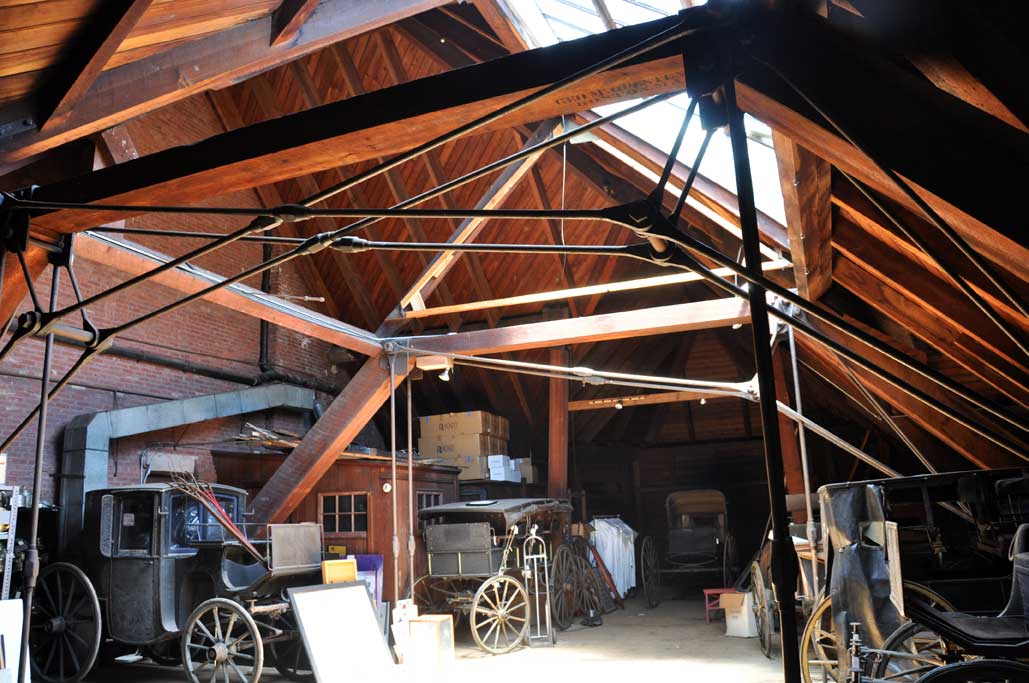
Last Sunday we were at the Larz Anderson Auto Museum for the Ford Taurus event. When we went upstairs to get a few shots of the crowd from above, Sheldon Steele, Education and Lecture Manager of the museum, asked if we wanted to something "really cool." He didn't have to ask twice!

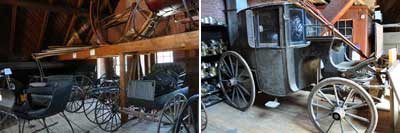
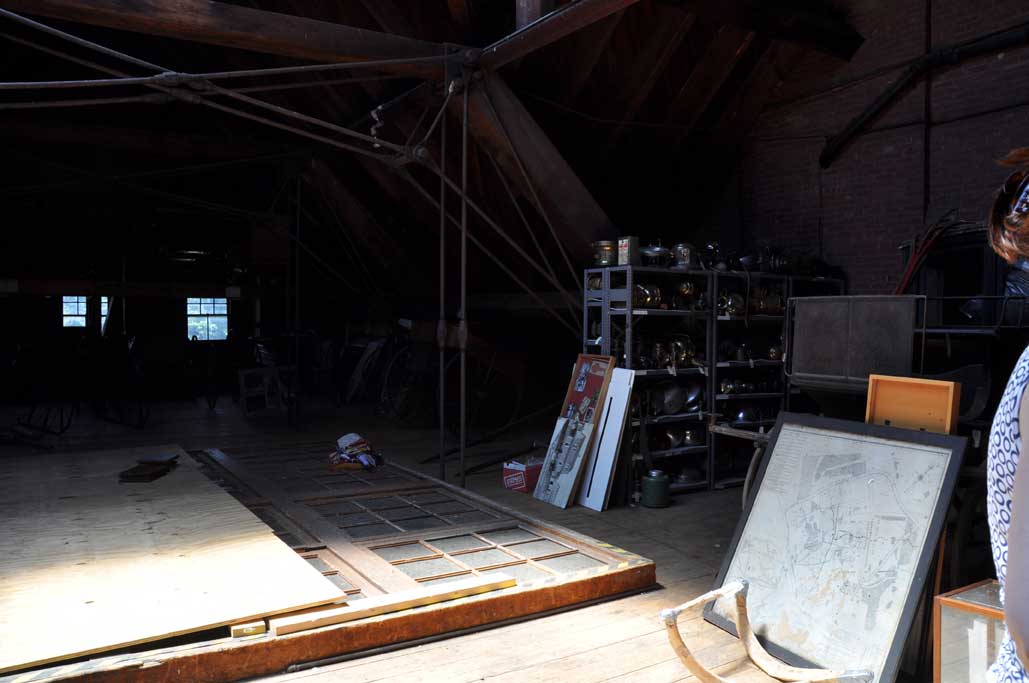
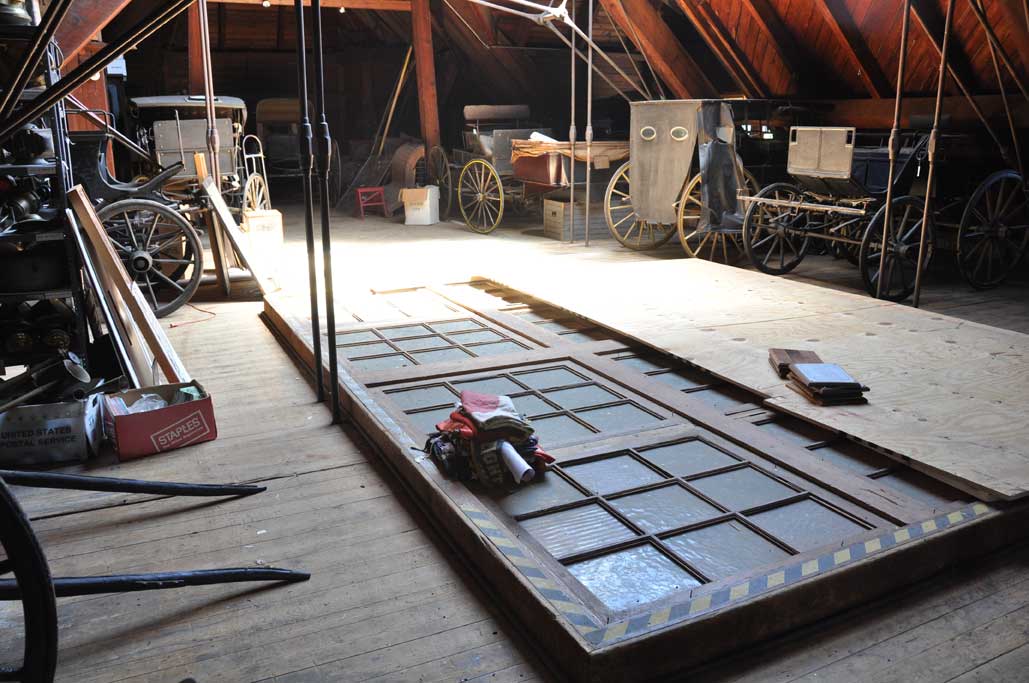
Sheldon led us to a non-descrip door at the top of the stairs. The door opened into a sun-drenched attic. It took our eyes a moment to adjust to the brightness. When they did, we were totally blown away. We only had time for a quick walk-through, but what we saw was quite amazing.
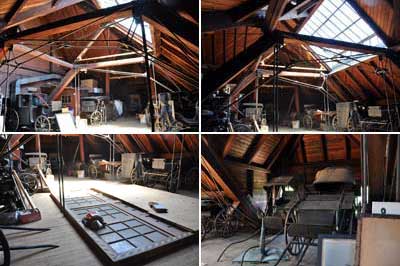
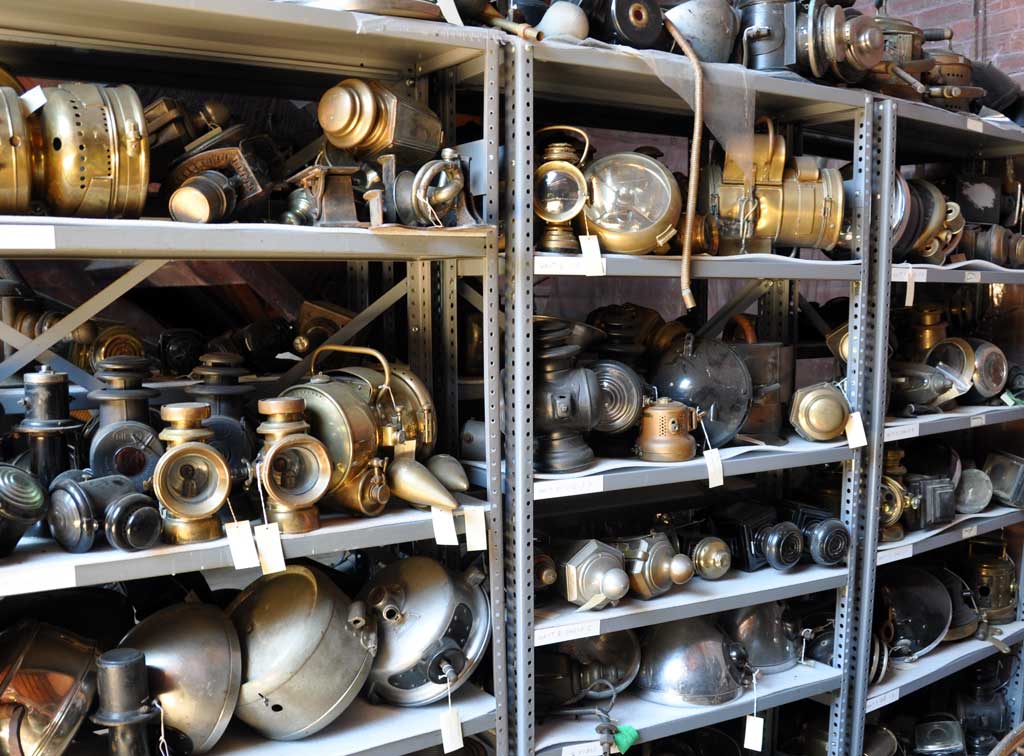
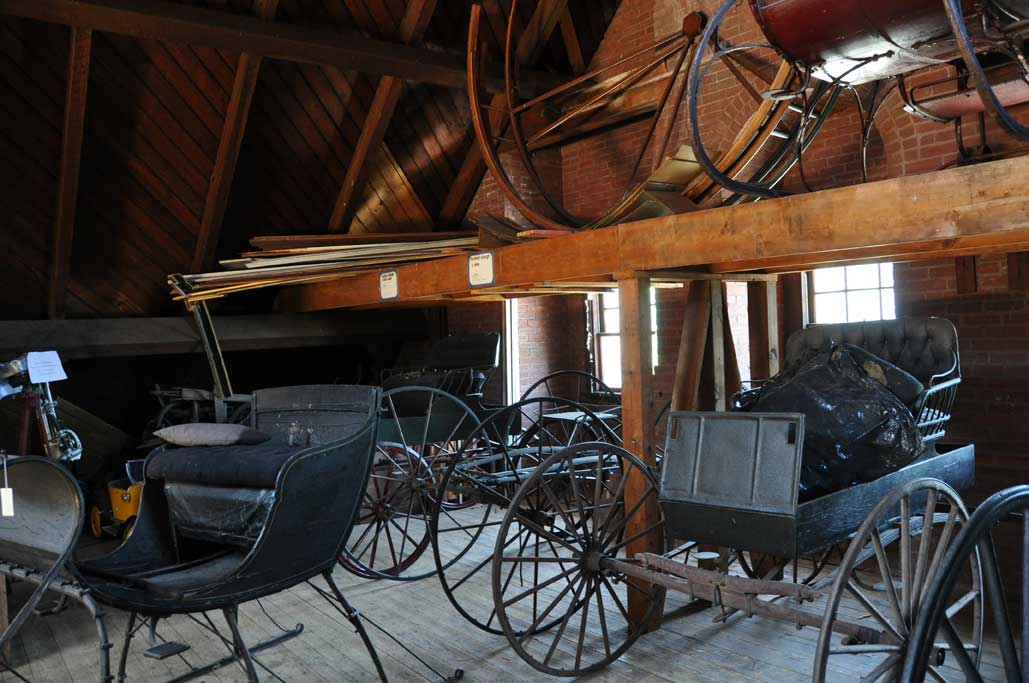
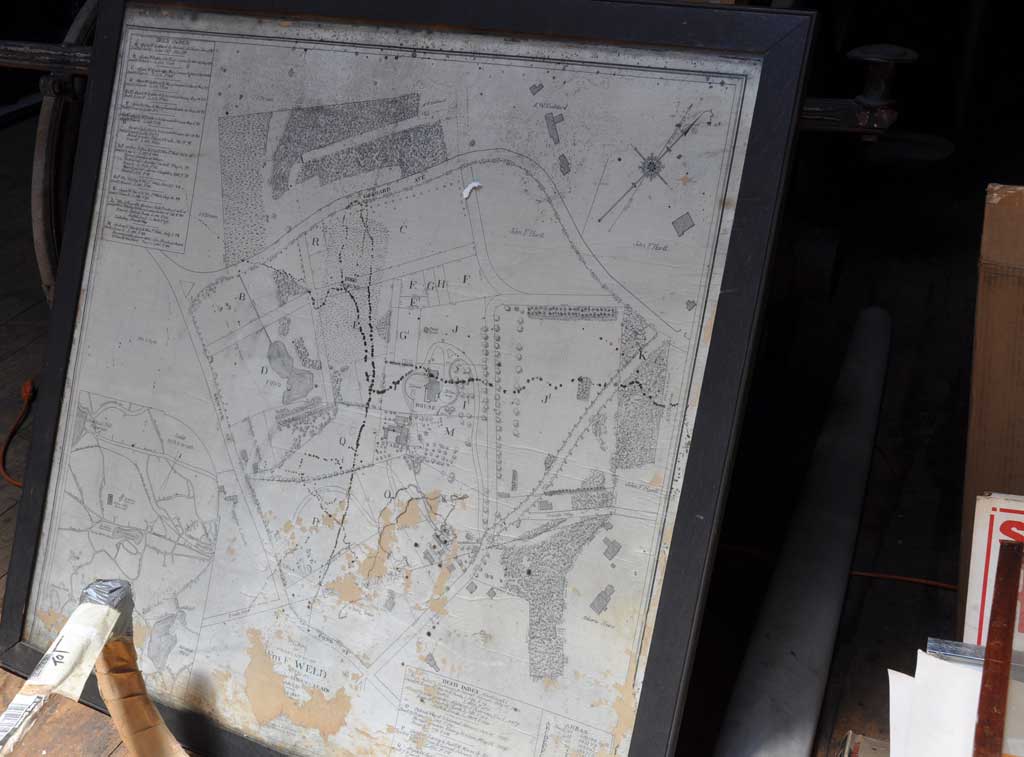
The attic was filled with all kinds of antique cars parts, carriages, and sleds. We now know what it must have felt like when a "treasure hunter" discovers a find! Aside from all of the antique automotive goodies, we also noticed the then state-of-the-art architectural construction (ceiling, floor) of this space. The techniques were amazing, even by today's standards. They definitely don't make 'em like this anymore.
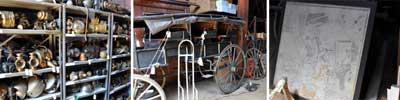
All of the stuff in the attic is in great condition, if a bit dusty. Properly displayed, they would make a great addition to the museum. In order to make these "treasures" available for viewing to the general public, the Larz Anderson Auto Museum could really use our support.
There are many ways to help them out. One is to become a member today. Another is to attend their great lawn events on the weekends. The next lawn event is the Tutto Italiano 2009 on August 2nd. Go and you may also get a chance to win a Ducati SuperBike! Hope to see you there! [Permalink] - LAAM Attic
|
|
The Larz Anderson Auto Museum (the LAAM), known for it’s eighty-year long tradition of Lawn Events featuring rare, collector’s motorcars and motorcycles, is adding some horsepower to its summer fundraising by partnering with Eastern Cycle Ducati on the raffle of a brand new 2009 Ducati 1198, with proceeds going to the LAAM, the world’s oldest auto museum.

The 1198 DUCATI Superbike will be raffled at $25 per ticket or five tickets for $100. August 2nd is the day of the big drawing, at Tutto Italiano, Italian Car and Motorcycle Day at the LAAM. Motorcycle lovers, Museum supporters, and anyone feeling lucky can purchase tickets on line, or by calling 617 522-6547 x 19. Second prize is a Matrix 50cc Scooter -- not as fast, but still stylish; and the very fashionable Ducati Corse Leather Jacket goes to the third prize winner. All proceeds will benefit the LAAM.
Last weekend we were at the Museum for the Great American Car Show. The LAAM is a unique resource for car lovers everywhere. The folks here at the RainyDayGarage are proud to support the museum in any way we can. We urge our readers to do the same. [Permalink] - LAAM Ducati Rafflei
|
|
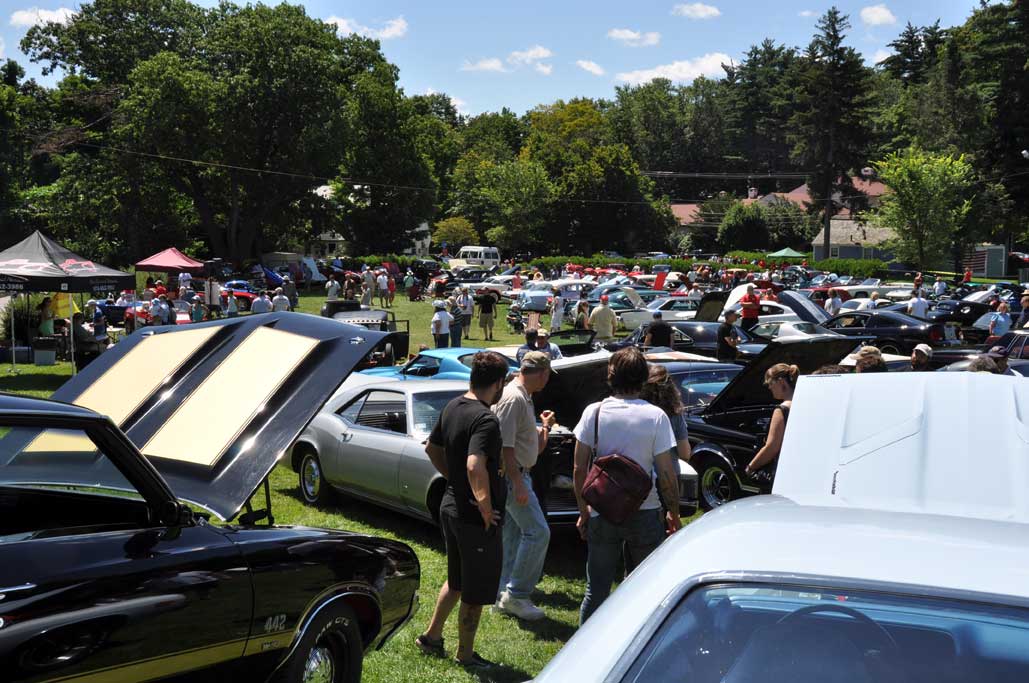
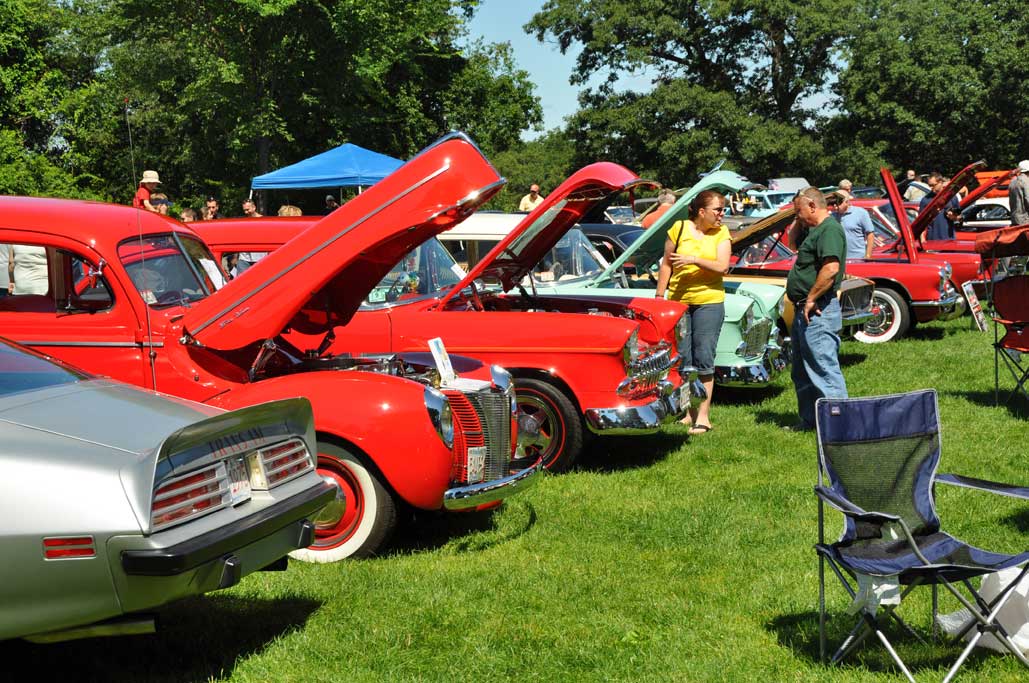
Today was a perfect day for the 1st Annual Great American Car Show at the Larz Anderson Auto Museum. The event was made possible by the FORD MOTOR COMPANY in collaboration with the Greater Boston YMCA. Judging by the turnout, it was an enormous success.
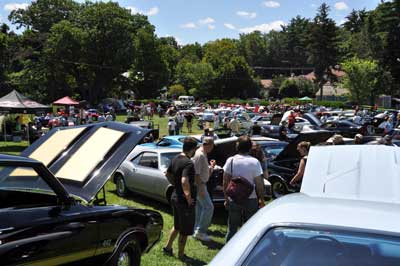
Everything American was welcome to today's event, including Pre-War Classics, Post-War Classics, Muscle Cars, Pony Cars, Modern Exotics, Street Machines, Customs, Hot-Rods, and Motorcycles. A lot of folks brought their "babies" to the event.
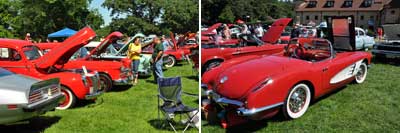
We got there around 10AM and the place was already hopping. It was going to take the better half of the day if we wanted to check out all the cars. We didn't have that much time, so we only looked at the red ones... and there were a lot of them!
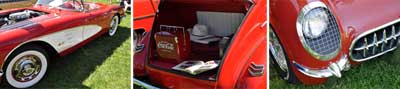
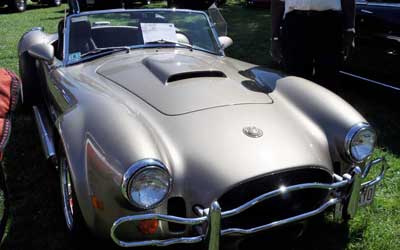
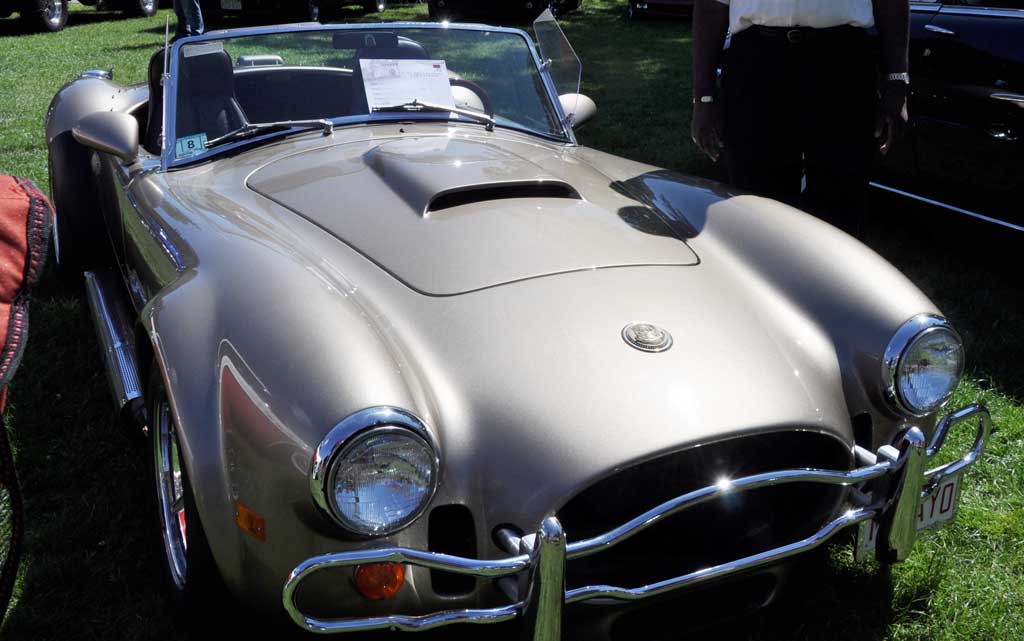
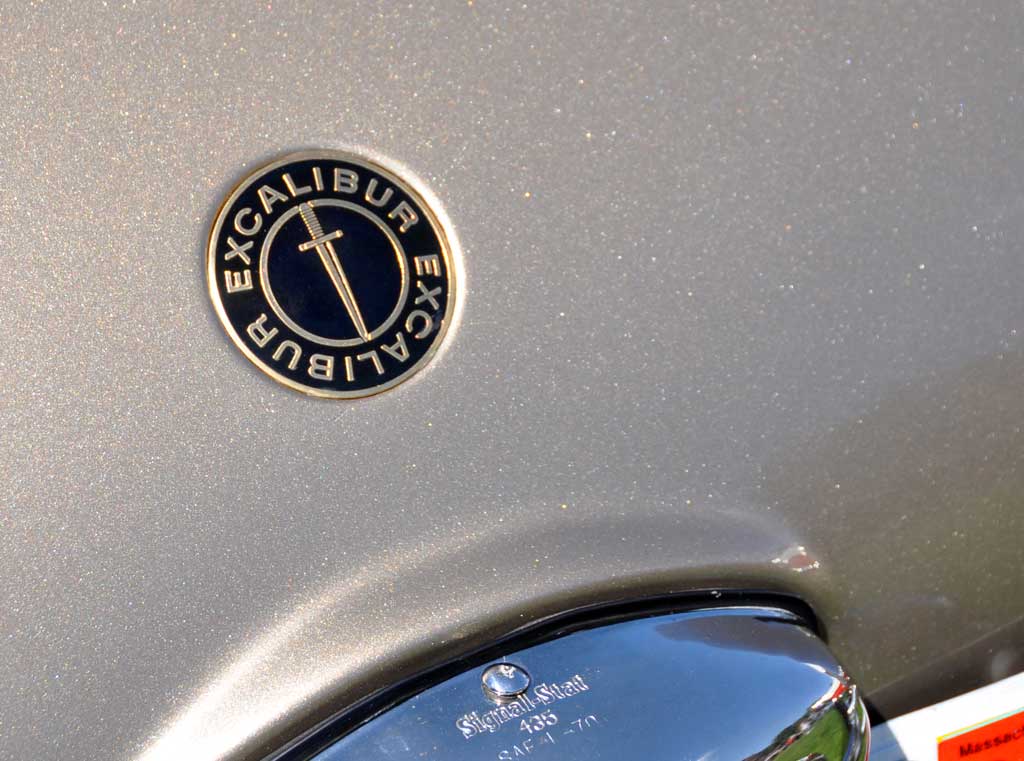
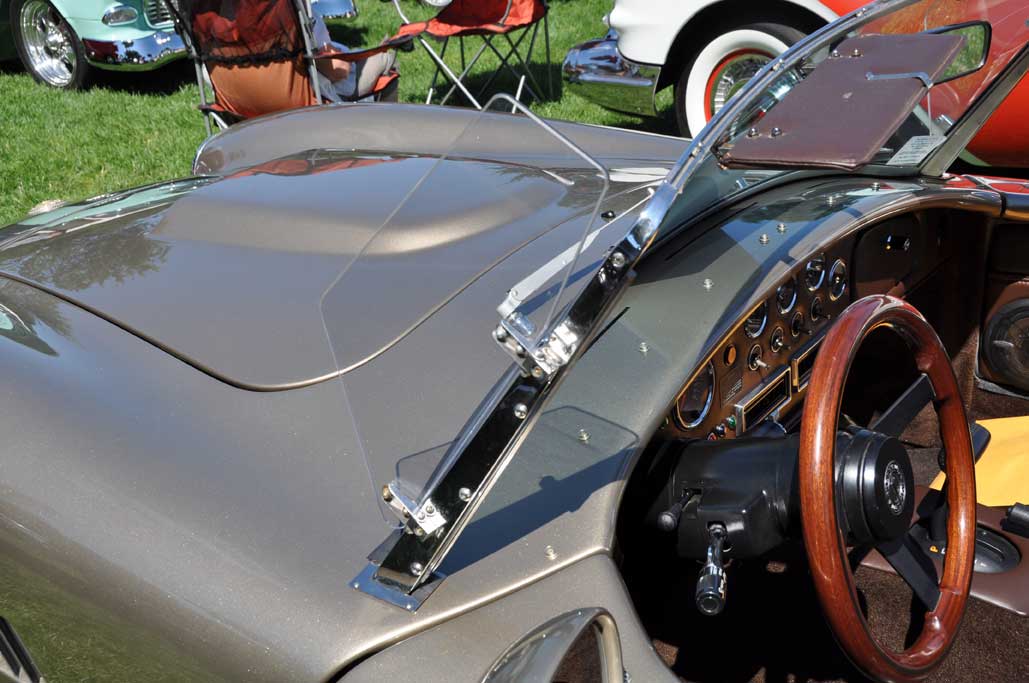
We spent about an hour walking around, but it was this metallic gold Excalibur Cobra that stopped us in our tracks. This car is owned by Anthony Fernandez and is in fantastic condition. The crest is on the hood of the car is actually that of his family's.
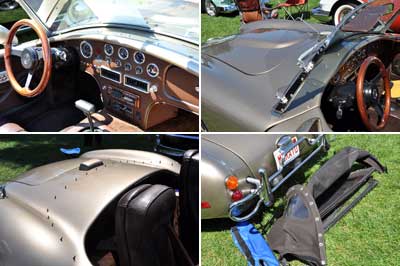
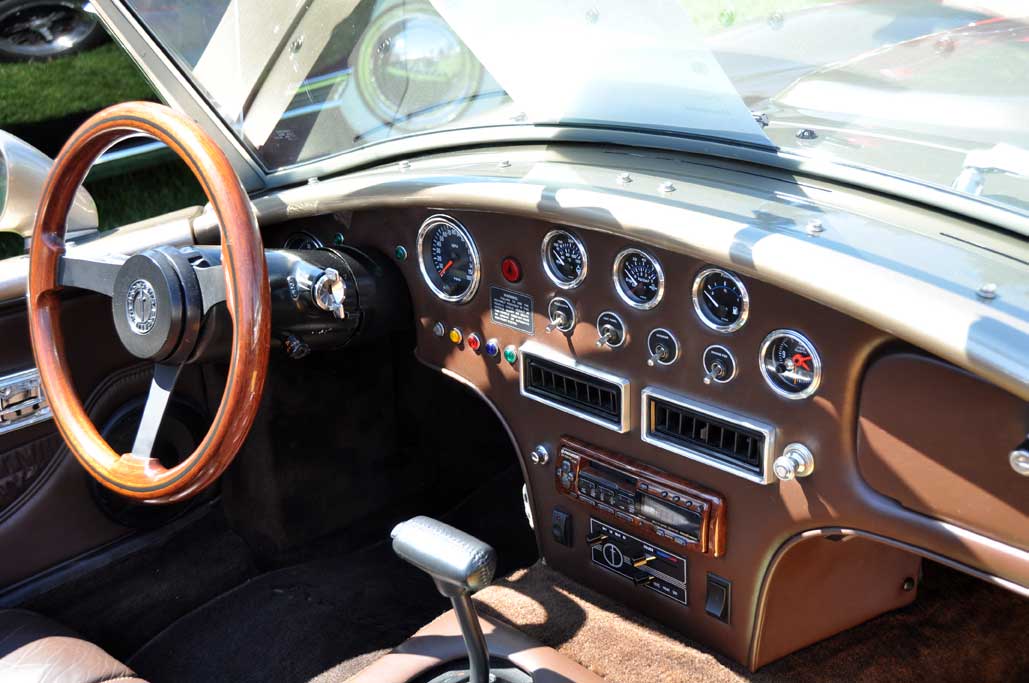
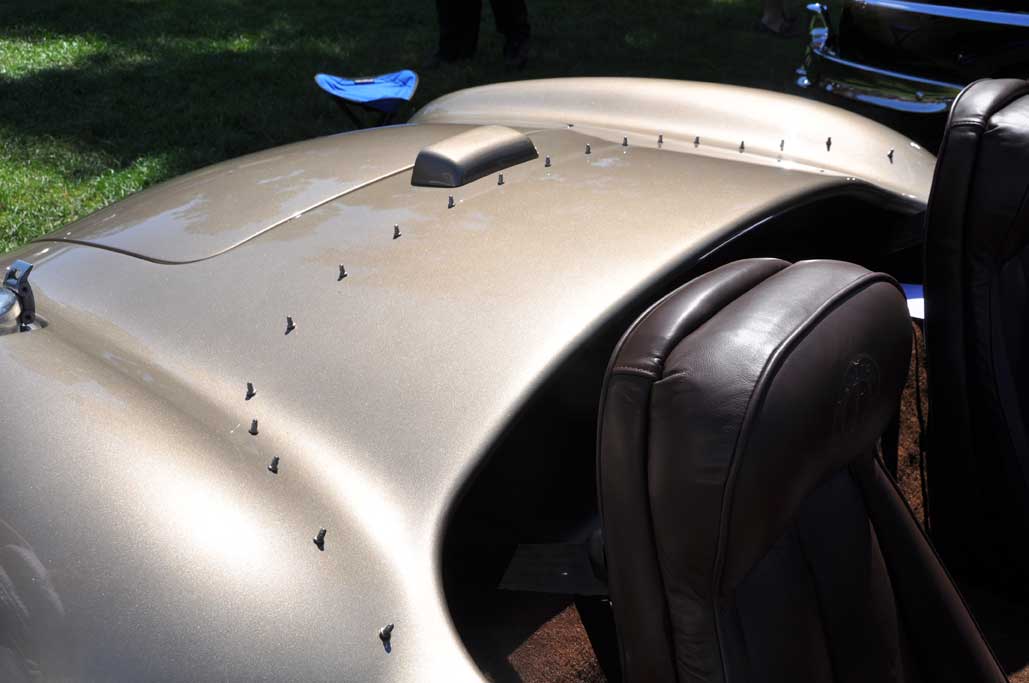
One of the fun things about being at these events is being able to get up close and getting a really good look at the interesting details (side window, dash, convertible top) of the cars.
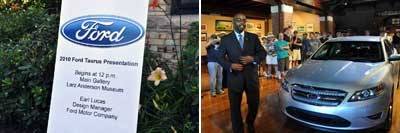
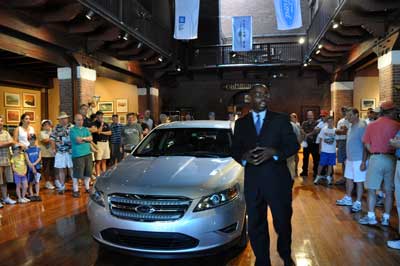
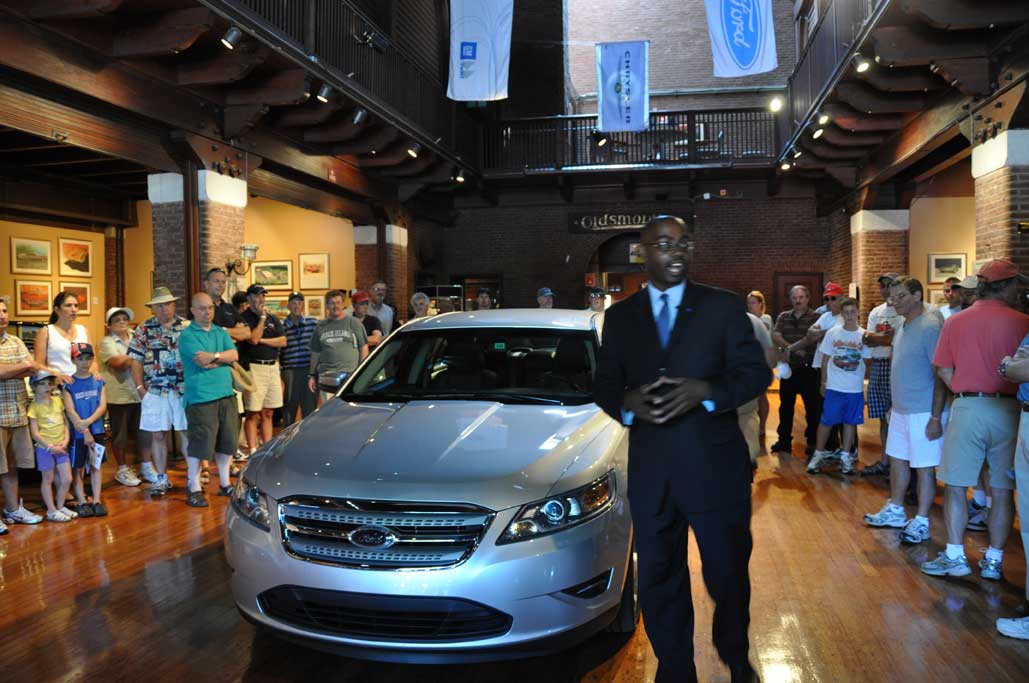
Not all the great American autos were outside on the Museum's lawn. One of them was in the main gallery inside the Museum. The car is a Ford Taurus. Yes, we said a Taurus.
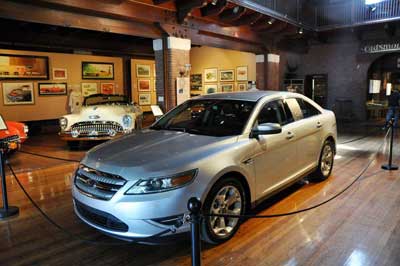
Ford made available one of its redesigned 2010 Taurus models for the event. Ford also sent the head of the design team, Earl Lucus, to personally talk to the crowd about the redesigned Taurus. It was an awesome PR move as they could not have found a more receptive audience. The talk was a huge crowd pleaser.
The Taurus's image is a dependable family car, not too exciting, but it gets the kids from A to B. Ford wanted to keep that fundamental usability of a family car (carries 4, lots of trunk space, etc...) but asked...why not also give it the styling of a much higher-end luxury/sports sedan?
While they were at it, they also made it feature competitive with technologies found only in cars at twice the price. Features like keyless entry, adaptive cruise control, rear view camera, voice-activated navigation, brake-assisted collision avoidance, etc...
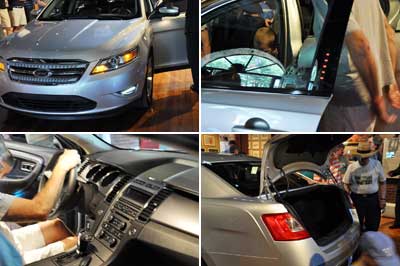
From the outside, the lines gives the vehicle the appearance of a much smaller and lower car. This is a well designed illusion. The car will easily accommodate four adults. Under the hood can fit an engine with up to 365HP. The trunk is huge.
The Taurus model at the event ran just under $30K fully loaded. If we were in the market for a 4-door sedan, this 2010 Taurus would definitely be on our list...in silver, of course.
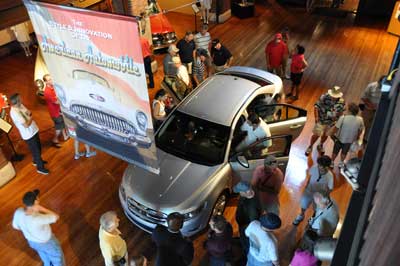
We are not sure how long the 2010 Taurus will be at the LAAM. It may already be gone (we forgot to ask!). However, if you have a chance to take a look at one in person, definitely do. We think you will be impressed. [Permalink] - Great American Car Show
|
|
|
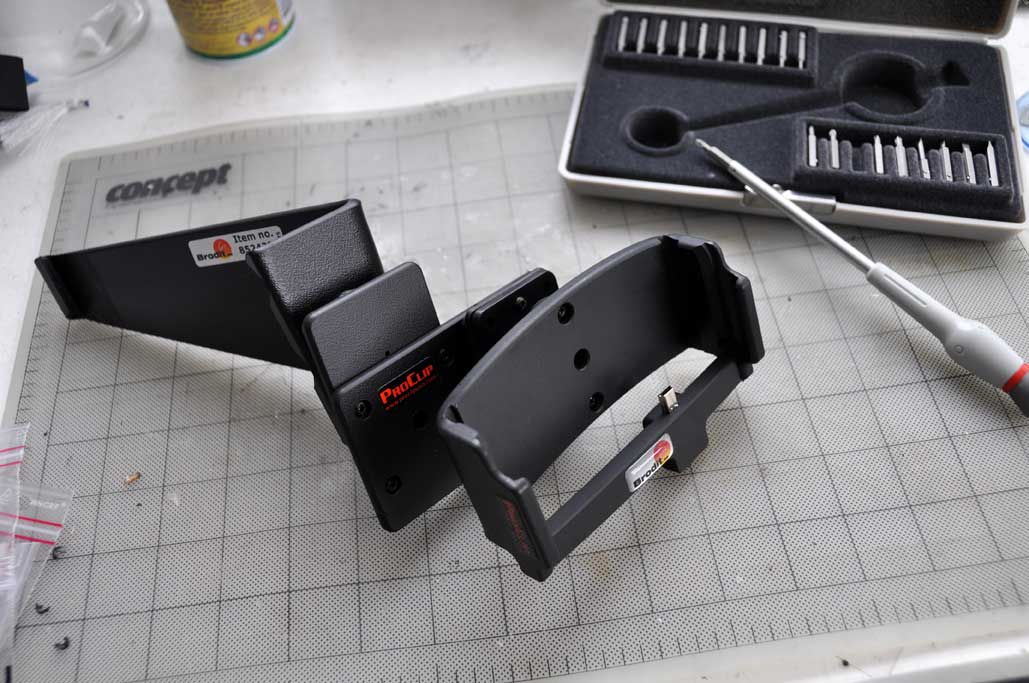
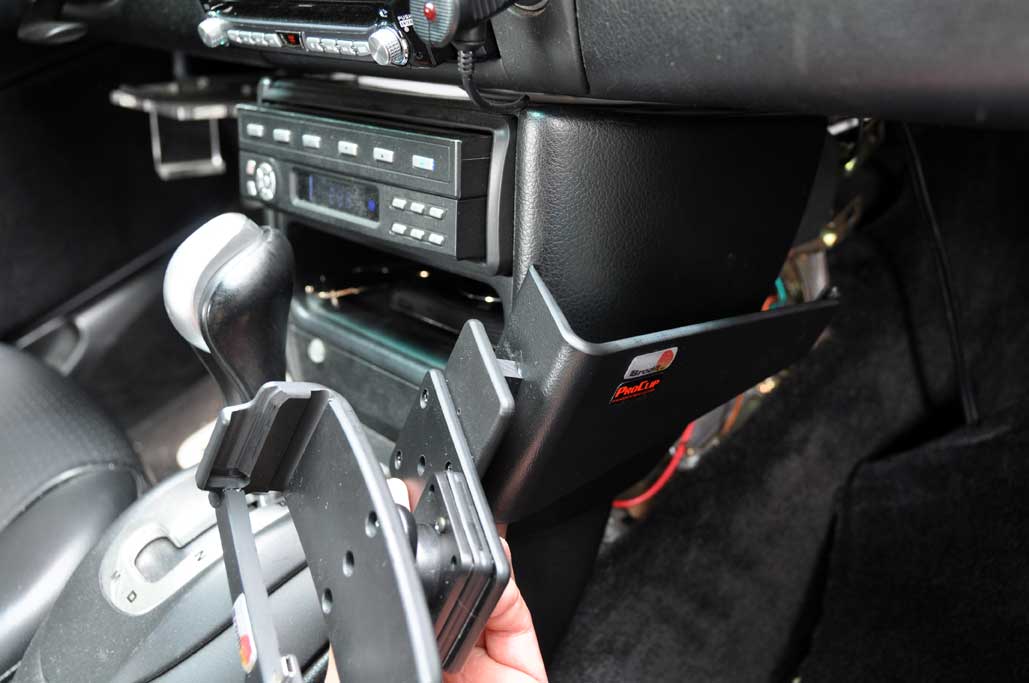
Last Thursday we completed the assembly of the ProClip mount for the Navigon GPS. We took advantage of the nice weather these past few days and completed the installation of the ProClip mount in the Boxster.

The project was a lot quicker than we had expected as no tools were required. All we had to do was to remove a few panels, position the mount, and put everything back into place. We've documented all the steps for completeness, but it was a bit of an overkill for how simple it really was.
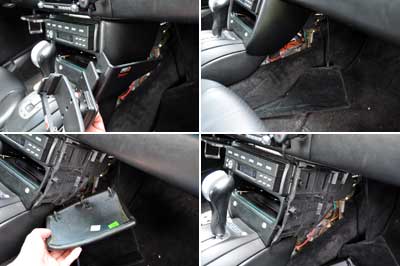
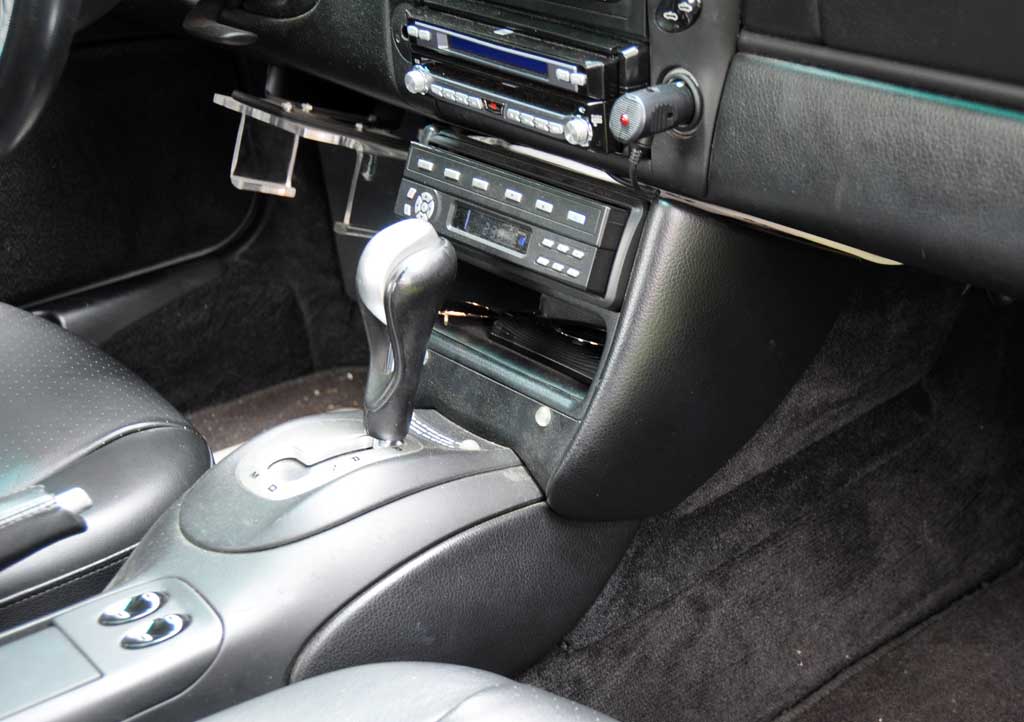
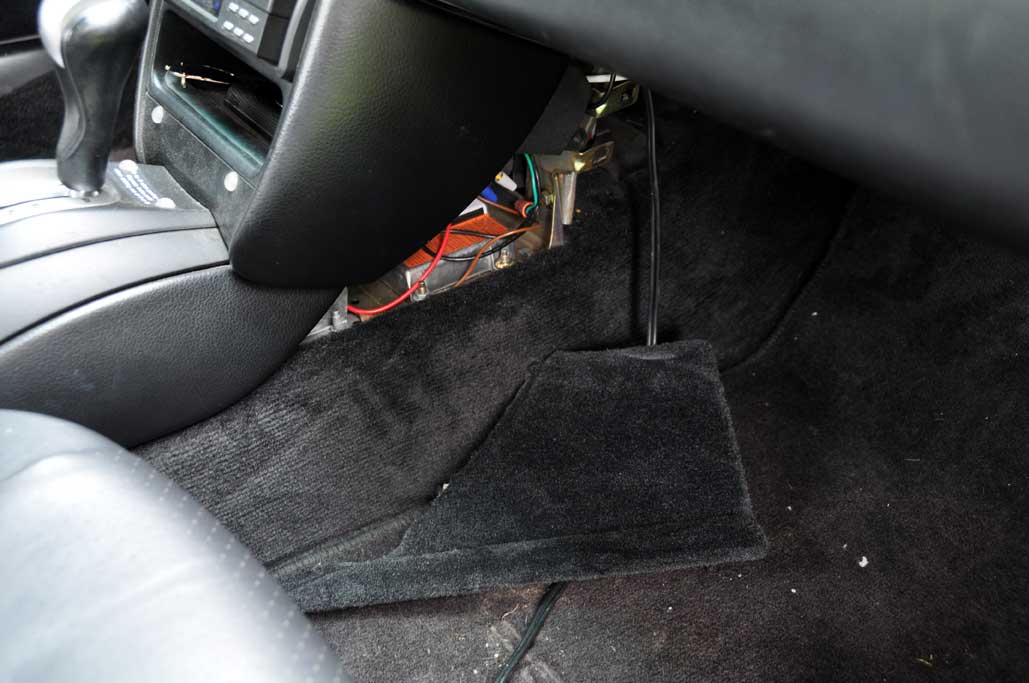
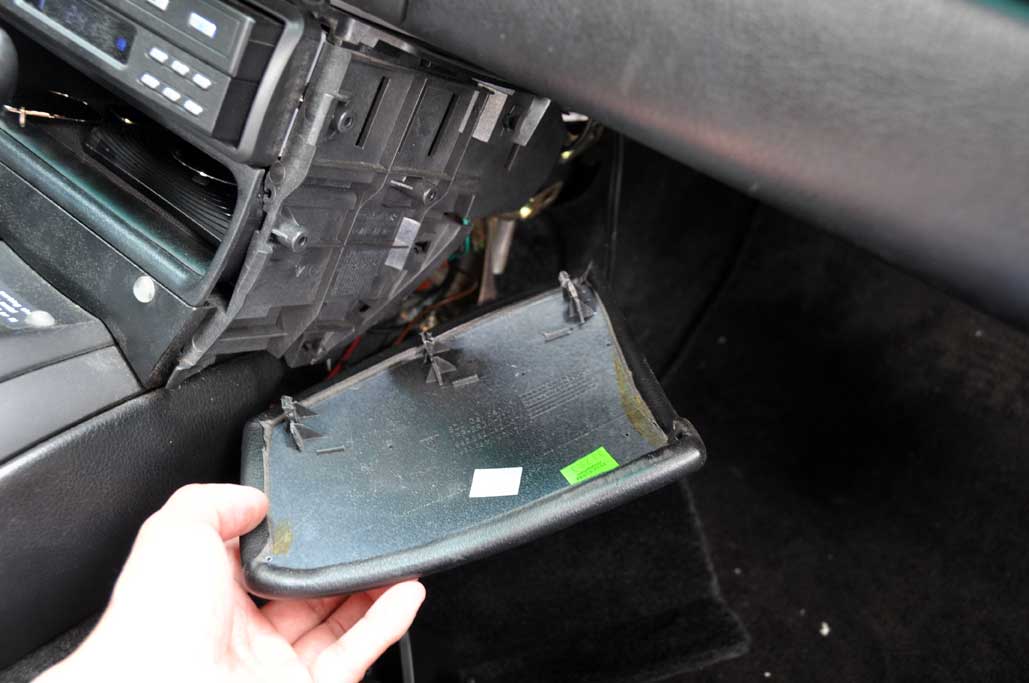
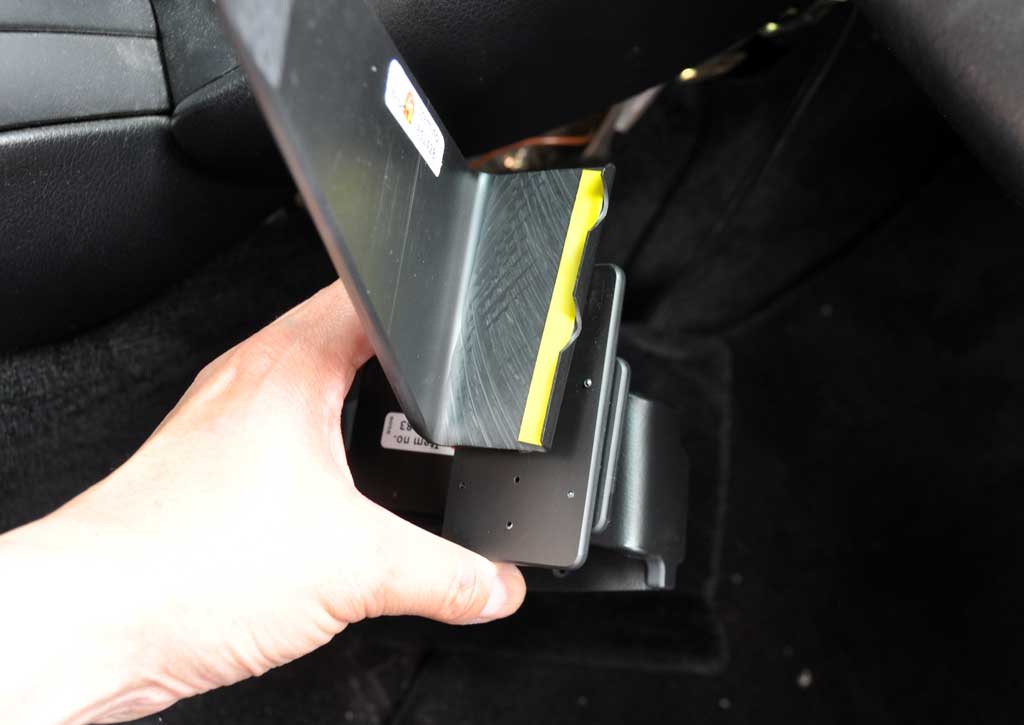
The mount we chose clips onto the panel on passenger side of the central console. The first step was to remove the lower carpeted panel. It comes out if you slide it toward the front of the car. The upper panel is held in place by three plastic anchors. It may be removed by slightly sliding it away from the front of the car and pulling the rear of the panel toward the seats.
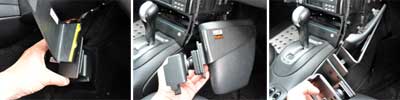
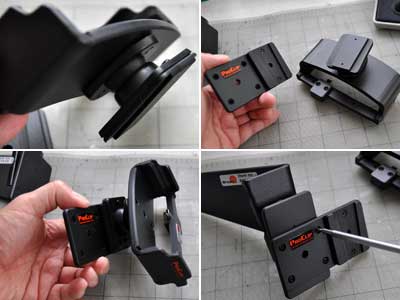
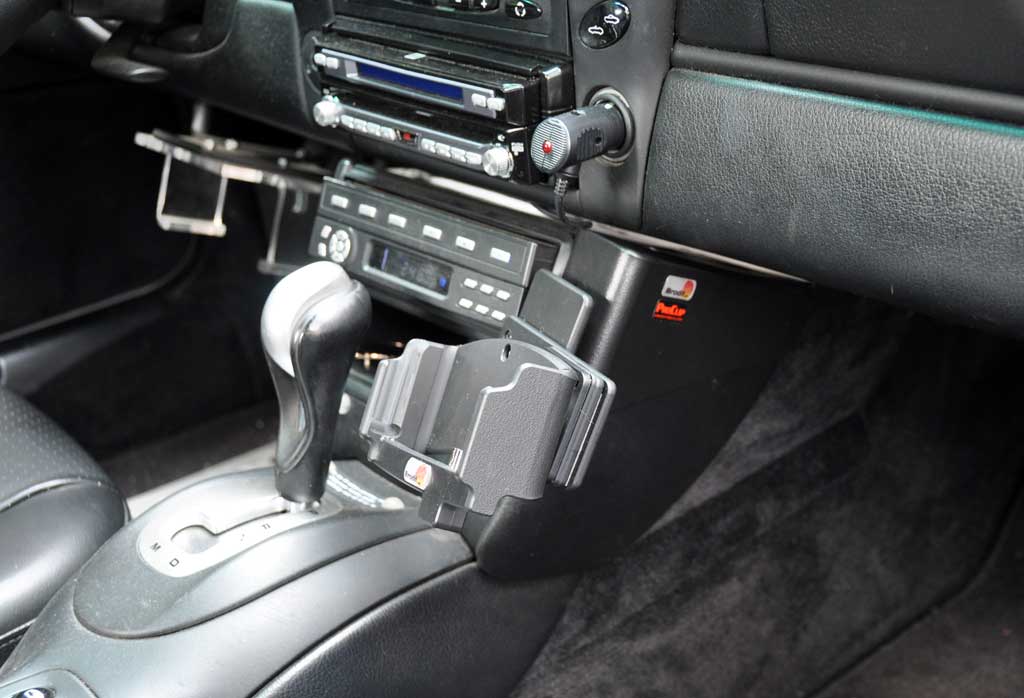
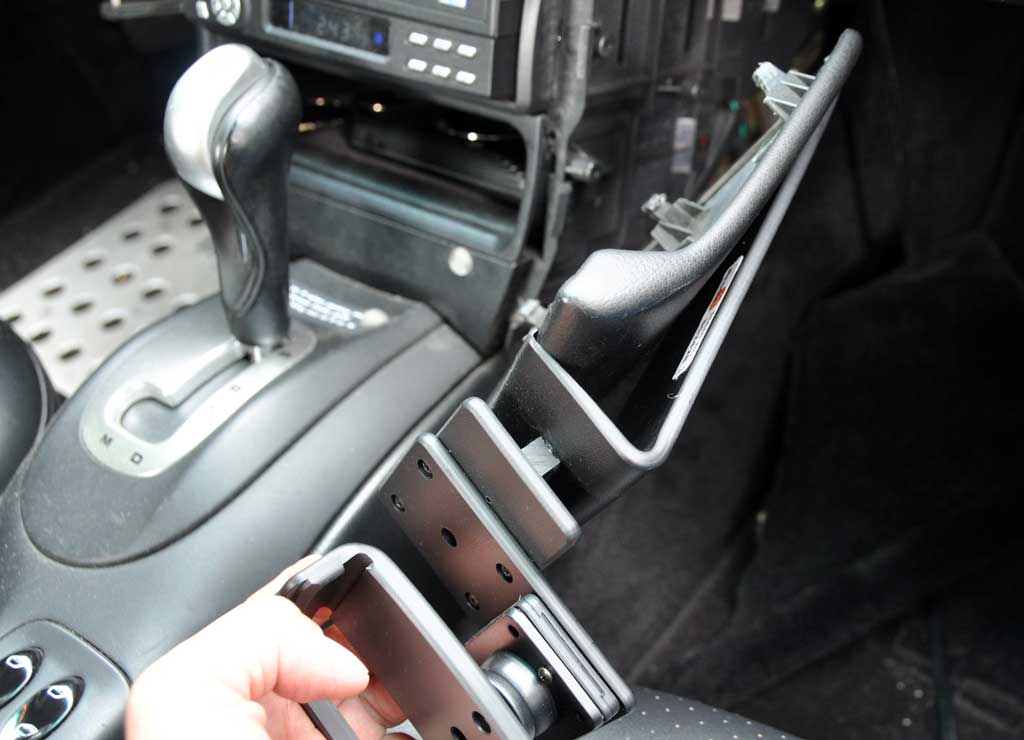
The ProClip mount is affixed to the upper panel by gripping it at the front and the rear. The adhesive strip provides additional grip to keep the mount from slipping. The mount may be placed anywhere along the length of the top panel, but we positioned it to be flush with the top of the console.
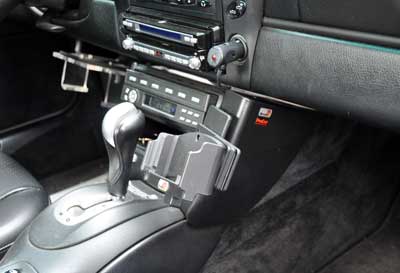
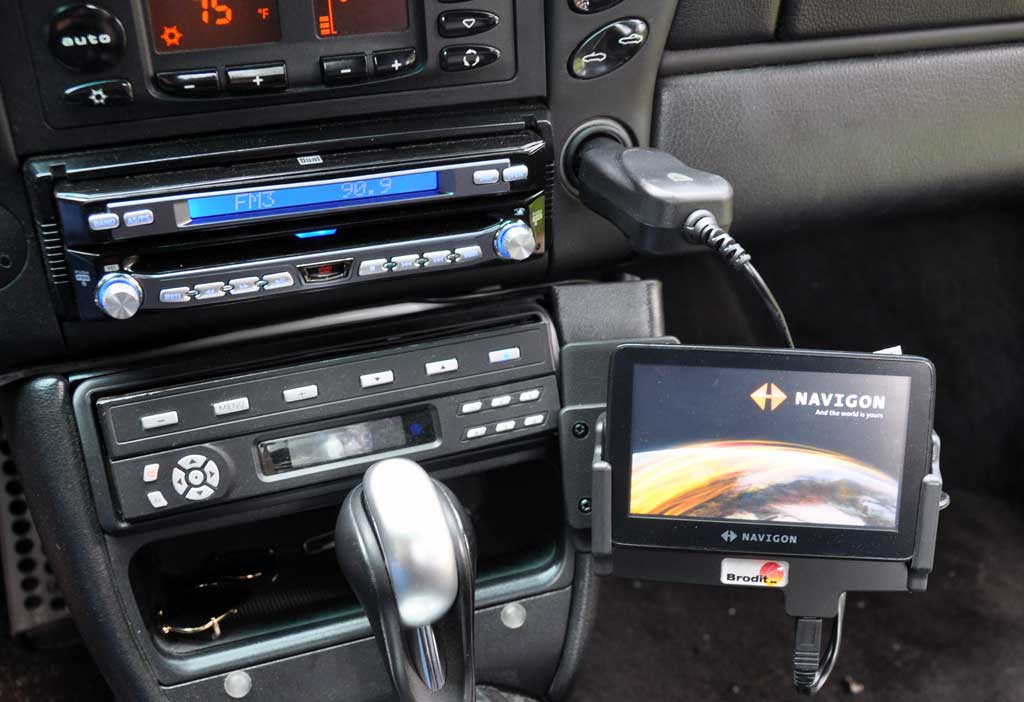
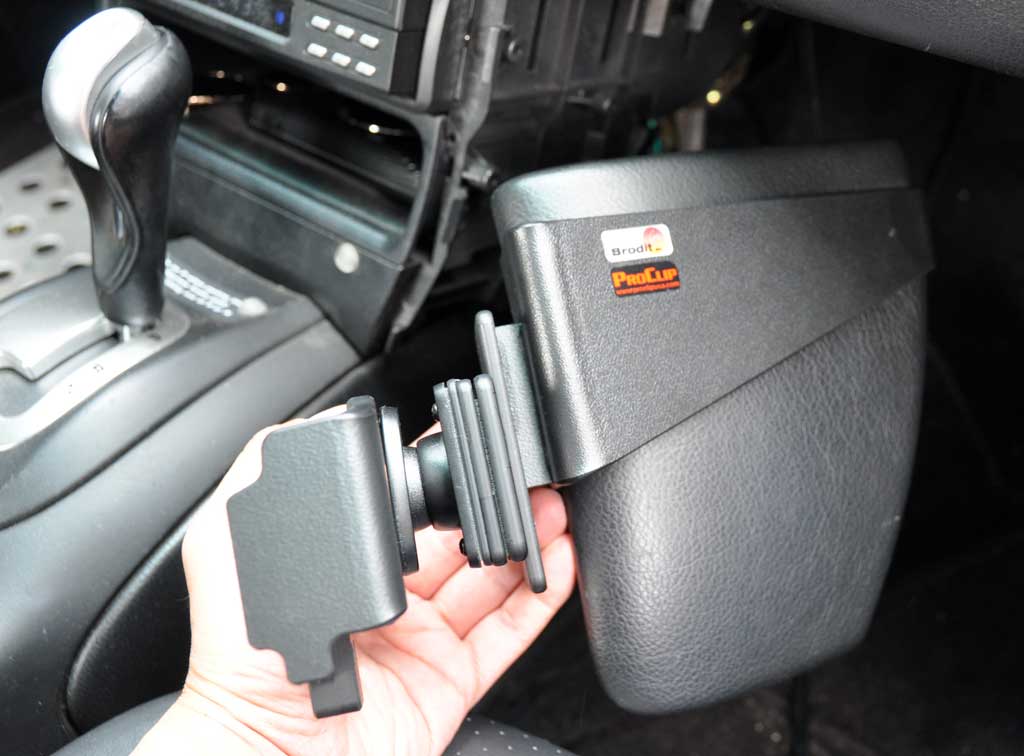
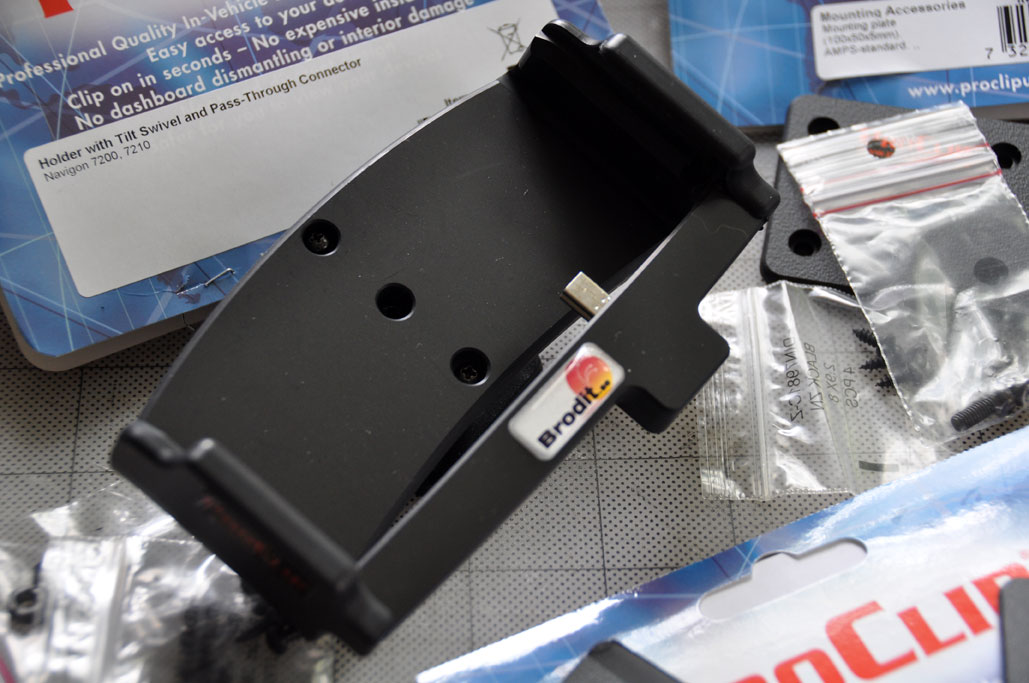
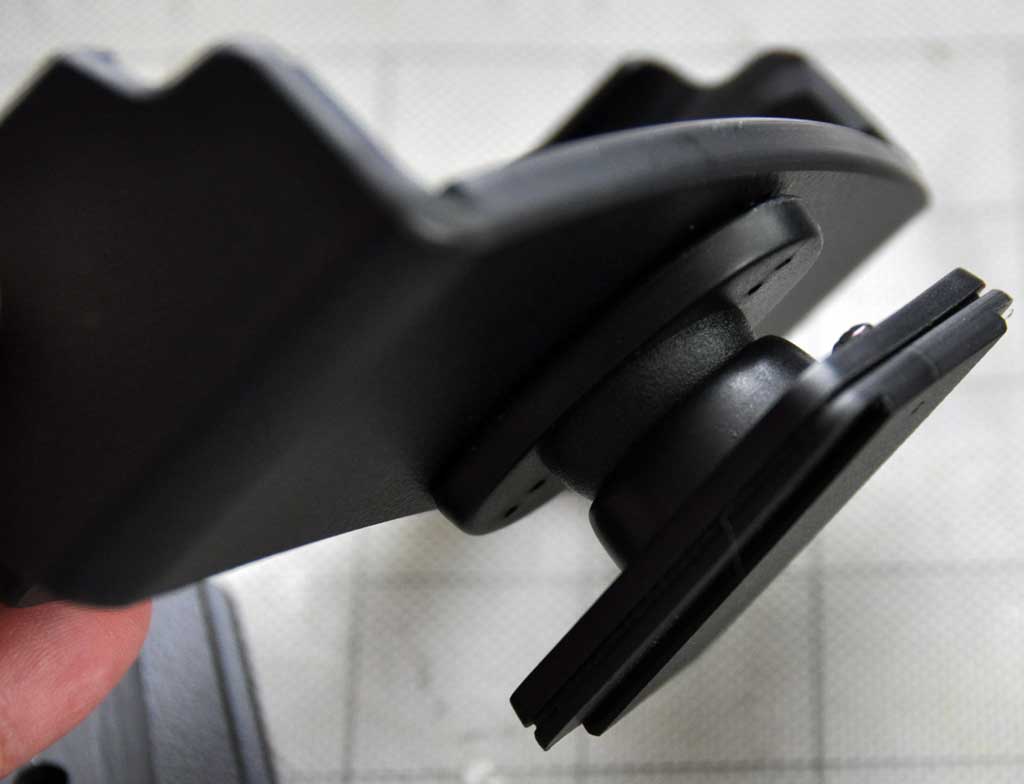
When the mount has been securely installed, the GPS holder may be placed into the clip and its orientation to the drive adjusted. The GPS holder has a ball-and-socket joint in the back. This allows for quick and easy positioning of the display for optimal visibility.
Note that the GPS holder has a power pass-through socket on the bottom right side. This is a lot more convenient and much more attractive than running the cord up to the windshield suction mount.

With the Navigon on the ProClip mount, we no longer have to worry about it falling off the windshield during the trip. We really liked how this project turned out. The ProClip mounting system is a flexible, secure, and expandable way to have gadgets close at hand in the car. If you are looking for a better way to mount electronic devices to the inside of your vehicle, go check out the ProClip mounting system. They have what you need. [Permalink] - ProClip Installation
|
|
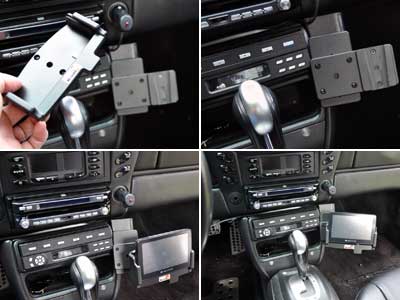
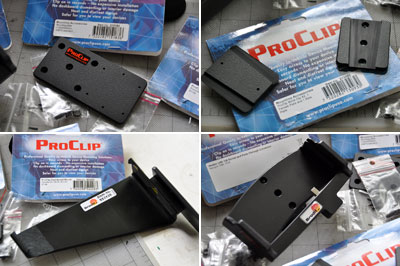
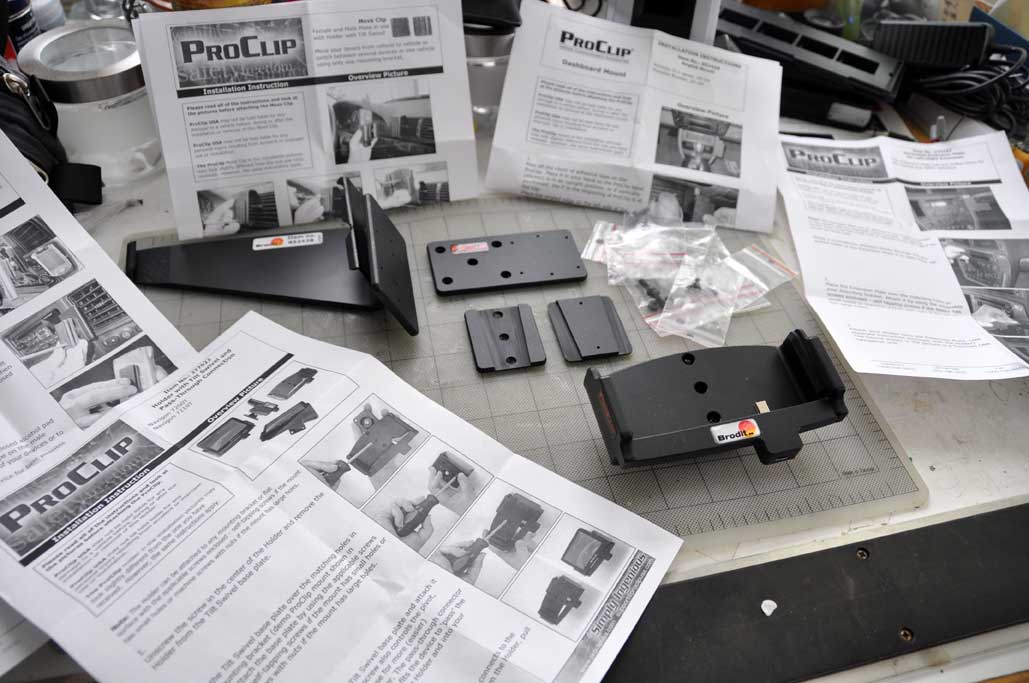
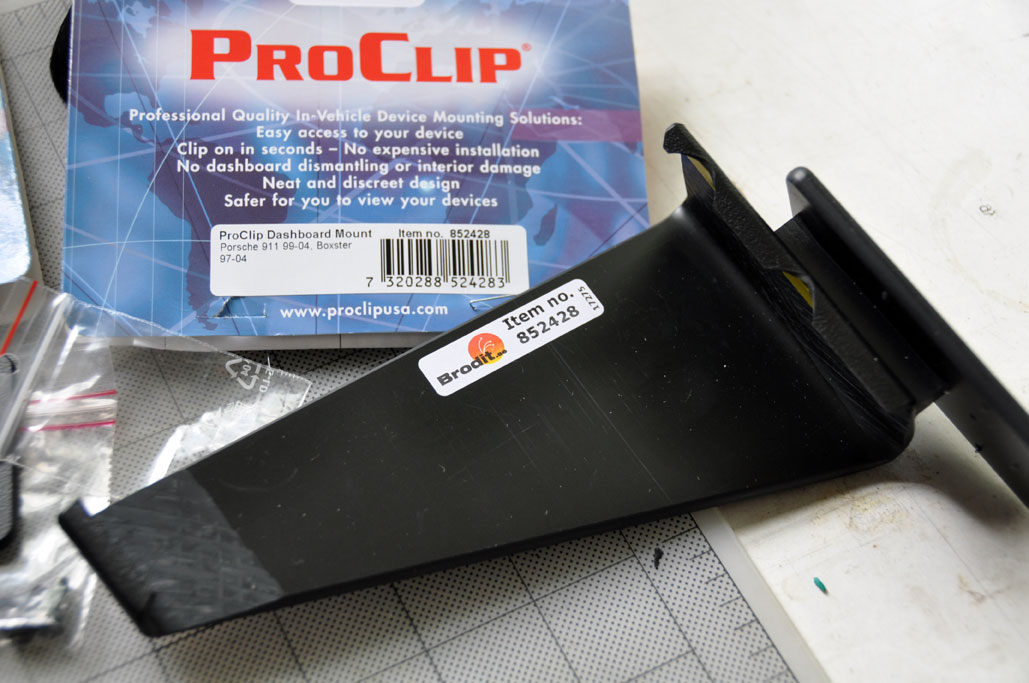
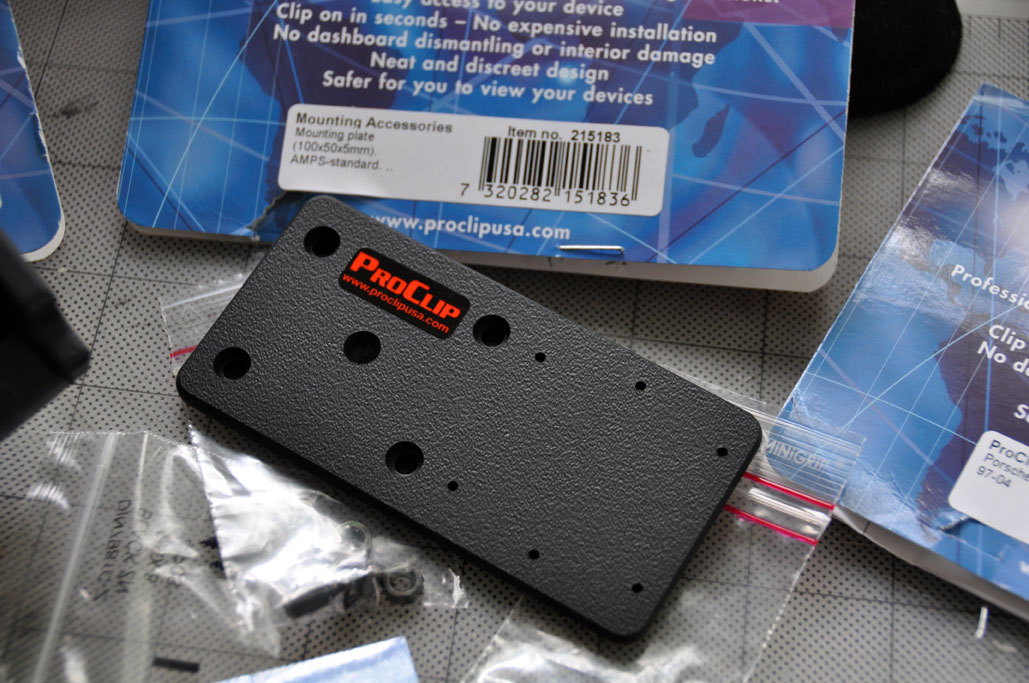
When we wanted a better way to mount our Navigon 7200T GPS in the Boxster, we looked around and found the ProClip mounting system. We chose the ProClip because the system allows the user to pick the pieces based on how, what, and where one wants the gear mounted.
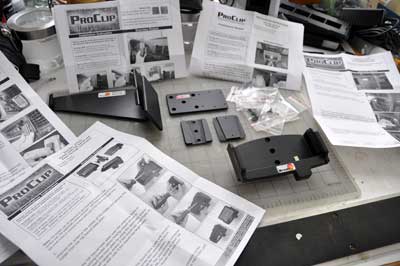
As the ProClip mounting system is made up of separate combinable components, each piece comes with its own set of directions. While this could be a little daunting at first, the assembly of the separate units is actually very simple. We will give a condensed version of the process to give a sense of just how easy it is to put together the exact ProClip mount for a specific device.
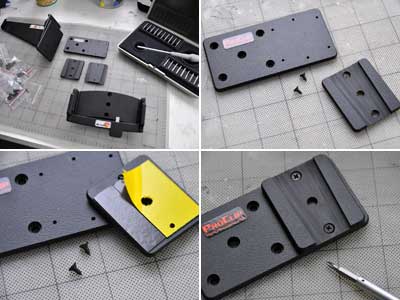
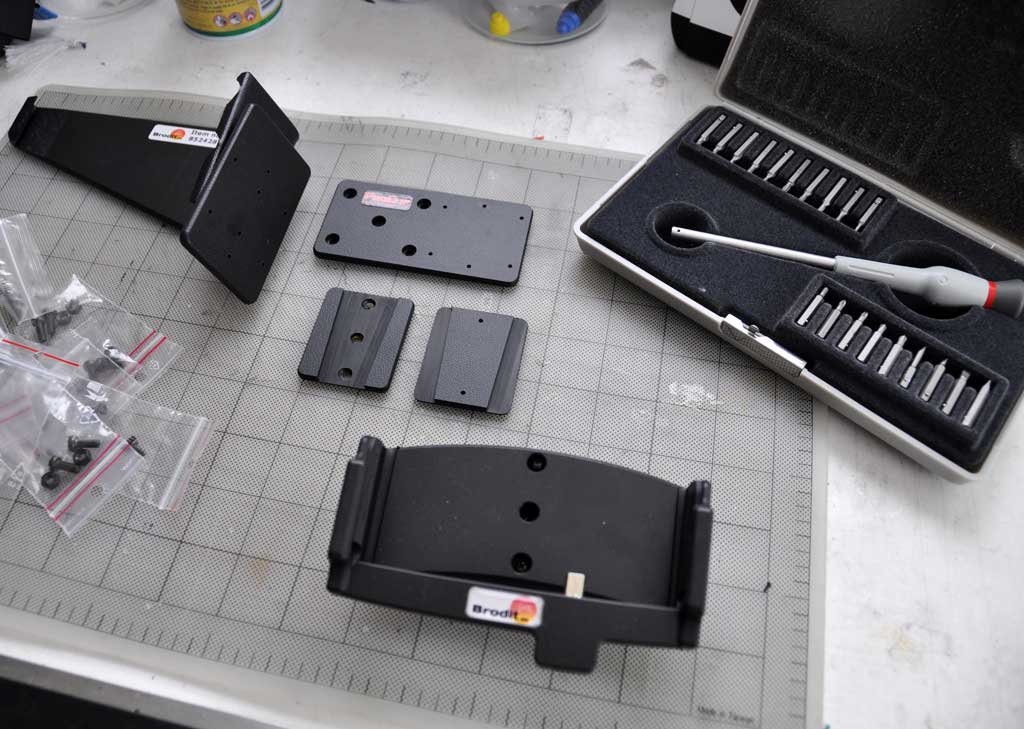
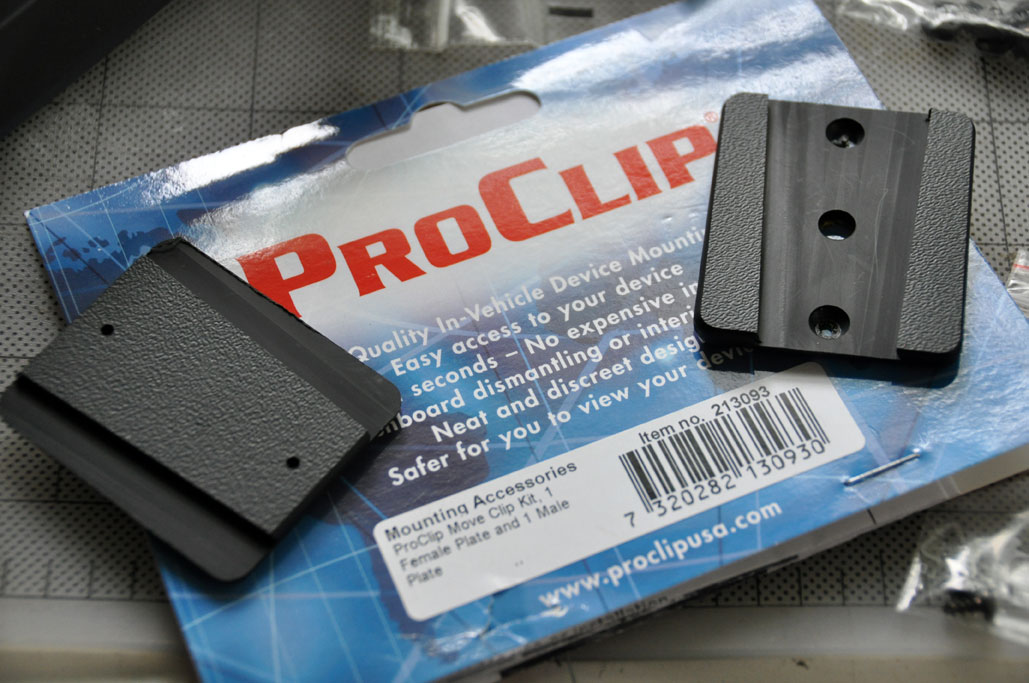
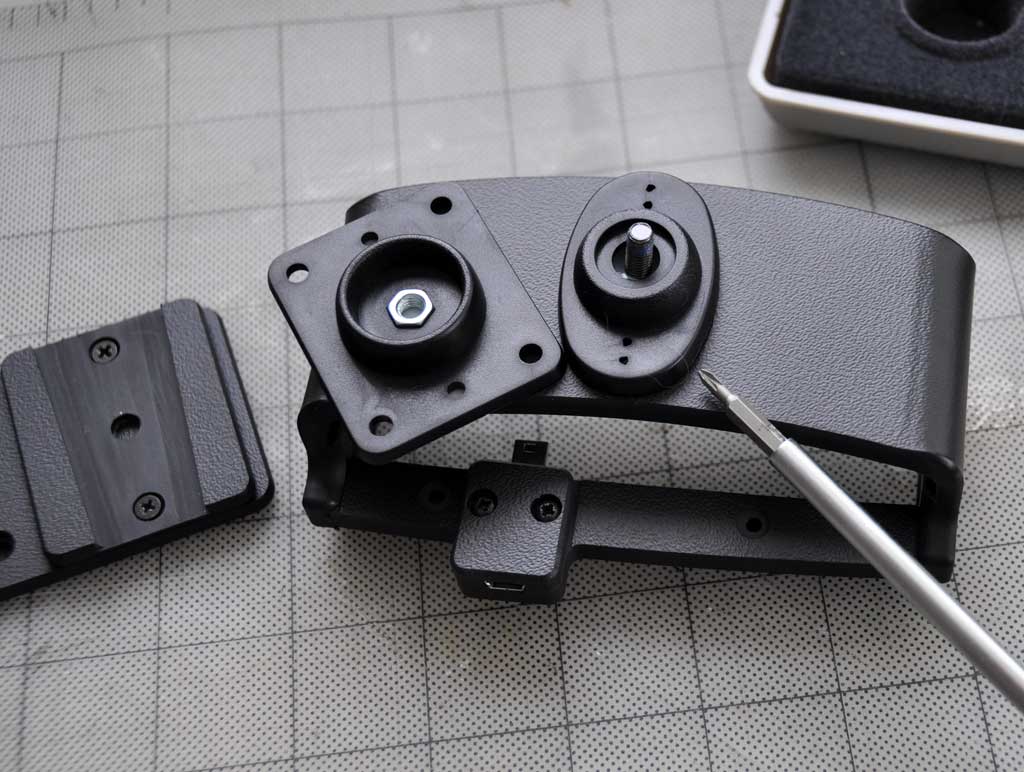
We chose the four components (dash mount, extender plate, clip, GPS holder) out of the dozens available on the ProClip site. Not all of these are required, but we wanted to create a mount which will allow us to quickly attach other gadgets (cellphone, iPod, etc...) just by removing the GPS holder. The key to this versatility is the V-shaped clip. The clip is made of two mated (receiver, hook) pieces. The receiver is attached to the car. The hook is attached to the GPS holder.
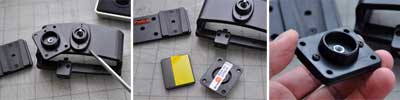
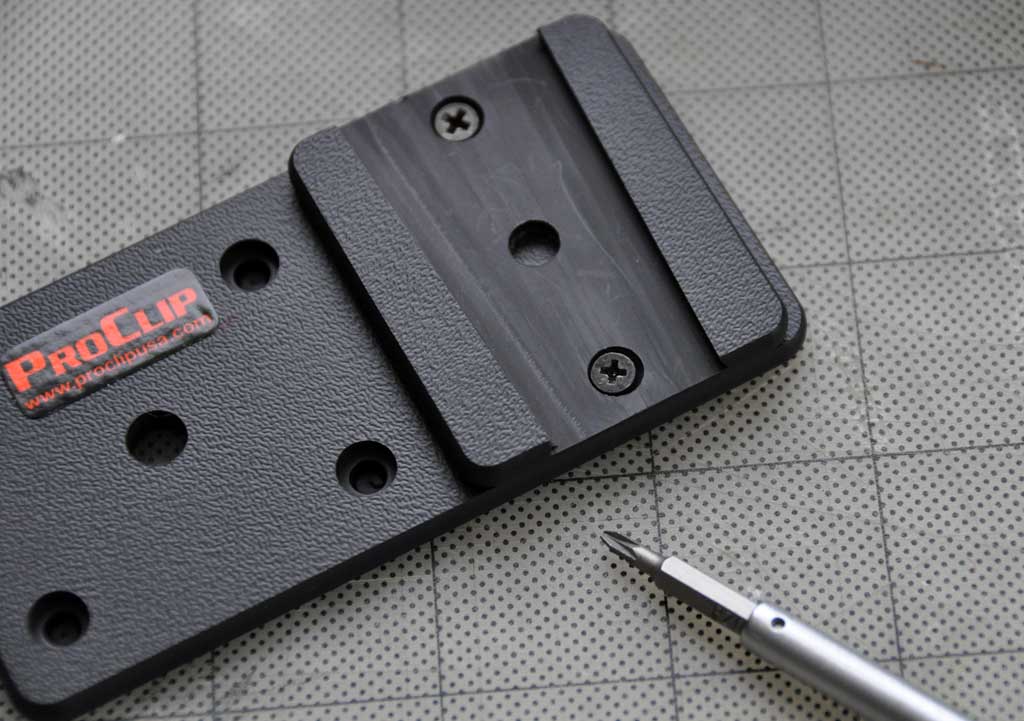
The GPS holder has a ball-socket joint in the back for precise angling of the GPS. The clip's hook piece may be attached using just the adhesive, but to solidly anchor it, screws are best. In order to screw in the hook, the joint must be taken apart. We used two of the self-tapping screws to secure the hook to the back of the socket plate.
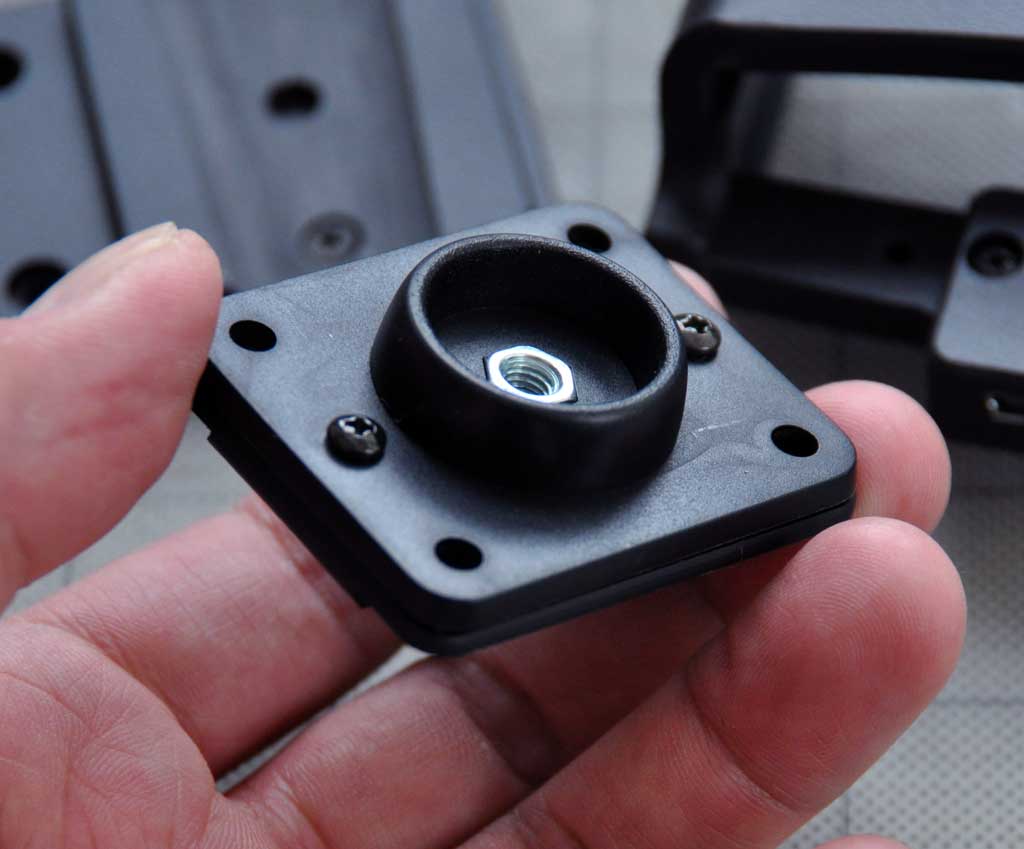
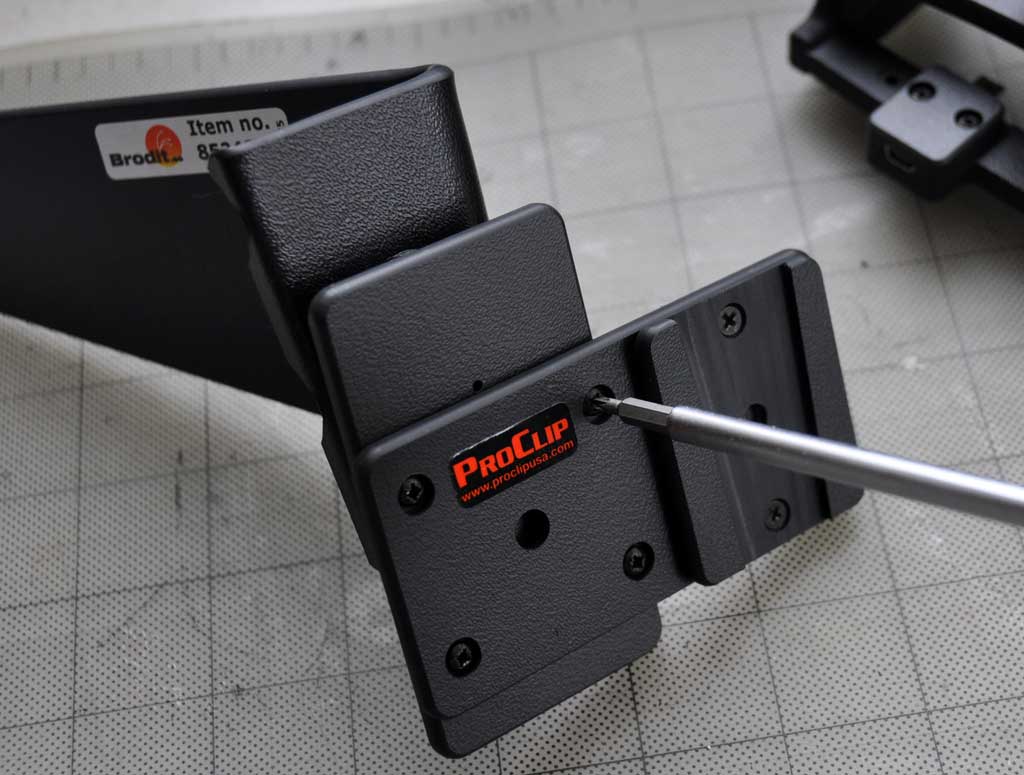
The last step in putting this mount together is to attach the extender plate to the dash mount. Four self-tapping screws into the pre-drilled holes made quick work of the task. With the extender plate attached, the mount is complete and ready for installation onto the car.

In the next installment of this series, we'll show how we attached this GPS mount to the Boxster. For readers who want to mount a GPS to their car, the ProClip system is a versatile option to the "suction cup on the windshield" method typical of the mounts which comes standard with most GPS. [Permalink] - ProClip Assembly
|
|
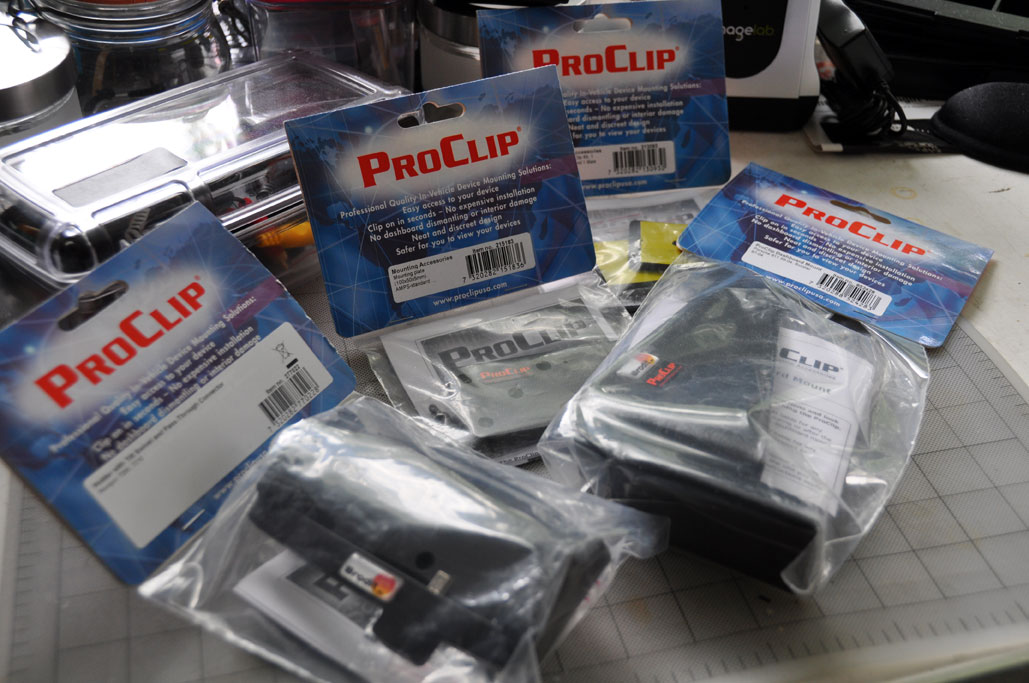
Most of us carry a few gadgets with us all the time: cell phone, iPod, GPS. Different companies have developed products to let us carry them more "effectively." One of our favorite is the clothing line from ScotteVest. Their multi-pocket jackets, shirts, and vests are perfect for carry gadgets without them banging into one another. That's great for walking around, but what happens when you get into a car? What to do with the cell phone, the iPod, or the GPS?

When we are driving, our Number One job is to drive... eyes on the road, hands on the wheel. It is not the time for fumbling around feeling for a cellphone or an iPod. We do agree that there are many situations where using a gadget is perfectly safe. We have done plenty of articles (iPod, video, GPS) showing how to hook them up to the car stereo system. One thing we did notice with our past solutions is that the gadget is often just tucked into a bin in the car. There has to be a more "elegant" solution to this problem. We searched around and found an excellent option: The ProClip System.
The ProClip folks have designed a system of combinable components to enable the mounting of practically any gadget in any car. We decided to get all the ProClip pieces needed to mount the Navigon 7200T. It might look like a lot of parts, but the system is actually very simple. There is a piece needed to attach the mount to the dash of the car, a piece to attach the connector to the mount, and a piece to make things removable.
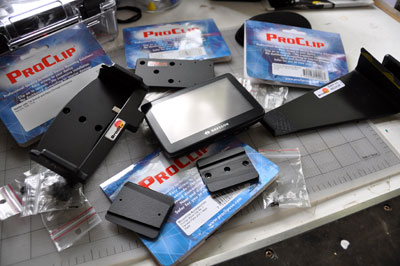
If you want to mount something on the dash of the car without all the dangling cables and suction cups and still have it be removable, the ProClip is the way to go. It is as close as one can get to having a custom-install without having pay a custom-install price. We should have this project completed by the end of June. Look for the write-up in July. [Permalink] - ProClip Mount
|
|
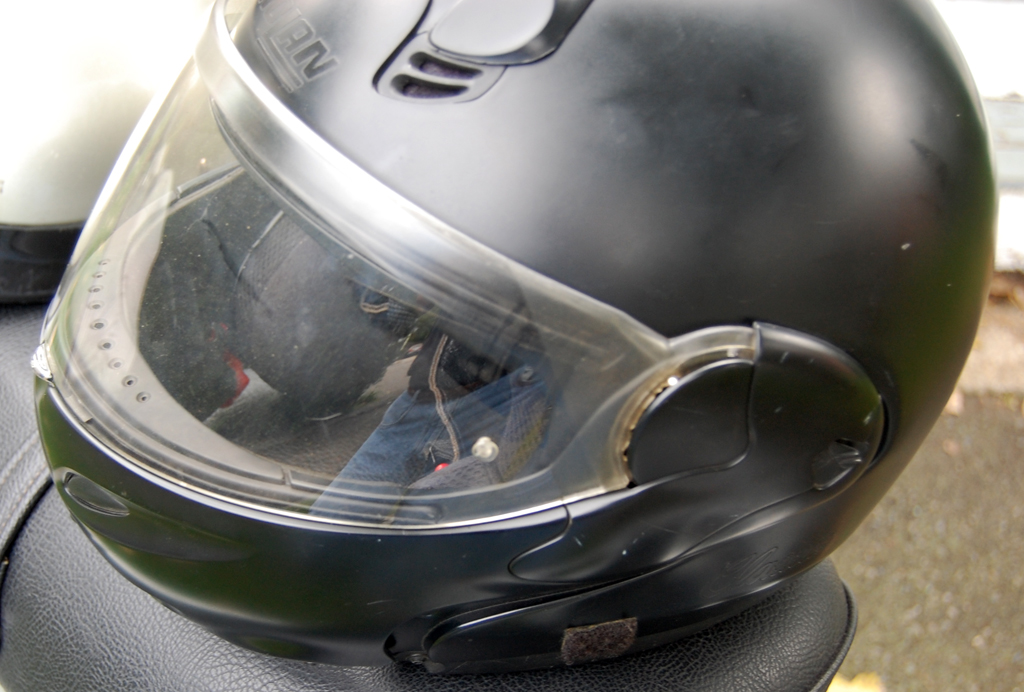
When it comes to driving, Boston drivers have a certain "flair." So wearing a helmet while riding a Vespa just makes sense. Many would argue that wearing one while driving a car wouldn't be such a bad idea neither. Having lived in this city for over 20 years, we have to say they are really not all that bad. The traffic moves relatively slowly due to the windy (and we don't mean air speed) roads and the associated congestion. Someone on a Vespa with top speed of 35 mph really can keep up with traffic. OK, we wouldn't try it on Storrow Drive, but riding on Memorial Drive during rush hour would not be a problem. Regardless, we would not do it without wearing a helmet.
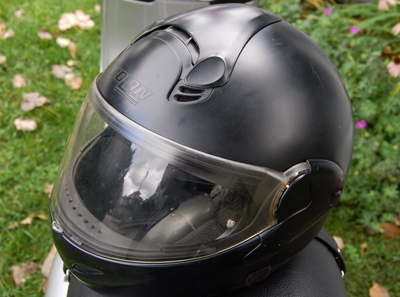
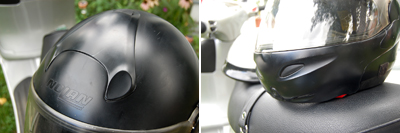
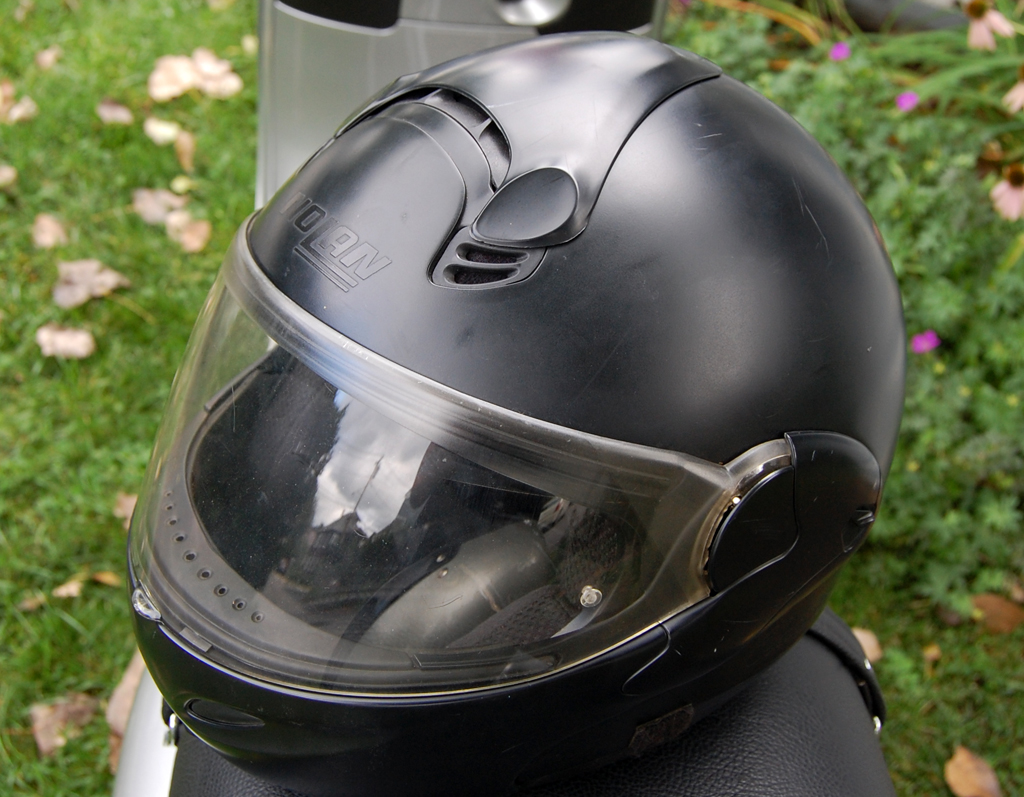
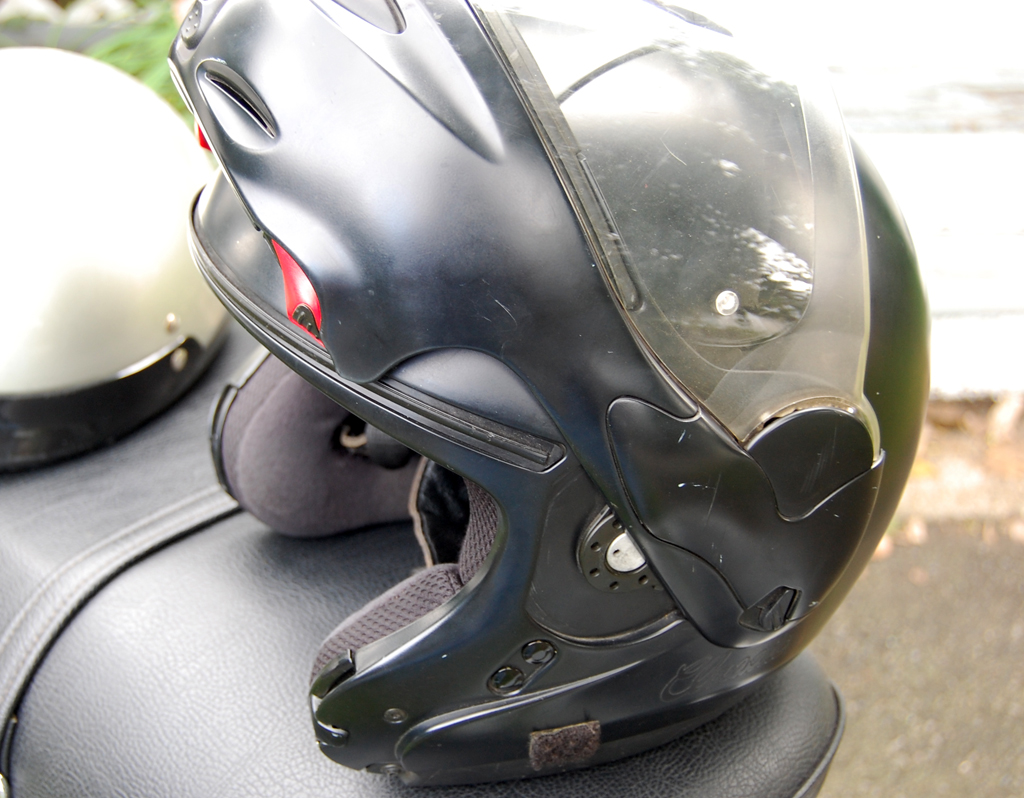
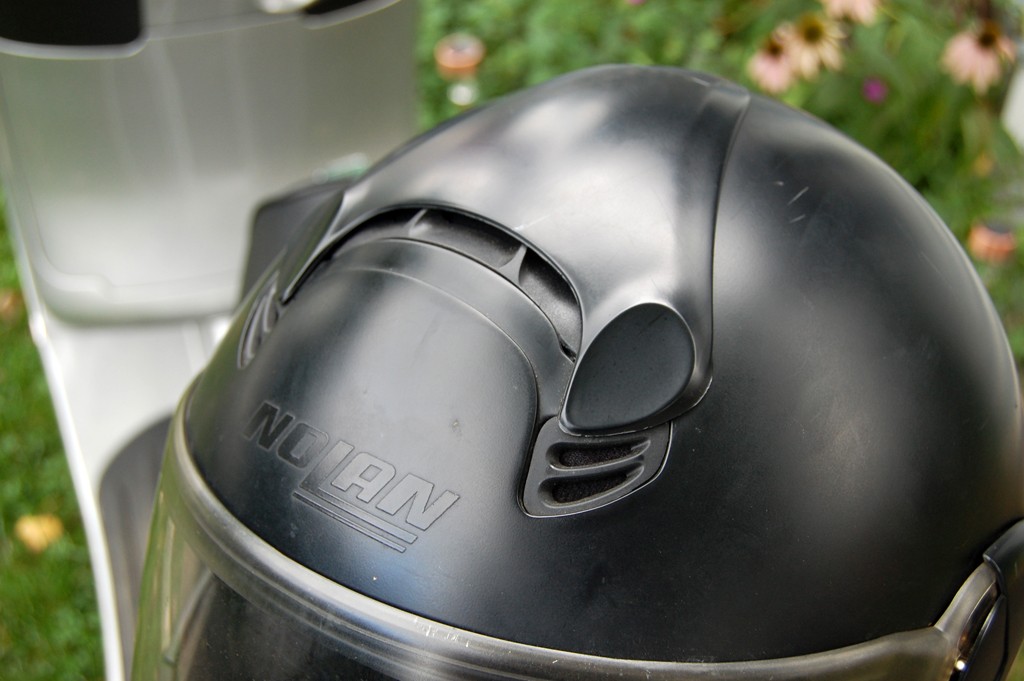
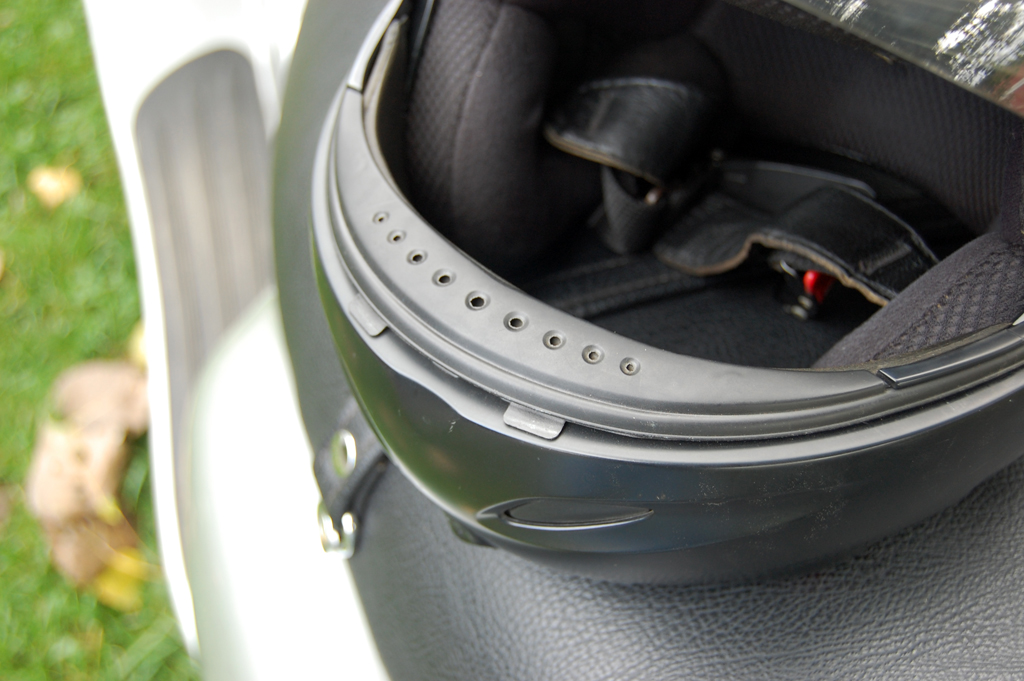
When we purchased the Vespa last season, it came with a half helmet. For riding in the city we wanted to get a full face helmet. We checked around and found a good deal on a used Nolan. A big reason why we went with the Nolan helmet is the pivoting chin bar. This design has both the protection advantages of a full-face helmet and the ease of an open-face helmets. There are many occassions where it is convenient to not have to take the helmet off (snacking, getting quick drink, etc...).
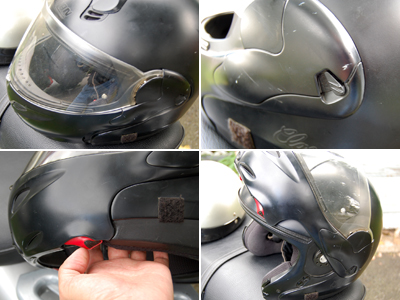
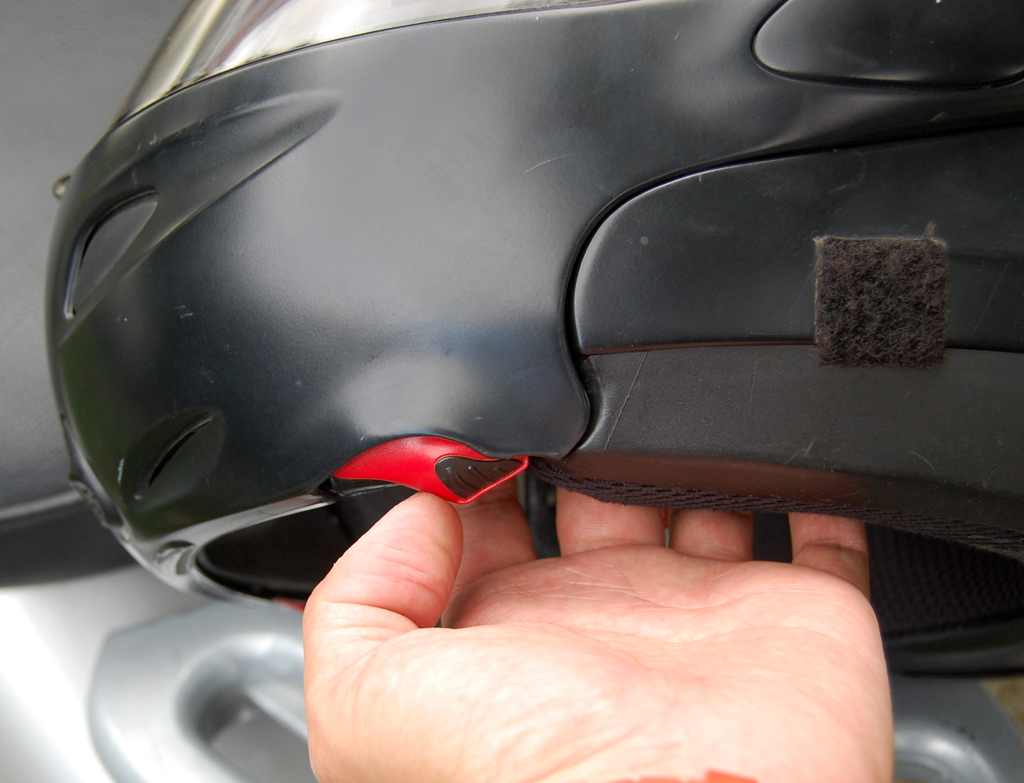
The pivoting chin bar may be unlocked with a button on the left. Pushing levers on the underside frees the catch-mechanism and the bar may be easily pivoted up and out of the way.
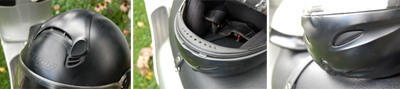
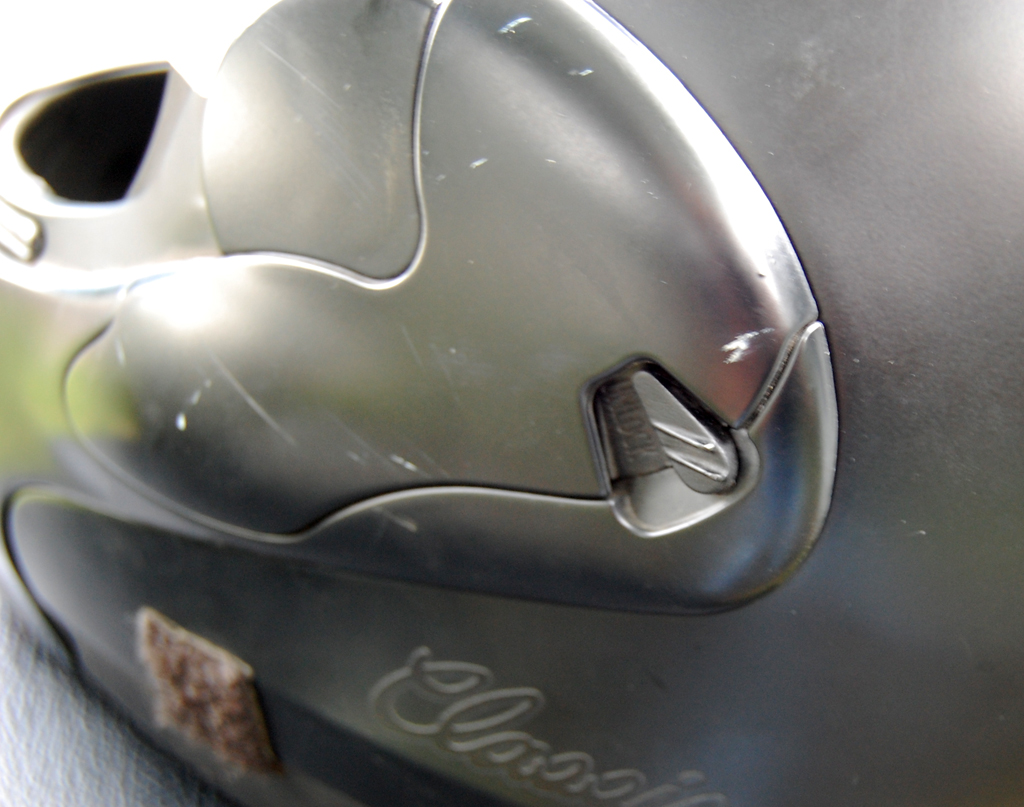
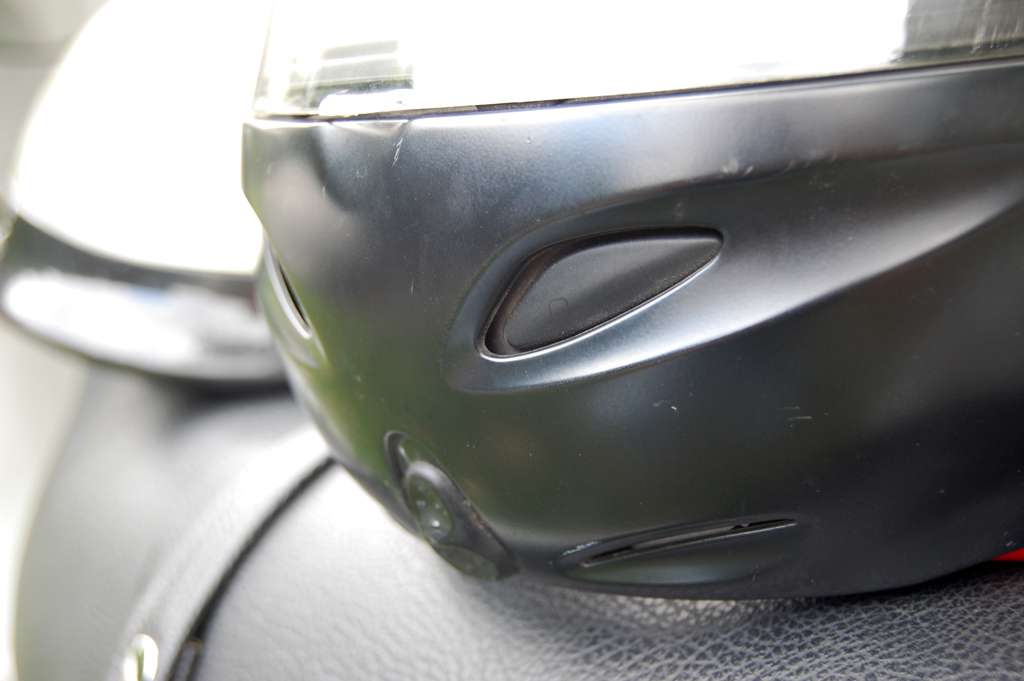
This Nolan helment also has scoops and vents to help circulate air inside the helmet. The scoops on top and front are easily adjustible. The vents really do make a big difference in both keeping the head cool and the face shield from fogging up.
We have had this Nolan helment since last October and have not experienced what it is like wearing it on a really hot day. We'll report back in August and let you know how this helmet performed after a few rides on 90º days. [Permalink] - Nolan Helmets
|
|
|
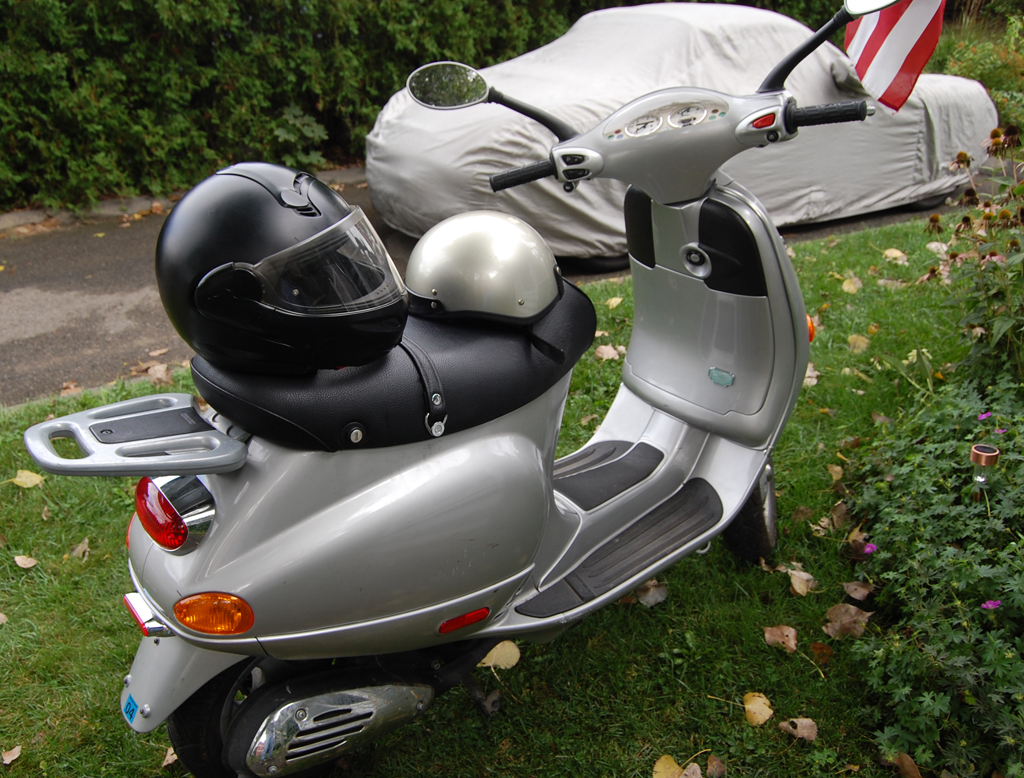
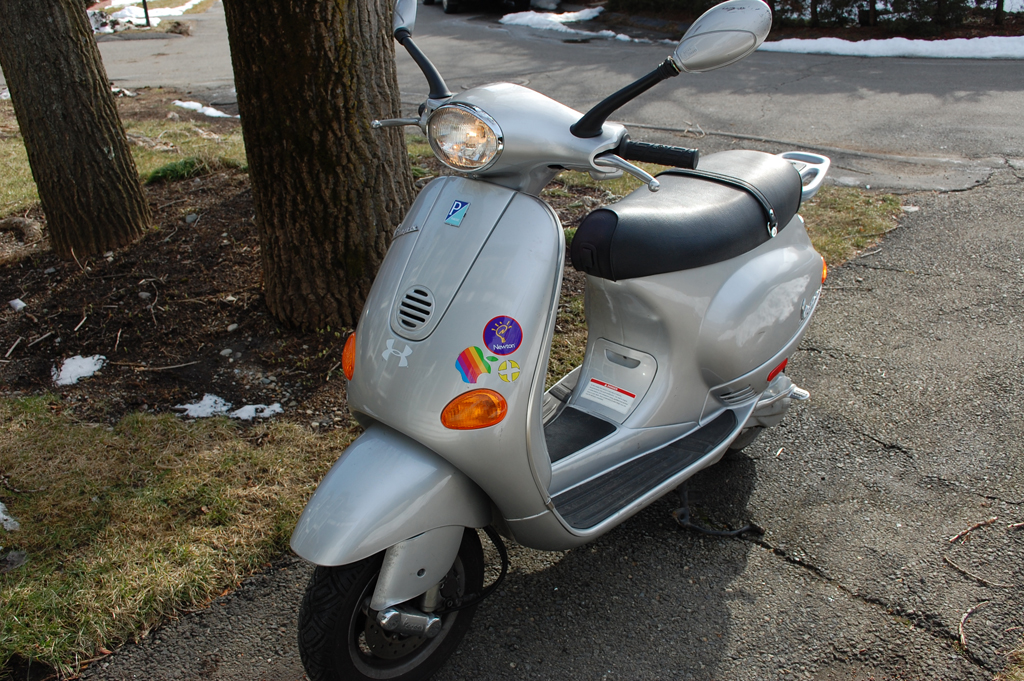
The Vespa has been getting a lot of use lately. It really is the perfect get-around-town transport for a city like Boston. They get about 60 miles to a gallon of gas. We filled it up last September and we are only at a half tank. A motorcycle license is not needed for a Vespa if it is 50cc or under. No special insurance is required. The best part of all, they can be parked anywhere, even on the sidewalk!
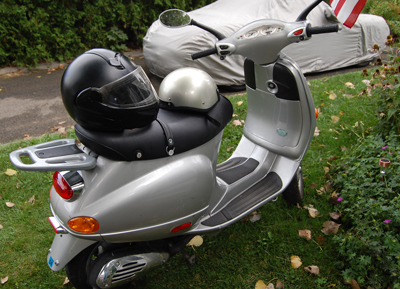
Even though a 50cc Vespa tops out at 35mph, we would never get on one without a wearing a helmet. The reasons are many...streets can be bumpy, cement is hard, and we are fond of the shape of our heads. For a helmet to work, you have to get one that fits, and you have to wear it.
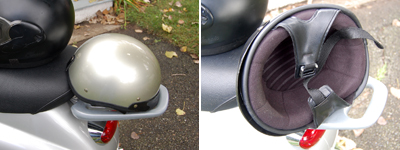
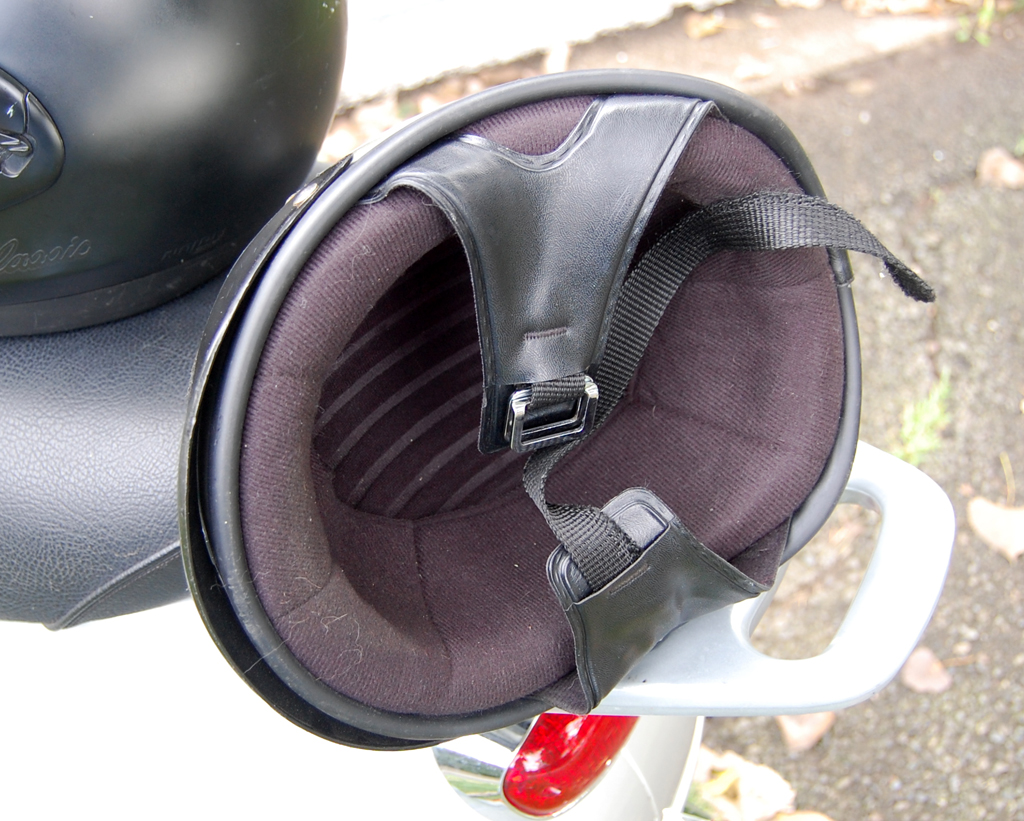
Some of us here have a problem with enclosed spaces...so they wear an open-face helmet. They are easy to put on and take off, are very comfortable, and will fit in the storage compartment of the seat of the Vespa. While not as protective as a full-face unit, they are infinitely better than no helmet at all. If we were on Monhegan Island, say, we would consider not wearing a helmet, but since we are in Boston we would never get on the Vespa without one. [Permalink] - Vespa Helmets
|
|
|
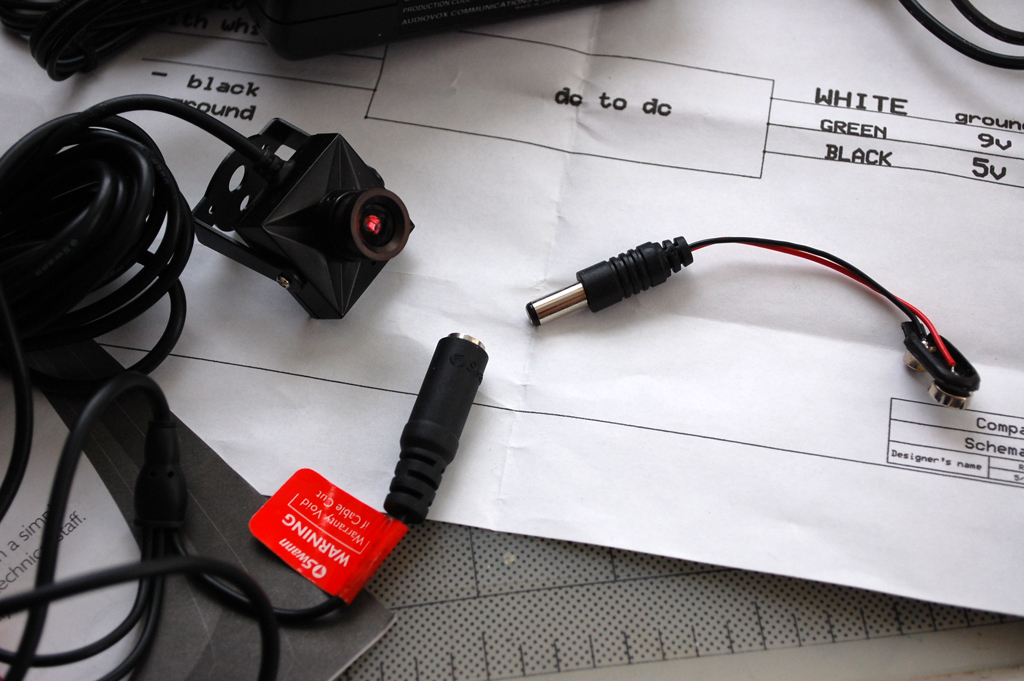
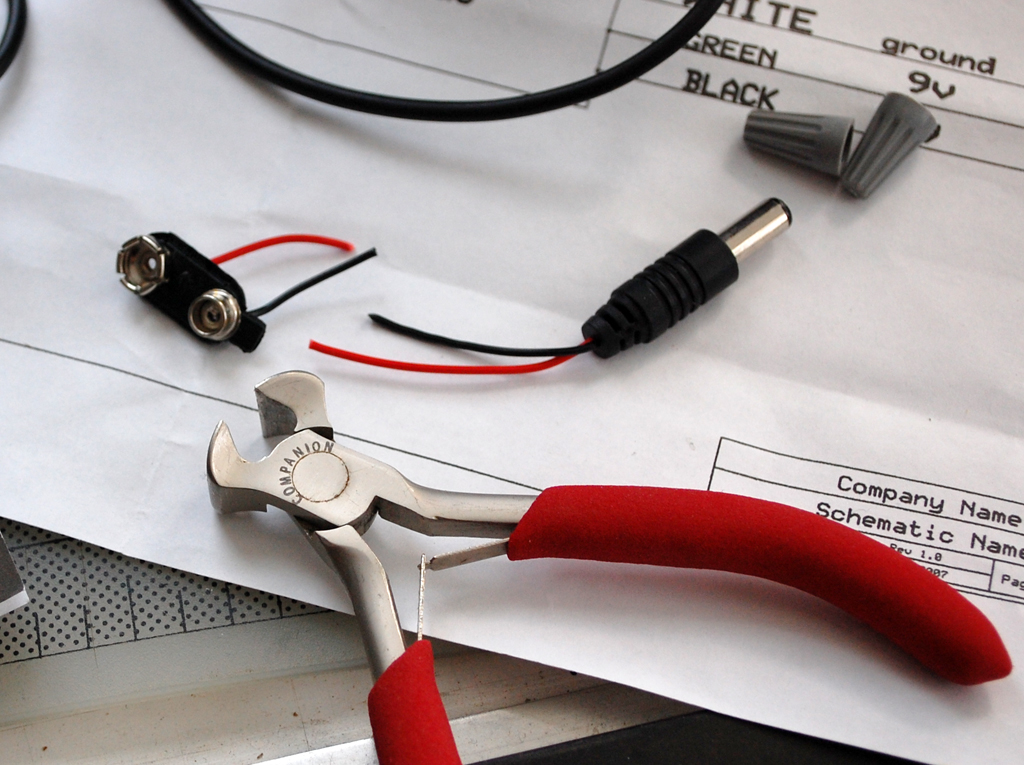
A rearview camera is useful when you have a large SUV and want to avoid running over stuff that is low to the ground. We wanted to add one to the Boxster because we had a couple of LCD screens already in the car and thought...hey, we could use one for a rearview camera! What made the project irresistable was a local MicroCenter had a sale on Swann Security Cams a while back. When everything was said and done, the total cost came to $5.00 after discounts and rebate. Not much of a financial risk even if the project goes completely belly-up.
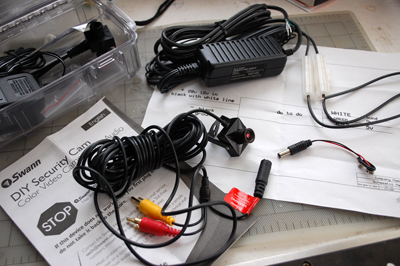
The Swann camera uses a 9V power source. In order to adapt it for in-car use we needed to get a 12V-to-9V DC-DC adapter. We managed to snag two adapters after a little haggling (hey...we are sure we'll need another one some day) for $15 from a nice seller on EBay.
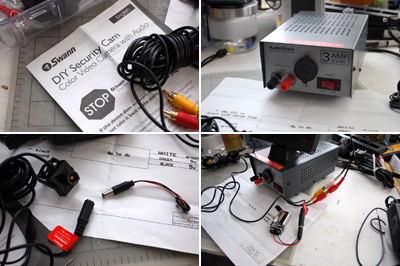
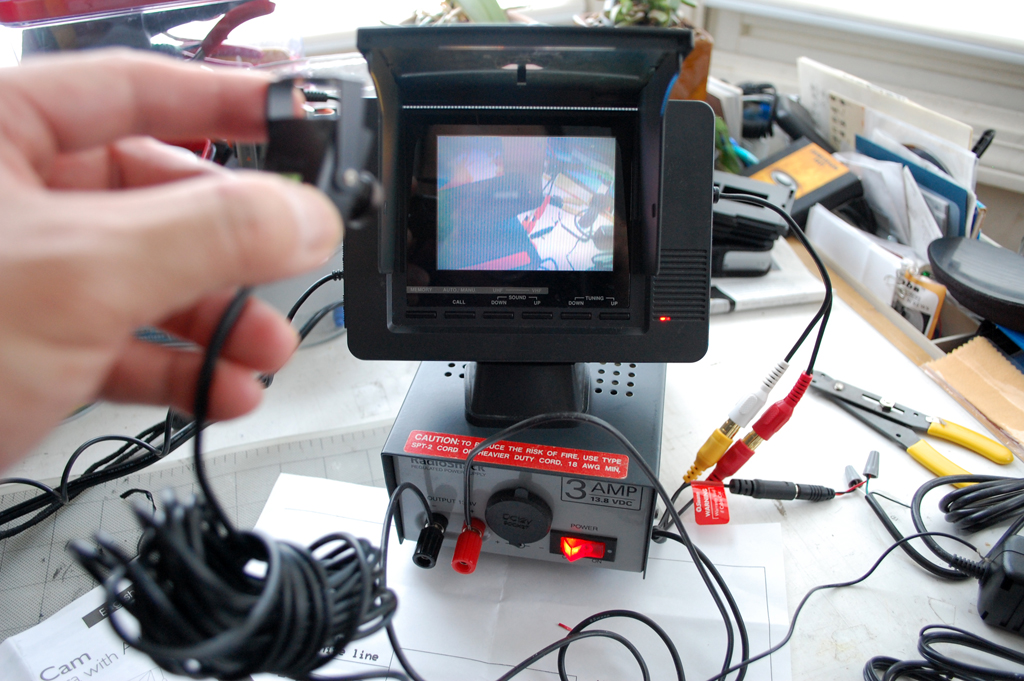
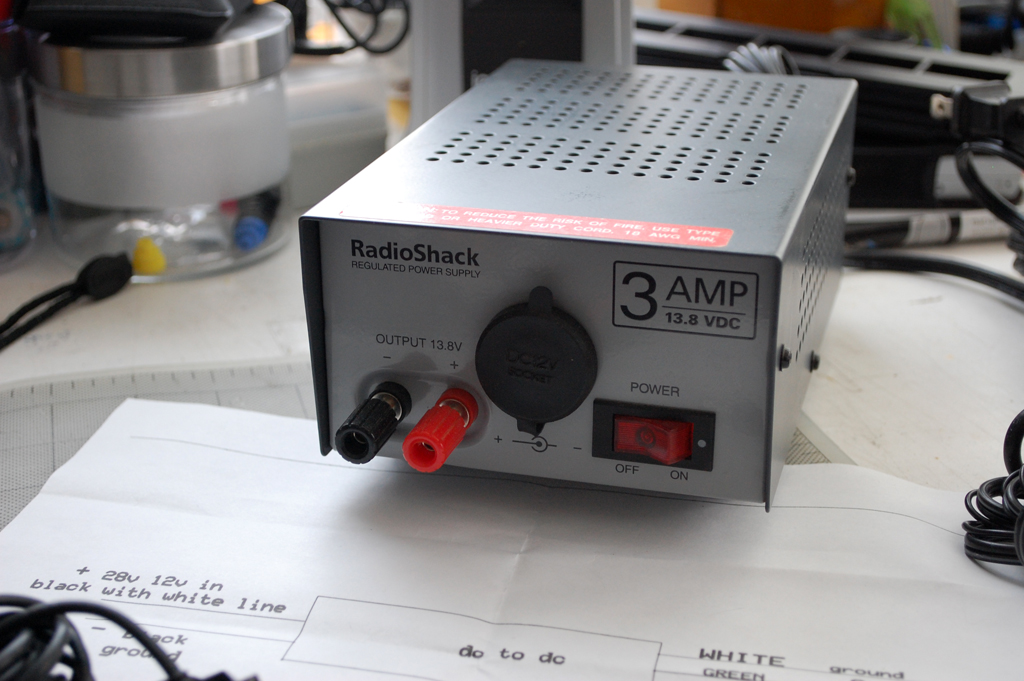
The first step was to make sure the camera was functional before bench-testing with the converter and the 12V DC supply. A quick 9V battery check confirmed the camera, adapter, and mic were all working as expected. We did notice that the video picture was pretty weak when powered by a 9V battery.
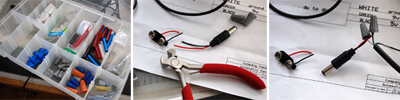
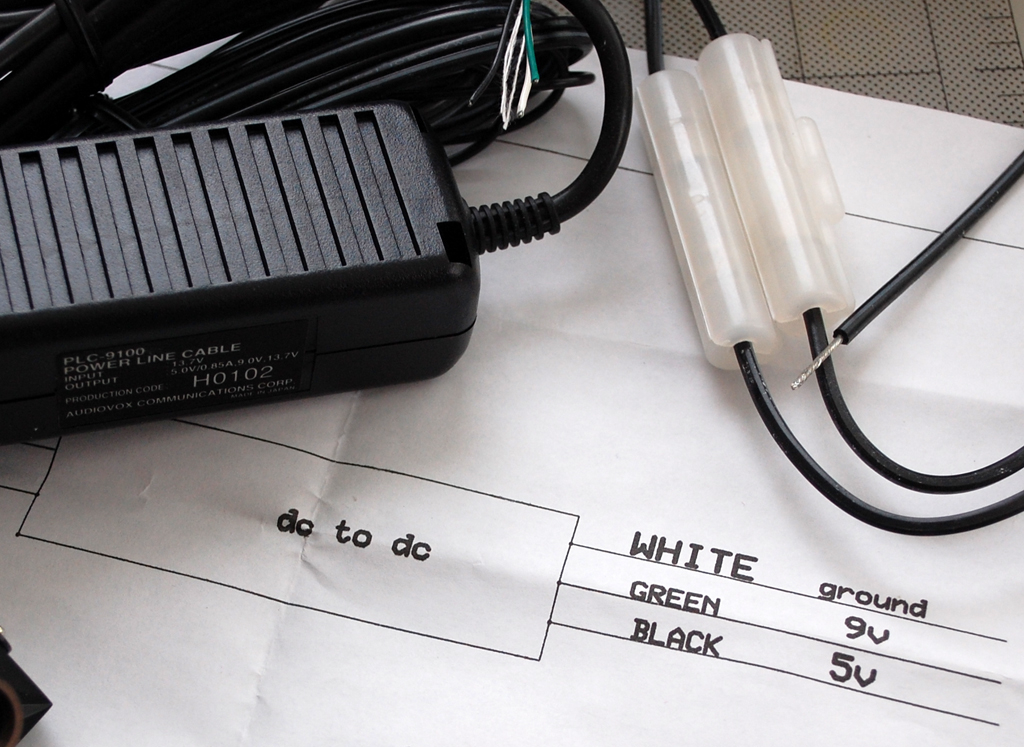
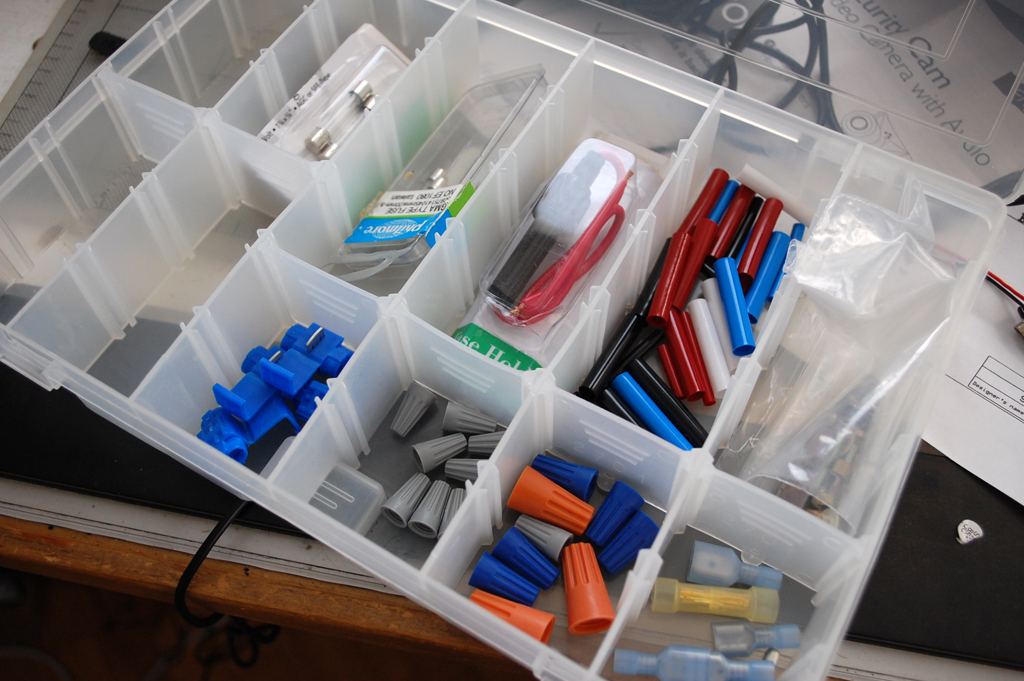
The next step was to attach the 9V battery adapter to the DC-DC converter. We had a few connectors options, but chose to use the quick and dirty twist-on caps...fast, easy to rework, and secure enough for the task at hand.
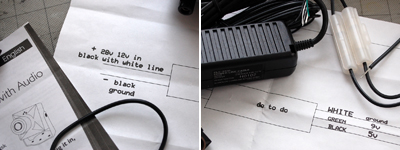
The DC-DC adapter was actually a lot more versatile than we expected. It put out both a 9V and an 5V line. We have no use for a 5V line at present, but it was good to know where to get one should we need it in the future!

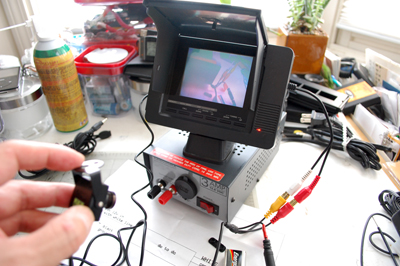
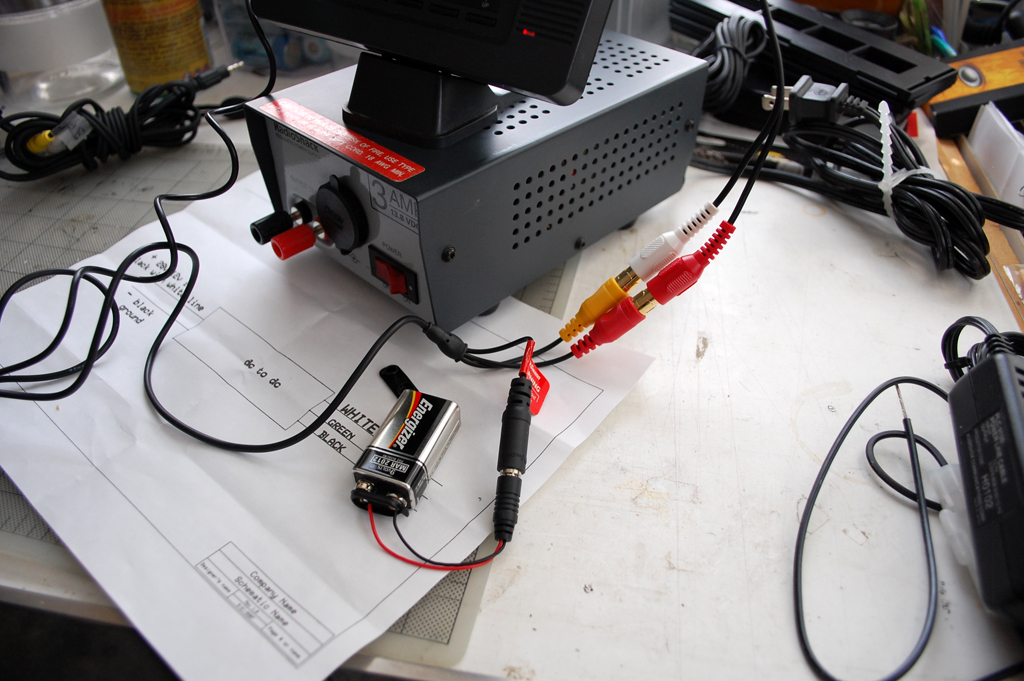
The wiring diagram was pretty straightforward. We wired everything up, hit the power switch, and everything came to life. The image from the camera was a lot better when powered by the bigger power supply. Now that we have successfully confirmed that all the parts (camera, DC-DC converter, wiring) were functional, we are ready to lay it out in the project car. Stay tuned. [Permalink] - Rearview Cam
|
|
|
Several months ago the RainyDayGarage guys got a mailing from Porsche tell them about "the next Porsche." It is a four-seater coupe called the Panamera. This front-engine, rear-wheel drive addition to the Porsche family will make its debut in 2010. We expect Porsche to step up the marketing campaign on this vehicle in the latter half of the year.

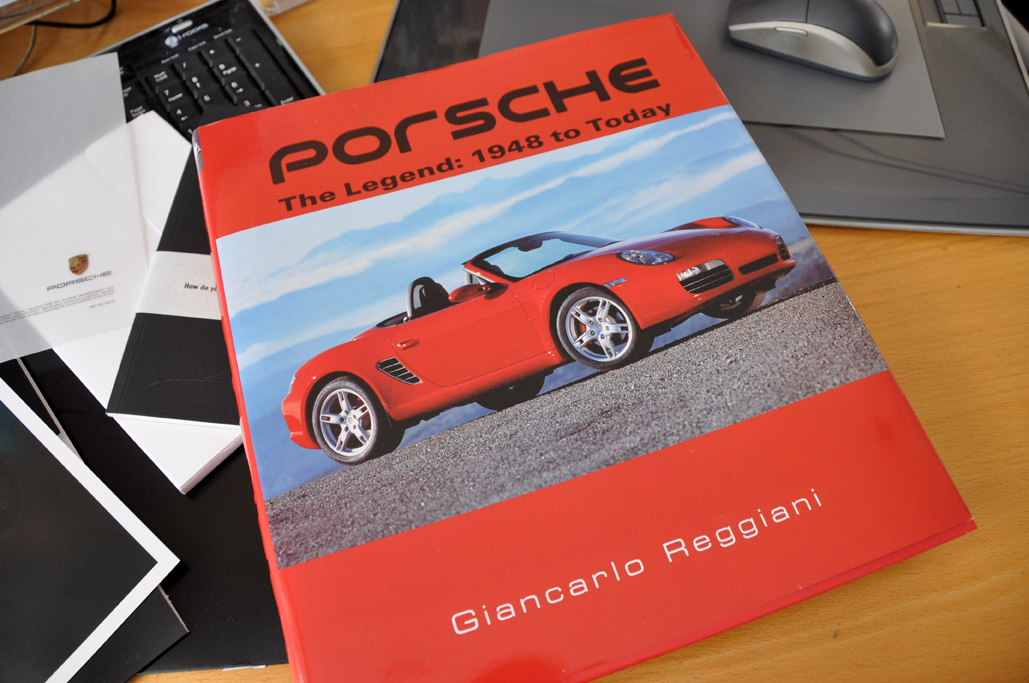
For readers who want to better understand heritage of the Panamera, they would be well served to add the book by Giancarlo Reggiani to their Porsche library. Porsche:The Legend covers the history of these fabled cars from 1948 to the present.
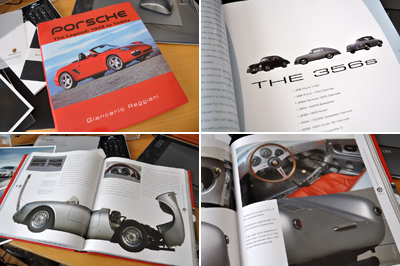
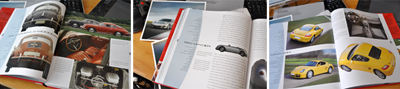
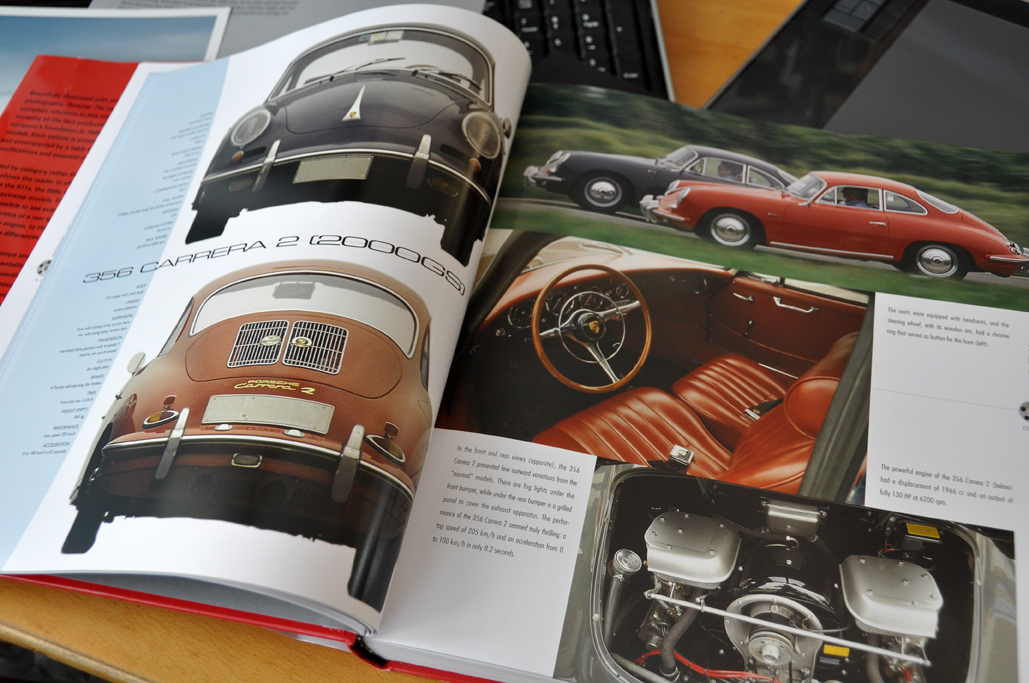
This giant volume is packed full of photos and info on all of the Porsches of the past sixty years. Many of the rare and one-offs are covered, some in double page spreads. Important details unique to a given model are called out separately.
We are not huge fans of the Cayenne and are not entirely sold on the the idea of a four-door Porsche sedan, but are willing to keep an open mind, especially they eventually offer a convertible version of the Panamera. Is this something for you? Let us know. [Permalink]- The Next Porsche
|
|
|
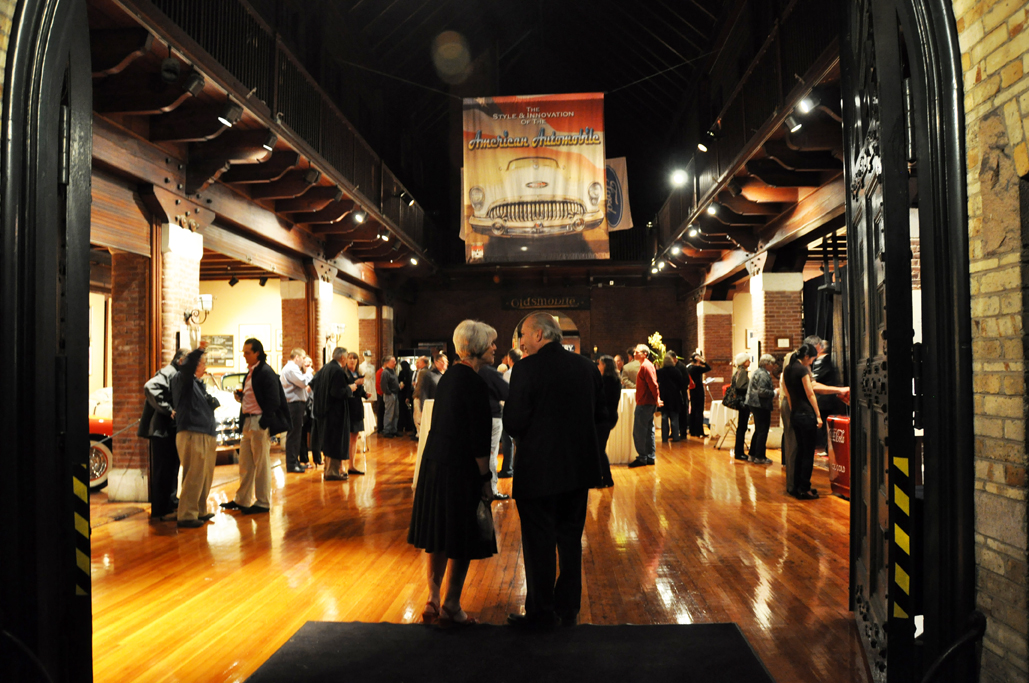
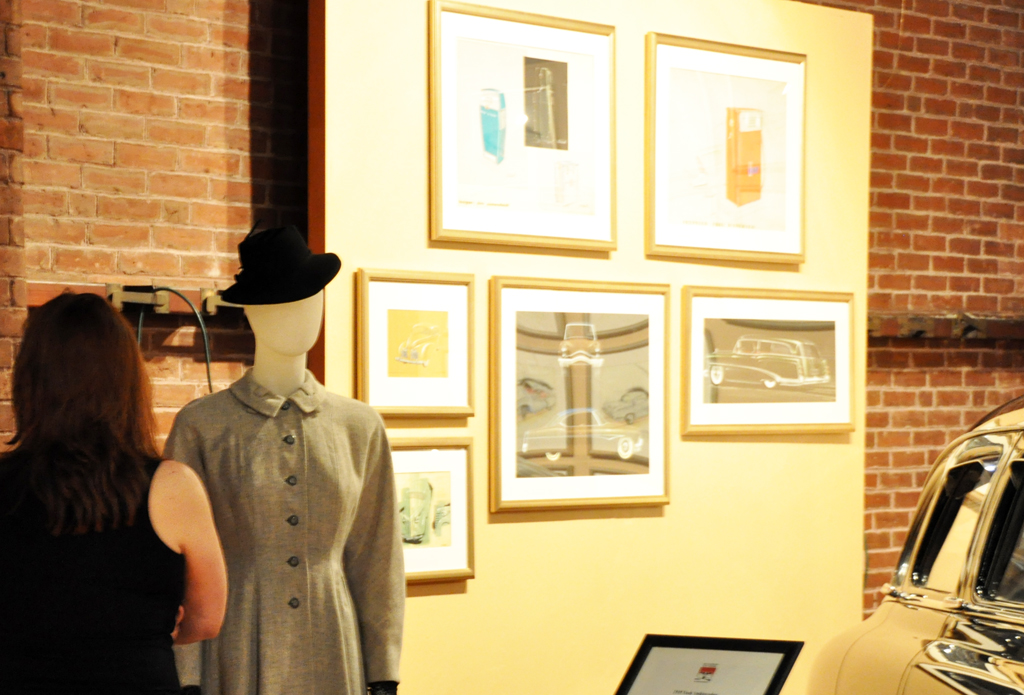
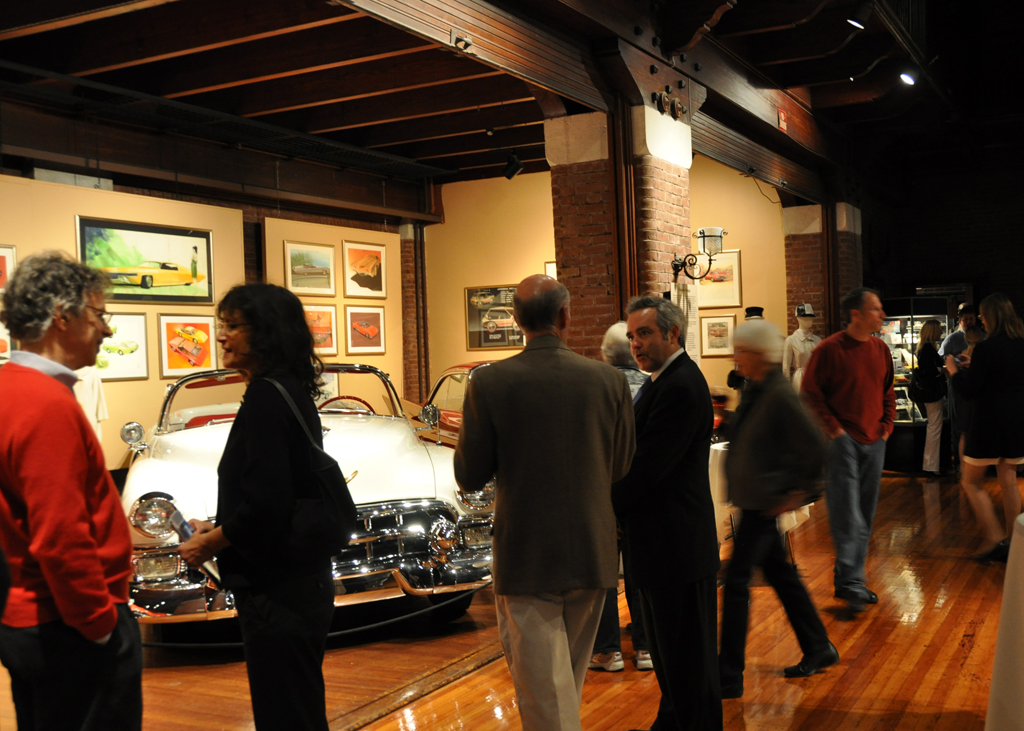
The RainyDayGarage folks went to the opening of Style and Innovation of the American Automobile at the Larz Anderson Auto Museum last night.

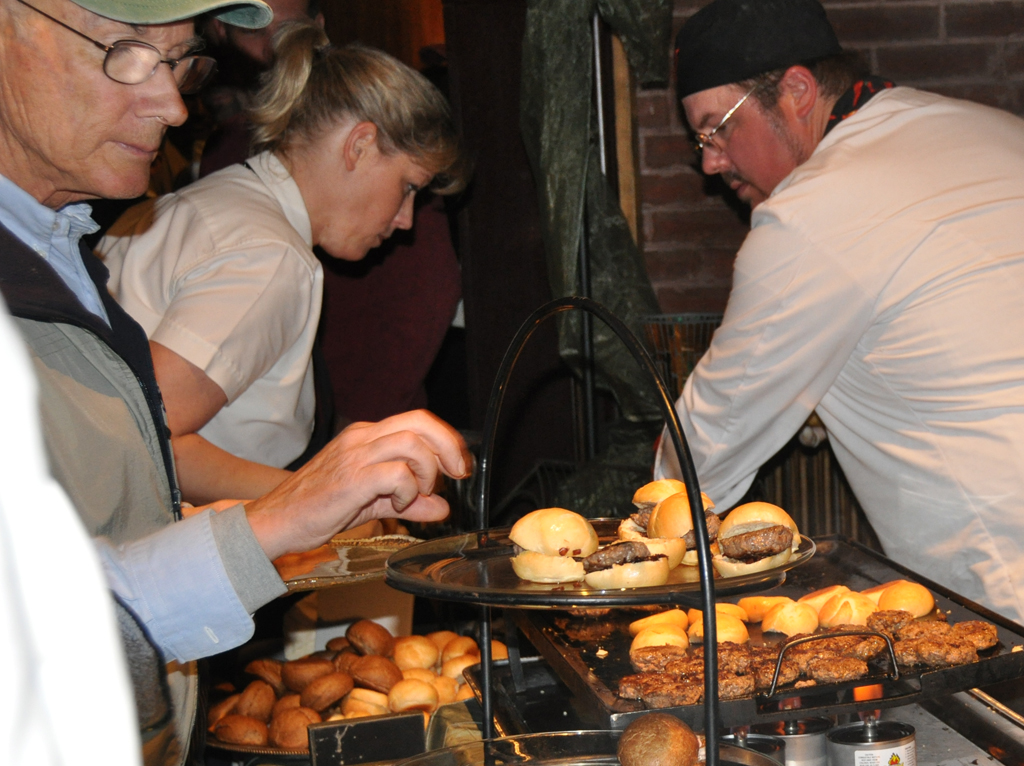
It was an amazing evening of fashion, food, and fun! We have been to many events at the LAAM and they are always a blast. The people are friendly, the conversations interesting, and everyone there LOVE cars! What more can ane ask for???
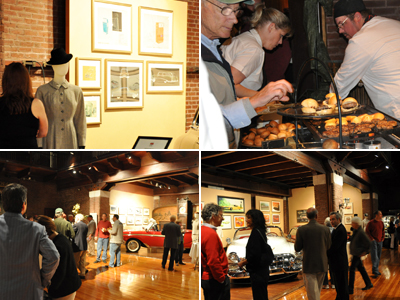
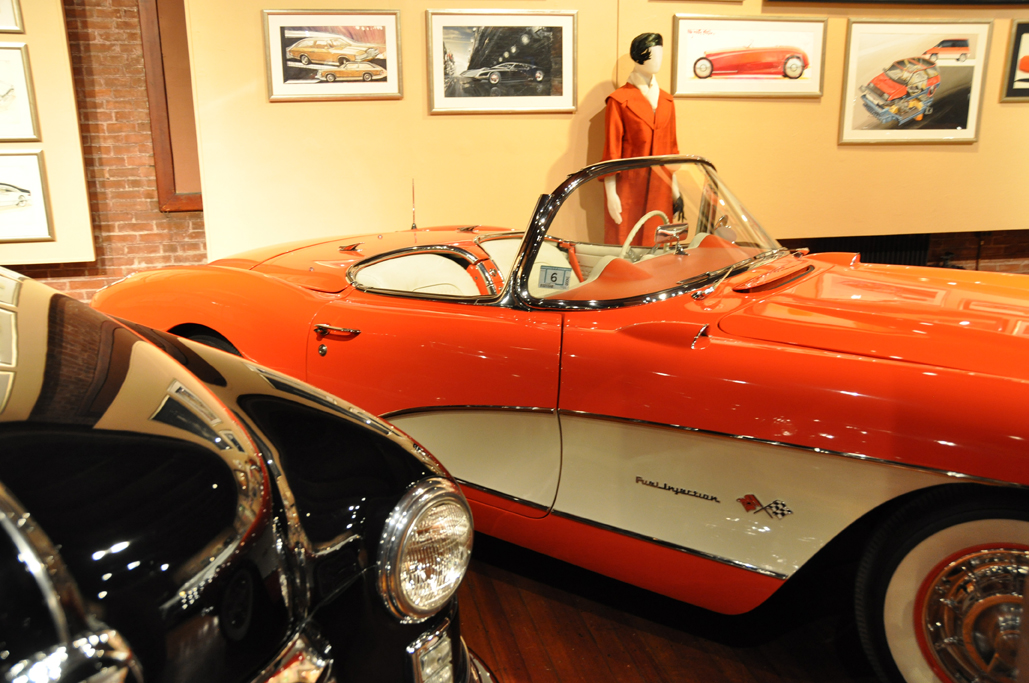
The exhibit was months in the making and all the effort paid off. It is spectacular. Many of the cars on exhibit are on loan from local collectors. Especially fun were the pairing of vintage fashion with the cars.


All of the autos owned by Lars and his wife Isobelle (previously on display in the main gallery) have been "returned" to their rightful places in an exhibit on the lower level. They have been arranged in the same manner as they were back when the garage was part of the the Anderson's home.
The exhibit is a fascinating step back in time and worth its own visit. We will go back soon and do a more complete write-up of all the new things at the LAAM.
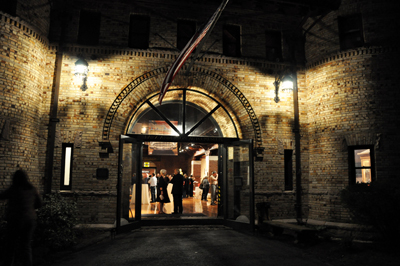
If you love cars, the Larz Anderson Auto Museum is a "must visit" destination. If you love parties, check out the LAAM events calendar. There is always something coming up. We hope to run into you at the next event! [Permalink]- Larz Anderson Auto Museum
|
|
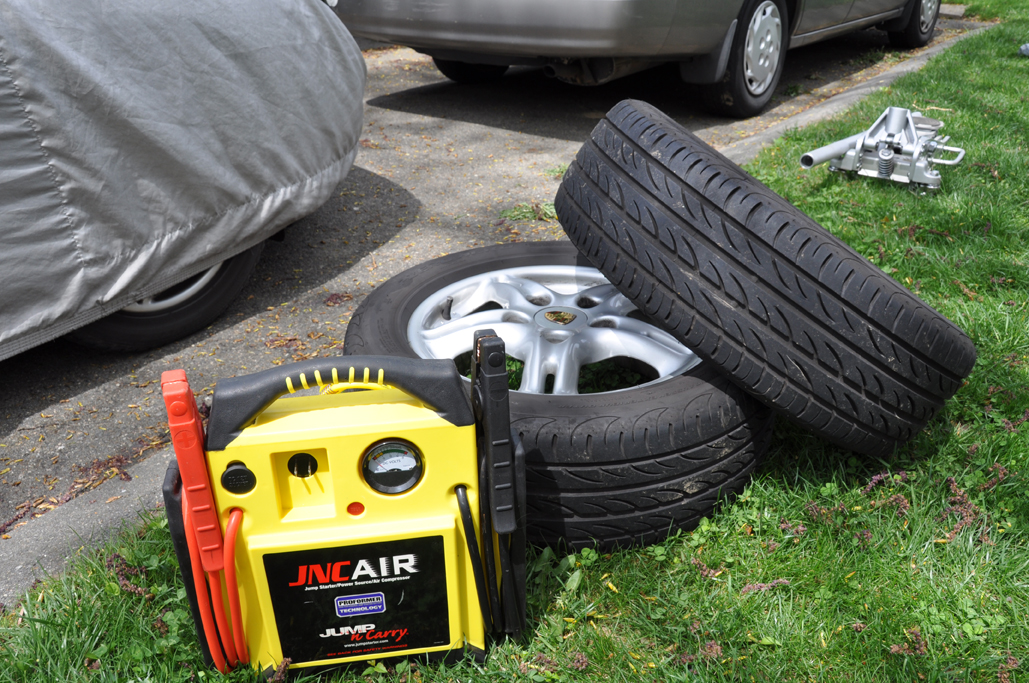
The weather has been beautiful these past two weekends. We decided it was probably safe to swap out the Boxster's snow tires for the Summer road tires. This year we checked and filled up all the Summer tires BEFORE putting them on the Boxster. Tthat is just good practice because one year we missed a nail in a tire, put the tire on the car, and it immediately went flat. Our go-to portable pump is the Clore Automotive's JNCAir. We have had it for a few years now. It costs a bit more up front, but it always works when we need it.

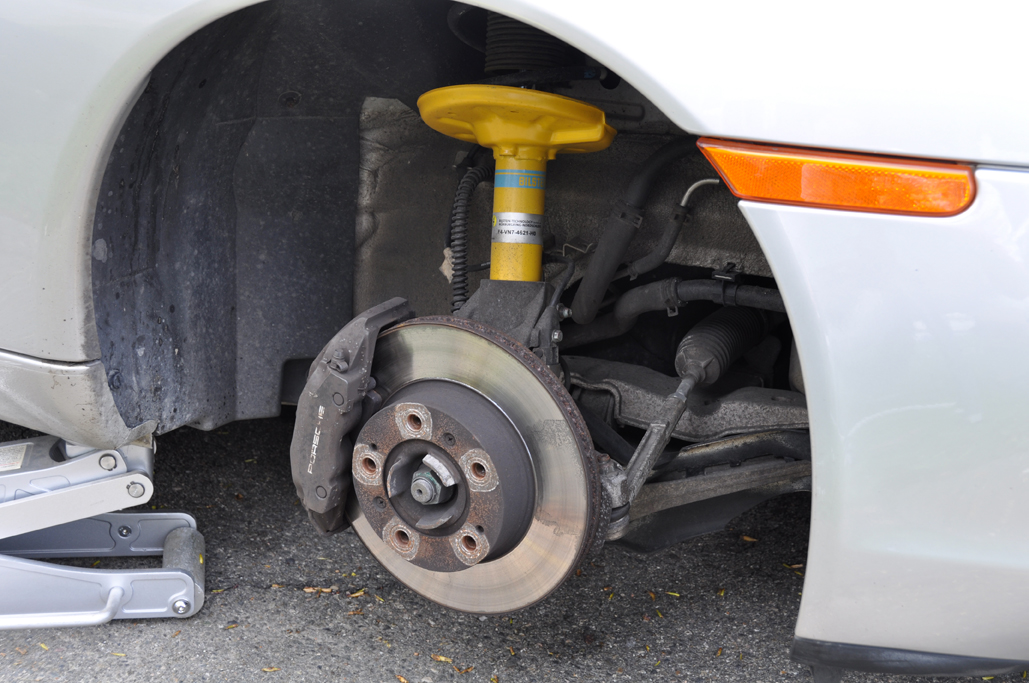
A few weeks ago, we brought the Boxster in for the annual inspection. It failed because the front shocks needed replacing. Last week, it threw a code (P0302) because two of the fuel injectors went bad. A quick check with the Bentley's Porsche Boxster Service Manual made us realize that this was a job for the pros :-) We also realized that, after almost 100K miles, what the car really needed (besides the shocks and the fuel injectors) was a really good tune-up.
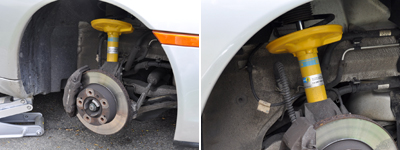
So we stopped by our local garage and consulted with Al. Al owns Gerardo's on Hyde Park Ave in Roslindale. When complicated or messy repairs are required on our Porsche, Gerardo's gets it done right at a price we like. We got the car back on Friday, and it is now running as good as new, and just in time for our roadtrip to Long Island for Mother's Day. Yay! [Permalink]- Spring Boxster Tune up
|
|
|
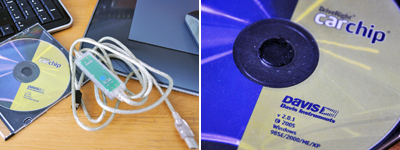
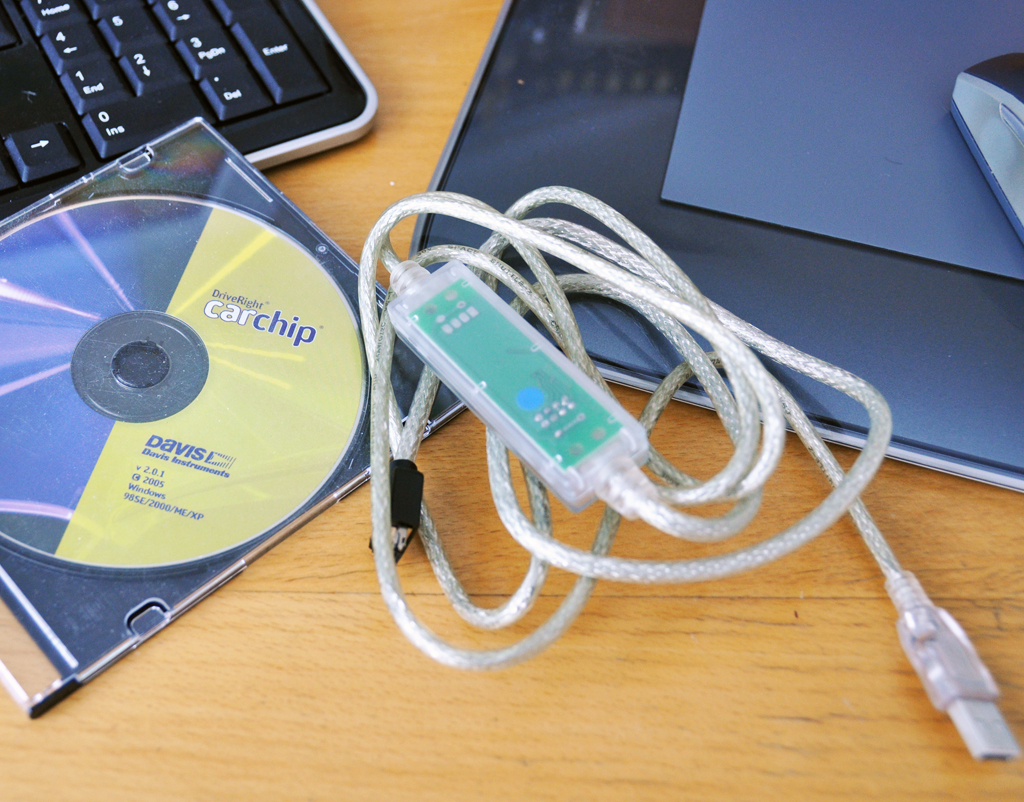
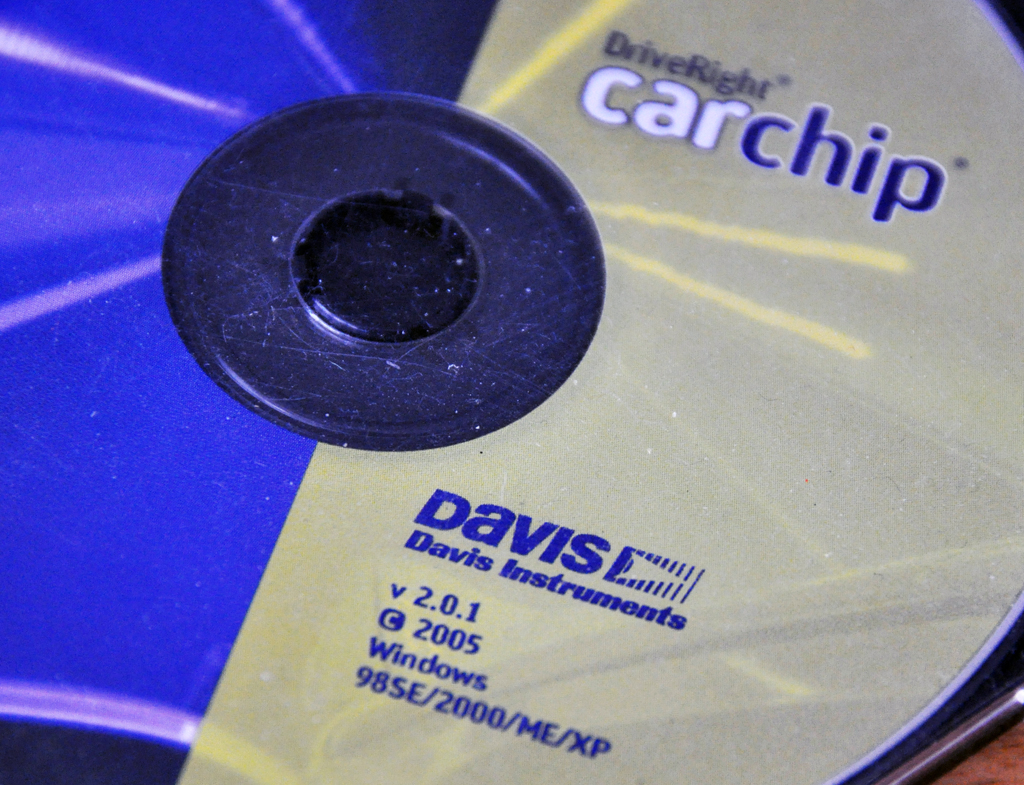
One of the most useful diagnostic tool the RainyDayGarage guys have in their toolbox is the DriveRight CarChip from Davis Instruments. Whenever any of our cars act up or throw a "Check Engine Light" code, we can quickly get a readout and get a better understanding of the cause of the problem.
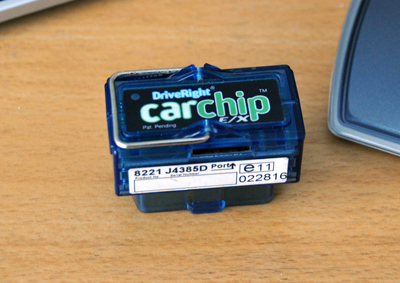
The kit comes with everything needed (OBD II compatible reader, USB data transfer cable, diagnostic software) to download the data and perform all kinds of analysis on a PC. The software is relatively easy to use and all kinds of data can be collected and examined.
We have been using this cool little device since 2005 and it has continued to prove its worth. The CarChip is not just for folks who like working on their cars. Sometimes it is good to just know what that "check engine" light is really telling you before you drop the car off at your local mechanic. [Permalink]- CarChip
|
|
|
Today is tax day. On this day, some will be writing a check to the government, others will be asking for some cash back. For those in the latter group, we have a suggestion on what to do with the "found" money. If the refund check is big enough, our suggestion would be to go get yourself a Porsche. Everyone should have the pleasure of owning one some time in their life. We joined the Porsche "club" and bought a Boxster eight years ago. We are glad for it everyday.
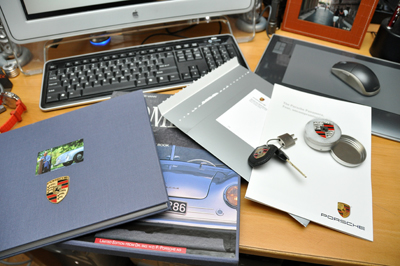
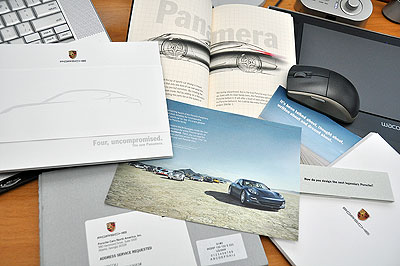
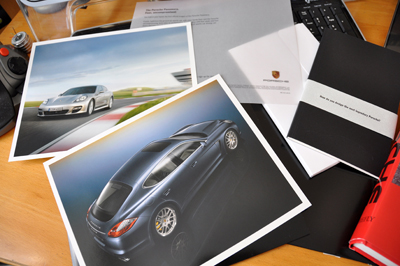
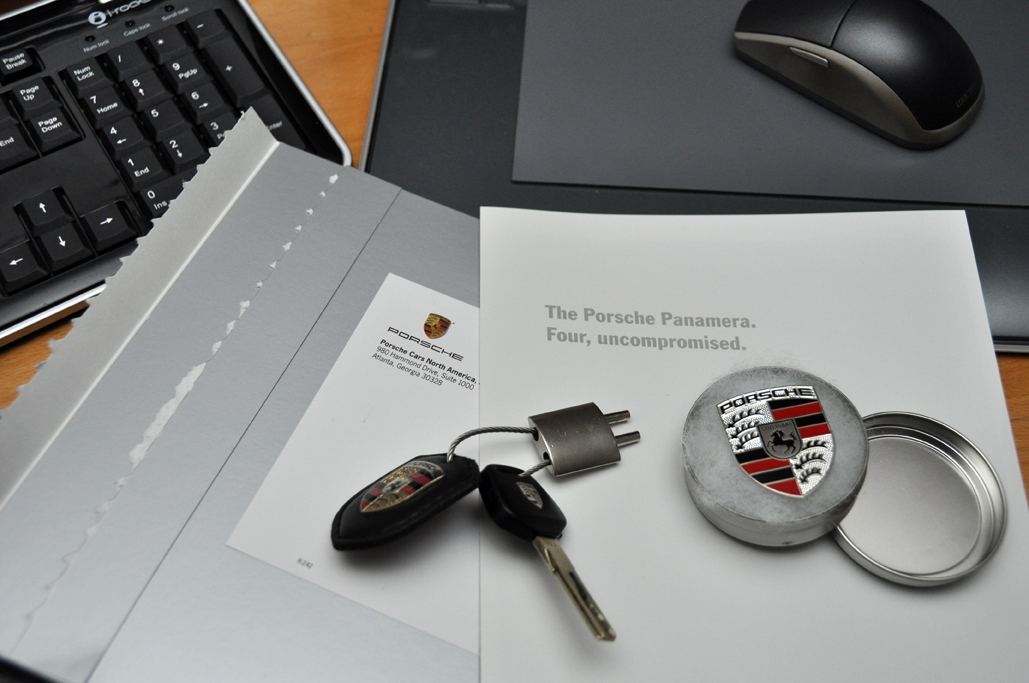
There are many nice things about being in the "club." One of them is all the awesome swag Porsche sends you when they are in the middle of a new car promotion. We have received crests, books, and brochures.
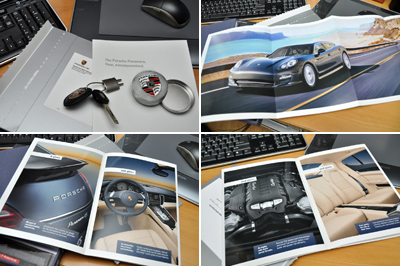
Porsche is very big on brochures. We get a lot of them...and yes, we save them all. The most recent one was about the new Panamera 4-door coupe. You heard it right. A 4-door Porsche. It is called the Panamera.

This new Porsche Panamera will make its worldwide debut on April 19 at the Shanghai Auto Show. This unveiling will be streamed live in real time. Those interested can watch it here. For those getting a substantial tax rebate check, the new Porsche Panamera may be a nice way to help "stimulate" the economy...along with your senses. [Permalink]- Porsche Panamera
|
|
|
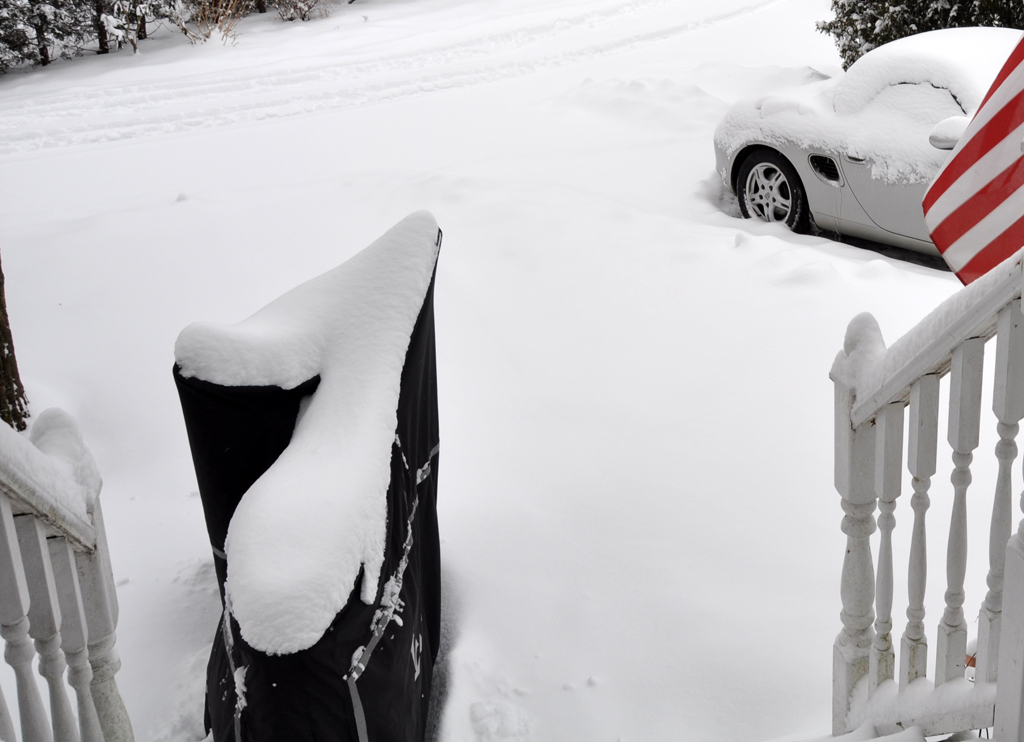
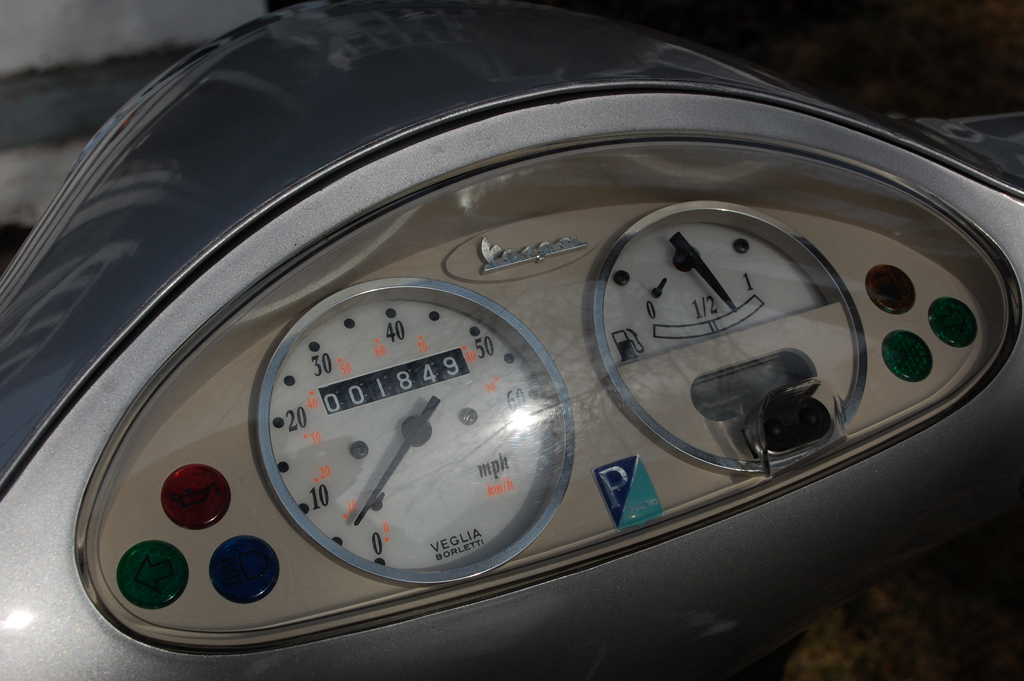
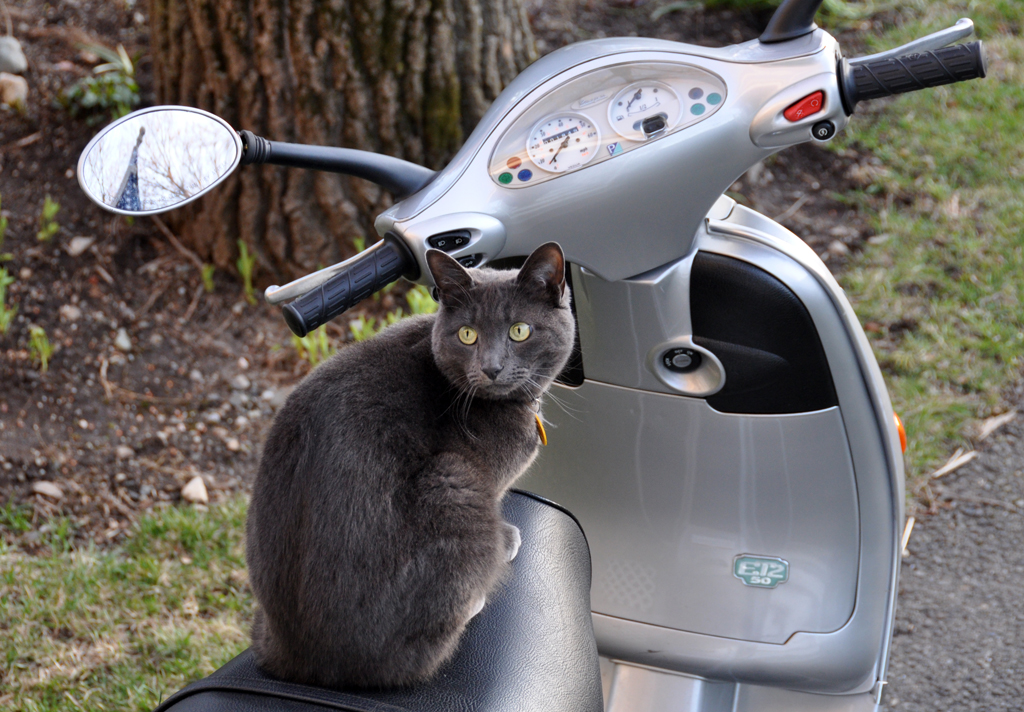
The Vespa we purchased last Fall spent the entire winter outside under an all-weather cover. We had no idea what would emerge when we uncovered it in the Spring or how much work we would need to do to get it ready for riding.
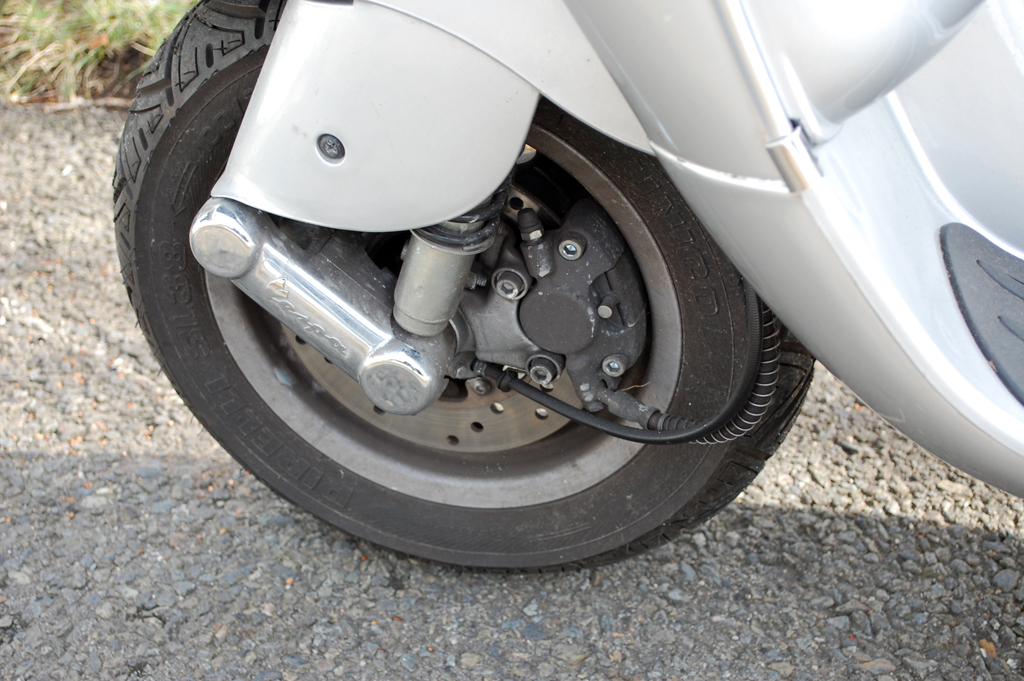
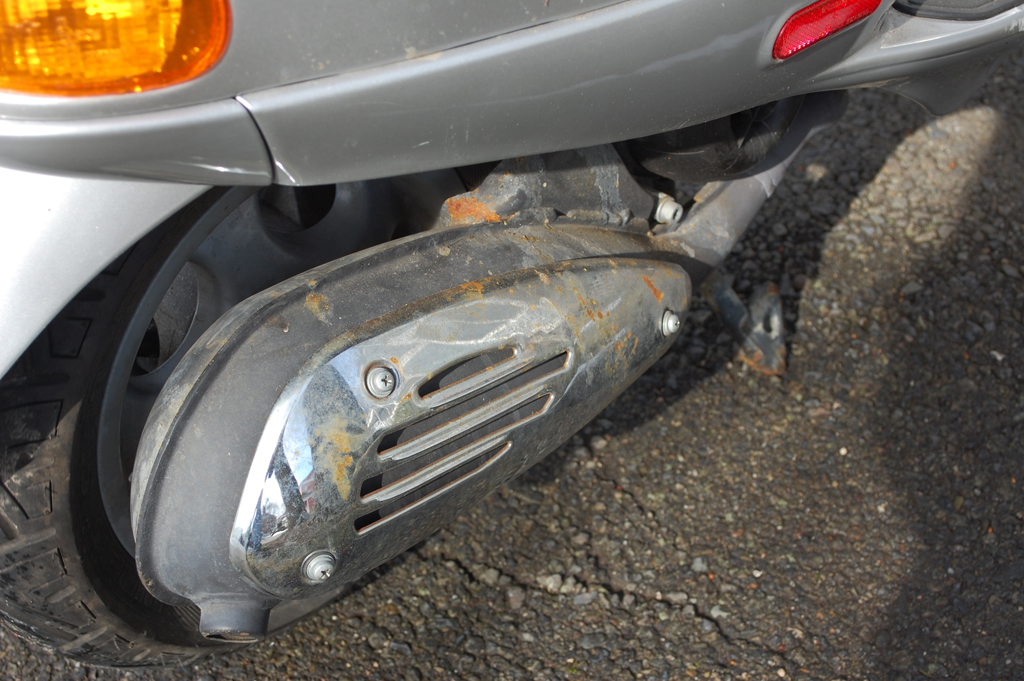
When the cover came off this weekend, the bike looked pretty much like when we covered it last Fall. Everything was dry. There was no moisture in the dash, no rust on the disc brake, and just a little bit of rust on the muffler.
The big question was, would it start up? When we hit the starter switch, the Vespa coughed a few times and, much to our relief, came to life. We were very excited to see that we did not have to do anything to get the scooter running.

Eliot was ready to go, so we took it out for a quick spin around the block. We will give the Vespa a complete cleaning just to shine it up for our first extended ride. [Permalink]- Vespa after Winter
|
|
| |
|
|
|
|


