| Today |
| Workshops |
| Audio/Video |
| Electronics |
| Carputer |
| Misc |
| Other Garages |
| Contact Us |
| RainyDayGarage... |
||
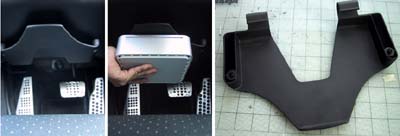
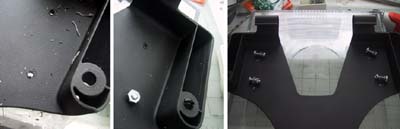
We looked at a bunch of different spots where we could put the Mac mini CPU and finally decided to put it under the steering wheel area. There was a handy mounting bracket already in place. We just had to figure out a way of attaching the Mac mini to it.
There were several reason for this choice: cooling the CPU, ease of access, and shorter cable runs. We felt the CPU would not get enought circulation in the front trunk since that space was pretty much air tight.
The central console was a great location, but we would have had no place for the DWW 700 LCD screen... we may look at this option again in the future. Other locations required too much cabling or shelf building.
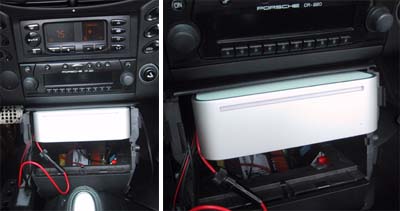
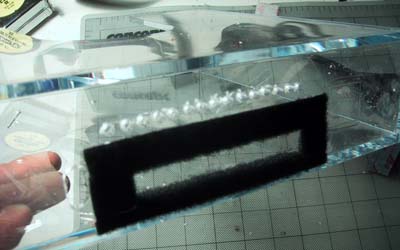
To mount the Mac mini, we found a box which we thought would work, but it was too big...our knees kept hitting it.
We decided we needed to find a better box... preferably one with the exact dimension to fit the Mac mini. We spent some time and found a supplier that would give us a clear polycarbonate box that did exactly what we wanted. The case was very sturdy and easy to drill. It fitted the Mac PERFECTLY. The rubber pad on the bottom of the Mac had just enough friction to keep the unit from moving around. In fact, if we had pushed the Mac all the way in to the back, we don't think we could get it back out.
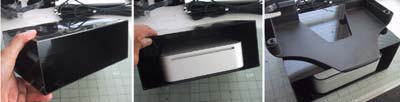
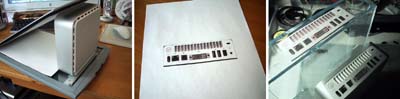
To get the exact dimesions for cutting the box, we scanned the rear of the Mac mini and printed a life size version that we taped to the back as a guide.
We drilled 4 holes right through the bracket into the box for mounting. We started with small pilot holes and worked our way up to the larger bits to make sure we didn't crack the plastic. It took a little longer, but we got much nicer holes :-)
Mounting the box was a bit tricky as space was tight, but we managed to get everything in place... long neck surgical clamps came in VERY handy in this situation. Next we'll install the DWW 700M LCD display. Go check it out here!
|
Apple Mac mini Shelf Installation |
|
The Mac mini is so small that we had many possible locations where we could install it in the Boxster. We thought it would be useful to document the possible placement considerations and share it with our RainyDayGarage readers! You are welcome to follow along on the entire Porsche Boxster Carputer project as we go from Design to Installation. The Mac mini portion of this Carputer project is divided into: Other segments of Carputer project:
Project Summary: CPU Placement 1. Difficulty - medium 2. Time - 90 min 3. Tools - drill, bits, screwdriver 4. Cost - $25 shelf, $5 screws/nuts NOTE: We had to buy a bunch of them to make it worthwhile. If you want one of the Mac mini CPU shelf, they are available for $25 + shipping directly from us (PayPal only). |
||