| Today |
| Carolyn's World |
| Gear & Gadgets |
| Garage |
| Garden |
| Kitchen |
| Unaccompanied Minors |
| Workshops |
| Contact Us |
| Index |

| RainyDayProjects... |
||
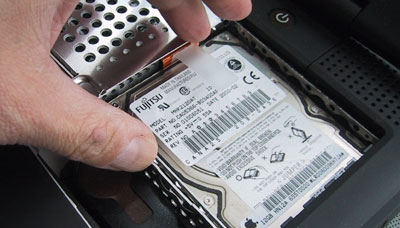
The 2.5" internal hard drive is on the right side of the opening. There is a pull tab on the frame and it LOOKS like we should be able to just pull ou the whole assembly. Not so fast :-) First, we needed to remove the metal heat shield (2 screws), the heat sink (3 screws), and the memory module and processor assembly.
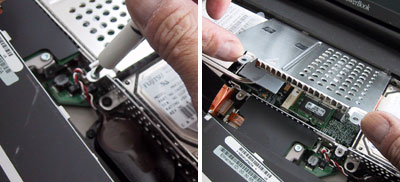
The metal heat shield is anchored by two Phillips screws. Once the screws were removed, the shield lifts right up and out. Under the heat shield is the memory expansion/processor card.
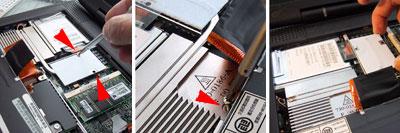
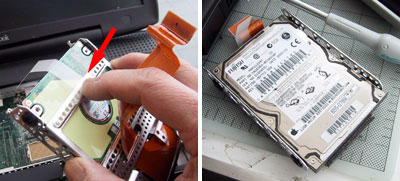
A metal heat sink is attached to the processor card by three screws (red arrows). Two of the screws are Torx #8 and the other is a Phillips screw.
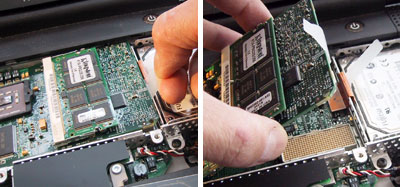
If the heat sink has never been removed before, there may be some adhesive (black square) between it and the chip underneath. However, it should lift off if pulled gently.
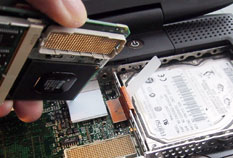
With the heat sink removed, the processor module can be lifted using the tab. Note the large connector at the lower right corner of the module...this must be aligned properly when the module is reinstalled later.
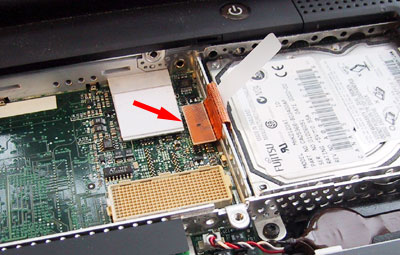
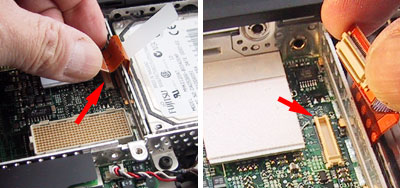
The drive interface connector (red arrow) must to be removed before the drive bay can be lifted clear. We were able to use our fingers to disconnect the cable...just be careful of the electronics.
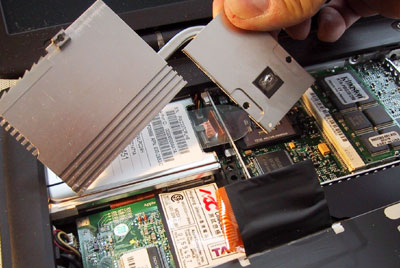
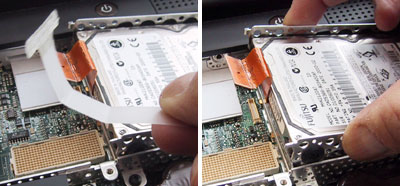
We tried lifting out the drive and the mount by using the tab. We managed to lift the frame part way out before we pulled off the tab. However, we were able to grab the side and slid the drive out of the space.
With the entire assembly removed, we realized the tab was to lift the carriage and not for pulling the assembly out. We reattached the pull tab to the bottom of the frame...next time we'll know better :-)
The drive assembly is now ready for the last part of this upgrade project...installing the new Seagate 100 GB drive. |
Apple G3 Upgrade Accessing The Hard Drive |
|
Why do we here at RainyDay Magazine keep trying to make our old discontinued gear work with the new technologies? Well, we can think of plenty of reasons (too much time on our hands, not enough money, too cheap to upgrade, etc...) However, sometimes we do it just for the fun of it :-) Take the G3. Because upgradability was part of the G3's design, user access to it was engineered in. In this series we'll walk through the steps on how to do some upgrades (memory, hard drive, G4 processor) to an old Apple G3 laptop so it can run OS-X, edit iMovies, and god knows what else :-)
In this article, we'll take a look at the G3 laptop, its removable pieces, and how to get at the upgradable components inside it. Accessing the inside : Drive Upgrade : Software Upgrade : 12 GB External Drive: Memory Upgrade: 1. RamJet 512 MB module install G4 Processor Upgrade:
|
||