| Today |
| Carolyn's World |
| Gear & Gadgets |
| Garage |
| Garden |
| Kitchen |
| Unaccompanied Minors |
| Workshops |
| Contact Us |
| Index |

| RainyDayProjects... |
||
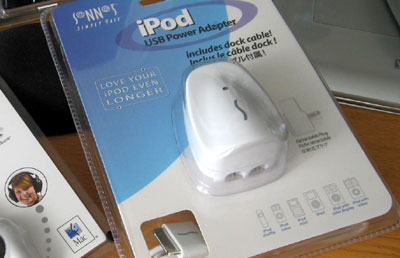
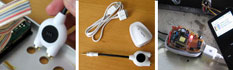
We chose the Sonnet iPod USB Power Adapter for this project because of it size. The adapter has fold away prongs at the bottom. We think it should be easy to solder on some wires to them and connect it up to the power switch of the box to control the AC to the adapter.
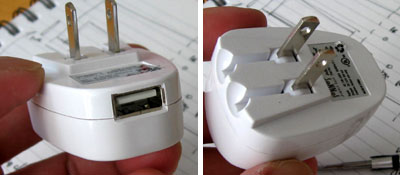
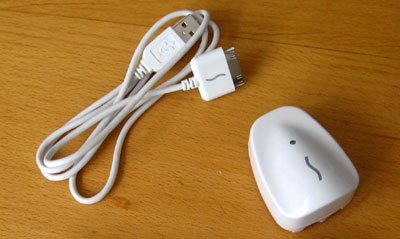
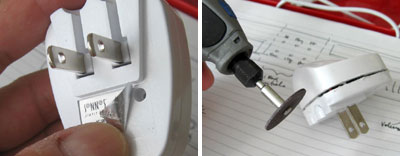
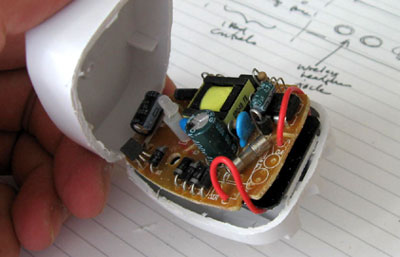
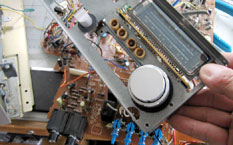
We also like the removeable USB cord because if the design of the iPod connector changes, all we have to do is probably get a new cable. When we thought about just connecting wires to the prongs, we realized that the prongs are probably not in contact with the electronics when in the retracted position. To find out for sure, we decided we needed to open up the case. Usually the label is a cover for the screws holding everything together. However, when we peeled it back, we didn't see any screws...so out came the Dremel Stylus. The Stylus made short work of opening the case. We loved the precise control and easy handling of the Stylus for these types f delicate cutting tasks.
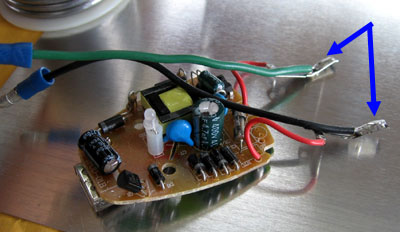
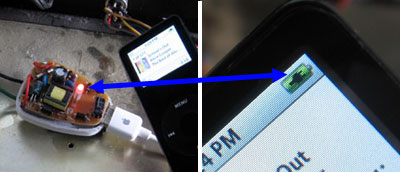
It turned out the prongs were NOT in contact with the circuitry when retracted. So we soldered on the wires directly to the contacts (blue arrows below) . The wires were attached in the direction shown so when everything was reassembled, they would be pointing out from the case in the proper way.
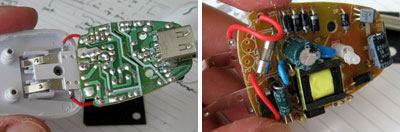
We used non permanent connectors to make future assembly/ disassembly easier. It is a little more work now, but they usually pay off if/when we have to debug the system.
When reassembling the Sonnet charger, be sure to put back the black insulating piece so the circuit board does not come into contact with the soldered wires. The wires exiting out the two openings at the bottom should fit well into the two grooves in the casing.
We decided velcro was the best way to secure the charger to the base. It will let us easily move it someplace else should we need to in the future.
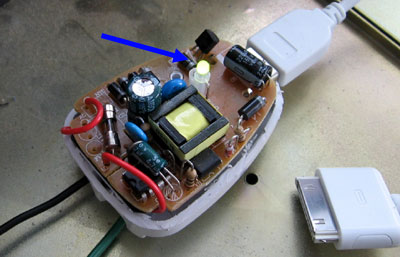
When we hit the switch on the front of the box, we were greated with a happy green glow (blue arrow). We thought we were done, but we decide we had better see if the iPod actually charges when connected to the charger. When we connected the iPod, nothing on the iPod screen changed. We were expecting to see the battery icon changed to the "charging" icon. After a little debugging, we concluded the Sonnet cable was the problem. A switch of the cable gave the expected results (below).
Note that when the unit is charging, the green LED goes red and the icon on the iPod changes to one with a plug inside the battery. We have reported the problem to Sonnet and they said they would send out a replacement cable. We'll let you know how the new cable works out. We have now successfully integrated the iPod charger to the Onkyo box. The power to the charger is controlled by the button on the front panel. The next task is to add the audio splitter to the front of the panel so the iPod can send it output to other audio devices. |
Cassette Deck iPod Dock Installing the iPod Charger |
|
The wireless network wasn't the only thing that went south over the weekend. Our 27 year old Onkyo cassette player also decided it was a good weekend to take retirement. The fact that we used it maybe 4 times in the last 9 years shouldn't be a reason why it didn't want to work when we needed it! To honor its memory and to keep its shell from entering the landfill just yet, we decided to gut it and convert it into... what else but an iPod dock/ charger/ wireless transmitter.
We were going to write-up this project when we get everything just the way we like it, however, your emails have convinced us that you would rather see the progress as it happens. So here it is! BTW, if you have a project of a similar nature...drop us a note. We would love to see what you have done! iPodDock Project:
|
||