| Today |
| Workshops |
| Audio/Video |
| Electronics |
| Carputer |
| Misc |
| Other Garages |
| Contact Us |
| RainyDayGarage... |
||
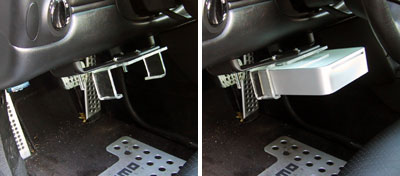
We looked at a bunch of different spots where we could put the Mac mini CPU and finally decided to attach it to the front console beneath the steering wheel area.
The first CPU mount was home-made and it worked OK for a few months. However, it was kind of big and we kept knocking into it when we got into or out of the Boxster. We finally decided to look for a better solution and found a few companies making mounts for the Mac mini. The BEST mount we found was one designed by Jeremy Hubbell of Hubbell Automation. There have been a few iterations of the design based on user requests and feedback.
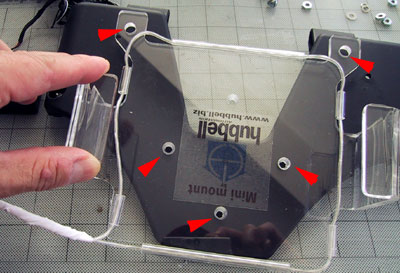
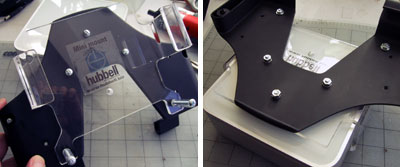
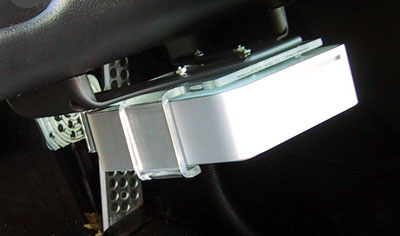
We checked out both the shelf mount and the wall mount. The shelf mount design is almost an inverse of the wall mount design. In the shelf mount, the "legs" are used as anchor points for the unit. In the wall mount, the back plate is where the anchor holes are (red arrows below).
We found the wall mount design was actually the best for our particular application since we were able to drill five anchor holes in the Boxster's map holder to attach the mount. Note that our wall mount unit came with the backlighting option (white wire). It would have looked great, but we decided we didn't want to deal with that in this project so we removed it.
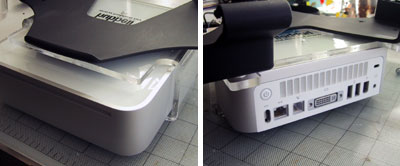
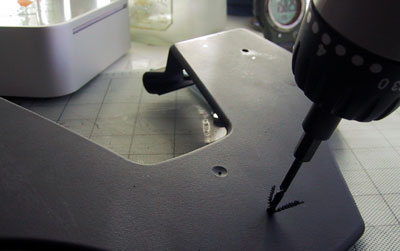
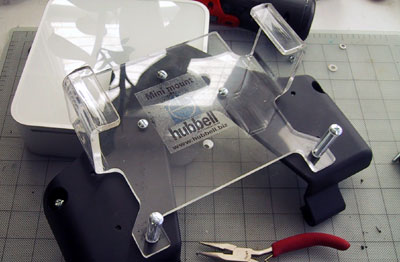
After marking the five anchor points, we drilled the holes, rechecked the alignment, and mounted the unit. We test-fitted the Mac mini during the assembly process to make sure it had sufficient clearance from the screw heads.
The design of the unit we received has changed from what's on the Hubbell Automation site. The rear "block" now has removeable pieces which are attached by a bolt rather than glued in place. We like this much better since it gave us two more anchor points.
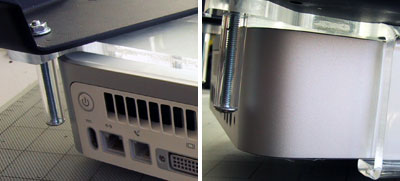
There is about a 1/8" clearance from the head of the bolts to the Mac. The anchor holes in the mount were actually counter-sunked so if we had used flat headed machine screws, it would have been completely flat. We had screws from the previous install and hadn't bothered to get new ones. However, if you want to be sure of not accidentally scratching the surface of the Mac mini, flat headed machine screws are obviously the way to go.
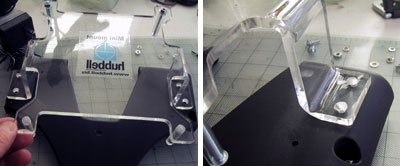
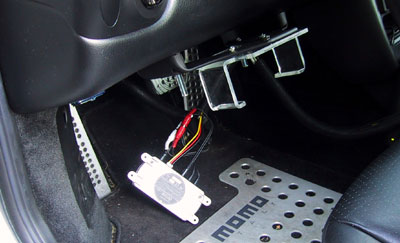
The installation of the mount back into the Boxster was a snap. As one can see, we now have MUCH more clearance under the steering wheel compared to the previous mount (pic at the top of this page). One thing we had to move was the Drive+Play brain module. We had it in the map holder, but we decided to move it to behind the carpet at the back of the footwell.
The Mac mini slides in and out with no problems. This Hubbell mount is a well thought-out design and a quality piece. If you need a way to mount the Mac mini onto a surface, we think the Hubbell Mount options are the best out there today. |
Carputer Hubbell Mount Installation |
|
The Mac mini is so small that we have many possible locations where we could install it in the Boxster. We thought it would be useful to document the possible placement considerations and share it with our RainyDayGarage readers! You are welcome to follow along on the entire Porsche Boxster Carputer project as we go from Design to Installation. The Mac mini portion of this Carputer project is divided into: Other segments of Carputer project:
Project Summary: CPU Placement 1. Difficulty - simple 2. Time - 30 min 3. Tools - drill, bits, screwdriver 4. Cost - $50-$70 |
||