|
|
|
RainyDayMagazine's content can now be licensed for your print magazine or web site. Please contact us directly here. If you want to see something reviewed, then drop us a note with a link and we'll be happy to take a look.
|
|
July 27,2008 (WeekendEdition) |
Those of you who came by for the "sale" last week got some nice bargains. We got rid of some good office funiture at some great prices. This weekend, folks here stopped by IKEA and picked up some new items for their workspace.
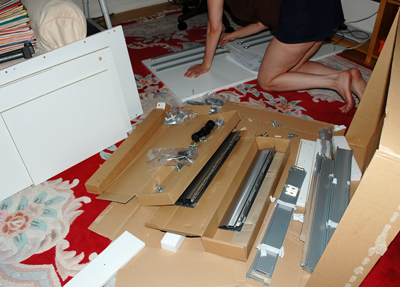
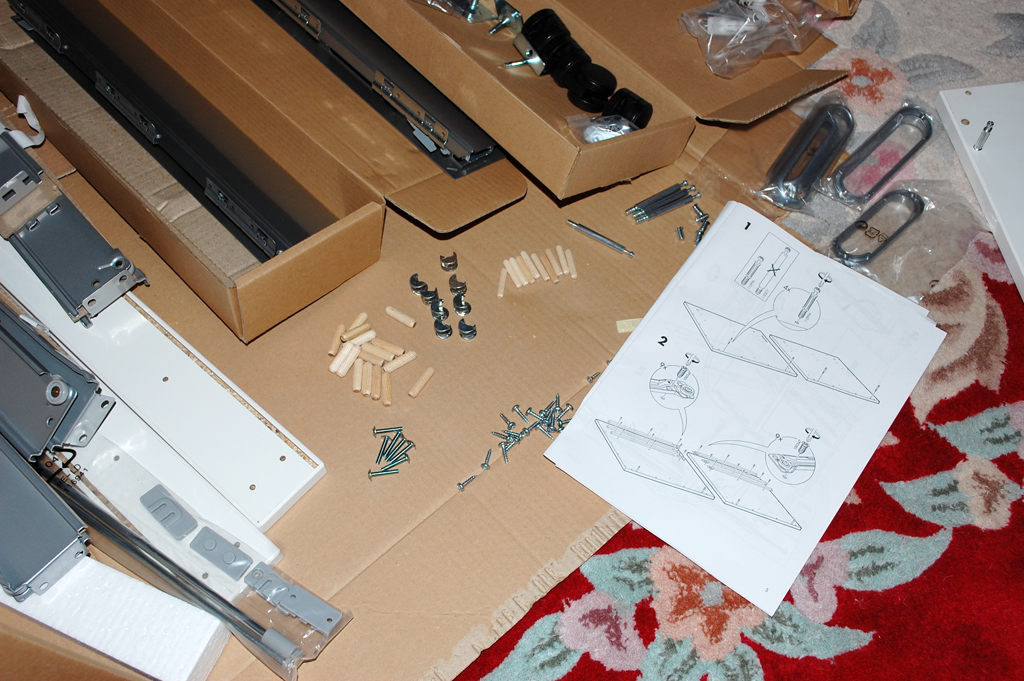
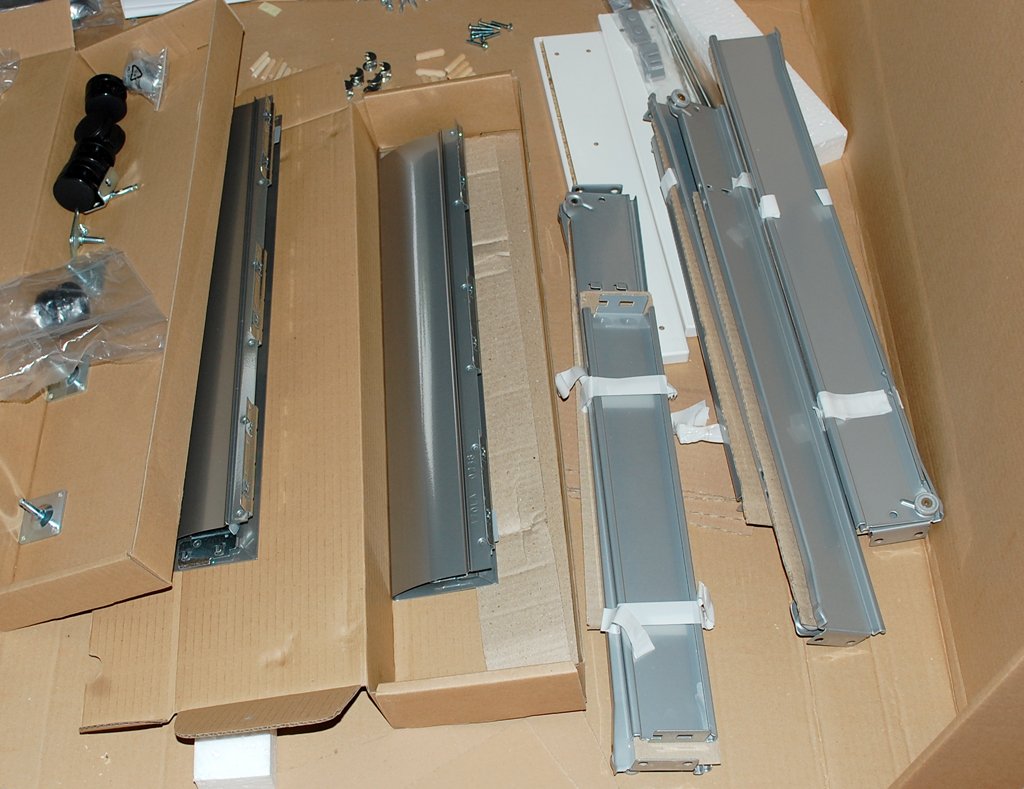
As with all things IKEA, assembly IS required. Putting desks and shelves together are pretty easy. Filing cabinets, on the other hand, are a different story. Carolyn thought it would be "fun" to see just how long it takes to assemble one of these units. We started the clock and off she went.
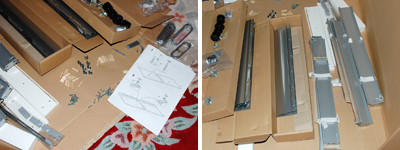
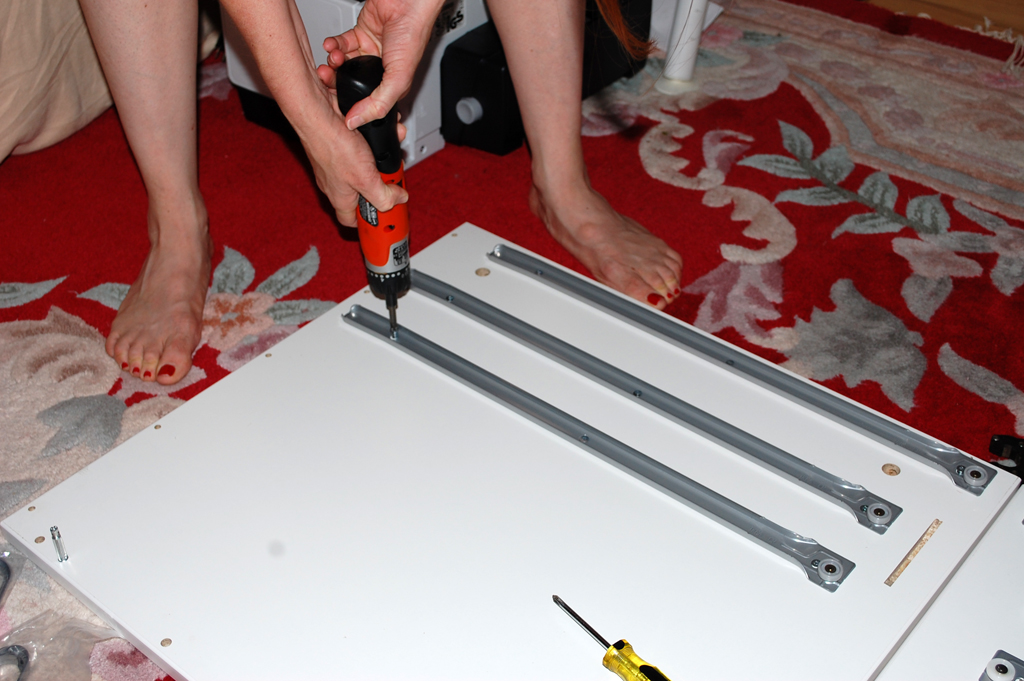
IKEA instructions are all in pictures, no language localization required. Carolyn thought it best to lay things out before diving in. The holes for the guides and rails are all pre-drilled. This made the process a lot quicker. Assembly can be done using a regular screwdriver, but a powered one is recommended.

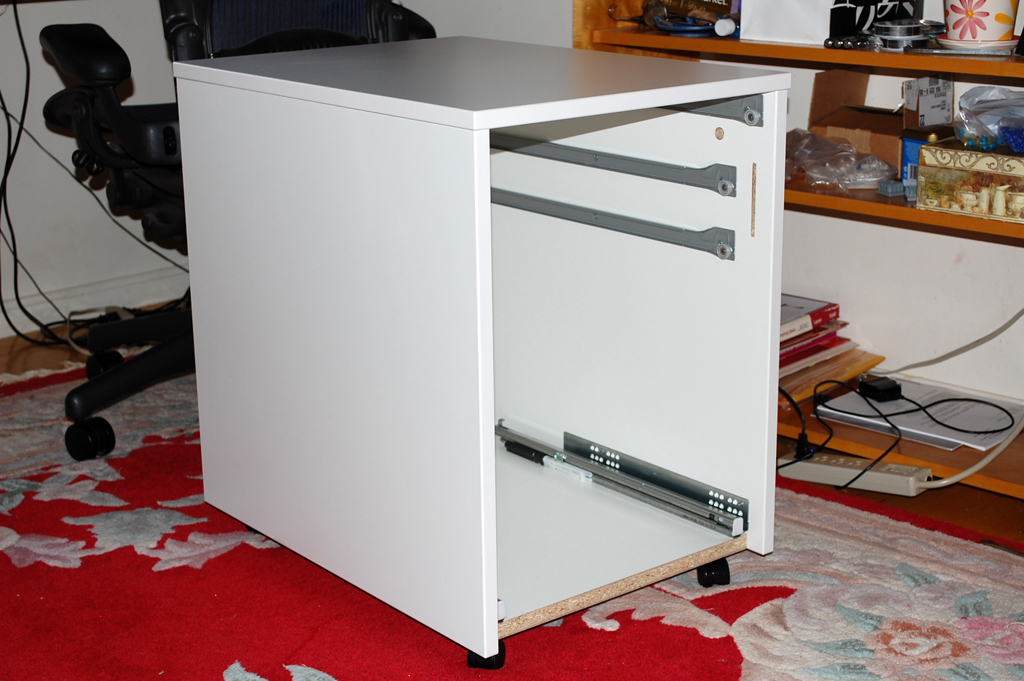
Getting the guides on was the most time consuming part of the assembly process. Erecting the cabinet, installing the lock, and handles were much quicker compared to mounting the guides.
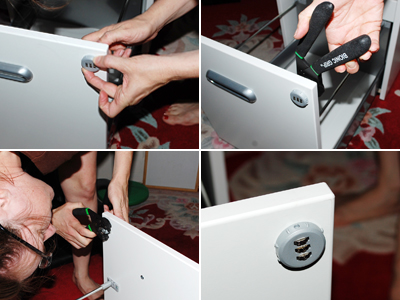
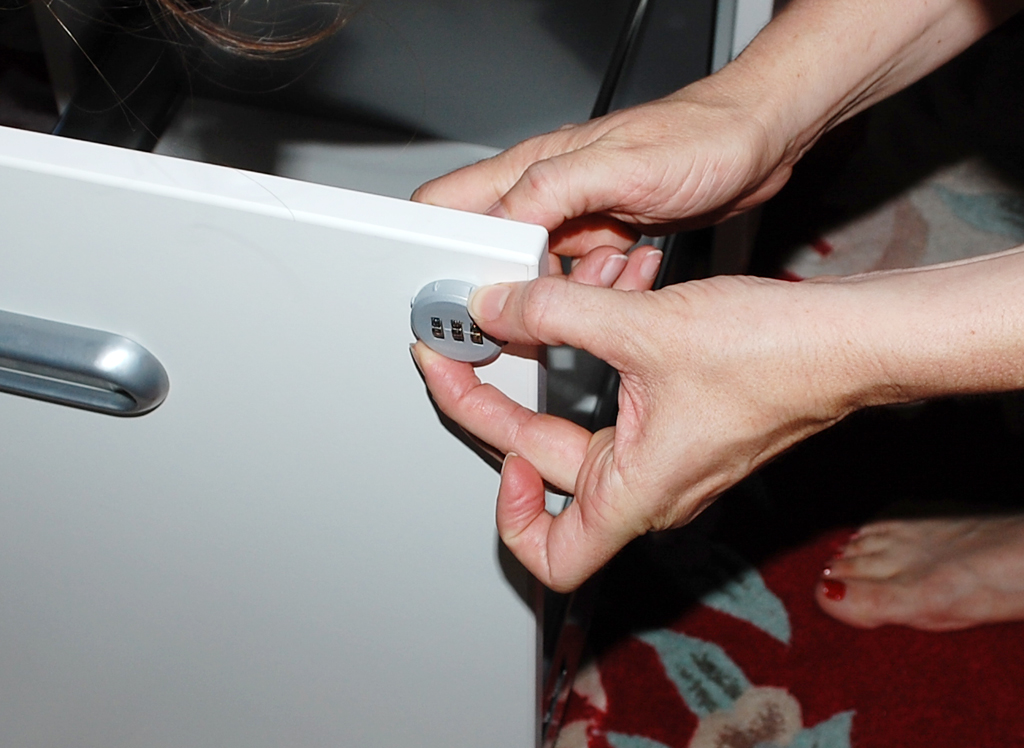
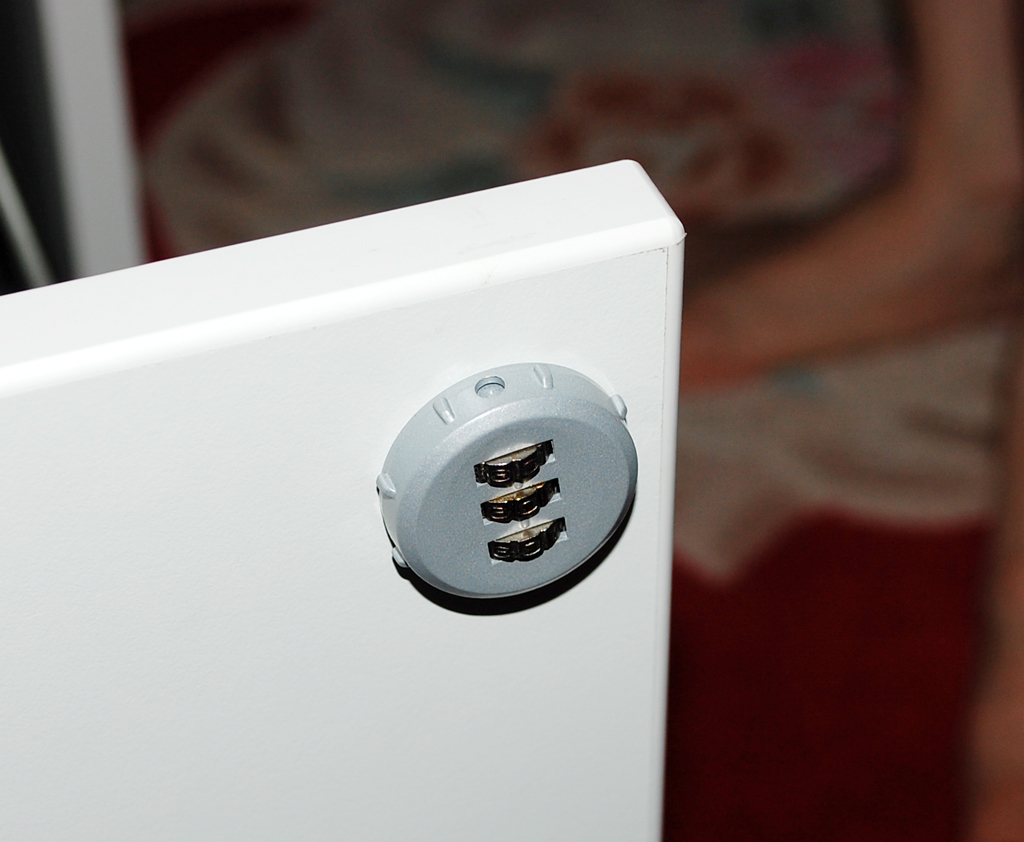
The lock is a combination dial which turns to lower a latch into a slot in the side of the cabinet wall. The lock will secure the file drawer and the two internal flat drawers. The top drawer can still be opened when the bottom part is secured.

Once completed, we noticed that the alignment of the top drawer and the file drawer were a little bit off. The bottom drawer does have controls which allows for some up/down and left/right adjustments, but both of these assumes the drawers are parallel...which they were not. Overall, the build when quite smoothly. The total time it took for the unpacking, assembly, and final adjustments? About 2 hours from start to finish. The completed GALANT cabinet and table look great together, are very sturdy, and should hold up well in most SOHO environments. [Permalink] - Wan Chi Lau
|
July 26,2008 (WeekendEdition) |
After two weeks of dry weather, the RainyDayGarden was desperate for some rain. What's the saying? "Be careful of what you wish for?" Well, we had four days of heavy intermittent thunder showers last week.


Everything received a much needed soaking and they all perked up when the sun came out this morning. The rain gauge had registered closed to two inches of rain just from yesterday's late day shower.

Once the sun had warmed things up, the garden came alive with activity. Buffy and Eliot quickly got tired of chasing the bees and butterflies and curled up somewhere for a nap. We went in search of "bug pics." It didn't take us long to get a variety of shots of grasshoppers, bees, and other flying insects crawling on the blooms.


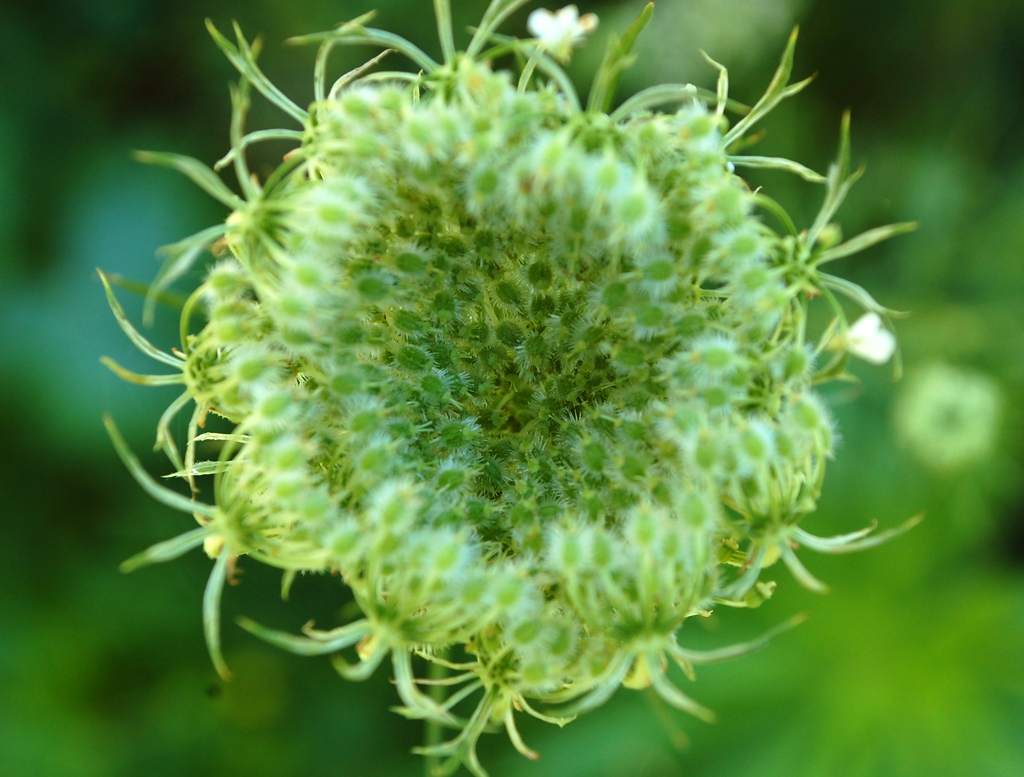
The rain was timed perfectly for the Queen Anne's Lace which pops up around the garden about now. This plant can be a bit invasive. Some even consider it a weed. We don't mind it so much because of the big white lacy flowers. Unchecked, they can spread quickly and grow quite tall. They are very hardy and attract a lot of bees and butterfies. So we tend to let them be unless they pop up in the middld of something or look out of place. [Permalink] - Wan Chi Lau
|
July 25,2008 (FineArtsFriday) |
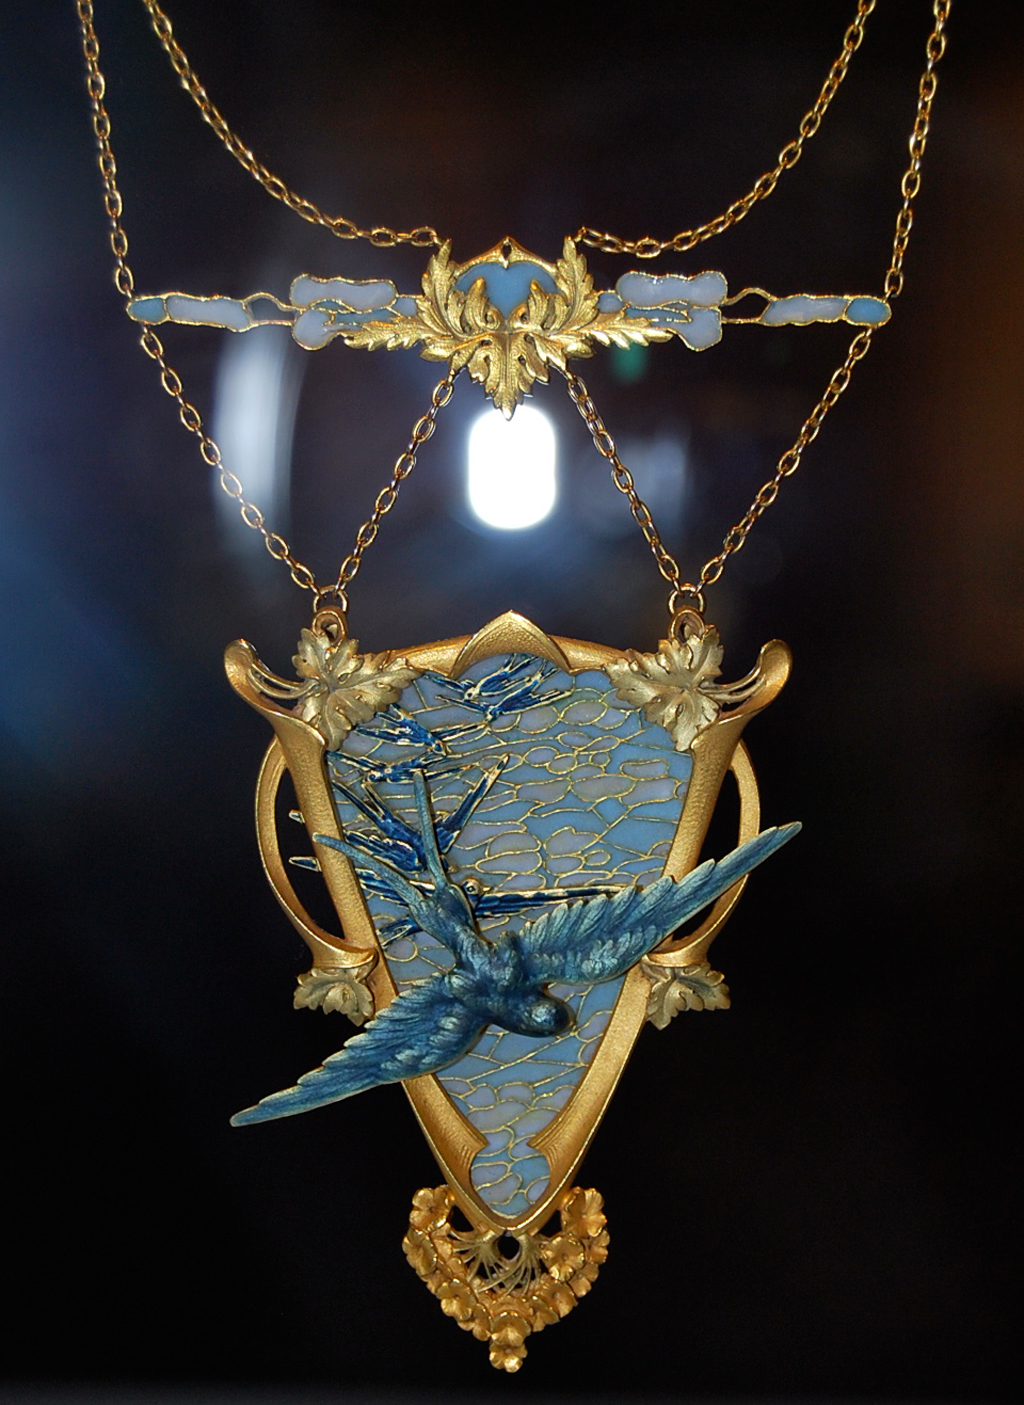
“Imperishable Beauty: Art Nouveau Jewelry” has just opened at the Torf Gallery of the Museum of Fine Arts Boston, and it is a lovely, delicate exhibition. While these things may have been jewelry when they were first made, they are works of art now, and have every right to be in a museum.

The Art Nouveau movement did not span many decades (two and a half, three at the most), but its lines -- or curves, to be more accurate -- are with us still. The idea behind the movement was to get away from the Edwardian (whites and diamonds) and Arts and Crafts (blocky and solid) ways of looking at the world. The jewelry in this exhibit, most of which are on generous loan from a collector couple who wish to remain anonymous (probably because if the females of their families knew they had these pieces there would be alot of requests for the borrowing of them), express the ideals of the movement in intensely artistic craft. They are delicate, and delicately colored, and curvy and flowing and naturalistic.

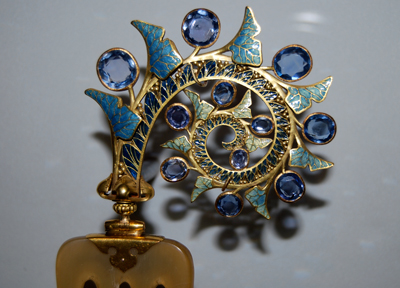
A number of the pieces are René Lalique’s, who might be better known for his glass work. There is his hair comb, for example, made with gold, enamel, sapphire, and horn. It the curvy-ness that gets you, and the way the blue of the enamel reflects the blue of the sapphire. I’m sure everyone will have their own opinion, but to me it looked like a stylized lick of fire, curling around on itself with newer licks veering away from the original.
Our own Louis Comfort Tiffany is here, too, both in jewelry and in his more well-known lampware.
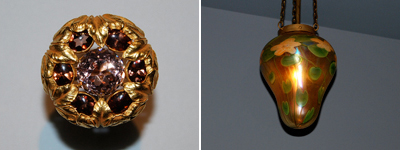
One of the things that strikes you is the amount of color found in almost every piece. After the whiteness of the Edwardians, the Art Nouveau-ists found that colored gemstones - topazes, emeralds, sapphires, tourmalines - only half-satisfied their need to show the natural world in their designs. The other half was satisfied with enameling. There were three types of enamelling used during this time, and the most astonishing type is plique-à-jour, or “open to the light” technique. This involved placing metal partitions between the enamels, but not behind/underneath it. The enamel, which in its beginning form is a powder, is carefully added to the various areas, is then heated to melt the powder. And this is done again and again and again until the desired depth and color is achieved. These pieces are like stained glass, you can see through the color. The nice thing about this exhibit is that everything is in cases, and so if you really really realy wanted to see this plique-à-jour up close, you can press your nose up against the case and the alarms won’t go off (I checked -- although it seemed to startle the exhibition’s staff...)

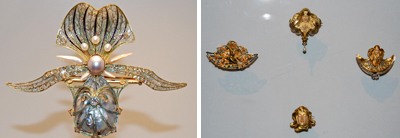
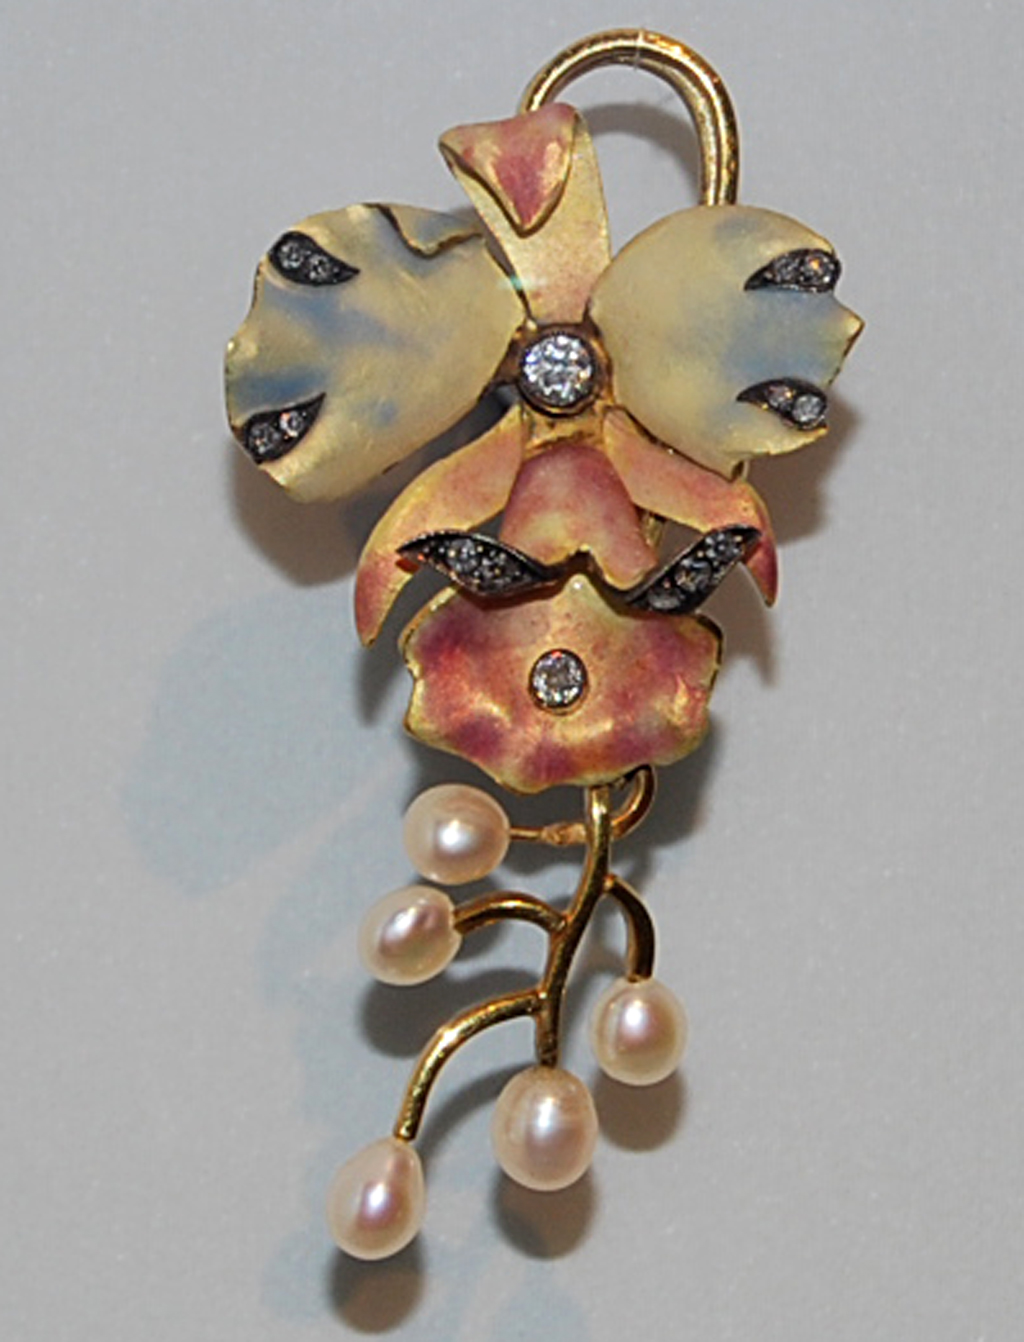
Art Nouveau focused on the three Fs: Flora, fauna, and females. The flora were mostly orchids, the fauna were mostly scary creatures made pretty(ish), and the women were mostly stylized goddesses (women suffrage was going on, rather make one up than have a real one shout at you about the vote and then not make you your dinner). I don’t know what was going on in the world -- perhaps there alot of expeditions to far flung places to discover and name new versions of old things - but these men (and funnily enough most Art Nouveau artists were men) seemed to have a prediliction for scarabs and snakes. Luckily, there are no delicately-wrought pieces representing the dung beetle here (perhaps they hadn’t been discovered yet).


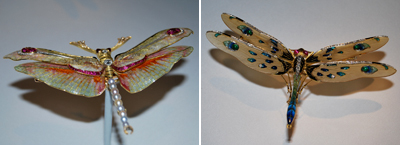
However, the two dragonfly brooches, whose wingspans are as wide as your hand is high, are as pretty in jewelry as they are in nature.
Yvonne Markowitz, a long-time research fellow at the MFA and now the very first curator of Jewelry, has done a remarkable job in locating these pieces and organizing this exhibit. The exhibit is a little bit about history, a little bit about politics, and alot about jewelry. It’s a wonderful, wonderful show, and if you can appreciate art, you can appreciate these pieces. I highly recommend it. [Permalink]- Text and Photos by Carolyn Donovan
Imperishable Beauty: Art Nouveau Jewelry
Wednesday, July 23, 2008 - Sunday, November 9, 2008
Museum of Fine Art, Boston
www.mfa.org
|
July 24,2008 (TechTreasureOrTrashThursday) |
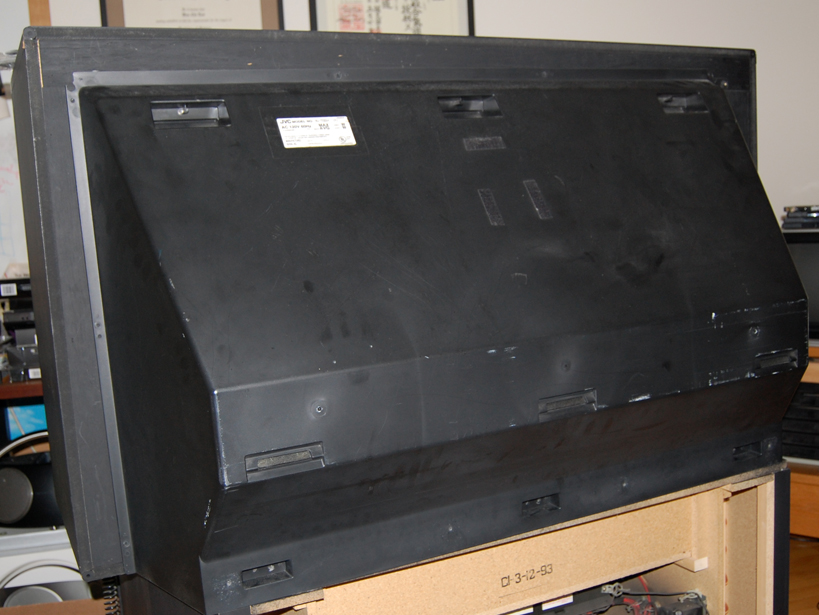
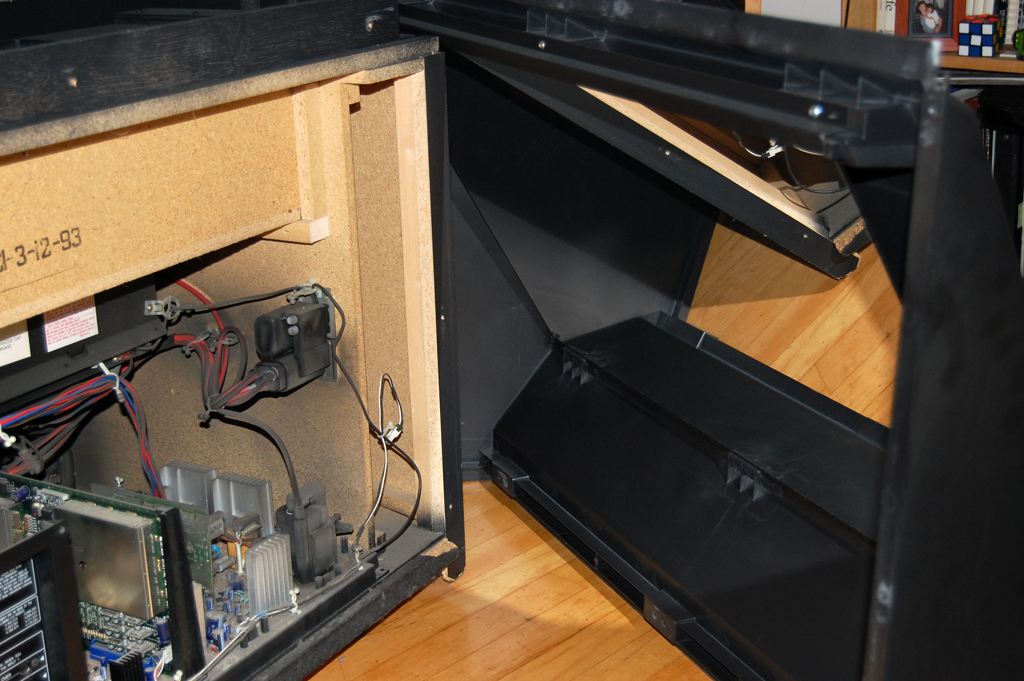
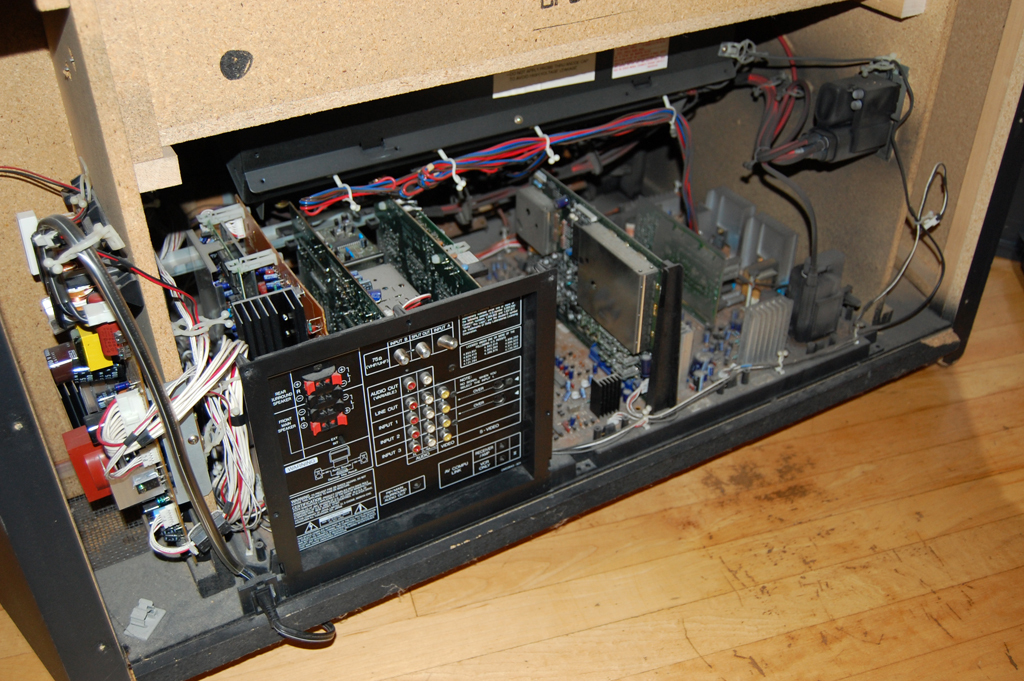
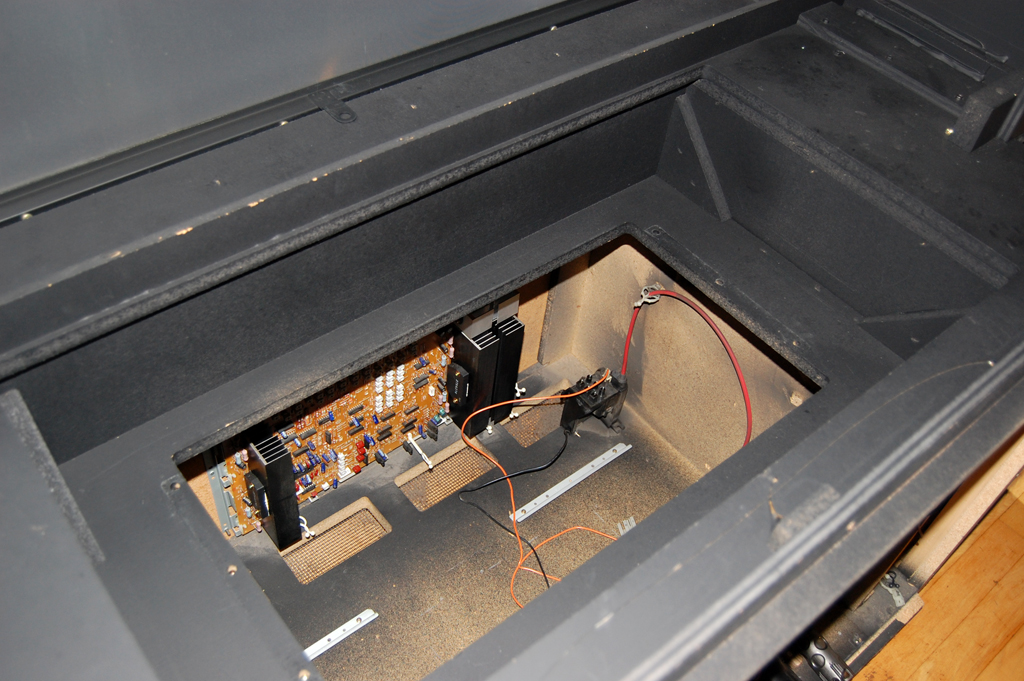
What does one do with a huge projection TV when it is no longer worth fixing? Is there anything good which can be salvaged from it before we put it out to pasture? Our problem is a 55" unit, which was professionally delivered to our second floor office back in the day, that is now just taking up room. So we did what any good DIYer would do, we decided to take it apart to see if there were any parts worth scavenging.
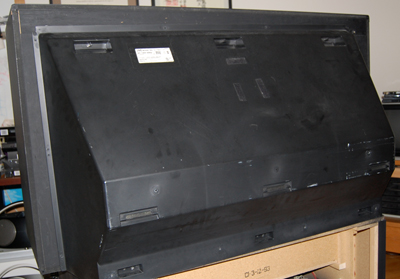
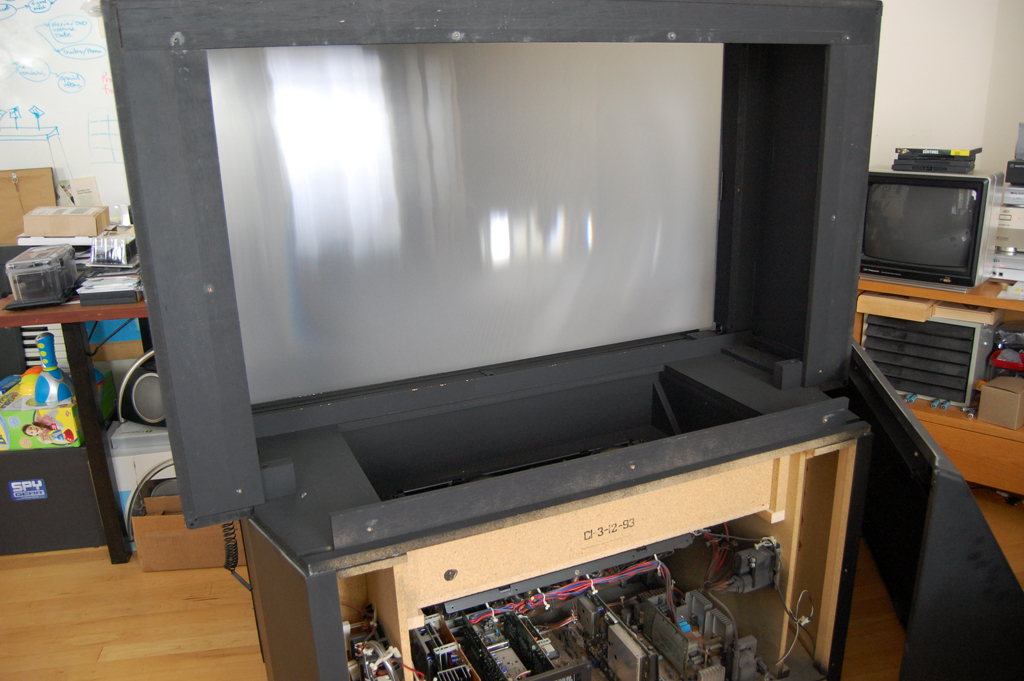
The back panel houses the mirror which reflects the image up to the screen. The panel is well attached but is not too heavy, and could be lifted by one person (once all of the screws were removed). With both the top and bottom covers off, the entire inside of the TV was now exposed.
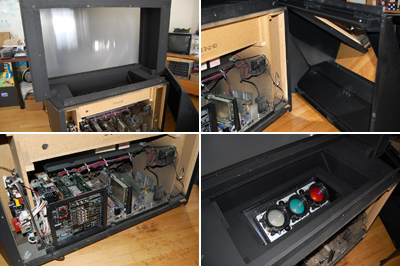
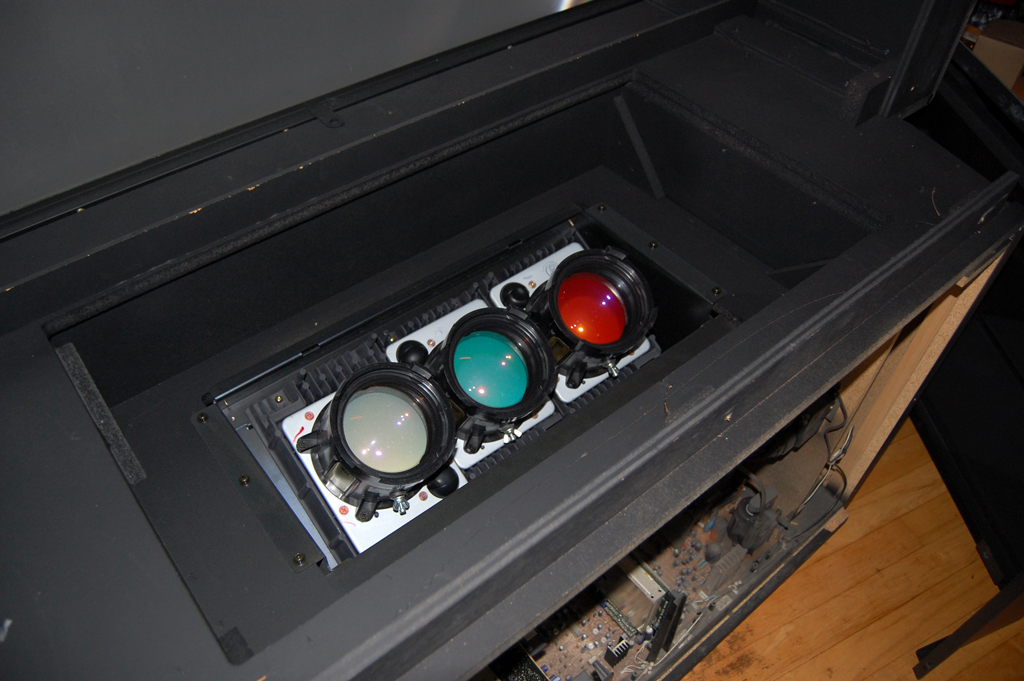
The screen, electronics, and lenses are the three main components of the projection TV. It was pretty amazing how much fine powdery dust had accumulated inside the cabinet. We decided to vacuum the exposed areas after repeatedly getting our hands covered with black, soot-like dust every time we reached in.
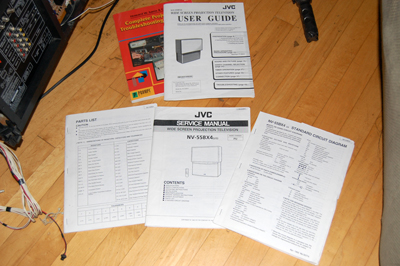
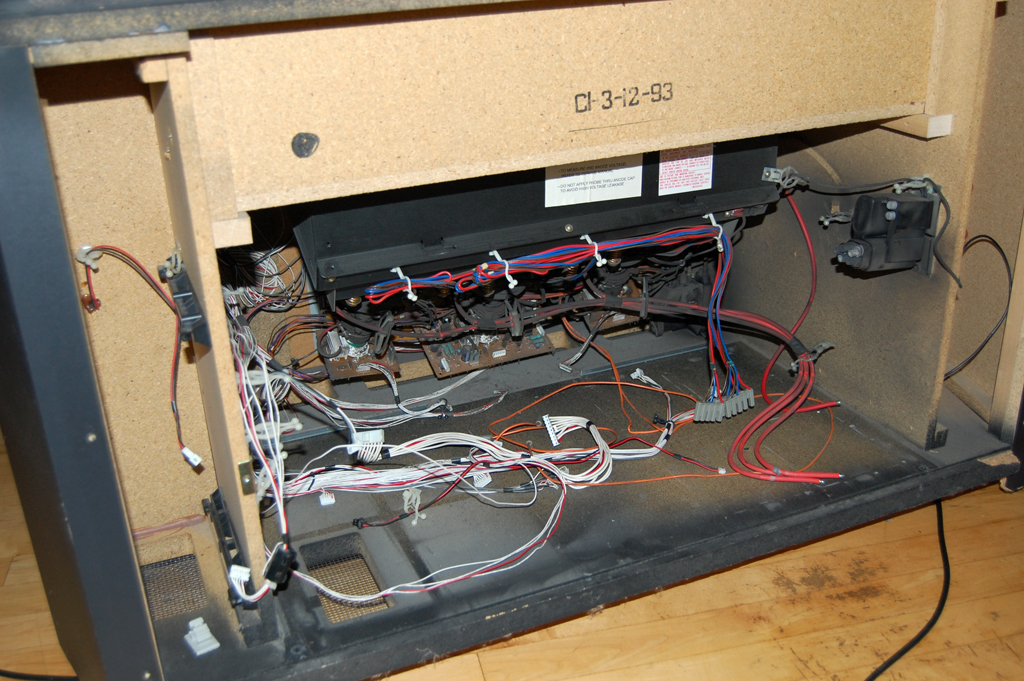
Since we had some fairly detailed schematics about the unit, we decided to resist the urge to just dig in and rip things apart. Based on the service manual diagrams, we worked out a logical order for removing the parts. We had worked on this TV in the past, but can now really appreciate how difficult it would be to replace/repair some of these parts.
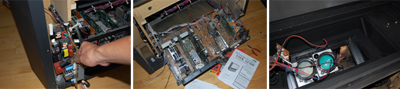
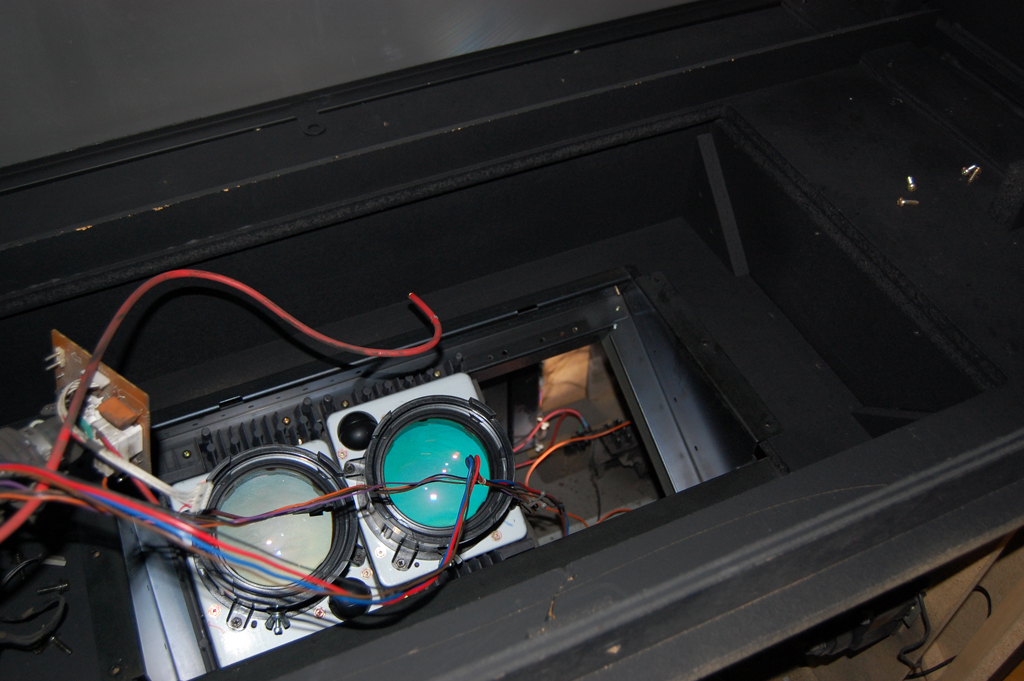
The AC board was on the left in its own compartment. The other electronics are all on one tray. This tray of circuits lifted out easily after the removal of two front-mounting screws. Freeing the lenses were a lot more challenging. They were firmly mounted on a steel bracket. The trick was to disconnect all of the cables below before trying to lift the lenses out from the top.
Once all of the lens have been removed, the mounting bracket may be removed from the top. The tray is a heavy-duty piece. Getting it out was a bit tricky, but eventually we managed to get it freed. It is a good thing we have no intention of putting things back together as many of the connectors were difficult to reach.

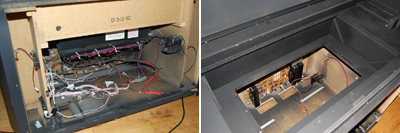
We now have a very interesting assortment of projection TV parts (lenses, high voltage AC transformers, TV tuner, etc...). Some of these parts will end up on EBay, bits of it will go into a sculpture for the garden, others will be reused in some of our future projects. Some of you is wondering what will become of the frame? Just you wait and see :-) [Permalink]- Wan Chi Lau
|
|
July 23,2008 (WowUsWednesday) |
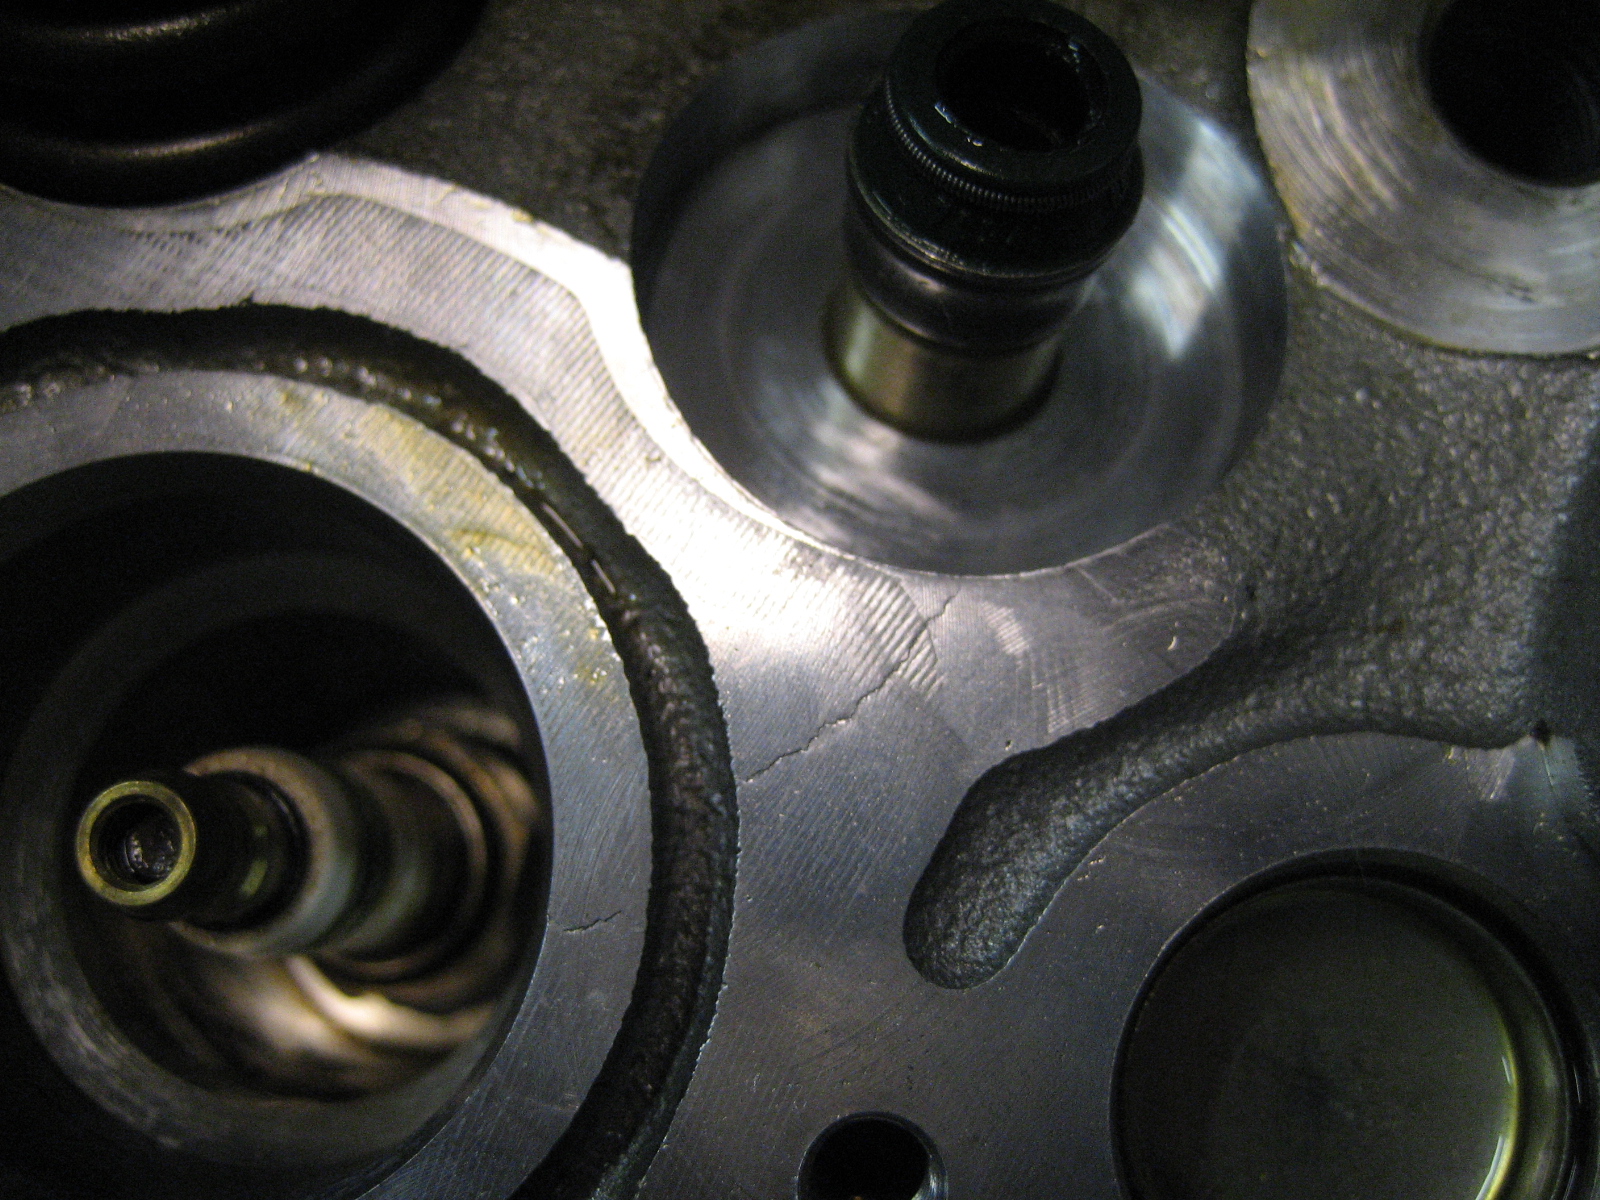
We got a few emails about this guy Glenn who rebuilt the engine of his Porsche Boxster S. He started the project because the cylinder head had developed a crack. Just that accomplishment alone is worthy of a "WowUsWednesday" mention. Not only did he fixed the problem, but the entire disassembly and reassembly process was meticulously documented! Some of the videos are now posted on YouTube.

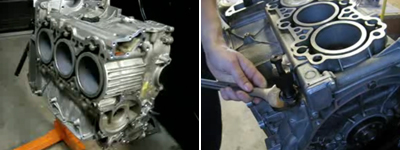

Most of us would pay the $5-7K for the new engine and have a trusted Porsche mechanic do the work, but it is nice to know that even a Boxster engine rebuild is a possible DIY project for somebody :-) Glenn is considering putting together a detailed manual for those interested in tackling a project of this size. Contact him for more info. [Permalink]- Wan Chi Lau
|
|
July 22,2008 (TechProjTuesday) |
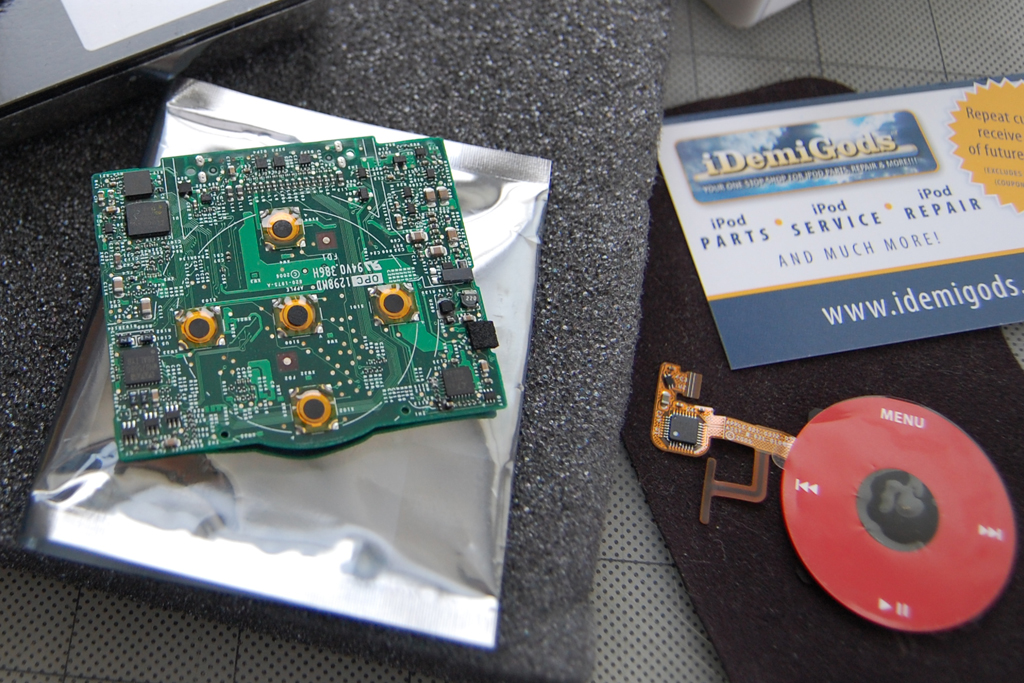
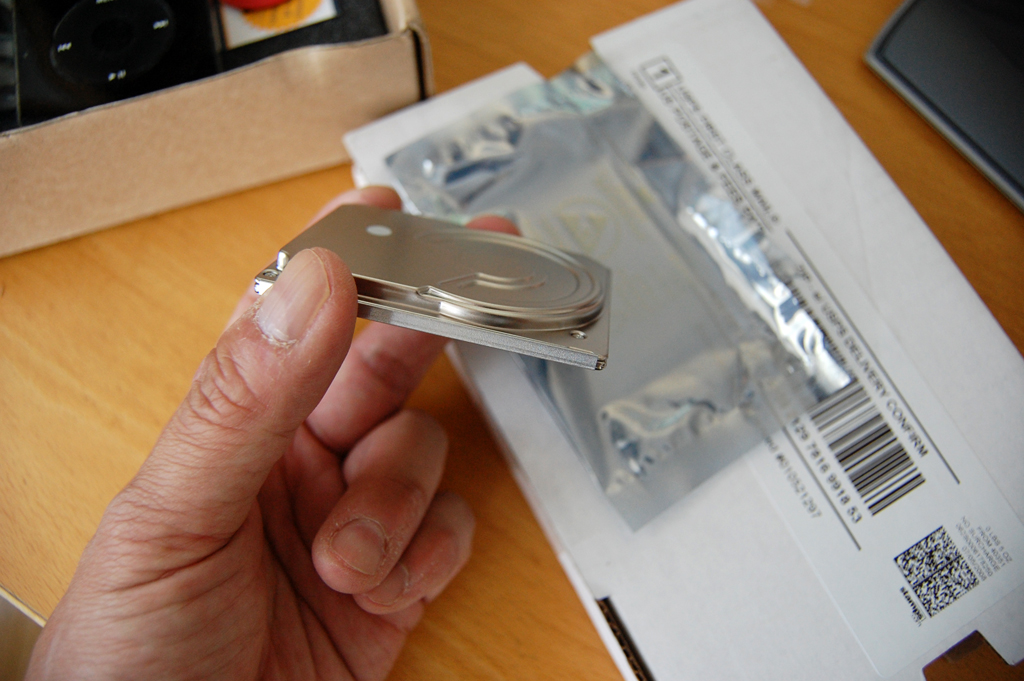
The Video iPod Repair project will get underway now that we have finally assembled ALL of the pieces. We could have done the circuit board and clickwheel replacements without waiting for the drive, but we didn't really want to keep opening the iPod up and taking it apart. If there was one lesson we learned from working with small connectors is they break when you disconnect them too many times.

There is actually nothing wrong with the drive or the clickwheel in our video iPod. We thought since we were going to open it up and do some major surgery on it, we might as well up the storage to 80GBand add a little flare to the unit.

The first thing we noticed when we got the drive was the connector is different than the drives we used for our laptop upgrades. The connectors are on the back instead of on the edge of the drive. We look forward to taking the iPod apart to see first hand at how things are put together.

To make things even more interesting, we thought we would put up a quick little RainyDayContest to kick off the project. Readers who can name all three vendors used for this project will have a chance to win a piece of gear from our "give-away" pile. The contest will run until we have completed the restoration project. Send you entries to us with the subject line "Make it work again!" In the body of the email, include the vendor's link to the item. As many have discovered, we have been giving away a small token prize to the first correct entry... there, the secret is now out :-) Good luck! [Permalink]- Wan Chi Lau
|
July 21,2008 (MobileAppsMonday) |
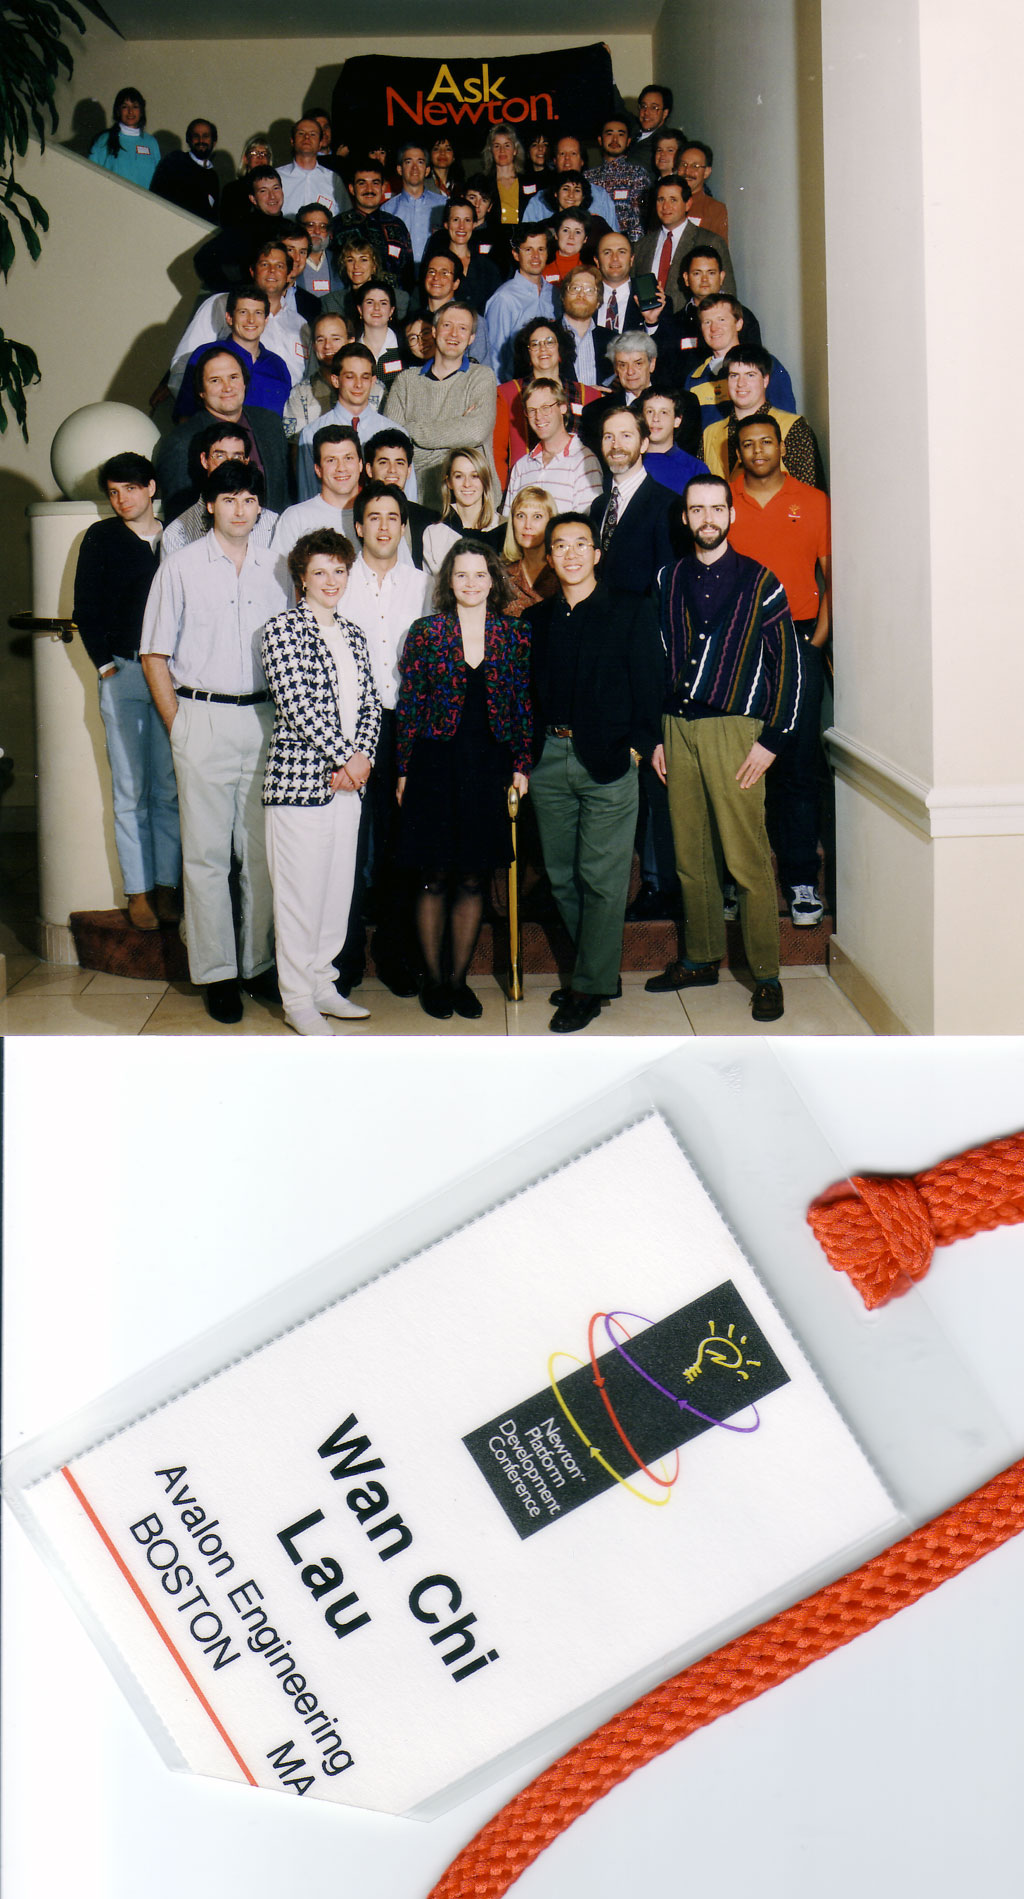
Some of us were mobile application developers way back in the Apple Newton days. When the iPhone SDK was released, those of us who are still around jumped at the opportunity to do something fun with computers again.

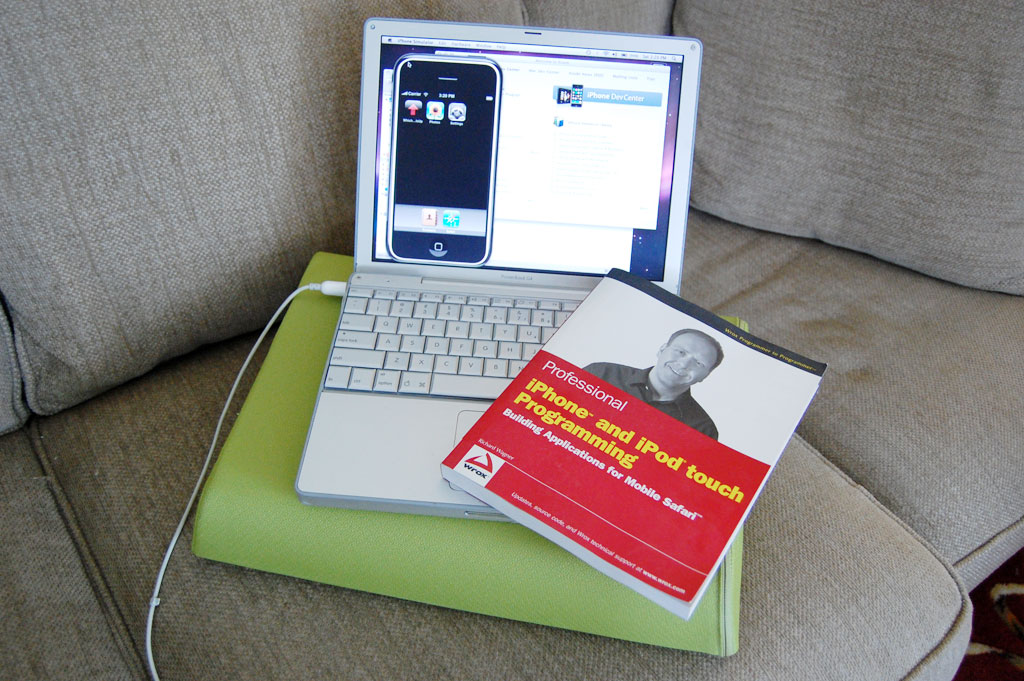
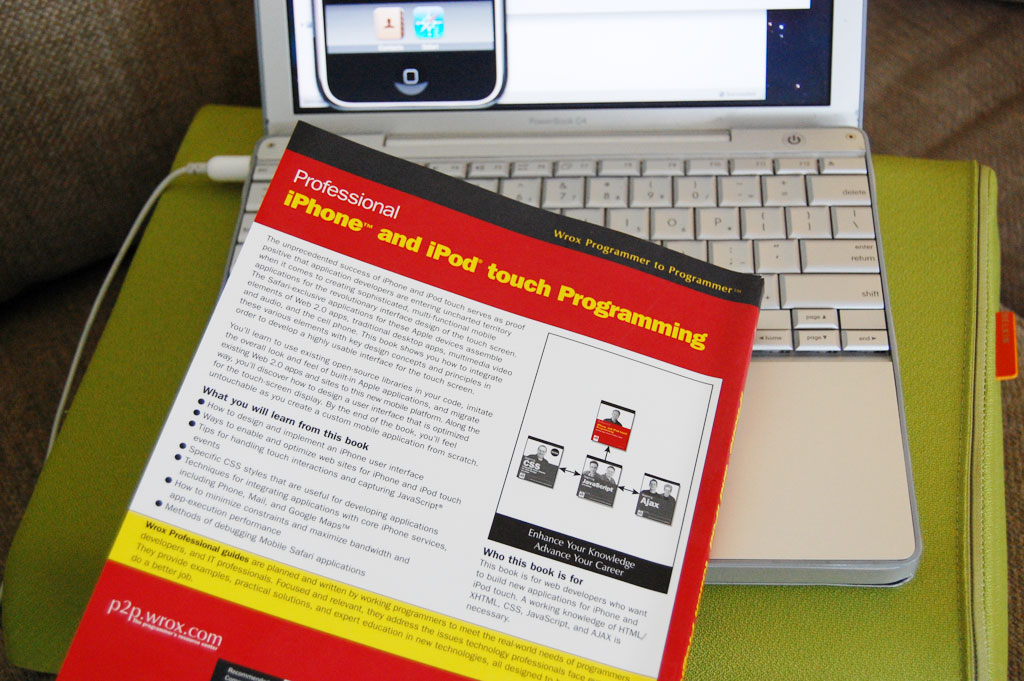
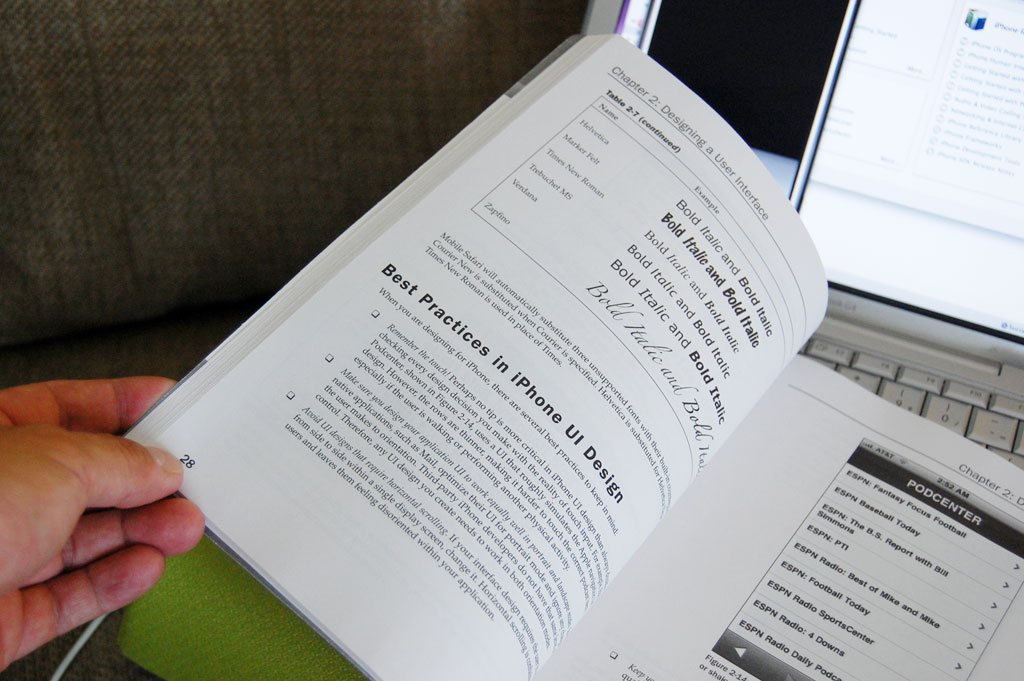
Apple has done a great job with the development tools, sample codes, and training videos which come with the SDK. However, there is nothing like having a few good books on the topic. Because the subject is so new, most of the iPhone programming books listed on Amazon have yet to be released. One exception is iPhone and iPod touch Programming by Richard Wagner.
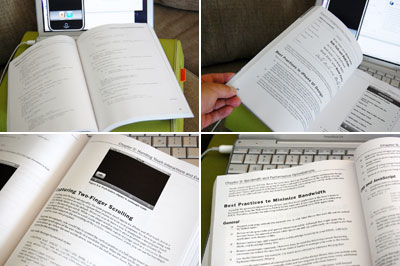
We spent a good deal of time in the user interface section learning about differences between programming for a "touch" interface vs. the point and click paradigm. The book also does a good job of exploring the limitations of the current iPhone environment and how to mitigate some of those issues so the software can provide a better iPhone experience for the end user.
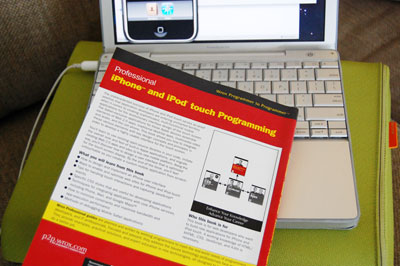
The book is from Wrox's Professional series. While those new to programming might be able to use it, it assumes readers will have some background in CSS, JavaScript, and Ajax. If you don't, Wrox also has books on those topic :-)

Yes, that is a Belkin CushTop we have underneath the Powerbook. The 12" laptop gets way too hot for the lap. When working on the couch, we've found the CushTop to be the perfect surface between the laptop and our lap. [Permalink] - Wan Chi Lau
|
|
|
[Dec] [Nov] [Oct] [Sep] [Aug] [Jul]
[Jun] [May] [Apr] [Mar] [Feb] [Jan]
....... 2007 ......
[Dec] [Nov] [Oct] [Sep] [Aug] [Jul]
[Jun] [May] [Apr] [Mar] [Feb] [Jan]
....... 2006 .......
[Dec] [Nov] [Oct] [Sep] [Aug] [Jul]
[Jun] [May] [Apr] [Mar] [Feb] [Jan]
....... 2005 .......
[Dec] [Nov] [Oct] [Sep] [Aug] [Jul]
[Jun] [May] [Apr] [Mar] [Feb] [Jan]
....... 2004 .......
[Dec] [Nov] [Oct] [Sep] |
|
|


