
| TODAY |
| Reviews |
| 2011 |
| 2010 |
| 2009 |
| 2008 |
| 2007 |
| 2006 |
| Projects |
| Contact Us |
RainyDayMagazine's content can now be licensed for your print magazine or web site. Please contact us directly here. If you want to see something reviewed, then drop us a note with a link and we'll be happy to take a look. NOTE: Click here to read more about our approach to product reviews. |
|
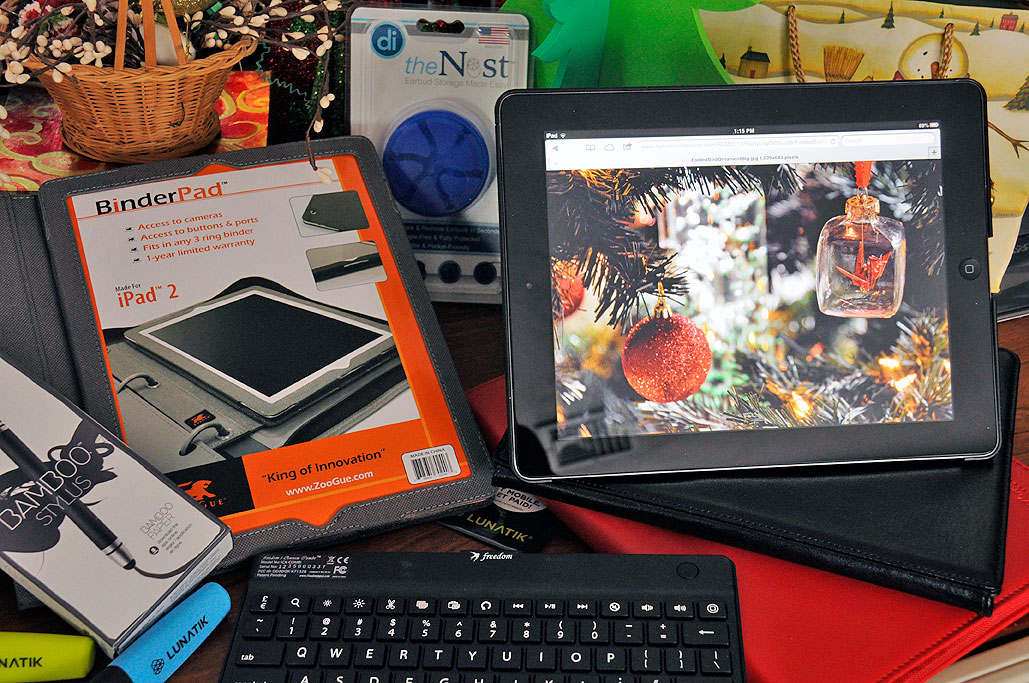
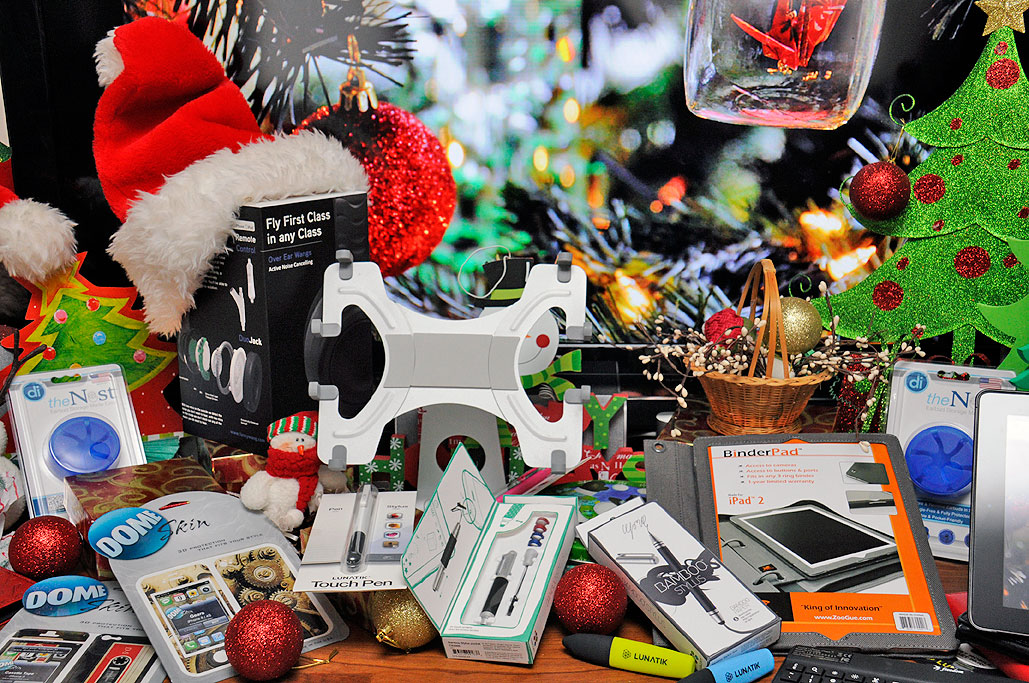
OK. OK. By now, most RainyDayMagazine readers know we don't review every piece of "iGear" that hits the market, and that we are quite selective when it comes to what we actually choose to recommend. Since readers tell us that they find our approah helpful, we continue the practice. As the process takes a little longer, it was no surprise to us that with December 25 fast approaching, we got more than a few "less-than-subtle" inquiries as to when the "iGear" GiftGuide would be posted. We took a bit longer this year not because we could not find anything...good. Just the opposite. There is an embarrassment of riches out there when it comes to accessories for the various iDevices. To come up with a list, we asked ourselves: what accessories did we... [more] -RainyDayGiftGuide: iGear
|
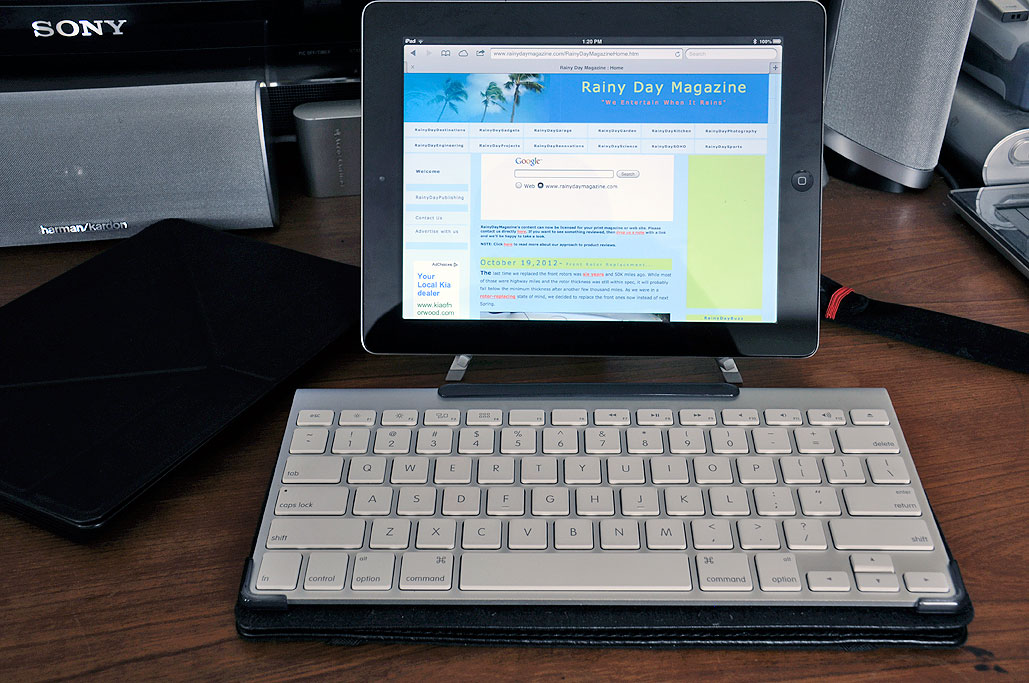
Having looked at a number of iPad-sized keyboards the last two years (Zaggmate, Logitech, Sena, ThinkGeek, Brando), we have come to the conclusion that they are just too small to be used for prolonged typing. We have also stated pretty emphatically that if someone was set on doing a lot of typing with the iPad, the keyboard they should get is the Apple wireless unit. We thought that was the end of the story, that we would never look at another iPad-sized keyboard again. So why are we writing about yet another iPad-sized keyboard?
Because we had not yet seen Freedom Input's i-Connex Combi. Freedom Input has introduced an iPad case with the most features that can be packed into a case. It also managed to make said case look great. Here is a list of... [more] -Freedom Case And Keyboard FirstLook
|
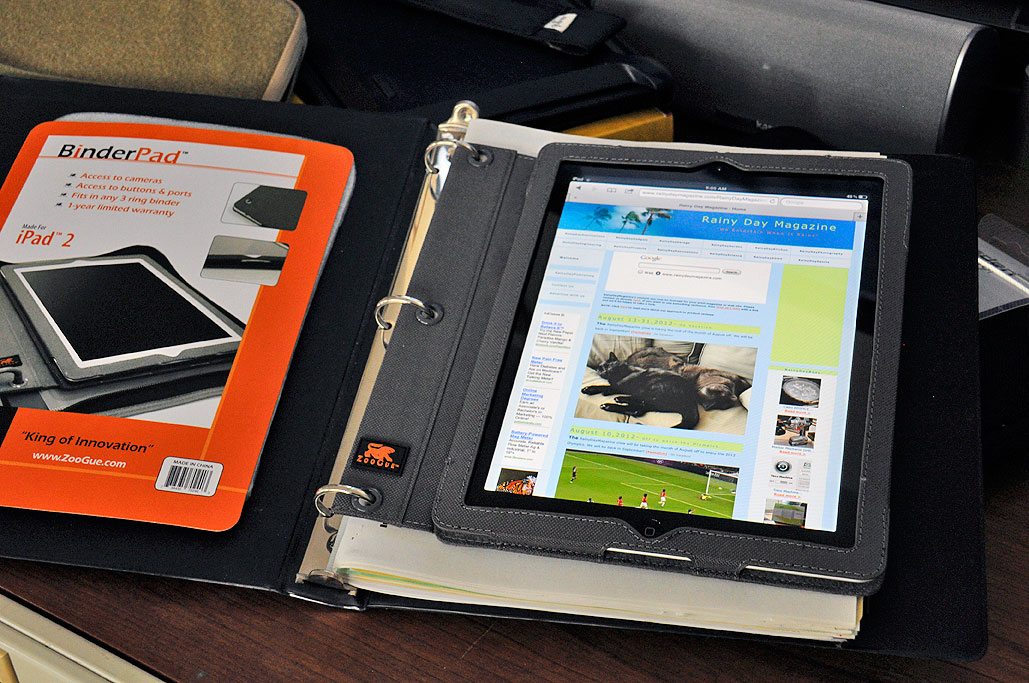
Yesterday we posted a quick overview of the iPad cases for this Back-To-School series. Today we take a closer FirstLook at them and examine the features each has to offer the student.
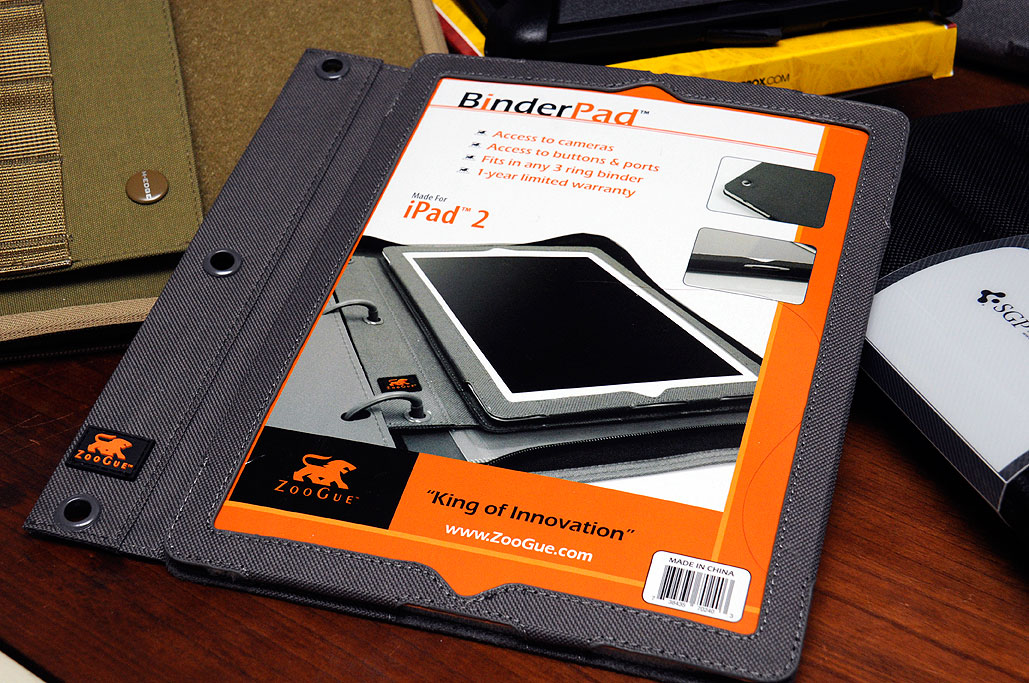
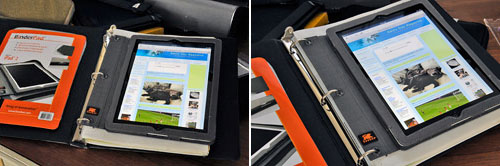
The iPad case we think is well-suited for many students is the ZooGue BinderPad. The BinderPad will securely hold an iPad in any three-ring binder while giving access to all of the buttons, ports, and cameras. The case is light (3.5 oz) and thin (0.5") so it will add very little additional bulk to... [more] - Back To School: Up Close
|
While computer tablets are not yet standard-issue for students, the technology/form factor is beginning to find its way into more and more school bags. Even though tablets are more than adequate to take on many school tasks, they are not yet powerful enough to replace a traditional laptop. However, what they have going for them is the all-day battery life, instant-on capability, and their lightness. Apple's iPad is clearly the tablet of choice at present, so we thought it fitting to take a look at a few cases for the iPad that may be appropriate for the "Back To School" crowd.
There are now literally hundreds of cases on the market for the iPad since it exploded onto the market in 2010. In deciding what cases made sense for the "Back To School" crowd, we filtered the choices with... [more] - Back To School: iPad Cases Preview
|
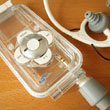
An alarm went off in the office recently. It took us a while to track down the source. After working silently for the past six years (so much so that we forgot we had it), our APC Smart-UPS 750 began beeping incessantly. The flashing red light on the front panel indicated the battery needed to be replaced.
We have a UPS because a power failure or surge/spike can happen any time. Besides the obvious inconvenience of data loss due to an unexpected power interruption, sensitive electronic equipment such as hard drives can suffer irreparable physical damage. In order to mitigate issues from power-related problems, we decided to use a battery backup system, and chose to go the UPS route. The UPS sits between the power from the wall and the... [more] - APC SmartUPS 750 Battery Replacement
|
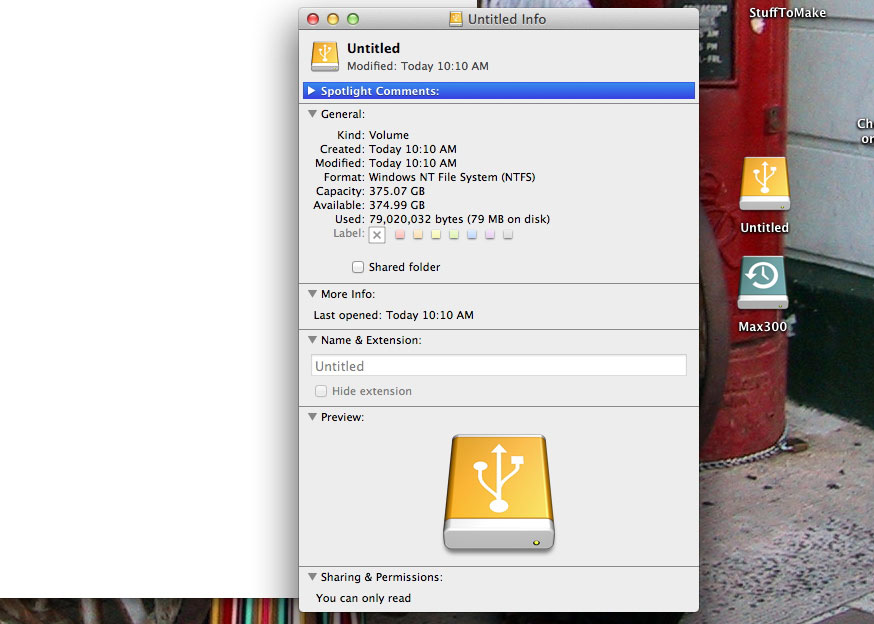
Yesterday we showed how easy it was to roll your own 3-terabyte external drive. Today, we will show how simple it is to set up and use OSX's Time Machine feature to perform automated backups of your data.
Most disks come pre-formatted for the Windows operating system (NTFS), but in order to use the Time Machine feature, the drive must be formatted as Mac OS Extended-Journaled. Reformatting the drive can be done easily with... [more] - Time Machine Setup
|
Everybody knows they should back up their personal data, but the majority of people do not. There are a few reasons for this, some of which are valid, others of which are lame. If you are using OSX, this article and the next will show just how simple it is to put an automated backup system in place.
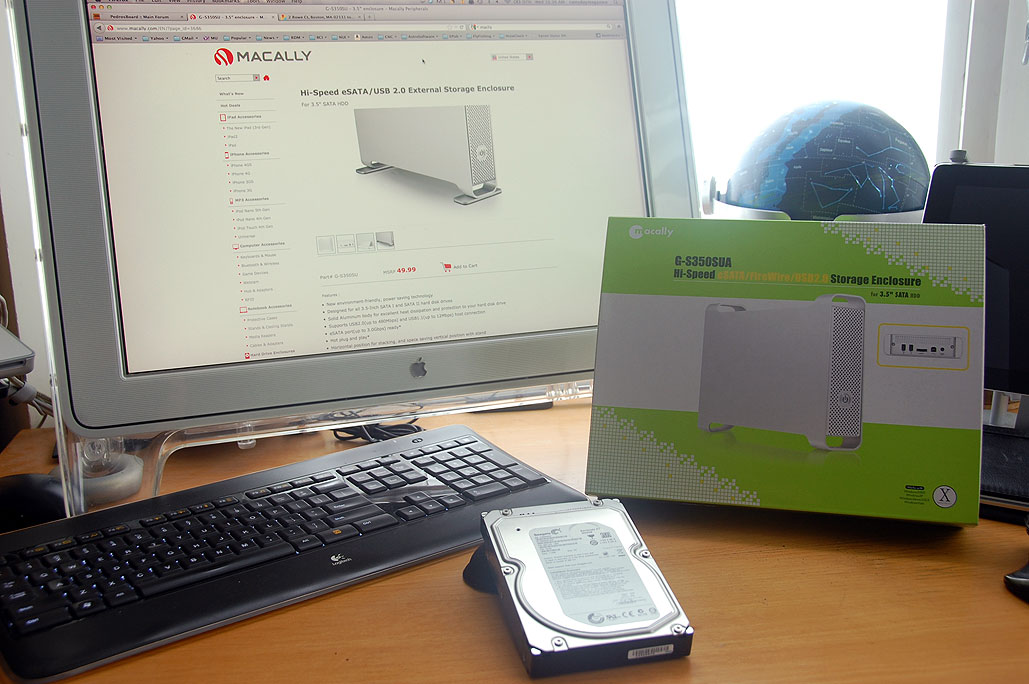
There are several ways one can back up data: back up to a partition on an internal drive; back up to "the cloud;" and back up to an external drive. We don't really like backing up to a partition in an internal drive. If the drive fails, then everything is lost (in techno-speak, "You are hosed, dude"). Backing up to the cloud is a pretty good strategy because the data will always be available regardless of where you are (assuming you have Internet access). The down side of a cloud backup is if you have a lot of data, the initial backing up to can take a long time. Also, you will likely have to pay an annual storage fee for the data. Backing up to a single, portable, external drive is the strategy we like best and is the... [more] - 3TB Backup Drive Setup
|
If you got to the end of yesterday's post you know that, after spending an entire day reviving and configuring a 7-year old Compaq PC to use with the BlueChick, it refused to start up the next morning. We tried rebooting the Compaq using the Recovering CDs without success. The only thing that happened on power up was a repeating series of long beeps which, uh, beeped, repeatedly. A bit of research on the Compaq support site indicated that there was probably some kind of hardware failure, most likely the hard drive. (Some of the RainyDay staff indicated that it was the non-Apple-ness of the frigging' machine and thus refused to participate in this project, but that is for our "Rants page," which we don't have.)
The last time we really opened up a desktop PC was probably back in 2000. We remember the process as being a nightmare, which may explain why we have not attempted it since. However, PC construction apparently has progressed quite a bit since. For example, even this 2005 Compaq required no... [more] -CNC PC Recovery
|
Getting the BlueChick CNC machine up and running is more than just assembling the deck. It requires wiring up the electronics, installing a host of software programs, and getting everything to work together. Over the weekend, we mounted and connected a few of the electronic components for interfacing the BlueChick with a computer. However, before we hook up the interface board to the CNC machine, we thought we should get the PC we will be using to run the CNC software up and running.
We have a bunch of ancient (more than 5-years old) WinTel laptops and towers sitting around doing nothing. Some of them were too old (Win95), but there were two Windows XT towers which looked to be suitable (PowerSpec, Compaq). The Compaq tower was purchased in 2005, and we have not used it for a few years. The last time we used it, we managed to completely mess it up trying to install an OS upgrade from HP. Fortunately, we still have the original HP/Compaq systems CDs, so we decided to... [more] -CNC PC Setup
|
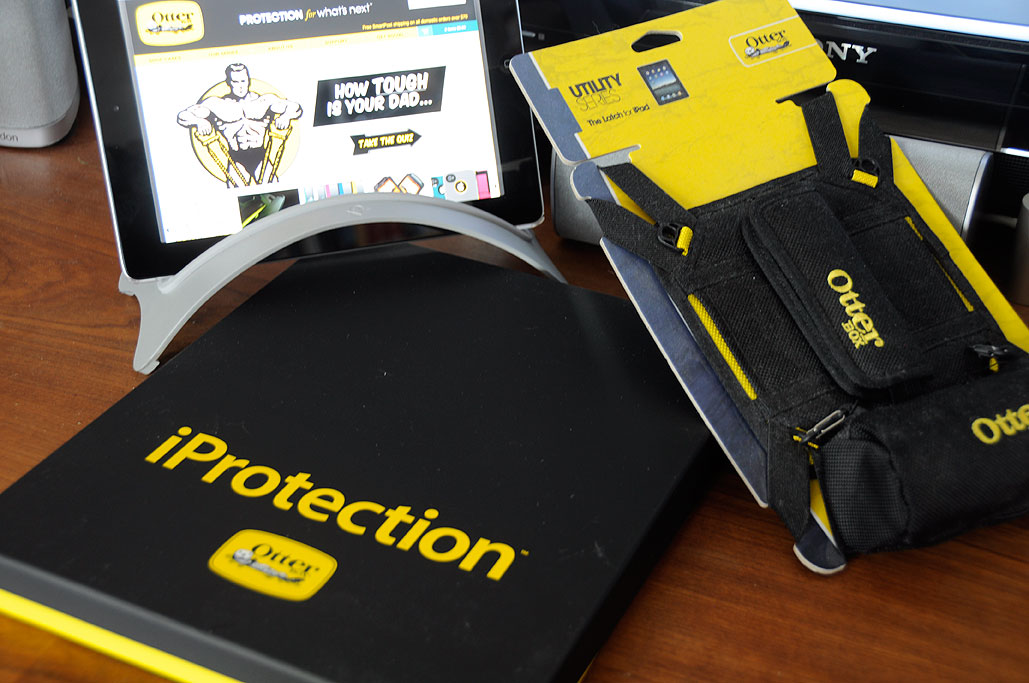
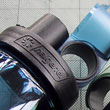
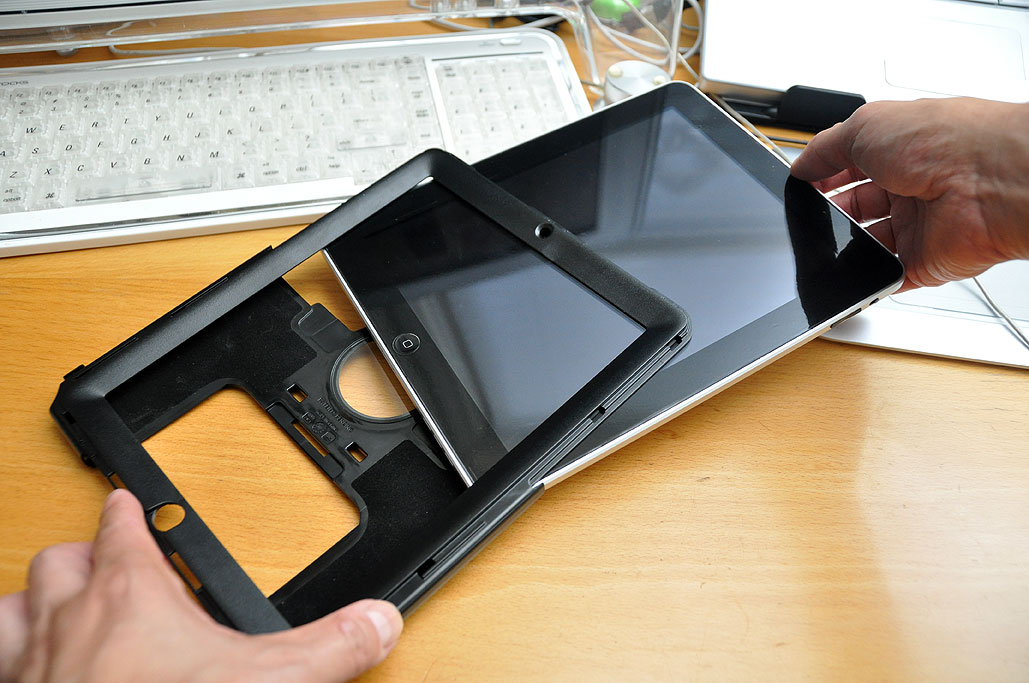
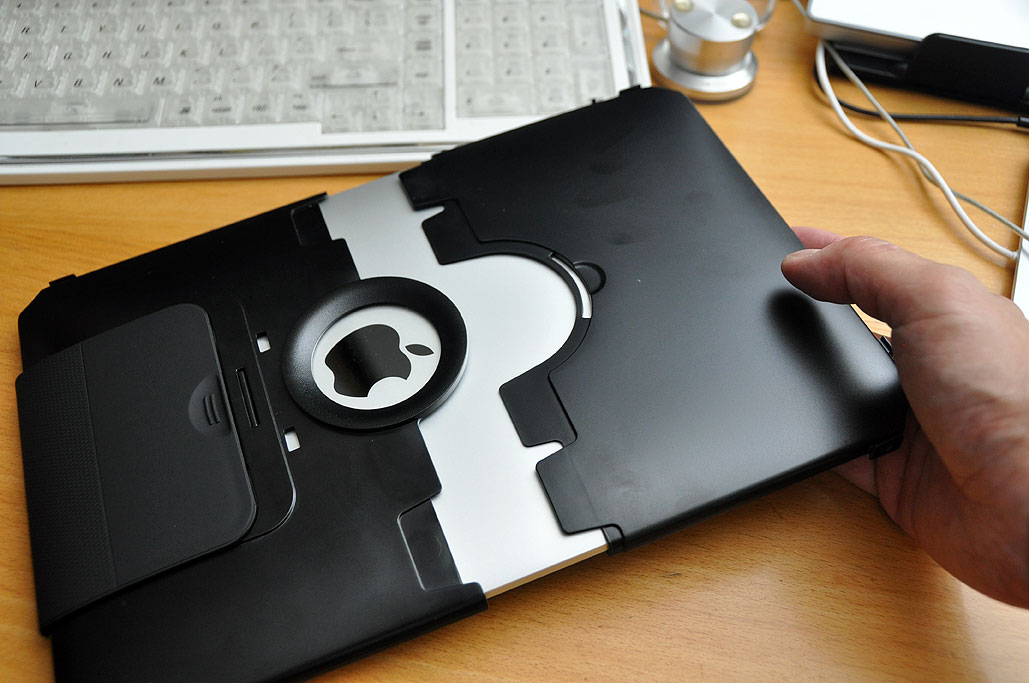
Last July we did a series on heavy-duty protection for the iPad2. One of the cases we looked at was the Otterbox Defender. When the new iPad came out, a few readers asked if the same Defender case would fit the latest Apple tablet
With each redesign of the Defender case, Otterbox has kept what worked and reworked what did not. The unit for the original iPad was ground-breaking with its multi-layer approach. The three-quarter case and split back were unnecessarily complicated. Also, the lack of a built-in stand was a glaring omission. Otterbox addressed all of those issues when they... [more]- Otterbox iPad Defender Case v3.0 FirstLook
|
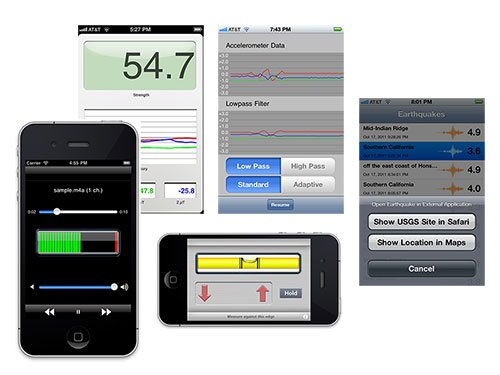
Writing software is simple, but it is not easy. It is simple because the computer will do what you tell it to do. The difficulty comes from needing to make the instructions very precise. There is no tolerance for ambiguity, neither when writing the software nor when the software instructions are executed, be they on a cell phone, tablet, or whatever. To do it well, it takes both creativity and discipline, qualities which are often in conflict with each other. However, that is not the half of it.
One of the challenging aspects of software development is staying current with the changes in the API and libraries provided by vendors like Apple, Microsoft, and others. The software writing tools get over-hauled. Sometimes, even the... [more]- iOS Programming: Staying Current
|
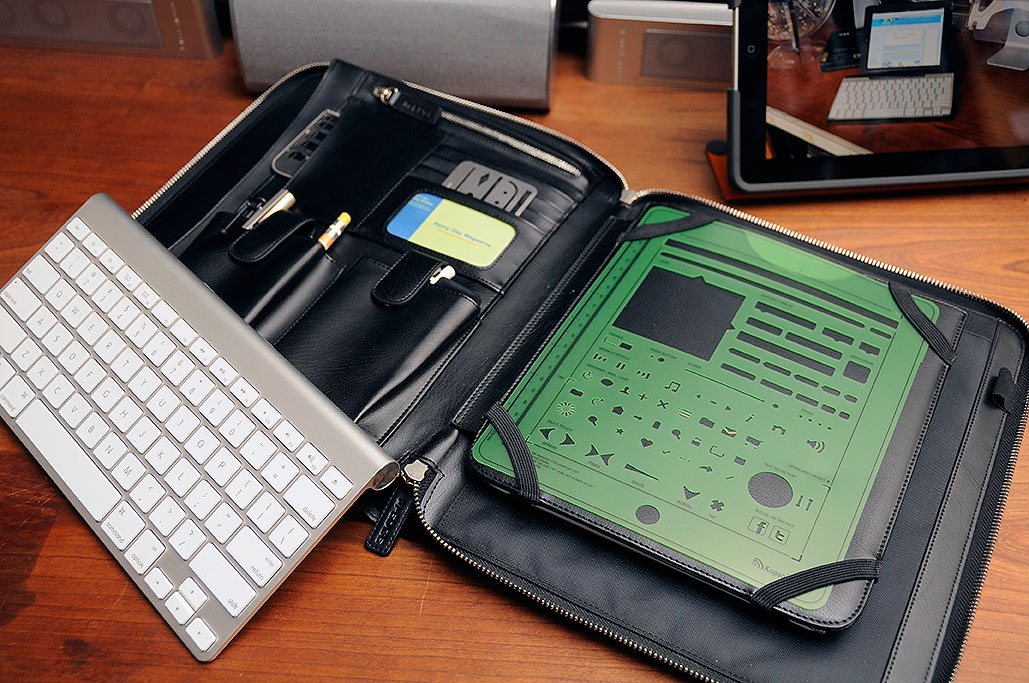
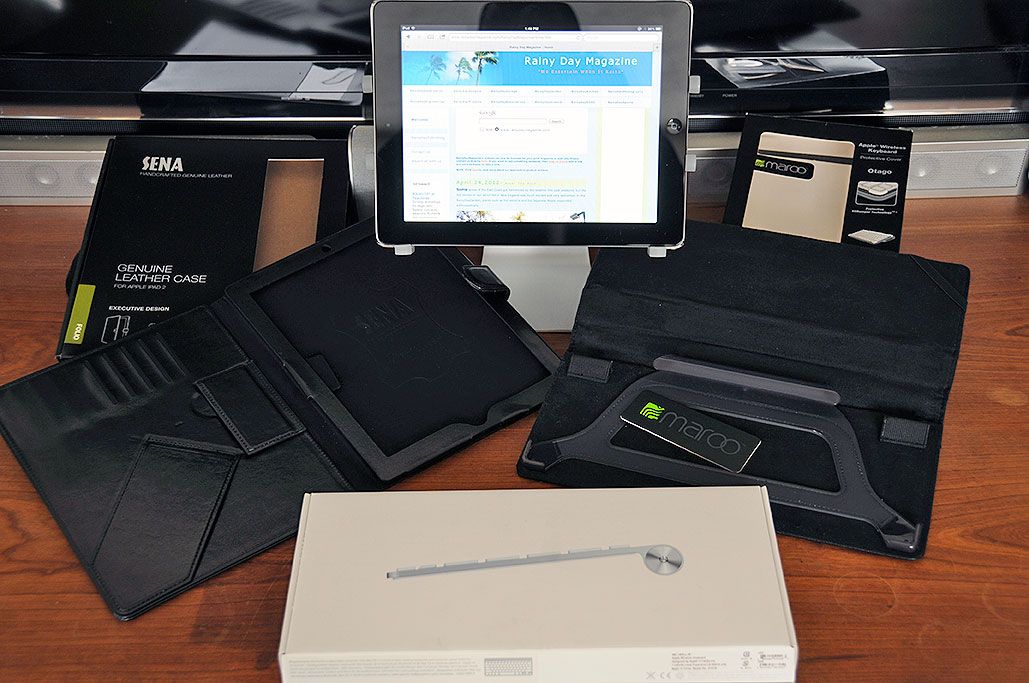
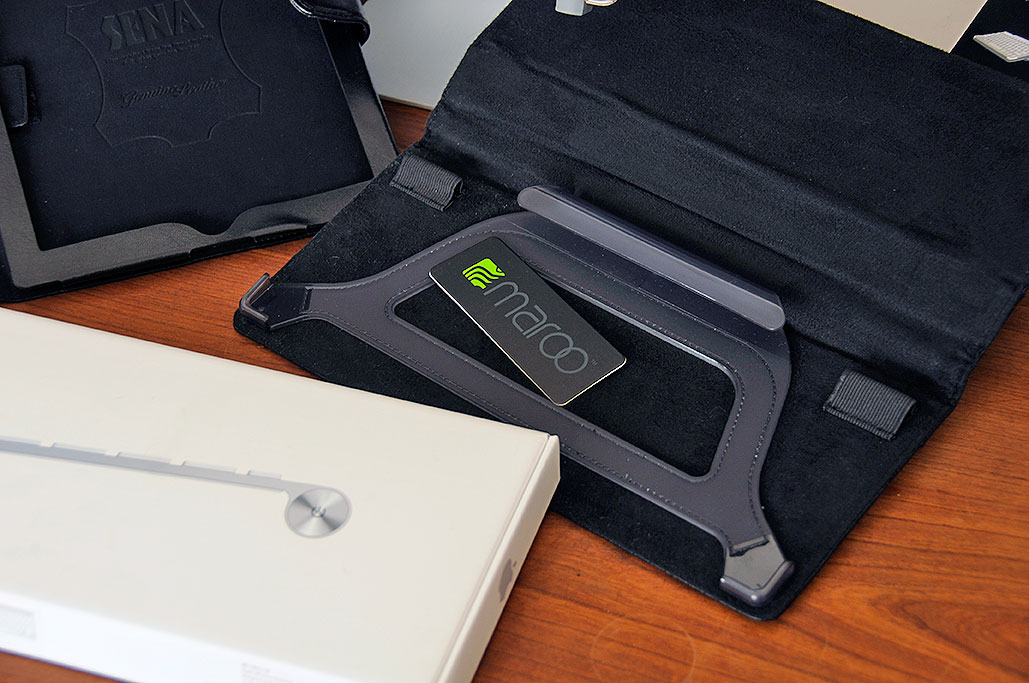
Our post last month on using the Apple wireless keyboard with the iPad brought in both comments and questions from readers. Some were not convinced that carrying two cases was worth the effort. Others asked why bother with a case at all? Why not just toss the keyboard into a laptop bag? Surprisingly, quite a few wanted to know if there was a folio large enough to carry both.
Answers to the many of the questions are subjective, but we do have a comment regarding the last one. A few years ago we had looked at a leather folio from M-Edge which was designed to carry both the iPad and the Apple wireless keyboard. However, we had not planned on mentioning... [more]- Keyboard-size Folio: M-Edge
|
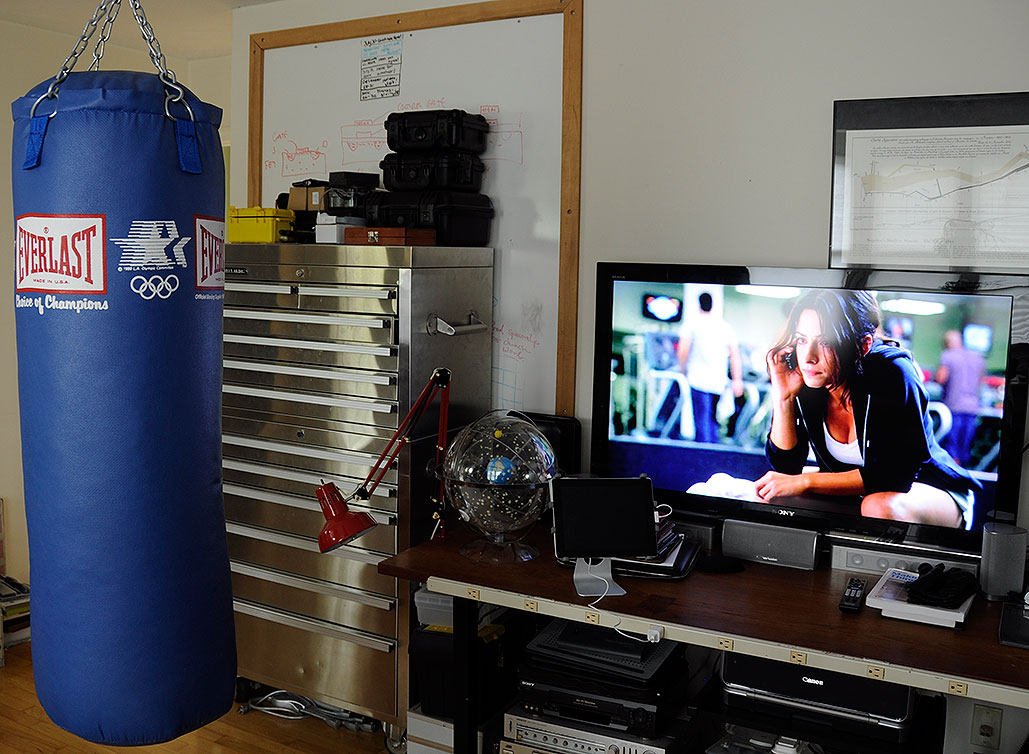
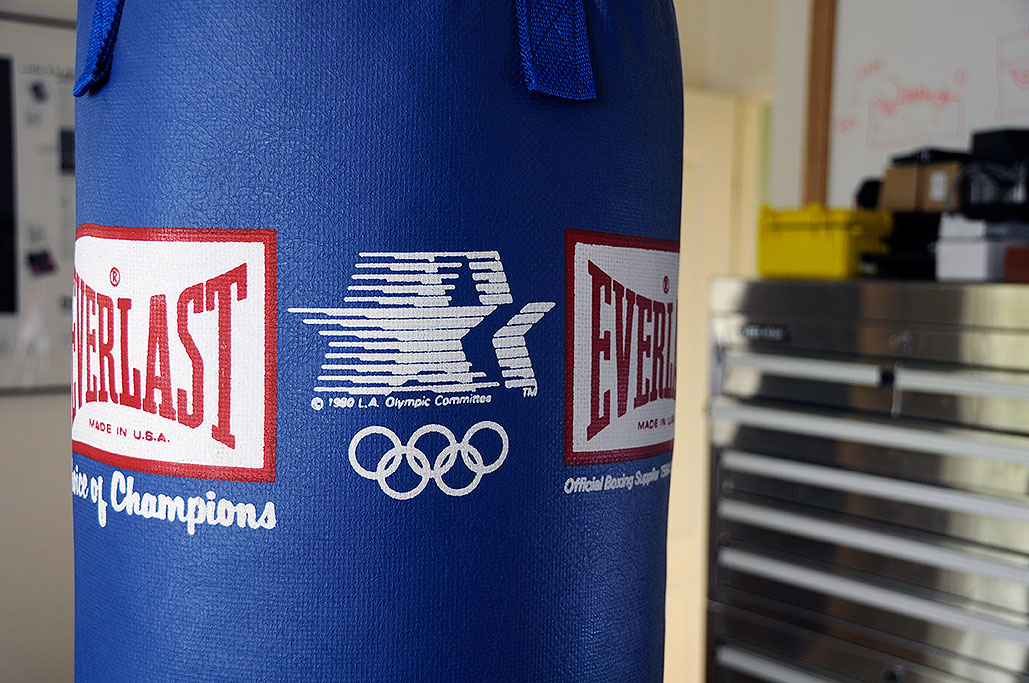
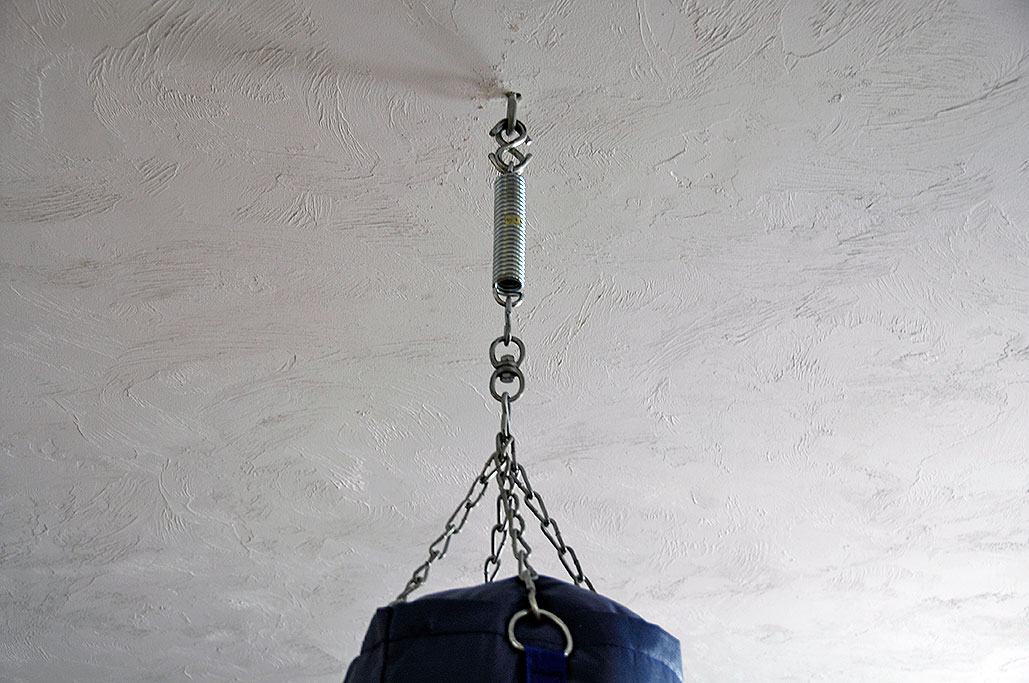
Working on a computer all day long and then watching TV in the evening are fairly sedentary activities, which, if practiced in immoderation, can lead to a fairly sedentary life. We at RainyDayMagazine have solved that potential/probable outcome by installing a heavy punching bag in the office for anyone interested in a quick workout whilst on duty. We've had the bag for a while (it is an Everlast commemorating the 1986 Olympics), but are not entirely certain when it came into our possession.
At 80 pounds, the bag is one of the heavier models. Hanging it securely required us to mount the hardware directly into the studs in the ceiling. Everlast has mounting hardware
|
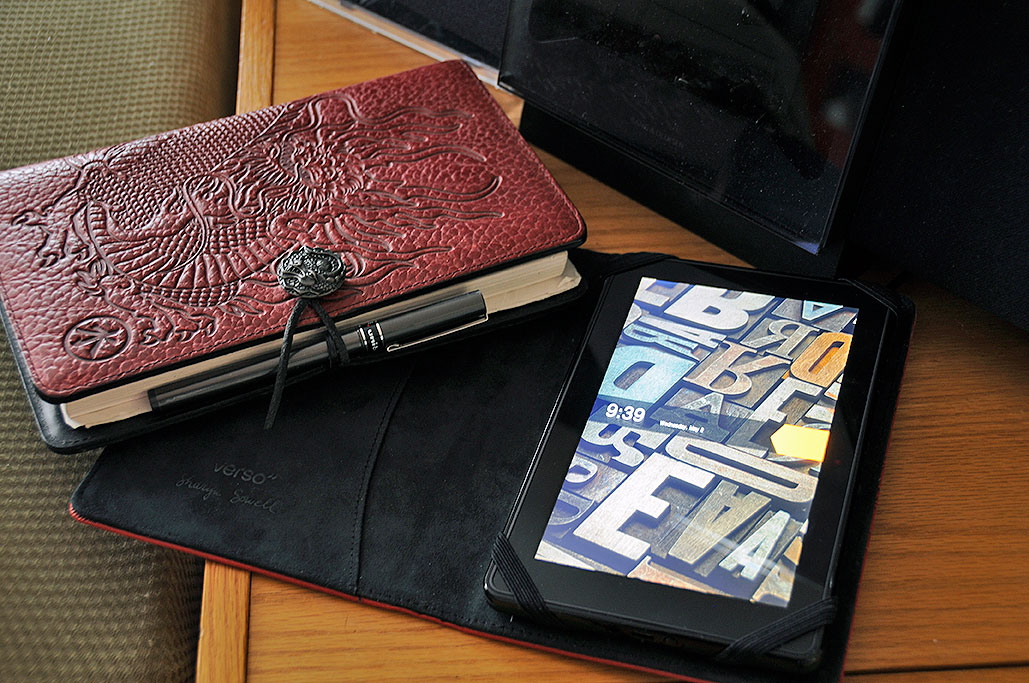
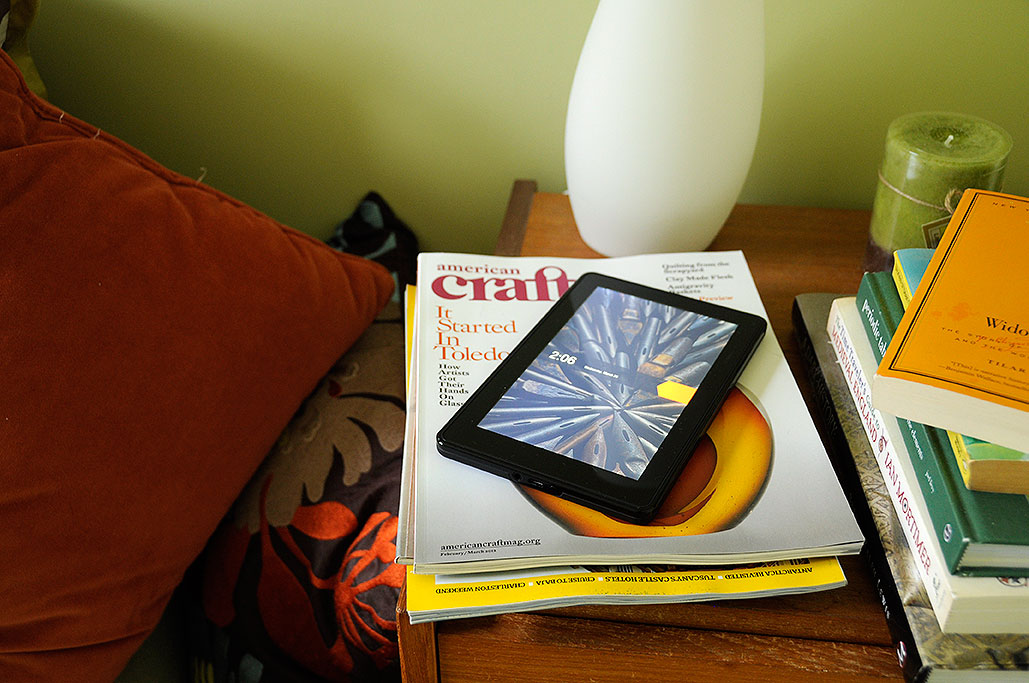
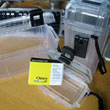
We have been using the 7" Kindle Fire tablet for almost six months and have been very impressed with both the quality of the product and the overall experience. So when we saw that Amazon was having a Gold Box Sale on the tablet, we thought it would be a great way to let you know. At $140, it one of the best deals
If you want one, don't wait. There is only 17 hours left...or until they are all gone. BTW, RainyDayDeals is a new addition to RainyDayMagazine. Like the products we review, we will only bring you deals that we would go for ourselves. [Permalink] - Gold Box Deals: Kindle Fire
|
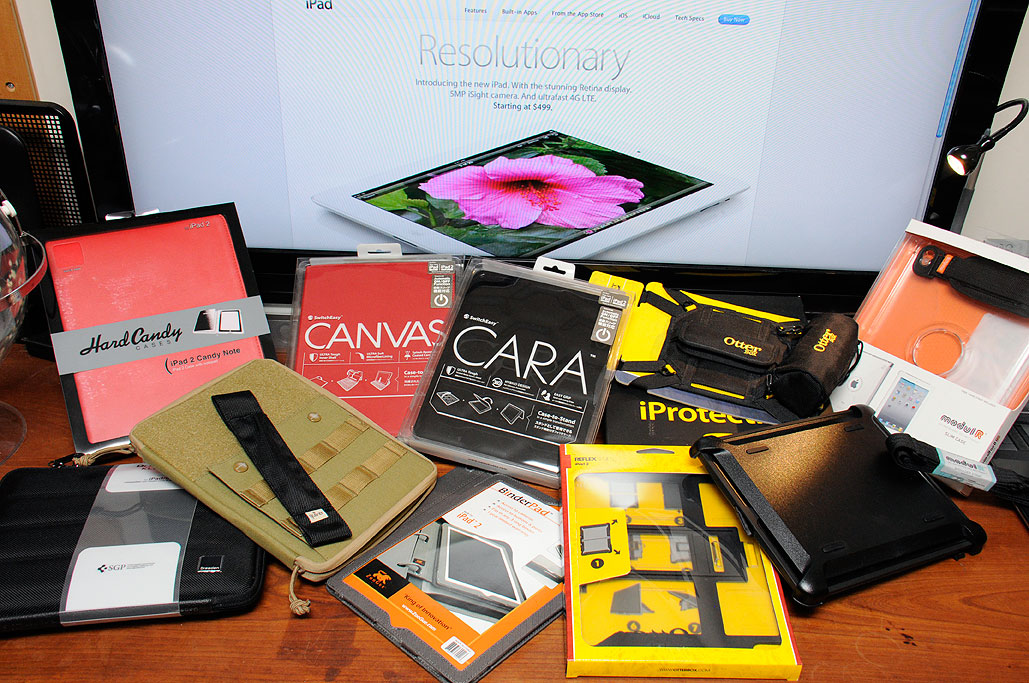
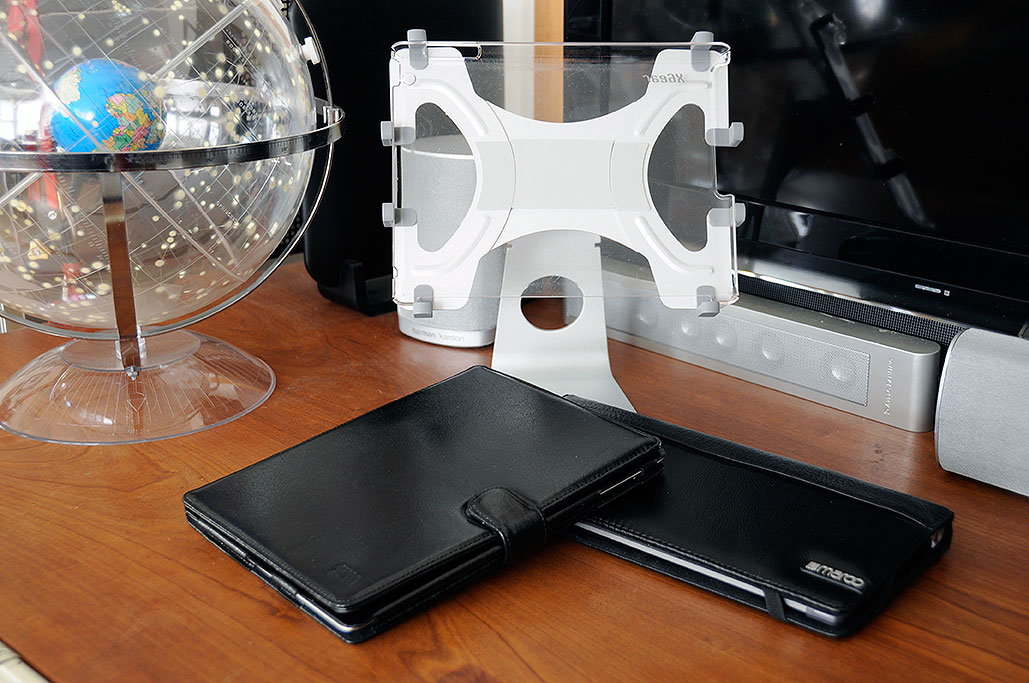
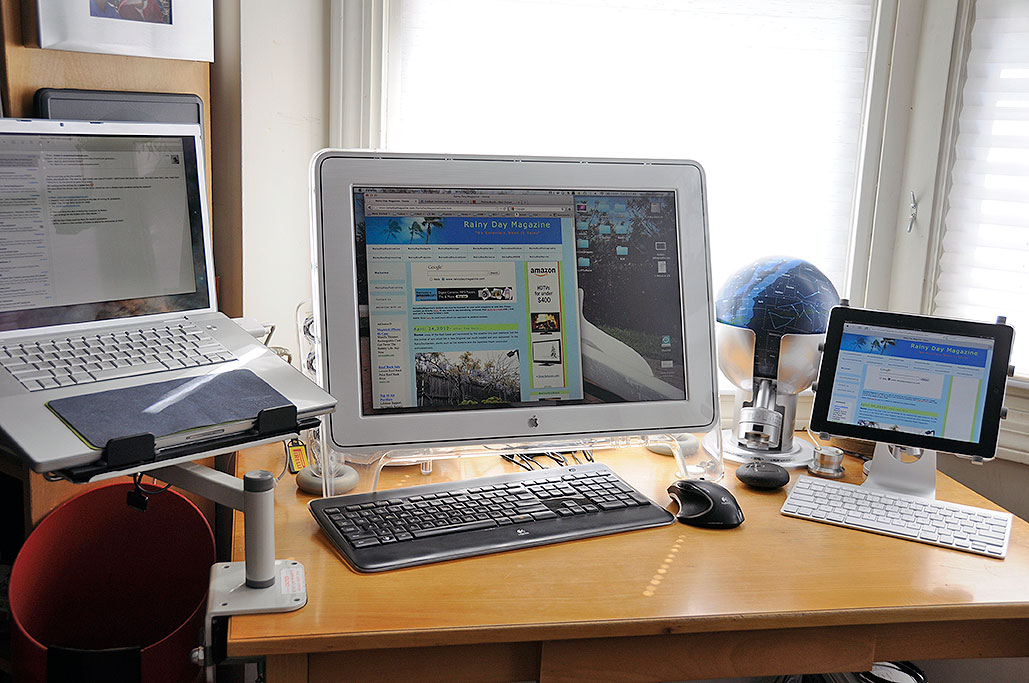
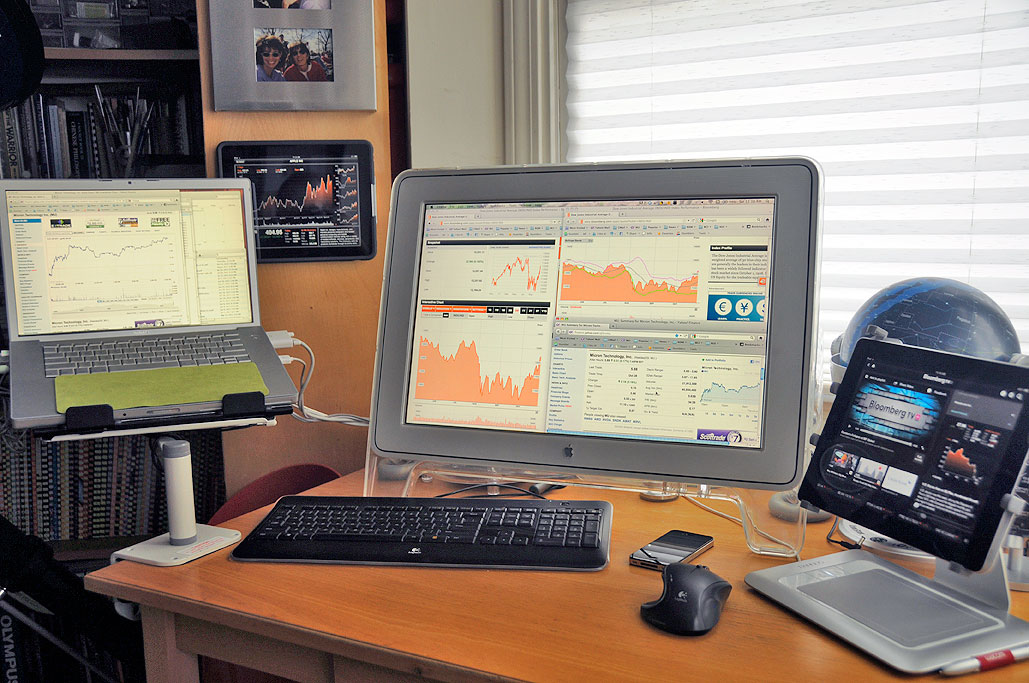
After having had the pleasure of trying out dozens of different kinds of iPad accessories over the last two years, we realized that some get used way more often then others. It's not that the ones which don't get used aren't any good, it's just that we have finally settled on a way we use the iPad and some of those accessories better fit with our "way." Those accessories are:
We found ourselves using the iPad most often for the following tasks: checking email, looking up something on the web, and writing short articles. Where we are doesn't change how we use our iPad, but it does change how the iPad is set up. When we are at our desks, we like the iPad on a stand so it doesn't take up much desk space. We looked at a few stands and after using them for a while, we found Innopocket's HexaPose UStand to be the one we used most. The stand is stable and the grip on the iPad is sure. Putting the iPad on and taking it off is fast and simple. Another reason why we like the stand is that it blends well with the look of the rest of our Apple gear :-)
We used to have a protective film on the front of the iPad, but the GorillaGlass is so good that scratches have not been an issue for us. The iPad screens have been "naked" for the past year and a half and have remained scratch-free. The back of the iPad is another story. We protect it using a... [more] - iPad Accessories: The Ones We Use
|
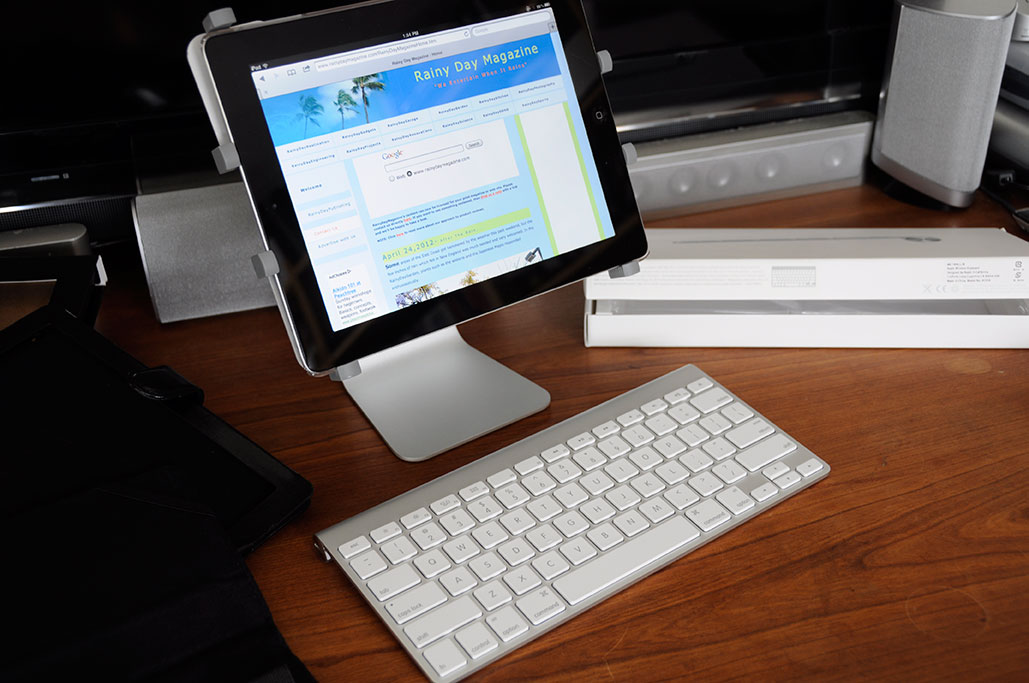
When the iPad first came out, we thought pairing it with a physical keyboard was a silly idea. We wrongly assumed the iPad's virtual keyboard would meet the occasional typing needs of most users. When we found ourselves typing more and more on the iPad, we wanted to see more of the screen than the virtual keyboard allowed. The tradeoff of carrying a physical a keyboard for more screen space was worth it to us. However, having tried many of the keyboards sized to pair with the iPad (Zaggmate, Logitech, Sena, ThinkGeek, Brando), we realized they all were flawed. The fundamental problem was that their size made them too uncomfortable for extended use, and by "extended," we mean for anything more than a few minutes of continuous typing. So we went looking for a better solution.
After trying a few different full-size keyboards, we realized that the best one to pair with the iPad was actually Apple's own Bluetooth keyboard. We do not mean the one with the 30-pin USB dock Apple created specifically for the iPad, but the... [more] - iPad Keyboard: Apple Wireless
|
We have had the Amazon Fire for a few month. While it is no iPad, the Amazon Fire is, when all things are considered, the best price/performance ratio for any Android tablet available. The interface is responsive and the display is very sharp. As we mostly use the Fire for reading, the battery life has been fantastic (over a week before requiring a charge). With the iPad as our default mobile device, we have not taken the Fire outside at all. Consequently, we have not felt a need to get a case for it.
However, quite a few readers were interested in a recommendation and have been inquiring when we would be doing a "Best Of Breed" review of cases for the Amazon Fire. After some research, we came to the conclusion that the offerings from the established case makers (Marware
|
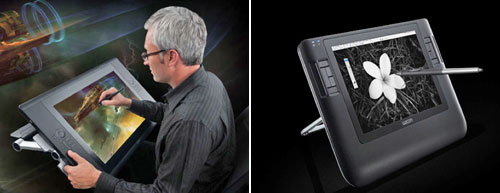
After two years of phenomenal sales and every skeptic being roundly embarrassed for dismissing the iPad, we think it is safe to say the tablet is here to stay. While we don't think that iPad sales have peaked, we do believe that the basic hardware feature set (multi-touch screen, camera, WiFi, etc.) is starting to stabilize. Not seeing any "must-have" features, we were not surprised to find ourselves holding back and not immediately upgrading to the iPad 3. Instead, we asked the question "What would get us to upgrade?"
Some may remember our attempt at building a directly-on-screen pressure-sensitive tablets back in 2008. We had some success, but the display's lack of brightness finally made us realize that if we really wanted such a tablet, we needed to... [more] -What would get us to upgrade?
|
Those who read RainyDayMagazine frequently know that we have been huge cheerleaders for the iPad since Day 1. Also, you will not find a more fervent group of Apple fans out there than those here at RainyDayMagazine. Some of us can trace our Apple roots back to the 128K Mac days where we performed 512K RAM upgrades to make our own "Fat Macs." So it was SHOCKING to some when they heard that we have decided not to upgrade to the iPad3. Don't get us wrong, we have nothing against the new iPad. It IS the best tablet on the planet today.
We ordered the original iPad sight-unseen, then upgraded from the original to the iPad 2 when Apple added a camera to the tablet. Physically the iPad 2 was different than the original iPad and we needed it to test the new accessories. Those two reasons justified our last iPad upgrade. While this new iPad 3 may have an... [more] -What? Not upgrading?
|
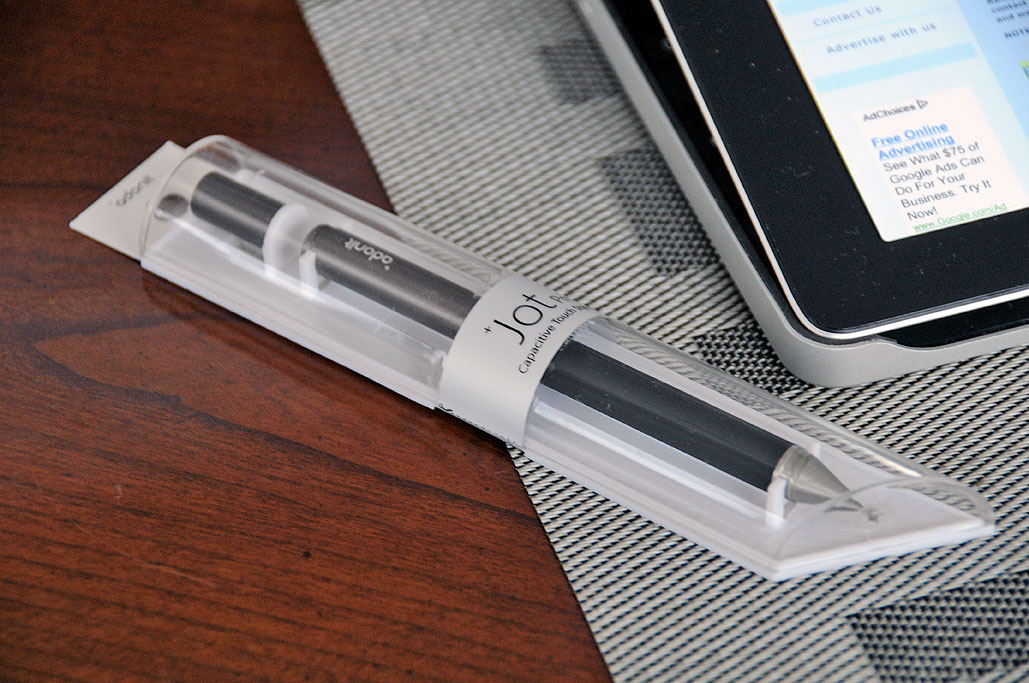
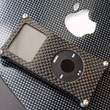
Most iPad users are happy to interact with the screen using their fingers. However, in certain situations, some would prefer the feel of a stylus over that of a finger tip. The problem for iPad stylus makers is that, because of how a capacitative screen works, it is not possible to make a detectable pointer with a finely tipped end. This is the reason why all styli on the market looked like they have an eraser for a tip...until the Adonit Jot.
Adonit didn't rewrite the laws of physics. They did something much more clever. They changed the user's... [more] - Jot iPad Stylus
|
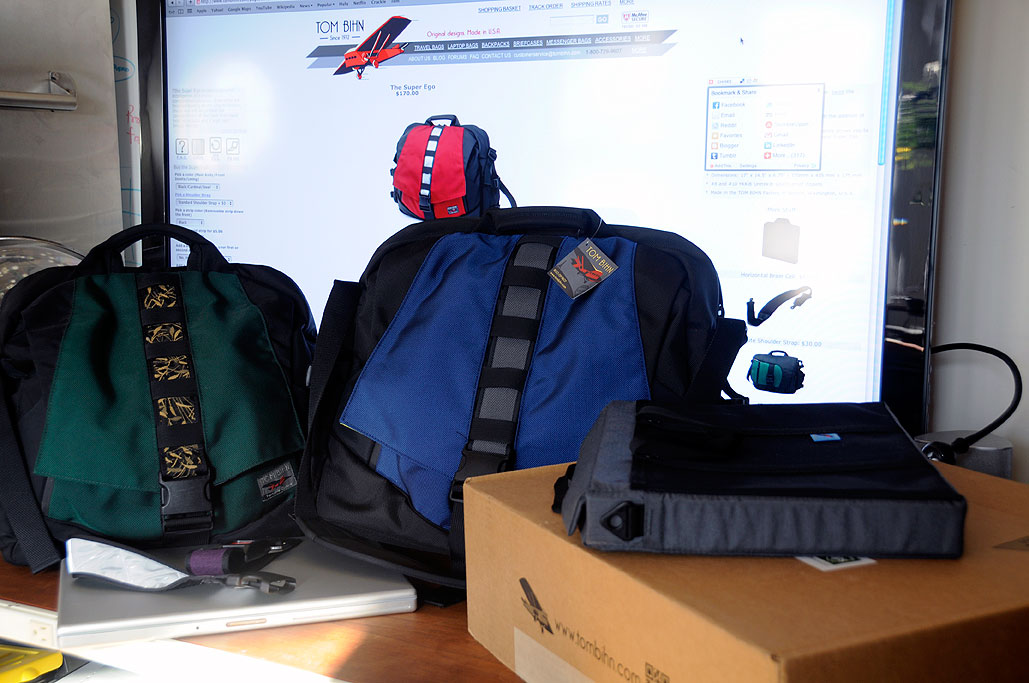
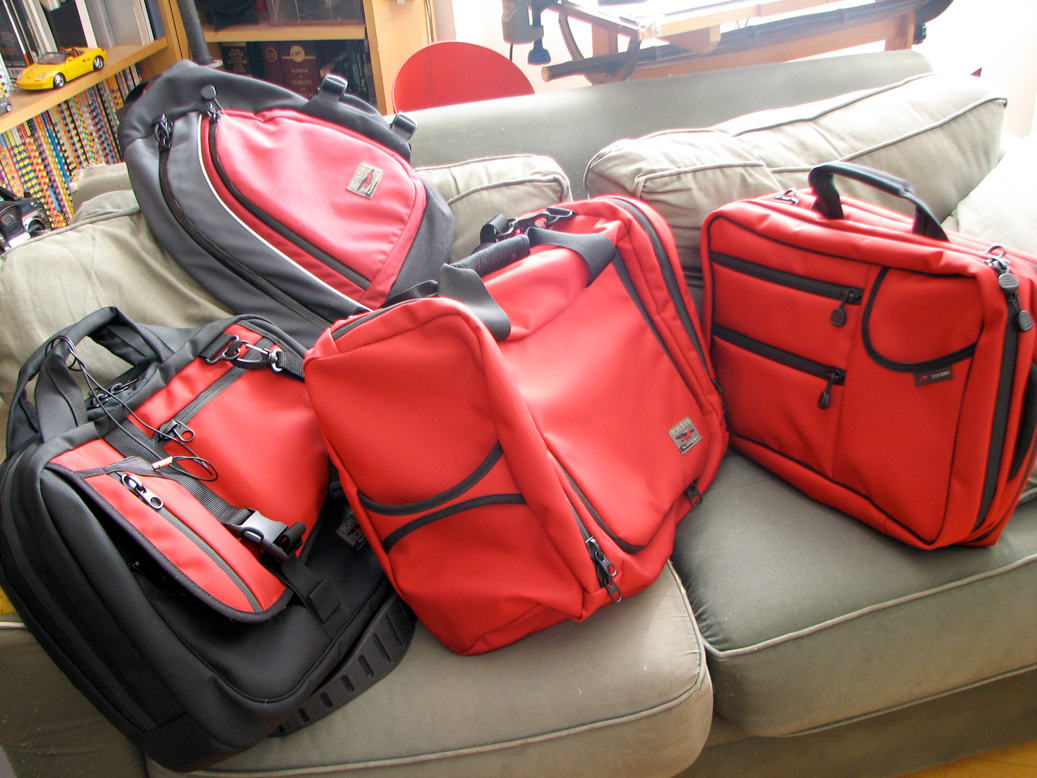
We got turned on to Tom Bihn bags many years ago. Over that time we have had the pleasure of using quite a few different models. We took them with us on vacations, on business trips, and general excursions around town. However, the one bag which has gotten the most use was the Ego. We did a FirstLook of the Ego back in 2008 and it has been used daily by one of our editors since. After four years, the Ego looks almost as good as the day we got it. Quite amazing considering all we've have put it through. So when we needed a larger laptop bag for our "new to us" 17" Macbook Pro, we knew it was probably best to pair it up with Tom Bihn's new SuperEgo.
Like the Ego, the SuperEgo is large messenger bag. This style of bag is popular with the folks here because it can easily be configured to carry whatever is neededfor the day (camera, video camcorder, papers, etc...). With the addition of the padded Brain Cell, the bag can be quickly transformed into a super-protective laptop carrier. Call us crazy, but we have carried... [more] - Tom Bihn SuperEgo FirstLook
|
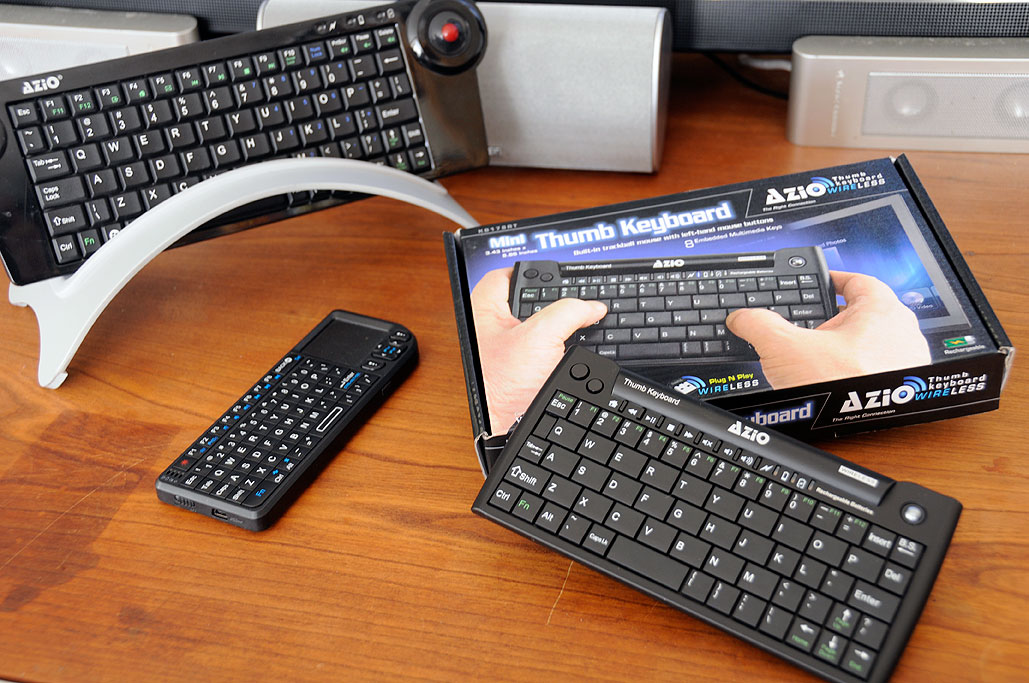
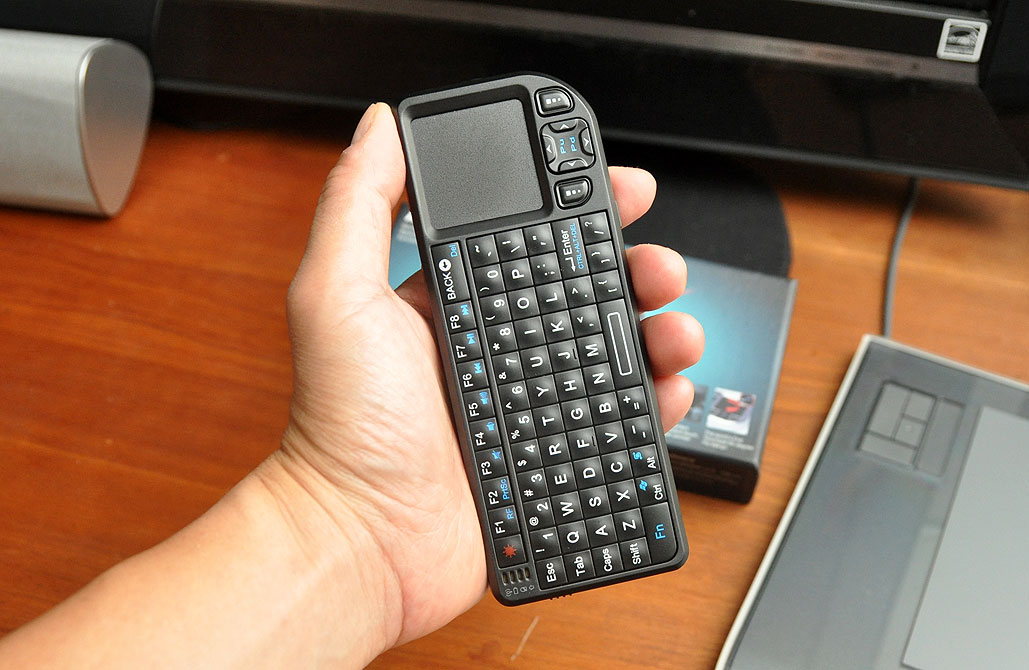
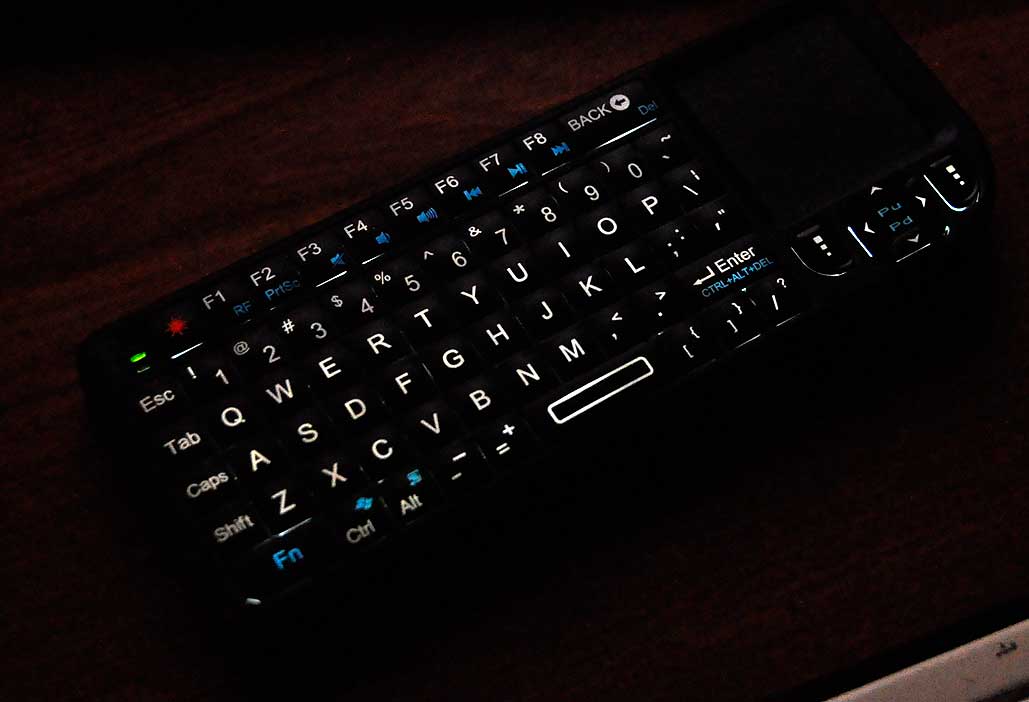
With the boundaries of TV and Web ever blurring, more and more folks are realizing that they need a keyboard to interact with their television screen. This is especially true for those who watch Hulu and Netflix content streamed to their large-screen LCD TV instead of on the computer's smaller monitor. Last July, we took a FirstLook at the tiny Magic-Pro keyboard. The Magic-Pro is tiny and has backlighting for use in the dark. It was a good solution as long as you don't mind the miniature keys. Today, we are going to take a look at a couple of slightly bigger alternatives from Azio.
Readers may remember Azio as the source of the low-cost alternative to the Apple wireless Bluetooth keyboard for the iPad. Azio has been getting some traction as a maker of quality multimedia-friendly wireless keyboards for home theater enthusiasts. We thought readers would be interested in taking a closer look at... [more] - Azio Mini Thumb Keyboard
|
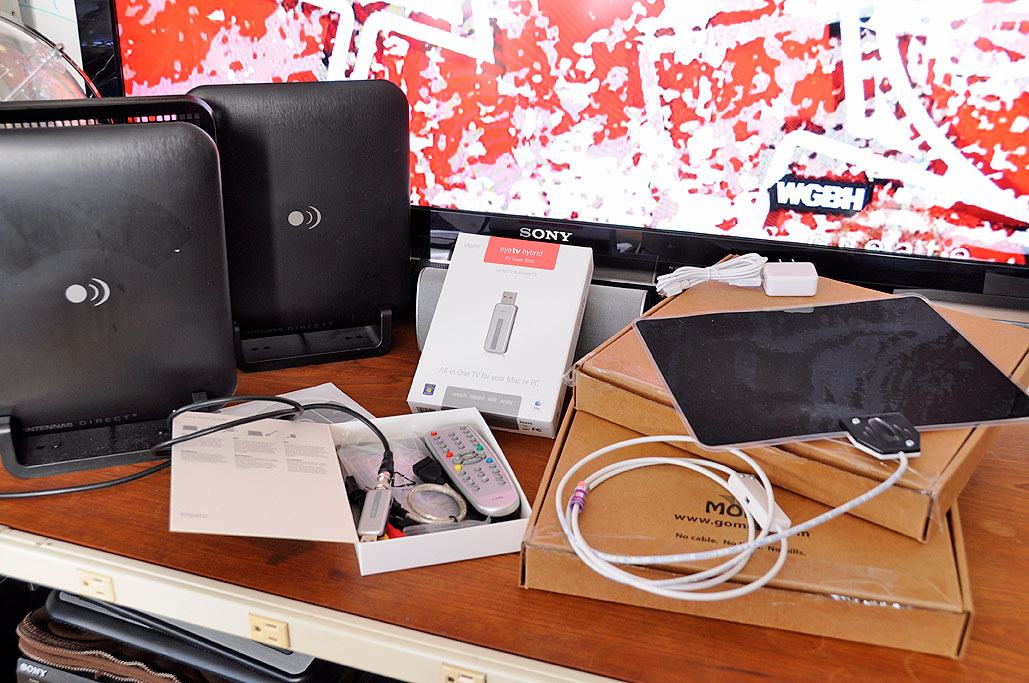
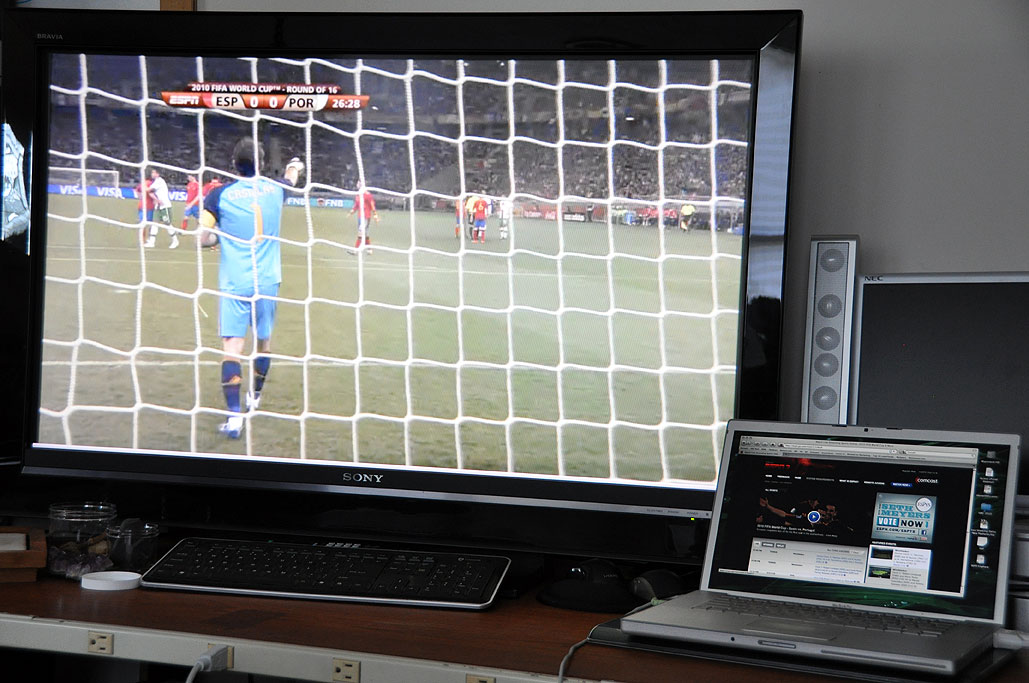
The NFL Super Bowl is this Sunday. A few lucky fans will be at the stadium, many will be at a local sports bar, but most of you (like us) will probably be watching the game at home. Today, there are many more ways to enjoy the big game beside just watching it on TV. There are live blogs and commentaries of the ads via the web, NFL play-by-play on the iPad, and your own instant replay on the computer if you are recording it with a digital tuner. We have put together a few gadgets to help you get the most out of Game Day. Of course, all of these suggestions are still applicable should you be more of a Downton Abbey than a football fan...and even better if you happen to be both!
Many readers have purchased a new large-screen TV the past few years, and probably get their TV signal from satellite or cable service providers. Maybe that is because they do not known that there is a free (and often higher quality) TV signal which can be pulled right out of the air. We have talked about this a few times in the past, but we feel obligated to... [more] - HDTV tuner and antenna
|
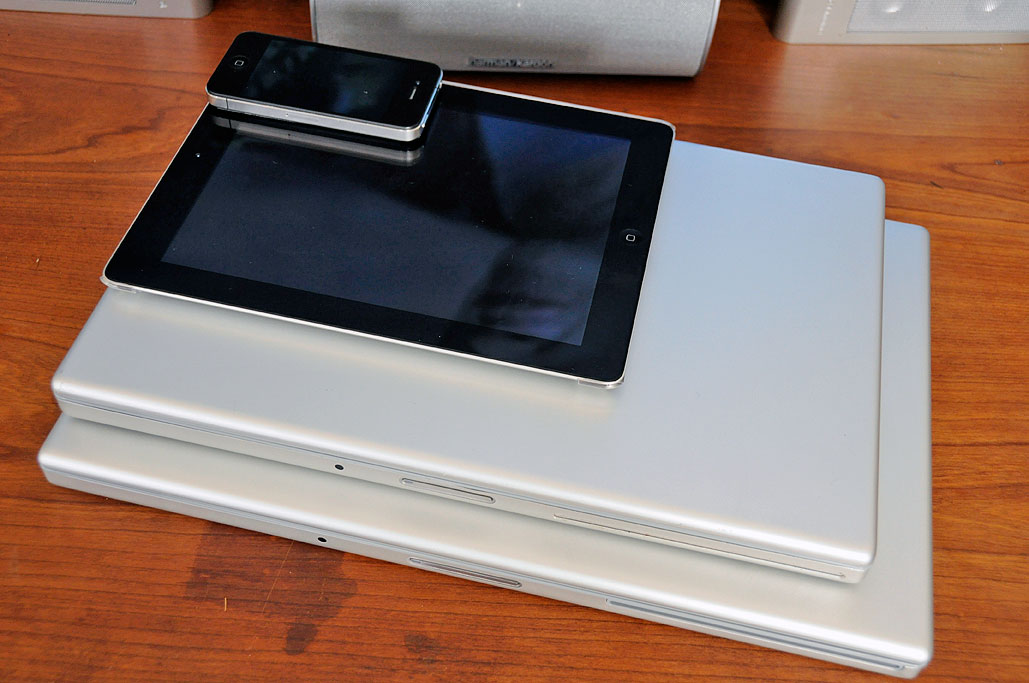
Most of us can get by just fine a computer that has been discontinued, as its computing power typically far exceeds the needs of most owners. With computers, things will always get faster and less costly. Paying for power not needed is a waste of money. Long-time RainyDayMagazine readers know that we only upgrade our hardware (Pismo, 12" MBP, 15"MBP) and software when we absolutely must. When we do upgrade, we feel the most value for the dollar is to purchase the oldest hardware which will satisfy our immediate needs.
A few weeks ago, Apple released iBooks Author. While the software is free, it does require a 64-bit Mac and the latest OS X 10.7 (Lion) to run. The "newest" Mac we have in-house is the 15" 32-bit Core Duo laptop. We upgraded to that MacBook Pro (MBP) in 2009 because the iPhone SDK requires an Intel processor and so would not run on our PowerPC-based 12" MBP. iBooks Author is compelling us to once again bite the bullet and... [more] - 17" Macbook Pro: upgrades
|
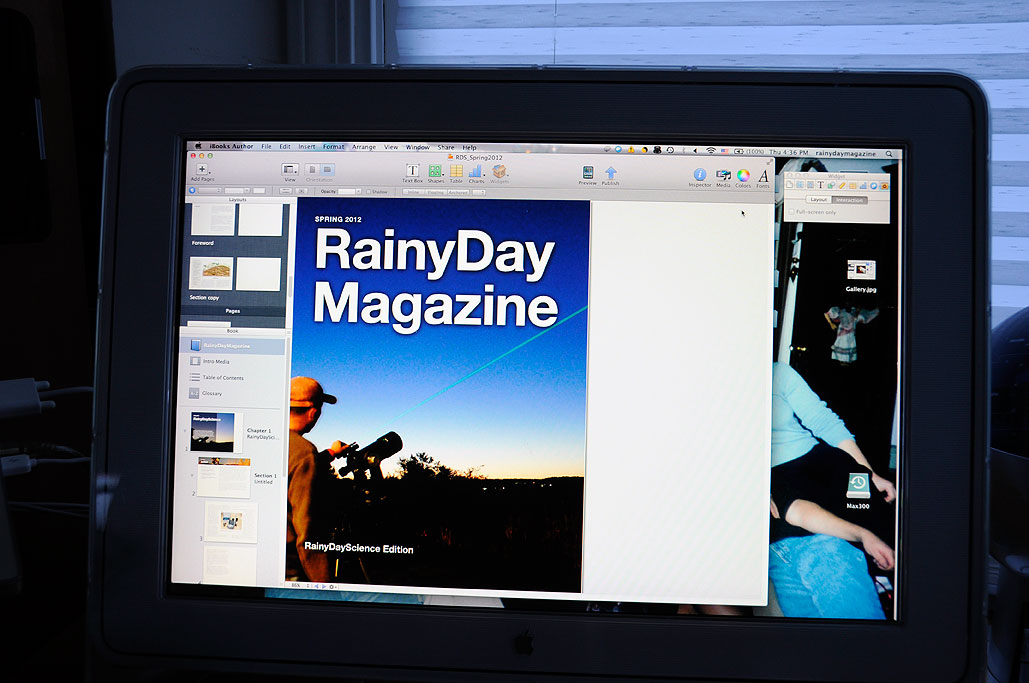
Adobe built their Digital Magazine Publishing (DMP) tools by leveraging their Creative Suite (CS) platform of applications. As we use CS5 (Dreamweaver, Photoshop) for much of our work, we were eager to give them DMP tools a try. We created a few issues (2010 Holiday Gift Guide, Spring 2011 issue, 1000 Character Reference) for the iPad using the beta version of the tools and would have kept using the released versions had Adobe priced them within our reach. Unfortunately, we had to look for other options.
When Apple announced they would reveal their plans regarding textbook publishing, we were hoping they would release a tool which will enable small publishers to build books for the iPad quickly and inexpensively. On January 19, Apple unveiled iBooks Author (iBA), the "iMovie" of iPad book creation. We have been playing with the application for the past ten days and have been duely impressed. iBooks Author is not as flexible as... [more] - iBooks Author FirstUse
|
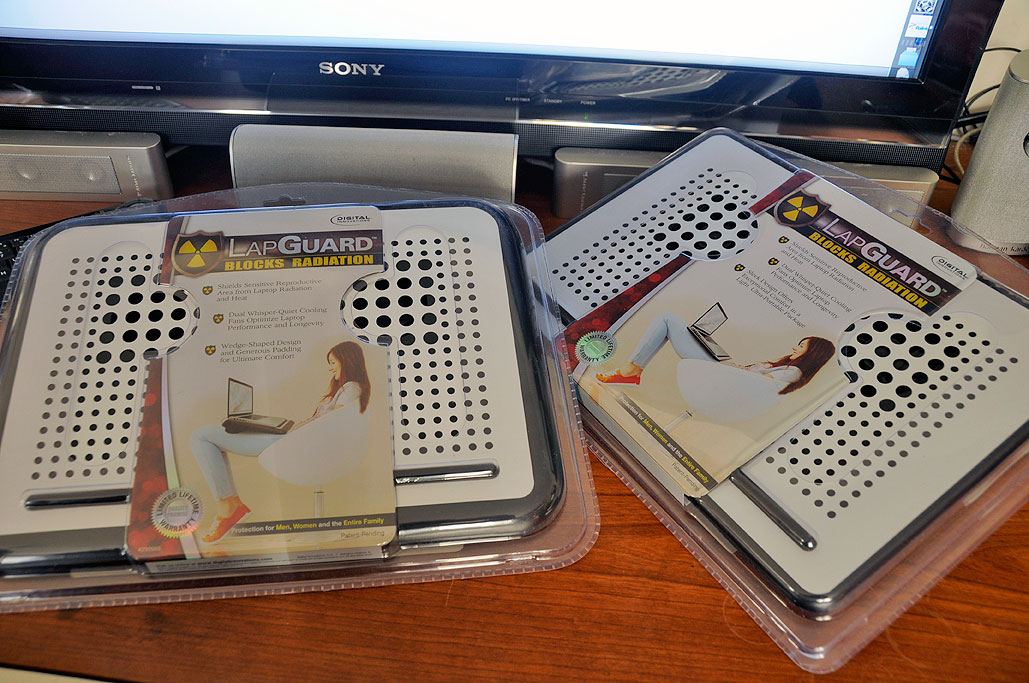
Laptops run hot. Some run so hot that they can be uncomfortable when used on a lap. However, if recent research is to be believed, EMF and Wi-Fi radiation may also be a problem. Of course, the concerns are not universally accepted. According to the CDC, “evidence for production of harmful biological effects is ambiguous and unproven.” Still, whether EMF or Wi-Fi radiation poses a problem, there is no doubt that heat from the laptop alone can be a issue.
Whether we need to be concerned about EMF or Wi-Fi radiation is not yet clear, but those concerned and want to err on the side of safety can find two well-made solutions from Digital Innovations. Even if... [more] - Digital Innovations LapGuard
|
Each generation is entrusted with the responsibility of educating the next. This task is uniquely different for humans in that we have the ability to record our knowledge. While the amount of accumulated knowledge has long surpassed what any one person can know, the development of tools (paper, printing press, computers, Internet) has made it possible for our collective knowledge to be disseminated without the constraints of either distance or time.
On January 5th, we posted our speculations regarding the January 19th Apple announcement. Our biggest wish was that Apple would provide an inexpensive tool that would enable content providers to easily create interactive iPad-specific books. That is exactly what Apple announced yesterday. Not only has... [more] - iBooks Author
|
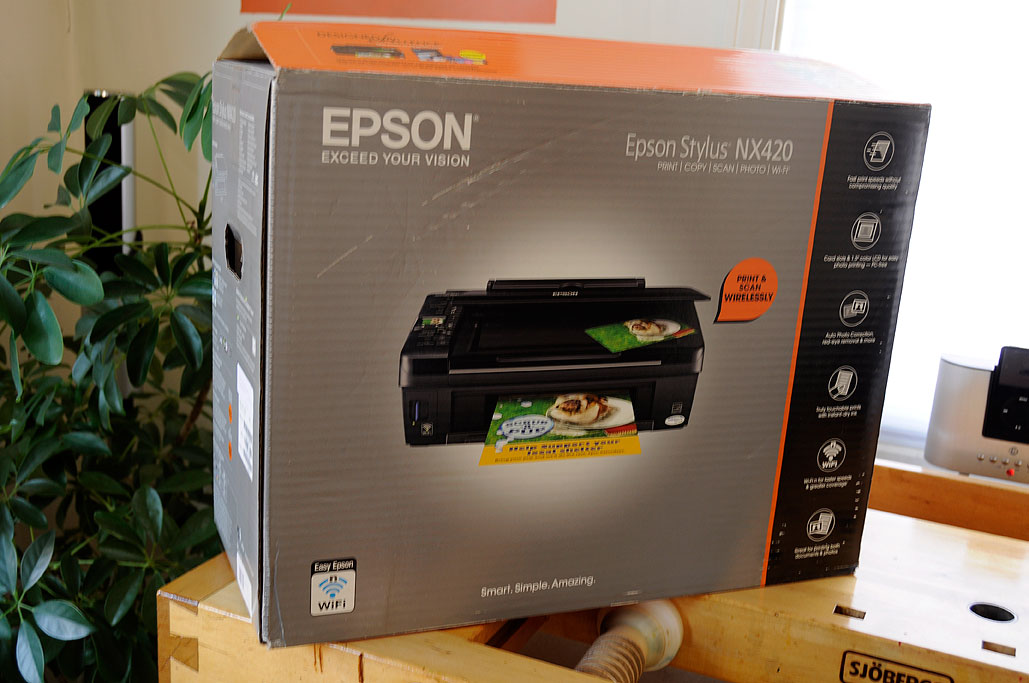
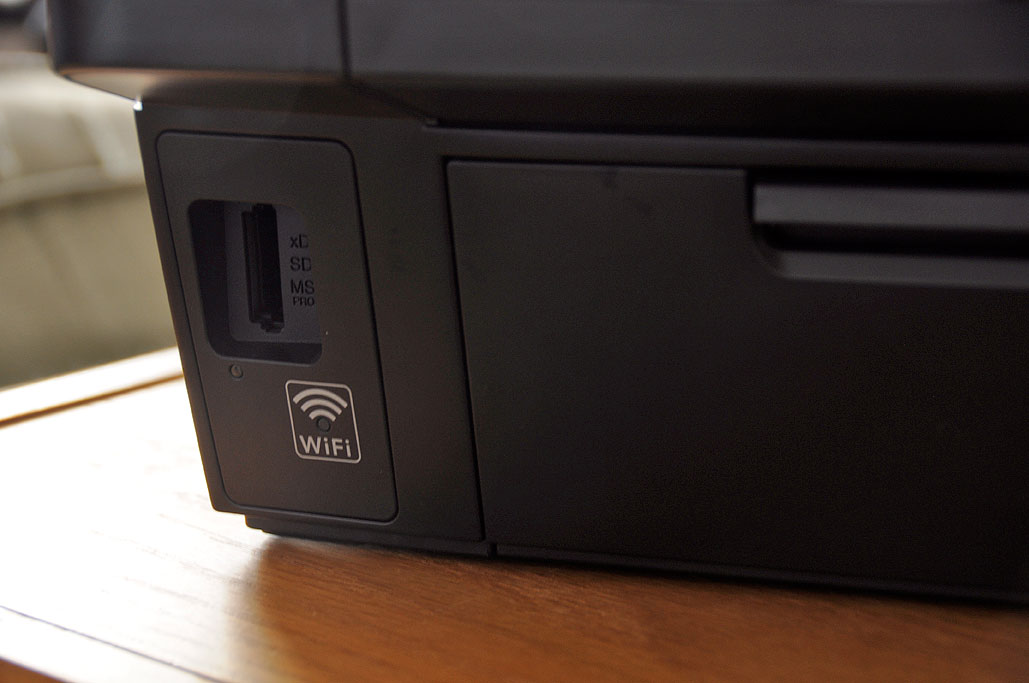
Buying a new computer these day more often than not also gets you a free printer. We already have a nice photo printer, so we typically just sell them on Craigslist or give them to one of the interns. Another reason why we don't keep them is because most inexpensive printers do not use individual ink cartridges. When one ink color runs out, the entire cartridge must be replaced. We find the approach both expensive and wasteful, so we avoid using printers which require those all-in-one cartridges. Apparently we are not the only ones who felt that way and printer makers have adjusted their offerings.
Recently, we acquired a printer (Epson NX420) which not only uses individual ink cartridges, but is also a scanner/copier, is WiFi accessible, and only costs around $50! With all the iPhones and iPads around the office, we had been thinking it would be convenient to have a WiFi-capable printer on the network. So we decided to set up the Epson NX420 and... [more] - Epson NX420 WiFi Printer FirstLook
|
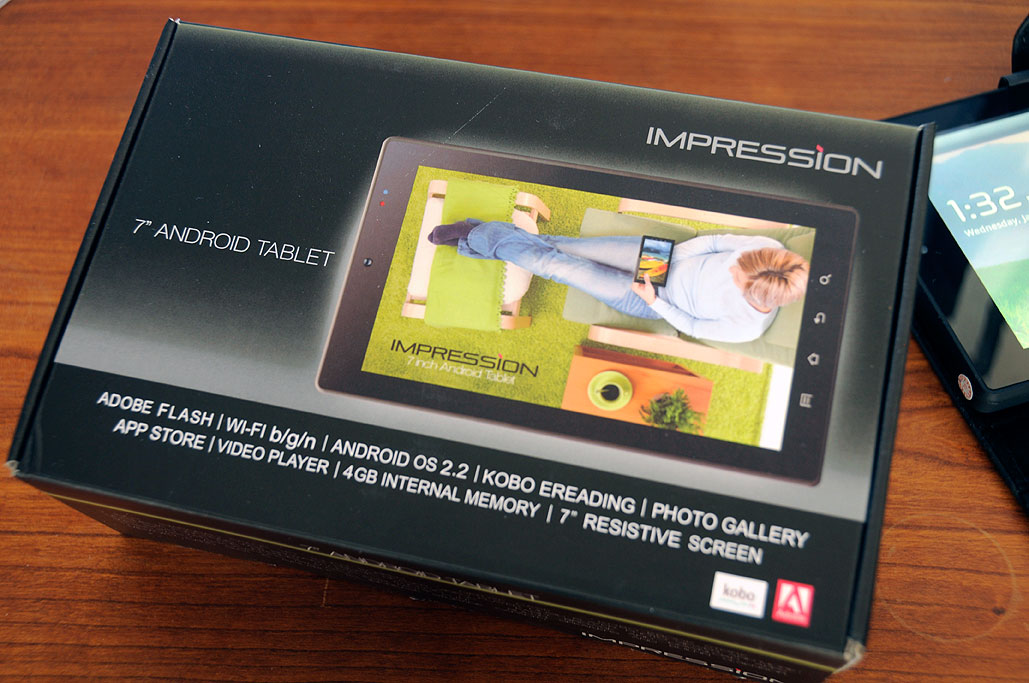
Android tablets are going to swamp the market this year, and many of them are targeting the 7" segment of the market. There are two reasons for this: competing in this space means not having to go up directly against anything from Apple, and it is a practical way for hardware-only vendors to bring something to market near the magical $200 price point. Over the course of 2012 we'll be paying attention to the 7" tablets. We think there is a lot of potential in the 7" market (more on that in a future article). It will be interesting to see who will be able to stake their claim in this emerging market.
To start things off, today we take a look at a 7" Android tablet from Leader. Leader has managed to not just break the $200 barrier, but has punched through it aggressively with a price of $129 (available now at Kmart and Sears)! Leader has made some reasonable choices in its feature vs. price compromise for the Impression 7. They didn't try to... [more] - Leader Impressions: 7" Android Tablet
|
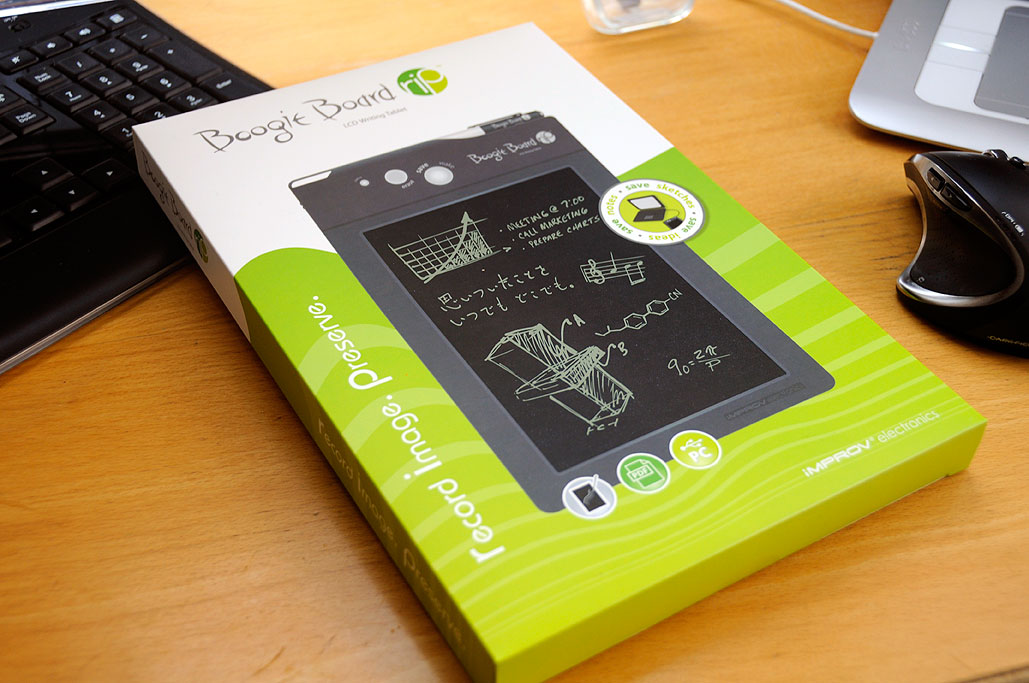
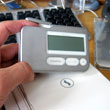
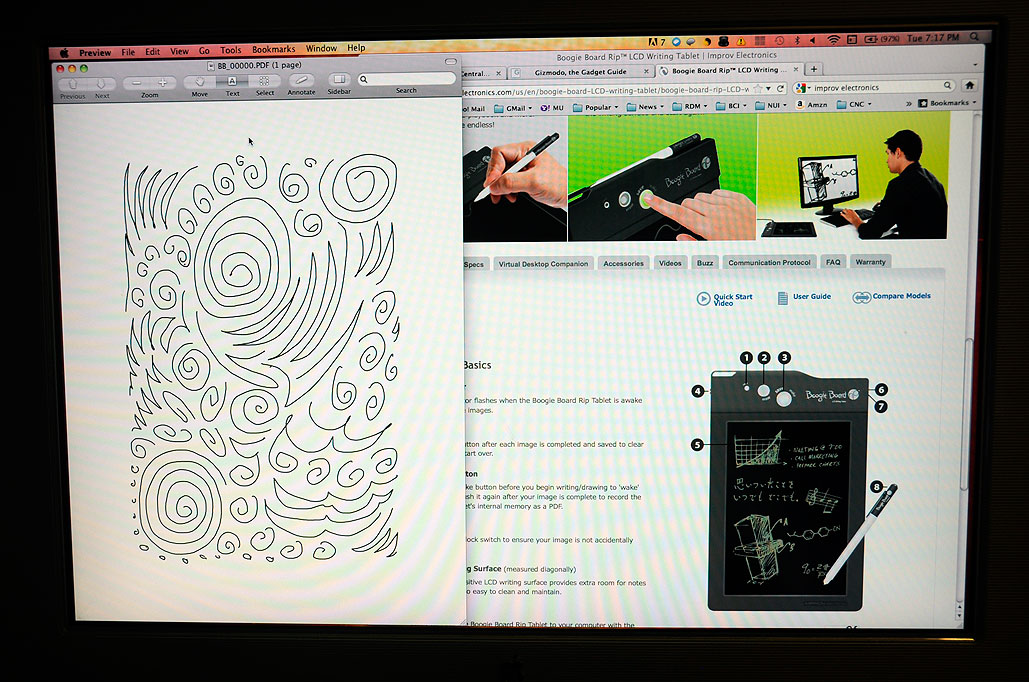
We posted a quick mention of the Boogie Board RIP
The specs for the RIP is as follows:
We have no idea how the image capture is being accomplished. Our guess is that there is a pressure-sensitive layer underneath the LCD panel which is detecting and recording the strokes. This conclusion was based on our observation that light strokes, while clearly visible on the LCD layer, are not recorded by the tablet. For the marks to be recorded, a firm stroke is... [more] - Boogie Board RIP
|
There is a rumor going around that Apple will be announcing some sort of iBook-related news at a New York event at the end of the month. The speculation on what the announcement will be has started making the rounds. The droning will get louder as the day of the event gets closer.
It should be no surprise that the interns have been having lively and spirited online discussions with many out there regarding what the announcement could be. Our hope is that Apple will announce that they will be providing a free authoring environment to aid in the development of truly... [more] - Interactive Books
|


| RainyDayBuzz* | ||
|
|
||
| GET GEAR* | ||
|
||
| RECENT TRIPS* | ||
|
|
||


| GO PLAY* | ||
|
||
