|
|
 |
| |
RainyDayKitchen's content can now be licensed for your print magazine or web site. Please contact us directly here. If you want to see something reviewed, then drop us a note with a link and we'll be happy to take a look.
|
|
November 27,2008 (TofurkyThanksgiving) |
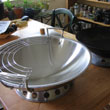
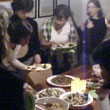
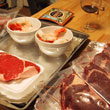
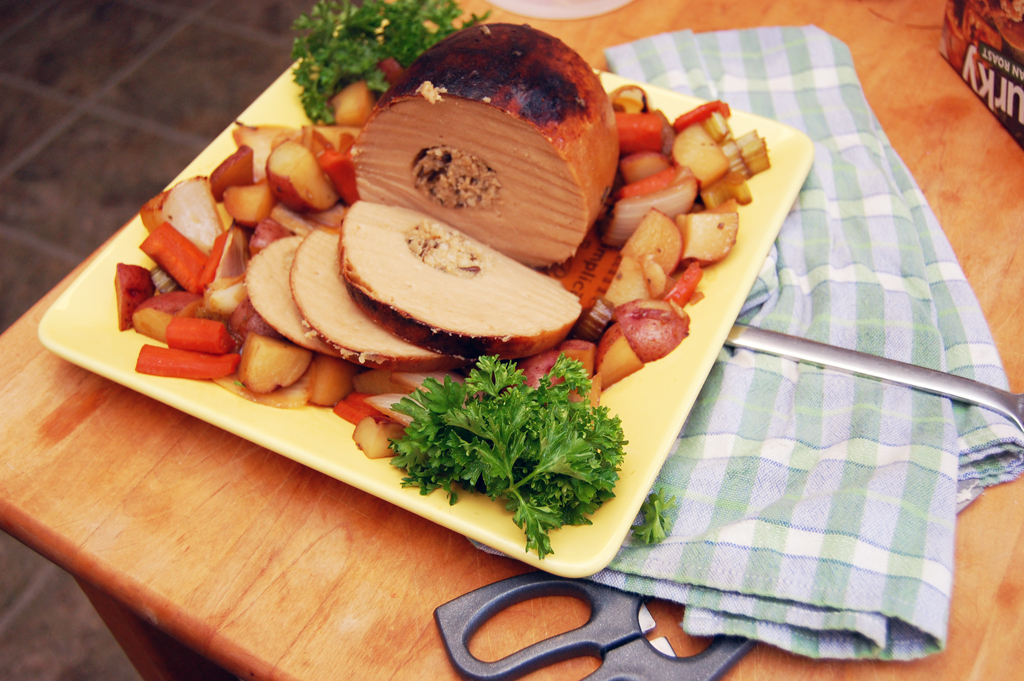
Roasting a Tofurky may not be the first thing most people think of when preparing a traditional Thanksgiving dinner. However, the cooks in the RainyDayKitchen are nothing if not non-traditional. This year they decided it would be a good opportunity try preparing a Tofurky in addition to the turkey.
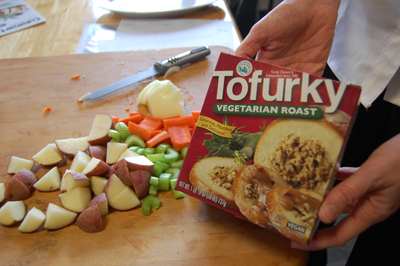
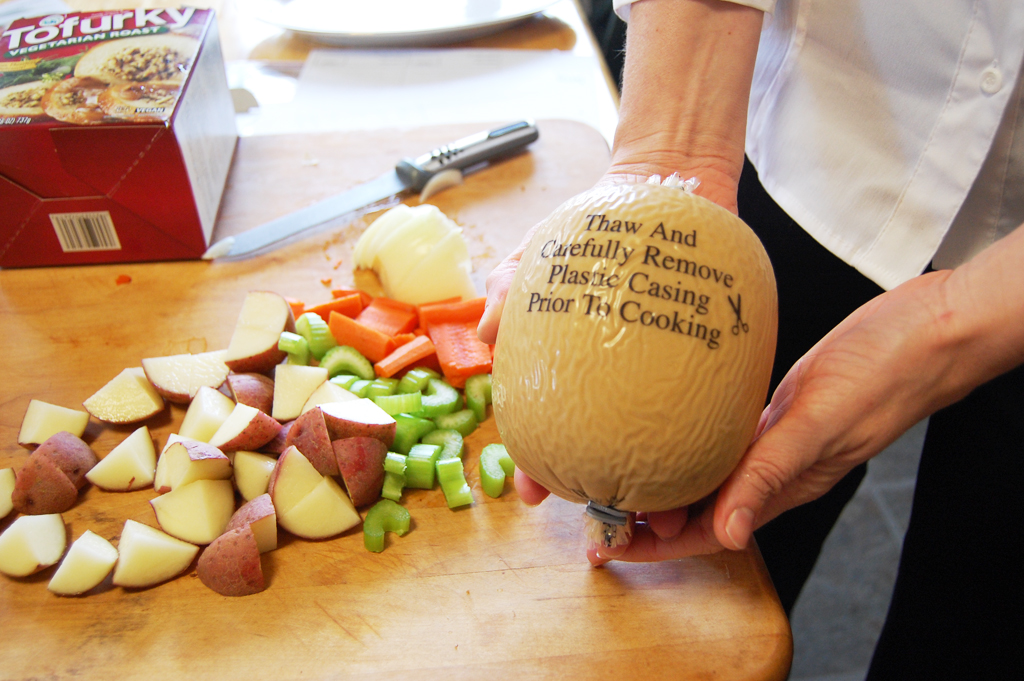
Tofurky is made from, among other things, soy protein. It is low in fat, nutritious, cholesterol free, and entirely without stupor-inducing triptophan. Properly prepared, it is both great tasting and good for you. And it comes stuffed!
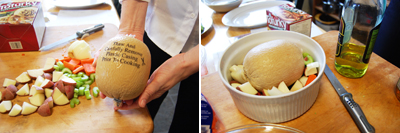
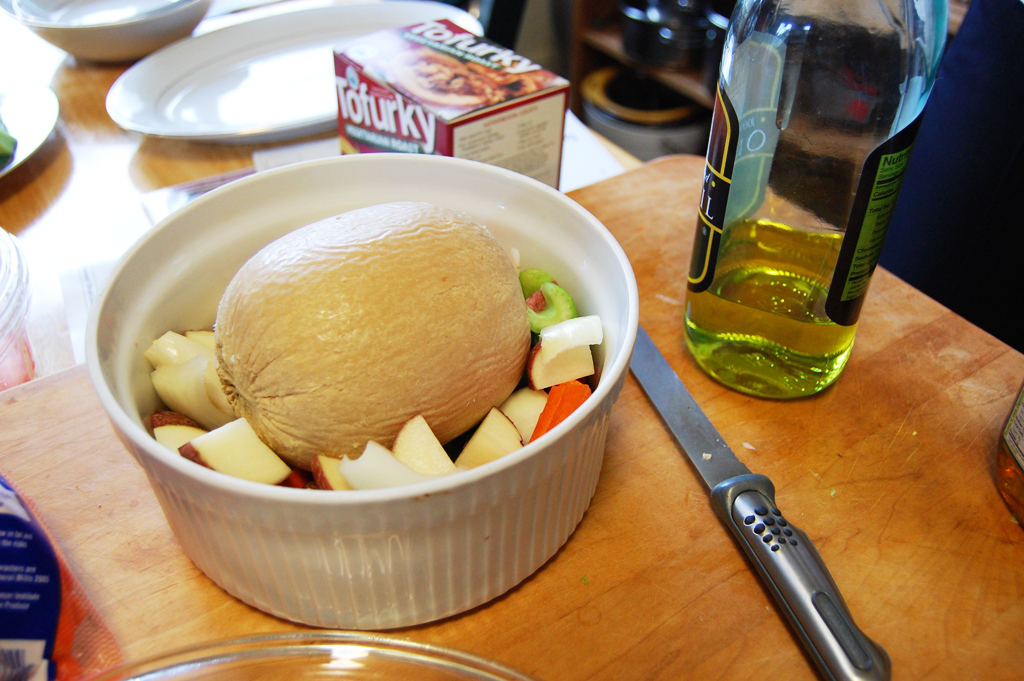
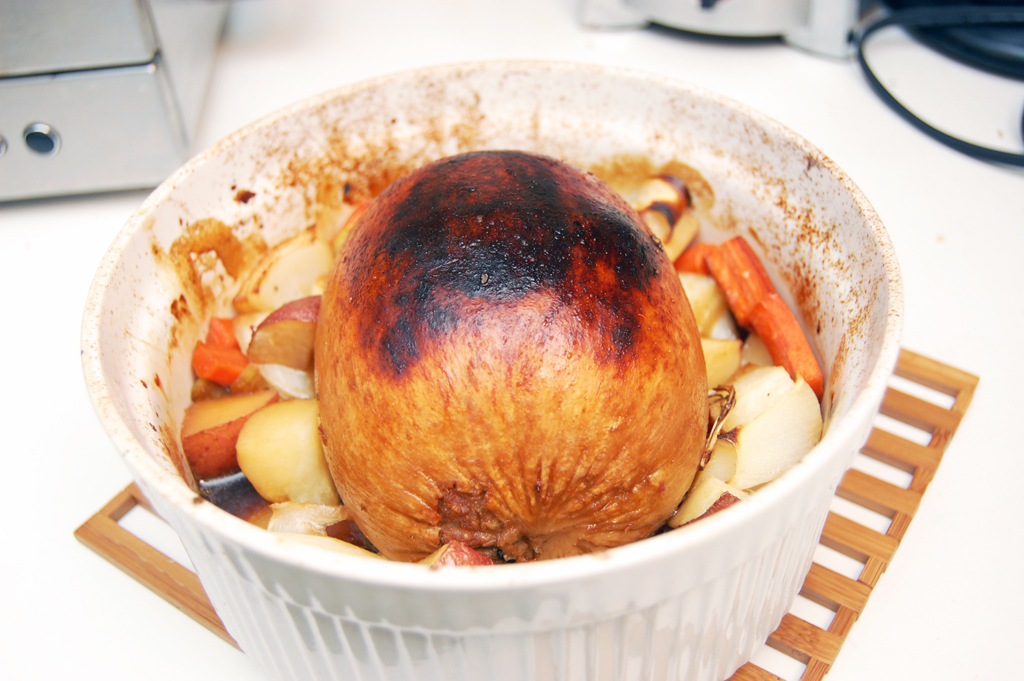
We purchased one of the newer pre-stuffed Tofurkies. It will stay fresh, uncooked, in the fridge for 30 days. Prepping the Tofurky was fairly simple: remove plastic casing, place in roasting dish with suggested vegetables, make basting liquid, cook for 75 minutes (Note: we used a convection oven so we reduced time accordingly to 60 minutes.)

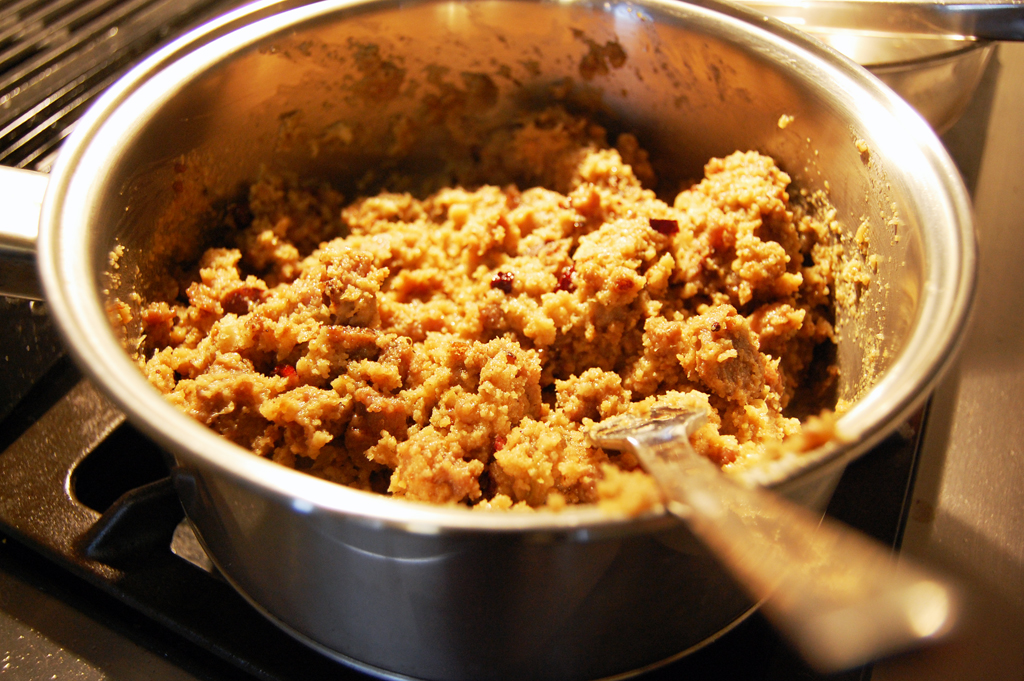
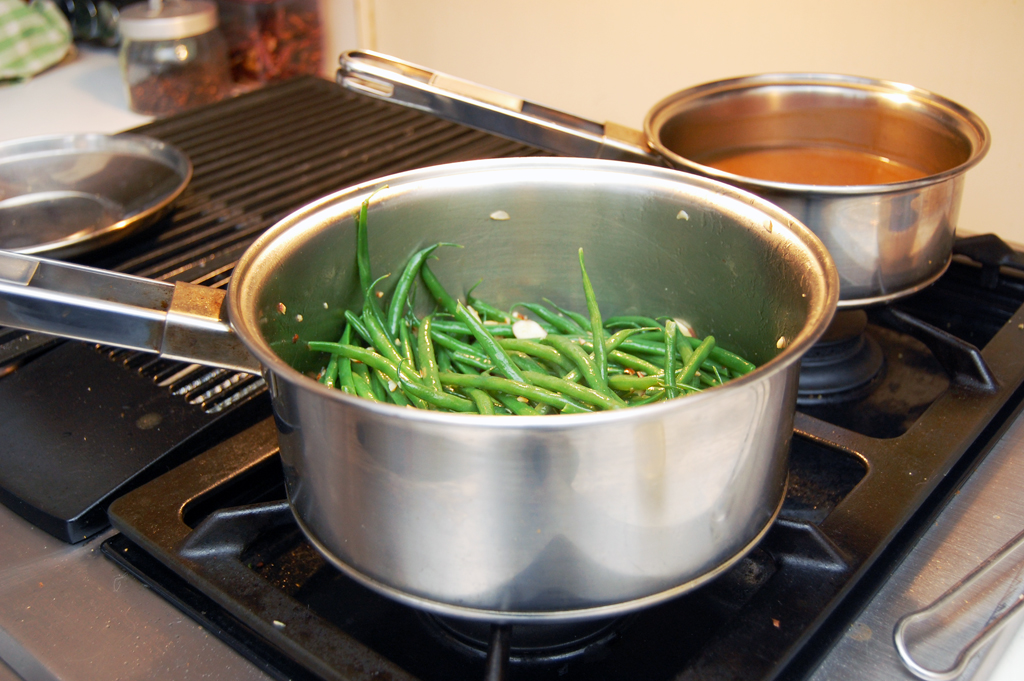
We also made some traditional sides: mashed potatoes, sausage cranberry stuffing, green beans w/almonds, maple-roasted carrots, and pies. Lots of pies - apple, lemon meringue, chocolate pudding!!!

All three of the convection ovens (Cuisinart, GE Advantium, Jenn Air) were put to the test. We cooked the Tofurky in the Cuisinart, the sides in the Advantium, and the regular turkey in the Jenn Air.


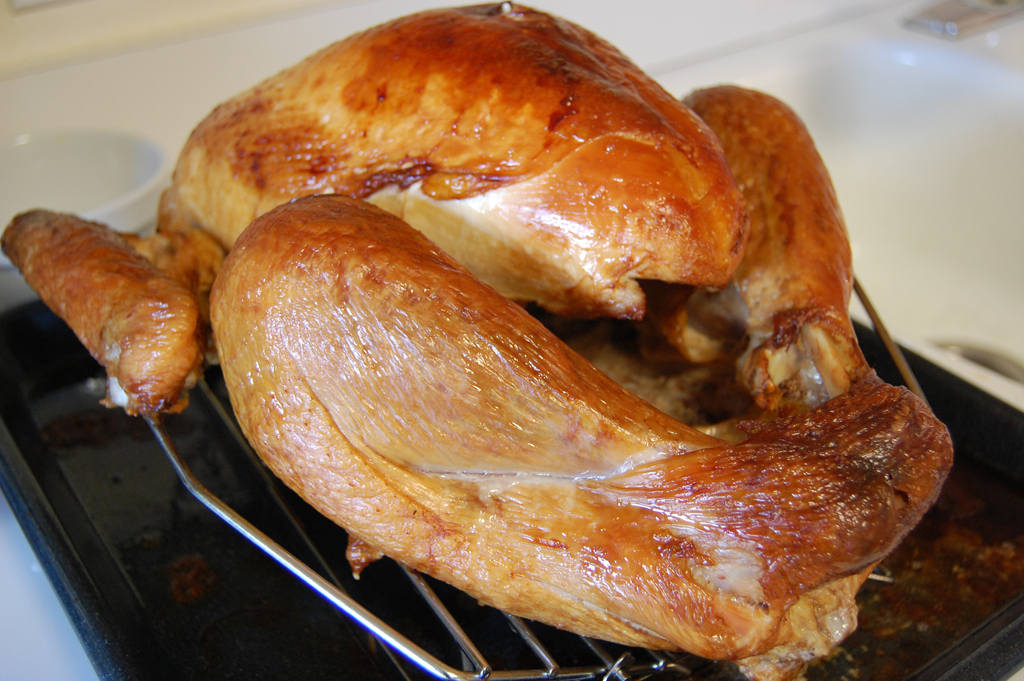
The pre-cooked Tofurky was ready in about an hour. The Butterball turkey was pre-cooked as well. The reheating time is normally 2 hours, but since we used a convection oven, the total time was only 90 minutes.

The pre-cooked Butterball turkey was amazingly juicy. The Tofurky was a hit with the vegetarians. The carnivors did give it a try and proclaimed it "tastier than expected."

We started our prep work at noon and by 2PM we were sitting down to eat. The biggest time savers were definitely the pre-cooked turkey and Tofurky. The other was Carolyn's mom brought us two fantastic home-made pies :-) The lemon meringue pie was especially fabulous. Thanks, Nan!

We wish all our readers a wonderful Thanksgiving. Remember, the Holiday shopping season starts tomorrow. So eat well, rest up, and be ready to get out there, shop for bargains, and help jump start this economy. [Permalink] - Tofurky Thanksgiving
|
October 31,2008 (FoodFriday) |
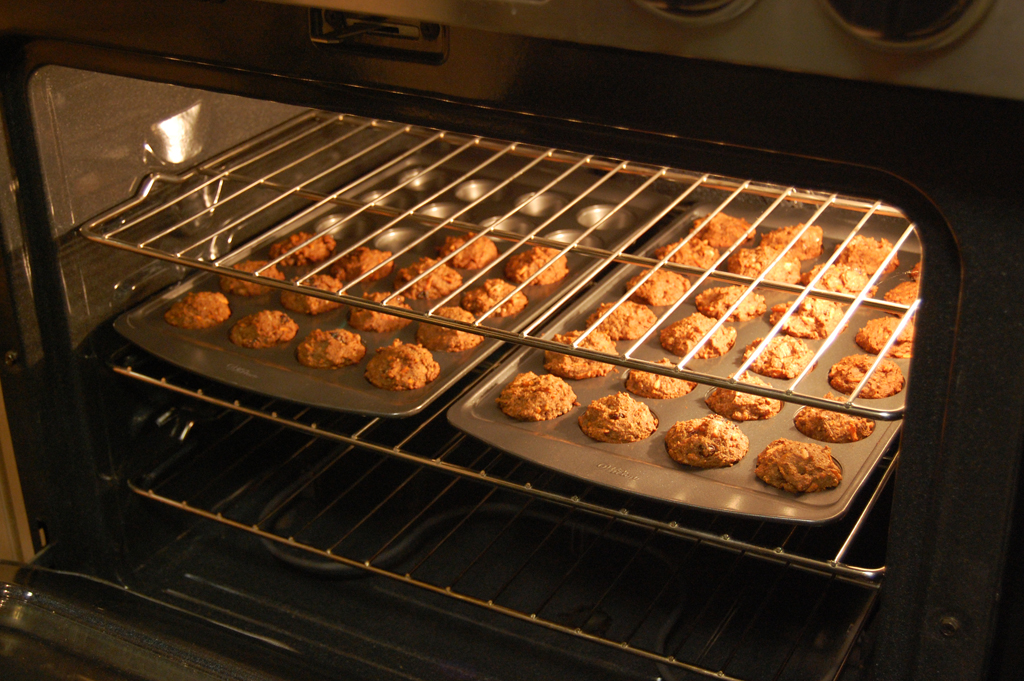
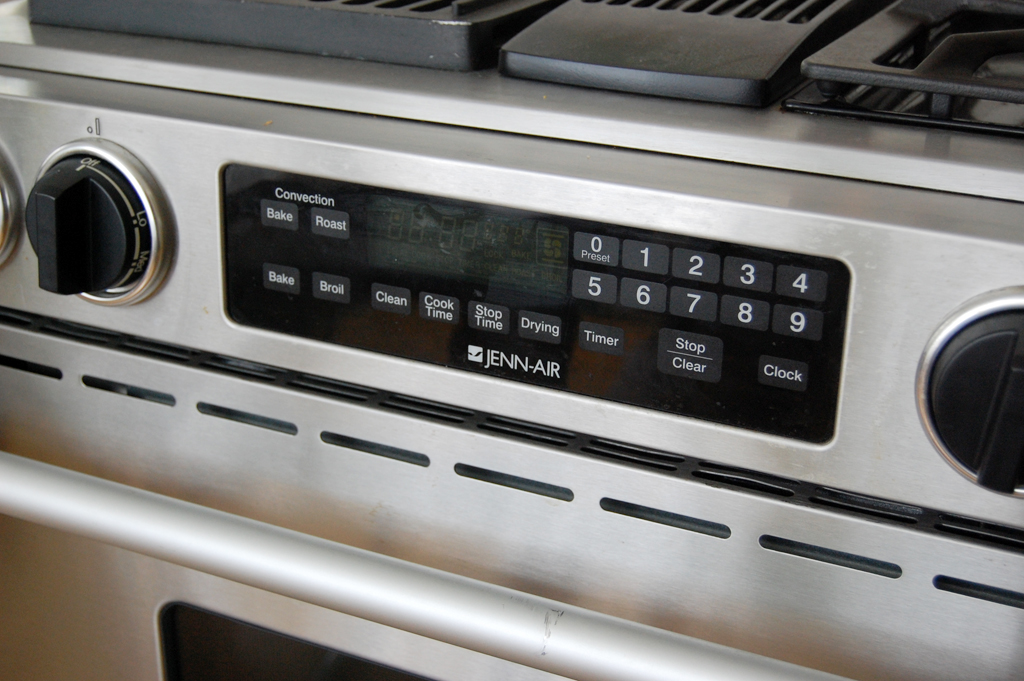
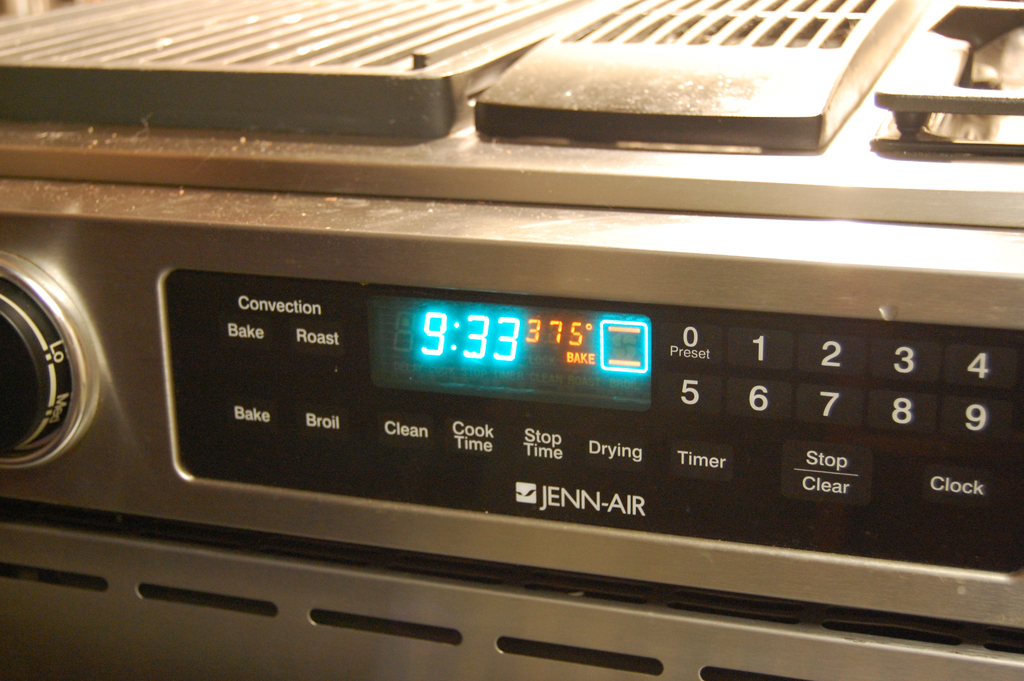
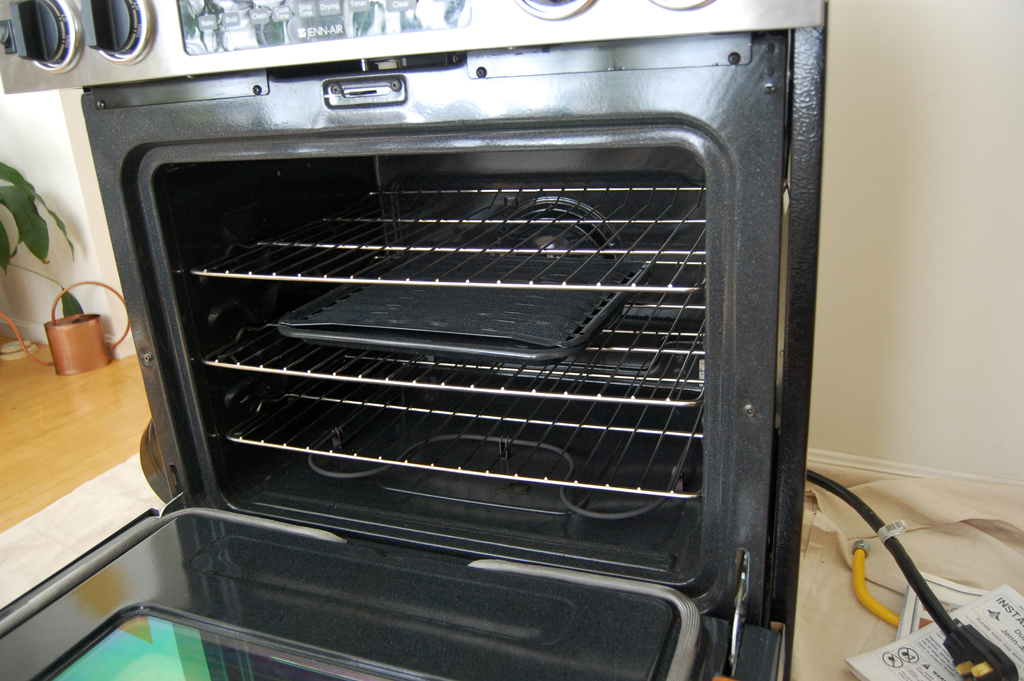
Now that the electric oven and gas burners of the new Jenn Air range are all operational, it was time to give things a FirstUse test. Most of us were more curious about the convection oven, so we decided we'll check that out first. What would be a better test than to make some muffins? Of course, the folks in the RainyDayKitchen couldn't make just any muffins, they had to make healthy spelt-flour muffins. If you don't know what spelt is, just drop Carolyn a note. She will tell you all about it. Anyway, back to the oven...

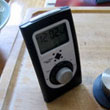
Working the oven settings was pretty straightforward (no manual needed): just hit the "Bake" button, punch in the desired temperature, and off it goes. The Temp Indicator gives the current reading and a "ping" goes off when the set temperature has been reached. We gave up trying to figure out how to make the timer work. I guess we'll have to RTMF for that one.

The oven came up to the desired temperature very quickly. A good reason for using 240V/50A. There is a convenient switch for an oven light so we could check on the baking without having to open the door.

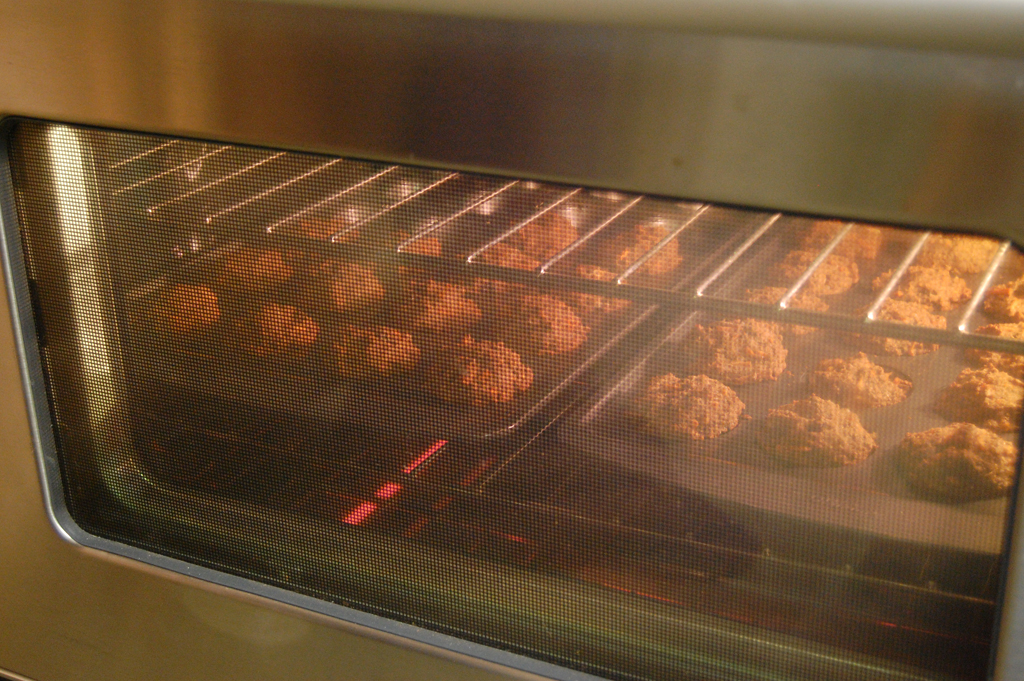
The first batch of muffins came out perfect. Now that we know the oven works, we will use our standard rosemary chicken recipe and give the convection feature a try. [Permalink] - Jenn Air Oven FirstUse
|
October 30,2008 (ReModellingThursday) |
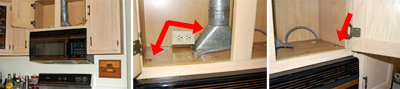
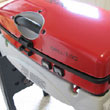
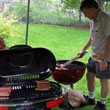
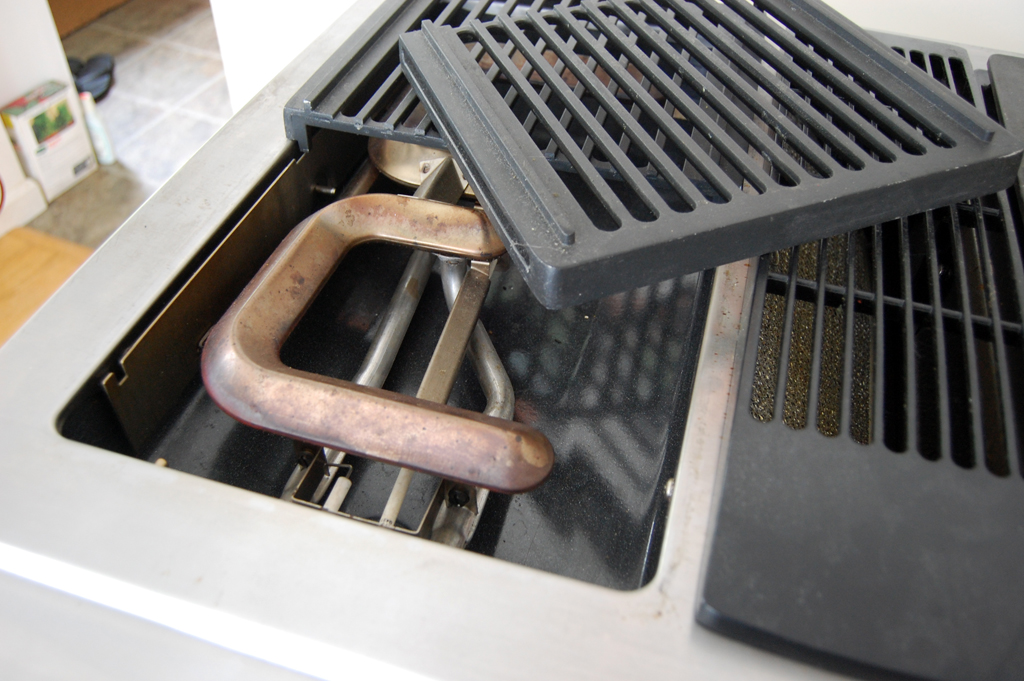
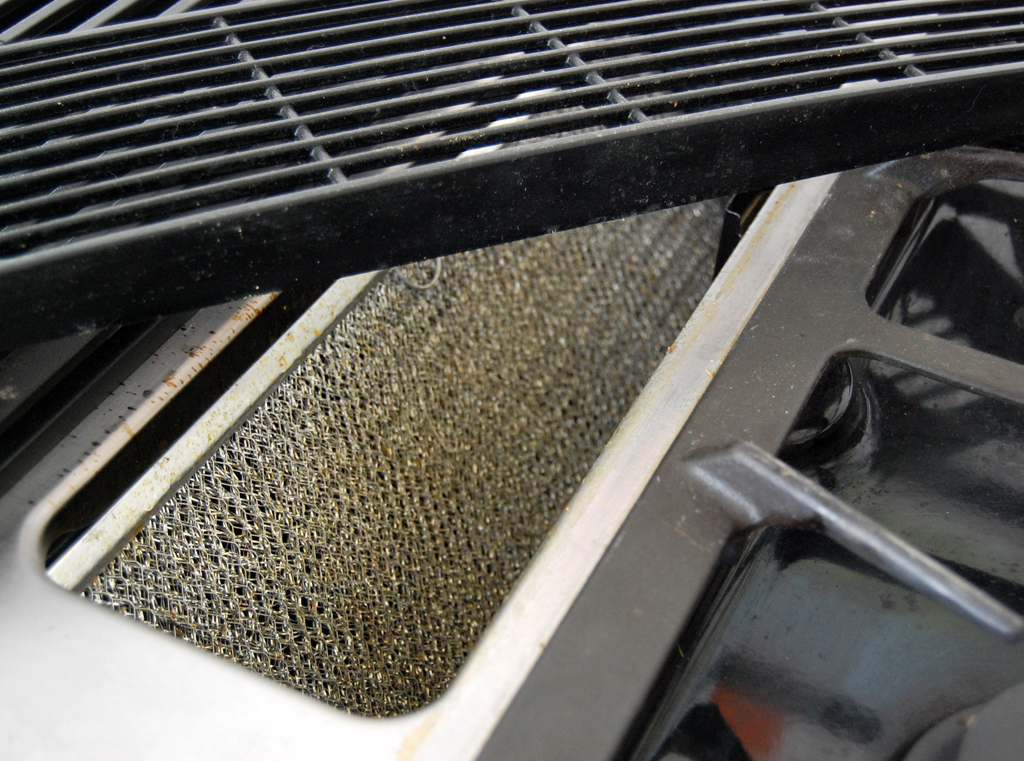
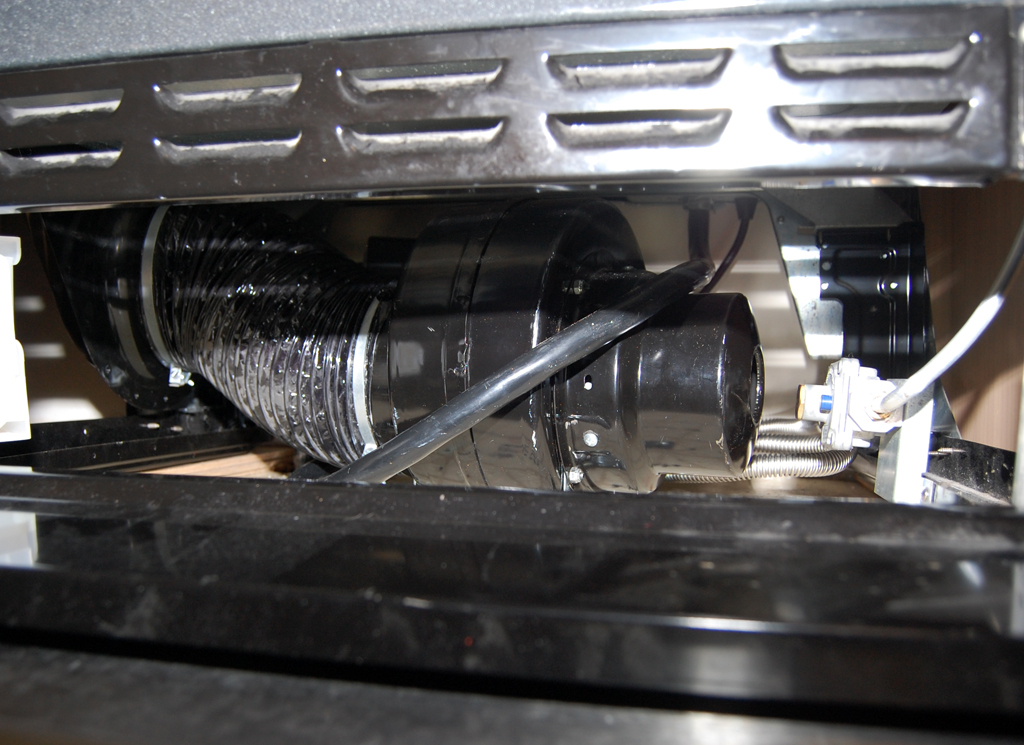
The Jenn-Air range we installed has a grill on the left side. To keep the smoke from the grilling from overwhelming the kitchen, there is a downdraft vent in the middle of the range.
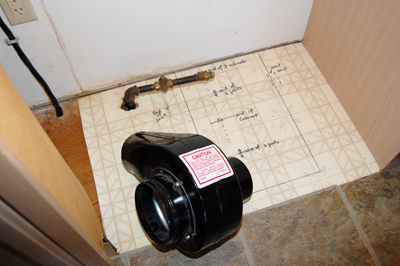
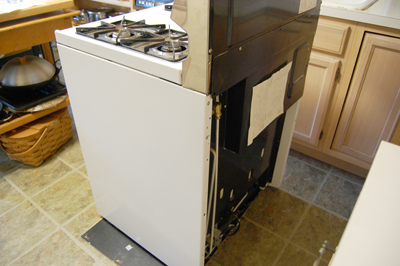
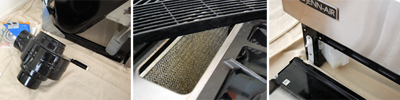
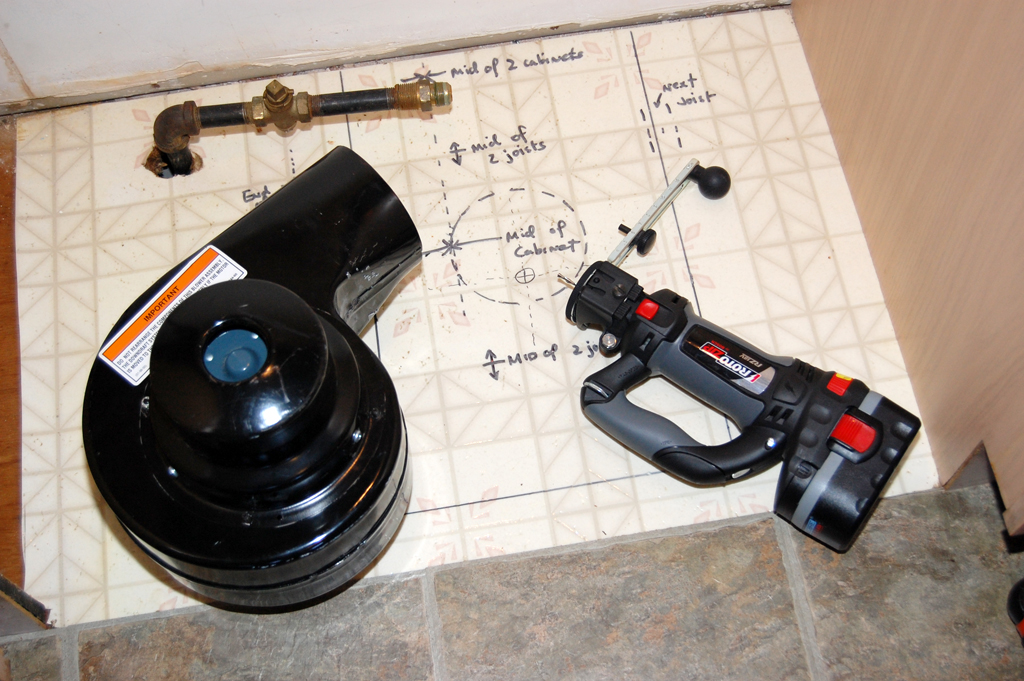
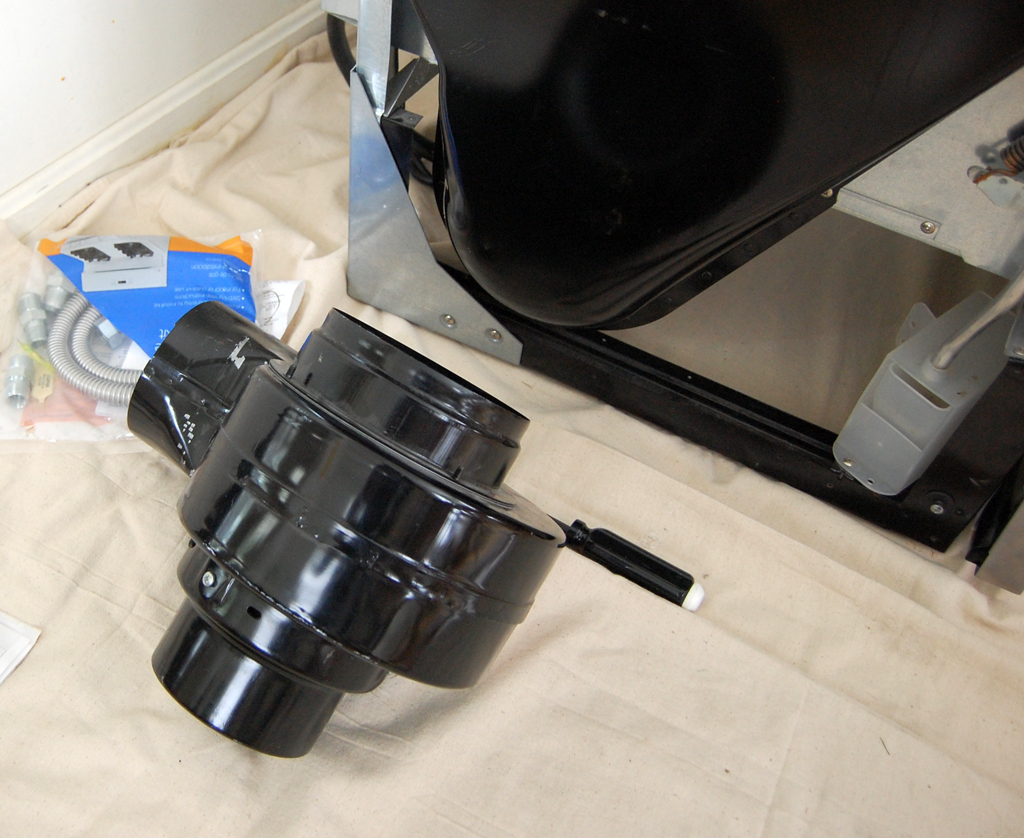
For the vent to work, a blower must be installed to suck the air down and out. This blower may be installed in a variety of ways. We chose to place it on the right side of the stove and vent the air down to the basement.

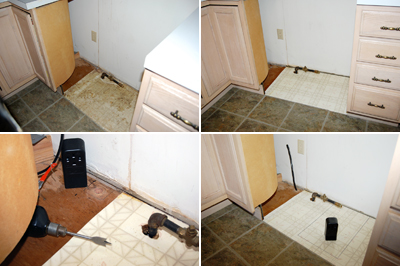
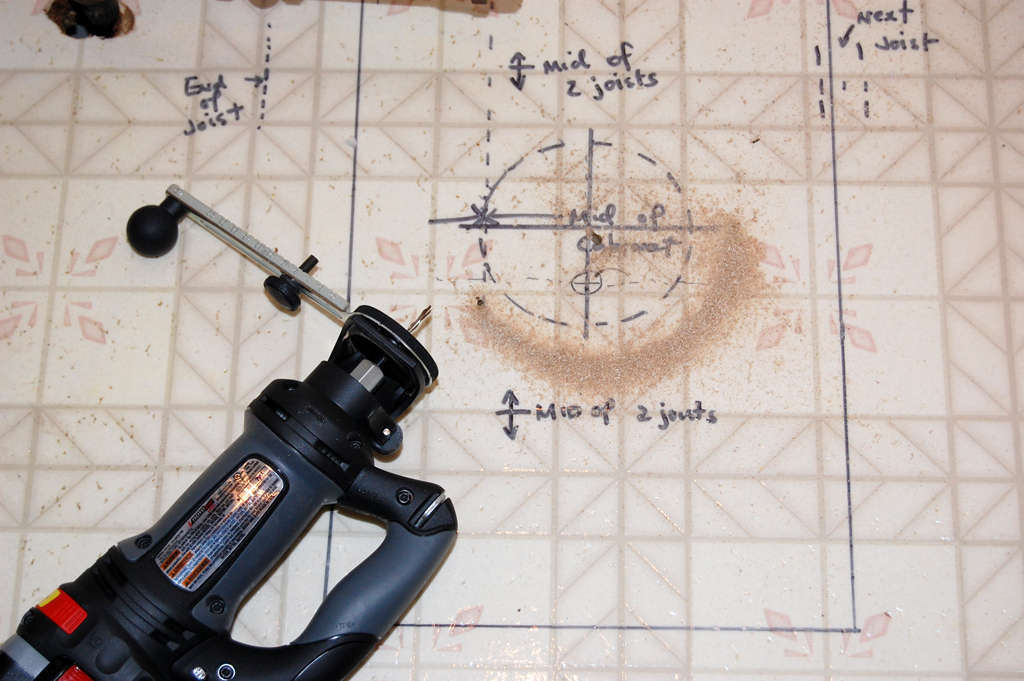
In order to vent the exhaust to the basement, a hole must be cut into the floor. The installation manual gave VERY explicit dimensions for the bounding box of where the blower may be placed.

We spent quite a bit of time double checking our measurements before making the first cut. To make the cut, we used a RotoZip with a circle-cutting attachment. It was a LOT easier than using than a jigsaw. The RotoZip is quite an amazing piece of gear. We have had it for a few years and have always meant to do a more detail write-up on it.

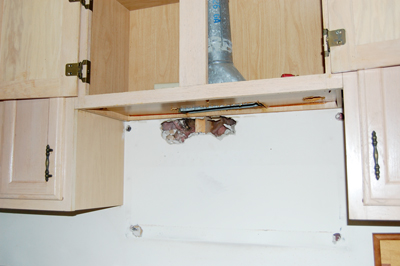
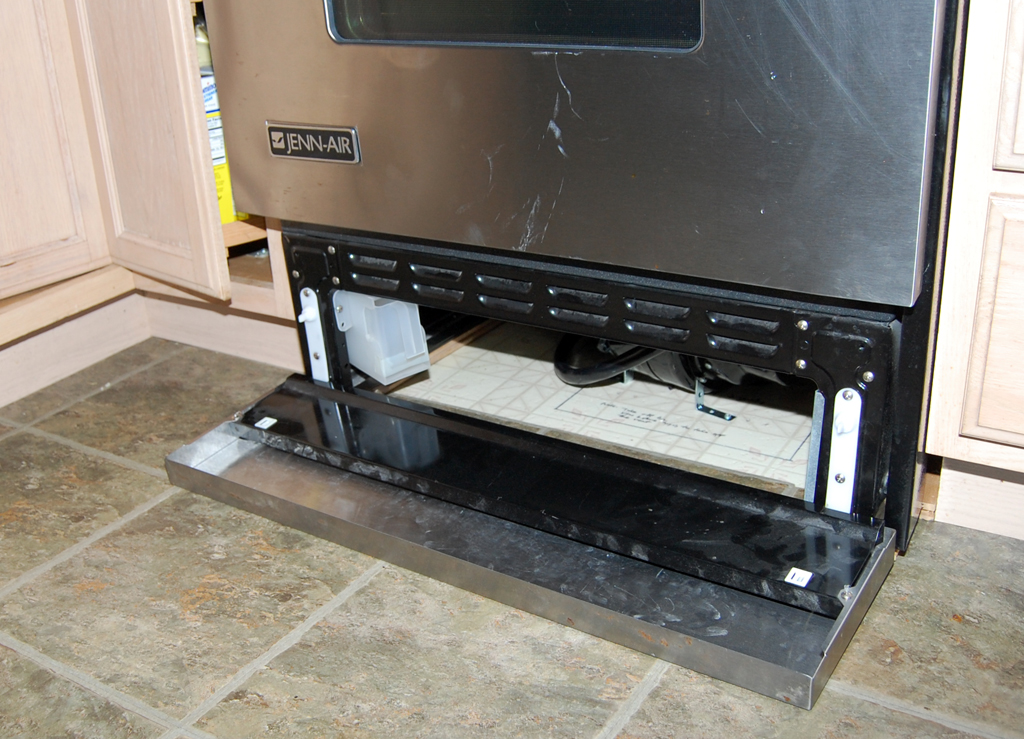
Mounting the blower was more of a challenge, as we realized the mounting brackets were not among the various parts given to us by the seller. No matter, we came up with a pretty sturdy method using some 3" angle brackets. However, when we tried moving the stove in, we realized the blower was about 1/2" too high!

We reworked the mounting using some 2" L brackets and screwed everything down onto the floor. The blower felt very rigid and did not vibrate at all during our power-on test.
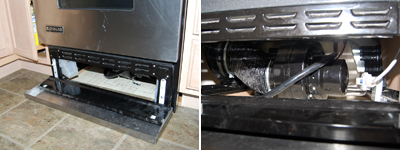
Once the gas line was hooked up and tested for leaks, we moved the stove into place. Everything fitted nicely underneath. The last step in this installation was to connect the vent outlet to the blower using the flexible hose. It took a little bit of crawling around but eventually we got it all attached and working. [Permalink] - Blower Installation
|
|
|
|
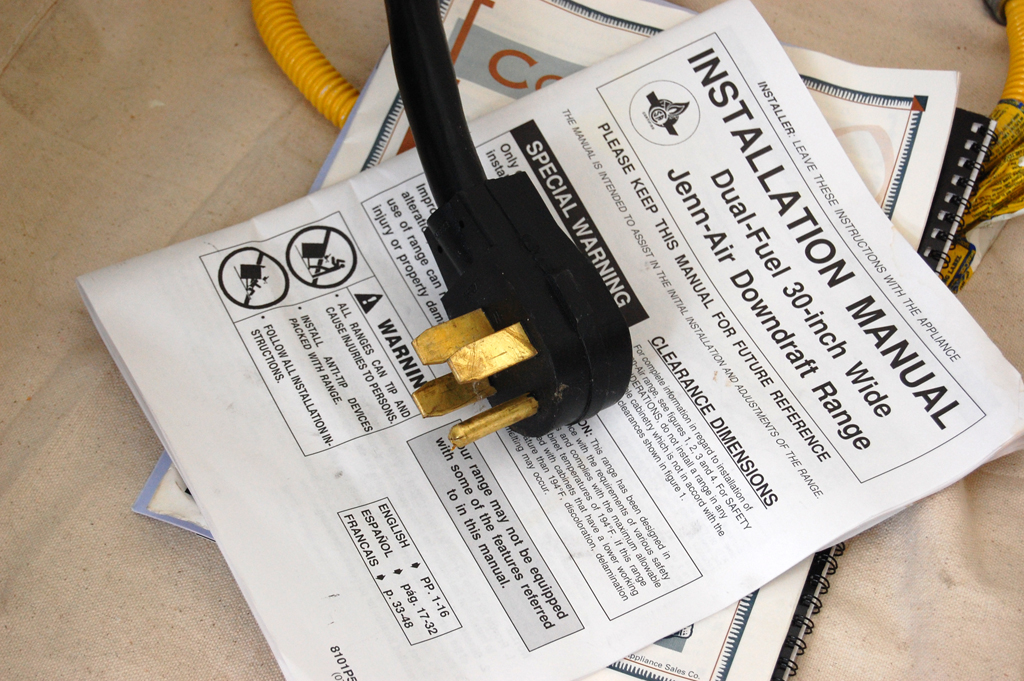
The old stove used gas for the burners and oven. It had a 120v line to power the timer and the oven light. The new JennAir is a dual fuel range - the burners use gas, but the oven is electric and needs a 240v line.
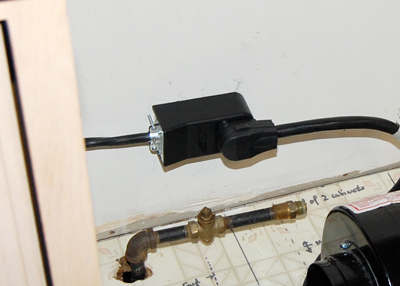
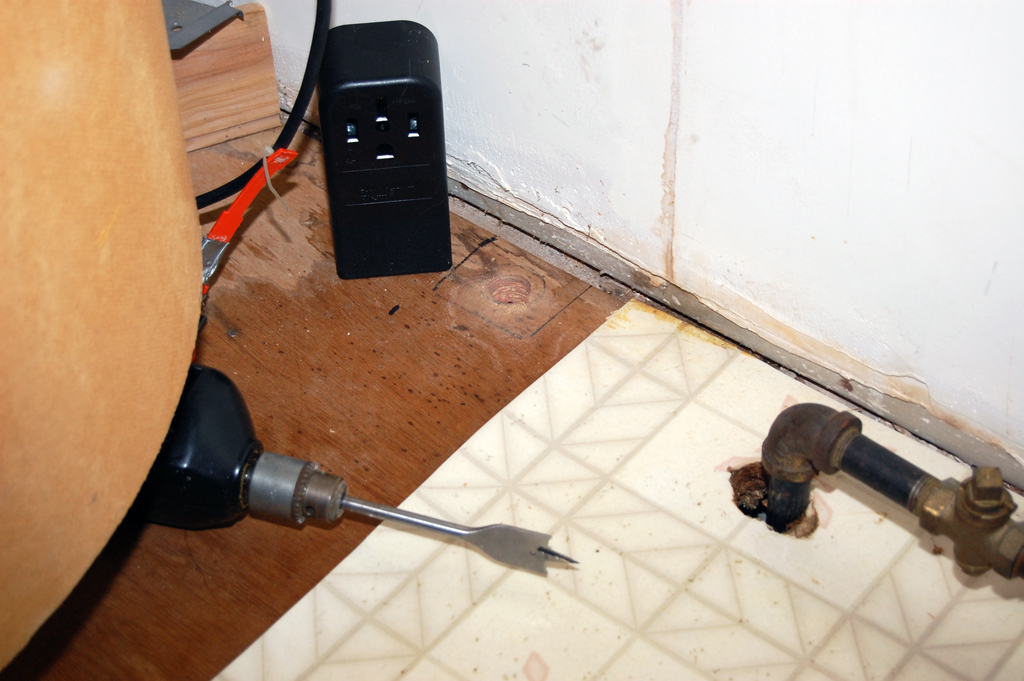
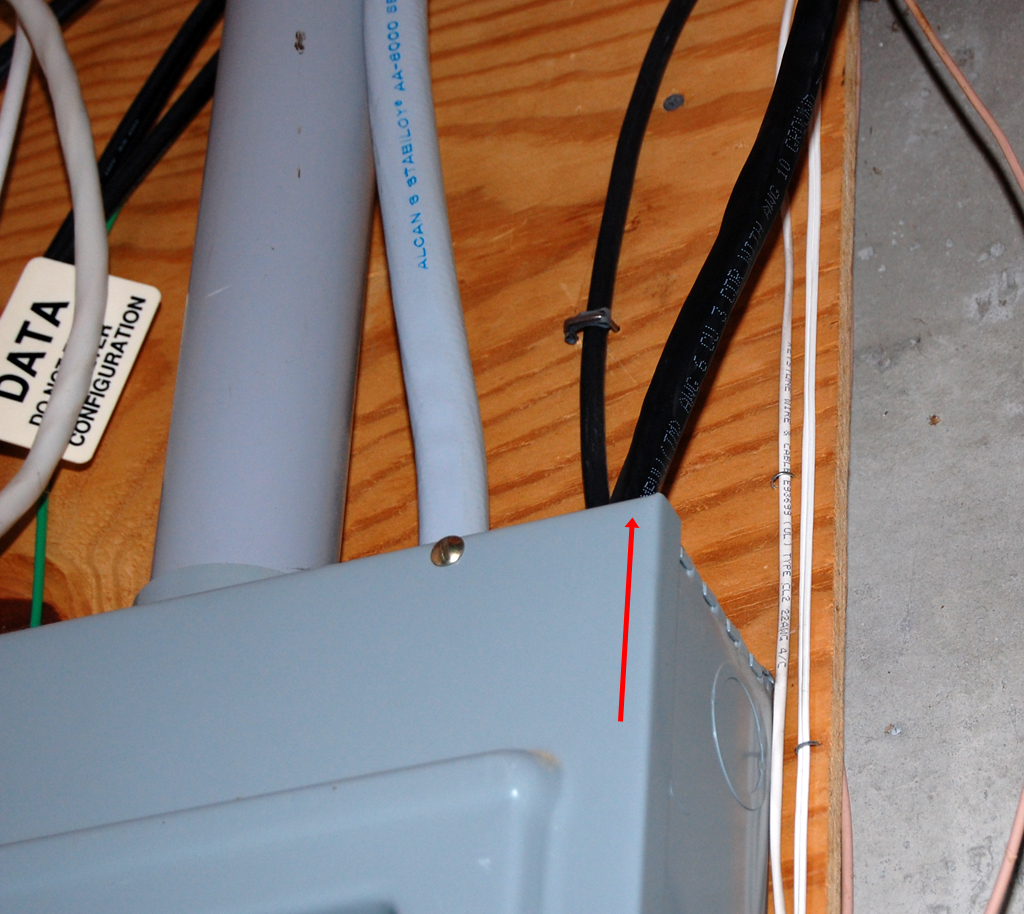
The installation of a 240V line should be done by a professional. However, it is still useful to understand the steps involved. We saved some money by geting all of the parts from Home Depot. First determine where the outlet should be installed. Second, make sure the hole for the cable is not blocked by a floor joist.
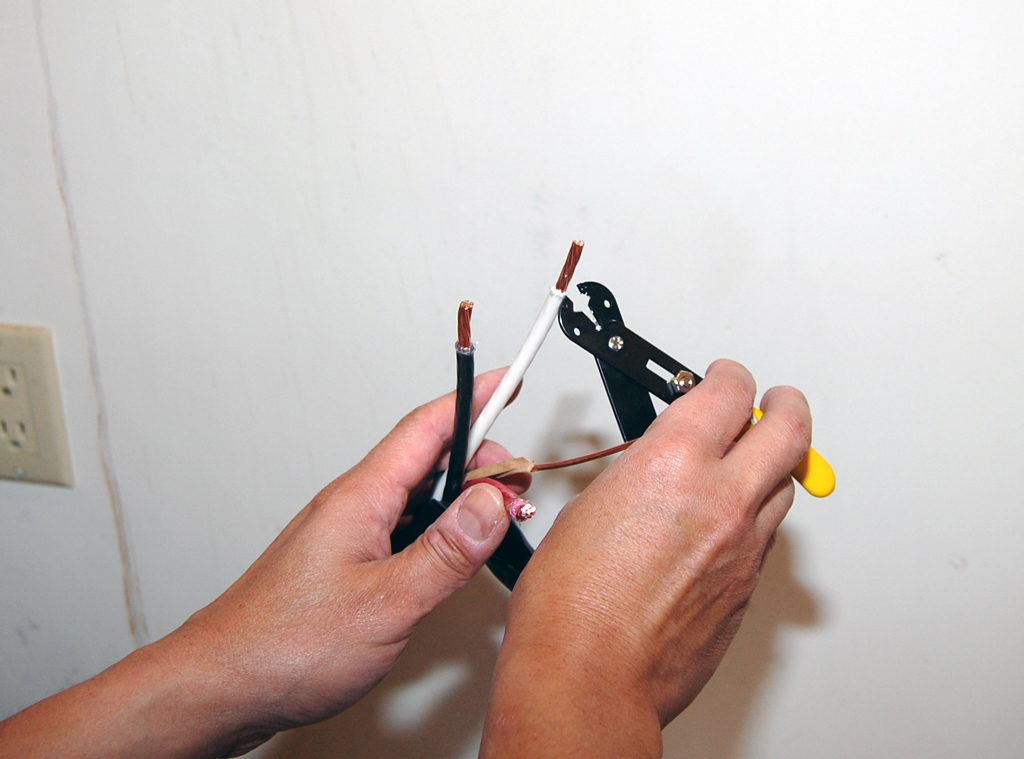
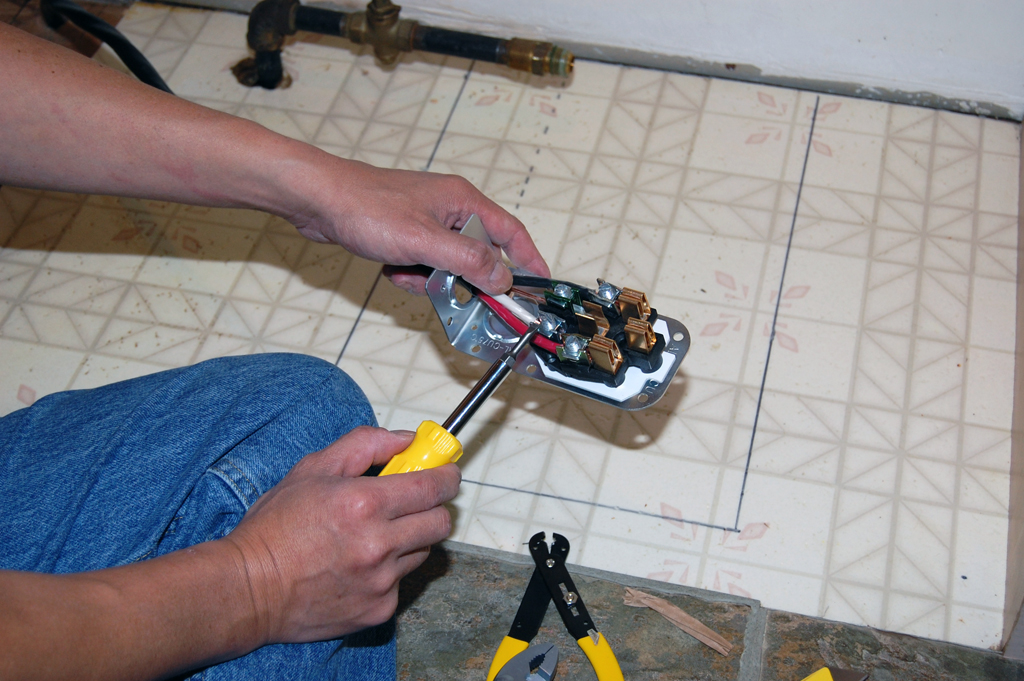
Third, strip the wires and attach them to the 240V outlet. Be sure to note the two hot leads, the neutral wire and the ground wire. One important point is that a 240V cable is VERY stiff. Make sure there is plenty of room for bending the cable should you need to place the outlet in a horizontal position.

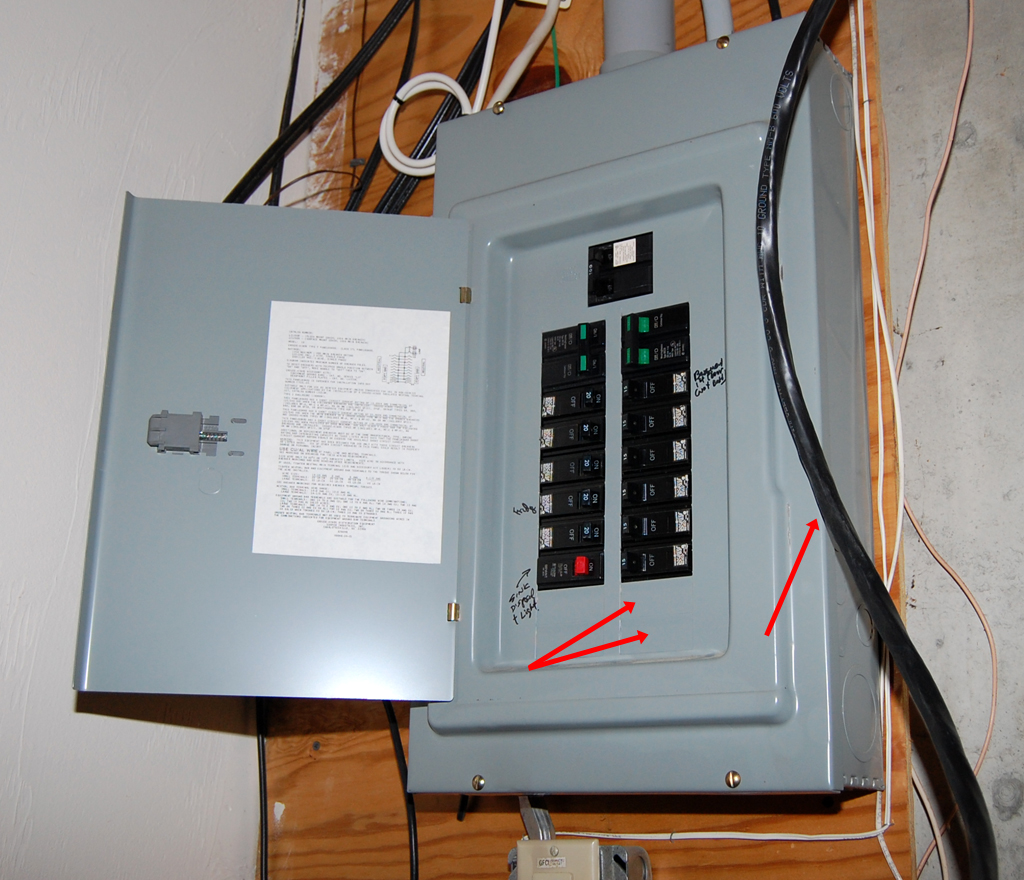
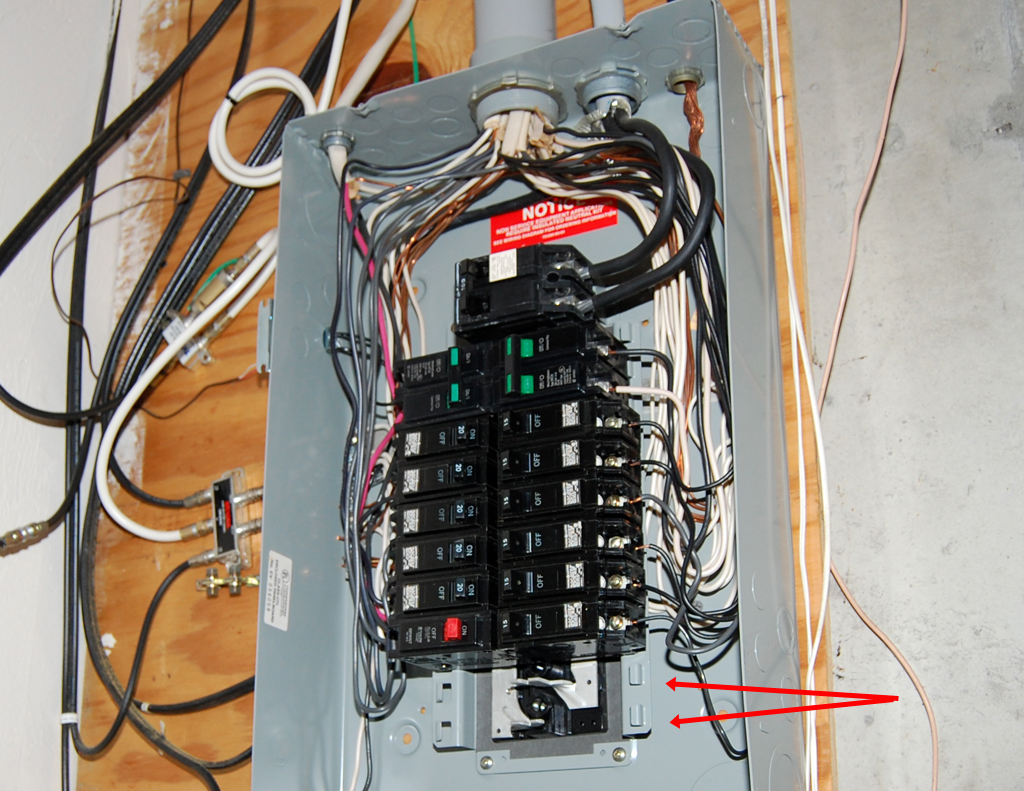
The last step in this installation is to attach the cable to the electrical panel. The panel may look confusing, but it is actually very simple. Two 120V lines from the power company come into the panel and everything taps off these lines.

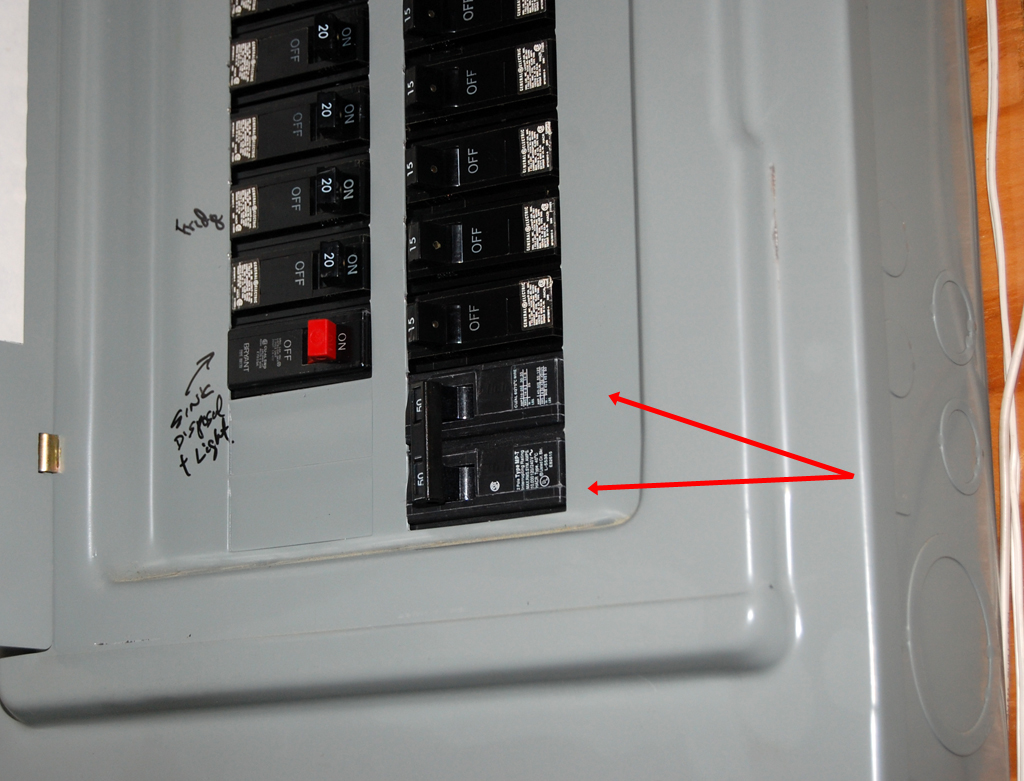
The new 240V 50A line required two new breakers to be added to the panel; each hot lead goes into its own breaker, the white neutral line goes into the neutral bar, and the bare copper ground wire goes into the ground bar.
With the 240V outlet installed and tested, we can now complete blower and the gas line installation. We ran into a few "gotchas" along the way, but nothing our installer could not work around. The installation was not difficult, but it is definitely not something folks should do if they are not sure what they are doing. [Permalink] - 240V Outlet Installation
|
|
|
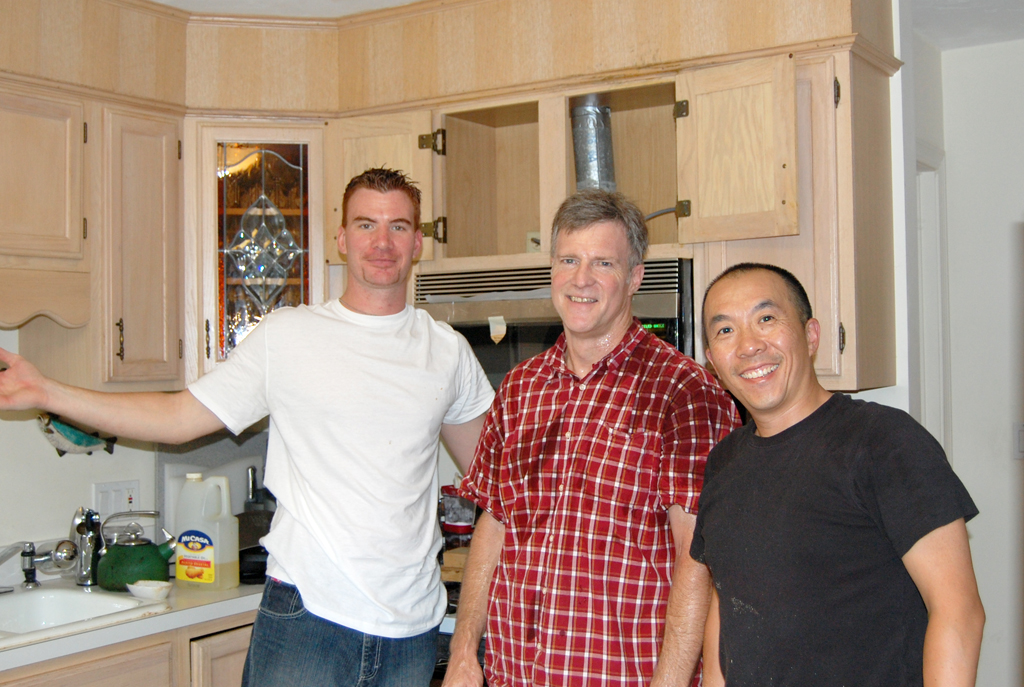
We took advantage of a lull in our schedule this weekend and finished the installation of the Jenn Air range. We'll have a full write-up of the project this week.
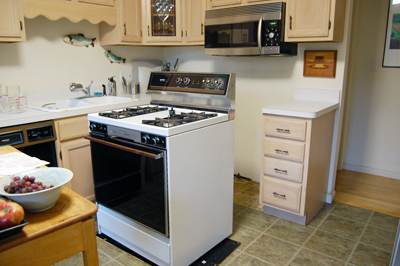
The project was a little more involved than we had first anticipated (240v outlet, vent installation, etc...), but it was a great learning experience for everybody.
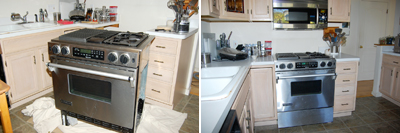
The range has been moved into place. Both the gas and electricity are connected and working. We still have to make the backsplash and complete the venting to the outside. Those side projects will be tackled as time permits.
We are expecting a whole group of LA transplants to be joining us for the Thanksgiving feast. The rumor is the RainyDayKitchen folks will be cooking a turducken (there's another, more insidious, rumor that they are thinking about cooking a Tofukey as well). Whatever happens on Thanksgiving, it will likely be a good test of the Jenn Air's convection feature. [Permalink] - Jenn Air Installation
|
|
|
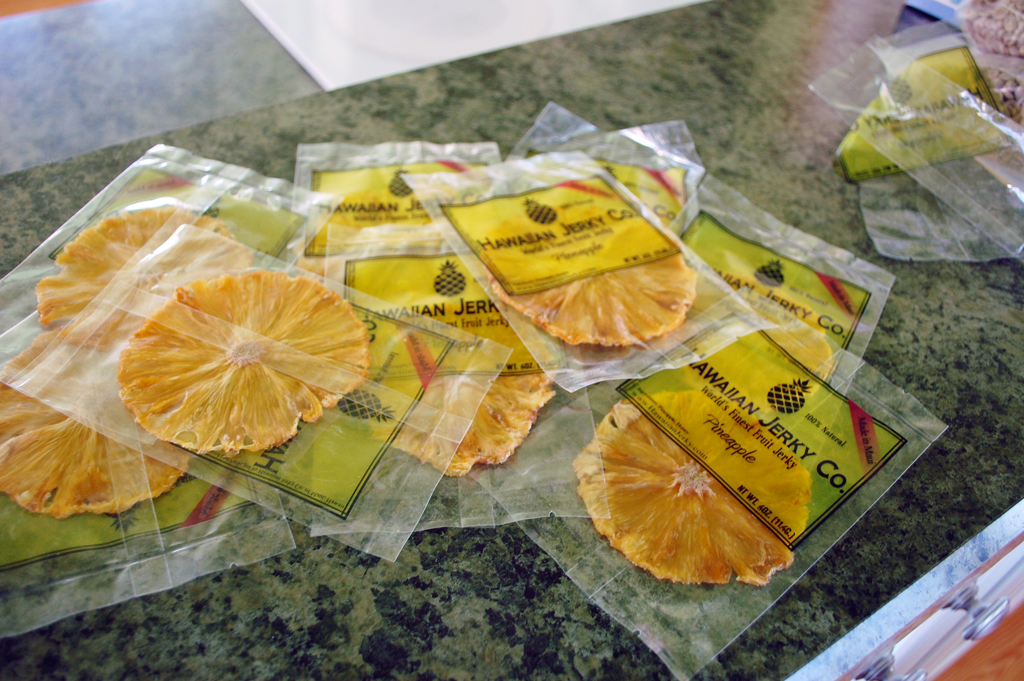
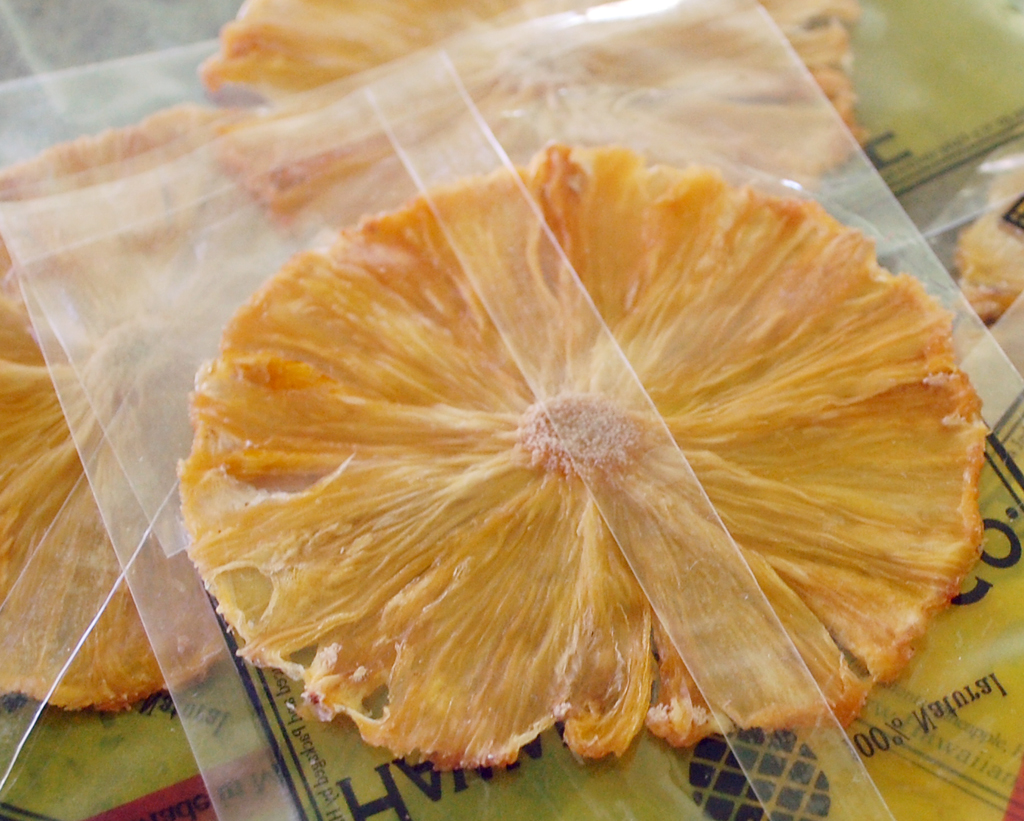
Last weekend we were up in Maine doing some hiking. One of the tasty treats that kept us going was pineapple jerky from the Hawaiian Jerky Co. We would have taken a photo of the jerky out of the package, but by the time we got back from the hike, it was all eaten!

The general concensus was that the pineapple jerky was much better than the standard sugary, dried, chunks of pineapple. The jerky is light weight, does not take up much room, and is individually wrapped. Perfect to have in the day-pack no matter how long you plan on being out.

If you are looking a healthy snack, you should give this pineapple jerky a try. You can find them from our friends at Jerky.com. They also have lots of other kinds of jerky should you want to round out your fruit with some protein :-) [Permalink] - Pineapple Jerky
|
|
|
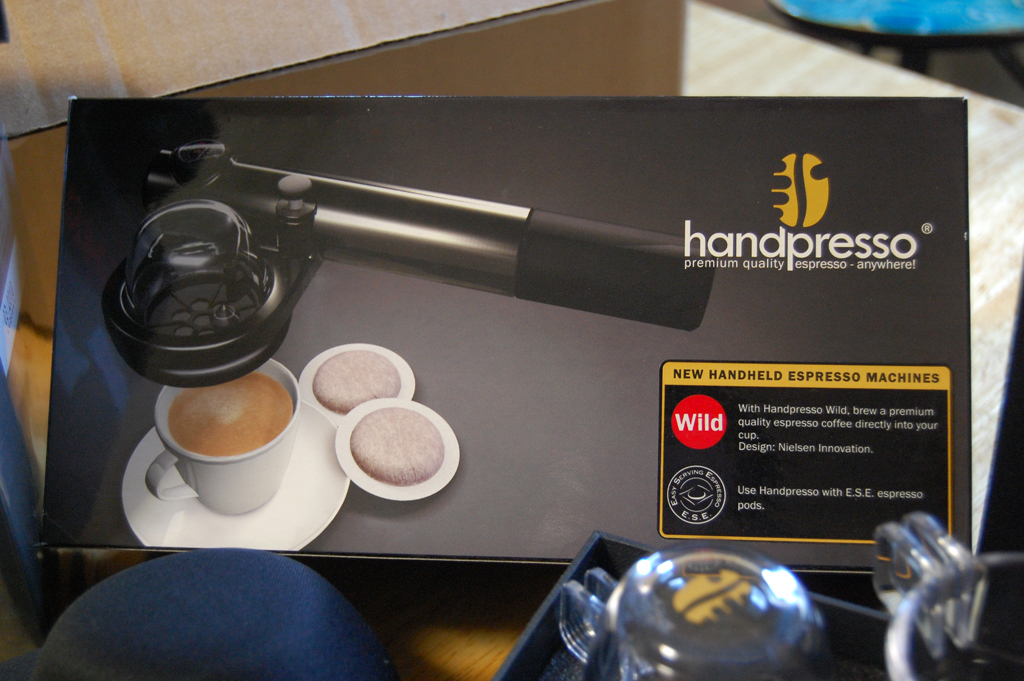
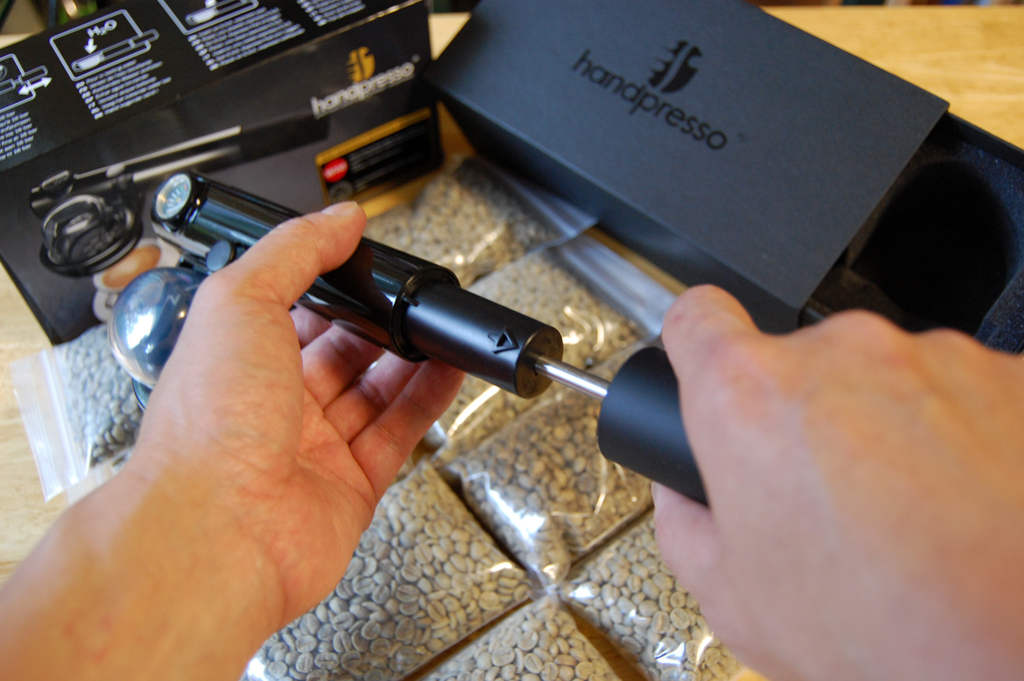
We took a FirstLook at the Handpresso Wild back in September. With the Columbus Day weekend trip coming up, we thought it would be a good opportunity to take it with us to Maine and do the FirstUse report up there.
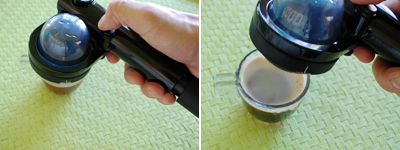
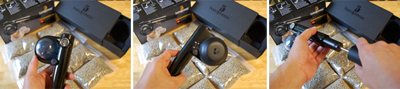
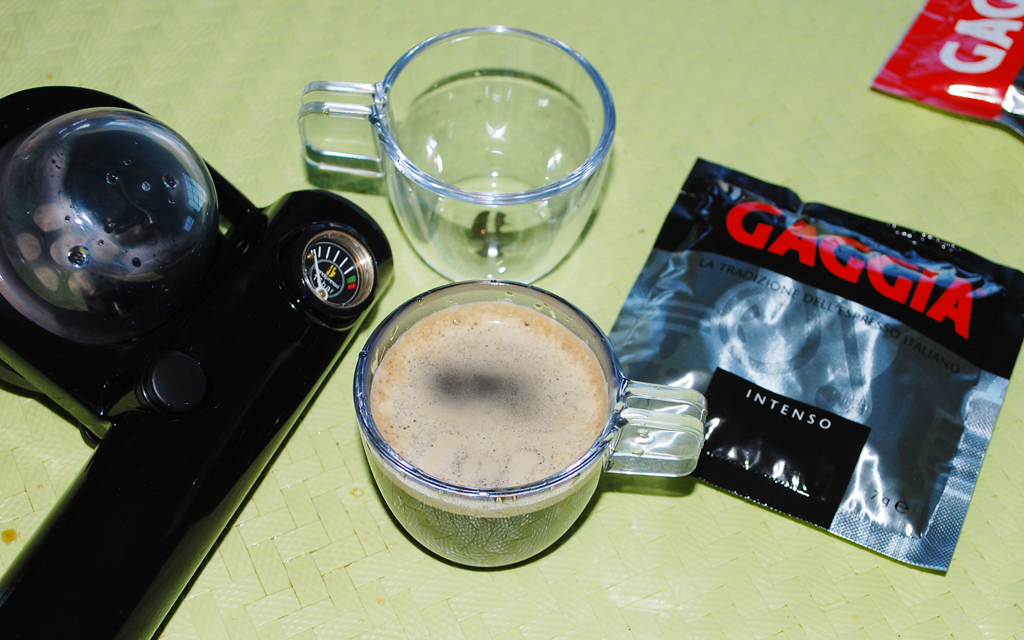
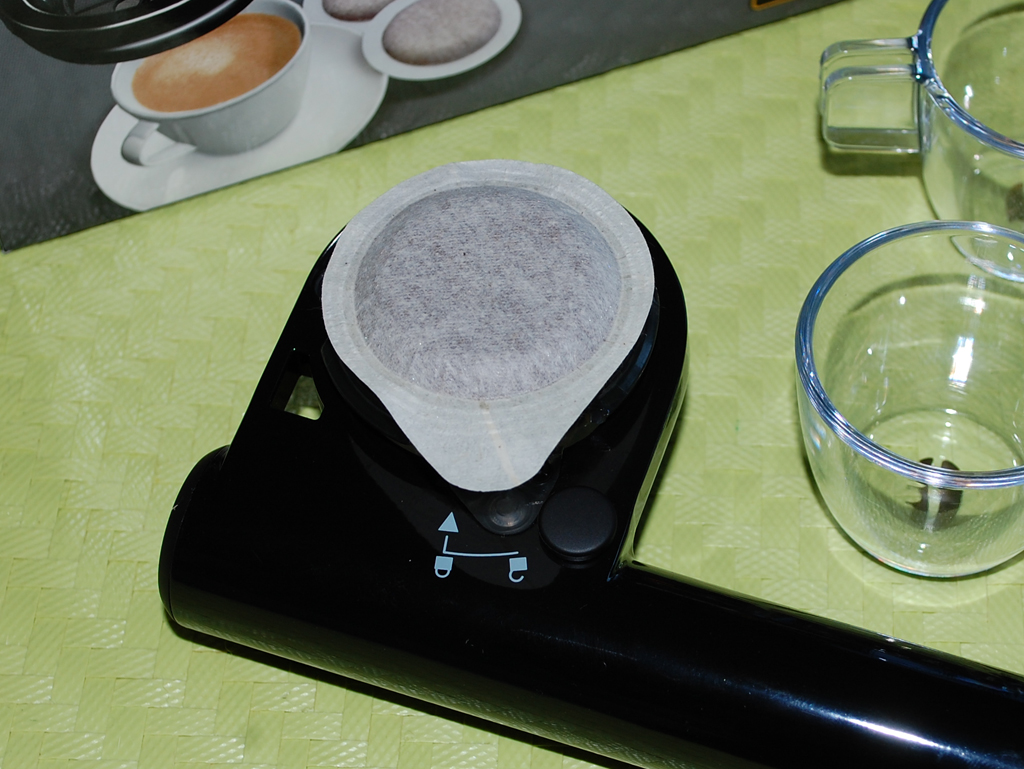
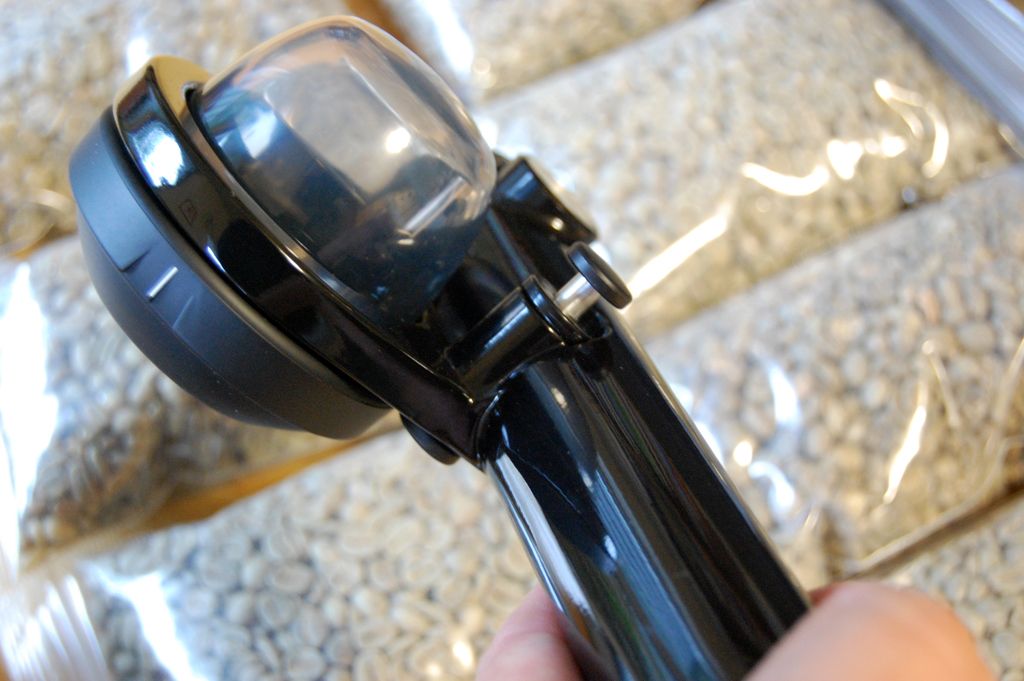
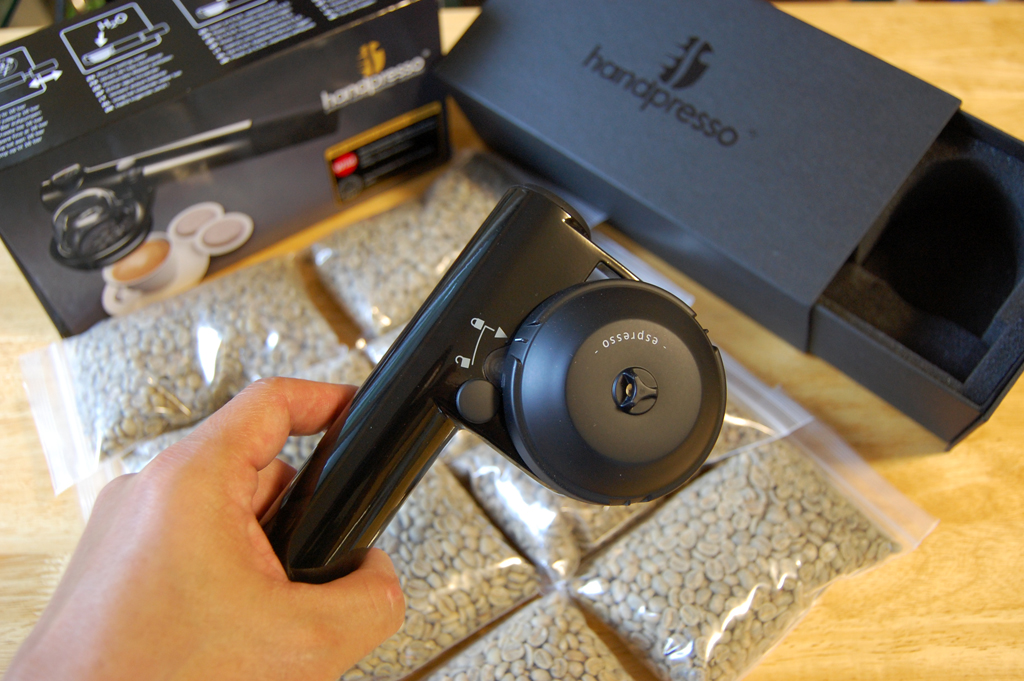
The kitchen in the rental unit had a typical drip coffee machine, so we were glad we brought this portable unit along. Everyone probably had some experience using a drip coffee machine. Making espresso using the Handpresso Wild is just as simple. All it takes are four easy steps: pour in hot water, add pod, pump to pressurize, release pressure.

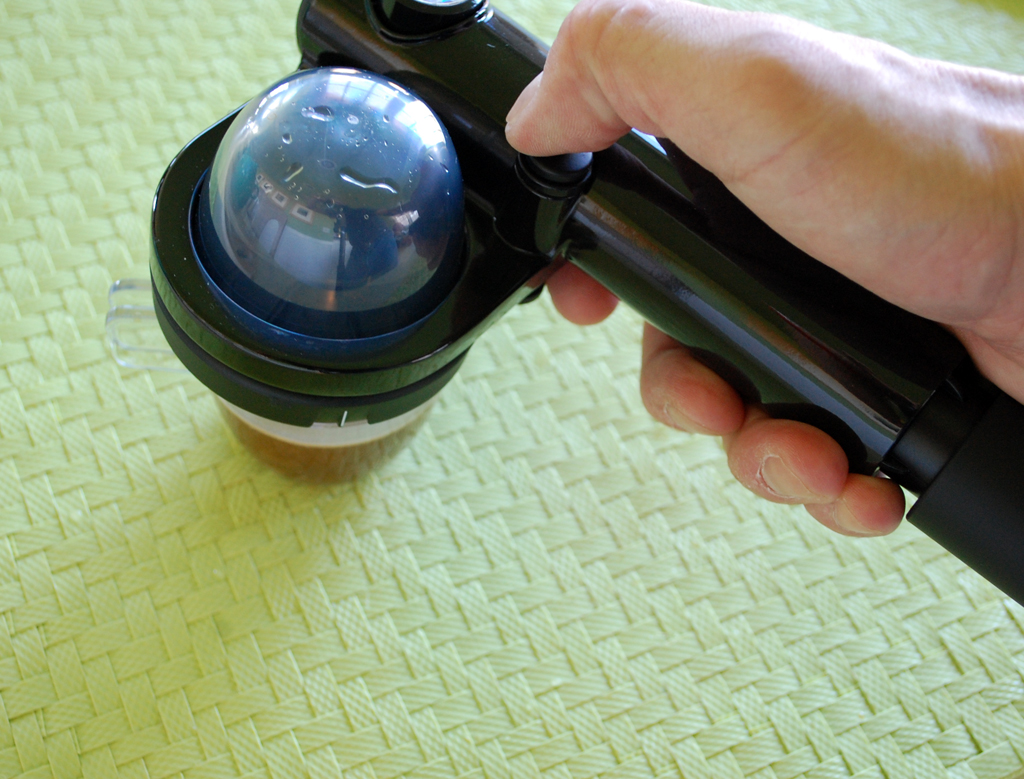
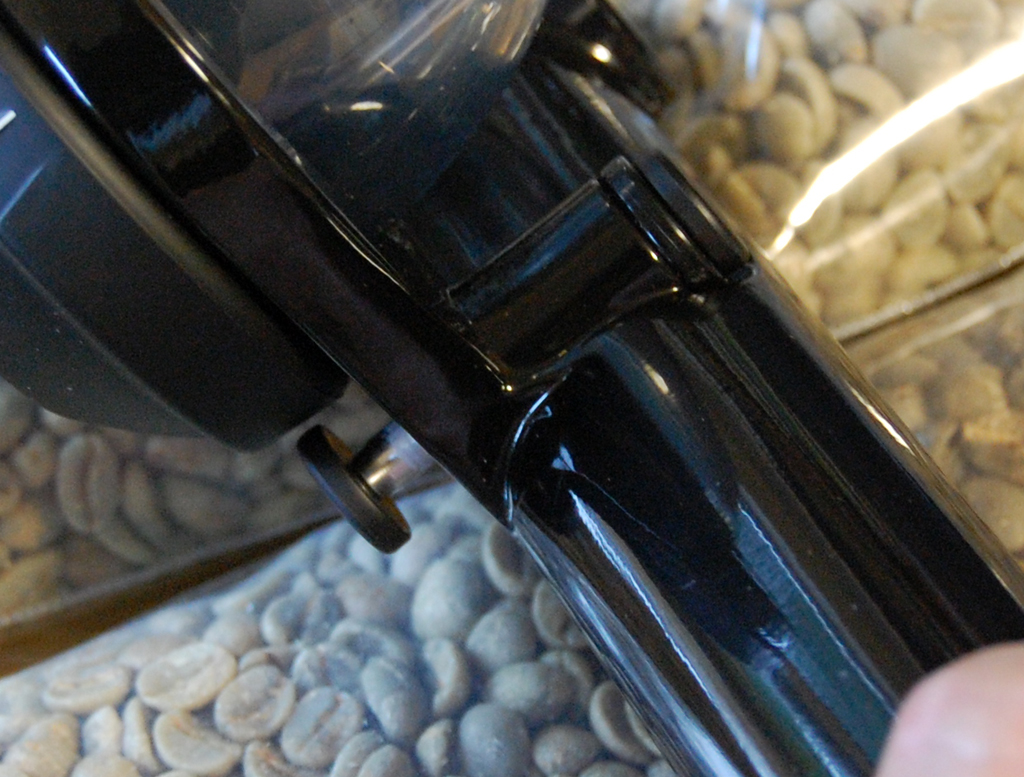
The hand pump's action was very smooth. The built-in gauge has clear green/red indicators to tell you when to stop pumping. We had no problems getting the internal pressure up to 16 bars.
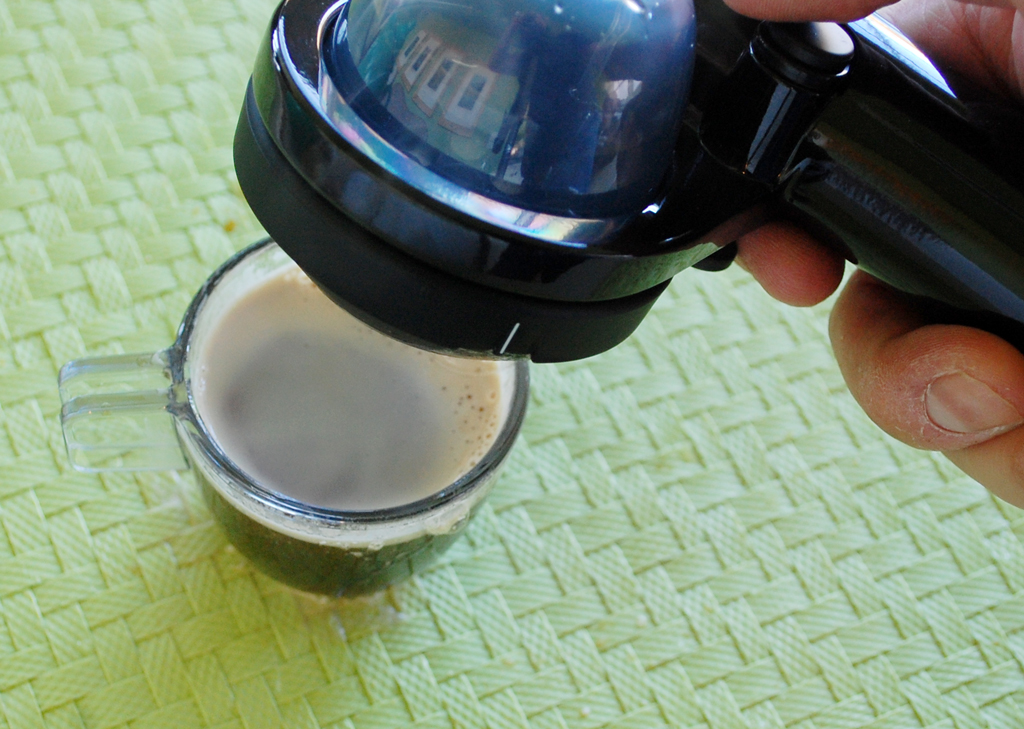
To make the espresso, all we had to do was press the button and release the pressure. The water is pushed through the filter pod and into the cup.
The espresso made from the Handpresso was surprisingly tasty. The creme was not as thick. The flavor was as rich as what we had with many of the pod units we have tested in the past.

The Handpresso Wild is certainly handy to have when "in the wild." The obvious limitation is the need for hot water. A small insulated canister would be the simplest solution. Handpresso has a unit with an integrated temperature gauge and should be available in the US by then end of the year. We'll try it out and report back when we get one in house. In the mean time, we'll take this Handpresso Wild along with us and will keep an eye out for hot water during our travels. [Permalink] - Handpresso Wild
|
|
|
|
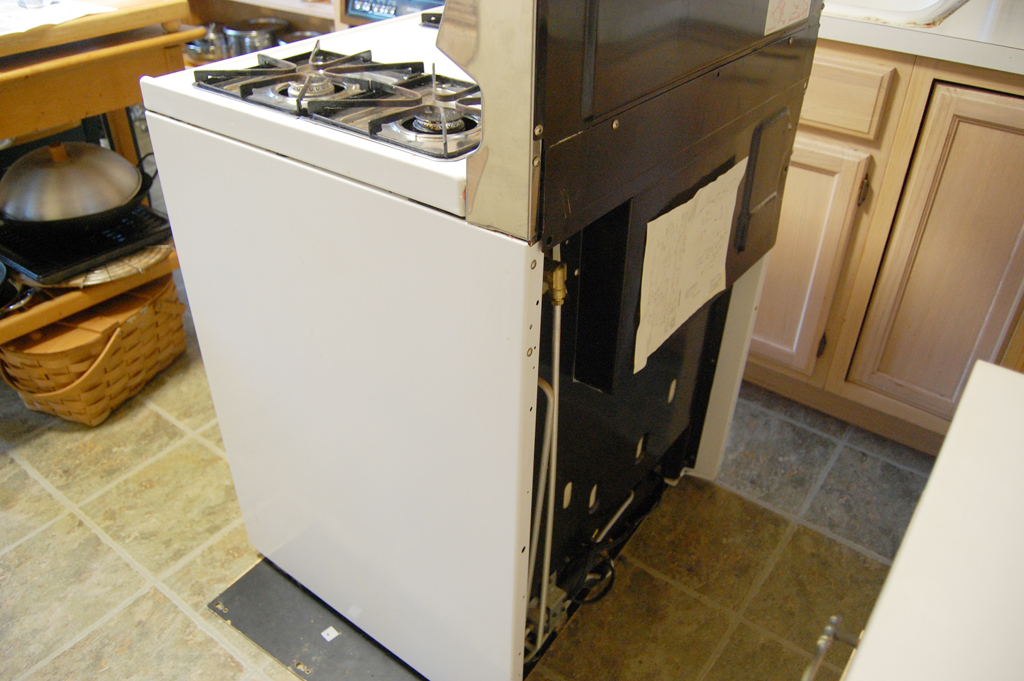
Folks here have been keeping an eye out for a better stove for the RainyDayKitchen for a while now. There are plenty of good ones in the $2500 range, but our budget could not justify such an upgrade. Last week our patience paid off. We found a Jenn-Air dual fuel gas range at about 80% off.
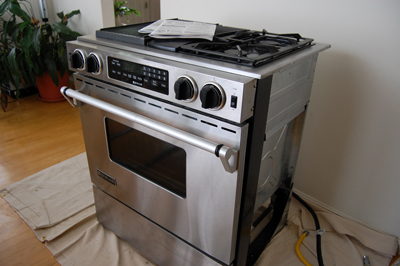
The owner was selling it because they had moved and the new place had no venting option compatible with this stove. It was slightly used, but otherwise exactly what we had been looking for! We rounded up some "muscle," rented a pickup truck from U-Haul, and snapped up the stove before anyone could change their minds.
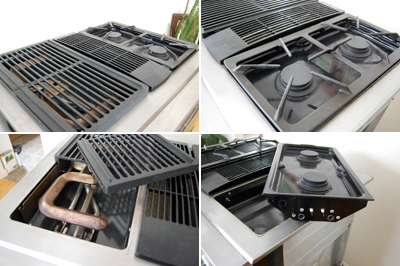
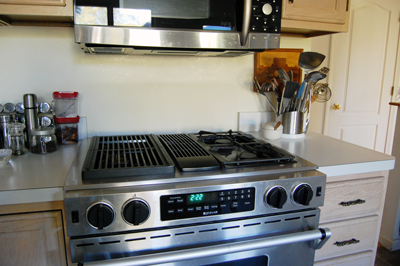
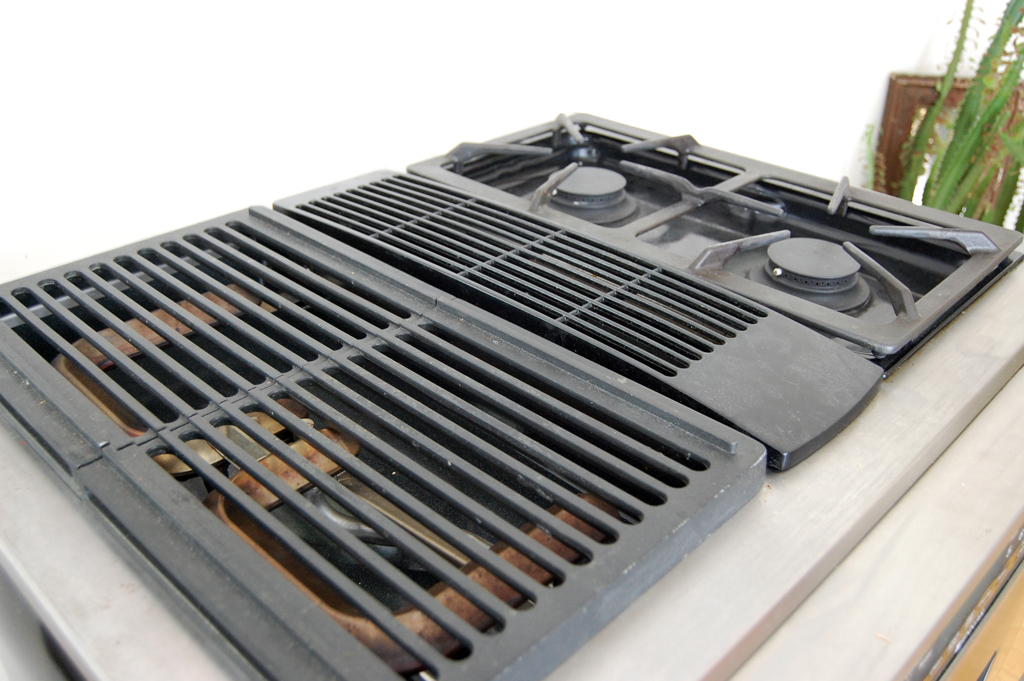
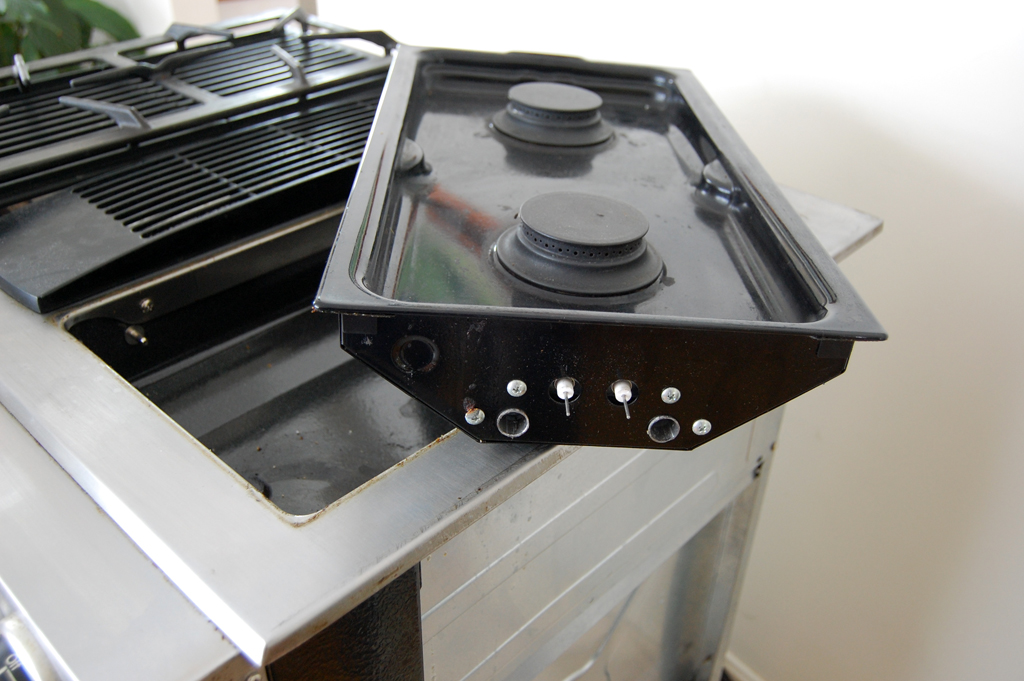
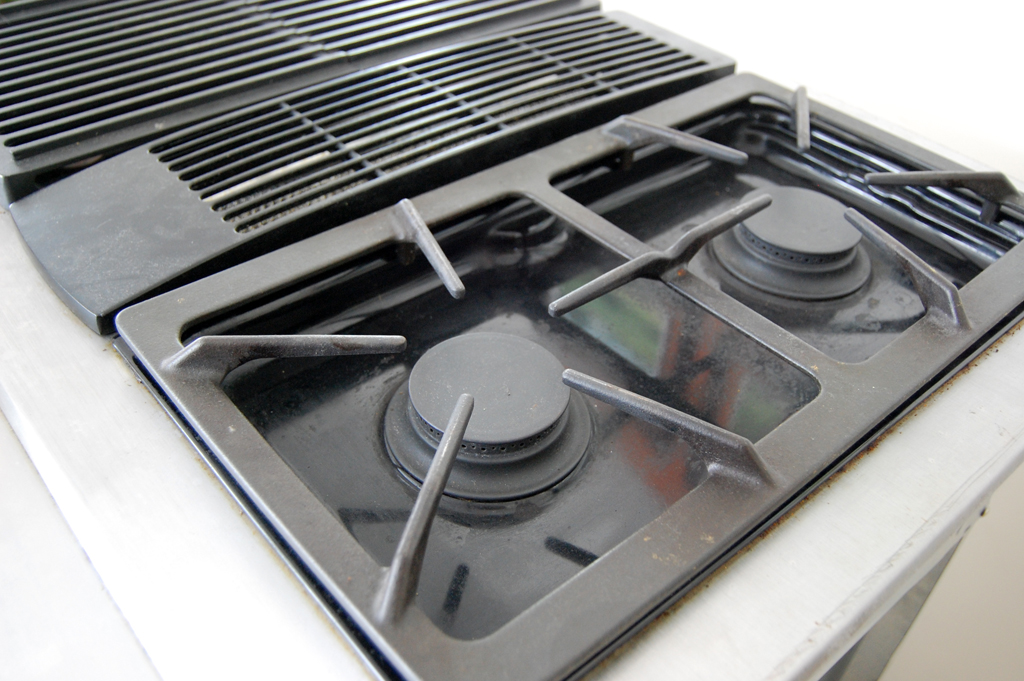
This Jenn-Air stove is designed such that the burners are removable. The one we purchased had the indoor grilling option installed on the left and high capacity sealed burners on the right. The benefit of sealed burners is they are so much easier to clean, since any drippings will be contained in the unit and can be wiped up in a jiff (which make the RainyDayKitchen folks very, very happy).
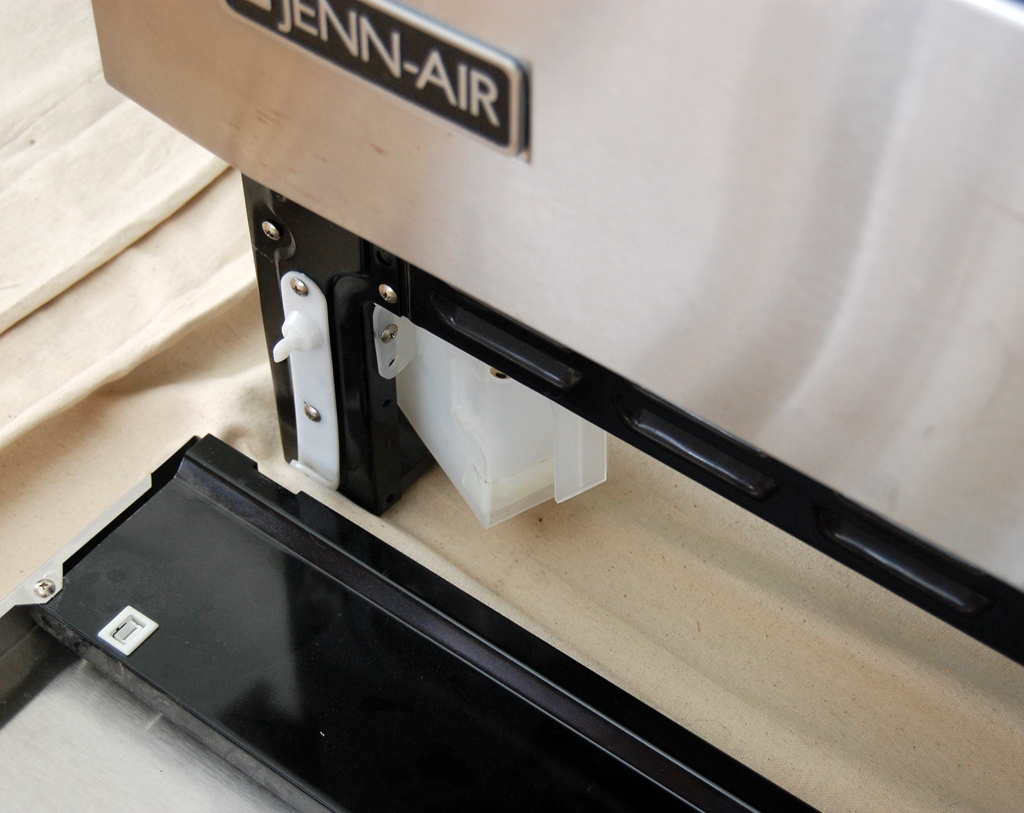
This range has a built-in downdraft vent for removing fumes and smoke from the grills and burners. On the grilling side, grease and oil are collected in a removable plastic trap below. The blower for the vent may be mounted under the range or to the side.
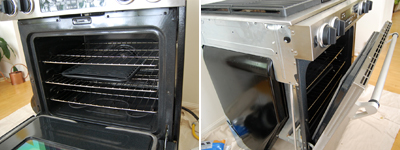
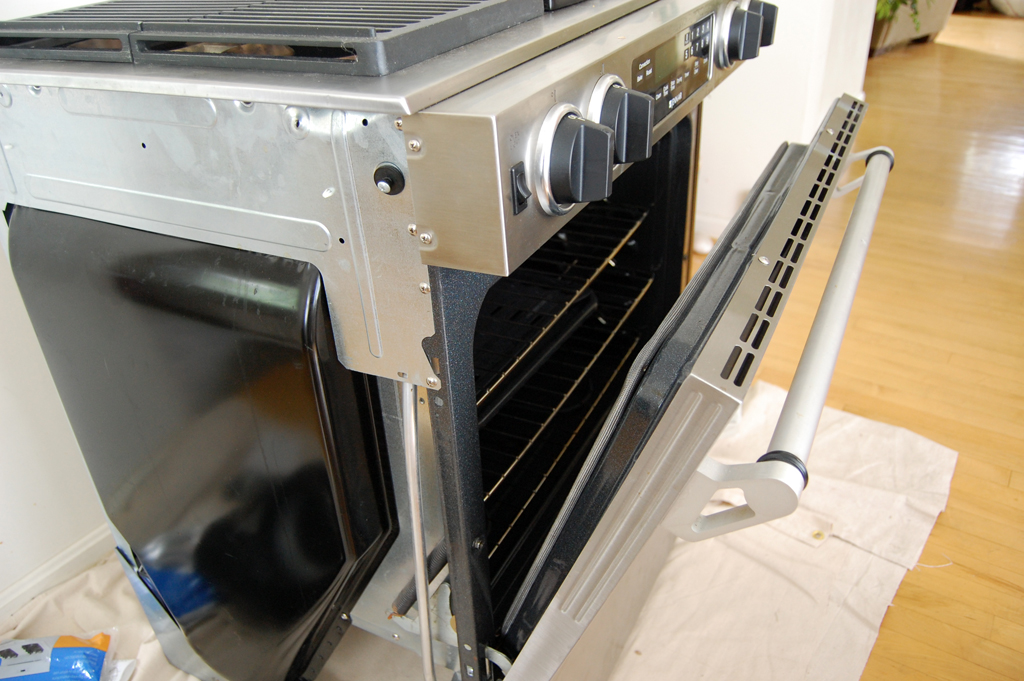
The advantage of an electric oven is the even heating. The convection option makes cooking faster by circulating the heat. This electric convection oven was spotless. In fact, we don't think it has ever been used. If it was, they cleaned it REALLY well.

This Jenn-Air uses both gas (burners) and electric (convection oven). There is already a gas line in place, but we'll have to install a 240V 50A line to the kitchen. We'll also have to install the vent so it can vent to the outside. Readers can look forward to the write-ups of these RainyDayKitchen projects over the course of the next couple of weeks. [Permalink] - Jenn-Air Dual Fuel Stove First Look
|
|
|
We had plans to go to Long Island this weekend, but the approach of Hurricane Kyle toward New England changed our minds. So instead of dining at our favorite Chinese restaurant this weekend, we are in the office catching up on some reviews :-) Since we had already started looking at the Handpresso Wild on Friday, it seemed logical to just continue with that.
When we first heard about Handpresso, we thought... "hmm, it will be great to have one when we go backpacking, but how often do we do that?" It then occurred to us having the Handpresso really meant we can have espresso anytime we have access to hot water! OK, now we are talking.
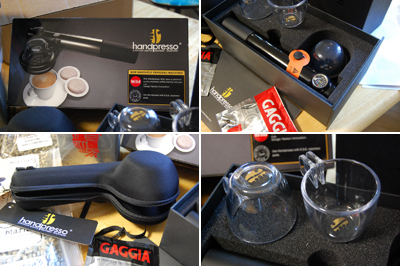
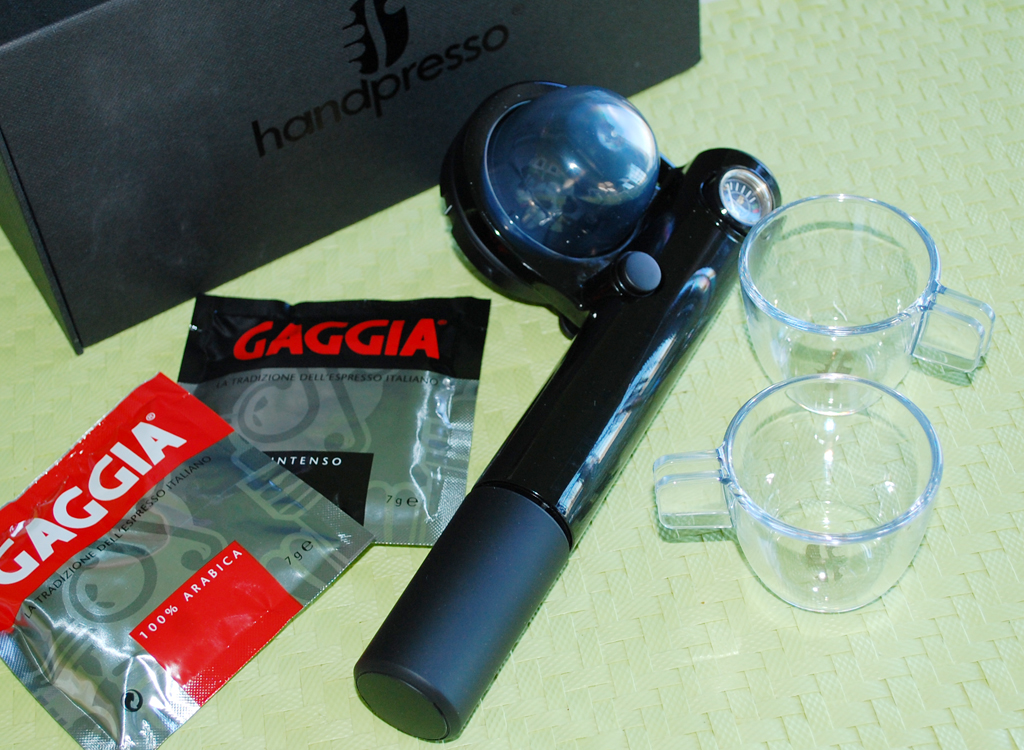
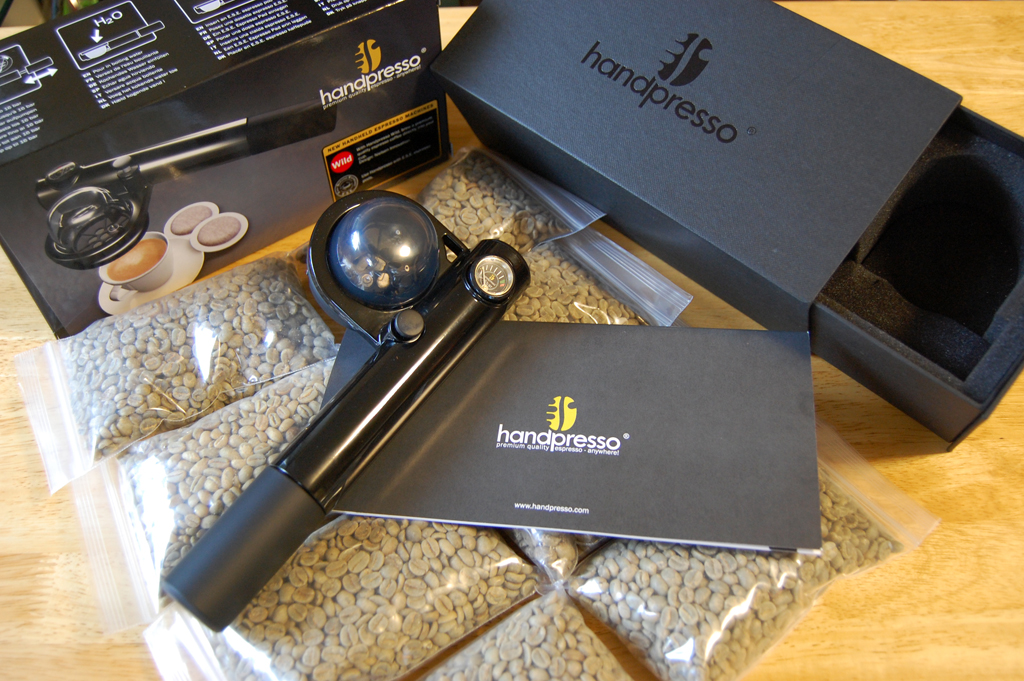
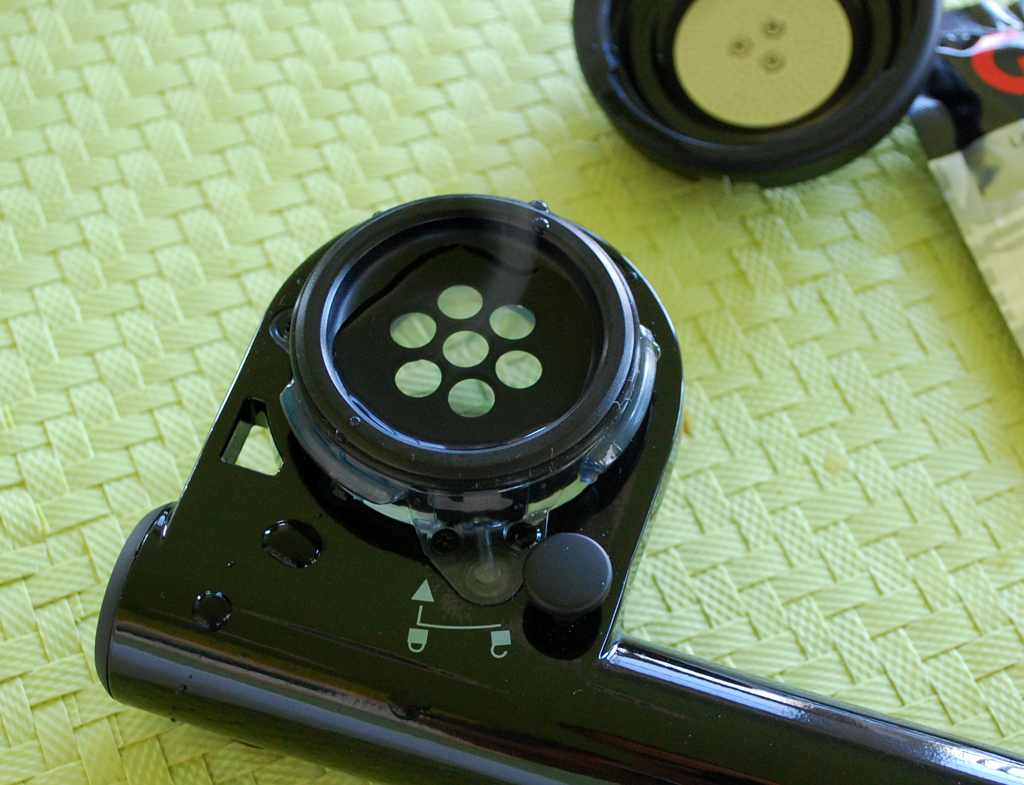
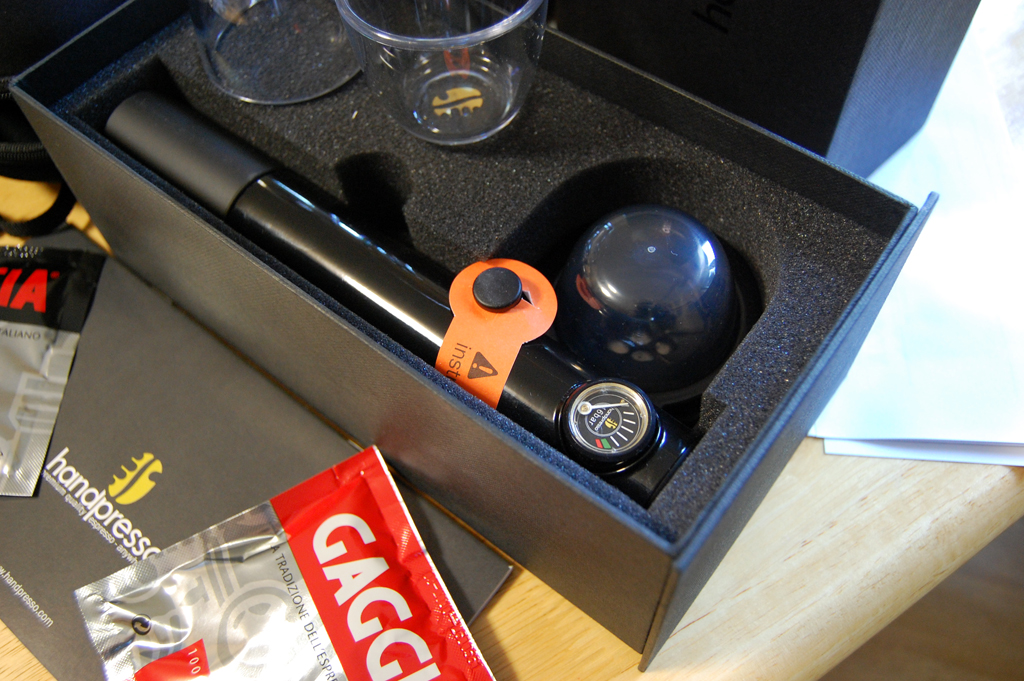
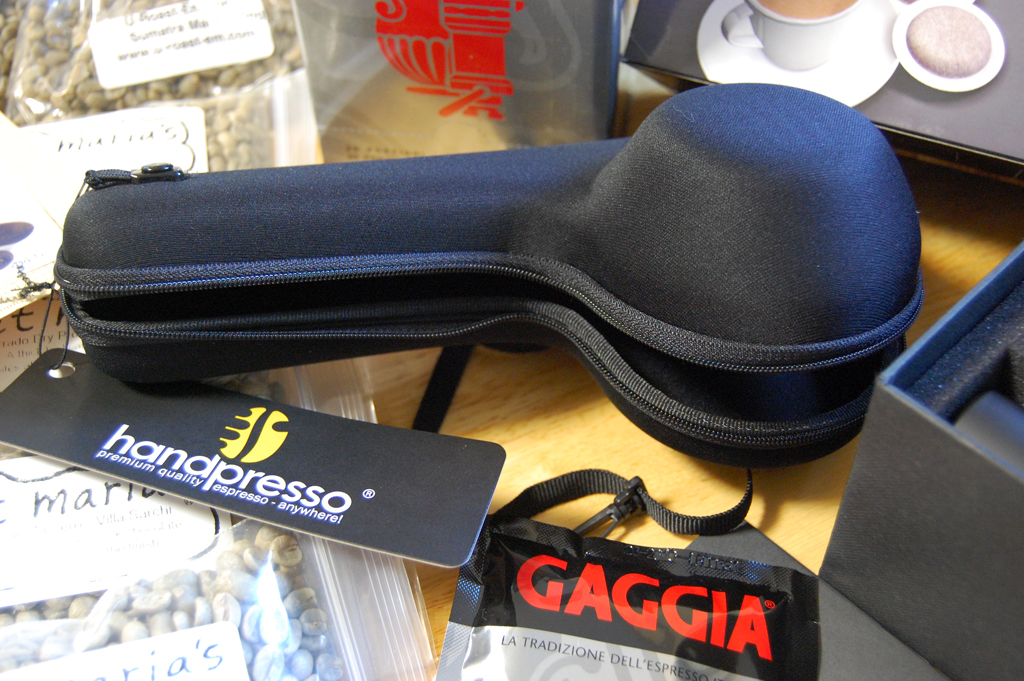
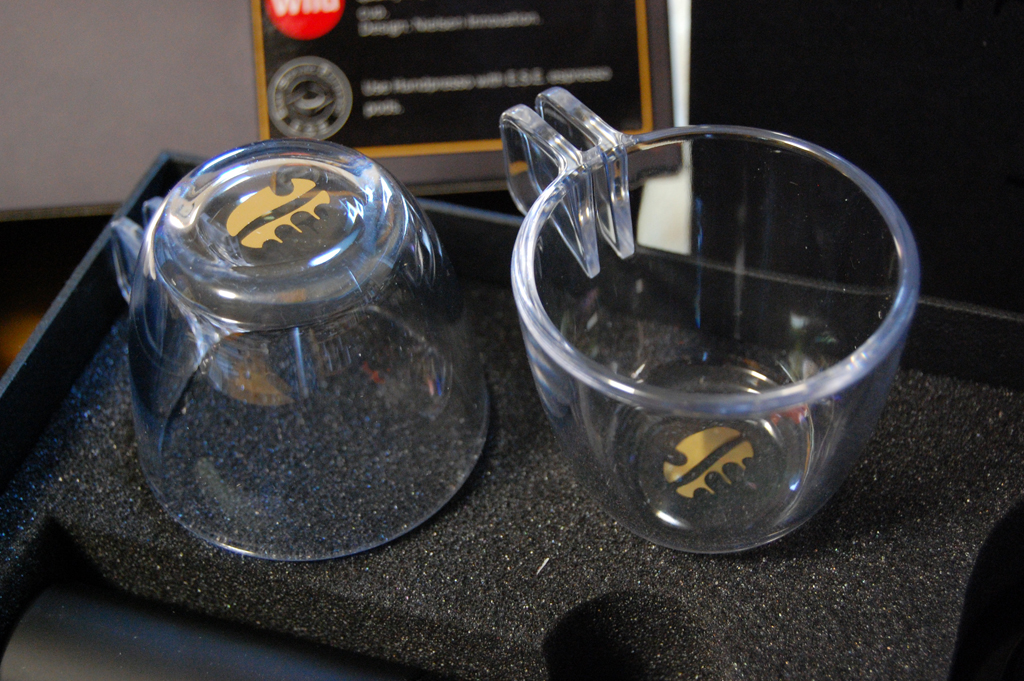
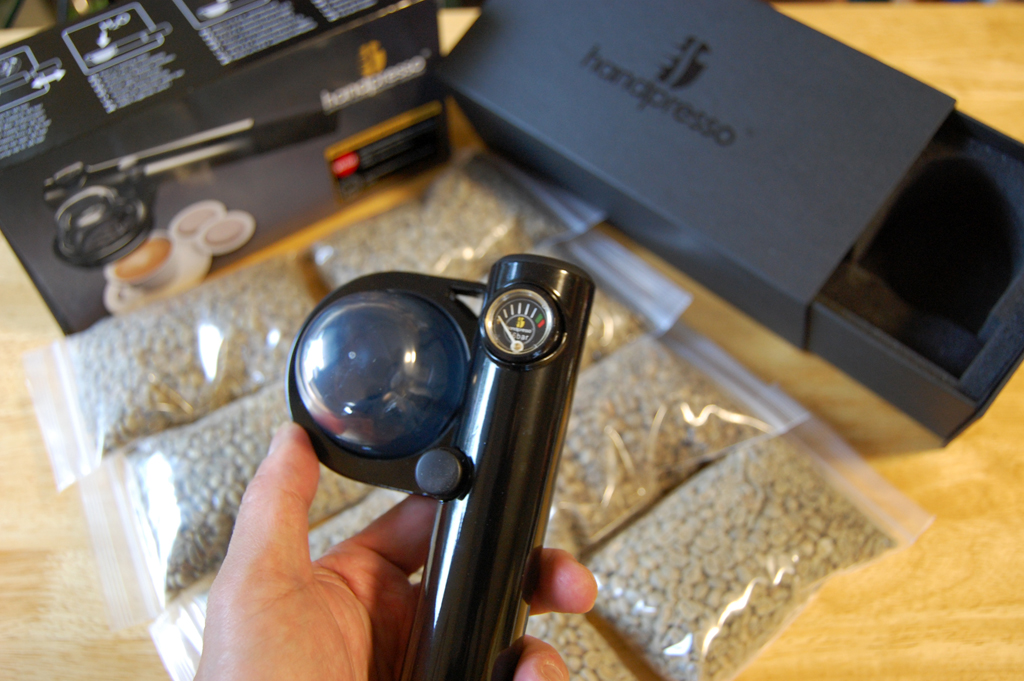
The Handpresso Wild is quite small and totally self-contained. To make the unit easier to take on the road, there are various accessories (case, cups, etc...). We got these items from Importika in New York.
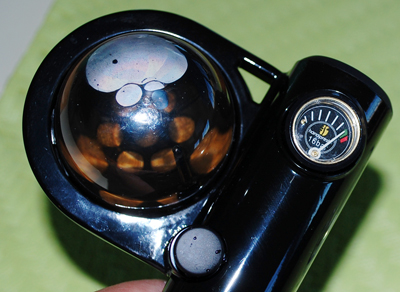
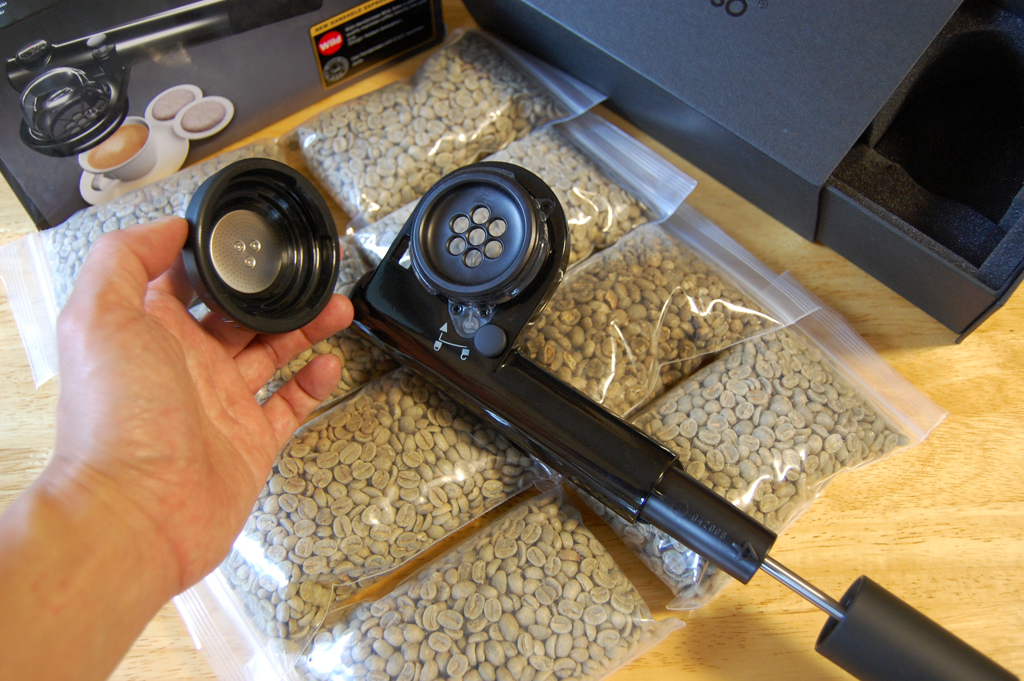
The Handpresso unit contains a water reservoir, a filter, and a hand pump. Pressure is created by working the pump similiar to the way one would inflate a bicycle tire. The gauge in the front shows the psi. There is a switch to open and close the valve.
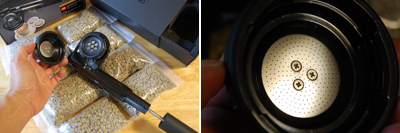
The way the Handpresso works is: hot water is poured into the reservoir, a pod is placed in the appropriate location, the filter cap is tightened to hold things in place, and a button is pressed that releases the pressure that forces the hot water through the pod into a cup.

The concept is sound and the unit looks and feels well constructed. The proof, of course, is in the making. We are eager to see if this hand-pumped device can really create a tasty cup of espresso. The FirstUse write-up will be coming soon enough. [Permalink] - Handpresso First Look
|
|
|
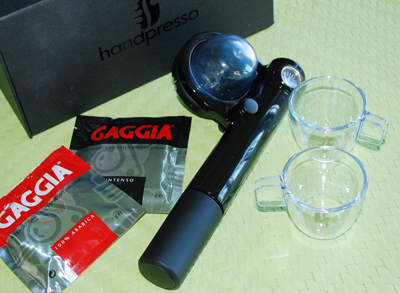
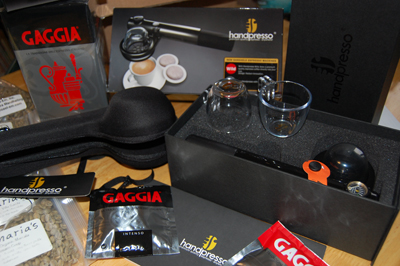
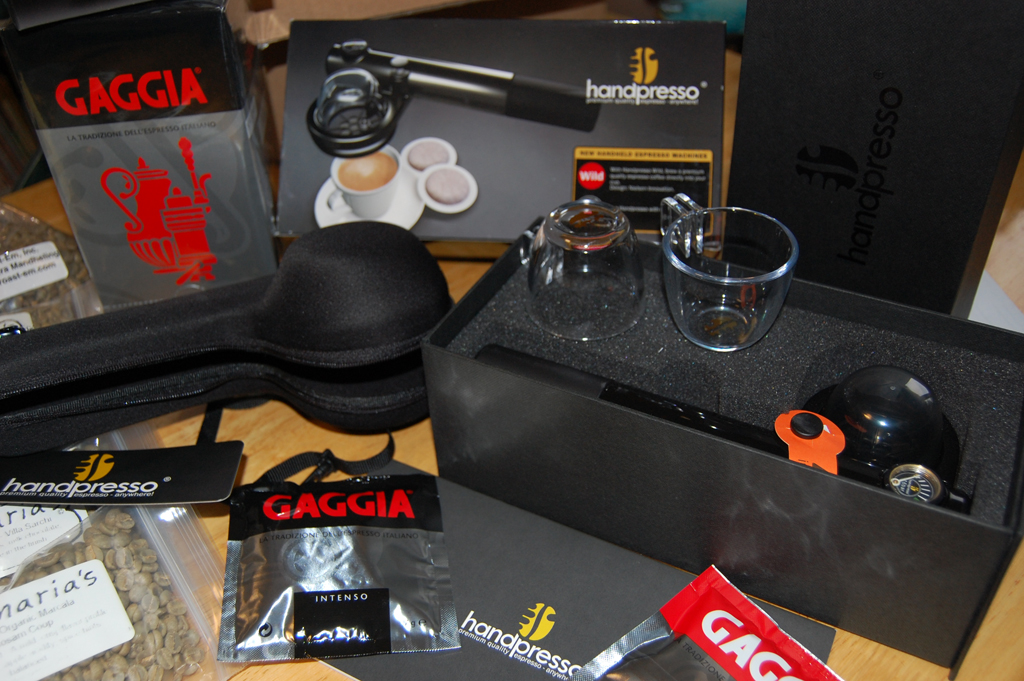
Want great espresso while you are out in the wild? Handpresso may be exactly what you need. A complete kit (espresso making unit, cups, case, pods) came yesterday.

The timing was perfect as we have a trip coming up in October. We'll have a FirstLook of the Handpresso before the end of the month. [Permalink] - Handpresso
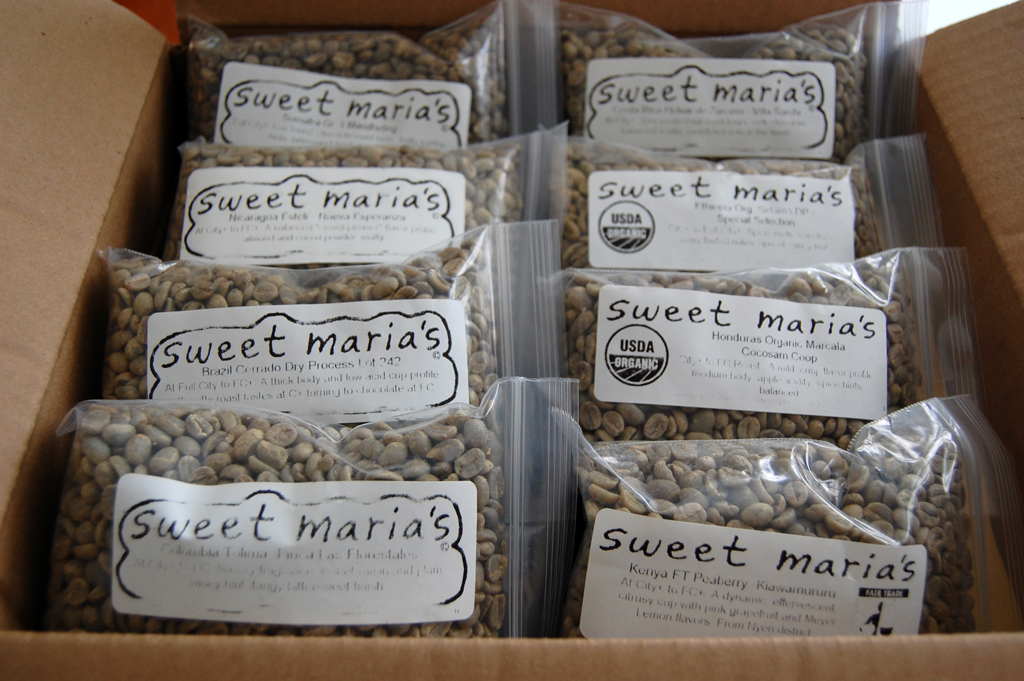
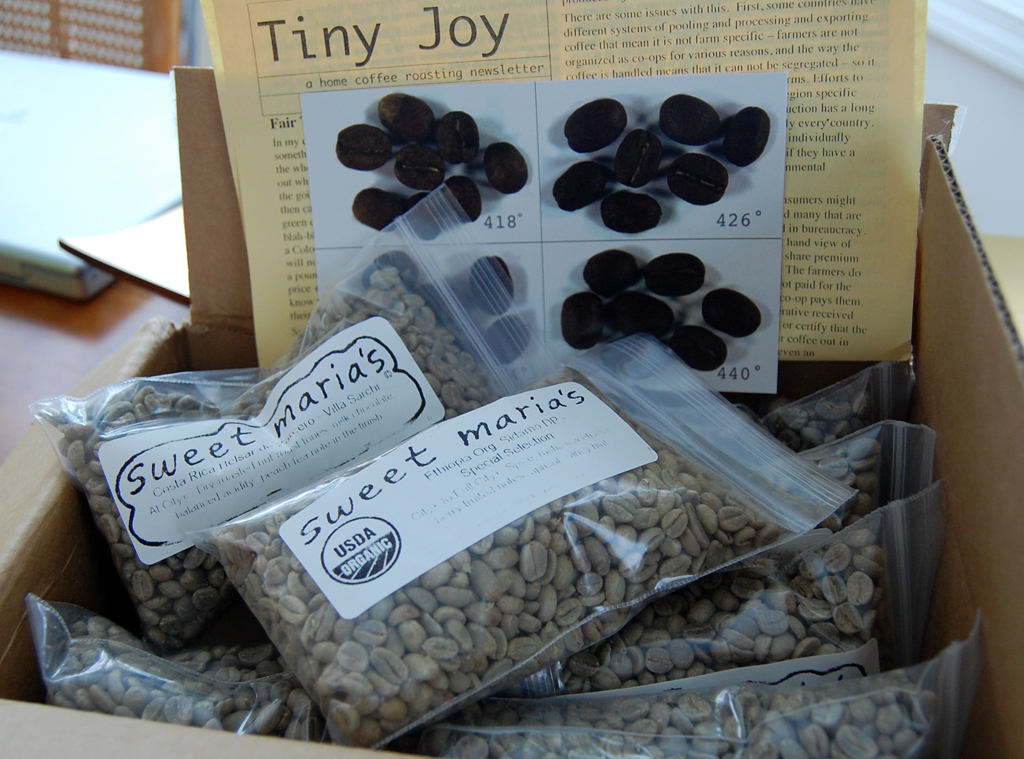
A few years ago, we did a series on bean-roasting. Since then we have received quite a bit of mail from readers on where they go to get the best "green" or unroasted beans. The two favorites were U-Roast-Em and Sweet Maria's. We decided to give them a try.
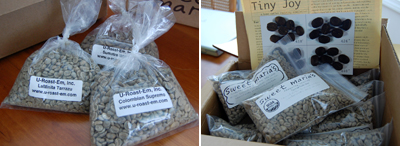
Yesterday, green coffee beans from the two different internet coffee vendors (U-Roast-Em, Sweet Maria's) showed up at the office.

All six of us from the office will be heading to Maine for the annual Columbus Day weekend retreat. We'll be taking these new coffee items (Handpresso, green beans) with us, roasting them, and "testing" them out during our mini-vacation. A full report on everything when we get back, as long as we aren't so spiked from the caffeine that we drive to Delaware. [Permalink] - Green Coffee
|
|
|
|
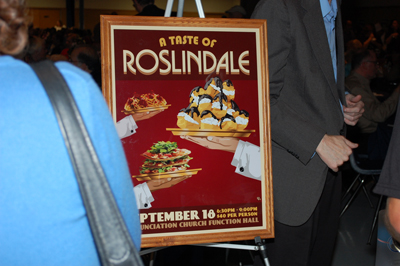
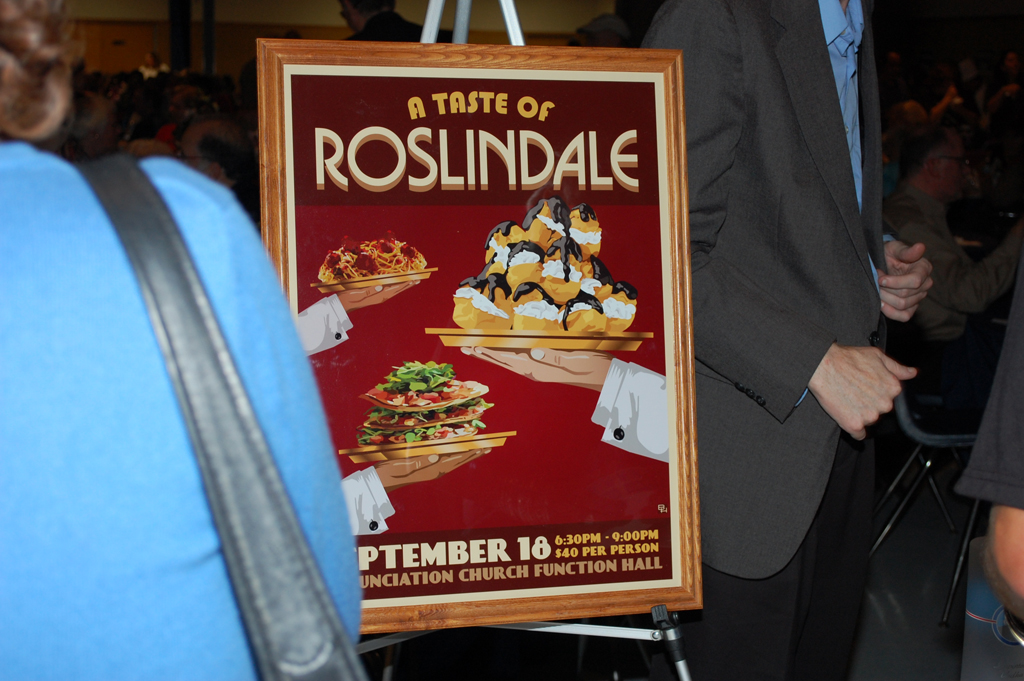
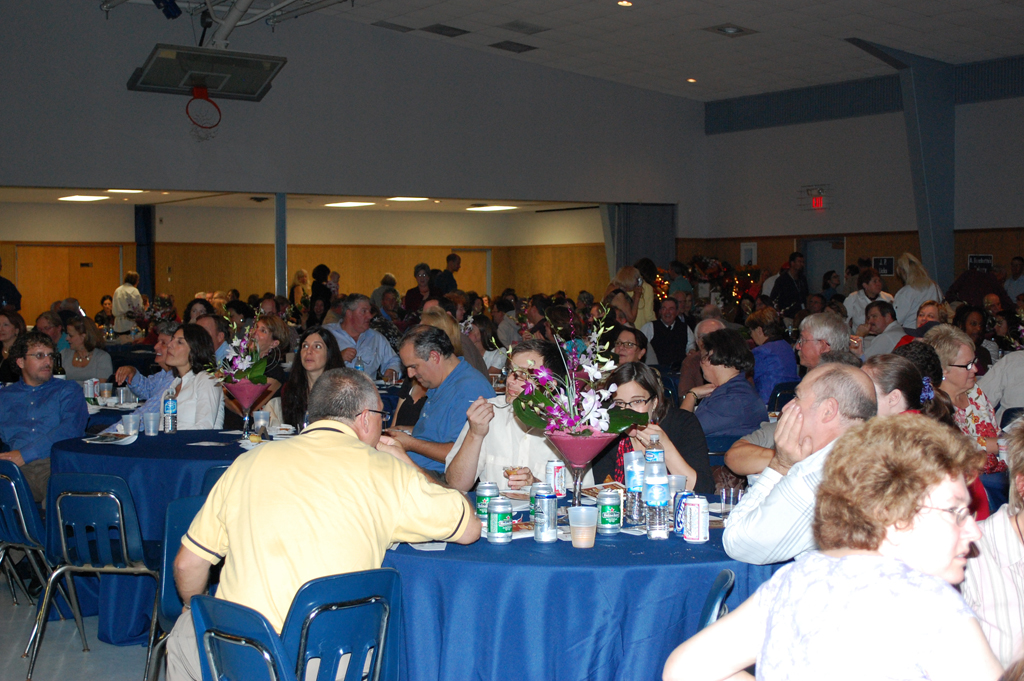
Judging by the turnout, A Taste of Roslindale last night was a hugh success. We arrived a little after 6:30. The place was already packed and the tasting was well underway.
It seemed like everyone in Roslindale was there. We said "Hi" to friends at a few of our local favorite restaurants (Sophia's Grotto, Pleasant Cafe) before checking out the rest of the hall.

The tasty treats from the participating vendors were all very tempting. We decided we had to try EVERYTHING! Our only plan was to save the dessert for last, but we deviated from the plan pretty quickly:-)
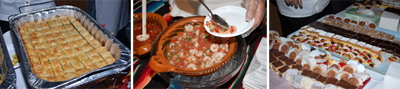
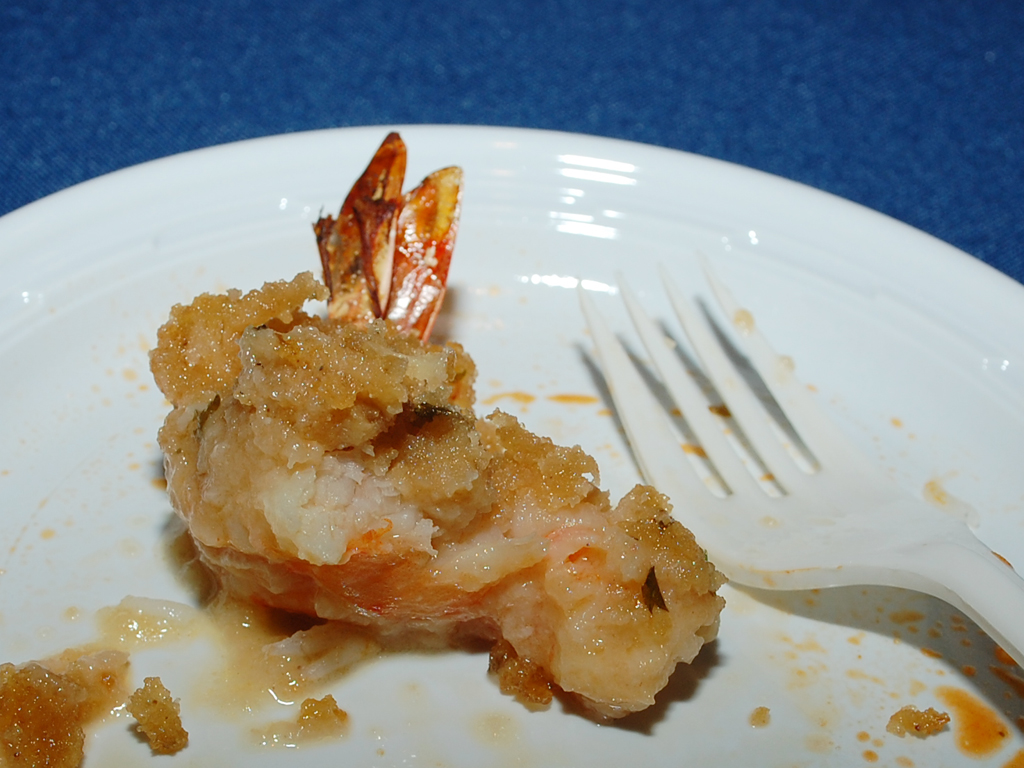
One thing we noticed was the many shrimp dishes restaurants were serving (Masona Grill, Yucatan Mexican Grill, Corrib Pub). As we LOVE shrimp, we were in heaven.

The shrimp ceviche from the Masona Grill reminded us of the ones we had fresh on the beach in Miami. The offering from the Yucatan was a great follow up to the ceviche appetizer. The surprise of the evening for us was the baked stuff shrimp from the Corrib Pub. It was SO GOOD that we broke our "no seconds" rule and went back for more.

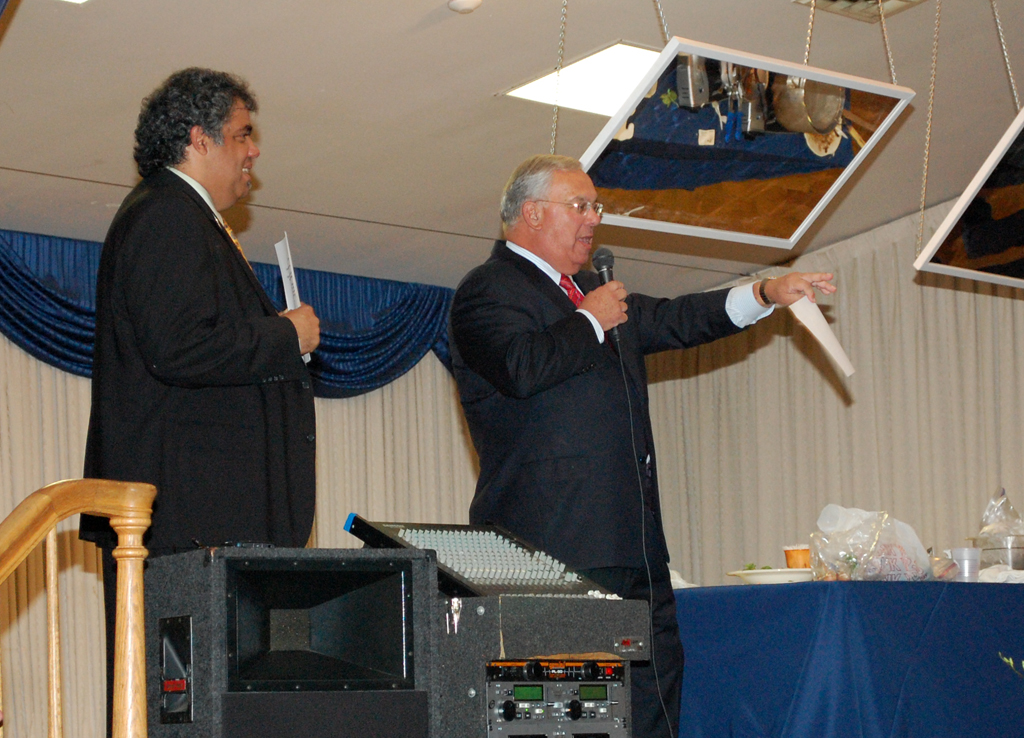
Mayor Menino worked the crowd and raised some additional funds with a few live auctions. All the funds raised by the event will benefit a cause such as The Babes Making Strides Against Breast Cancer, a local group of women who walk to raise money for the American Cancer Society.

The fundraiser also benefits the Jason Roberts Challenger League baseball, and will help purchase and install permanent holiday lighting in the Roslindale business district. We were glad we had a chance to sample all of the great tastes available in this wonderful little village in Boston. Even better that the money we spent will be going for a few good causes! [Permalink] - Taste Of Roslindale Event
|
|
Roslindale was just a nice place to live when we discovered it in 1989. Like many of Boston's neighorhood, it has its shares of wonderful local dining establishments (Pleasant Cafe, Blue Star).

With the opening of restaurants such as Delfino and Sophia's Grotto, Roslindale has developed into a dining destination! Tonight, for just $40 per person, you can sample food from some of the best eateries in Roslindale! The proceeds goes to benefit some wonderful charities. The event starts at 6:30. Go early, it will be crowded. [Permalink] - Taste Of Roslindale
|
|
|
Labor Day weekend is upon us once again! There is a slight hint of Fall in the air, but it was still warm enough for T-shirts and shorts. While Gustav is bearing down on New Orleans, the weather here in New England was more pleasant. Nice enough to get us out of the office and to take a drive out to World's End in Hingham.
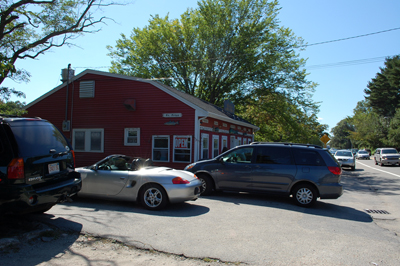
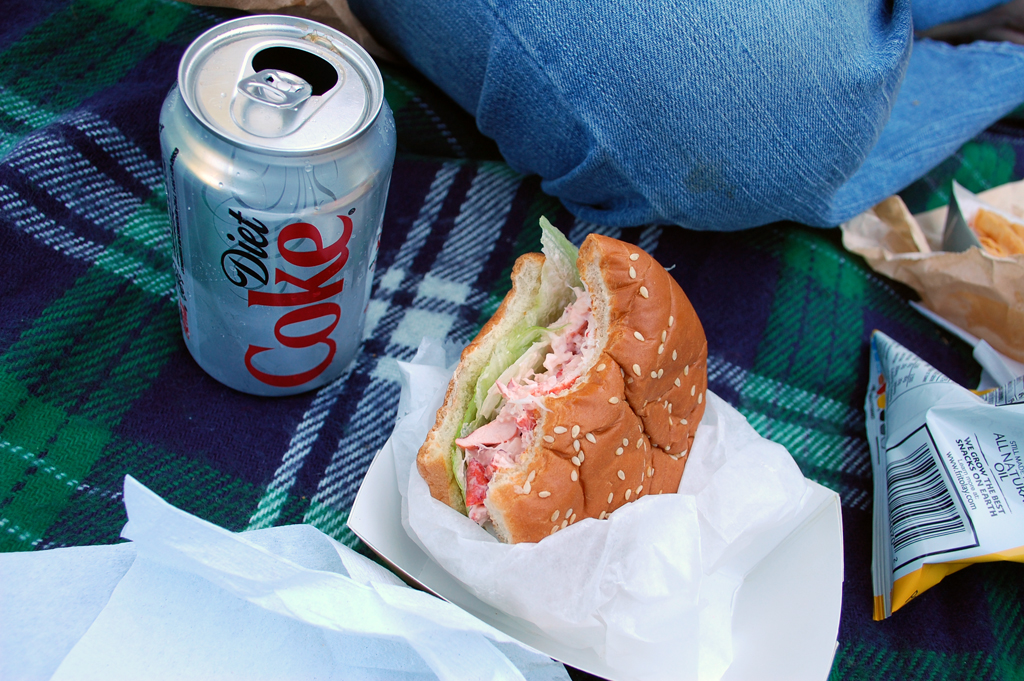
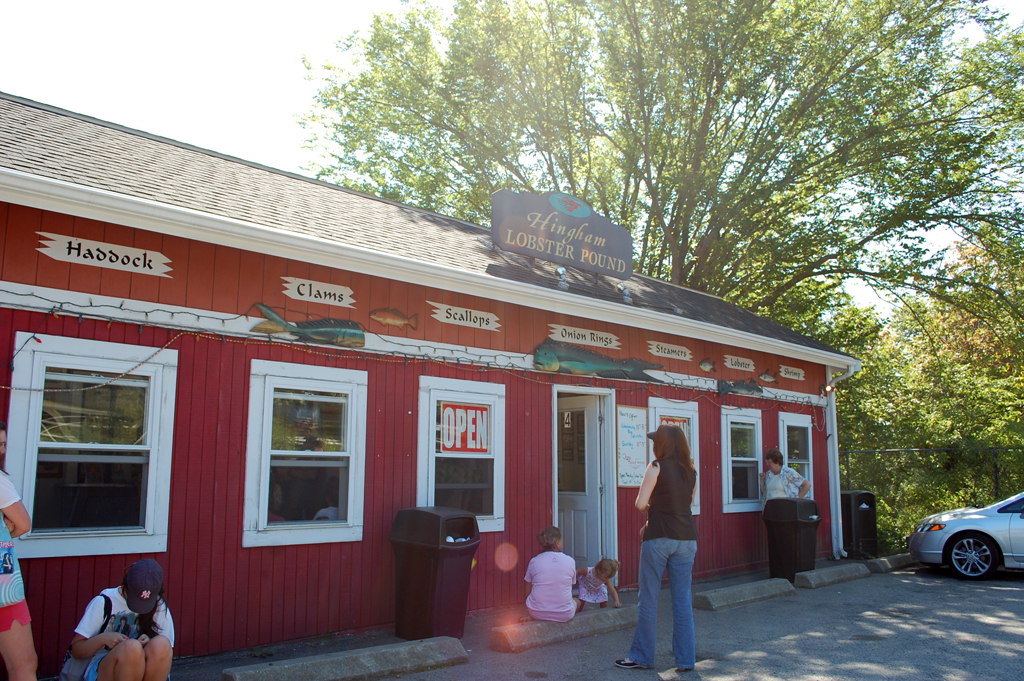
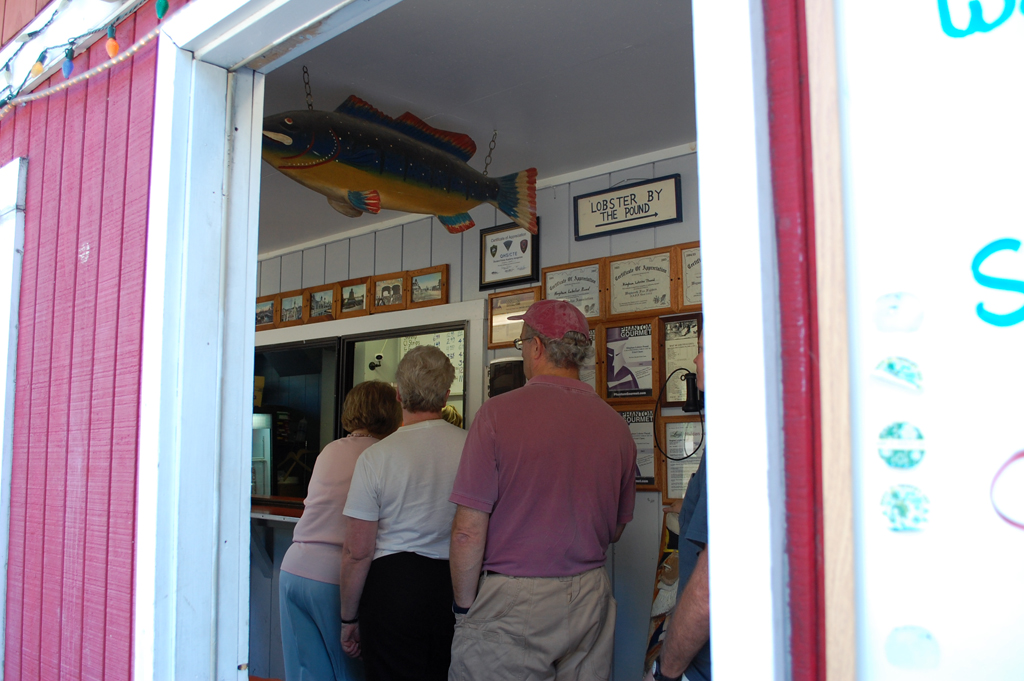
On the way to World's End, we realized none of us had lunch yet. Luckily, we were just passing by the Hingham Lobster Pound when hunger struck. As the locals know, the Lobster Pound is THE place to go if you are looking for fried clams or lobster rolls (or onion rings).
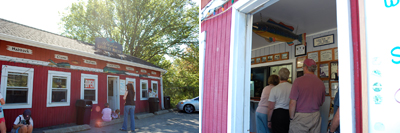
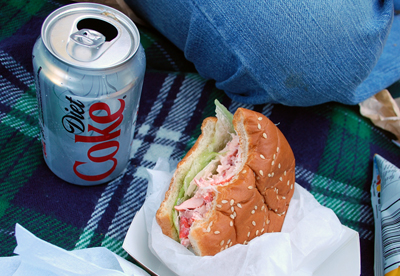
We were not disappointed. The sandwich was packed with large chunks of lobster meat, a light dressing, all held together by a buttery bun. Very TASTY!
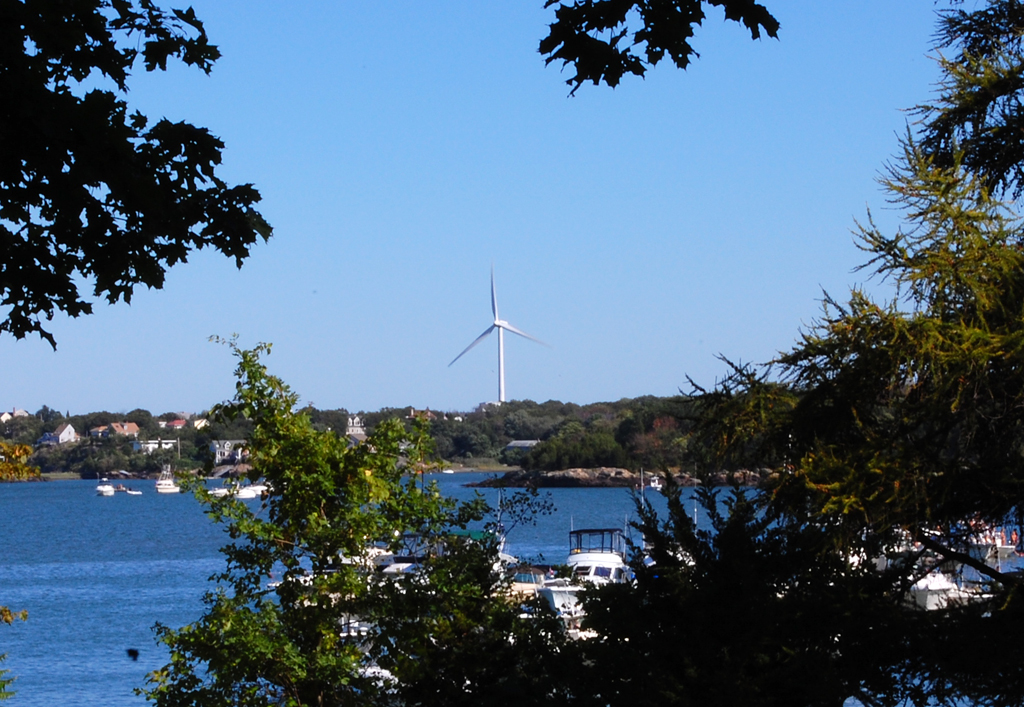
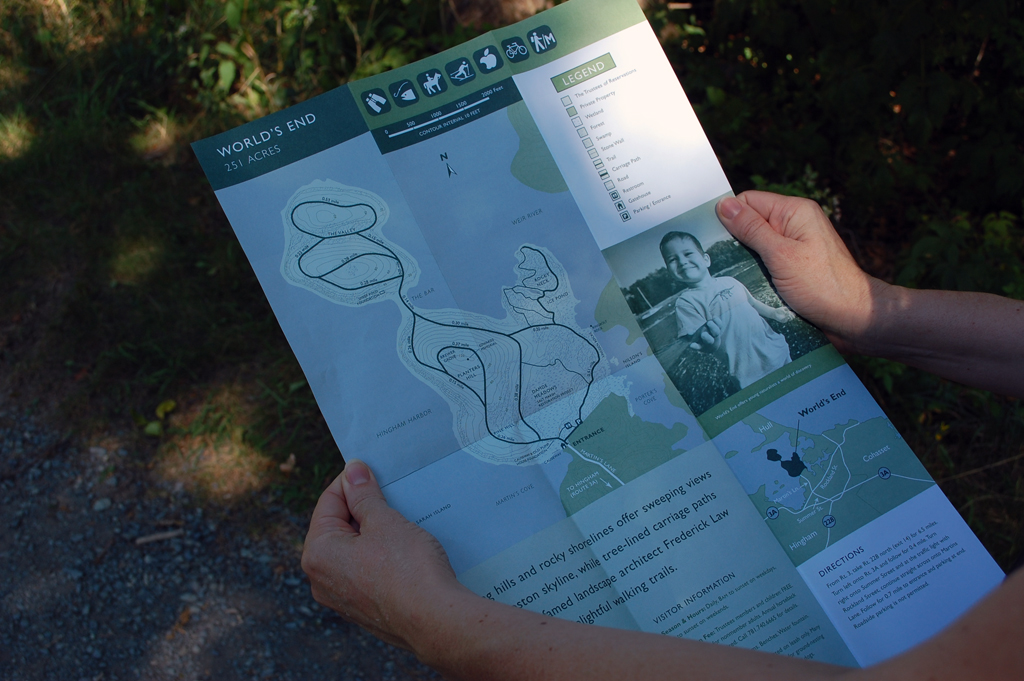
We finished lunch around 3PM and arrived at the World's End Preserve fully fueled for a walk around the various drumlins. This beautiful piece of land was originally purchased in the 1880s to be developed for homes.

Olmsted (the Central Park guy) designed the subdivision. The work progressed as far as the laying of the carriage roads, but none of the houses were actually constructed.

The land was acquired by The Trustees in the 1967. They have done a great job caring for this treasure. We spent a few hours hiking the 4 miles of trails.

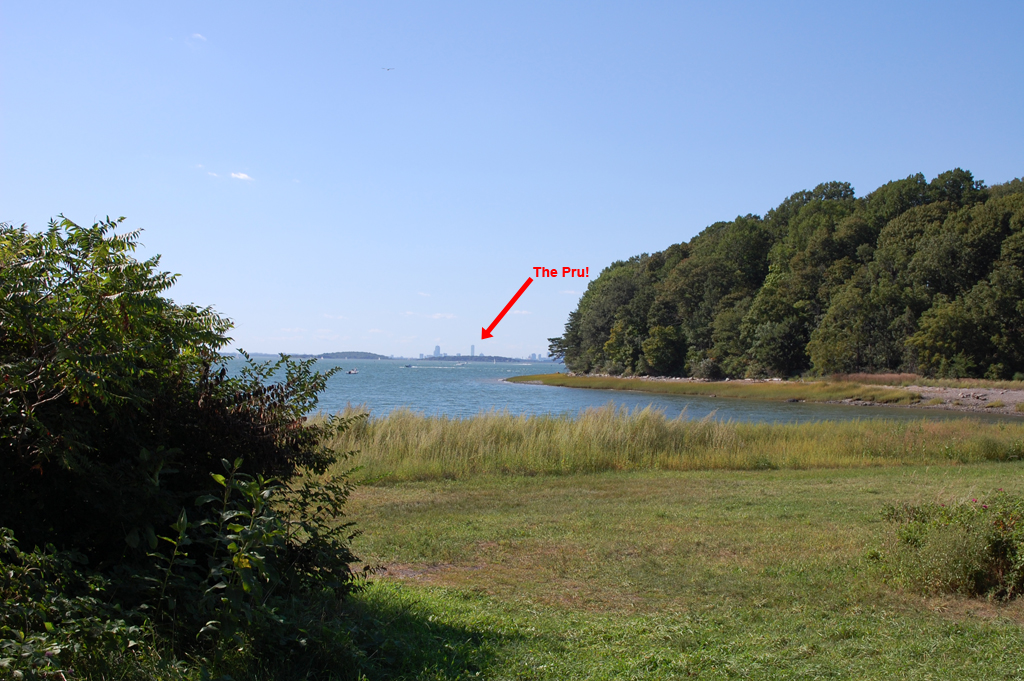
The paths took us through some lovely areas. Wild flowers were still in bloom everywhere. Believe it or not, we were even able to see The Pru from one of the trails.

At some point on the trail, we came upon an unexpected site... a windmill. When we got back to the office, a quick Google search determined that the one we saw was the municipal one in Hull. It good to see that some towns don't just endlessly talk about using "green" / alternative power and have actually done something about it. We are going to have to go check it out next. [Permalink] - World's End Hingham
|
|
|
The crew held the fifth annual RainyDayMagazine SausageFest this weekend. Kristin from L.A. flew in to help out with the event. We were thrilled to have her, even after she told us we needed to drop her off at Logan Airport at 4:30 AM for her return flight on Sunday morning.

The timing of the event was perfect as our friends from Italy, Toby and Francesca, were passing through town on their way to Martha's Vineyard and were able to drop by for a few bites.


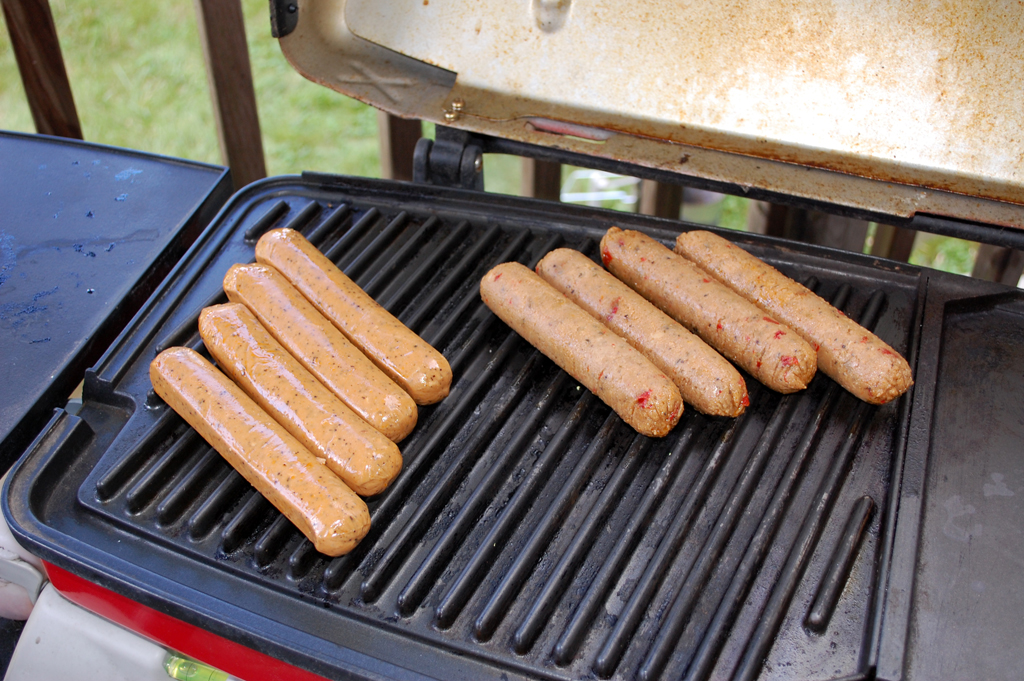
SausageFest is an event where we invite folks to find some interesting sauages, bring them by, grill them up, and share them amongst all who attend. We all rank them at the end of the feast and the winners in the various categories (Crowd Pleaser, Most Exotic, Best non-meat, Best Homemade) get to bring home fabulous prizes from the RainyDayPile.

RainyDayMagazine's "house" sausage (not part of the competition as the house is not allow to win) has been from the Buffalo Guys for the past three years. Why? Because they always bring down the house! Buffalo meat makes great sausages. It has just the right amount of juices and has incredible flavor. The hot dogs are out of this world. Just writing about them is making my mouth water.

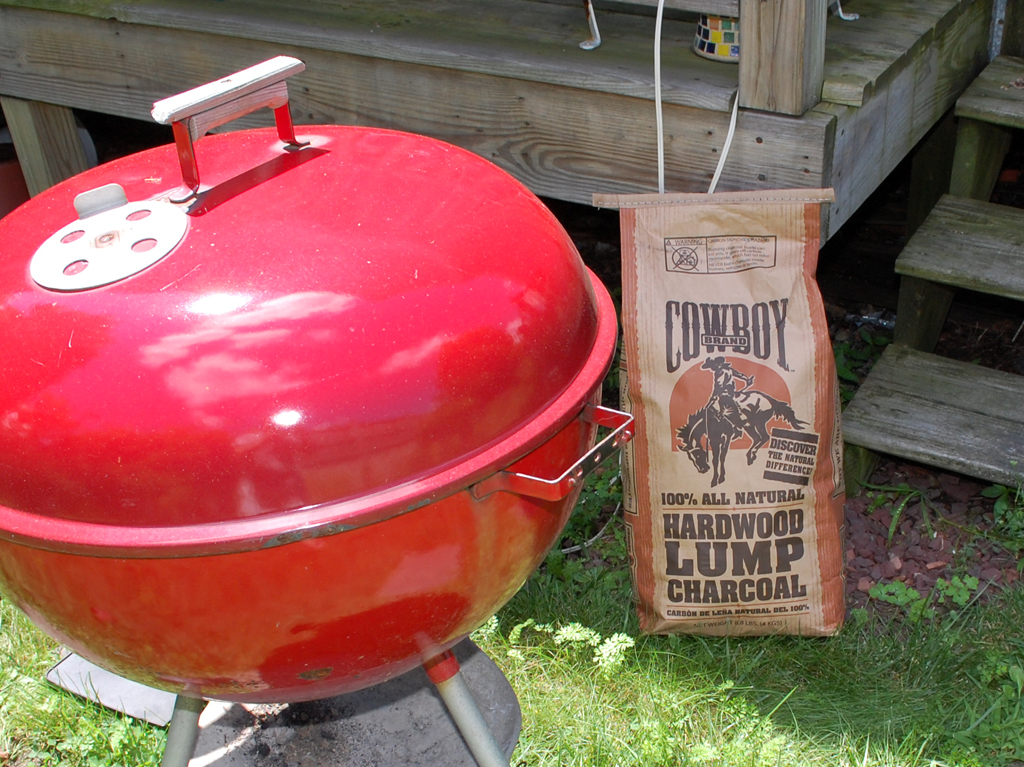
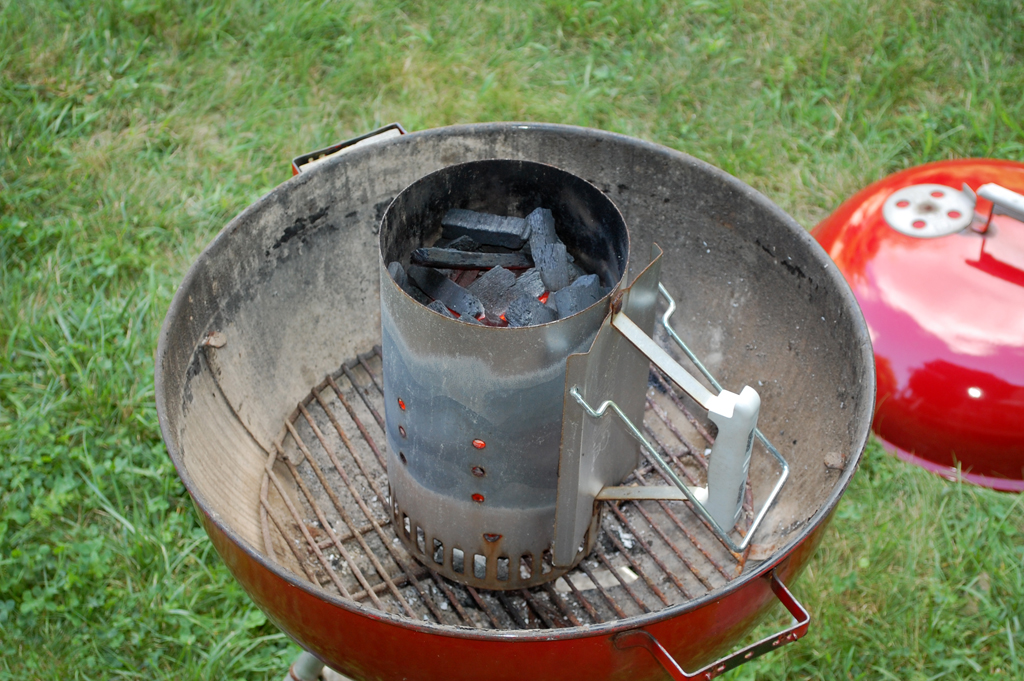
Of course, SausageFest is also the perfect time to try some new beers, new recipes for sides (mango chick pea salad, broccoli feta salad, etc...), and even new charcoals.
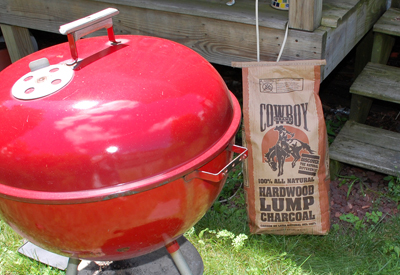
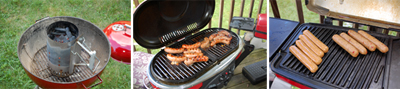
Three different grills (one charcoal, two gas) are available for folks to use. The Weber and the Coleman are normally used for grilling the meat. The Thermos is reserved for non-meat sausages and vegetables.

Guests started arriving around 3PM. The sausages started coming off the grills around 4:30 and the feasting began. A steady stream of meats (lamb, pork, buffalo, etc...) flowed into the "sampling room" for about two hours.

The sampling of the various entries as they came off the grill was fast and furious. The house sausages, supplied by the Buffalo Guys, were gone in a flash.

As always, everyone had great time grilling, eating, and voting. We enjoyed hosting the event and are looking forward to hosting it again next year! [Permalink] - SausageFest 2008
|
|
|
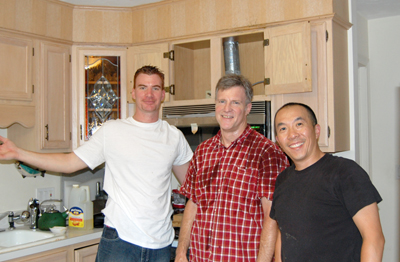
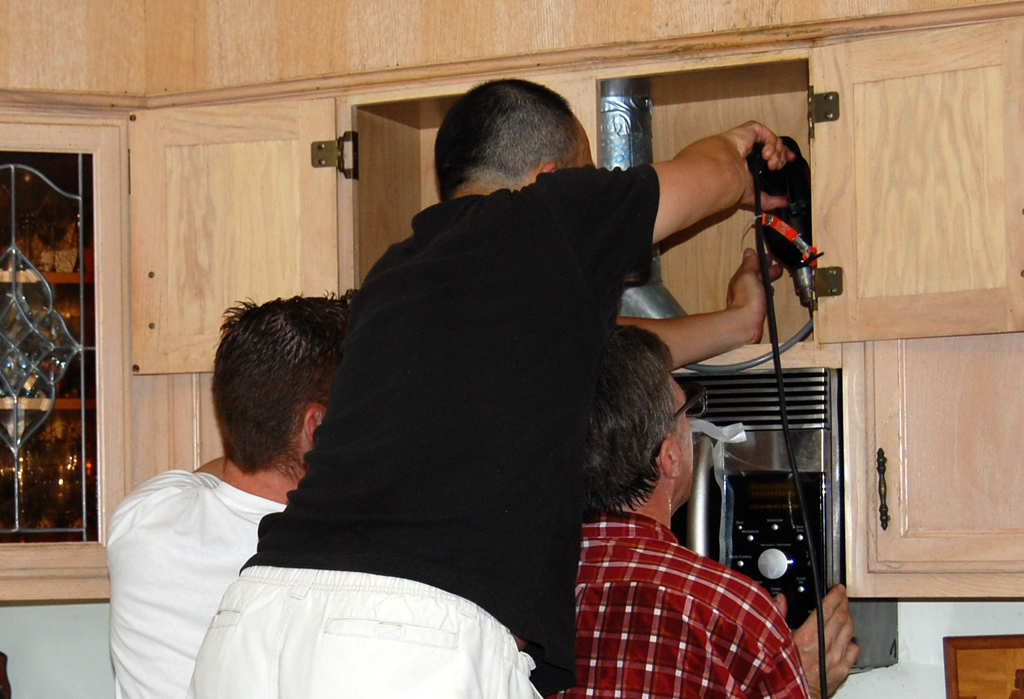
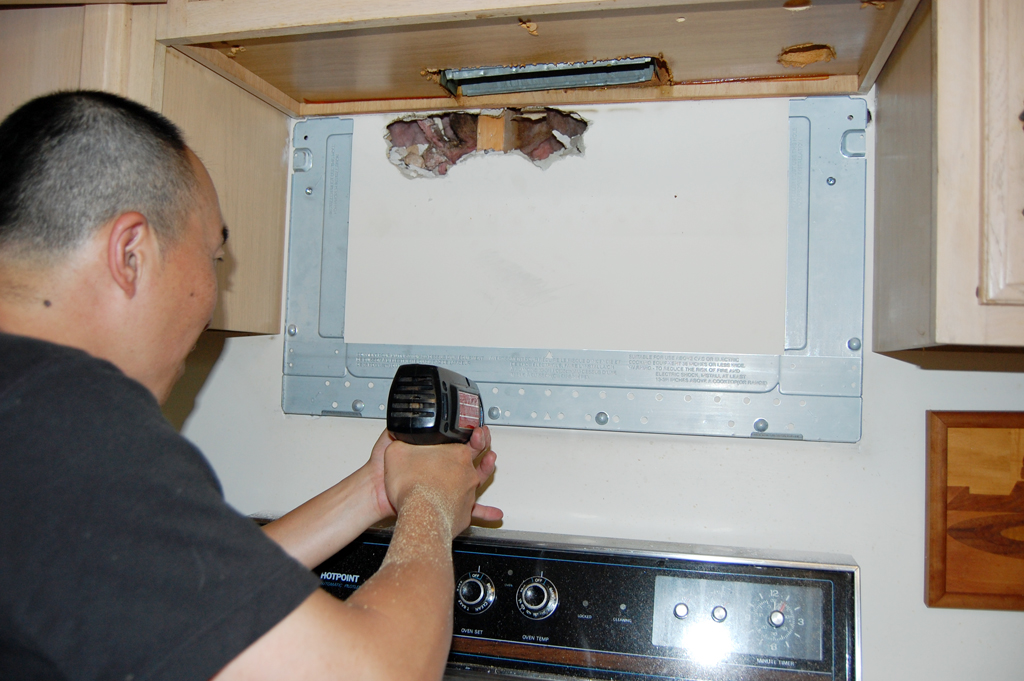
Since the microwave weighed in at about 85 lbs, we made sure we called in some muscle for this job. With Steve and Jay on hand, we were pretty confident that lifting the microwave wasn't going to be the problem.
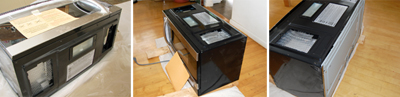
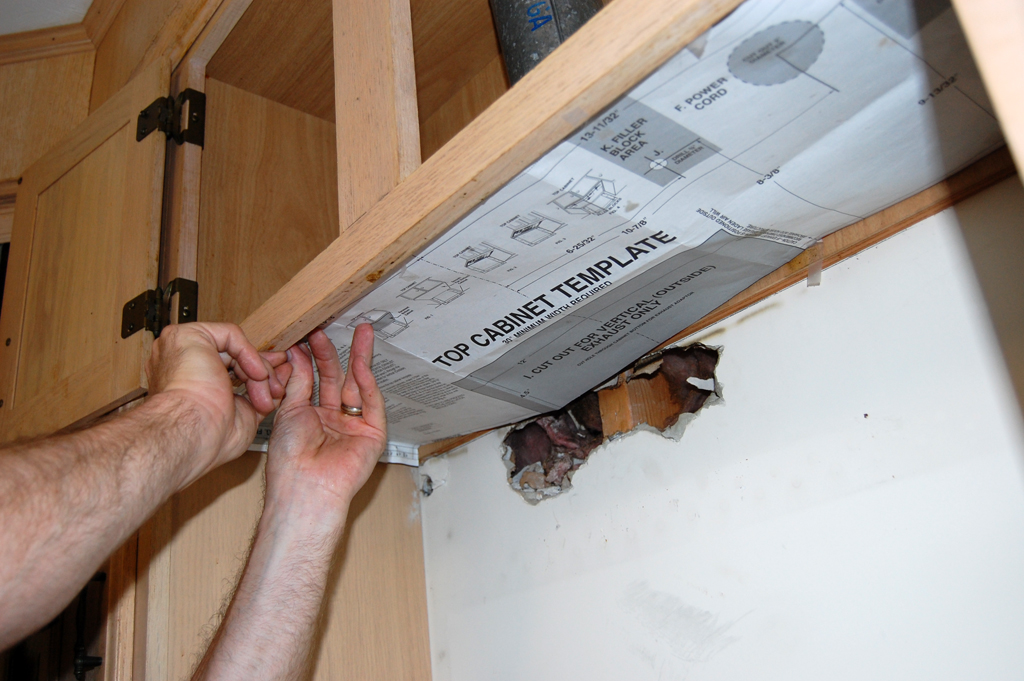
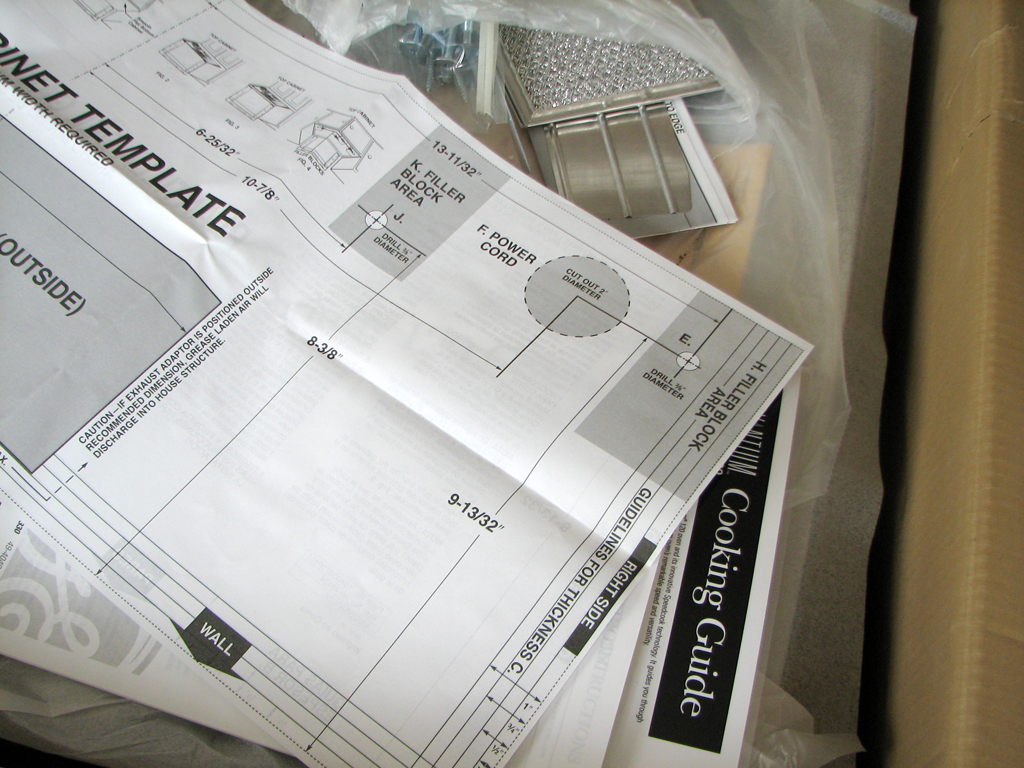
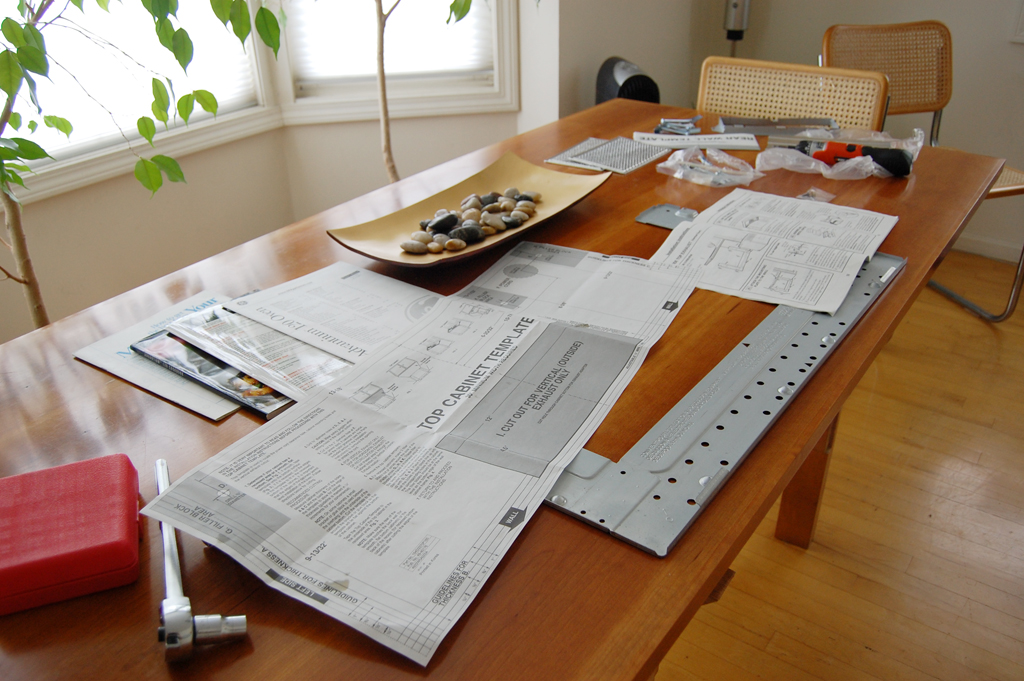
The two steps where this project could go south would be: 1. drilling the holes for the mounting and 2. installing the bracket. To make aligning things easier, GE designed the templates to be attached directly to the cabinet and wall. Once attached, all we had to do was drill where indicated. The giant hole in the wall did come in handy. It meant we didn't need a stud finder :-)
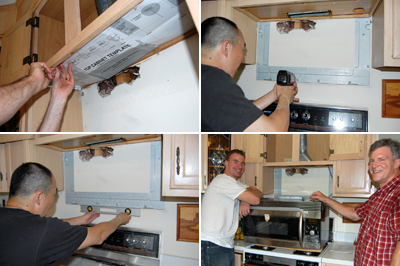
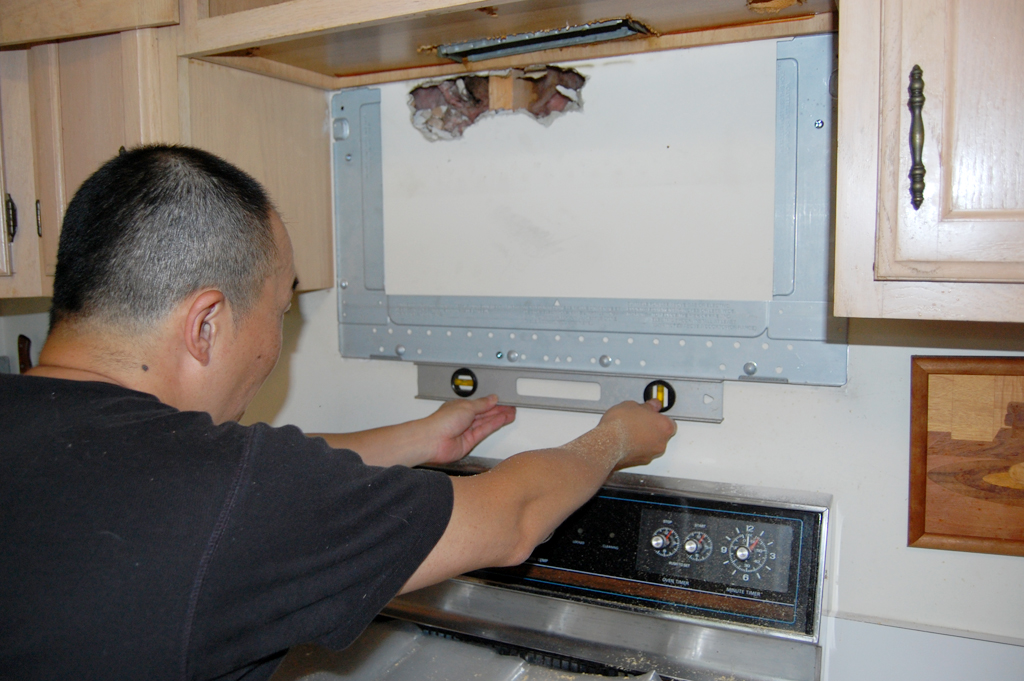
The holes on top and the bracket on the wall had to be sufficiently aligned with those on the microwave for everything to be properly anchored. The problem was we wouldn't know until we tried putting the unit in place.

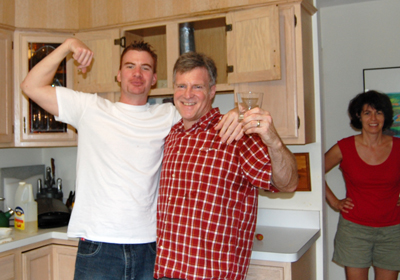
Ever wonder "how many editors does it take to install a microwave?" Apparently the answer is three. Well, technically, it took two editors and an intern. However, at least two of the three have to actually be able to lift things.
The problem we ran into was that a few of the top holes were a bit too much to the left. We couldn't get the bolts aligned enough to tighten things down. After a few attempts, a bit of grunting, and a lot of sweating, we finally got the unit secured.
This installation was conceptually simple, but the execution required a bit of effort. Next time we'll wait for maintenance. We'll just make sure they know there will be beer in the fridge waiting for them when the job is done! [Permalink] - Wan Chi Lau
|
|
|
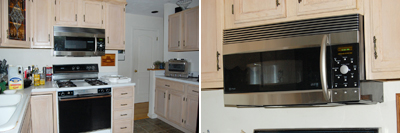
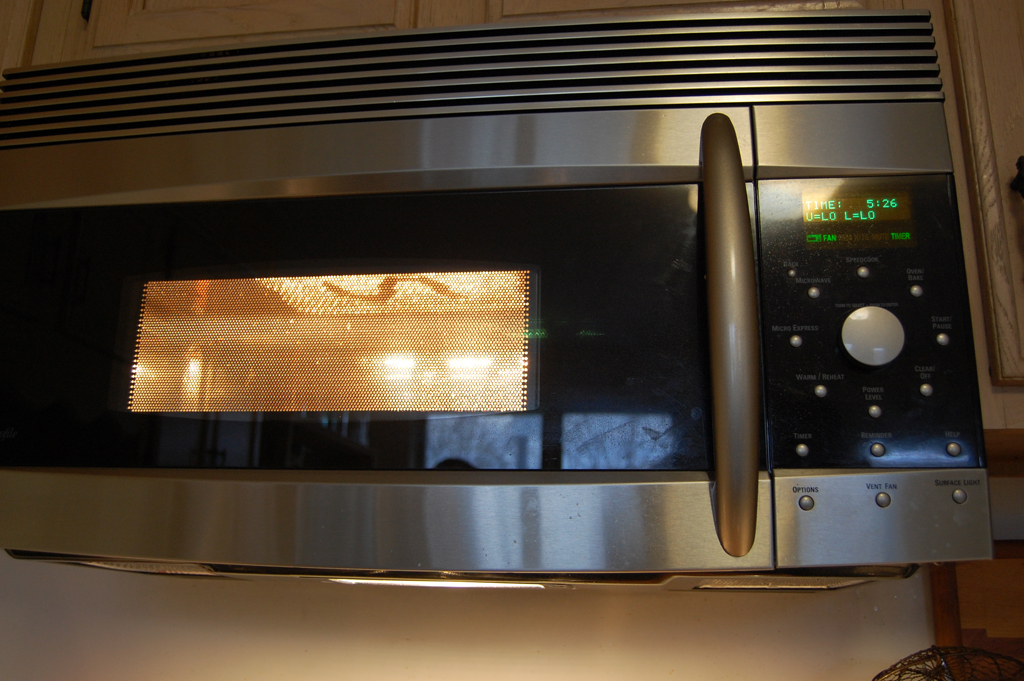
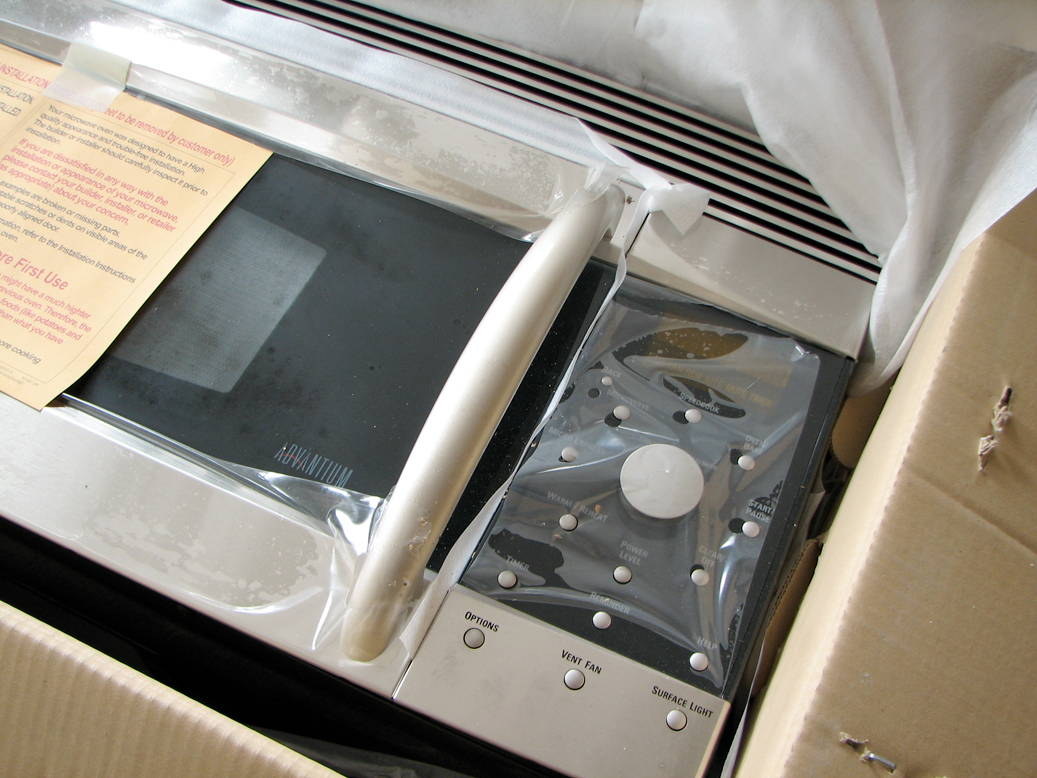
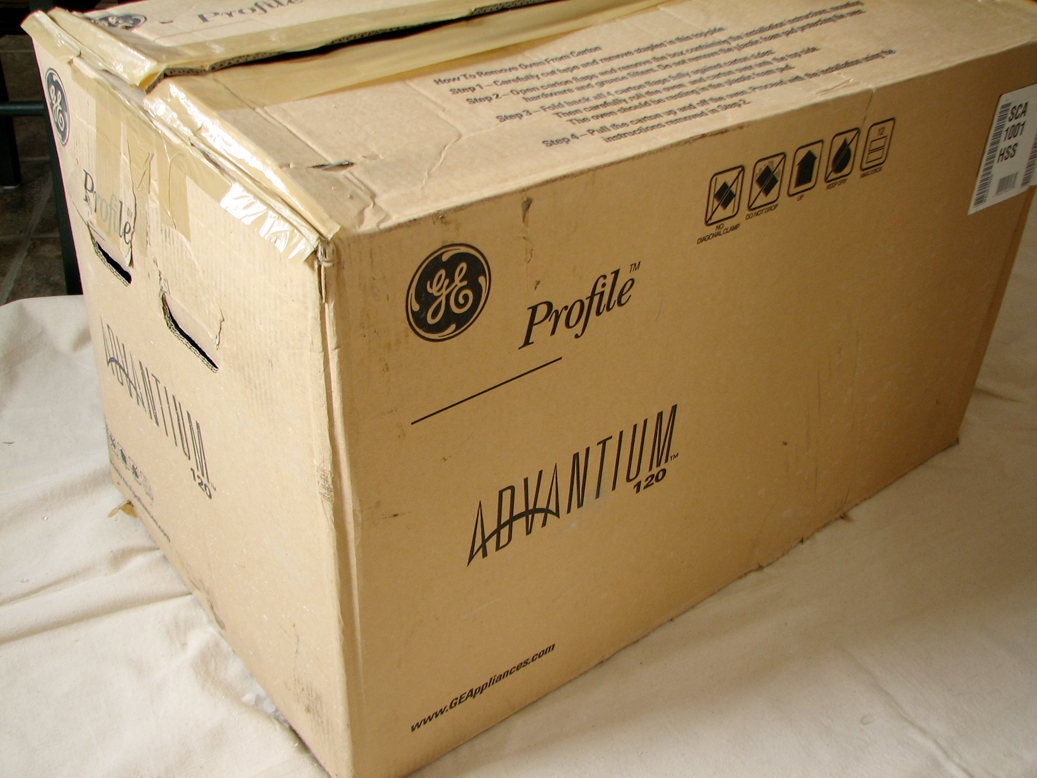
A while back, a GE Advantium microwave oven showed up at the RainyDayMagazine office. The folks in the RainyDayKitchen had been asking maintenance to install it for the past six months. We finally got tired of waiting and decided it was time for the editorial staff to take matters into our own hands. How hard could it be?
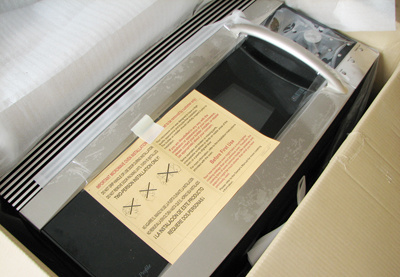
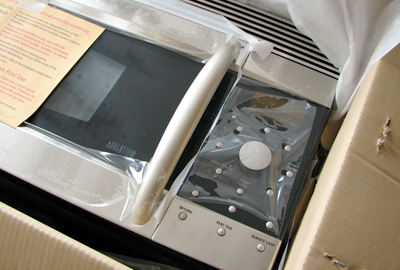
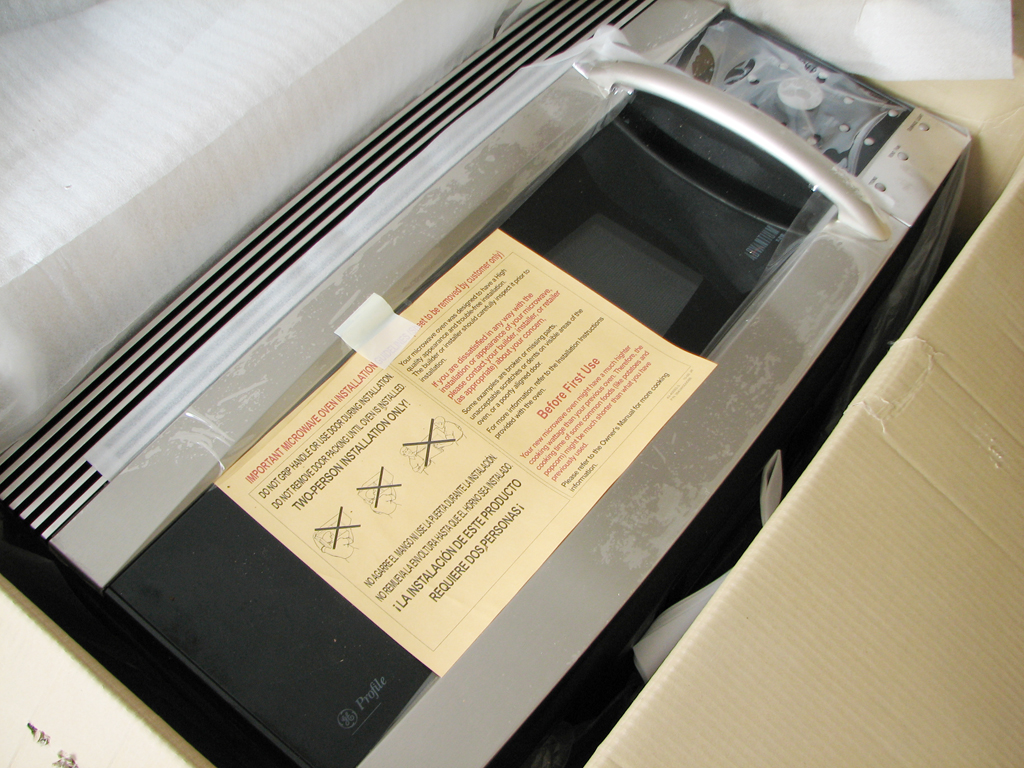
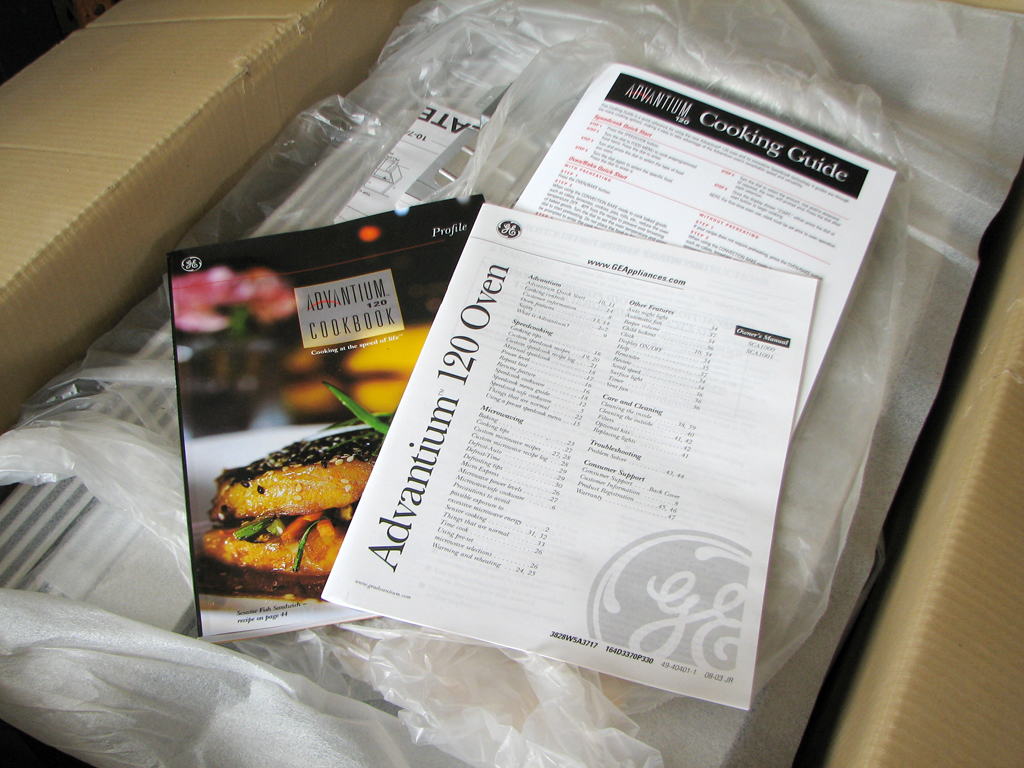
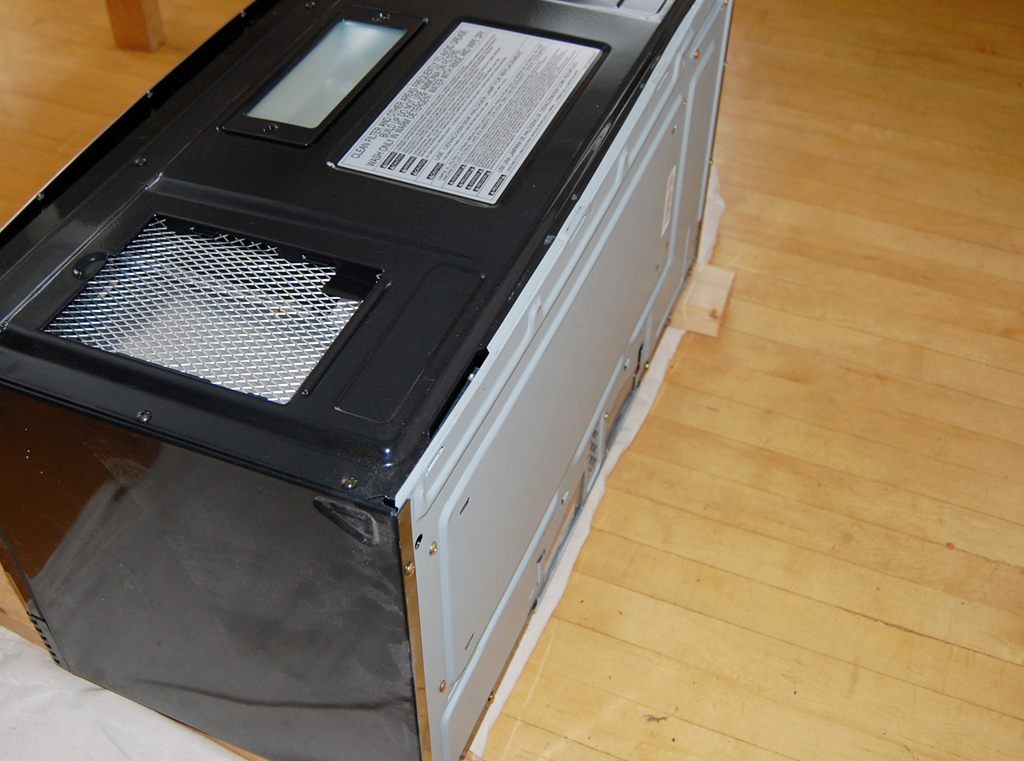
GE certainly made it as easy as they could. With the microwave came all of the normal documentations (plastic-coated tip sheet, user manual, oven specific cookbook).
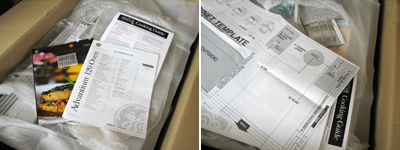
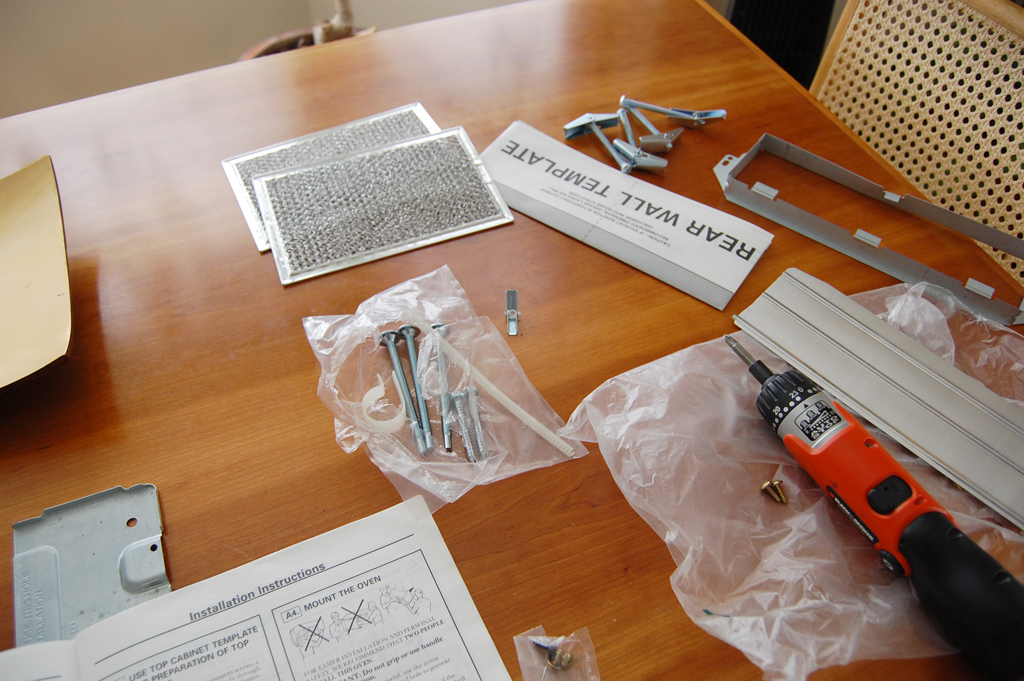
In the box was also the installation booklet, templates, and all of the mounting accessories. The one item which appeared to be missing was the wall bracket. Fortunately, in prepping the unit for installation, we discovered the wall bracket was attached to the back of the unit, which in retrospect, made perfect sense :-)
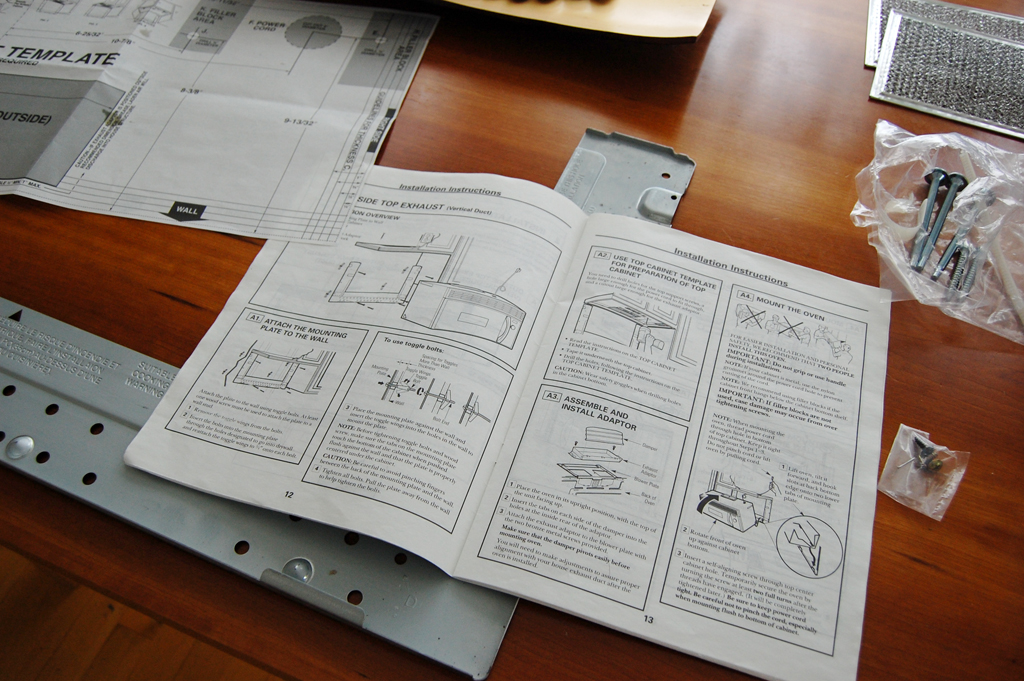
As none of us had ever installed one of these things before, we thought it best to lay things out and review all of the installation instructions before proceeding.
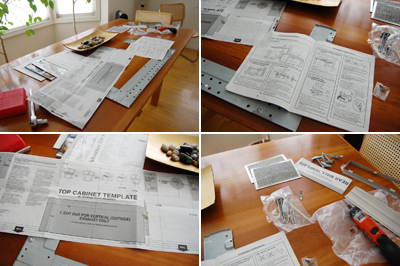
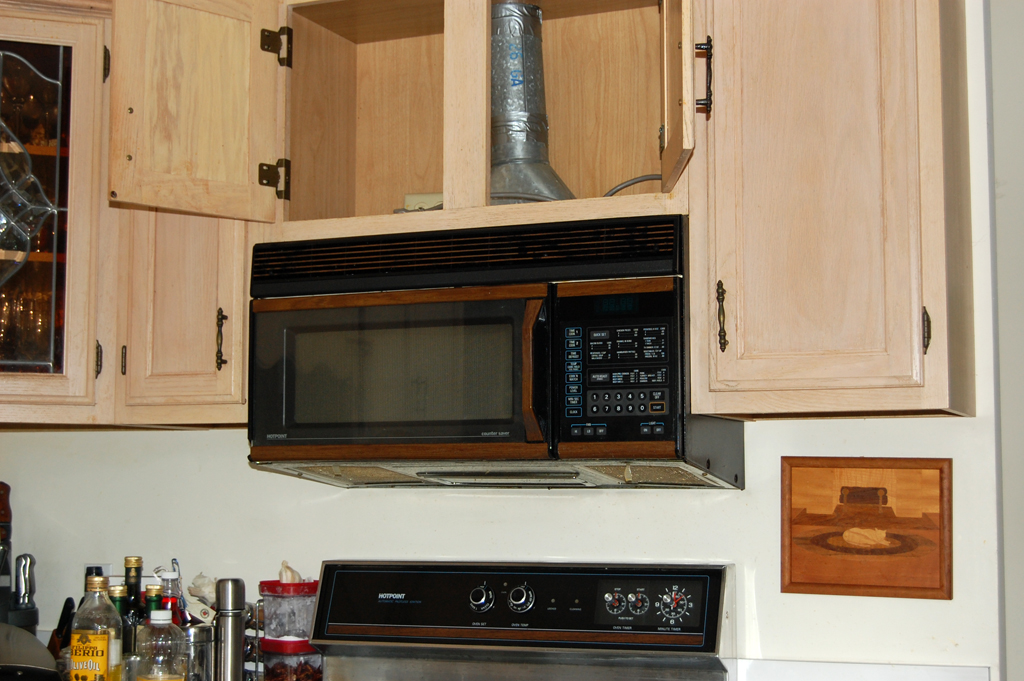
Based on the directions, we only needed a few simple tools (drill, screwdriver, and a level). The old microwave was mounted with bolts on top, vented to the outside, and supported by a wall bracket in the back. Since the new unit will also be vented from the top, we didn't have to redo any duct work.
It would be great if we could reuse the same wall bracket, but most likely the mount would be a different size. Getting the unit off the wall was not as "easy" as we had envisioned. After removing the top mounting bolts, the unit should have just tilted forward and out. It didn't happen quite that way.
The wall anchor bolts ripped out the sheetrock. BTW, the big hole in the wall was already there :-) Our best guess was that the electrician who helped build the place made it when he ran the wire for the outlet in the cabinet. In any case, that's the story and we are sticking with it. Tomorrow we'll post the rest of the installation. Next week, we'll check out the features of this Advantium Microwave...just in time for SausageFest!!! [Permalink] - Wan Chi Lau
|
|
|
|
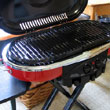
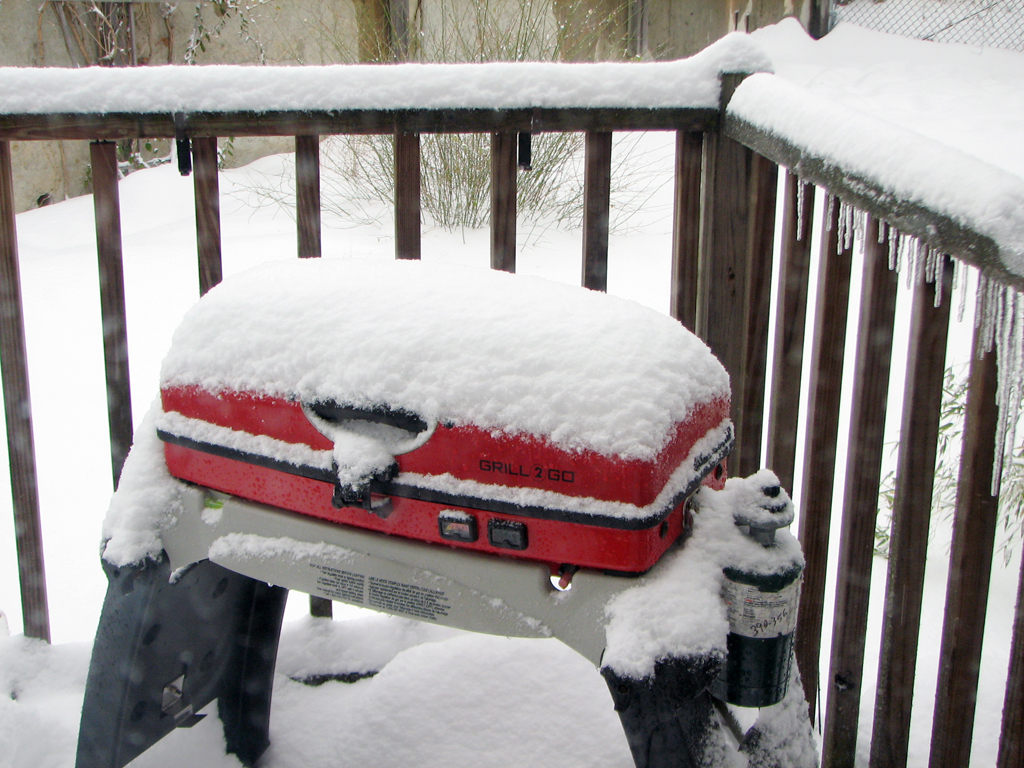
Normally, RainyDayKitchen's "FirstGrill" events start way earlier in the season. With the trips out to L.A. and the crazy review load, we just couldn't get our act together this year. So our first official firing-up of the grills didn't occur until July 4th.
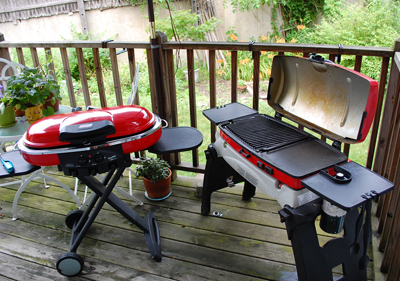
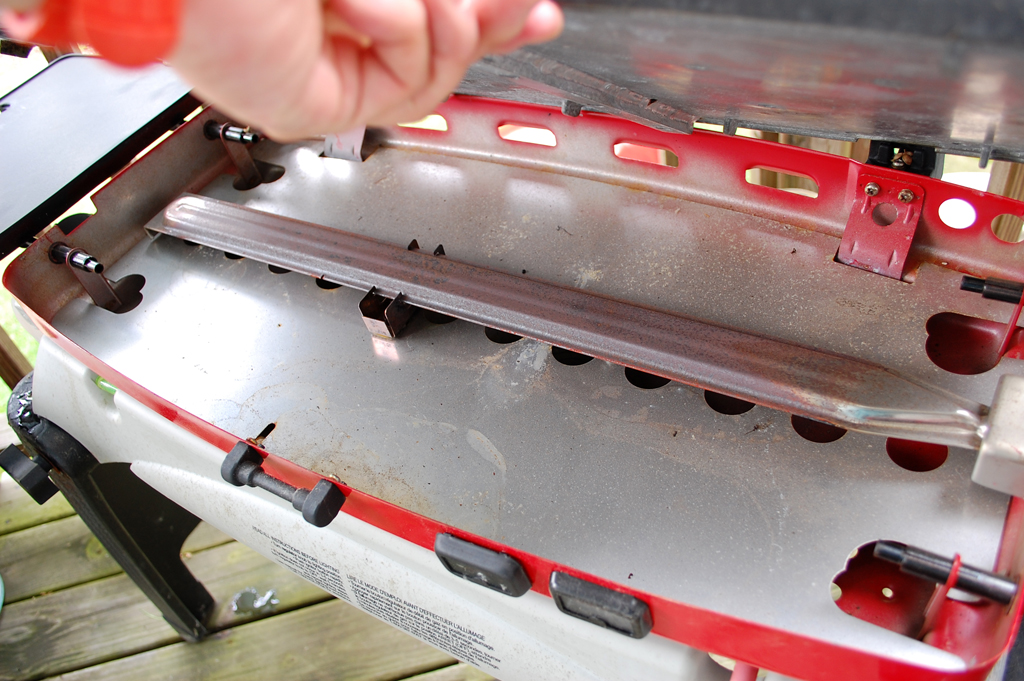
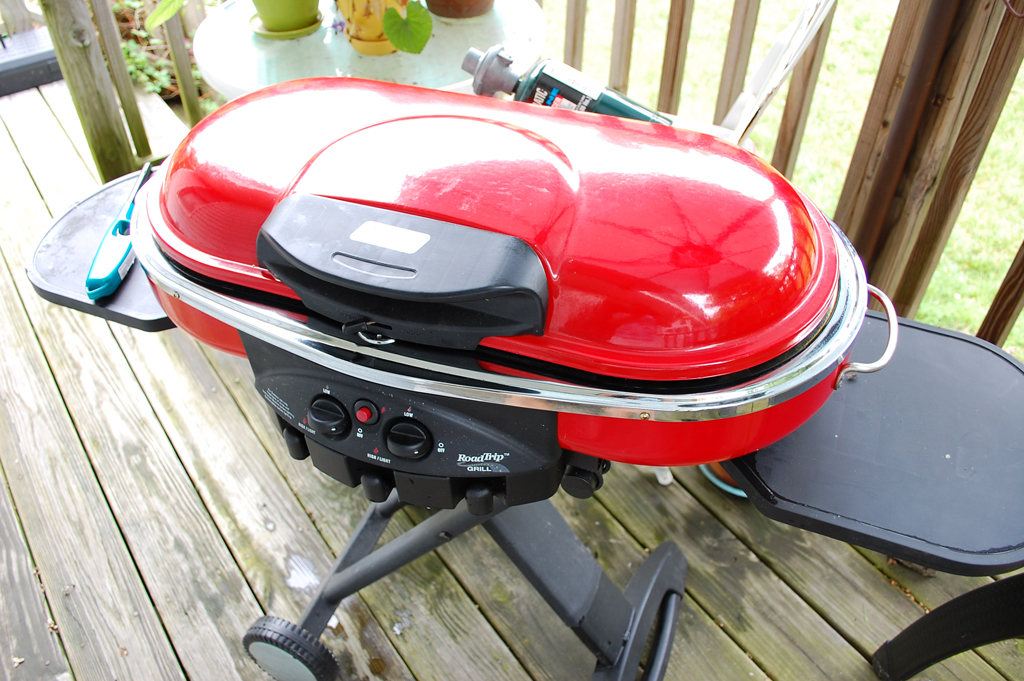
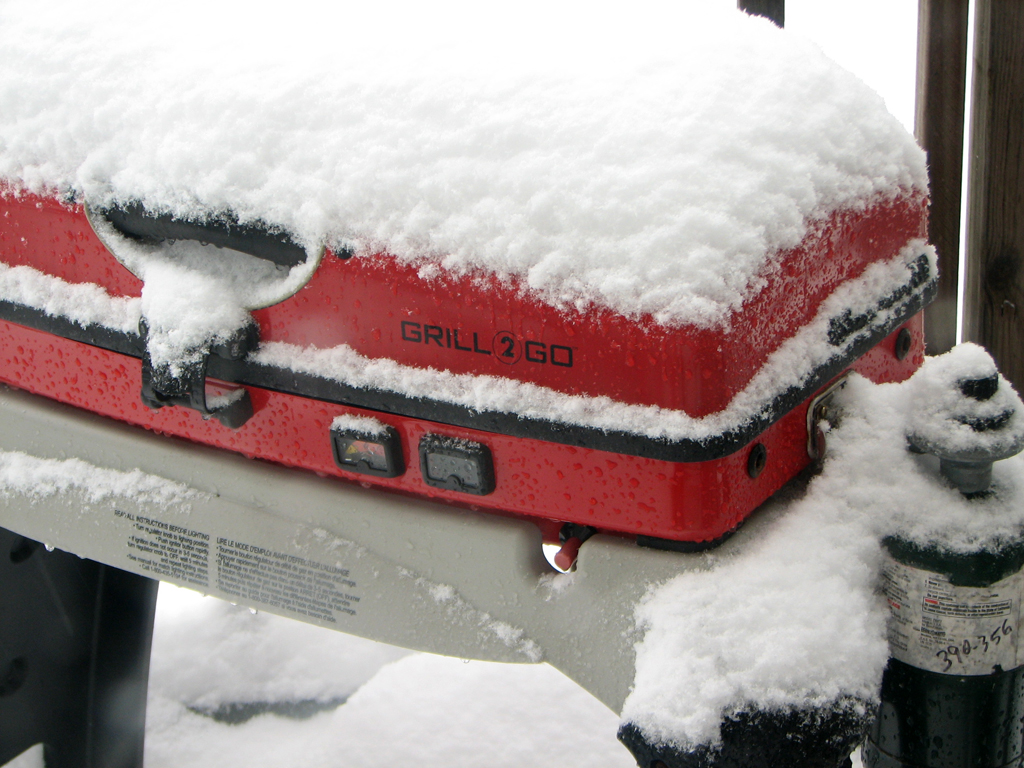
As it has been almost two years since we first reviewed the Coleman RoadTrip and Thermos' Grill2Go, we thought it would be appropriate to take a look at how they have held up. Now for those who may have thought that we "baby" these units, let me assure you, we have not :-) We use them, we clean them occassionally, but we basically treat them as if Coleman and Thermos dared us to abuse them.
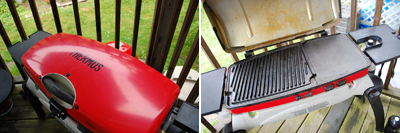
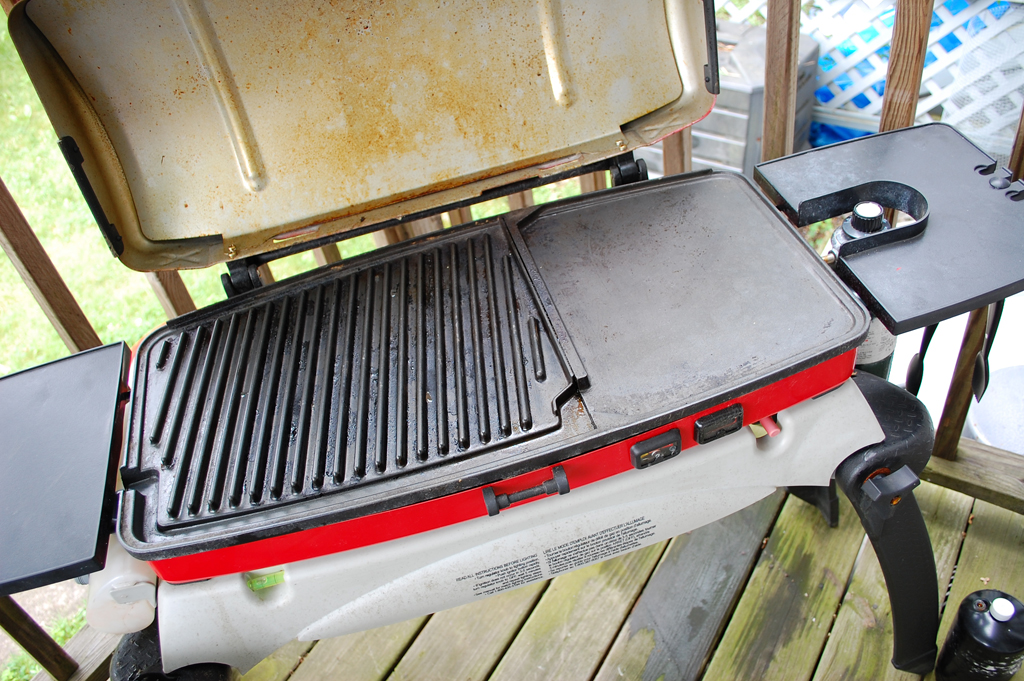
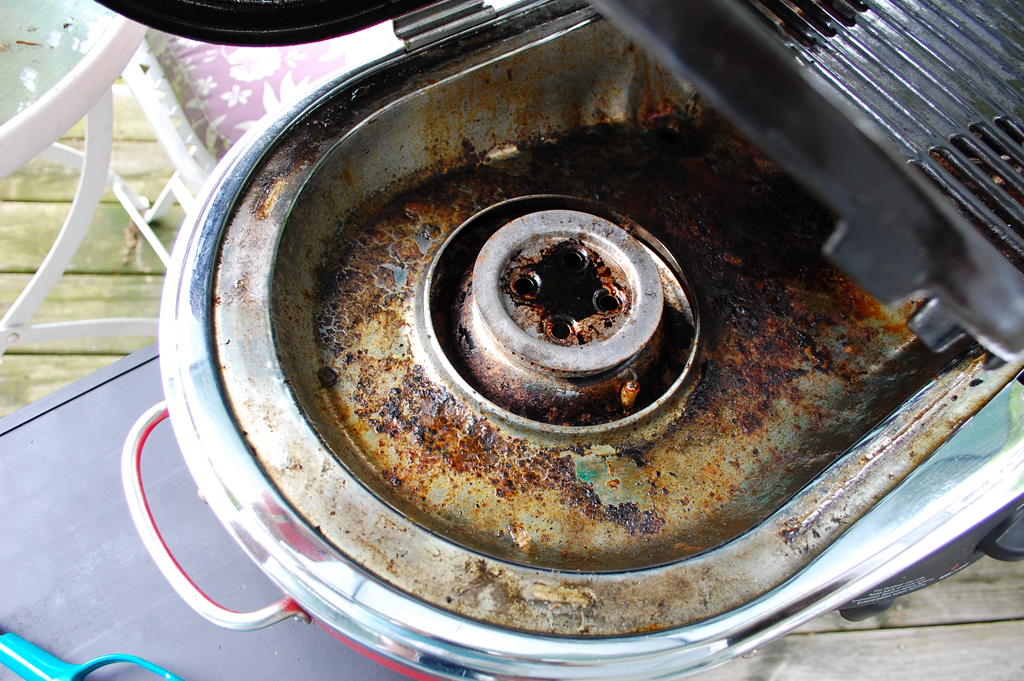
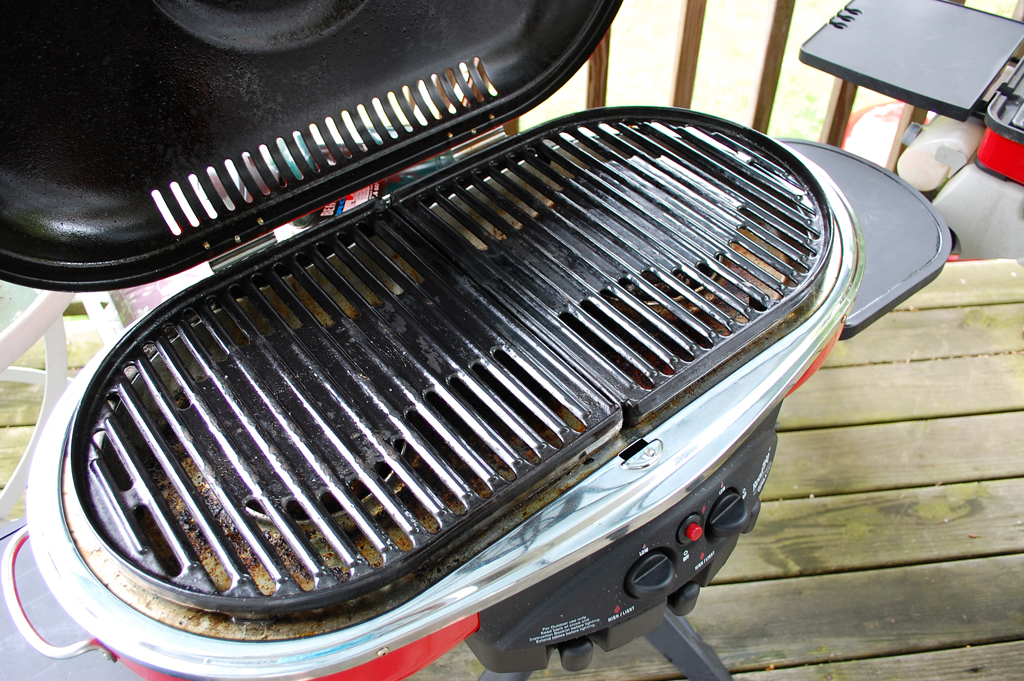
Of the two, the Thermos is hands down the easiest to clean. The one-piece non-stick surface cleans up in a snap. Because the plate has no opening, the grease and oil does not foul up the burners.

The Coleman, while harder to keep clean, is MUCH easier to fold up and move. It is one of the main reason why it spent its winters in storage while the Thermos is out in the cold. BTW, we are pretty sure that with a little effort by one of the interns, the Coleman burners can be spotless again :-)
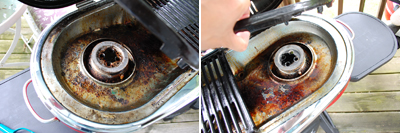
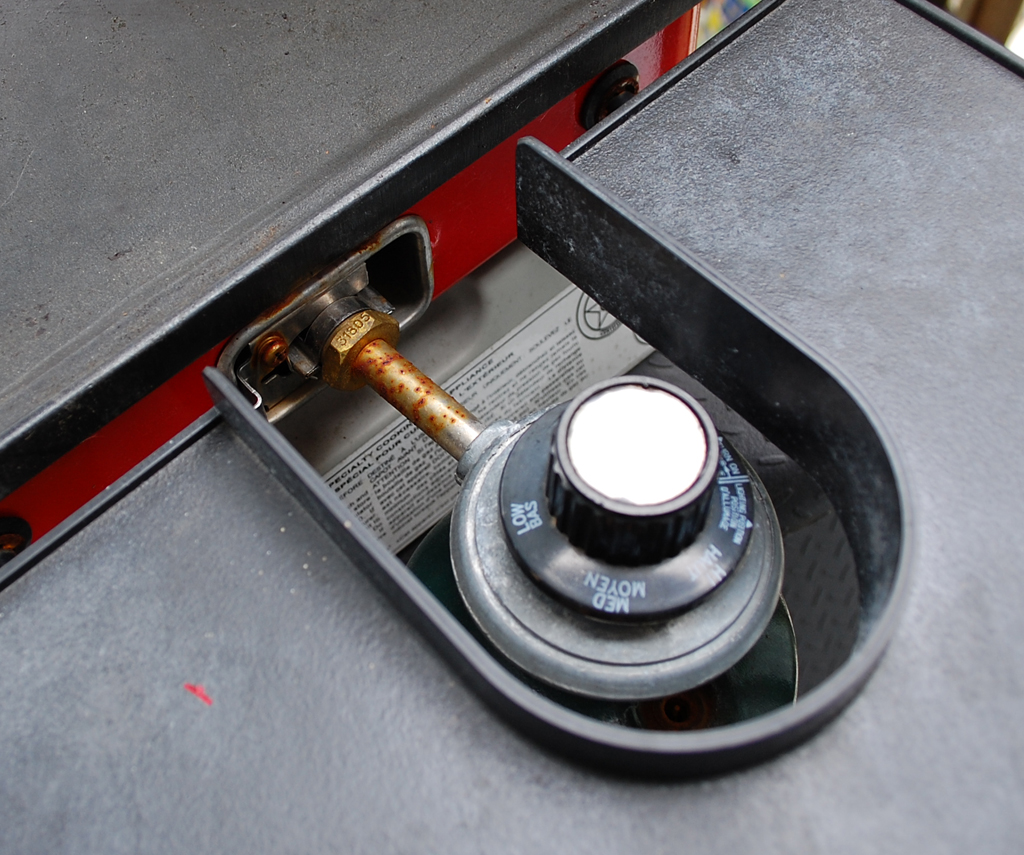
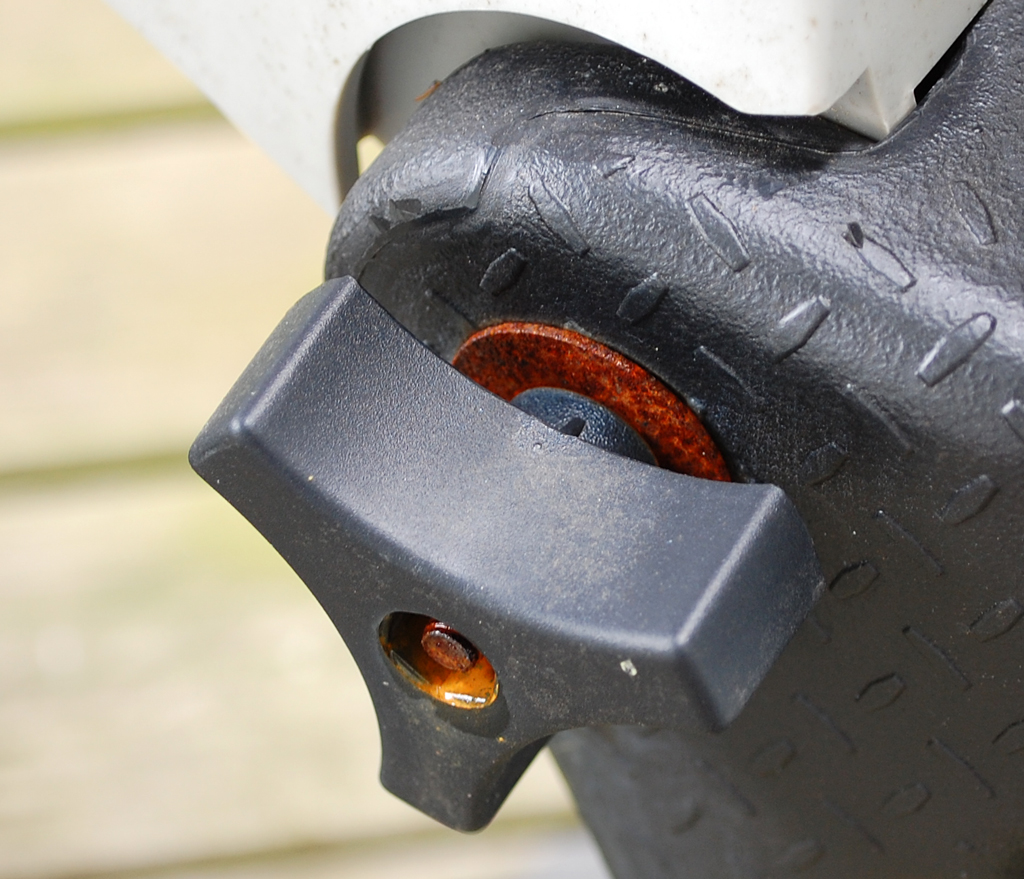
The Thermos' gas canister did not leak even though it was out on the deck all winter. Some of the parts did pick up a little bit of rust due to the exposure, but nothing which interfered with the grill's operation as it fired up on the first press of the lighter button.

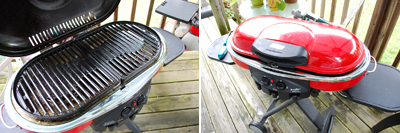
The Coleman's ignition button, however, no longer appears to work, but the burners worked just fine when lit using a butane wand. The lids of both units (Coleman, Thermos) showed no signs of chipping or wear. The heavy duty cooking surfaces (Coleman, Thermos) held up well after two seasons of grilling. All in all, both of these grills fared amazingly well. We would have no problems recommending either one.
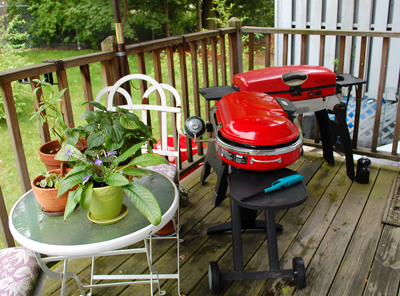
We expect to continue "reviewing" these units for many years to come :-) As of today, all three grills are now ready for the Summer season. Readers local to Bostyon should periodically check their "junk mail" folder to see if their email filter/bot has accidentally chucked our invitations to various GrillFests out with the email from "Nigerian generals" looking to share their loot. Happy 4th of July!!! [Permalink] - Wan Chi Lau
|
|
|
|
The Barking Crab is one of the best watering hole on Boston's waterfront. If you have a boat, you can pull right up to the dock and walk up to the bar. We don't, so we made the approach via the new Seaport Blvd bridge.


The Seaport Blvd also goes right past the burnt down remains of James Hook & Co. This lobster company has been on the waterfront since 1925. The fire destroyed about 60,000 pounds of lobsters. We swore we could still smell it. [Permalink] - Wan Chi Lau
|
|
|
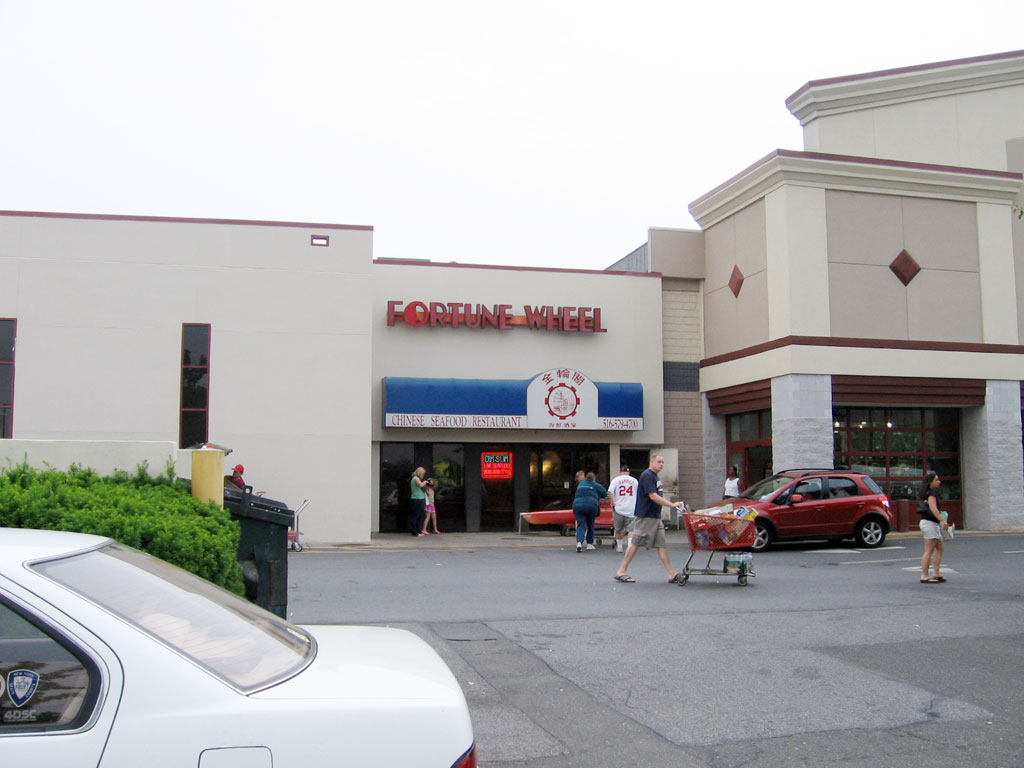
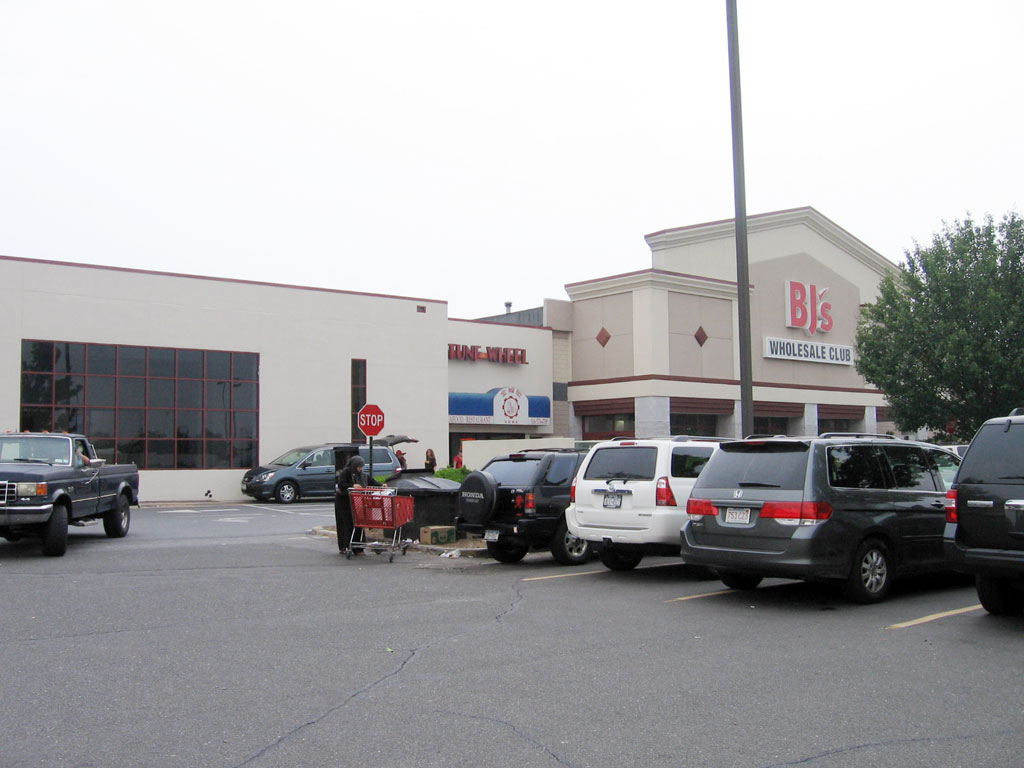
The Fortune Wheel has been in the Nassau Mall on Long Island for as long as we can remember. They were there when PathMark was still in business. Since then, many different tenants have moved in and out of the mall, but the Fortune Wheel stayed.
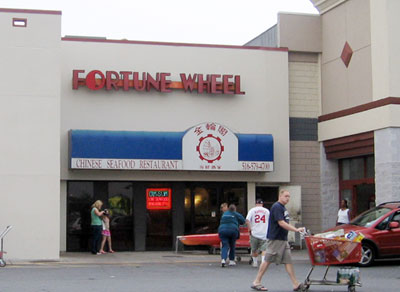
Giants stores like BJ's and Best Buy have now completely boxed in the Fortune Wheel. The ONLY way to even see the entrance to the restaurant is if you were facing at it straight on!

Looking at the restaurant from the outside, you would not expect it to be different from any of the typical mall fast food fare. However, if you know Chinese food, and trust us, we know Chinese food, this is one of the best Chinese restaurant you will find anywhere outside of NYC's Chinatown.
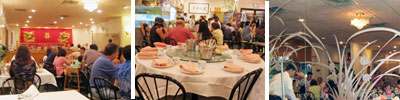
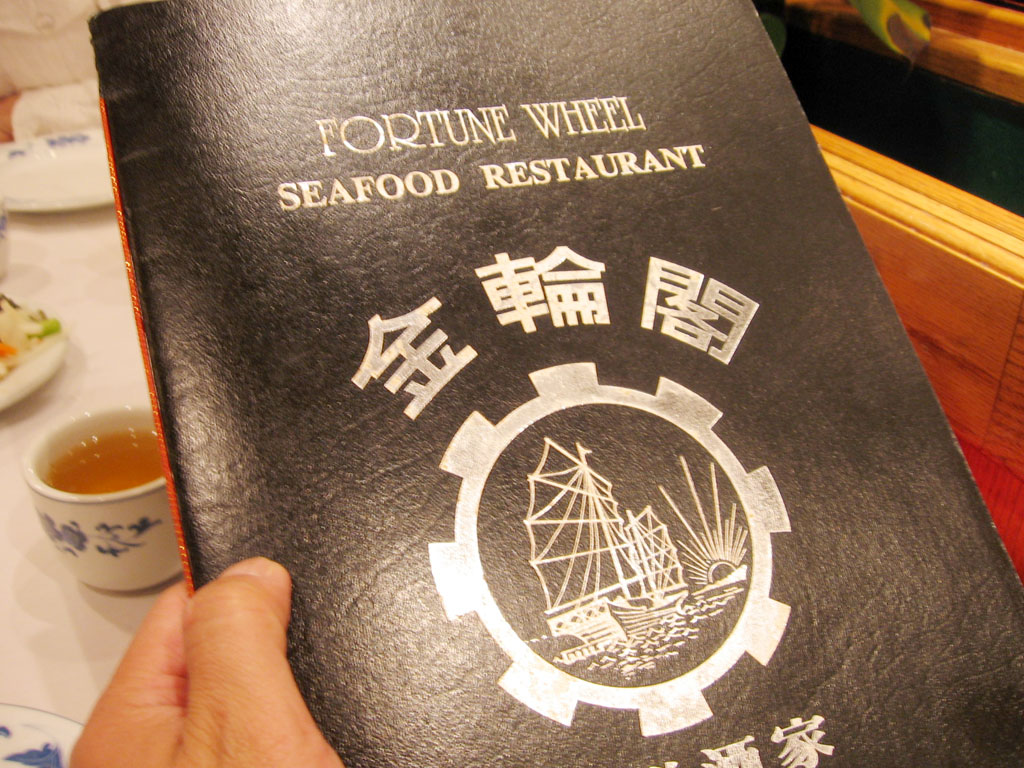
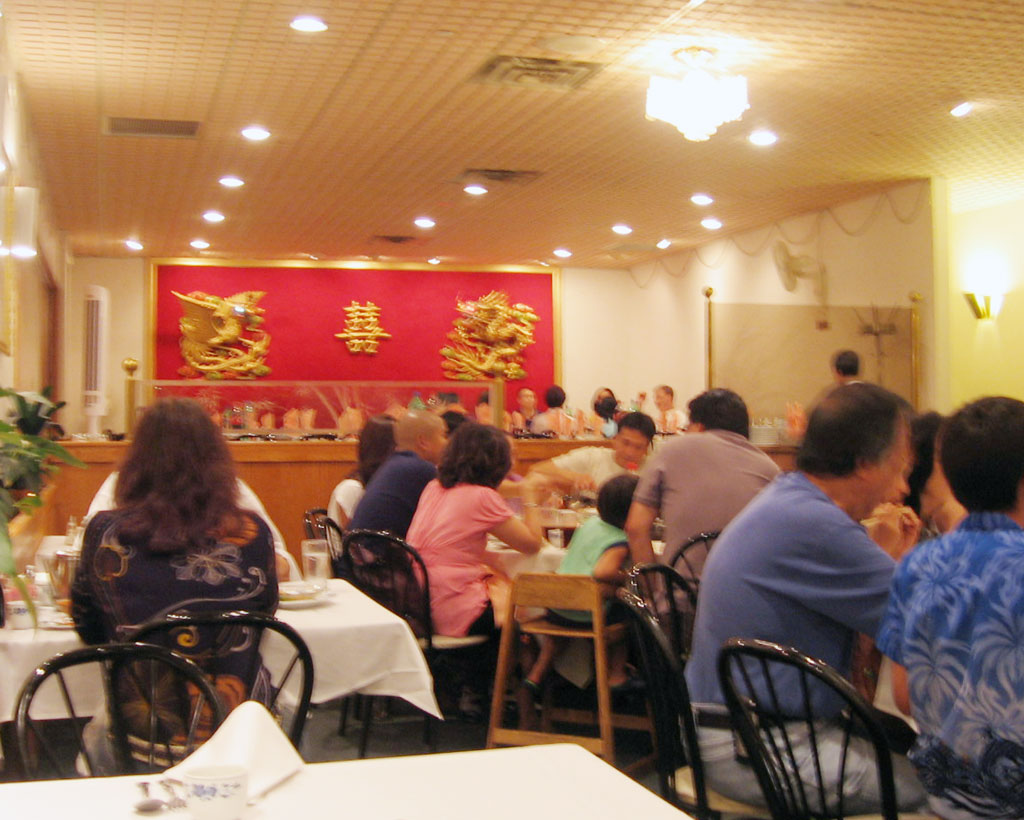
The Fortune Wheel can easily accommodate a few hundred people. They have a banquet area for weddings and celebrations. The wait staff is polite and efficient. Food was on our table with in 15 minutes of ordering. Also note how they clear a table...it is a show in itself.
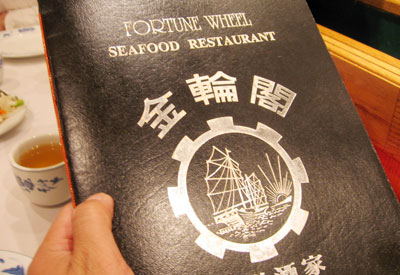
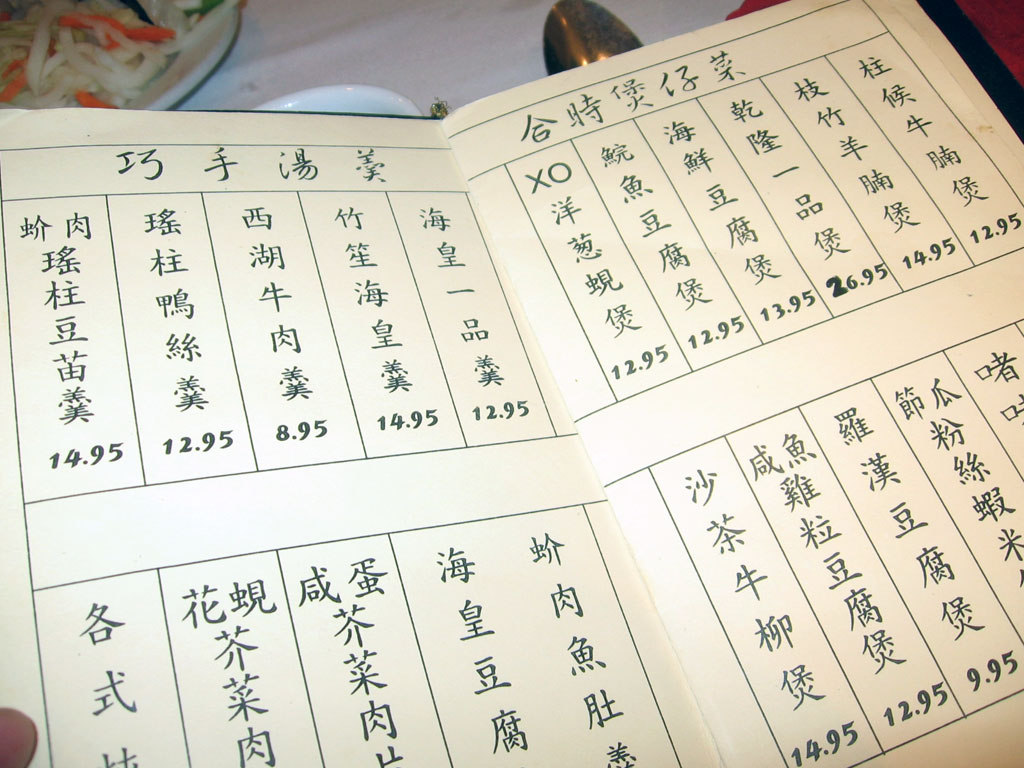
One way to tell if your local most Chinese restaurants is often frequented by the local Chinese is to see if they have two sets of menus. Often the tastier, but less "Americanized" dishes are only on the Chinese menu. The best way to try new dishes is to ask what is freshest that day. If you ask "what is fresh", the answer will be "Everything is fresh..."

Another way to find interesting new dishes is to see what the folks on the other tables are eating. Ask the waiter about the ones that look tasty. They will be happy to tell you about them.
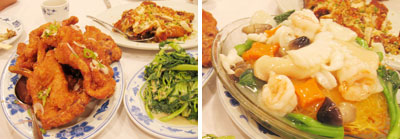
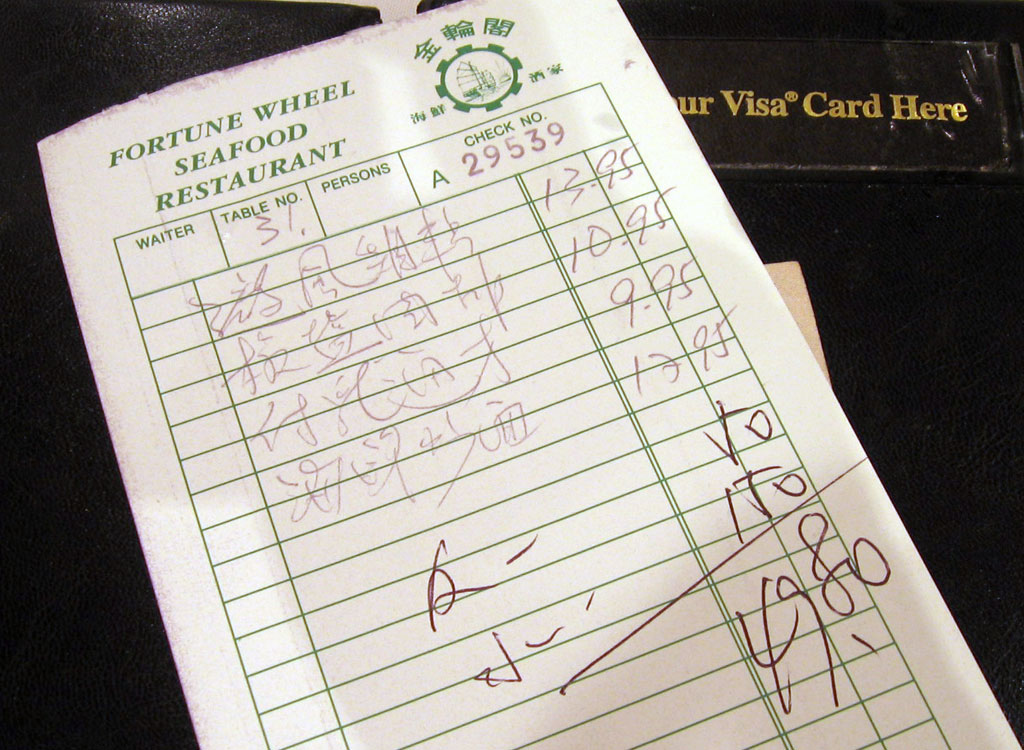
Below are some the dishes we sampled tonight: deep fried pork chops w/ spicy green peppers, garlic and scallion encrusted chicken (cooked by pouring hot oil on the whole chicken), mixed seafood on pan fried noodles, and fresh watercrest greens with fermented tofu. We ate like kings. Total bill? Less than $50.
If you ever are on Long Island and have a hankering for awesome Chinese food, punch "3601 Hempstead Tpke Levittown" into your GPS, and find your way to the Fortune Wheel. You will consider yourself "most fortunate!" [Permalink] - Wan Chi Lau
|
|
|
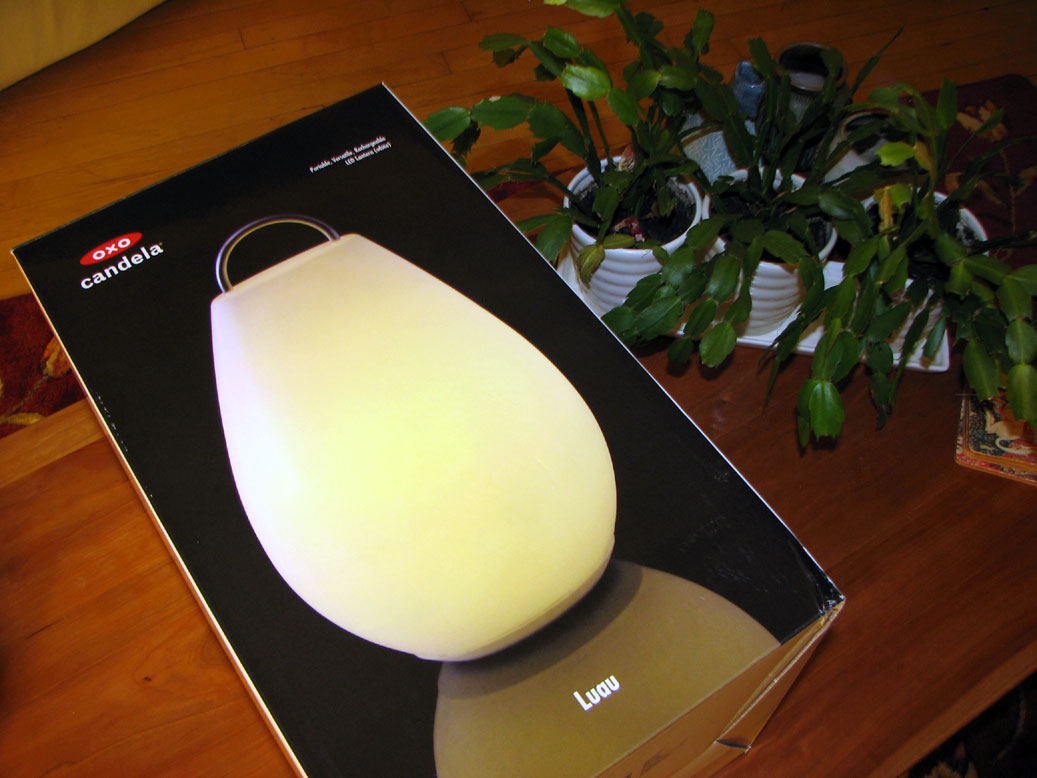
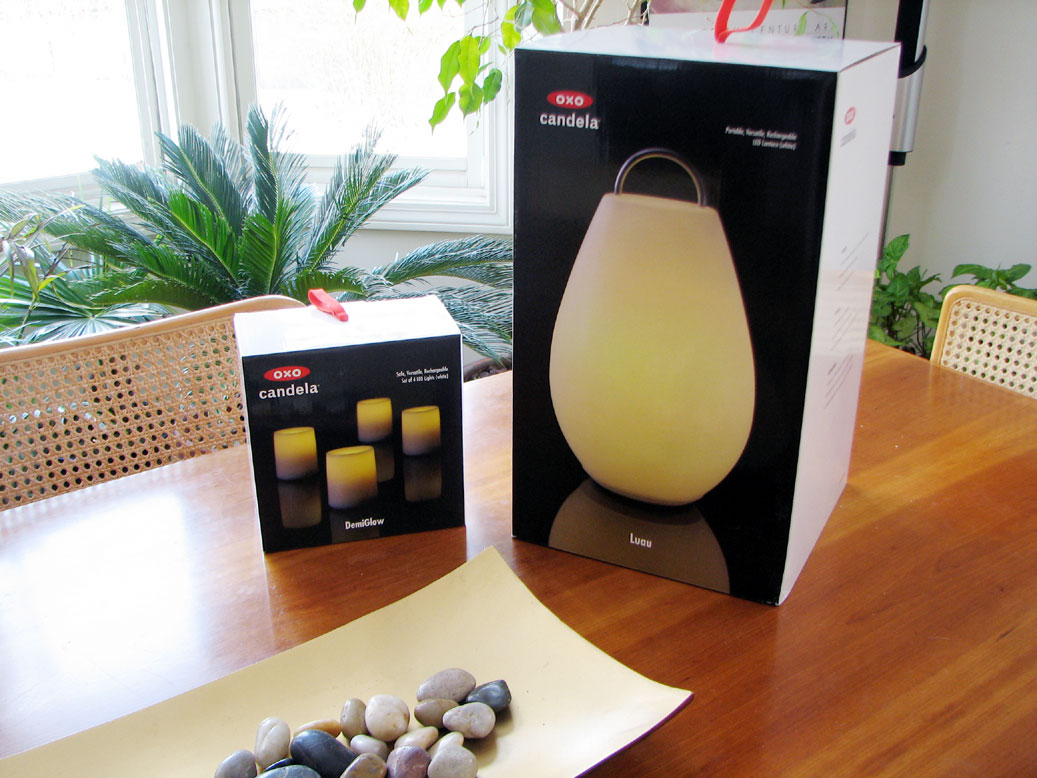
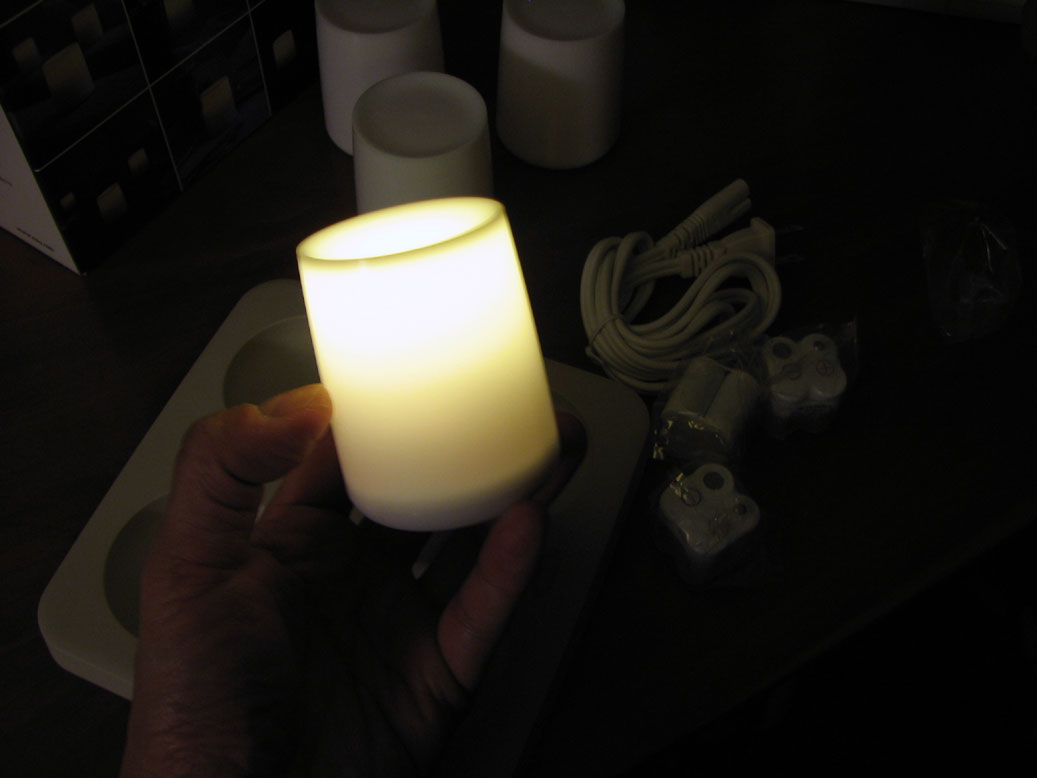
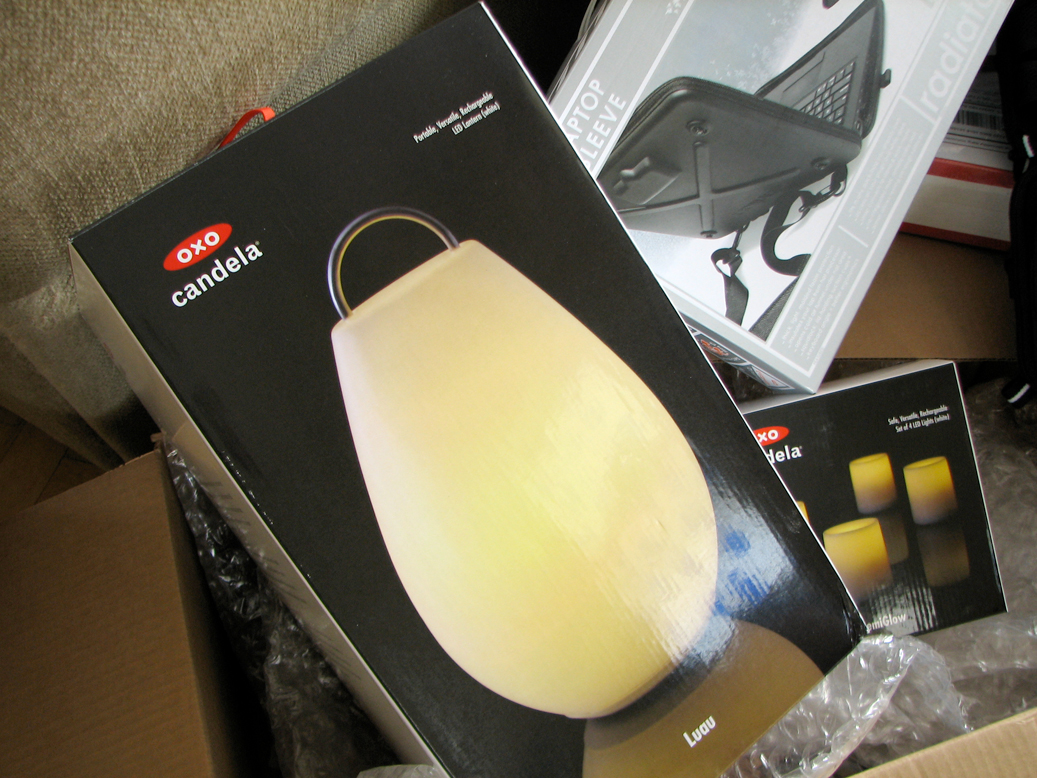
Judging from the emails, many of you are just as interested in the OXO Luau as with the DemiGlow. We were going to post the Luau's FirstLook on Monday, but thought we would post it this weekend since there were so many questions.
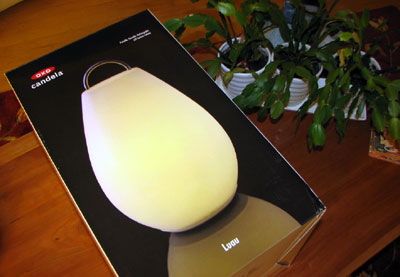
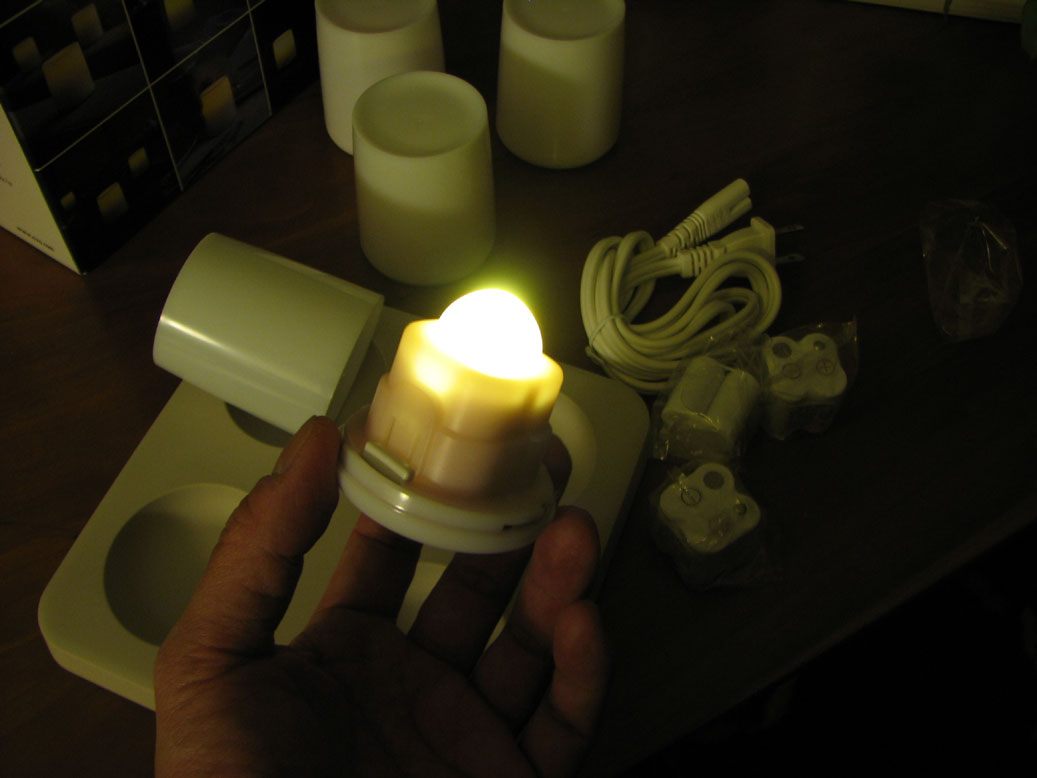
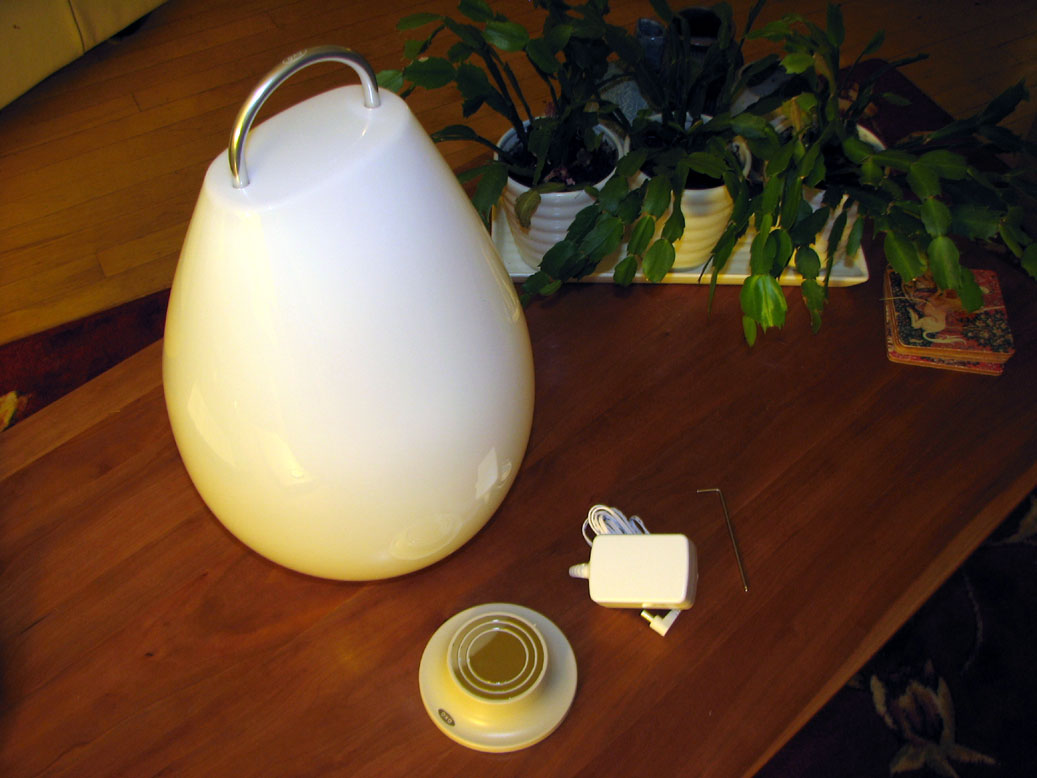
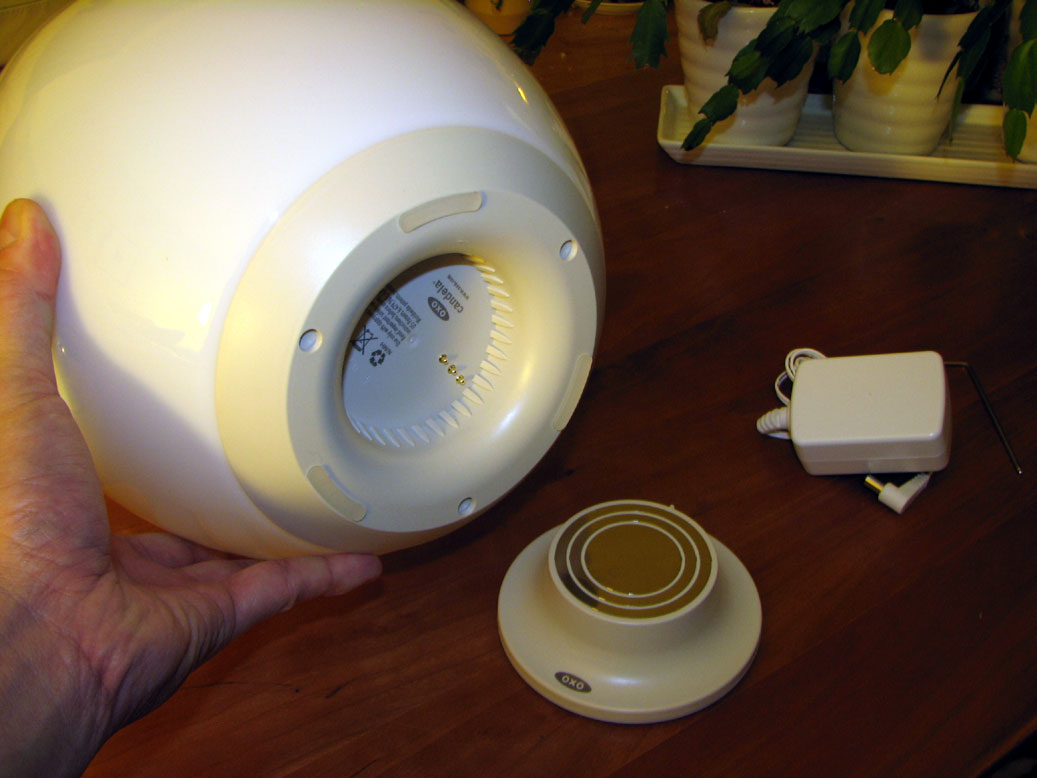
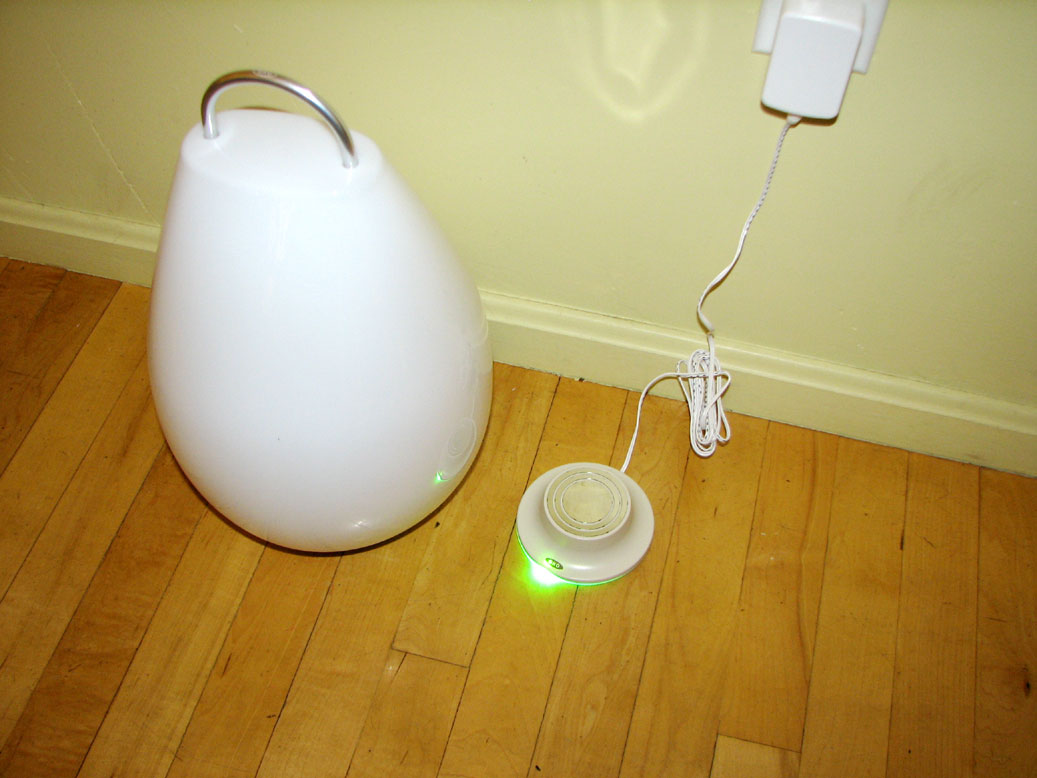
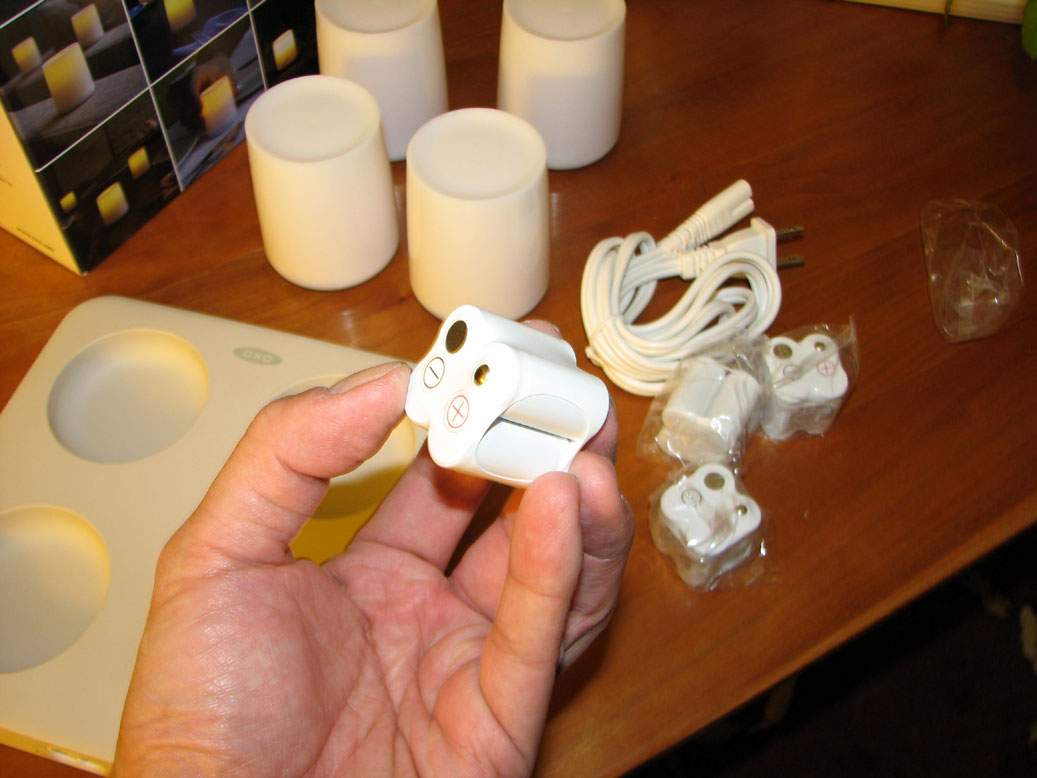
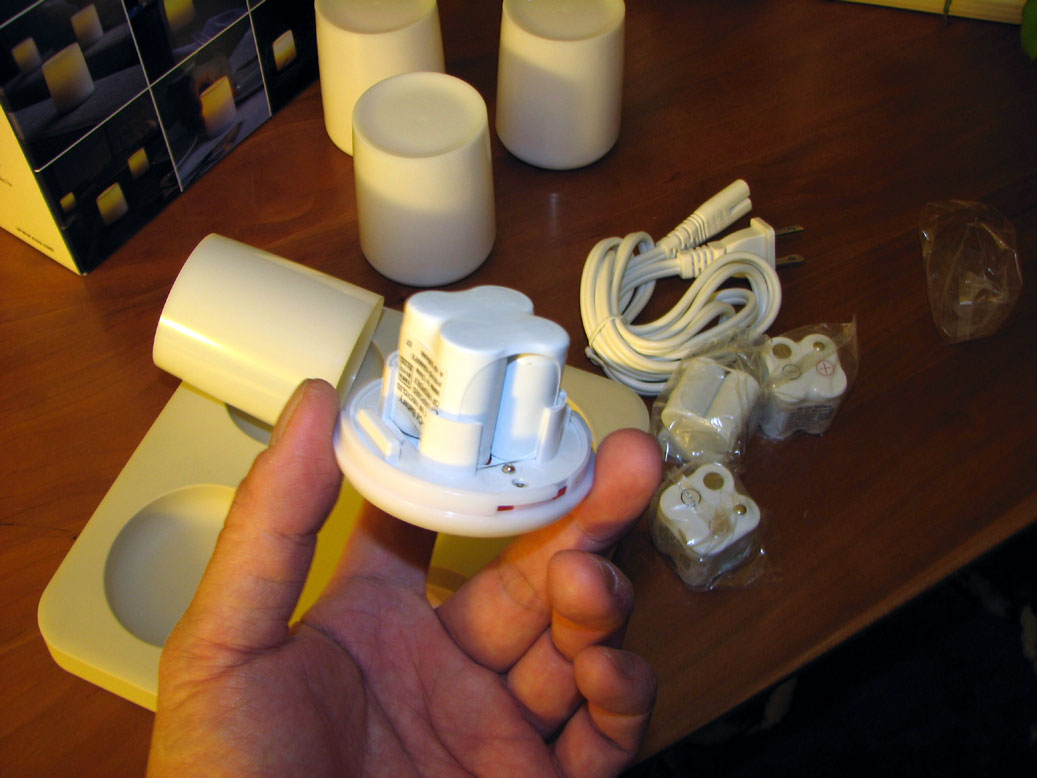
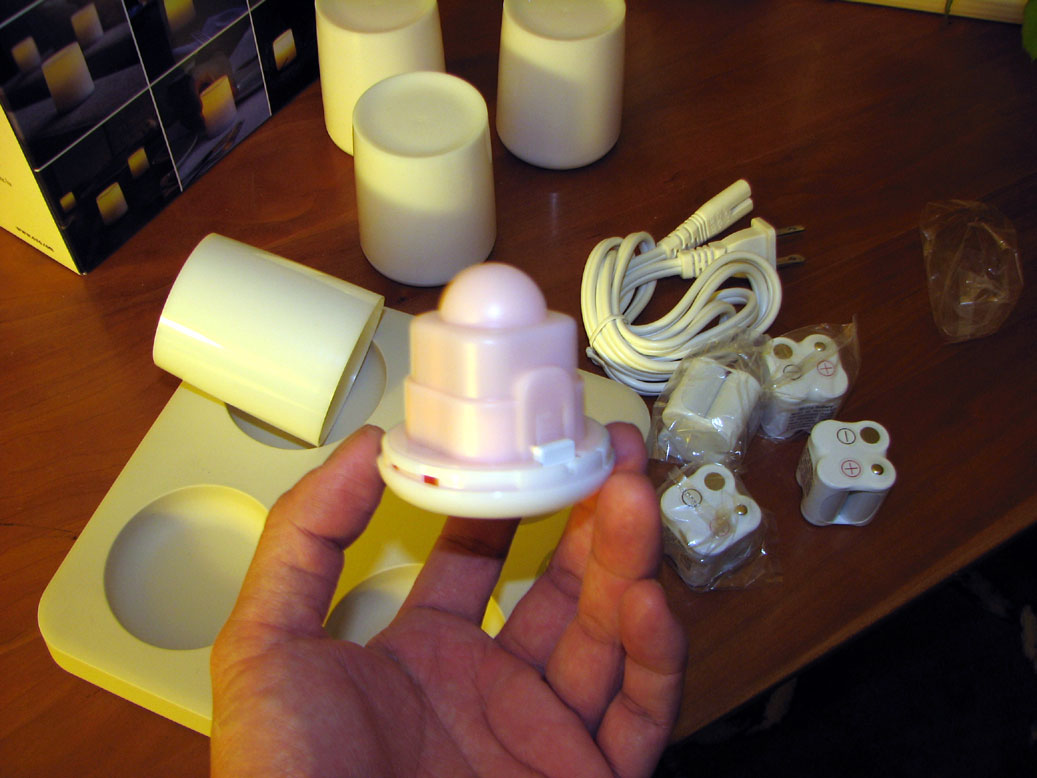
The Luau rechargeable LED lantern package has three pieces: a lamp, a circular charger, and an AC wall adapter. A dimmer is cleverly integrated into the bottom of the lamp. The brightness of the lamp may be controlled by rotating the entire base.
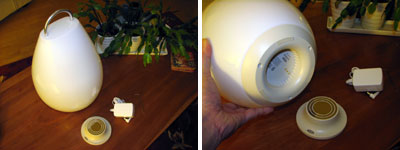
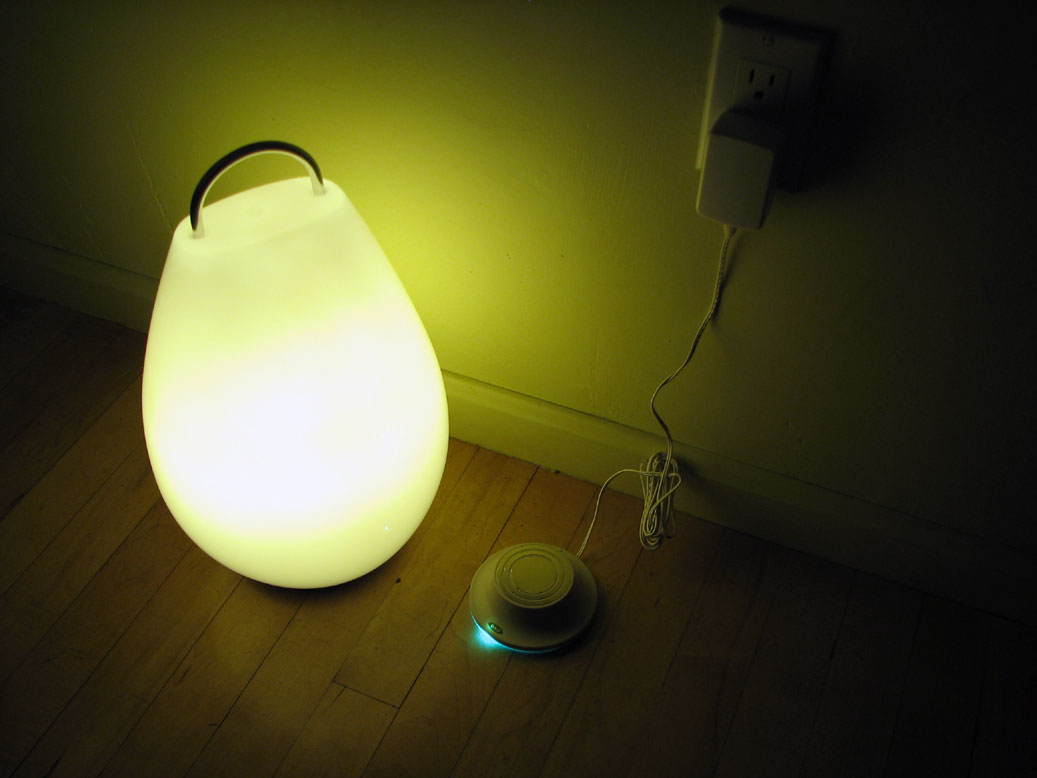
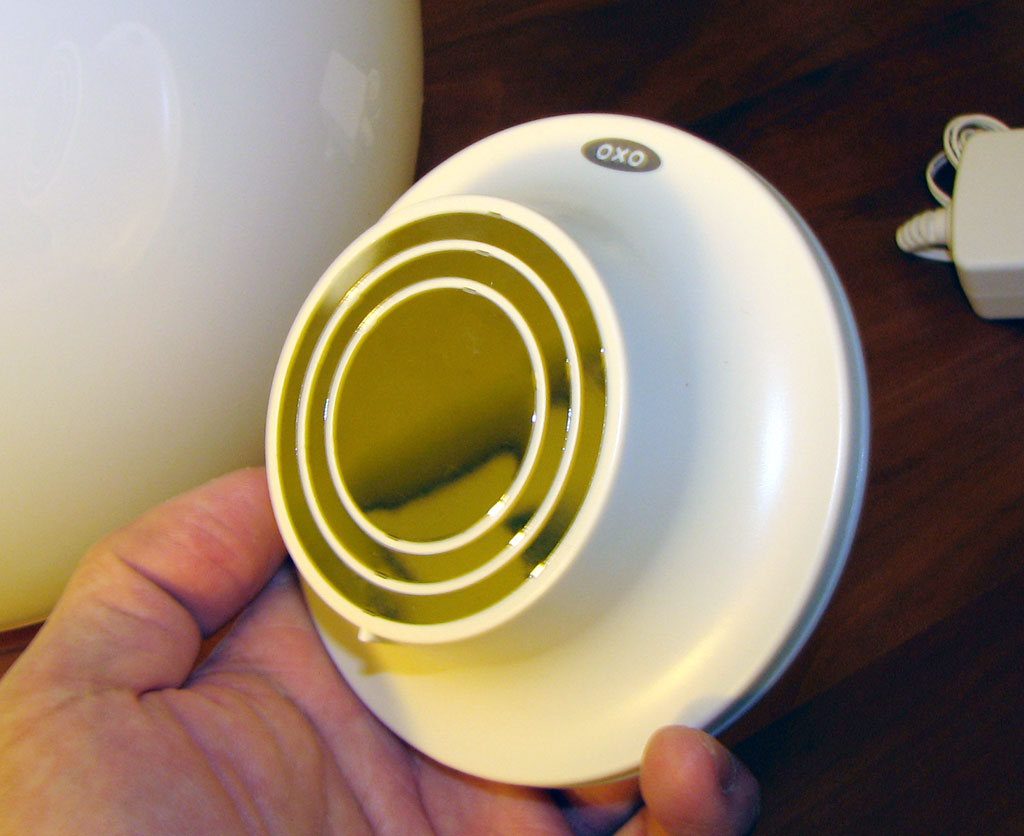
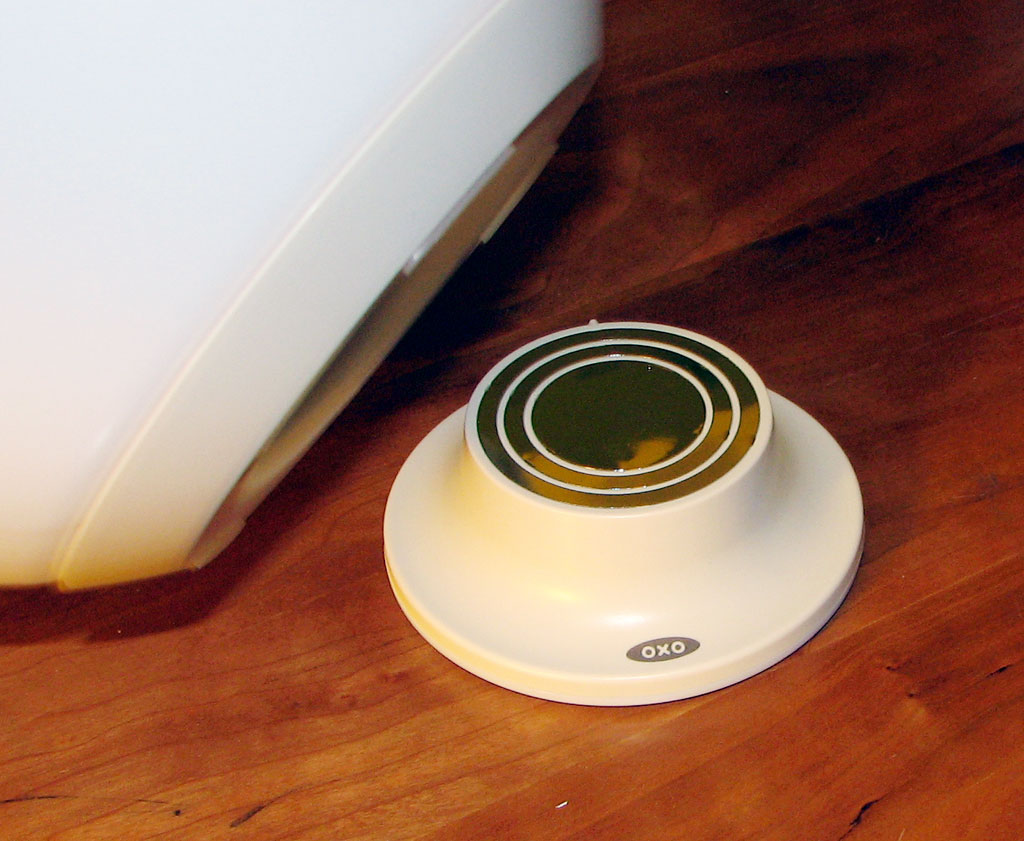
The shape of the Luau's charger is circular. This design ensures the proper placement of the lamp on the charger and eliminates the need to orient the contacts. The bottom of the charger has a channel to allow the wire to fit into the base so everything lays flat on the floor or table.
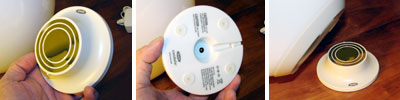
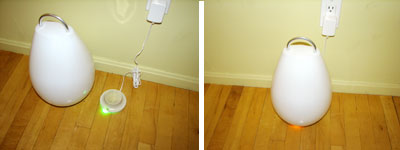
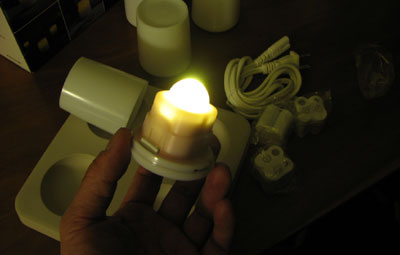
The charging base glows green when the lamp is removed and orange when charging. Like all Candela lamps, if charged, the unit automatically turns on when removed from the charging base.
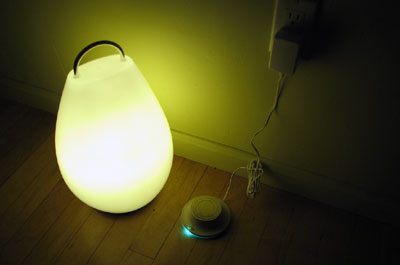
We really like the execution of this Luau rechargeable LED lantern. It is great looking, surprisingly light, comfortable to hold, and is rated to last for about 6 to 10 hours on a charge. This Luau will be a nice lighting companion whether for sitting out on the patio or on walks along the beach at dusk. Folks here will have more comments once they have taken it out for a stroll. - Wan Chi Lau (permalink)
|
|
Feb 15,2008 (FlameFreeFriday) |
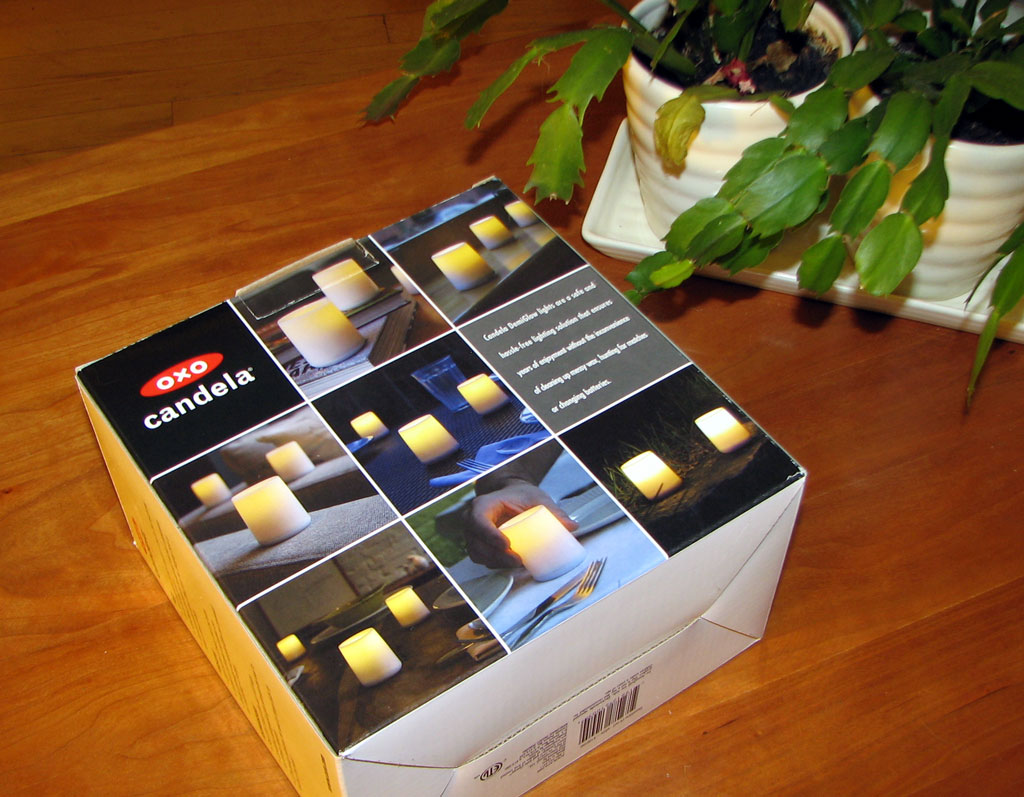
A week or so ago we mentioned that Candela has been sold by Vessel to OXO. OXO has extended the line with the introduction of a few new lamps based on the Candela technology.
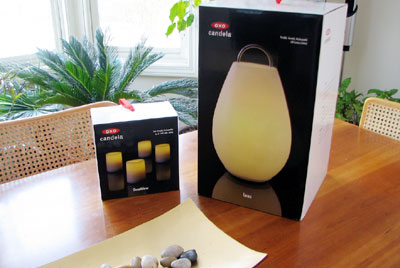
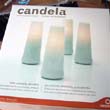
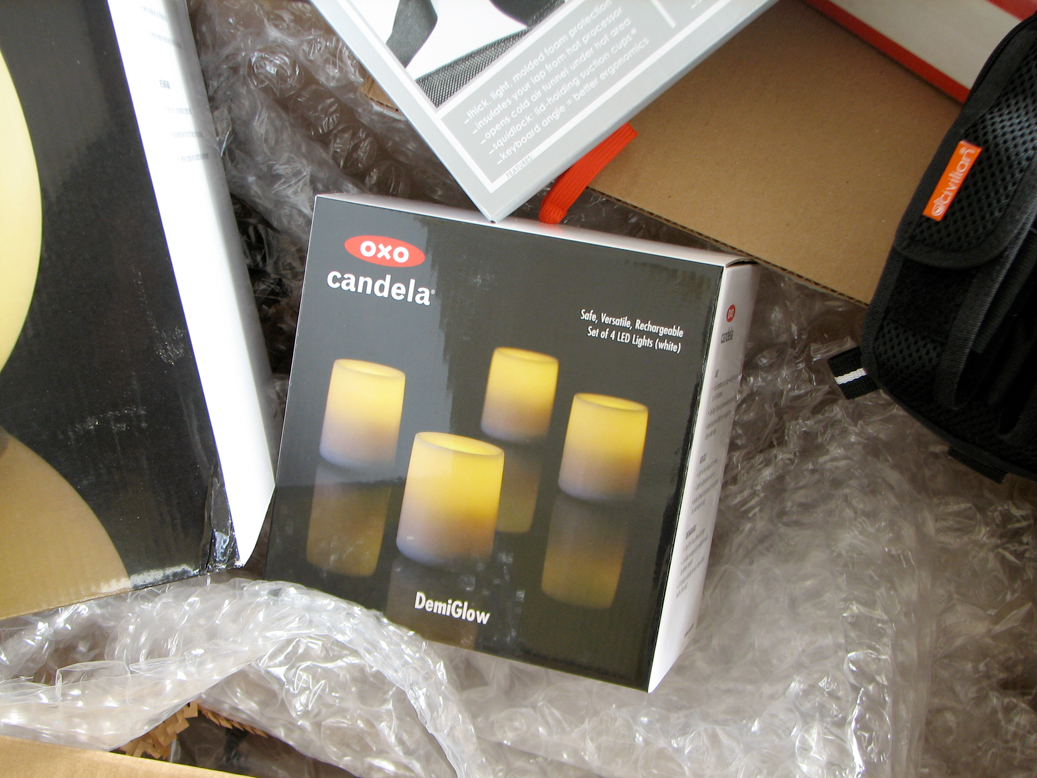
Today we will be taking a FirstLook at the DemiGlow. The DemiGlow is based on the same recharging mechanism as the original Candela, but updated with an energy efficient LED instead of an incandescent bulb.
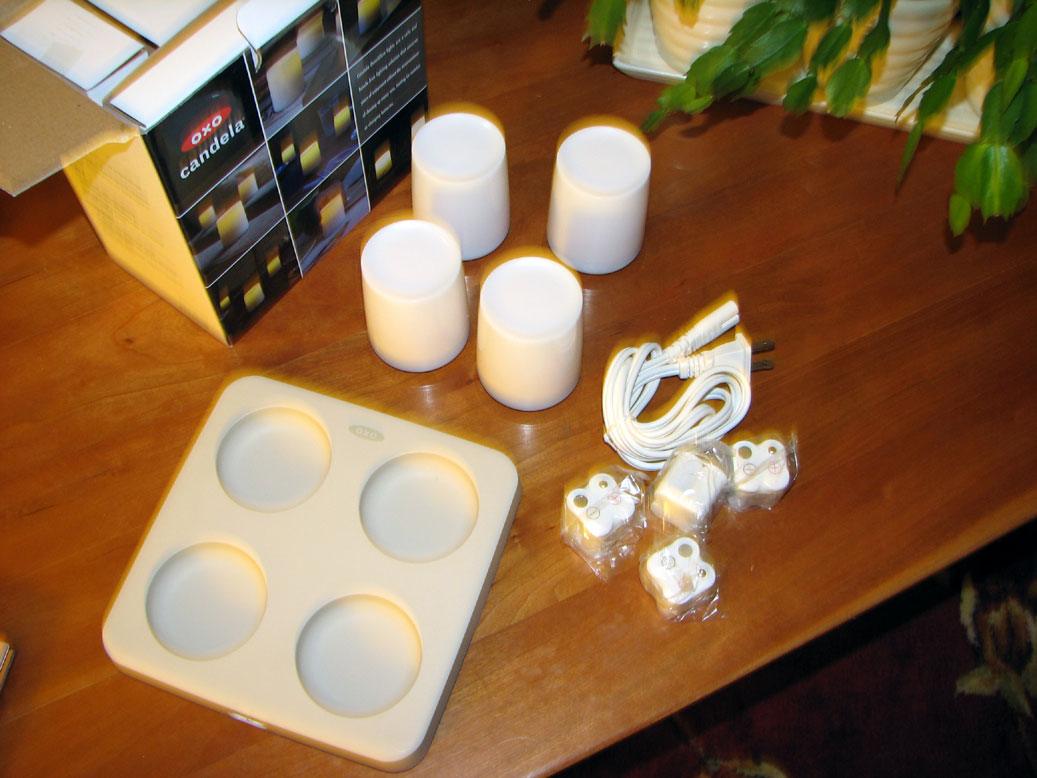
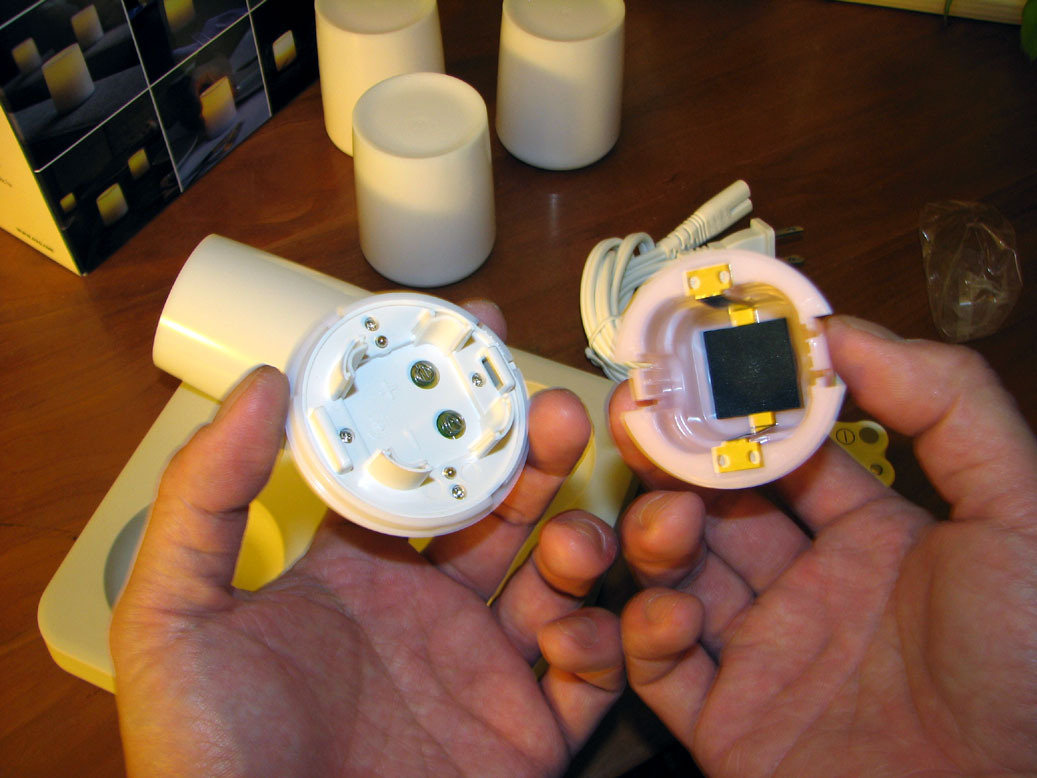
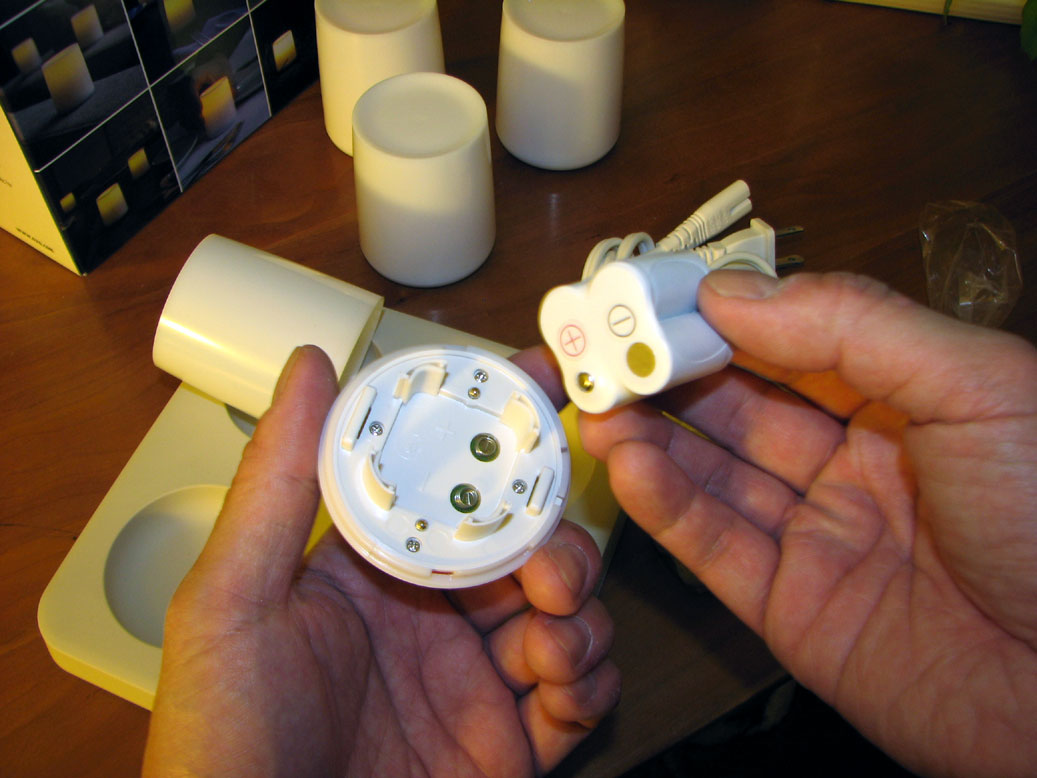
These smaller DemiGlow lamps are sized to be used in place of the normal votive candles. The obvious advantage with the Candela lamp is the safety aspects of a contactless charger and the flameless light. The use of an LED now makes the DemiGlow more reliable. A separate battery pack will allow the unit to be easily serviced when it needs to be replaced.
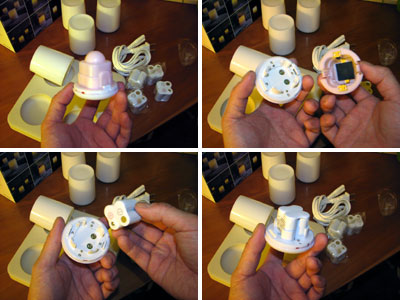
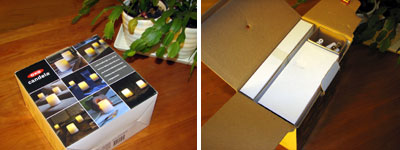
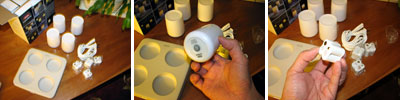
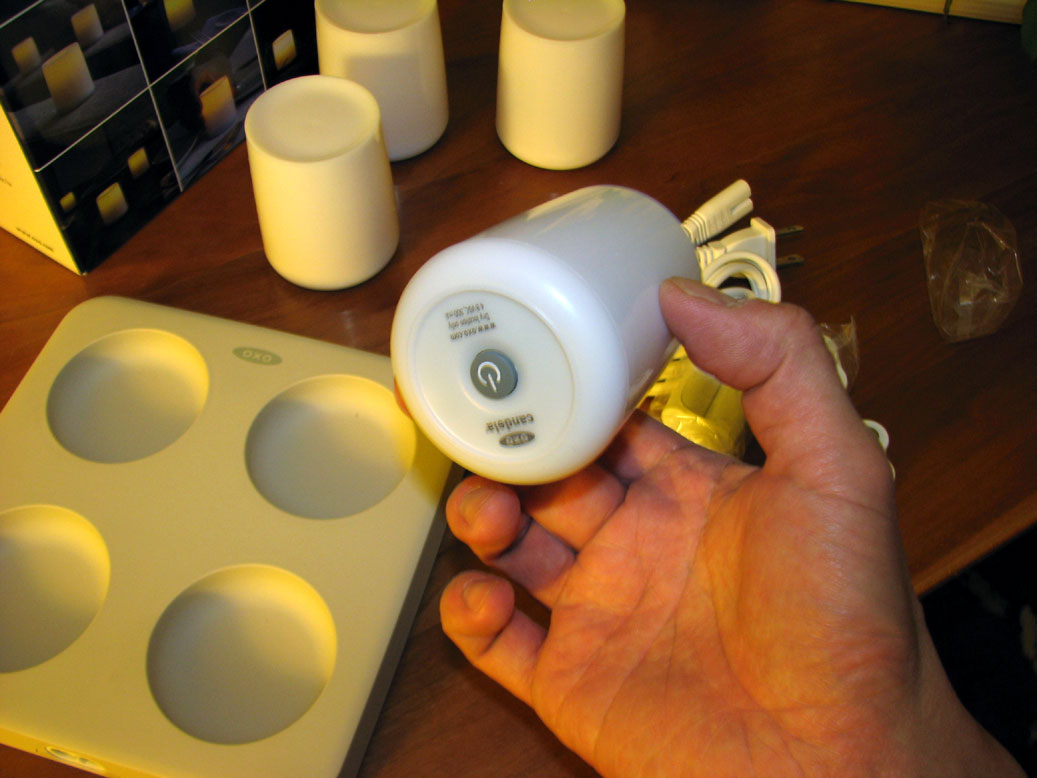
The battery packs were shipped separate from the lamps, but ssembly was very simple. The lamp module is released from the shade with a twist of the base. The +/- orientation is clearly marked on the battery and the holder.
The batteries all have a small charge in them. This was useful for testing whether the lamp and battery were properly assembled. The recommendation is to let the battery fully discharge then recharge it overnight.
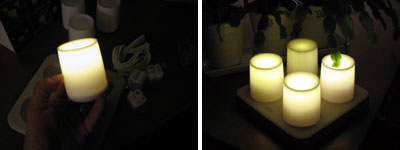
In the photo, one of the unit already appears dimmer than the others. We'll let them all discharge fully overnight before the first charge. - Wan Chi Lau (permalink)
|
|
|
|
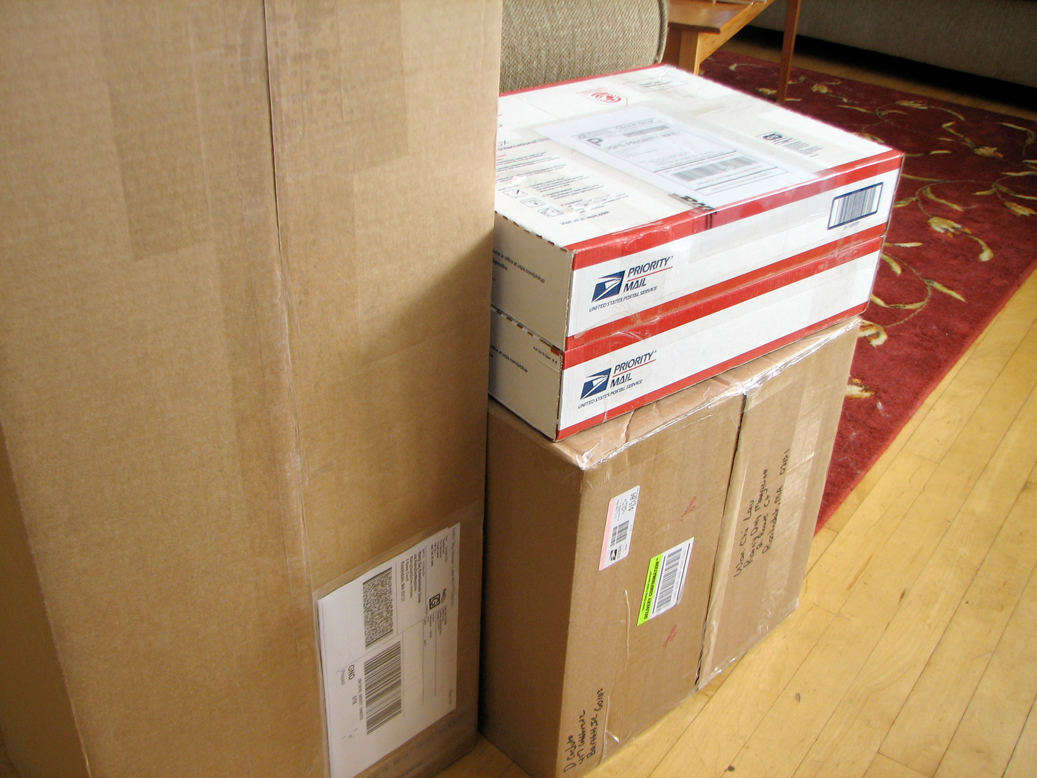
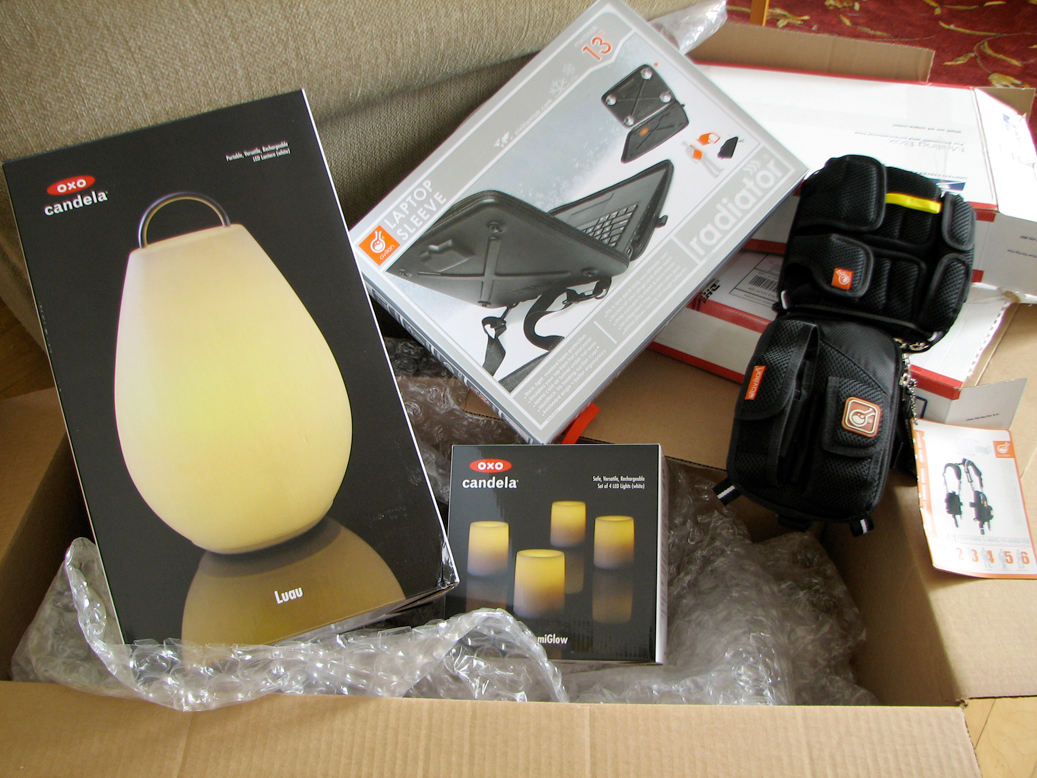
Another week has passed, but the post-CES stream of gear coming into the office continues to give the delivery guys a rigorous workout. Quite a few interesting things showed up on the loading dock the last few days.
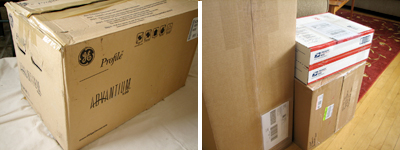
The largest item is the GE Advantium Microwave Convection Oven. It is the next of the DIY projects for the RainyDayKitchen, a series we started at the beginning of 2008.
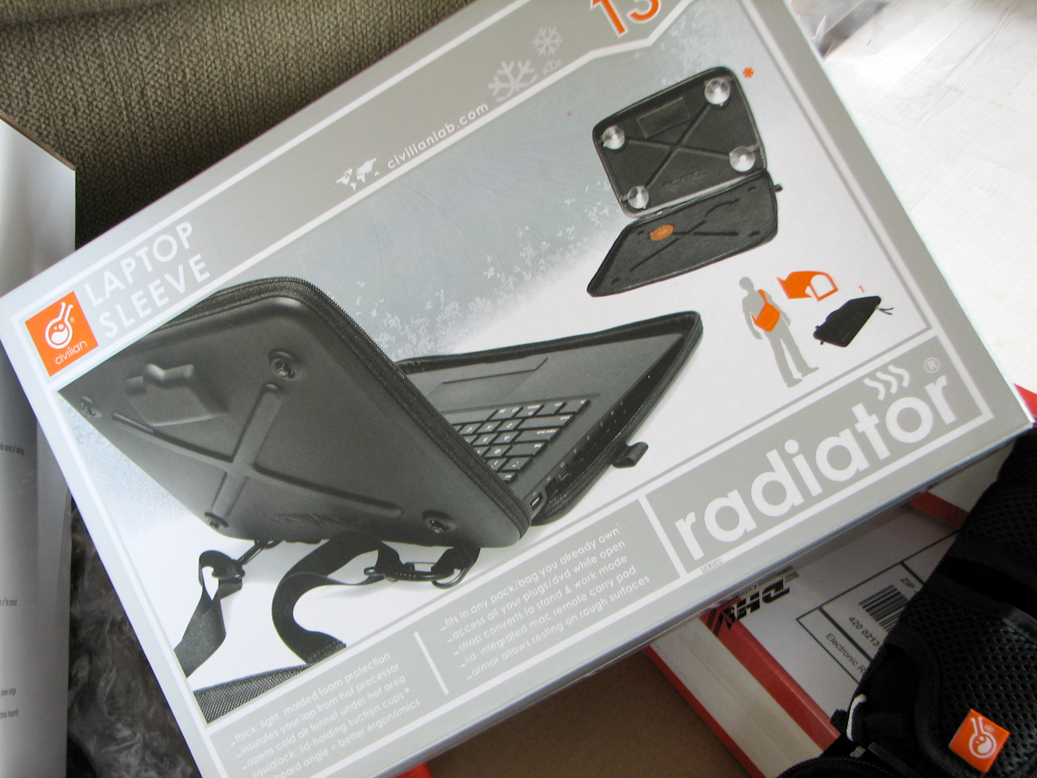
The other items which showed up were equally innovative. We came across a company called Civilian Lab. They make a line of unique gear harness and case for active folks. We'll have an indepth look at both in the upcoming months.

We also had a most interesting conversation with OXO, the kitchen utensils people. We learned that they have since acquired the Candela line and have put their manufacturing muscles behind this fantastic product. We will be looking at some of the new Candela offerings (Luau, DemiGlow) later in February.
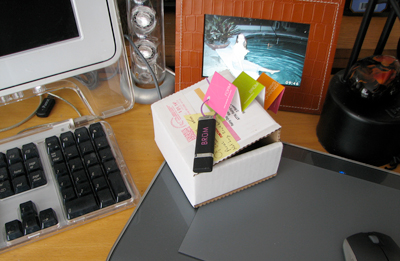
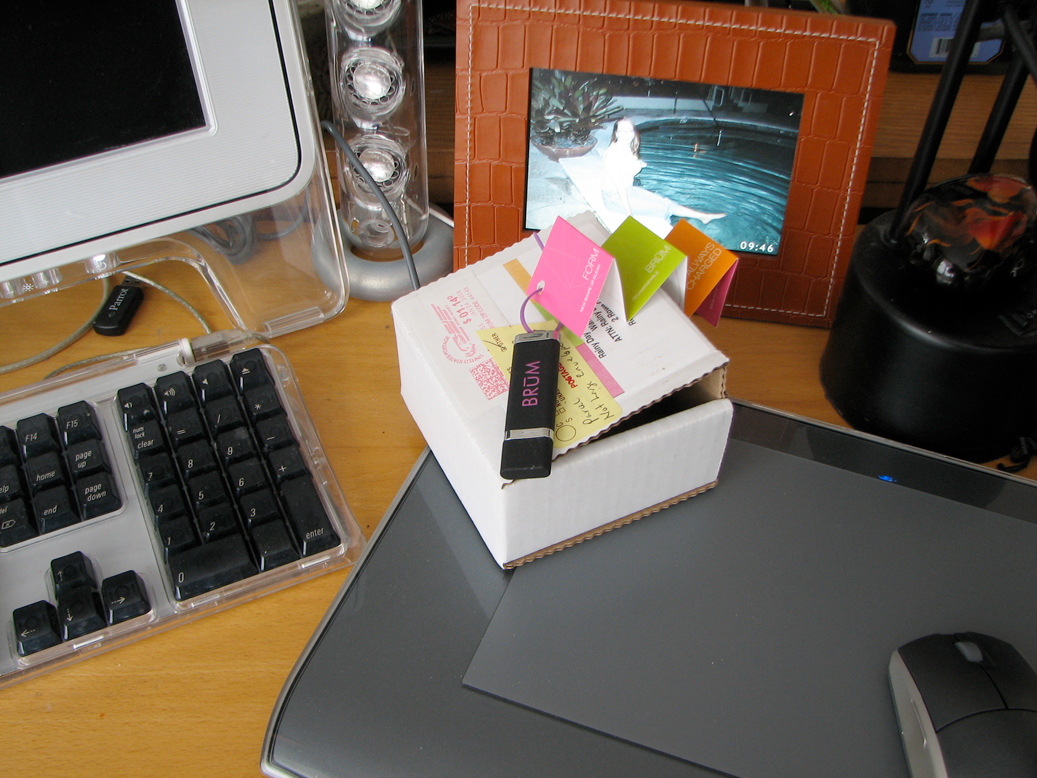
Some RainyDayMagazine readers may find this next little bit of information more useful than others :-) One trend we appreciate very much is the shift to using flash drives for sending out PR/Marketing materials to editors. Not only is the information in a much more usable form, but once we no longer need it, we still have a perfectly useful flash drive and no paper to throw out or recycle! Leave it to the Dirt Devil folks who make stuff to help us all clean up to think of ways to give us less stuff to clean up! - Wan Chi Lau (permalink)
|
|
|
The crew in the RainyDayKitchen has tested their share of cleaning tools and gadgets. When we asked them to check out the new Dirt Devil line they were thinking it would be more of the same. However, when they saw the new Dirt Devil line, volunteers were suddenly a lot easier to find.
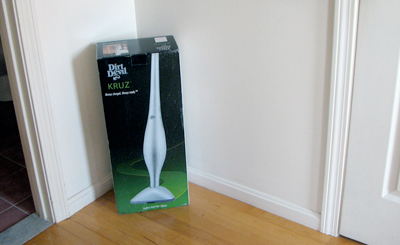
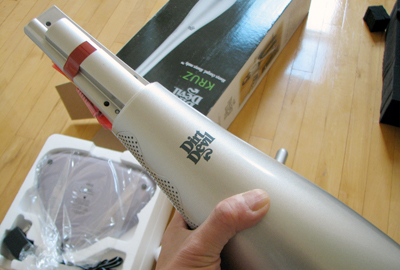
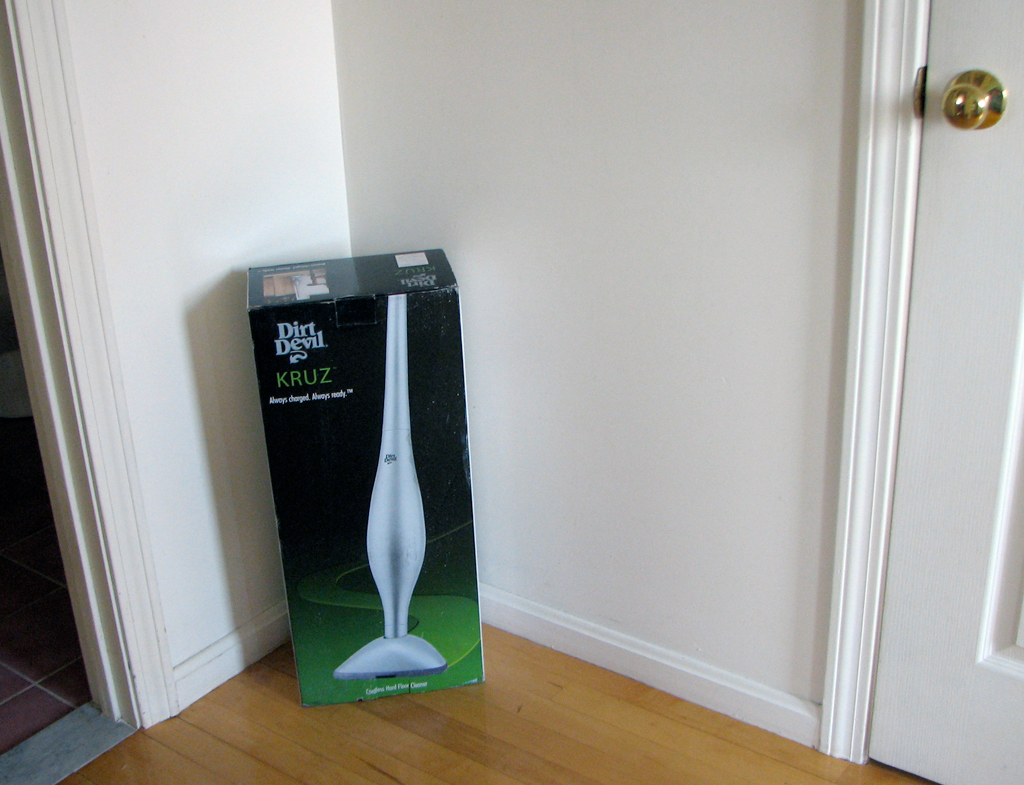
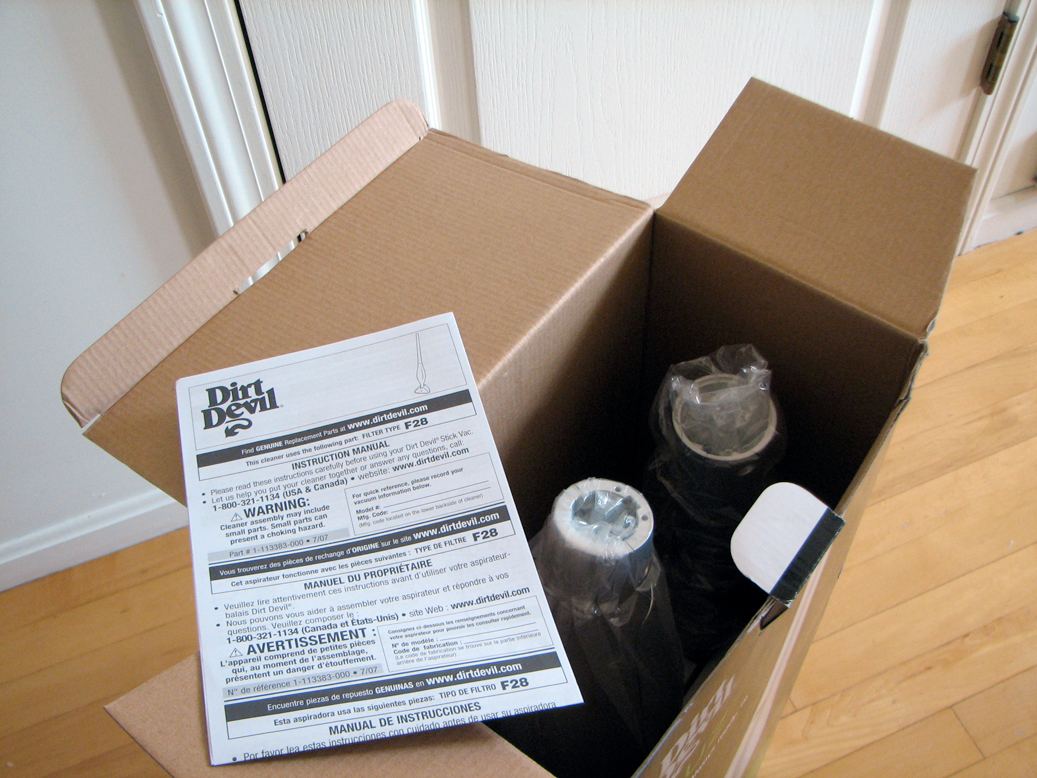
First up is the Dirt Devil KRUZ. The KRUZ is a cross between a dust buster and an upright vacuum. It is designed for chasing down dust bunnies and quick crumb cleanups.
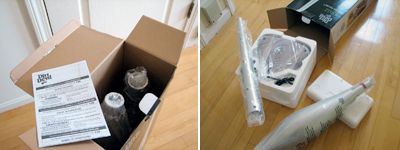
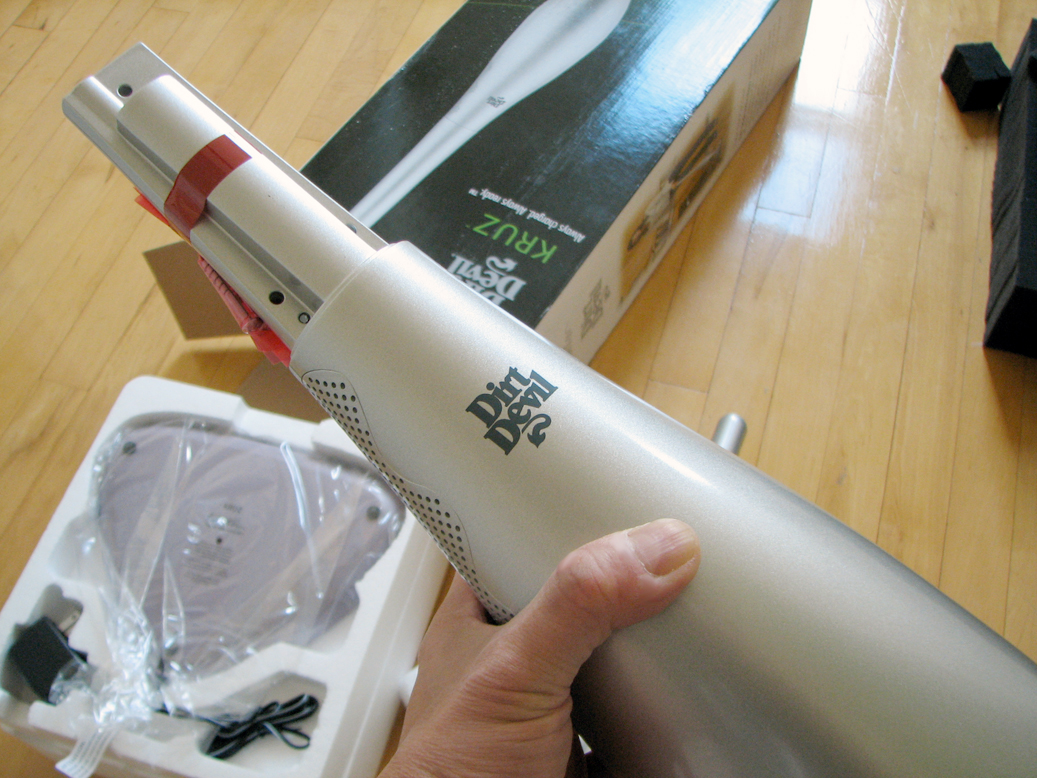
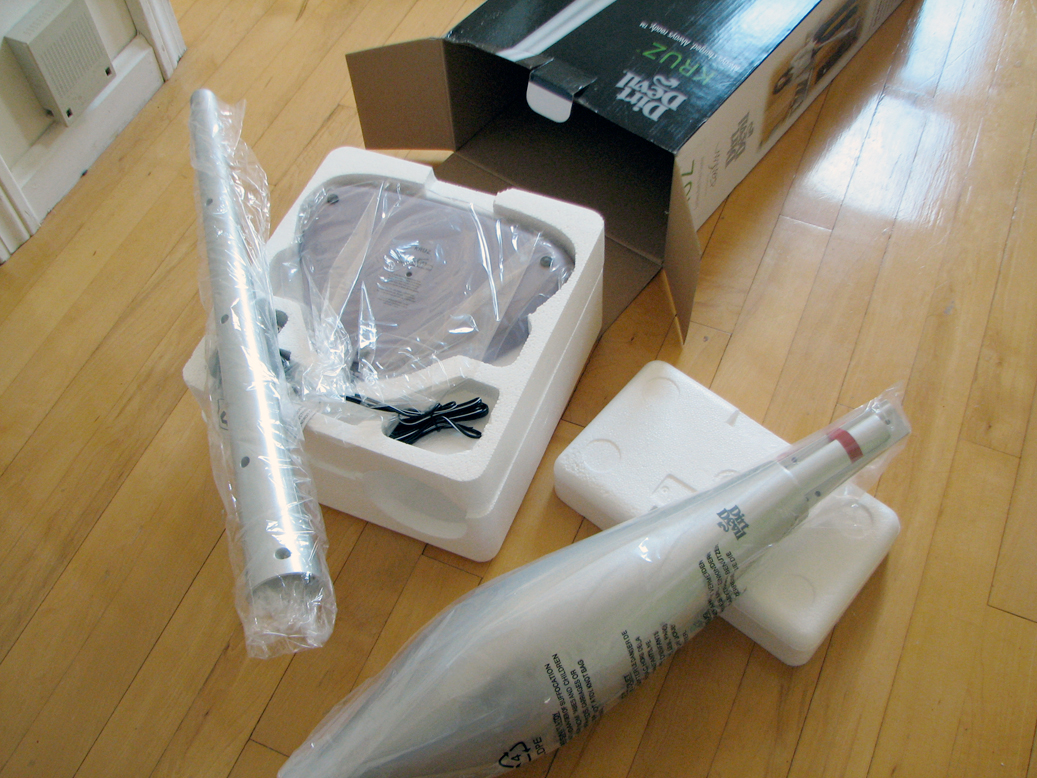
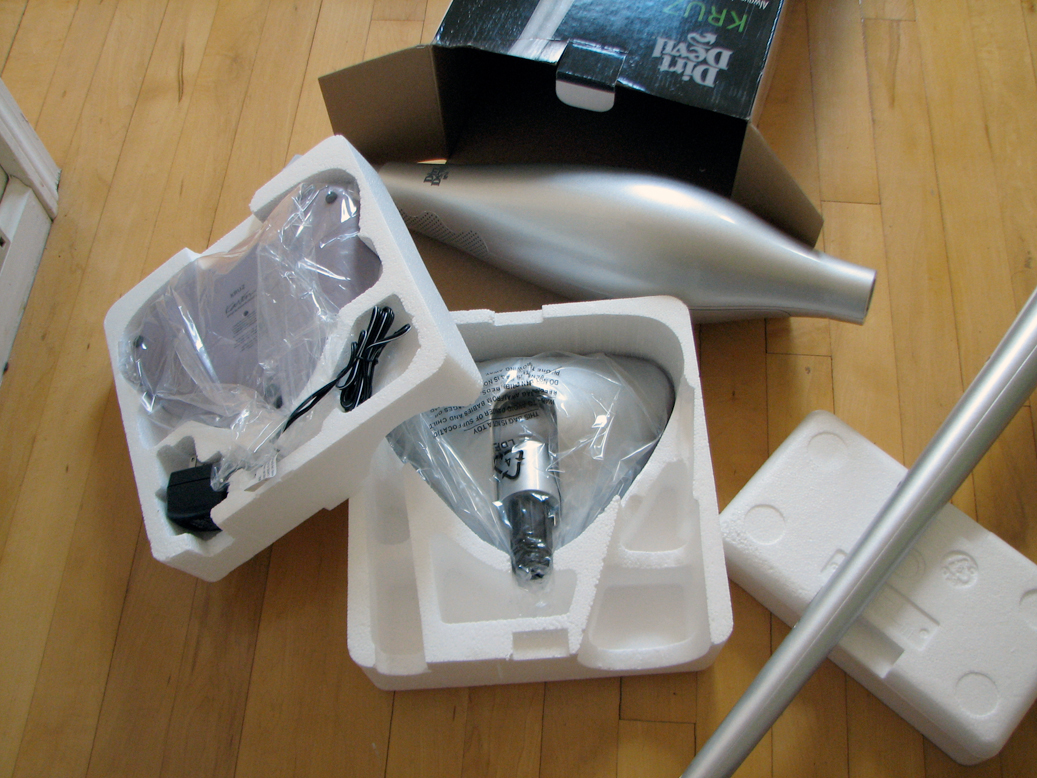
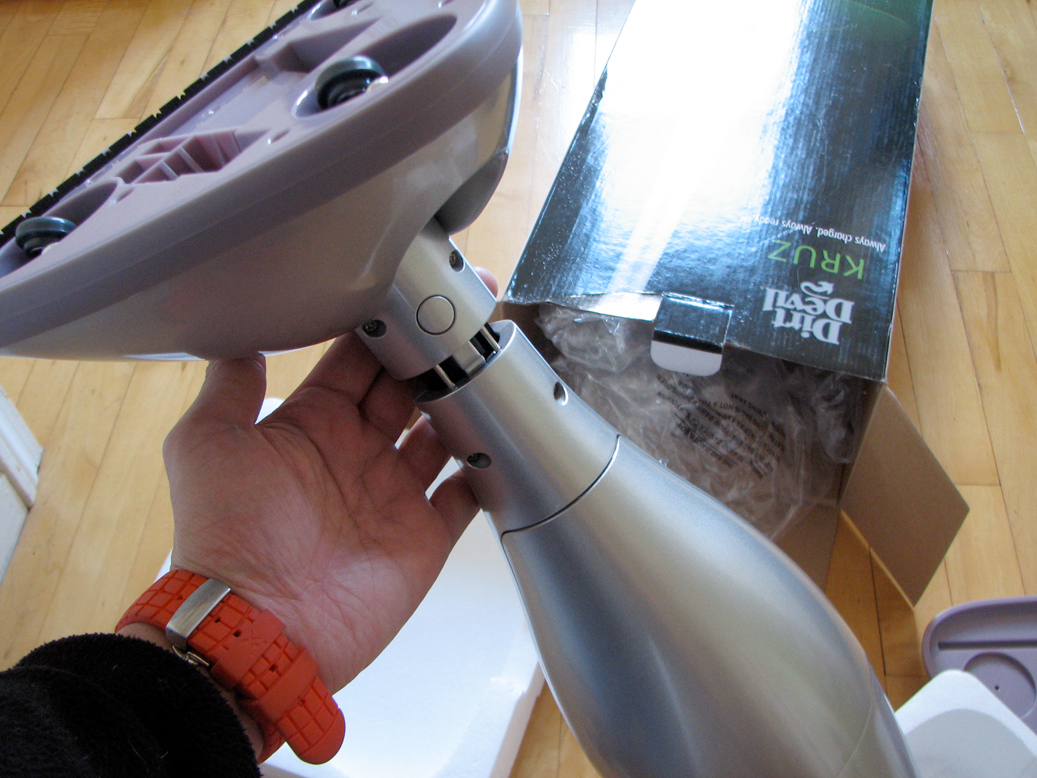
The KRUZ comes partially assembled. There are three main pieces (handle, motor, base) which fits together to form the unit. The connectors are all designed to align and mate uniquely. Most will find it simple to assemble the pieces.
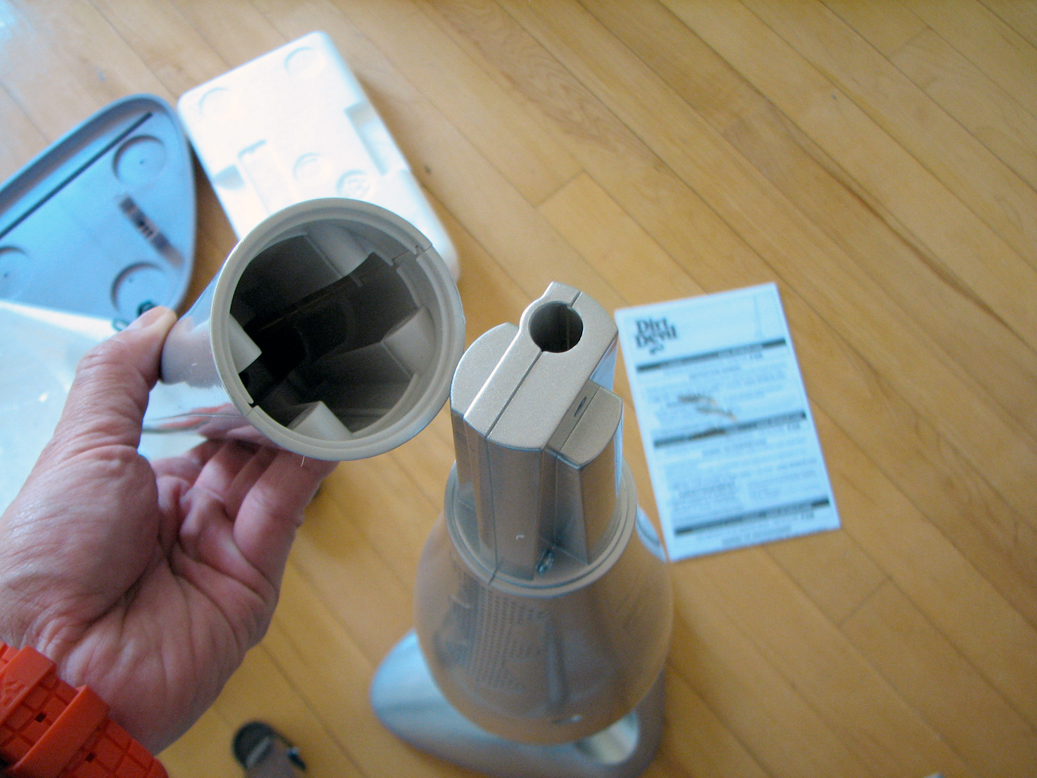
We probably should read the directions, but since we rarely do...we saw no reason to start now :-) The assembly steps seemed logical enough: attach the handle and base to the motor. You will need a Philips screwdriver.
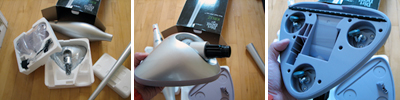
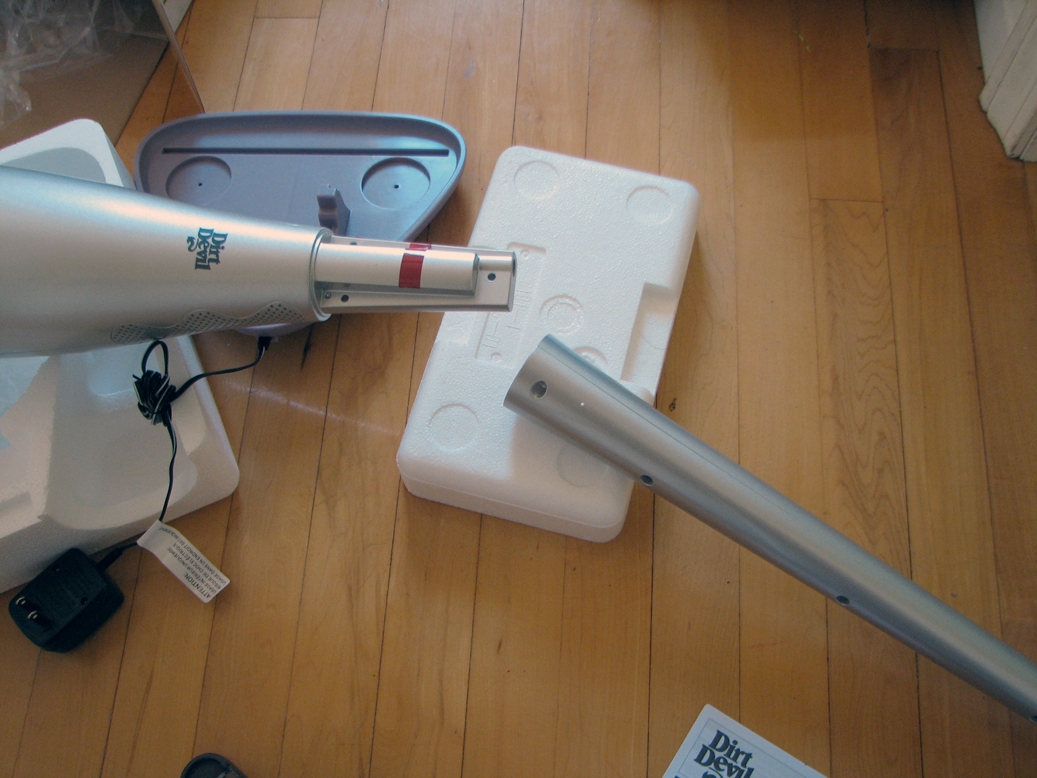
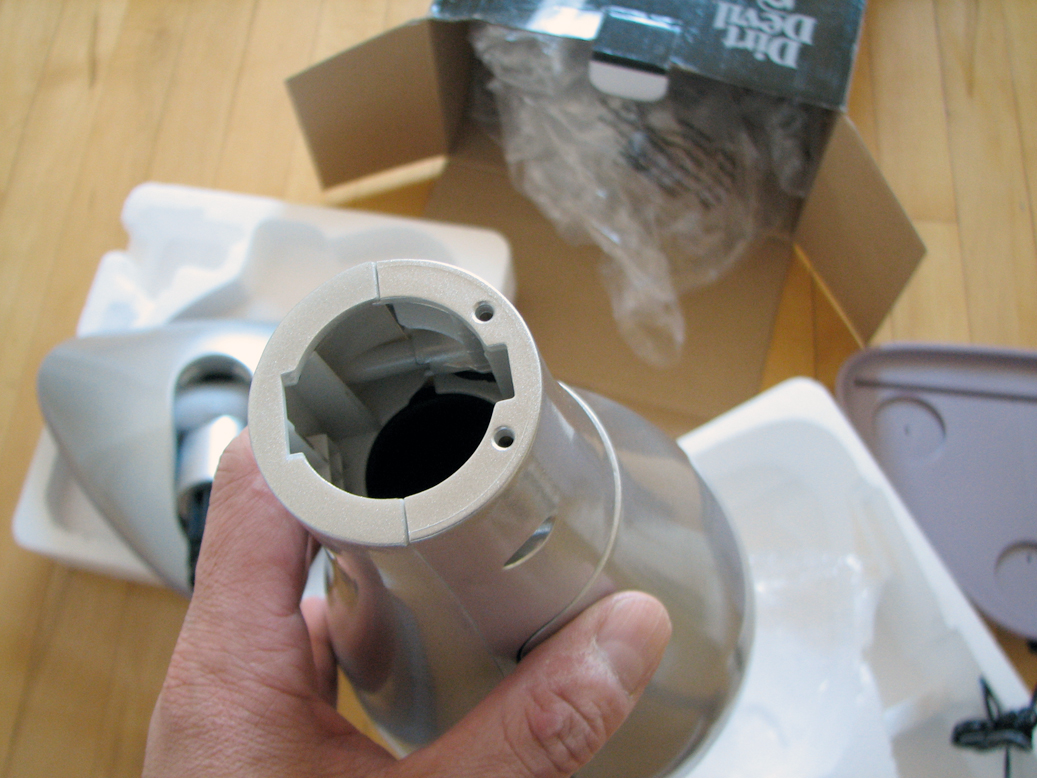
The base of the unit plugs into the motor via a central tube. On the side of the tube are two metal pins. There are matching holes at the bottom of th motor unit. The two pieces snaps and locks together.
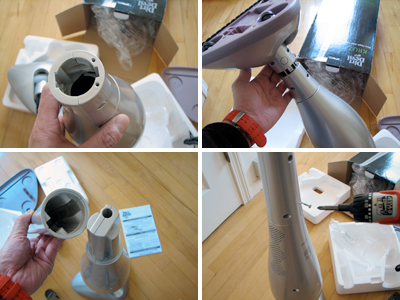
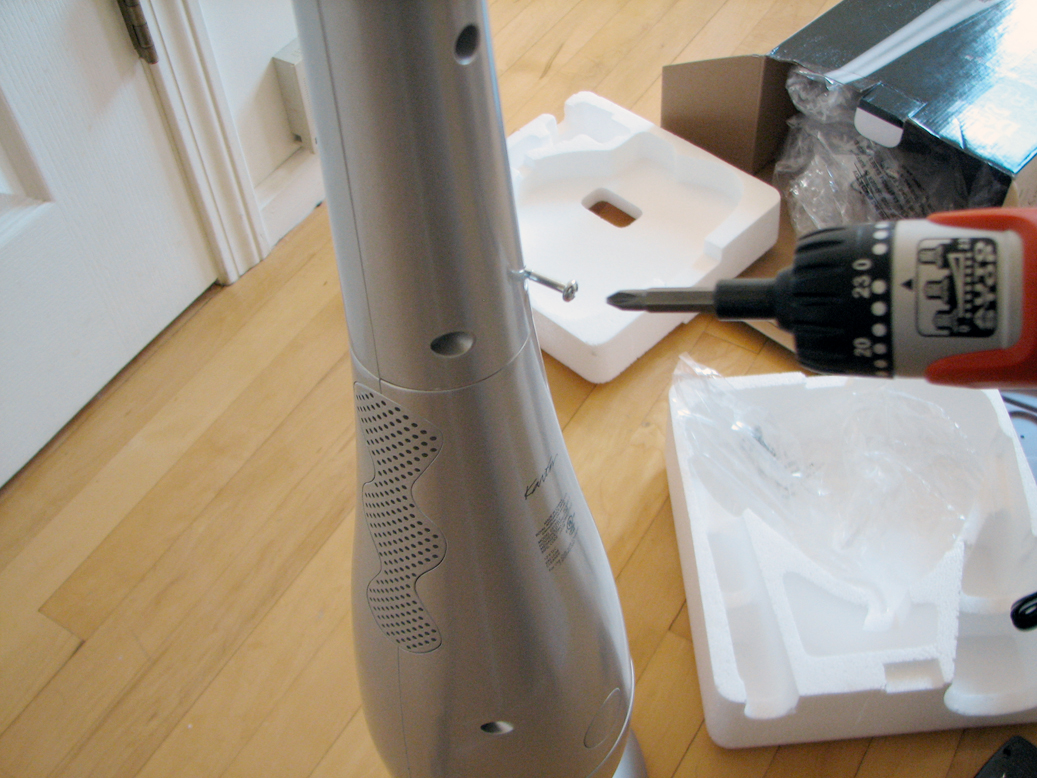
The handle attaches to the upper part of the motor by sliding onto it. It is held in placed with three screws. Again no force is needed to mate the two pieces. If it does not fit, you have the orientation wrong. The entire assembly process took us about 15 minutes.

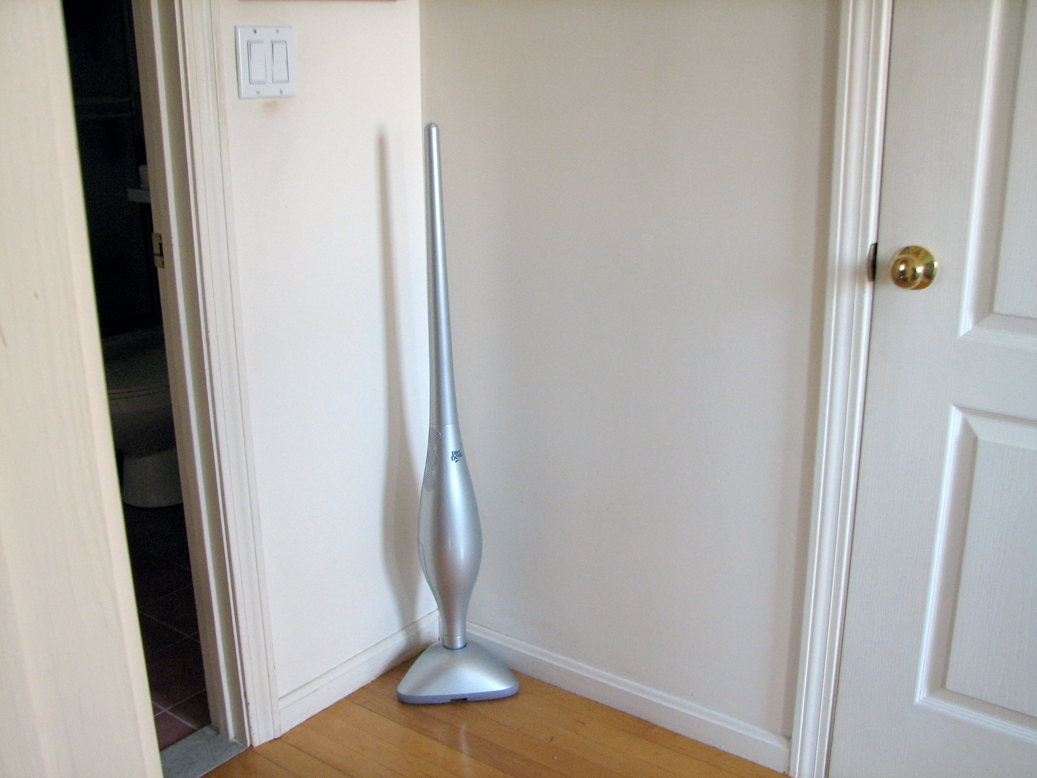
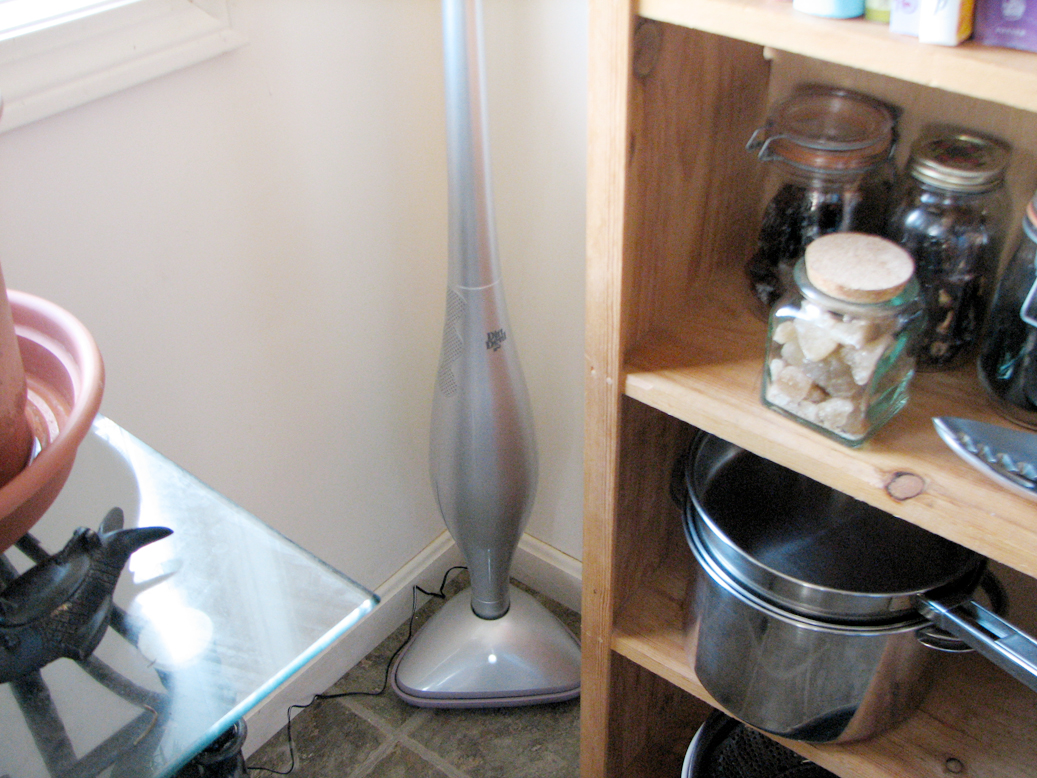
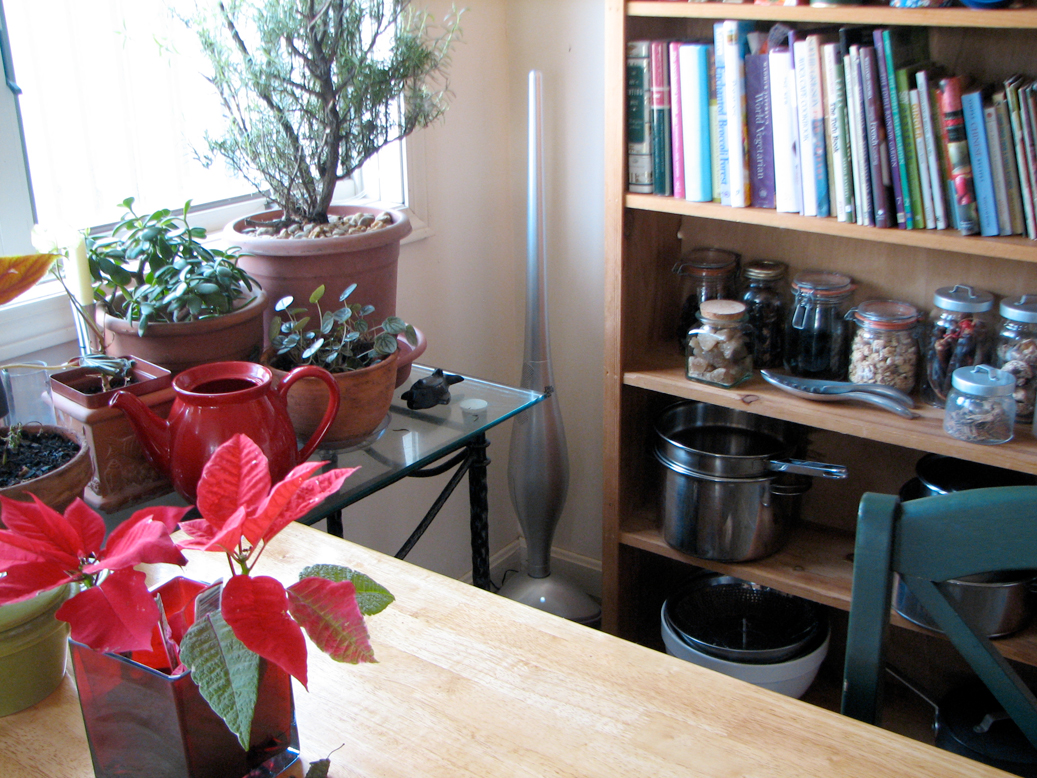
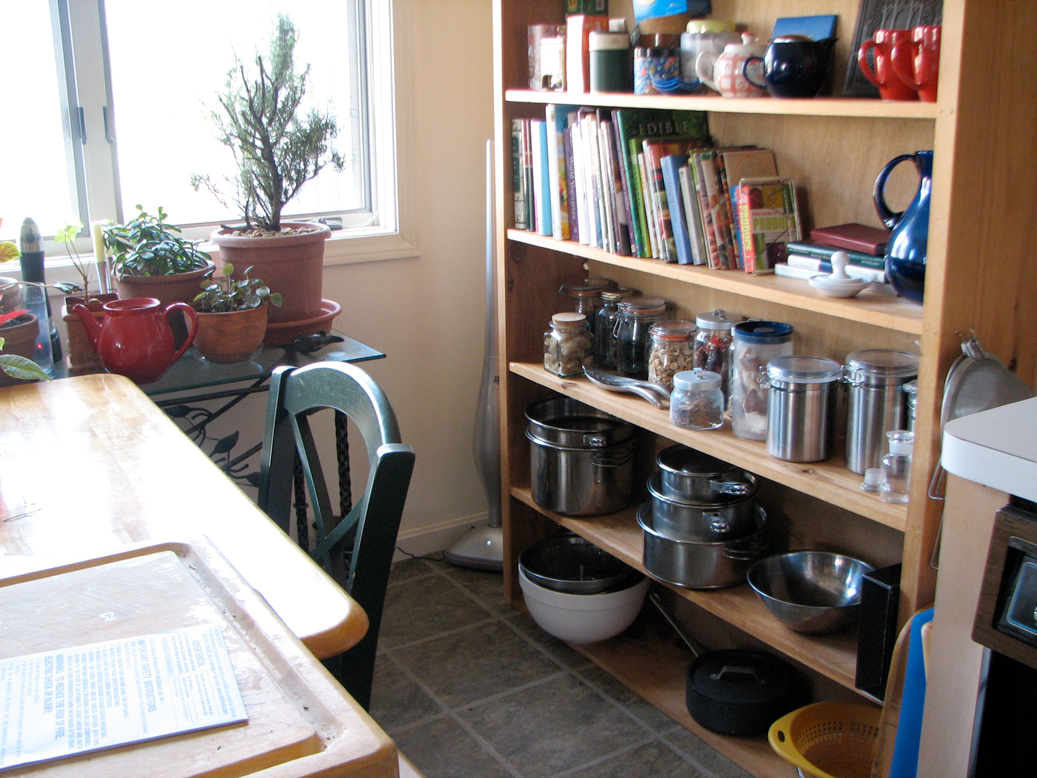
When fully assembled, the KRUZ stands about 4' tall. The switch is at the top of the handle. The unit will fit neatly in a corner. We will let it charge overnight before taking it on its FirstUse run.

The KRUZ, with its tiny footprint, can be stored just about anywhere there is a free square foot of space. There is a perfect spot in the kitchen in the corner next to the bookcase. It will be readily accessible, but yet mostly out of sight. However, the KRUZ is so good looking that you may not care even if it is out in the middle of the room! - Wan Chi Lau (permalink)
|
|
|
|
Some nice black pepper, akin to what you might find on a sunny side up egg, is no stranger to those with a hankering for beef jerky. But with New England in the grip of a record cold wave we wanted something extra to stoke the home fires. It just so happens Rainy Day had some Bull Whip Ring of Fire, Red Hot Pepper Beef Jerky on hand.
Vacuum packed to retain it’s punch this jerky is something of an unknown quantity. The label assures us it’s not only made from solid cuts of beef but that it is has a heat equivalent an order of magnitude or so beyond the norm. So would that be at just north of Tobasco Peppers (about 40,000 Scofield Units of heat) or at the top end of 16 million Scofield units where the essence of Capsaicin lives? . In these situations it’s good to be King and even better to be Editor because you can bring in one of your food testers to determine if there is life after ingestion. We had just the fellow. Recently returned from South Africa where he had sampled Biltong, a mild but flavorful variety of dried meat he was looking for something to ward off the chill.
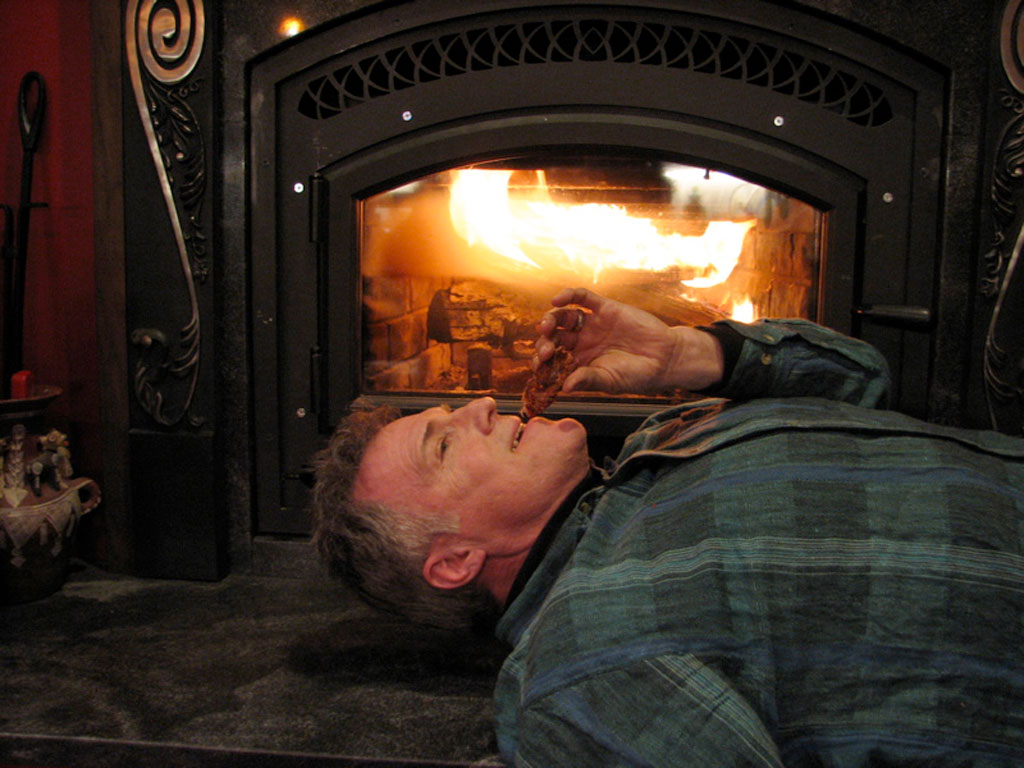
You can see the results in the photo essay below. The upshot is while not for the faint of heart Ring of Fire has not only the heat but the requisite flavor to carry it off.

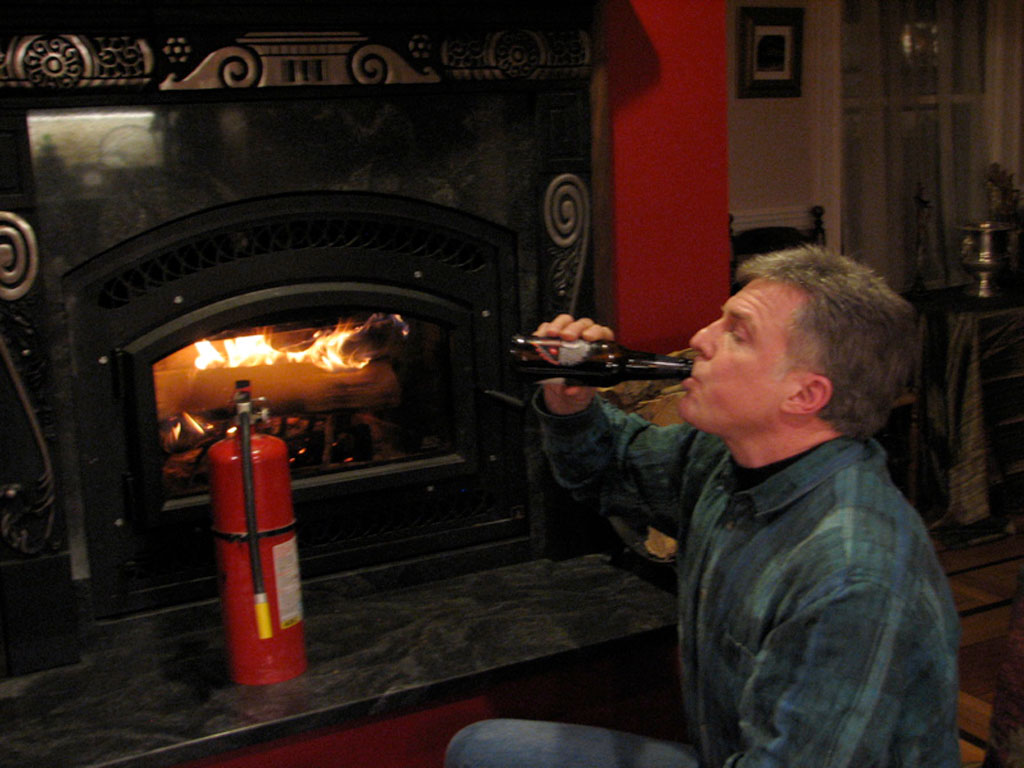
Bull Whip’s Ring of Fire beef jerky appears to be the perfect antidote for a cold winter’s night in New England. Unsure of what we’re getting into we have one of Magic Hat Brewery’s special winter beers at the ready, just in case I go the route of the Fab Four’s Human Torch.

Like any fine comestible the bouquet, or nose as the epicures say, of an aged jerky should be savoured prior to that first bite. Without a doubt there is some heat in there. I decide the first bite is best taken in the Roman reclining position. “Ring of fire” is an apt name for this jerky. The heat is the perfect compliment to round out the rosy glow of a log on the hearth and the rich beef flavor.
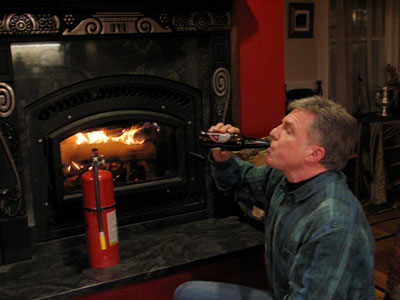
In case my hair burst into flame the fire extinguisher was at the ready but a cool beer chaser turns out to be just the ticket for this hearty repast. The next time you have to shovel the sidewalk and scrape the car’s windshield bring some of this along to warm you from the inside out. Taking a note from our editor’s intro we also tried it with some morning eggs instead of bacon. Delicious. - Jay Rogers (permalink)
|
|
|
Dirt Devil became a household brand when they introduced the hand vac back in the 1980s. Years later, the original Dirt Devil design was reissued as the "Classic."

Fast forward to 2007: the entire Dirt Devil line has been revamped by Karim Rashid, with an eye toward both modern forms and innovative functions.

RainyDayMagazine will be reviewing them in our RainyDayKitchen section this year. Some will be featured in this year's Spring Cleaning issue. Others will be used in our Fall Cleanup project. Look for a RainyDayPuzzler at the start of February where you can win something and get a jump on your own Spring Cleaning (hint, hint). - Wan Chi Lau (permalink)
|
|
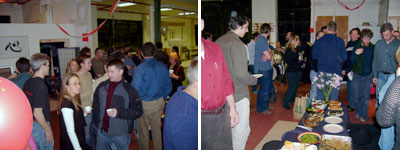
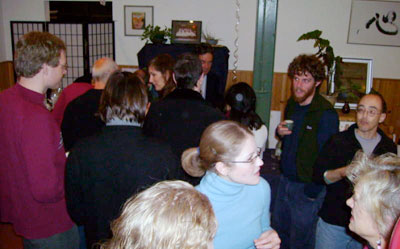
The Sake Tasting Fundraiser at Shobu Aikido of Boston tonight was a LOT of fun. We watched a great Aikido demonstration, tried ALL of the sake, and met TONS of great people.
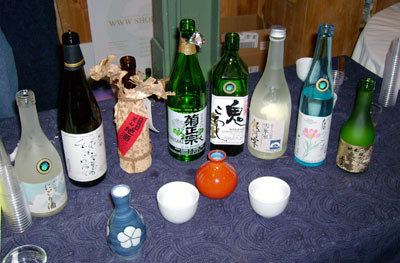
The dojo received a generous donation of sake for this tasting, enough for 200 guests. Judging by the crowd, it was a good thing they did! Our favorite was the third one from the left. We also liked some of the unfiltered ones (frosted bottles).
What was not consumed were auctioned off at the end of the evening. If you did not managed to get down there for the event, you really missed out! - Wan Chi Lau/Photos by Larry Murray (permalink)
|
|
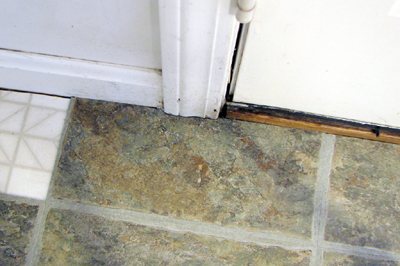
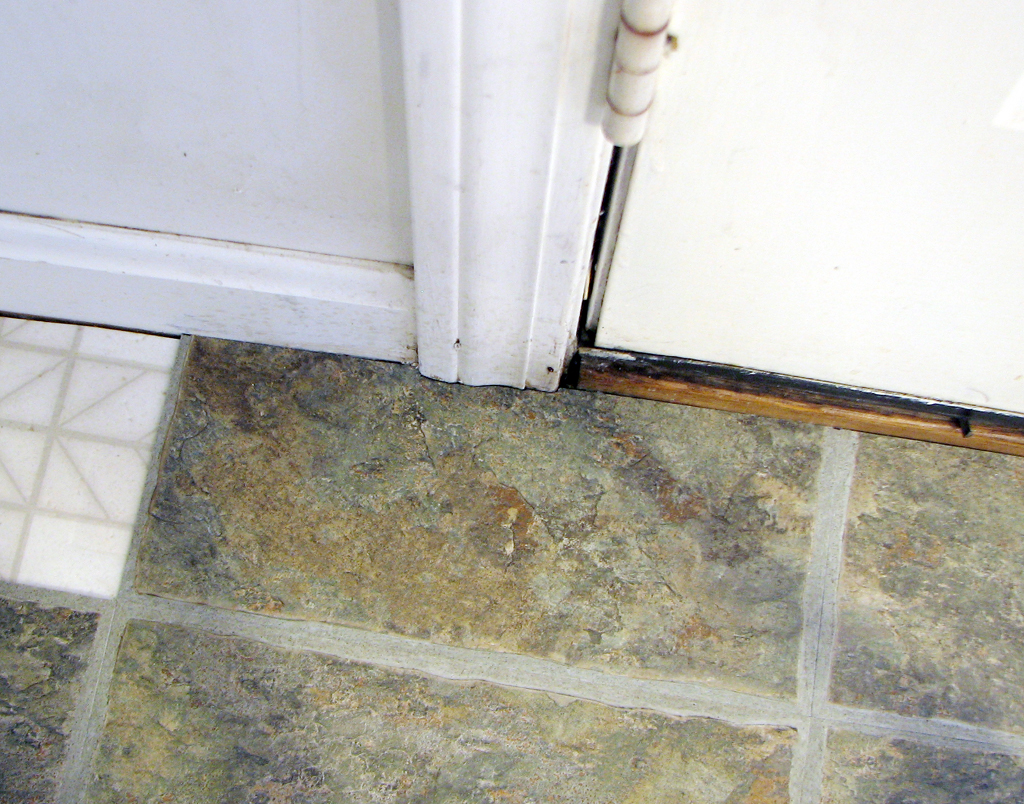
Yesterday we laid down all of the whole tiles in the center of the room in about 2 hours. Another five hours were spent on making the single cuts for the various tiles along the edge. Today, we finished up the more difficult compound cuts of the corners and around the door mouldings.
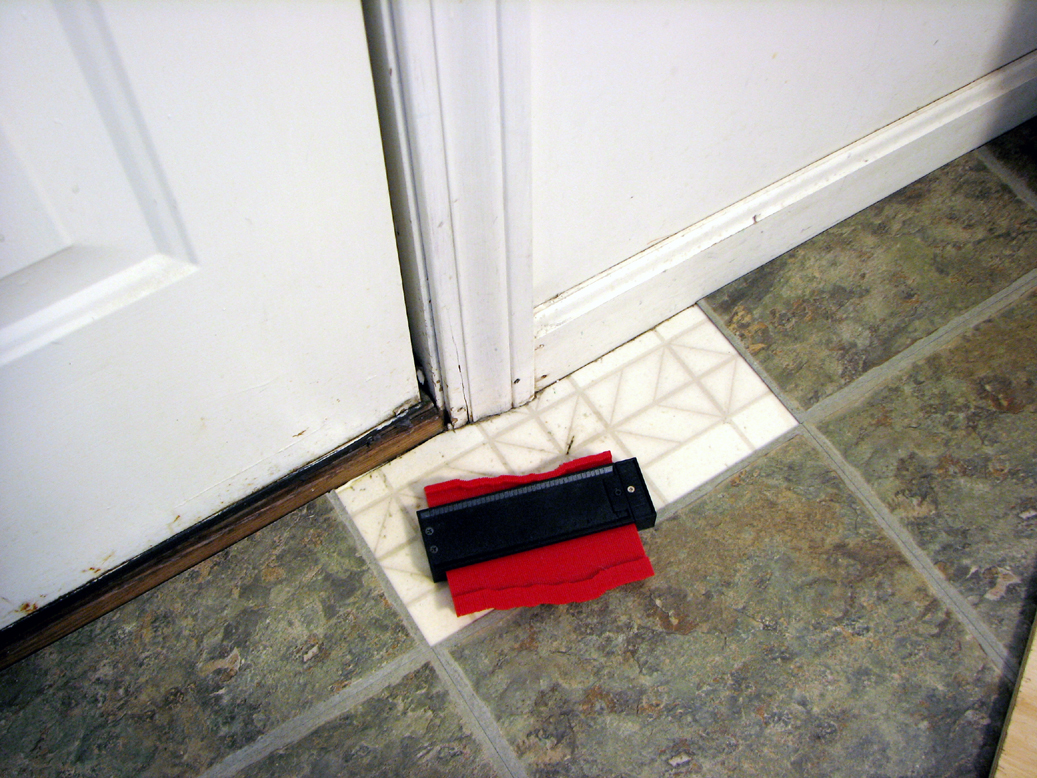
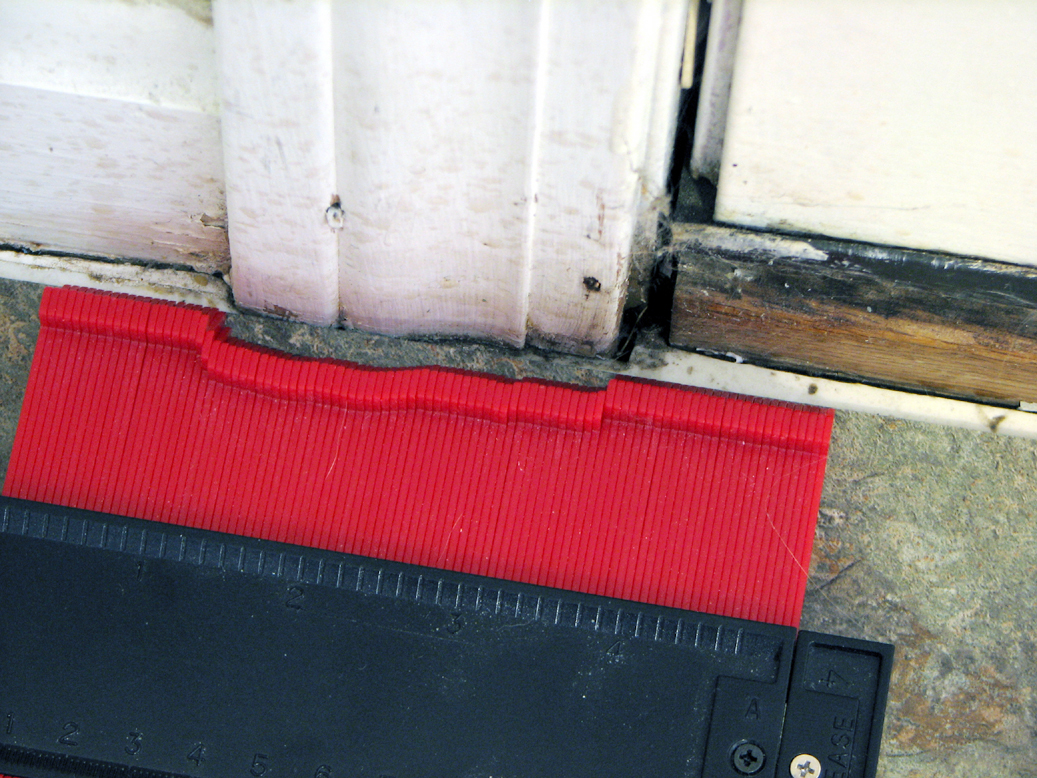
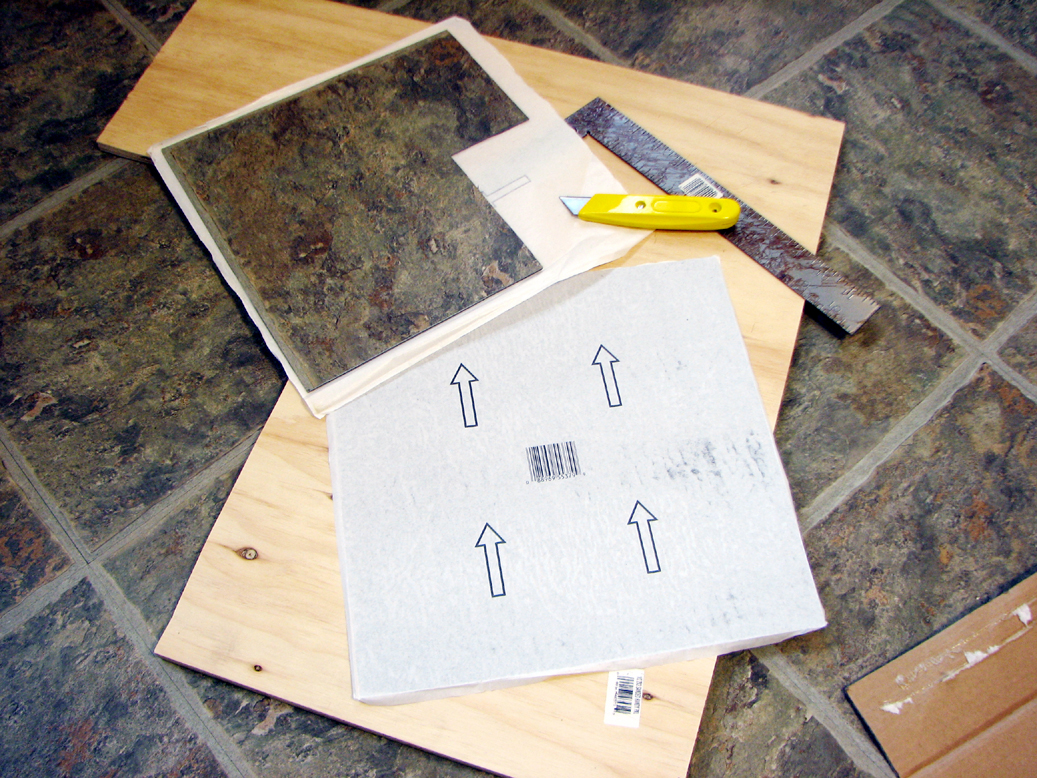
There are two ways to place a tile around door mouldings: under it or around it. To place the tile under the door moulding, the moulding must be removed. To place the tile around the moulding, the tile needs to be cut. We opted for the latter option.
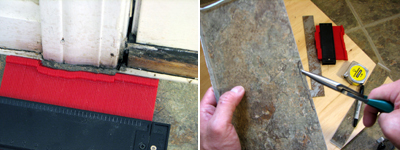
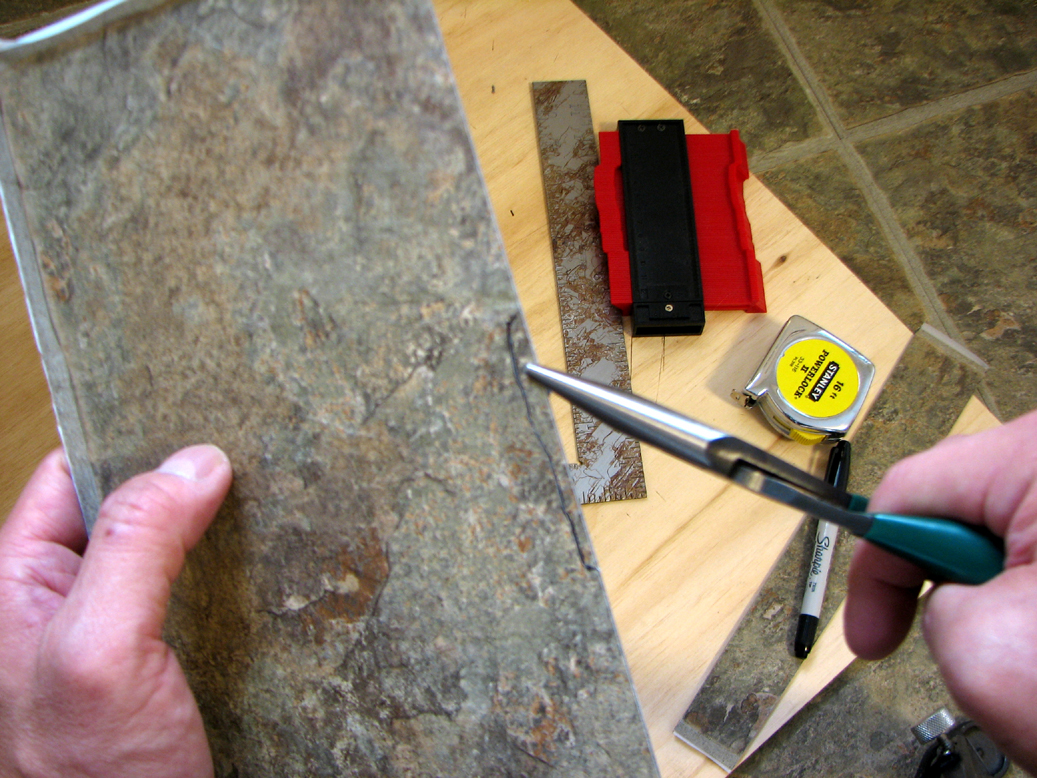
The easiest way to fit the tile around a moulding is to use a form tracing tool. The tool is simple to use. Just press it against the shape, trace the outline onto the tile, and cut. We found that it was not necessary to cut too deep into the tile, just deep enough so it can be removed using some needle-nose pliers.
There is a compound cut every time a tile hits a corner. There were ten of them in the kitchen. We found the old saying "measure twice, cut once" really was something one should take to heart when making these compound cuts.


This size project can easily be completed by two people in one weekend. The main recommendation we have is to work from the center, take care in aligning the tile edges, and to wear knee pads :-) - Wan Chi Lau (permalink)
|
|
|
Indoor renovation projects in the Winter are great because not much can be done outside :-) It is also feels good to have accomplished SOMETHING right at the beginning of a New Year!!!
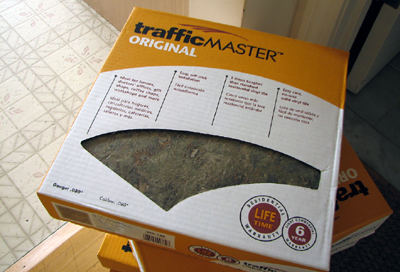
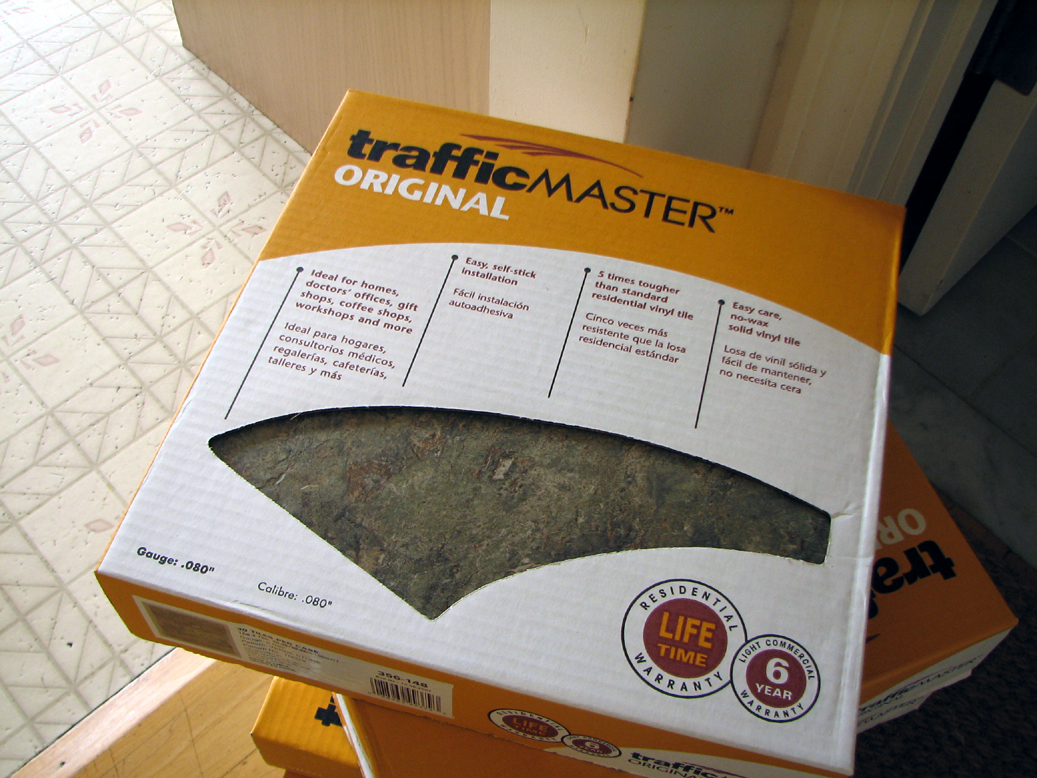
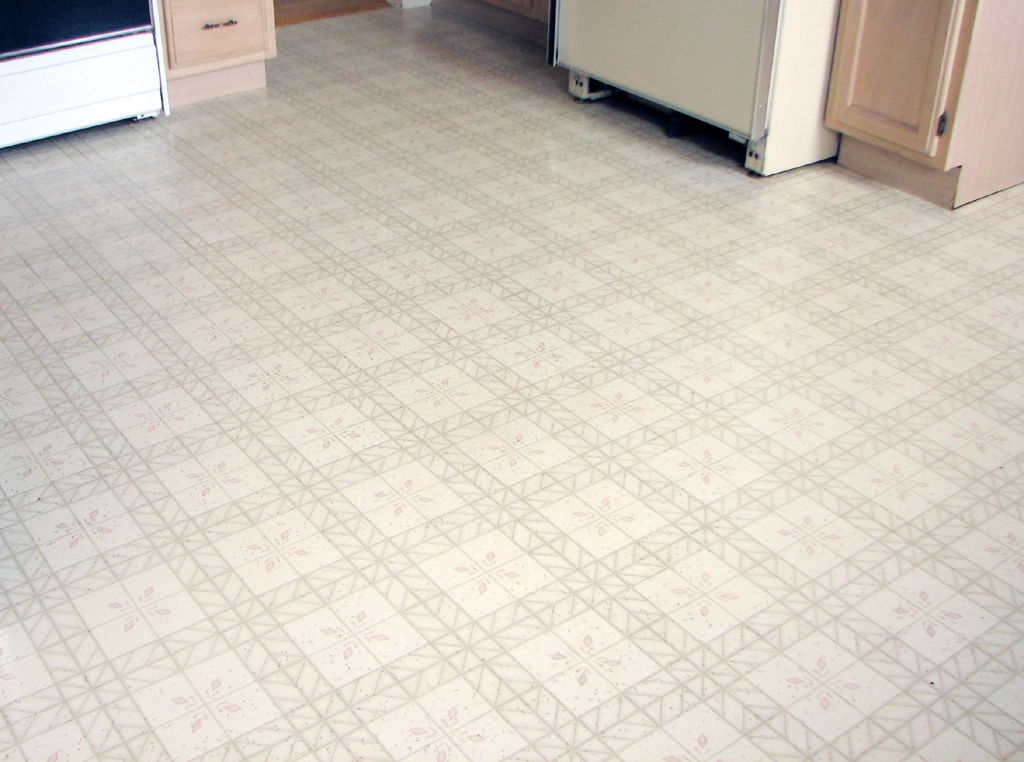
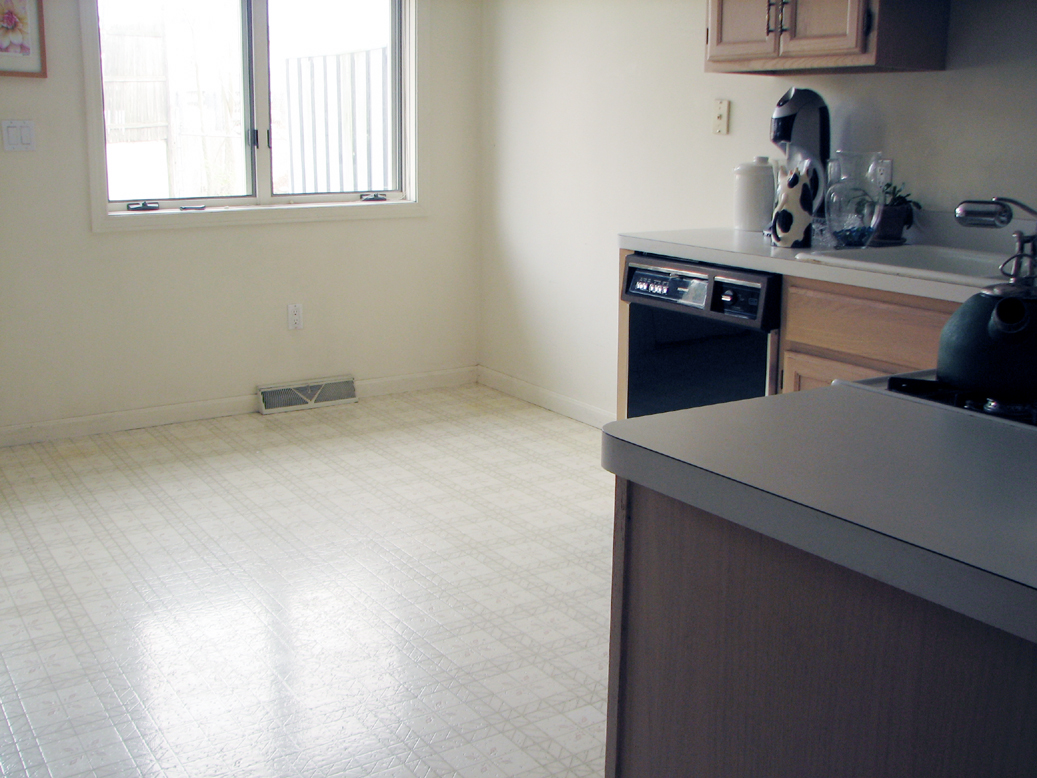
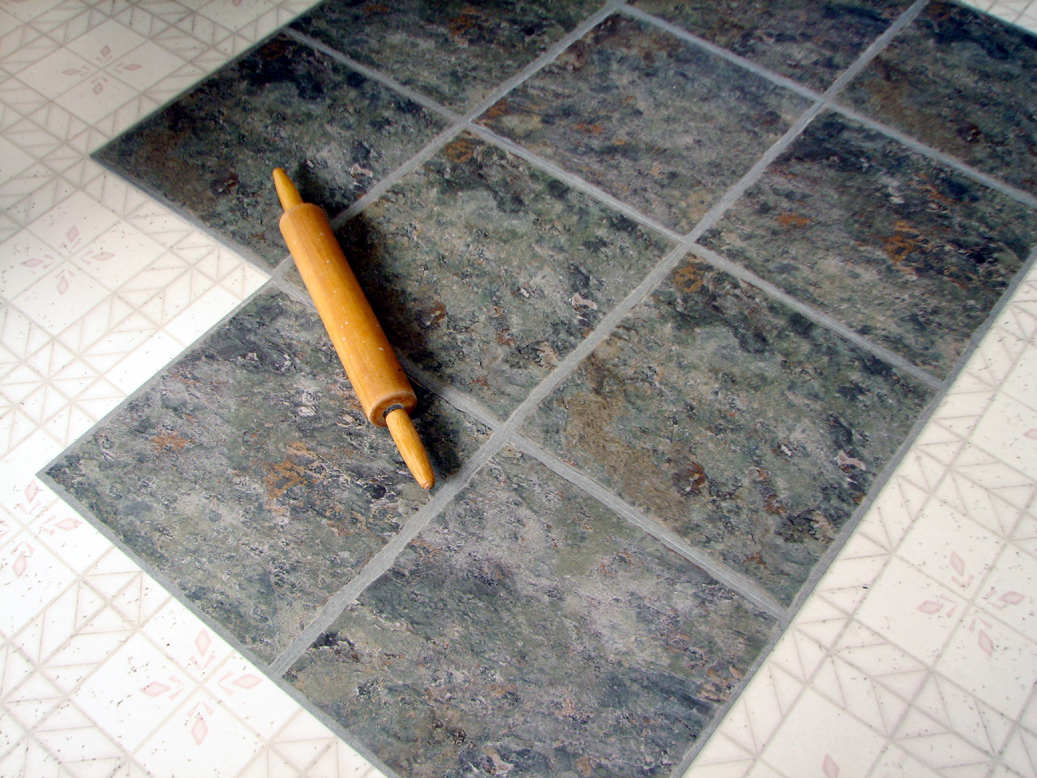
We decided our first RainyDayRenovation project of 2008 is going to be retiling the floor in the kitchen. The floor which is there now is a single sheet of patterned linoleum. The light color gave the 10x15 sq ft room a nice spacious feel. However, it easily showed dirt from the traffic and it was difficult to keep clean. We wanted something which will both warm up the room and make it a little easier (ie: show less dirt) to maintain.

The original floor in the RainyDayKitchen was still in pretty good shape so there was no need to pull it up or put down a new plywood subfloor. This saved us about a day's worth of work.
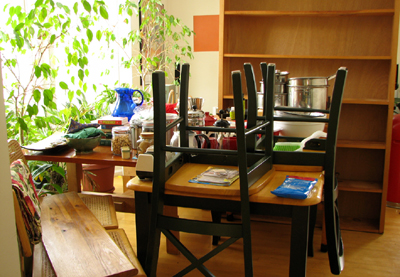
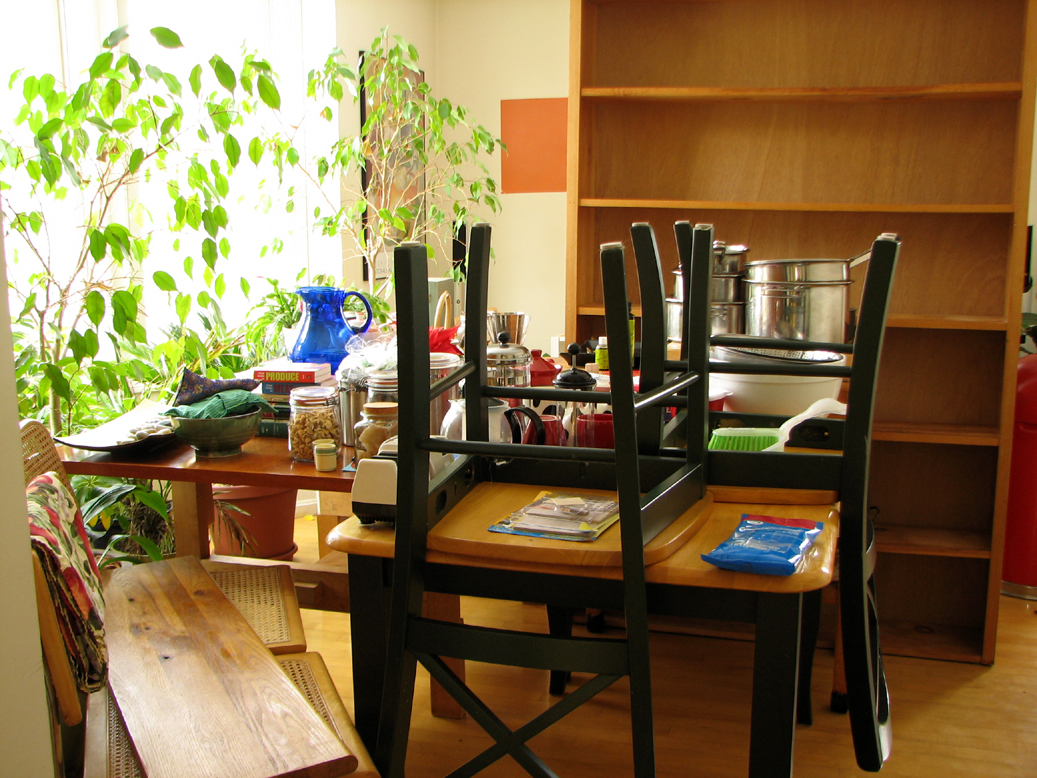
The interns spent a few days moving all of the stuff into another room, vacuumed and washed everything. For good adhesion, it is VERY important for the floor to be grease and particle free.
To complete the entire project will take most of the weekend. Our recommendation is to lay down all of the whole tiles first, next do the ones which requires only a single cut, and finish with the more complex ones.
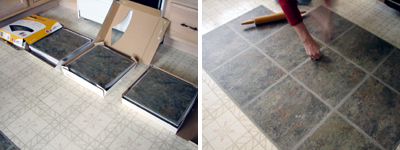
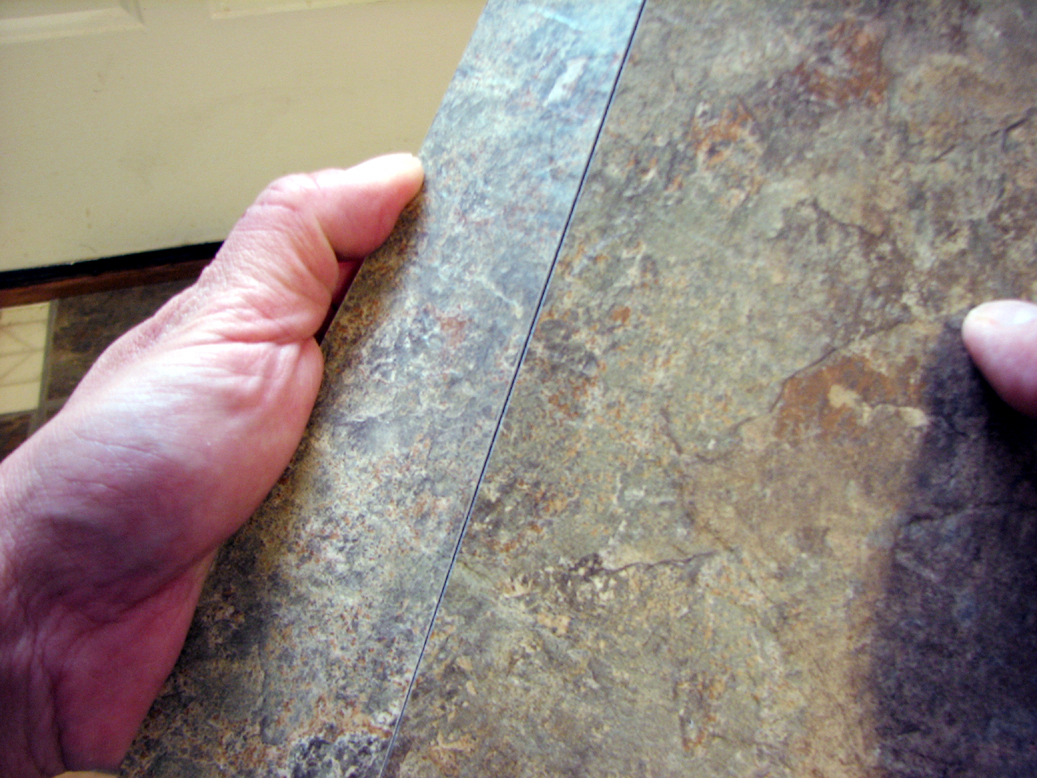
Laying down the tiles is pretty easy, just peel and press. The key to a good looking job is to realize that little errors will accumulate over the course of several tiles...so LINE THINGS UP before proceeding on to the next tile. The tools required are simple (rolling pin, angle square, box cutter).
For a 150 square foot room, a reasonable estimate is between 10 to 12 hours of work. This is excluding all of the "prep" work: moving, cleaning, buying tiles. The job can be done in much less time by the pros, but it will cost you about 10x more :-)

Tomorrow, we'll show you the completed project. If you have started your own RainyDayRenovation projects, drop us a line or send us some pics when you are done. We'll be happy to share it with everyone! - Wan Chi Lau (permalink)
|
|
|
|
|
|
|


