"We Entertain When It Rains"  
 
RDM for iPhone


Google
Web www.rainydaymagazine.com

RainyDayMagazine's content can now be licensed for your print magazine or web site. Please contact us directly here.  If you want to see something reviewed, then drop us a note with a link and we'll be happy to take a look.

 
October 5,2008 (WeekendEdition)

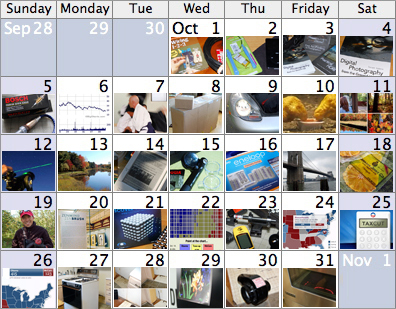
Our Boxster's check engine light came on back in May. The code indicated that the problem was with the oxygen sensor. The local Porsche dealer quoted $317 for the part and $200 for labor to swap out the old sensor. At those kind of prices, we knew we were going to see if we could replace it ourselves.

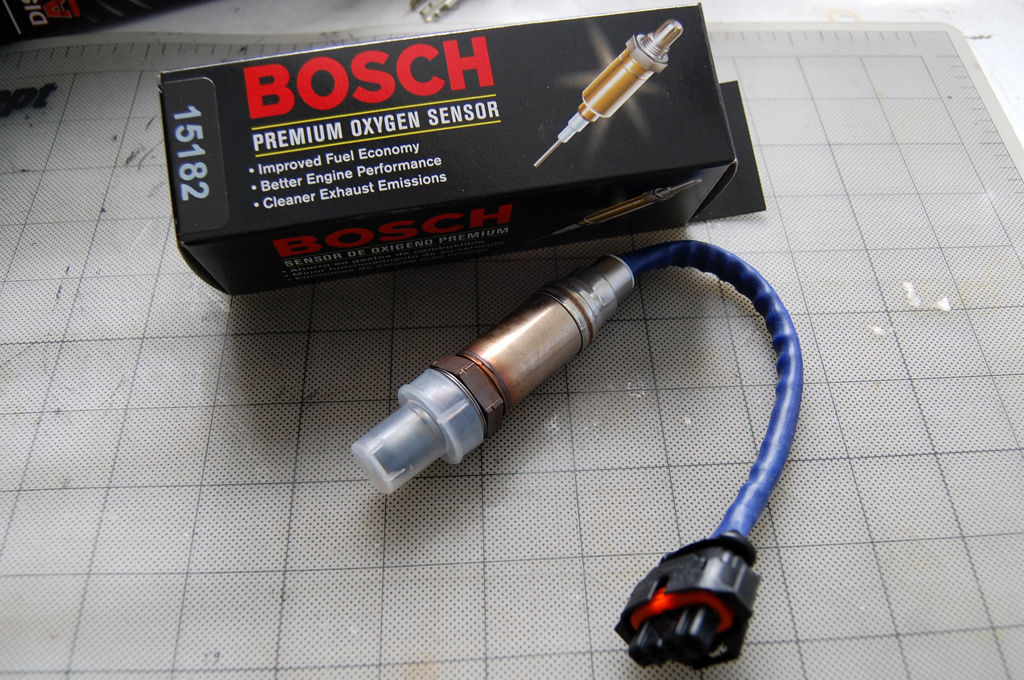
We had been procrastinating because the light would only go on intermittently. We finally got tired of seeing it come on and decided to just get off our butts and replace the sensor. Prices for a replacement sensor were all over the place.  We found prices ranging from $45 to $250 on Ebay. Autohausaz.com sells a Bosch unit for $110 with free shipping. We think Bosch is the source of the Porsche OEM part.  Most of the less expensive ones did not have the connector already attached.

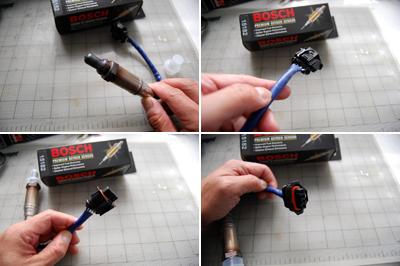
We didn't want the hassle of attaching the connector, so we ordered the complete unit. We are going to keep the old connector and see how difficult it is to disassemble. We may try using a connector-less sensor the next time we have to replace one.

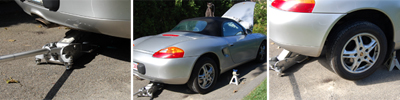
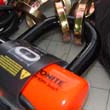
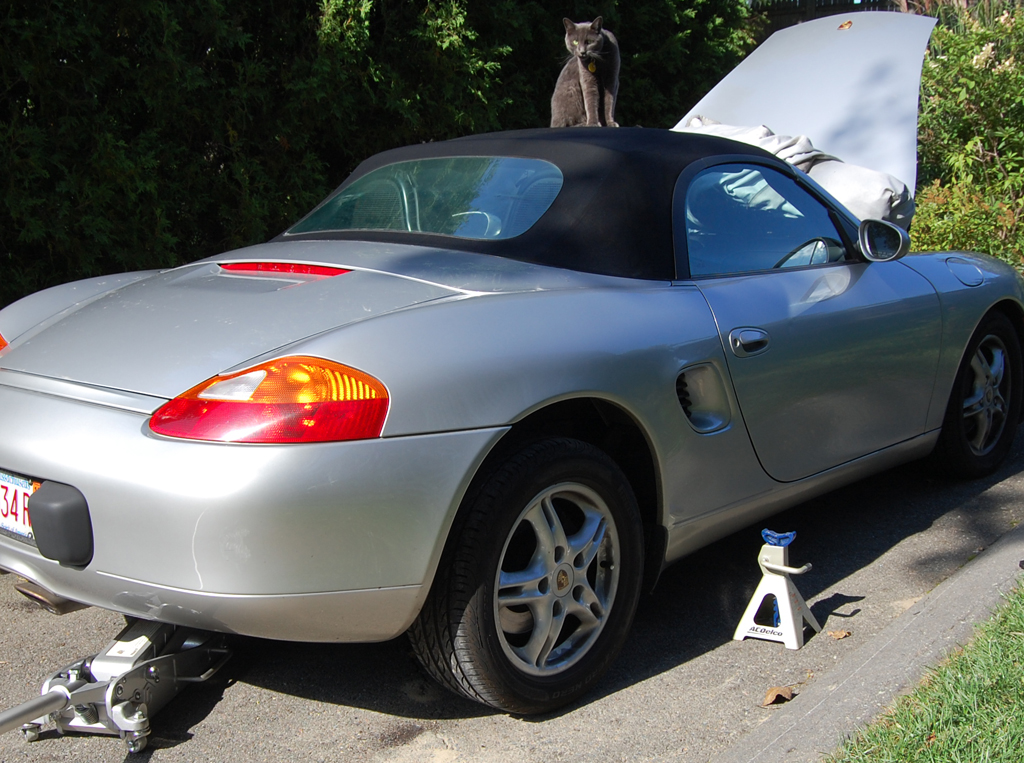
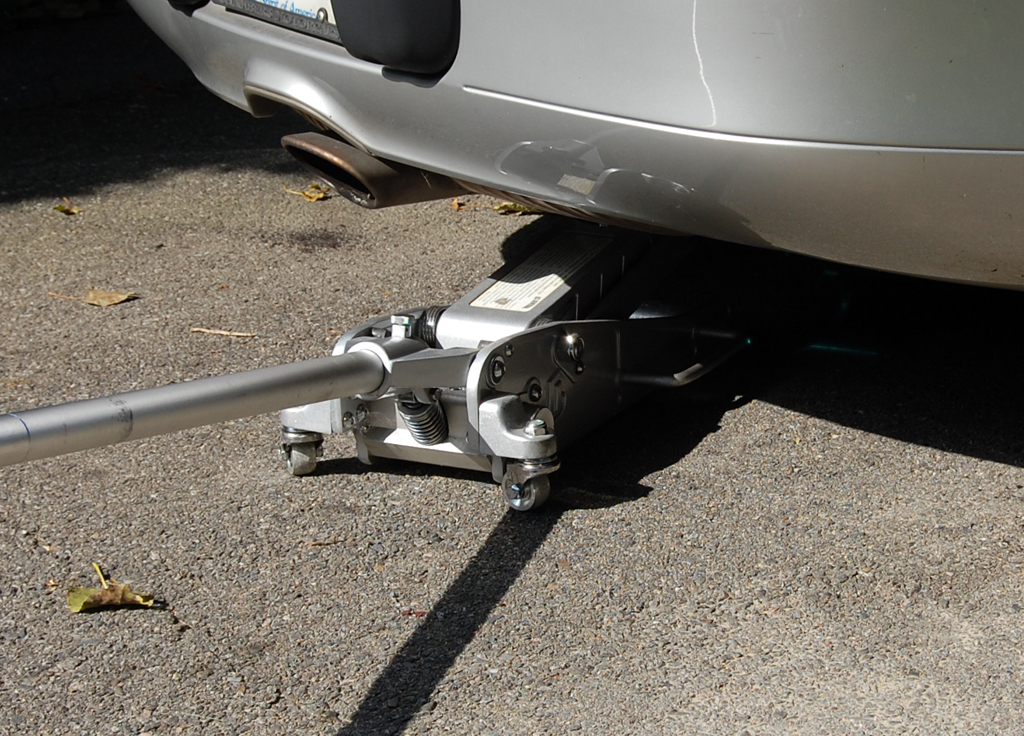
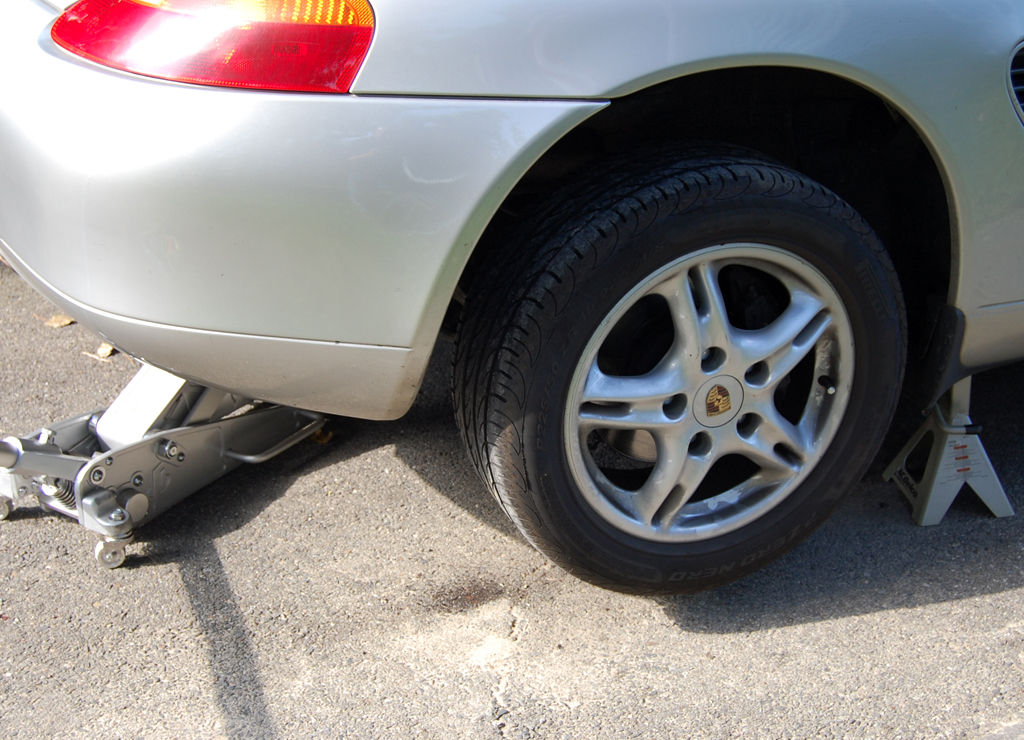
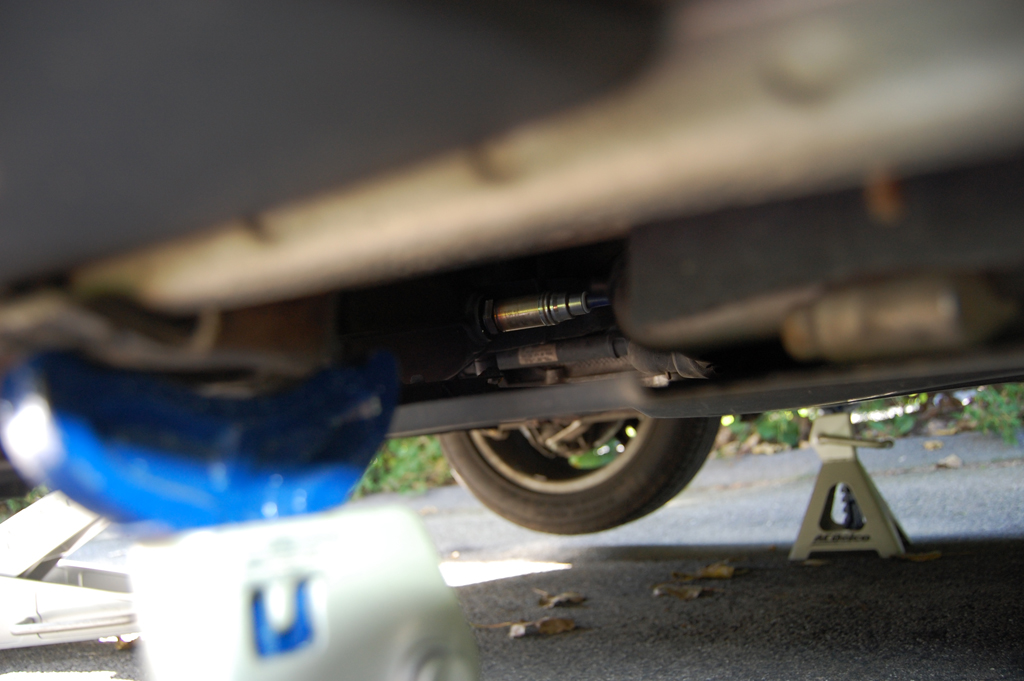
The sensor which needed to be replaced was the one in front of the catalytic converter. To get at the old unit, the car must be raised up.  We would absolutely never get underneath a car held up just by the hydralic jack. Thus, jack stands must be used.

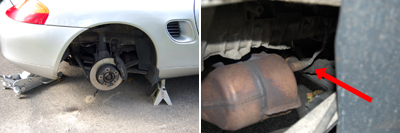
The easiest place to jack up the car is from the rear.  Once high enough, the stands may be place under the rear jack points.  With the car raised, it was easy to locate the sensor.

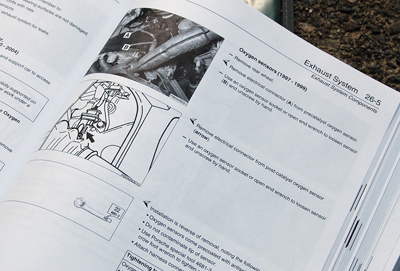
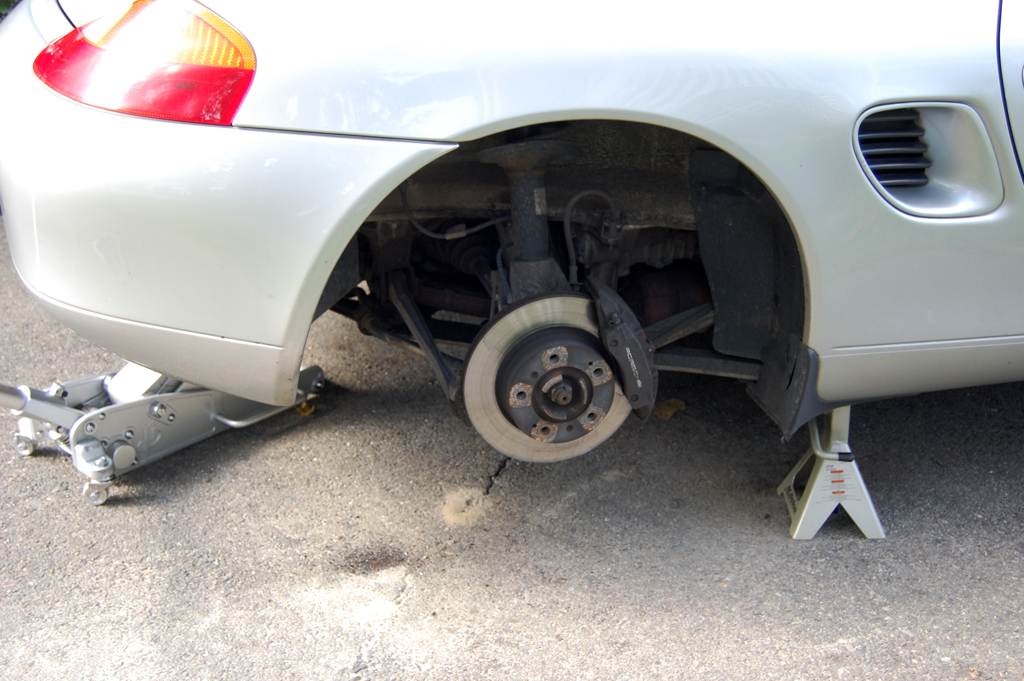
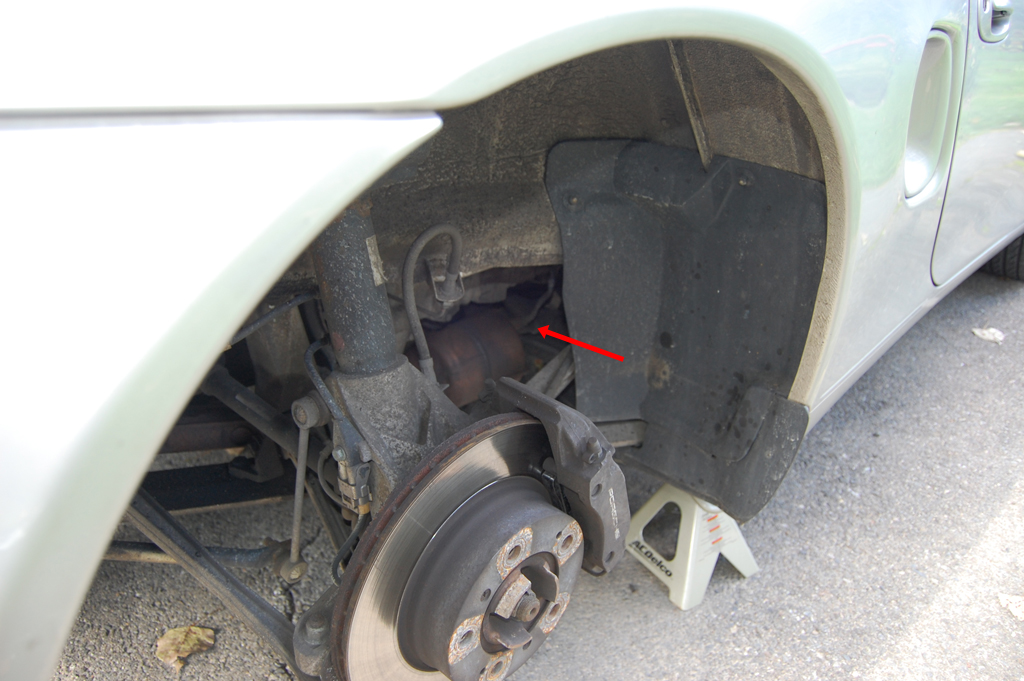
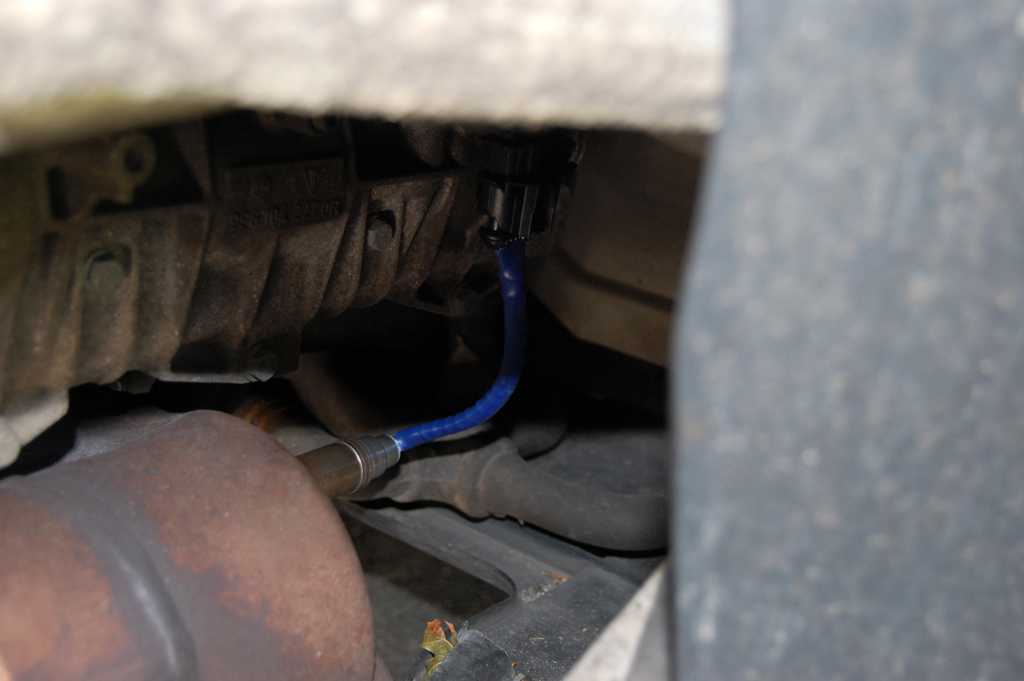
The replacement directions in the Bentley manual were pretty clear, but we had a little trouble visualizing the relative location of the sensor. In hopes of making it easier for our RainyDayGarage reader, we took a few extra photos from various angles to make it a little easier to see.

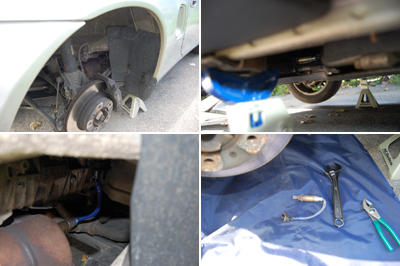
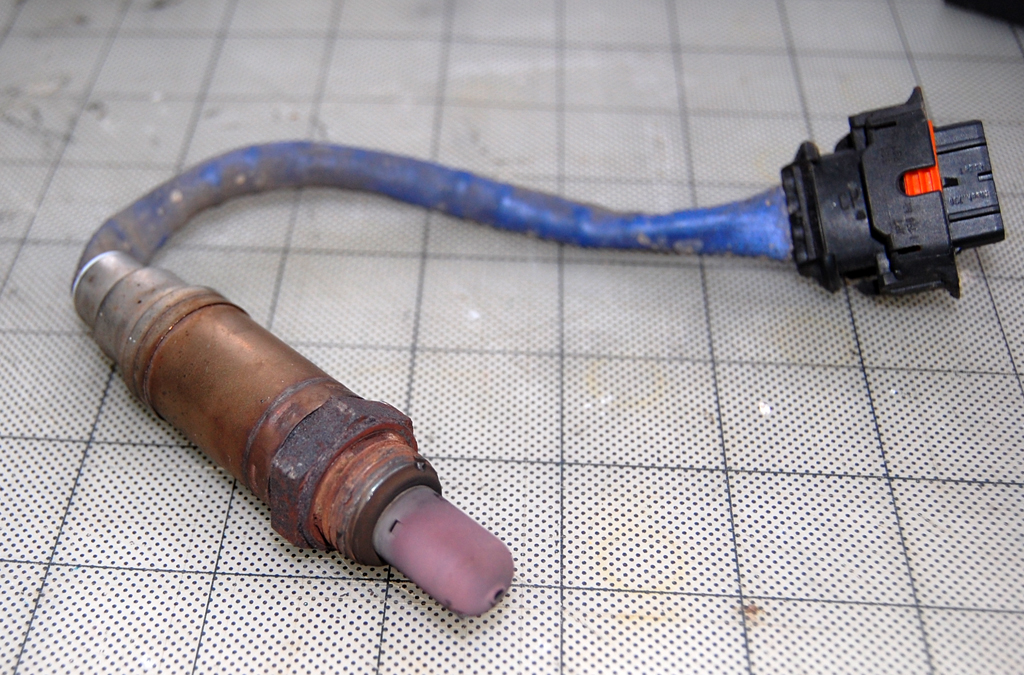
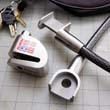
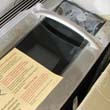
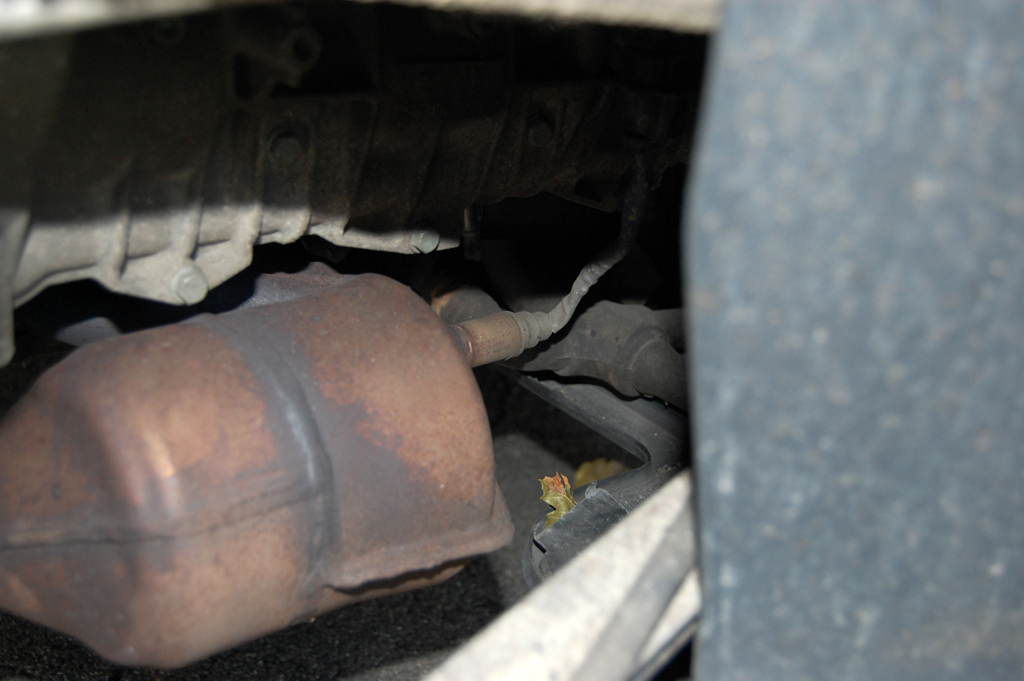
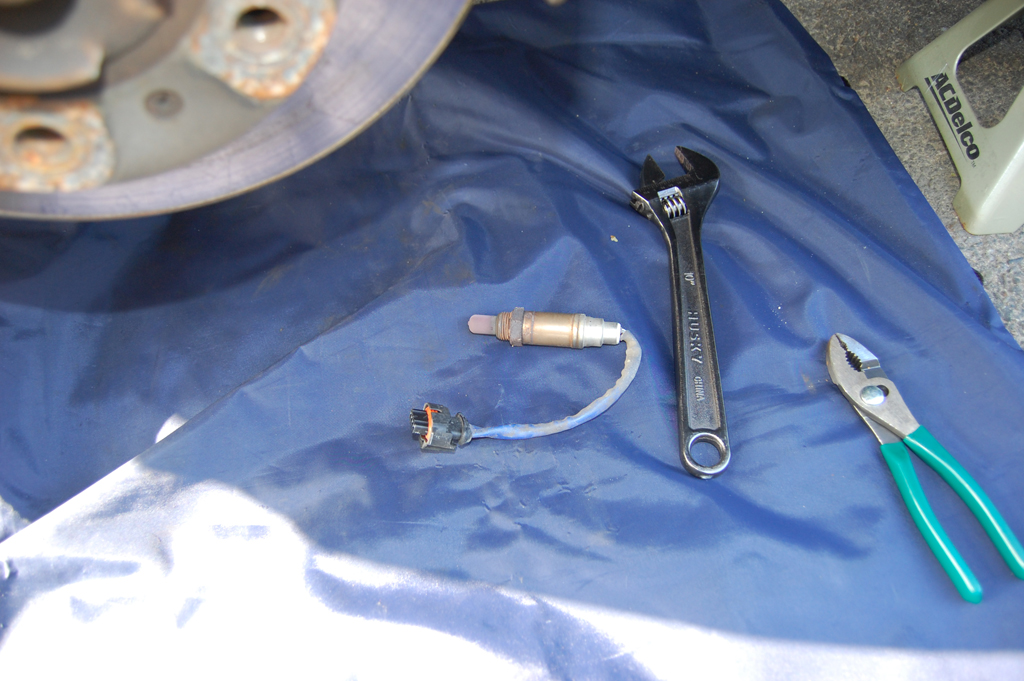
The sensor is easily removed using an adjustible wrench.  A lift would have made this task even easier. The working space was a little tight as we had to work from the ground. However, we managed to get the old sensor out in about 5 minutes. Putting in the new one took even less time. Below is what an oxygen sensor looks like after about 90K miles.

This Boxster project was a lot easier than we had anticipated.  It is definitely a DIY project within the capability of most who can use an open-end wrench.  If you have the tools and can spare about 15 minutes, then you can probably replace your Boxster's oxygen sensor.  [Permalink] - Oxygen Sensor Replacement


October 4,2008 (WeekendEdition)

Anything related to photography is always of interestes to everyone here at RainyDayMagazine.  We are always eager to help promote the art and craft of this topic, especially in the area of digital photography. 

For those of you just starting out in digital photography or those interested in making the switch from film, Digital Photography from the Ground Up by Juergen Gulbins does an excellent job of covering the basics, ranging from storage cards to image output options.

Gulbins also touches on some general photography topics such as composition, lighting, and equipment handling.  He pays special attention to those areas where digital equipment differs from film.  For folks interested in selling on sites such as EBay, the section on close-up and still setups will be especially helpful.

A reasonable portion of the book is devoted to the topic of image editing.  Image editing is, of course, one of the major advantages of working in the digital domain.  The book covers the "how-tos" of using such features as tonal adjustment, blurring and sharpening filters, and the like.

Besides discussing the fundamentals of digital tools and techniques, more advanced topic such as how to shoot panoramas are also covered in this book.  Obviously there are a lot more to any of the subjects touched on by Gulbins in this book, all of the discussions were sufficient to enable those interested to get started and explore deeper on their own.

Juergen Gulbins' book definitely does a good job of covering the basics of digital photography.  It is a good intro to the digital craft for the beginner and a reasonable reference for those making the switch from film.  Advanced amateurs may want to check out Rocky Nook's other more indepth offerings.  [Permalink] - Digital Photography From the Ground Up


October 3,2008 (FotoFriday)

Digitial photography exploded into the mainstream about ten years ago.  The crossover point was when a $300 digital cameras was able to produce images of acceptable quality.  Today, an excellent digital SLR camera kit can be had for around $500.  That price point means many folks interested in digital photography can now afford the gear.

Shopping for photography gear is fun, and learning how to use it is even MORE fun!  Rocky Nook is a publishing house which puts out some excellent titles, covering all aspects (basic, advanced, etc...) of digital photography.

Some of us have been around since the start of it all.  A few even worked on one of the first commercial digital imaging programs for the Mac.  So when they are excited about these books, we know there must be something to them :-)

Regardless of whether you are just starting out or an advanced digital photographer, Rocky Nook's collection will have something of interest to you.  We will be giving readers a more detailed look at these (Fine Art Printing, HDRI) and some of their other offerings this month.  We know you'll find these books useful; we did.  [Permalink] - Rocky Nook Collection


October 2,2008 (TechThursday)

While the folks in the RainyDayKitchen got to play with high voltages and large currents, some of us were only allowed to work on projects which were battery powered.

One of the intern's iPod had stopped charging.  The iPod was three years old, so it was probably a dead battery.  The batteries for the various versions of iPods are different.   The one we needed was for a 30GB Video iPod.   It is thinner than the one for a 60GB iPod.  The one we ordered for $7 on EBay even came with a set of tools for opening the iPod. 

The tools definitely made opening the iPod much easier.  The tips were thin so it was easy to slide it into the edge of the case.   The plastic tips did not scratch the iPod, no matter how clumsy we were.  Do know that these tools will open the case, but the tips are likely to break after one use.

Once the case is opened, replacing the battery was just a matter of unplugging the old one and plugging in the new one.  The entire replacement process took about 30 minutes (including the time it took to take these photos).  The battery came partically charged so we were able to see that the replacement was completed successfully.

This project can be done by anyone with opposable thumbs :-) Trust us when we say that some of us here are ALL THUMBS.  If we can do it, so can you.  So if your iPod will no longer hold a charge, you can use that as an excuse to upgrade to an iPod Touch or you can just replace the battery.  [Permalink] - Ipod Battery Replacement


October 1,2008 (WireItUpWednesday)

We have been reading up on what we need to do to wire the RainyDayKitchen to accommodate the new Jenn Air range.  Once we got things mapped out, the interns took a field trip to Home Depot and gathered the necessary parts (breakers, recepticle, cable, etc...) for the project.

They were gone a long time (no doubt touching everything in the store).  One item they did pick up was a book published by Home Depot on wiring.  We were amazed at how well written, informative, and useful this book was.  It was packed full of project ideas and "how to" articles.  It contained everything we needed to know about our project.

Working with 240V was not something which worried us, it was how to properly handle the 50 Amps.  To carry the current, the wires have to be both thick and well insulated.  That much current will light us up if we didn't treat it with respect.  The code specified NM #6-3 wires for this particular application.  At $3/foot, the cost can add up.  We needed about 30' of it. 

Wires that thick meant all of the parts which must work with it were equally "beefy."  The 240v circuit breaker was twice as thick as the 110v version.  The 4-prong recepticle looked just as substantial.

We are excited about tackling this electrical work.  We will also have a chance to cut a hole in the kitchen floor as we need to run a vent from the range to the outside.  No, we didn't ask the landlord for permission.  Besides, by the time he finds out, we would be well into the project and there would be no turning back.  We are sure everything will work out just fine :-)  [Permalink] - Wire It Up


[Dec] [Nov] [Oct] [Sep] [Aug] [Jul]

[Jun] [May] [Apr] [Mar] [Feb] [Jan]

....... 2007 ......

[Dec] [Nov] [Oct] [Sep] [Aug] [Jul]

[Jun] [May] [Apr] [Mar] [Feb] [Jan]

....... 2006 .......

[Dec] [Nov] [Oct] [Sep] [Aug] [Jul]

[Jun] [May] [Apr] [Mar] [Feb] [Jan]

....... 2005 .......

[Dec] [Nov] [Oct] [Sep] [Aug] [Jul]

[Jun] [May] [Apr] [Mar] [Feb] [Jan]

....... 2004 .......

[Dec] [Nov] [Oct] [Sep]


Featured Review*

Fresh Coffee


RainyDayBuzz*
   
 
GET GEAR*


Rainy Day Magazine is a Publication of Rainy Day Entertainment© 2008
case label case and battery battery in case battery bottom power check inverter side