"We Entertain When It Rains"  
 
RDM for iPhone


Google
Web www.rainydaymagazine.com

RainyDayMagazine's content can now be licensed for your print magazine or web site. Please contact us directly here.  If you want to see something reviewed, then drop us a note with a link and we'll be happy to take a look.


July 31,2008 (PutItBackTogetherThursday)

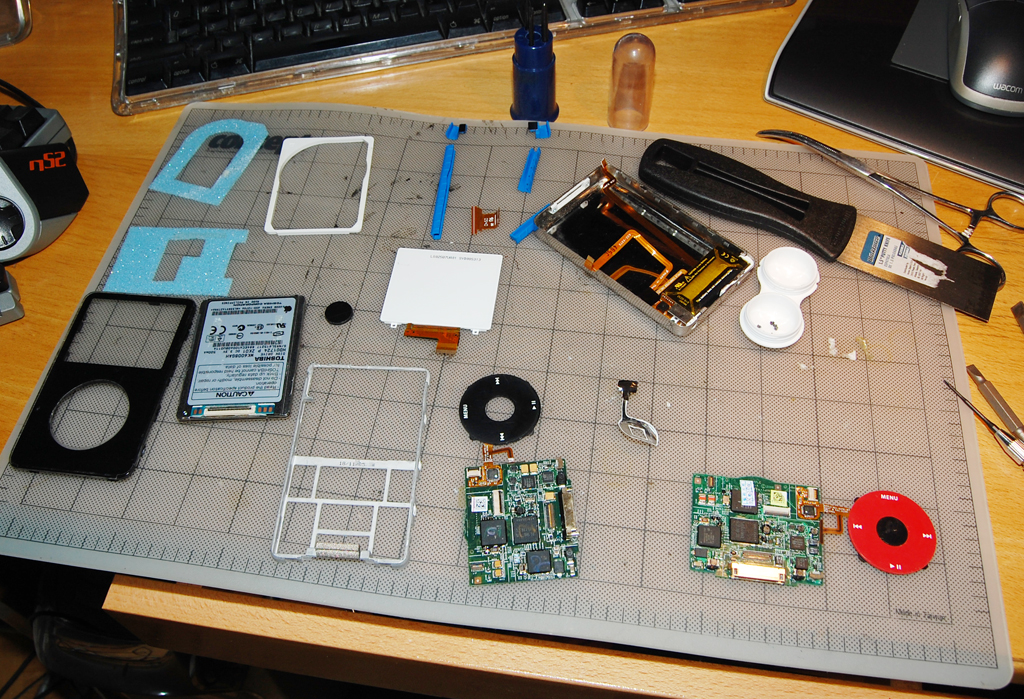
In Tuesday's installment of this iPod repair series, we showed how to take the iPod apart.  Today we will show how to swap out and upgrade the various components. 

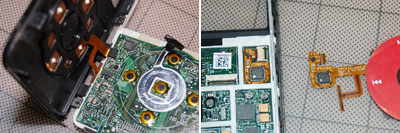
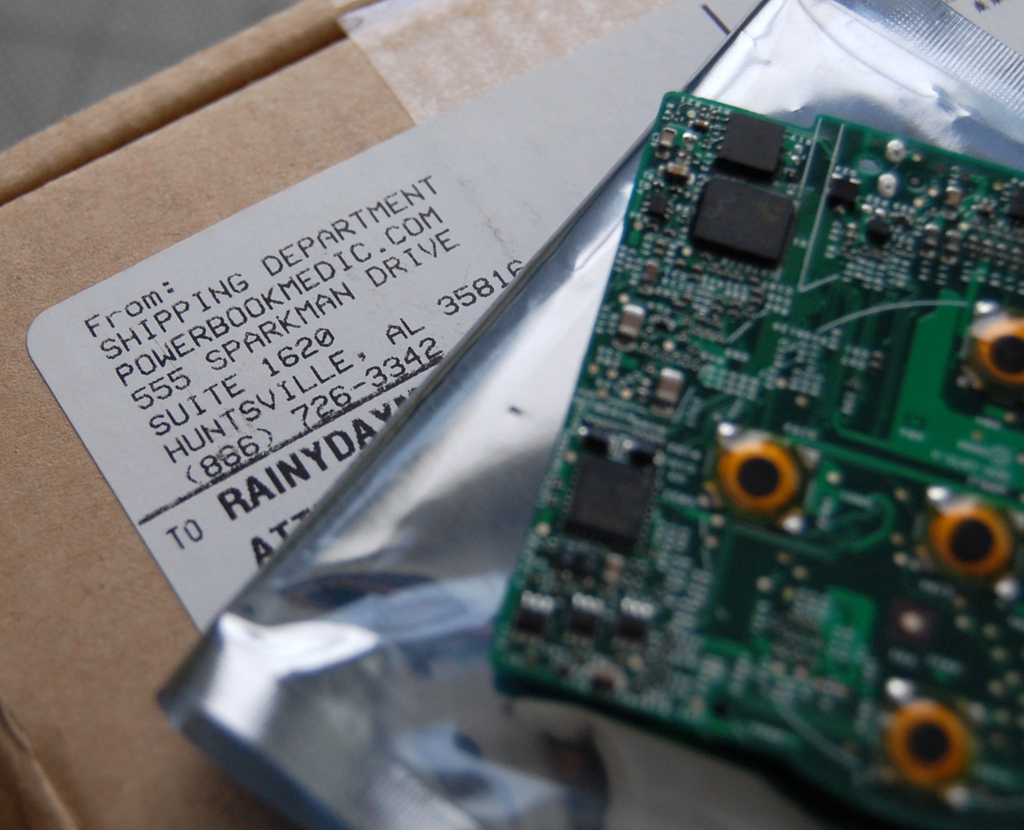
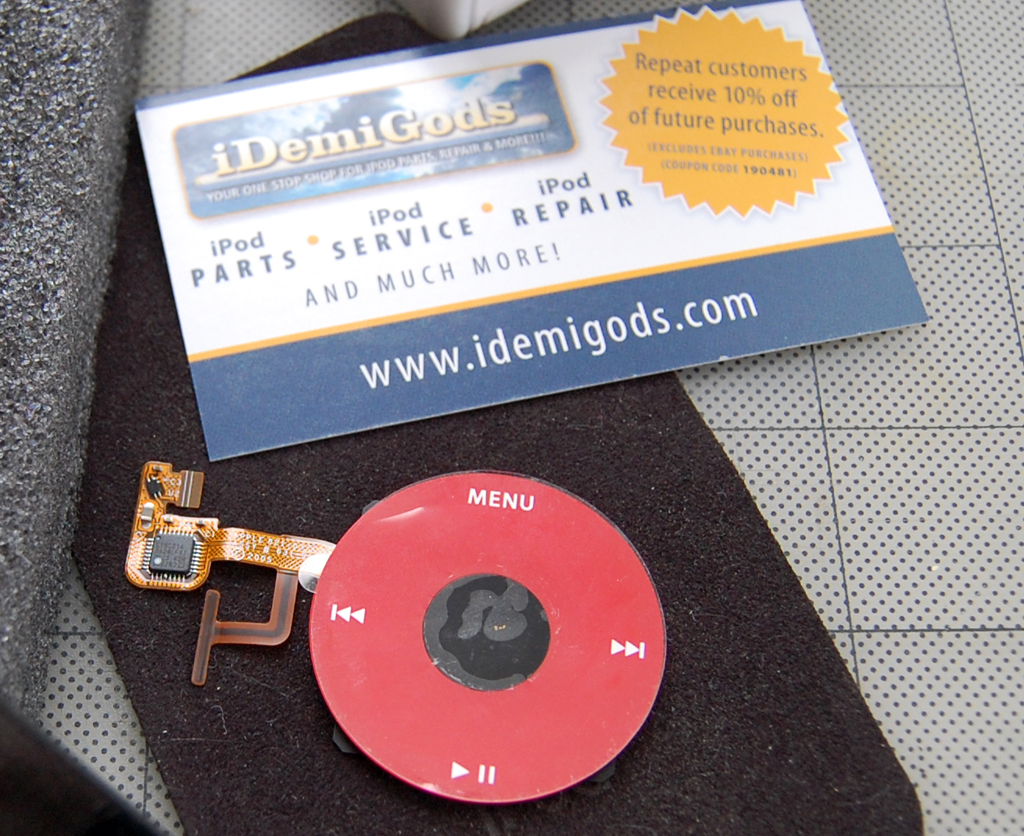
Our cool red "special editions" U2 clickwheel came from the folks at www.iDemiGods.com.  They were recommended to us as the place to go for hard to find iPod parts.  The new motherboard came from our friends at PowerbookMedic.  We used them when we upgraded the processor for our G3 laptop.  These guys really know their stuff when it comes to Apple hardware and their support staff is awesome.

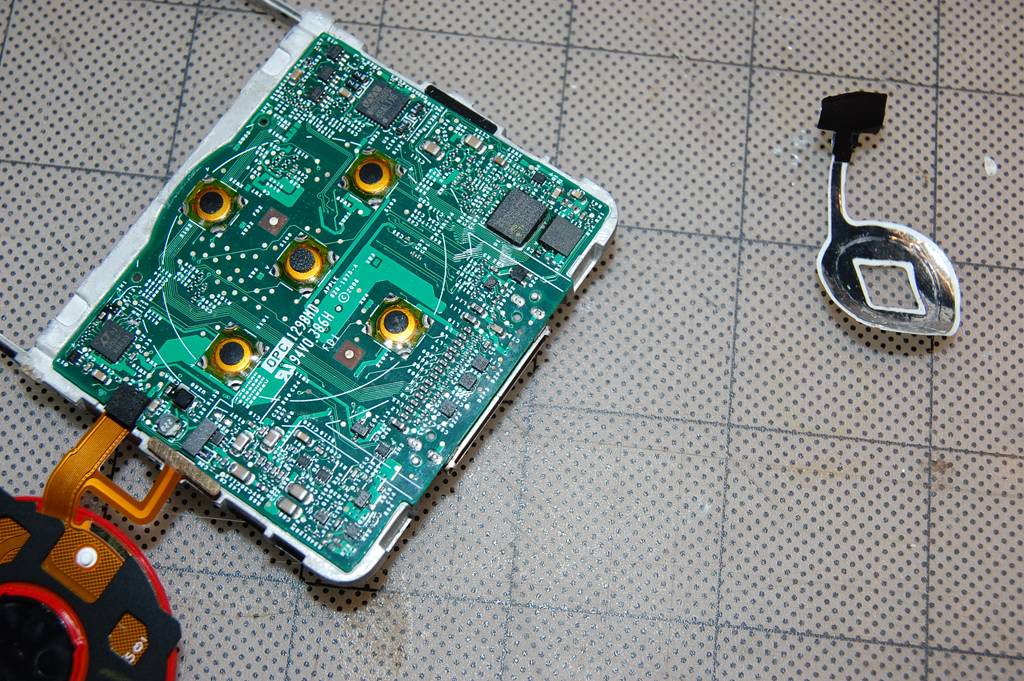
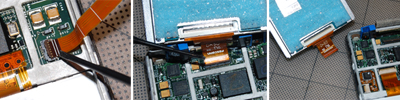
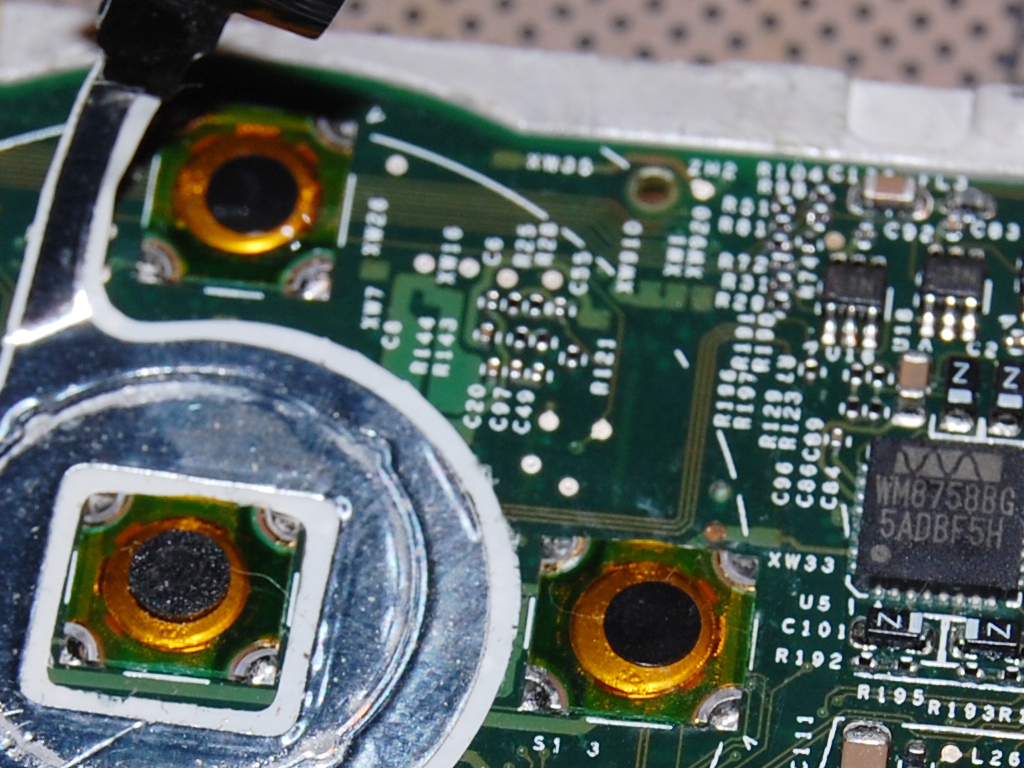
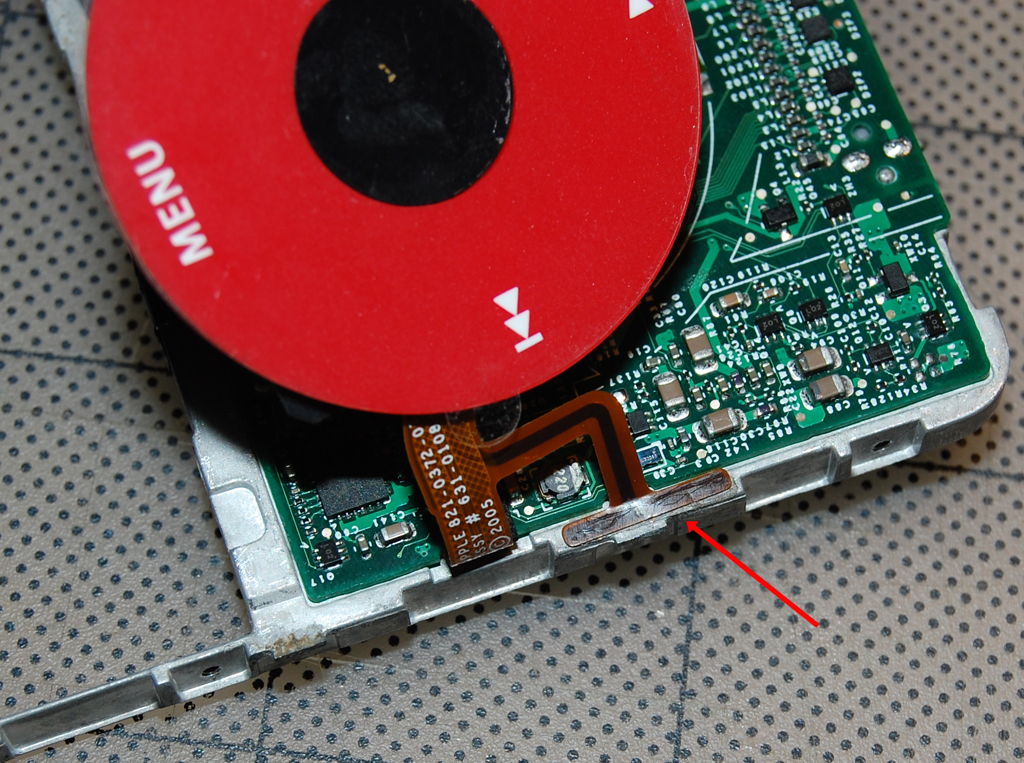
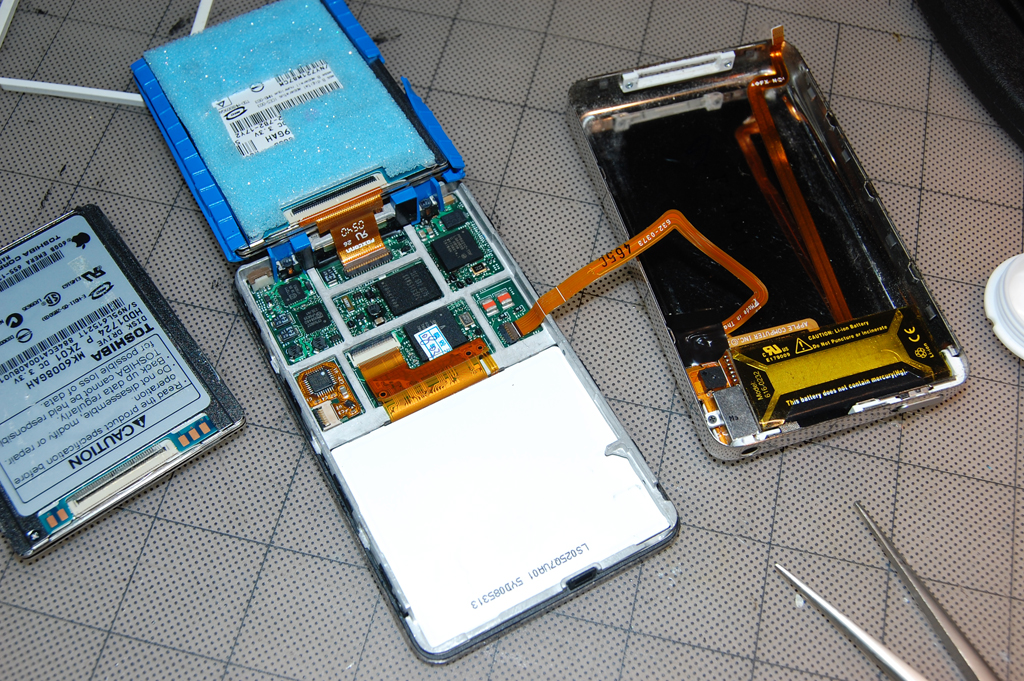
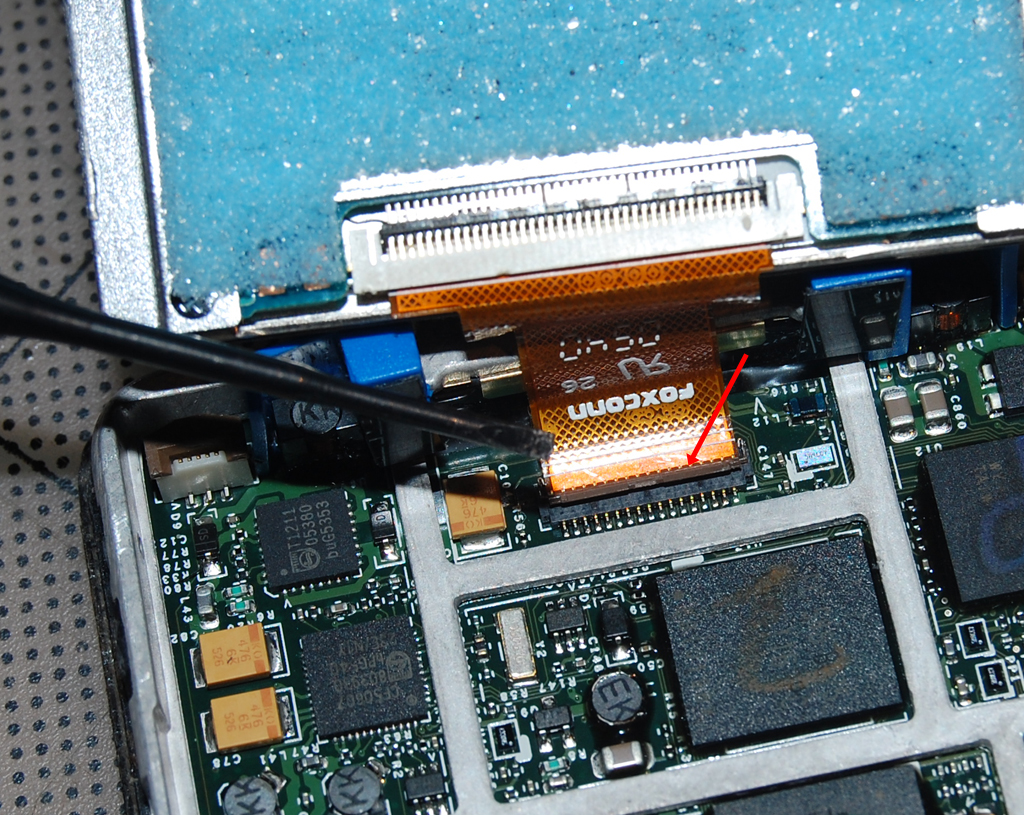
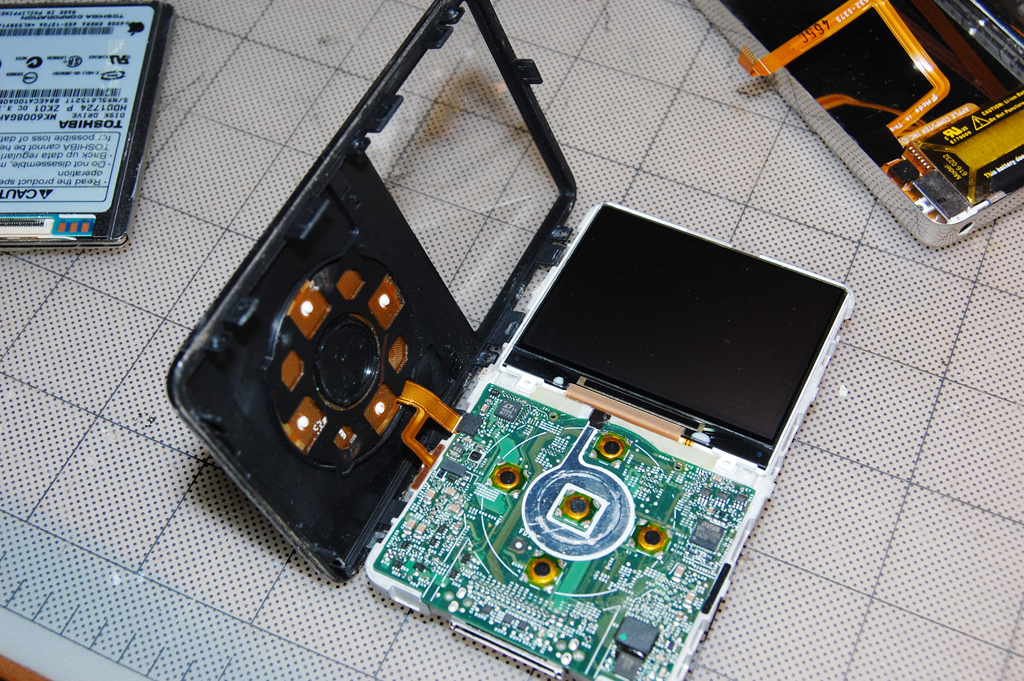
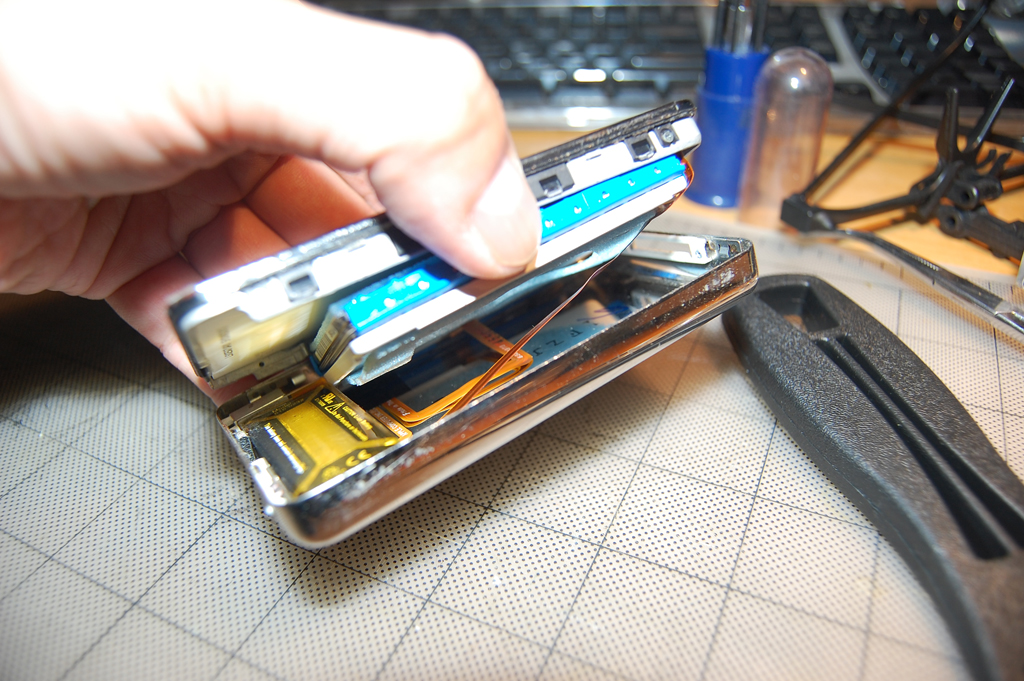
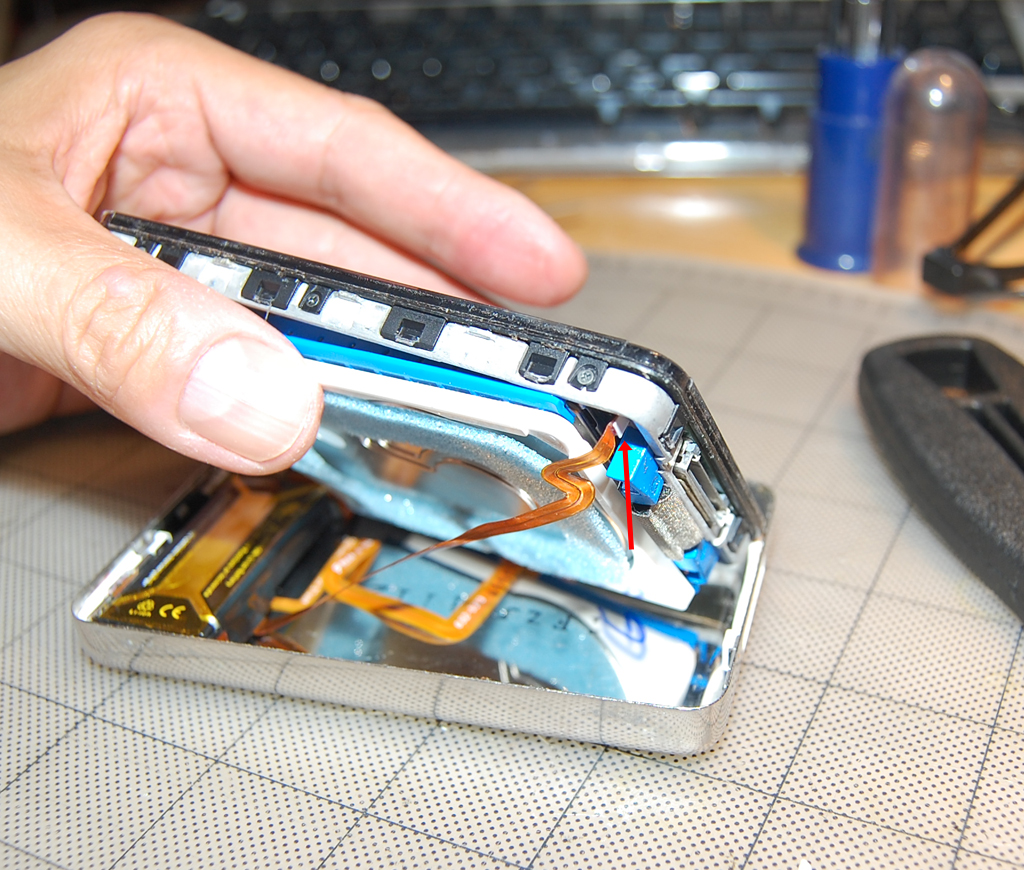
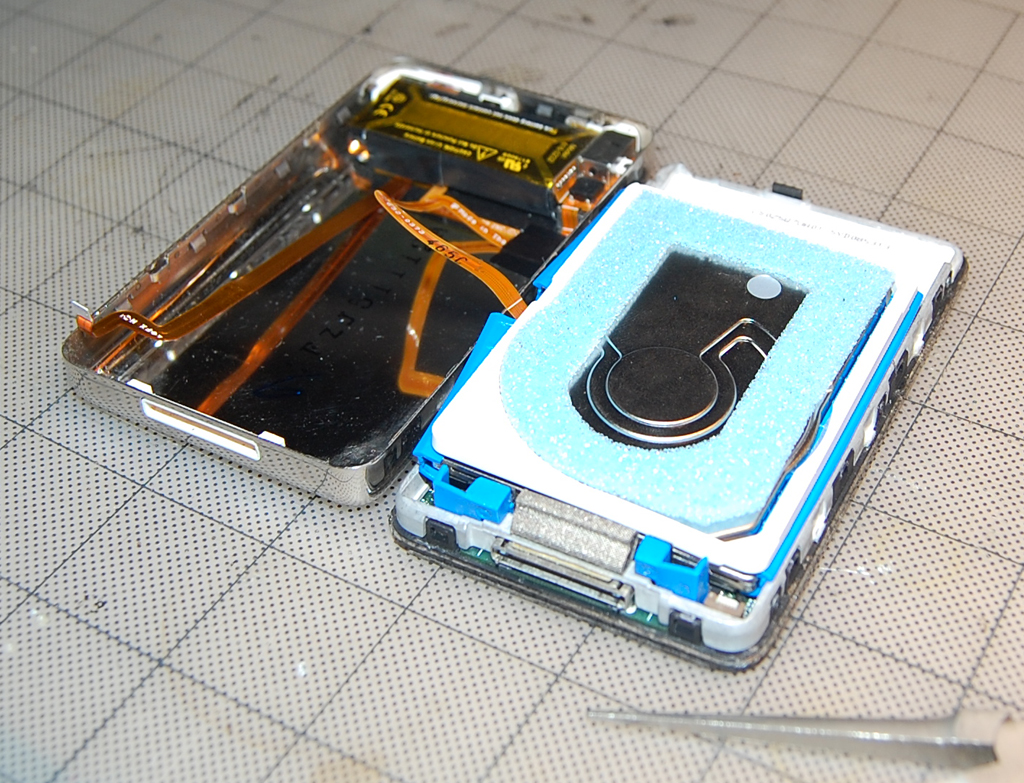
We learned quite a bit about the construction of the iPod during the disassembly process.  In trying to remove the motherboard from the frame, we noticed there was a thin silicone film on the clickwheel area (red arrow).  We realized that this gasket was probably to provide some protection to the electronics should a little moisture get in from the clickwheel. 

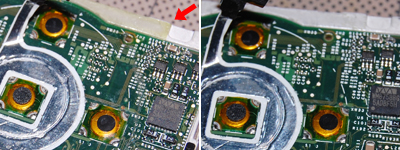
In order to remove the bad motherboard from the frame, we had to remove this film.  Since we did not have a replacement gasket for the new board, we'll have to be extra careful to avoid getting this iPod wet in the future. 

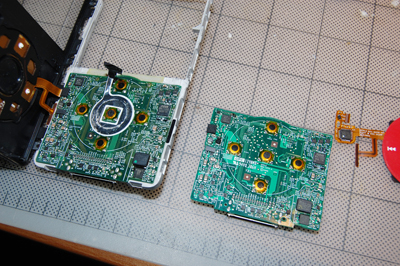
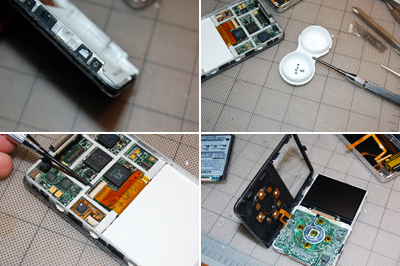
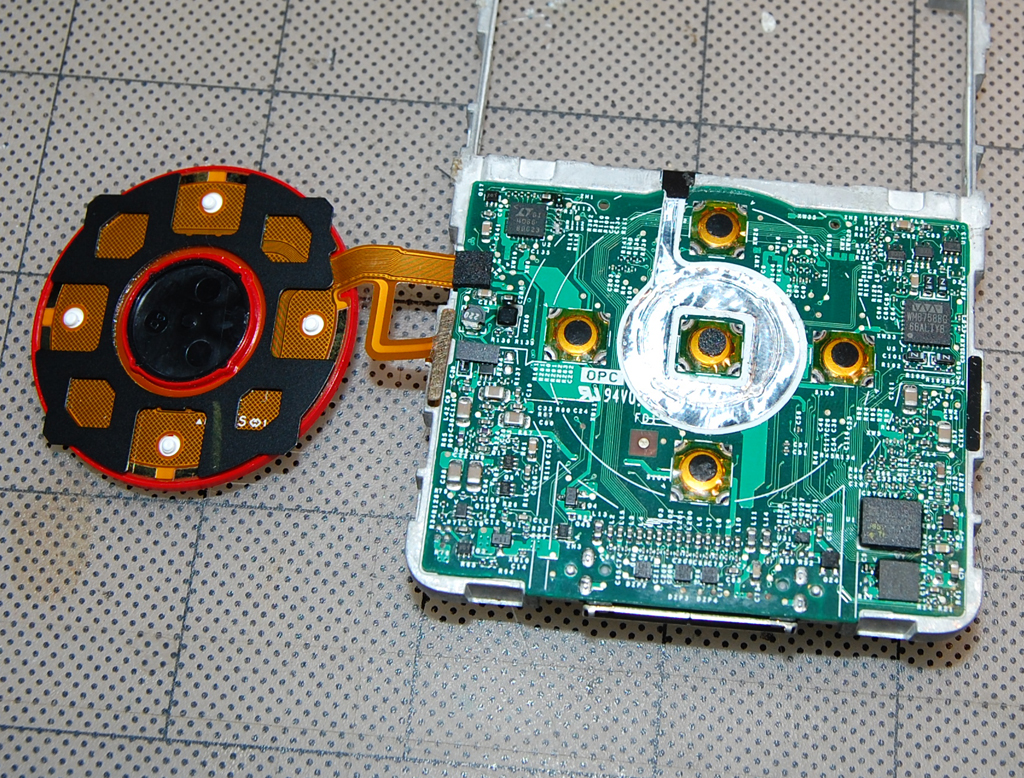
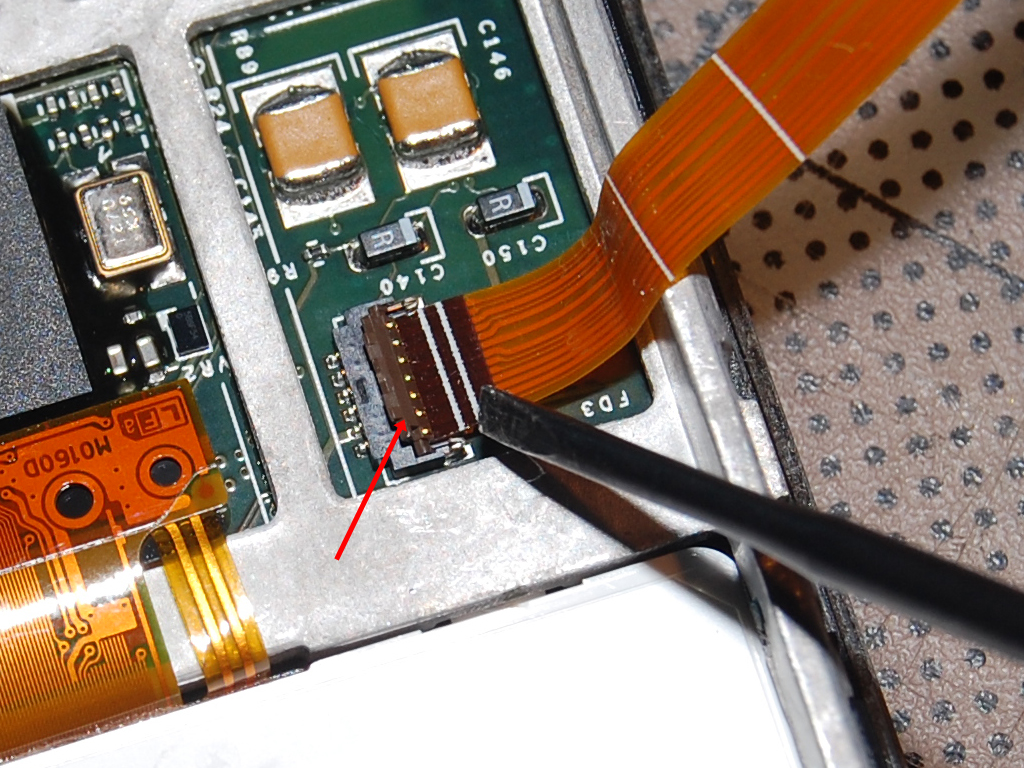
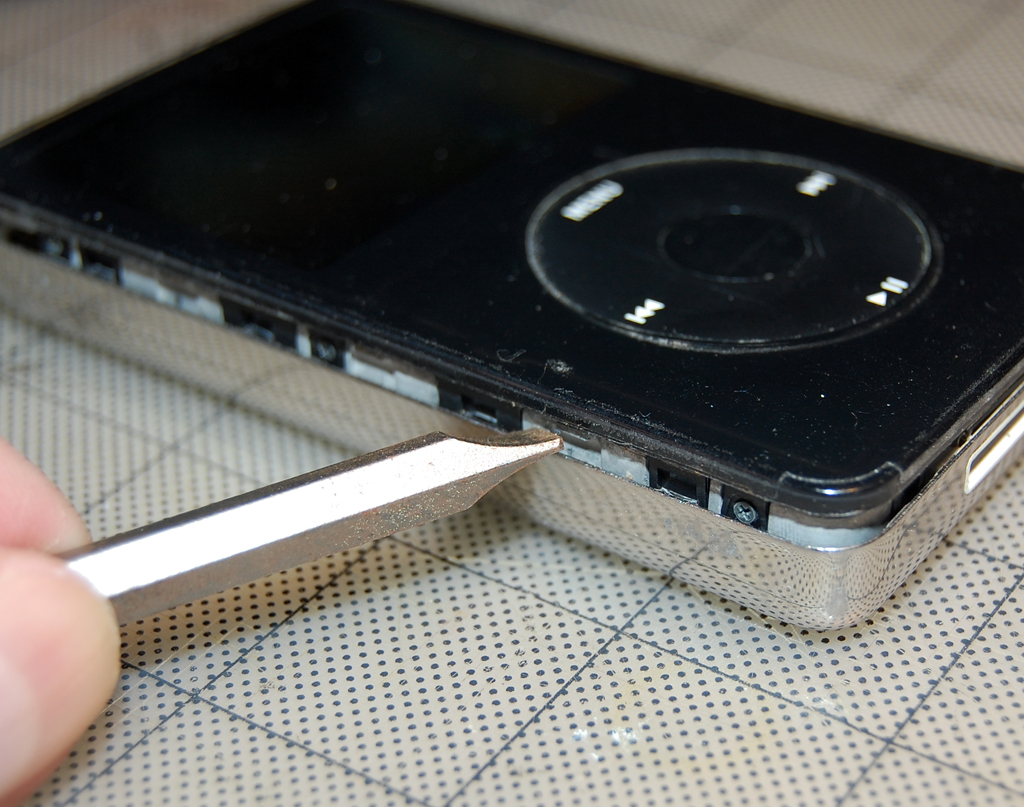
We also noted the clickwheel area was covered by a circular contact which connected to the frame.  We assumed this piece was needed to complete the circuit for the clickwheel.  The piece just lifts off.  It was sticky enough to be placed back on the new board. 

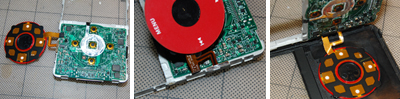
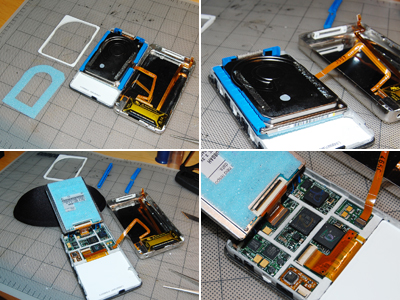
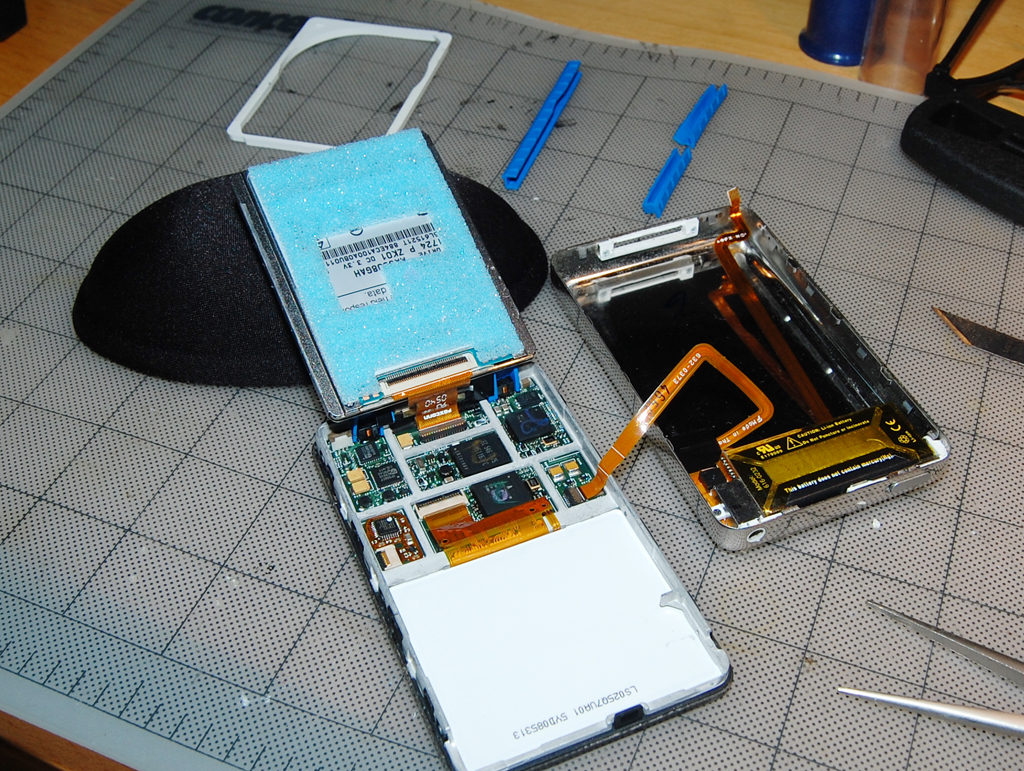
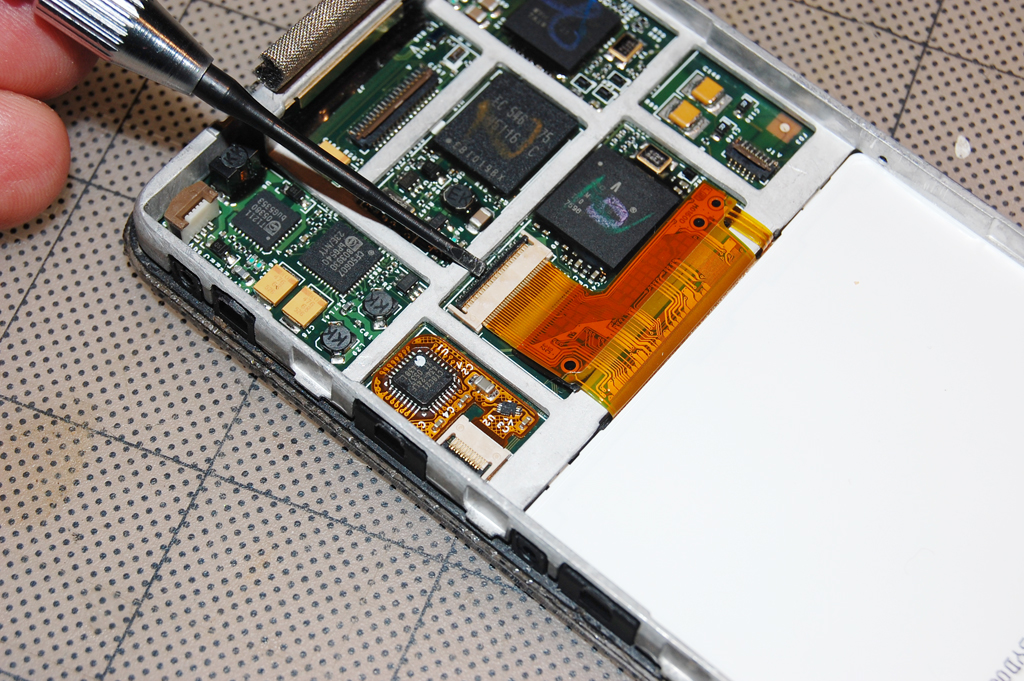
The new clickwheel and board went into the frame with no problems.  We made sure we reattached all of the cable contacts to the same points on the frame.  Our assumption was that they were either grounds or somehow needed to complete the circuit.  Either way, we didn't want to have to debug things after eveything was reassembled.

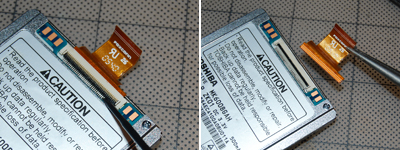
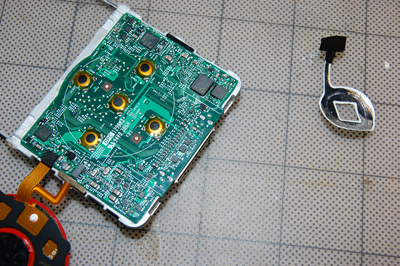
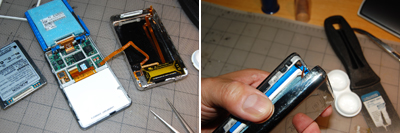
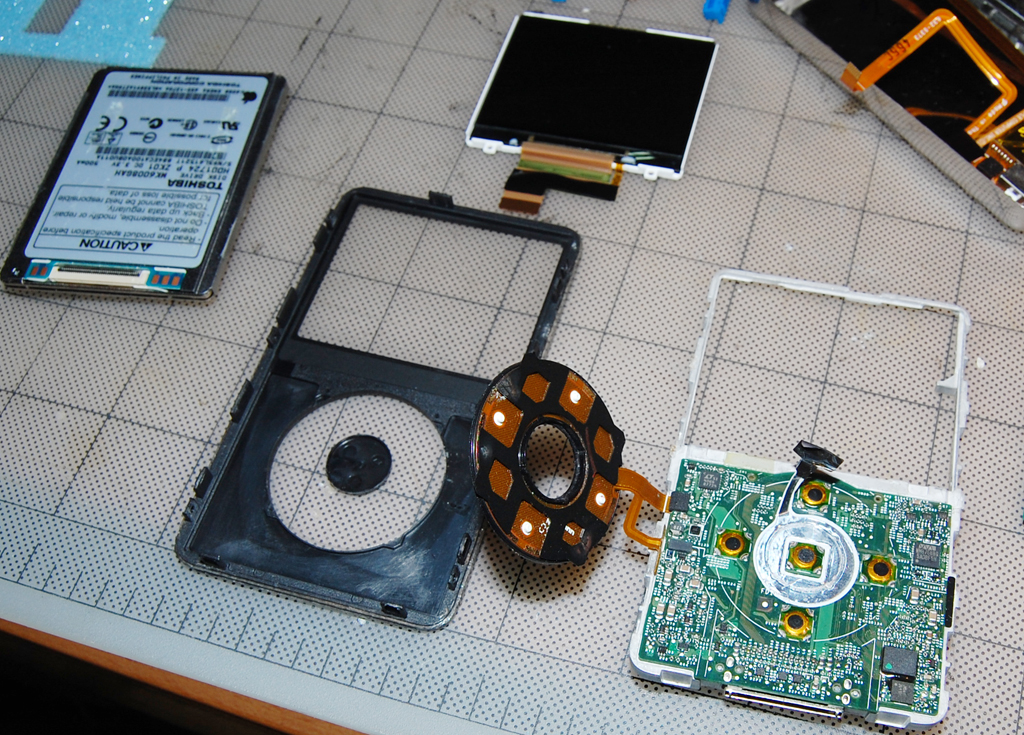
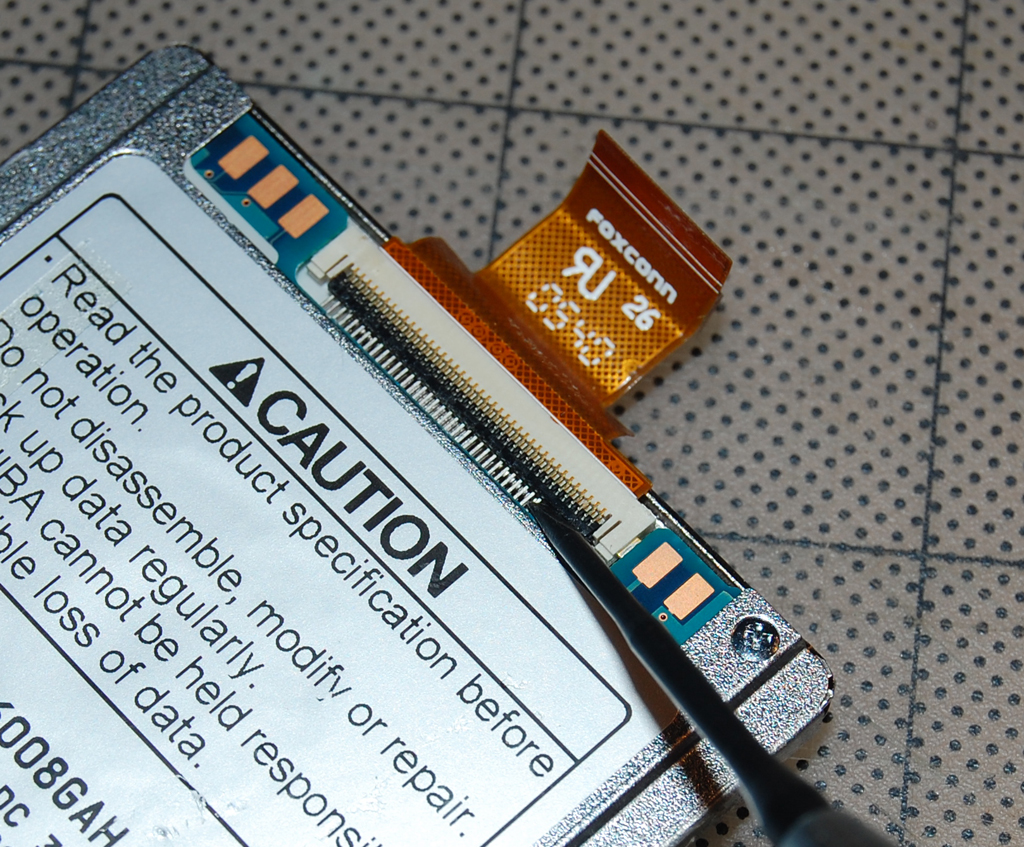
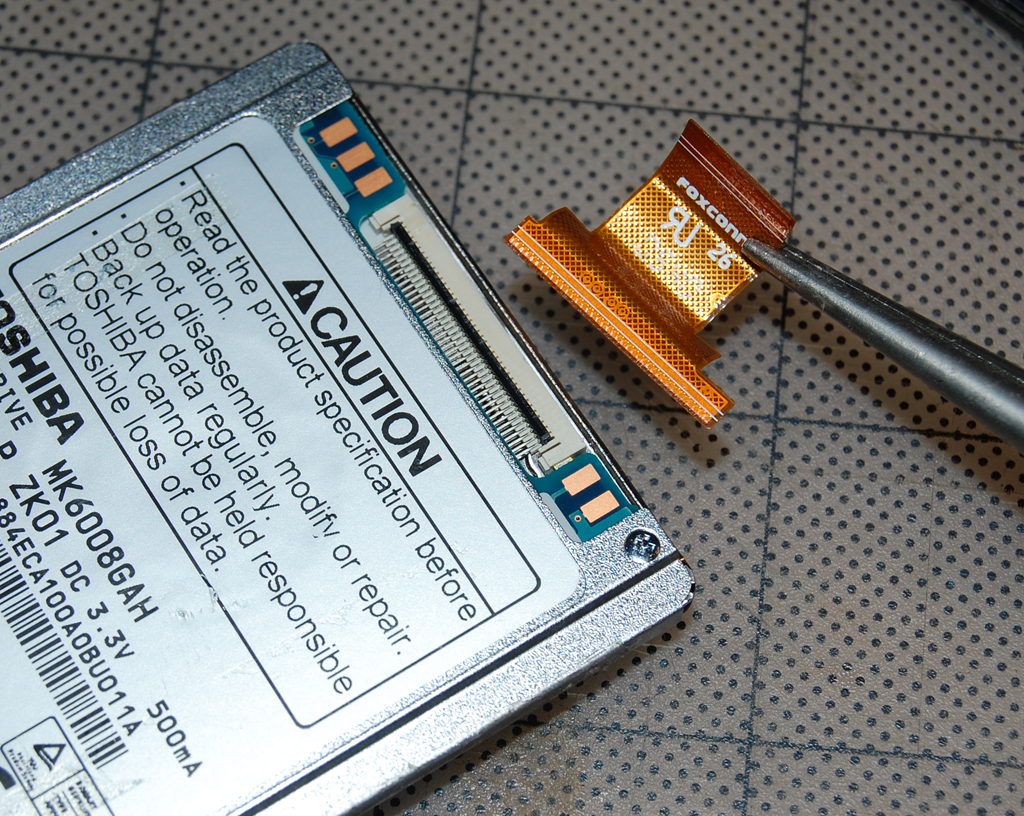
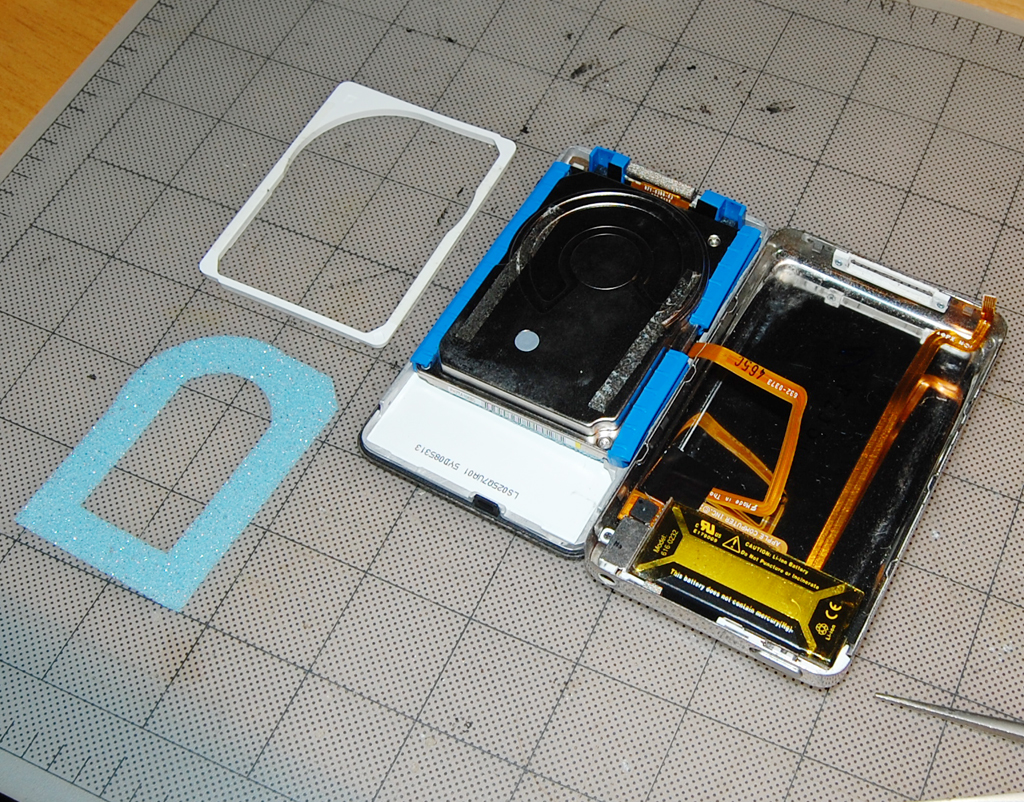
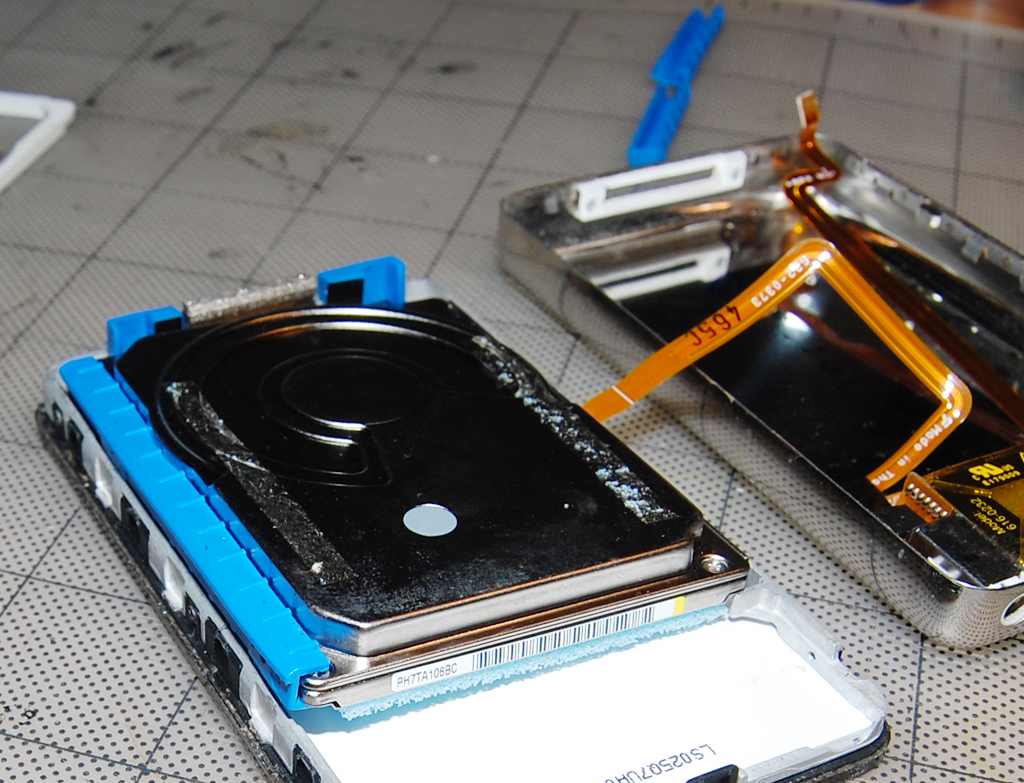
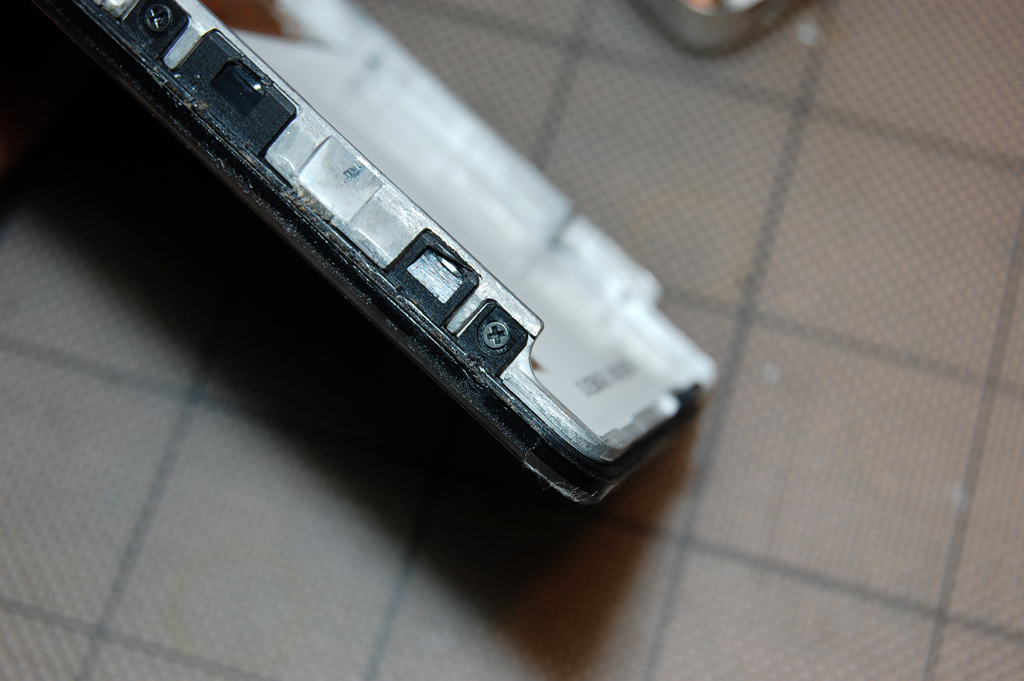
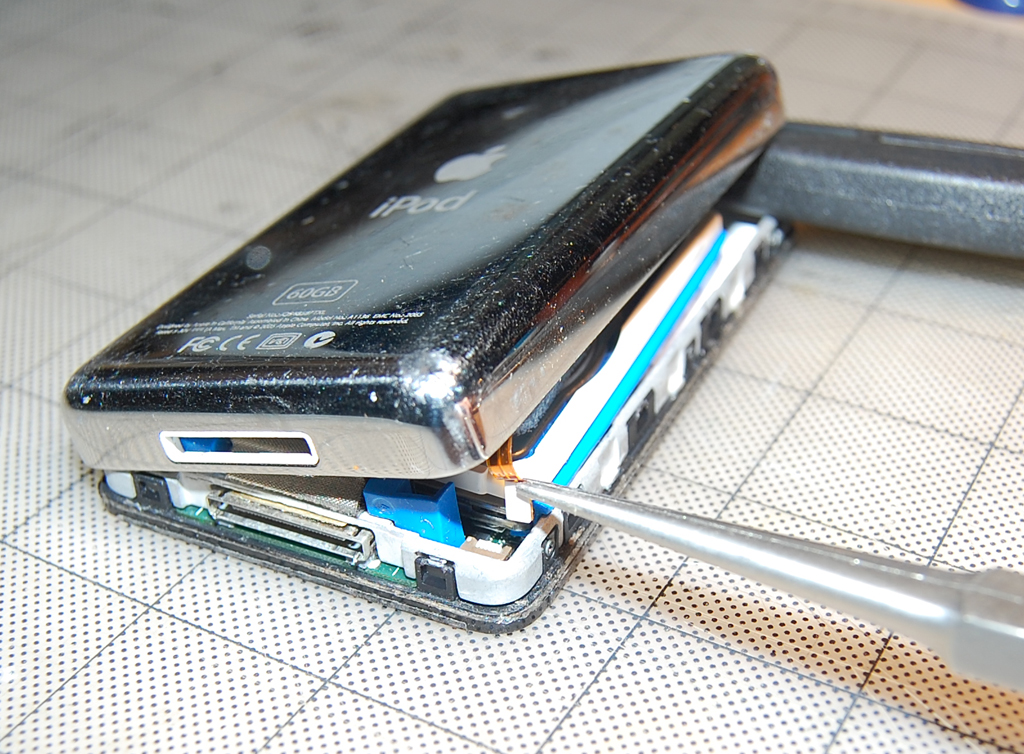
Before we could swap in the bigger drive, we needed to retrieve the connector cable.  Like all the connectors, this had a brown lever which, when flipped up, released the cable.  The new 80 GB drive we got came from www.kingipod.com.  They are a full-service shop where they will tell you what's wrong with your iPod, fix it if possible, replace parts if required, and generally get it working again for you as quickly and inexpensively as possible.  If you want to do the work yourself, they will also gladly supply what you need.

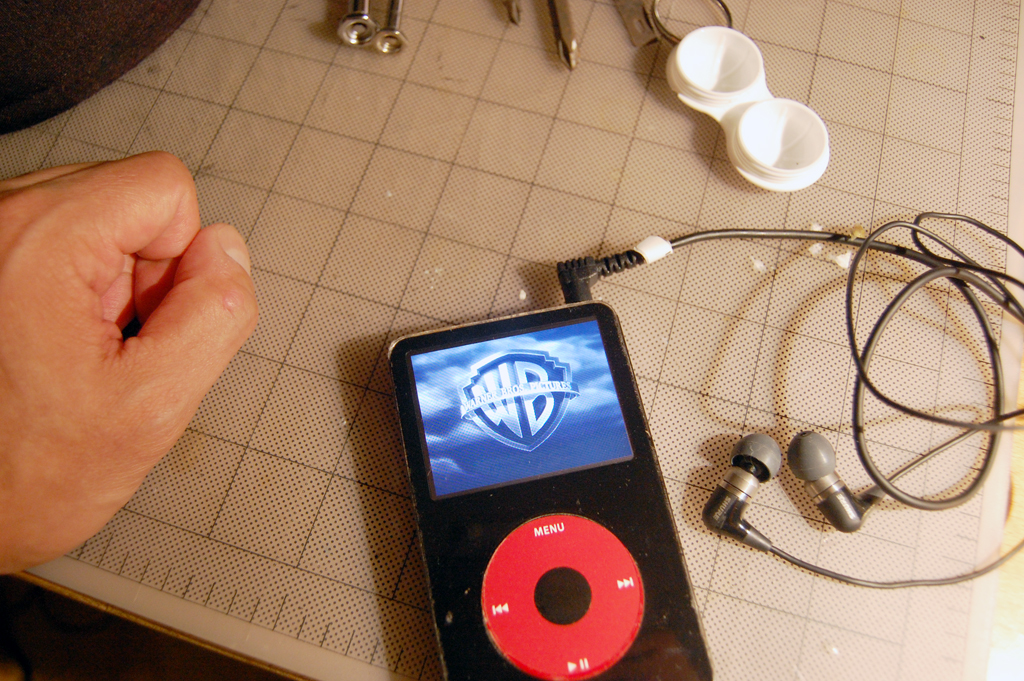
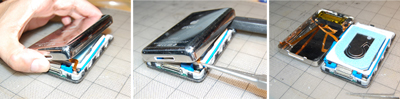
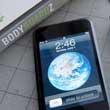
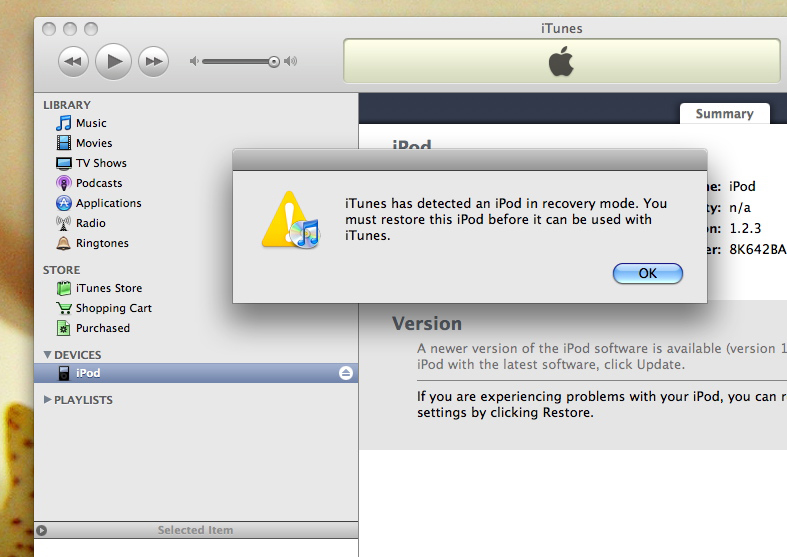
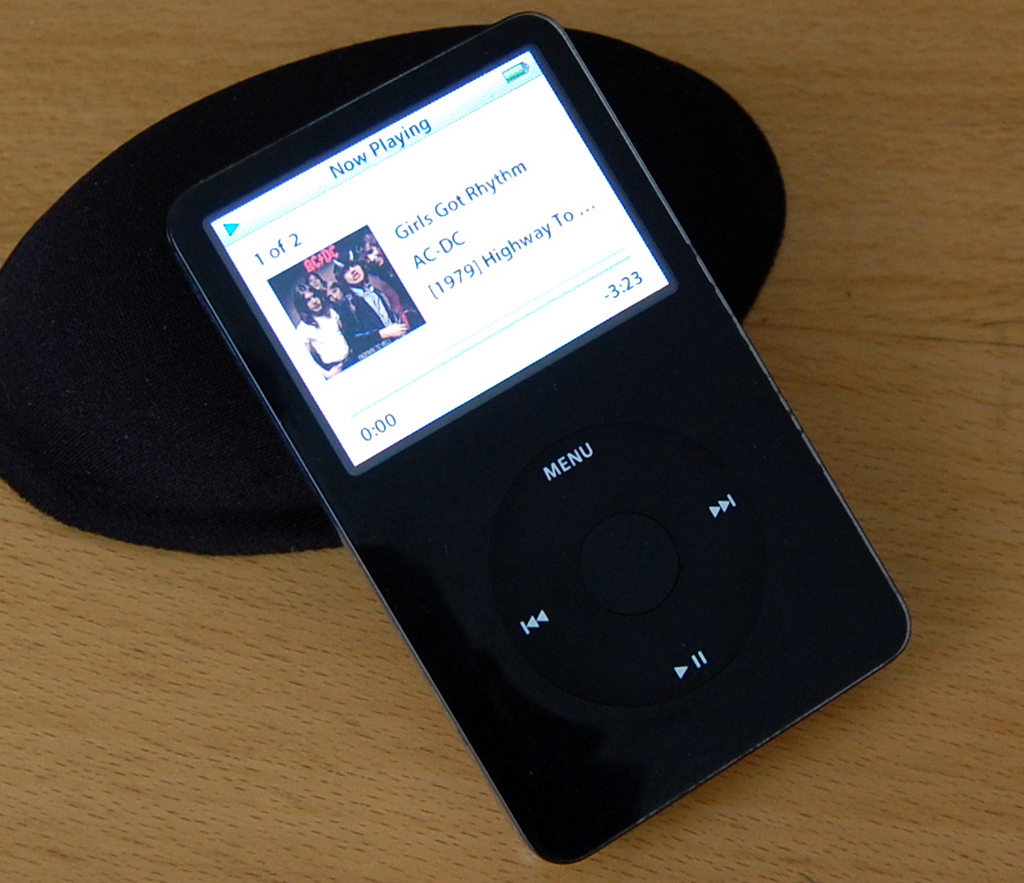
Putting the unit back together was considerably easier than taking it apart.  Probably because we knew what to expect by then.  The only anxious moment came when we pressed the "Play" button. 

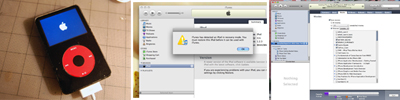
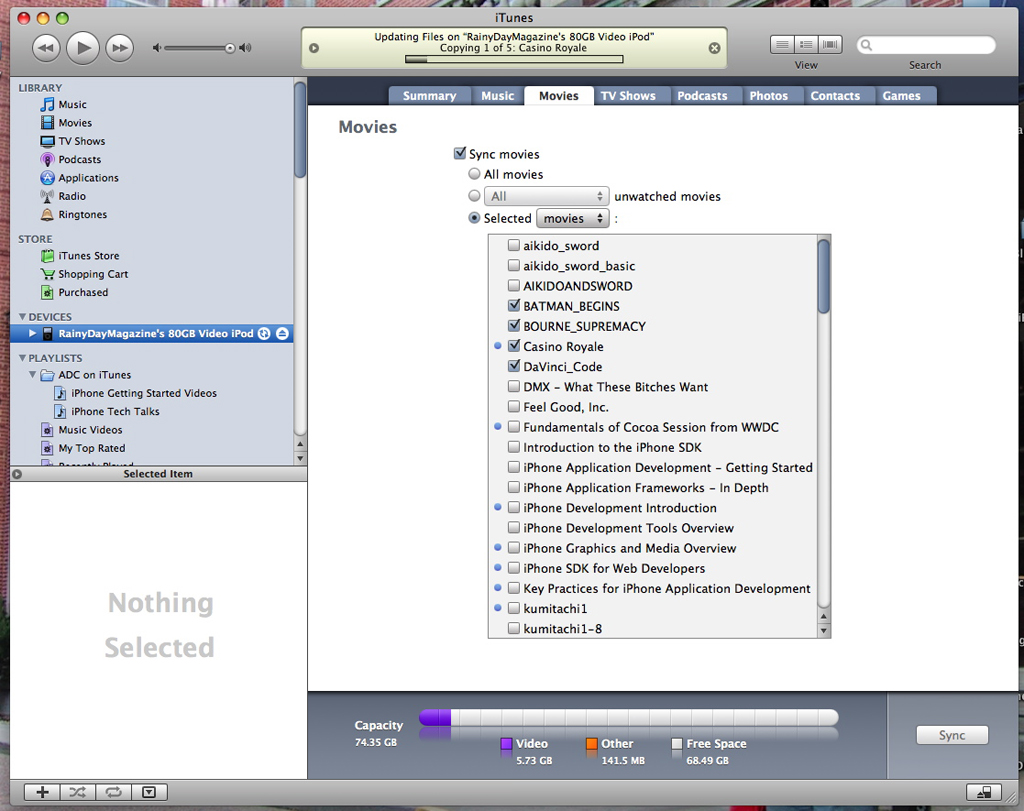
A few seconds went by before the Apple Logo appeared.  The software automatically knew it needed to go into "recovery" mode and to sync things up   Once it did what it had to do, it rebooted and everything came up working!

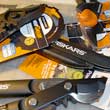
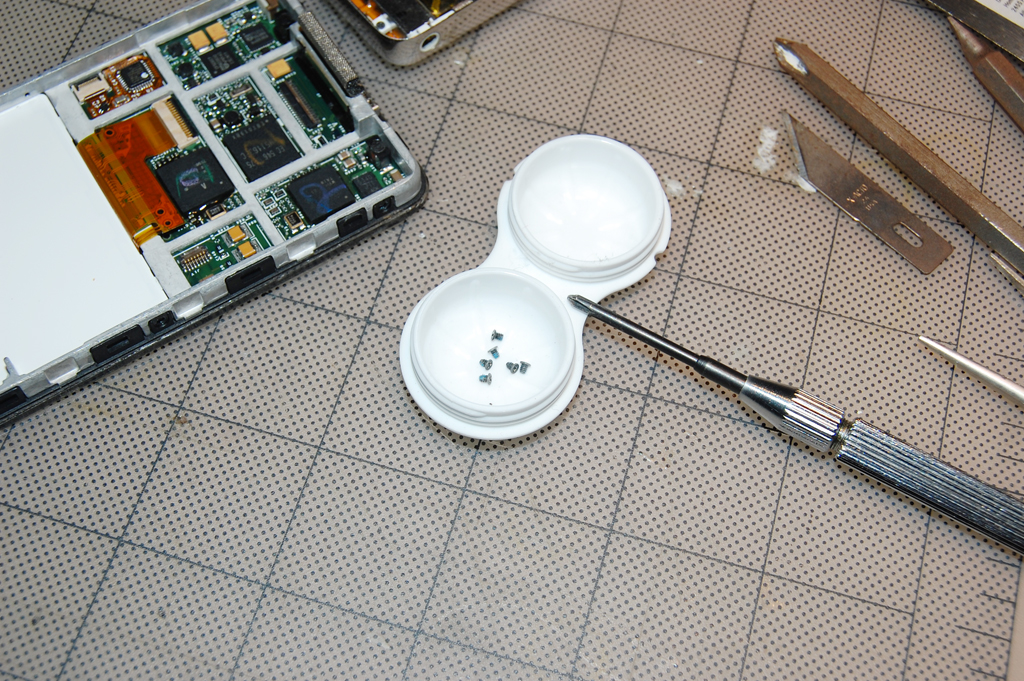
The entire project took about 2 hours to complete and involved working with a lot of small parts in a tight-fitting space.  It would have been challenging had we not had the proper tools (clamps, magnifiers, small screwdrivers, etc...).  However, there was nothing technically difficult about it and we think anyone with sufficient manual dexterity would have no problems with this fun little RainyDayProject.  So if you happen to come across a broken iPod on EBay for a song, snatch it up and see if you can get it working again on your next rainy day :-)  [Permalink] - Wan Chi Lau


July 30,2008 (WowUsWednesday)

One of our readers, Michael S of NY, sent us an email commenting "Here is one view you won't see with your telescopes."

We agree!  This amazing video clip of the moon passing in front of the earth was made by NASA's Deep Impact spacecraft from 31 million miles away.   While this vantage point is familiar to all X-Files extraterrestrial visitors, it is the first time for us here the magazine.  Definitely "WowUsWednesdays" worthy. [Permalink] - Wan Chi Lau

BTW, as a little "Thank You", Michael... pick your favorite, we'll have it out to you today.


July 29,2008 (TakeItApartTuesday)

Yesterday we showed how to open the video iPod.  Today, we  will take a closer look at how we took apart the insides.  With the back of the iPod opened, it was easy to see all the padding around the disk drive.  Clearly Apple designed the unit to survive a few bumps.

The first step to the iPod's disassembly was to remove the drive.  To access the drive, we removed the various foam and rubber paddings on and around the drive.  The blue rubber ones just slip off, but the foam sheets were attached using double-sided tape.  A razor blade was useful in lifting the tape without damaging the foam.  Lifting the drive up revealed that the drive was connected to the iPod by a thin ribbon cable.

The drive cable may be disconnected by flipping up the brown latch on the motherboard and sliding the cable out.  The battery cable may be detached in a similar manner.  A small flat-head screwdriver made flipping the latch easier, but care should be taken as they are quite delicate. 

The front cover was attached to the frame by six small screws (3 on each side).  The screws are VERY small.  A screwdriver with a slightly magnetized tip will aid in the screw's removal as it will lessen the chance of accidentally dropping them.  Also, we found that a contact lens case was the perfect holder for the loose screws.  The slightly curved bottom grouped the screws nicely for easy retrieval.

Once all of the screws have been removed, the front of the case lifts off the frame.  The clickwheel was held in place by the front cover.  Be careful about the center of the click wheel, as it is not attached to anything and will pop out.  The LCD screen may be detached by freeing its ribbon cable from the motherboard.

Now that the entire iPod has been taken apart, we can start replacing the various pieces (motherboard, clickwheel, hard drive).  In the next installment, we will show you how to do just that.  [Permalink] - Wan Chi Lau


July 28,2008 (MakeItWorkAgainMonday)

We purchased a broken 5th-generation video iPod on Craigslist.  The seller let us know that the CPU board was fried because he spilled liquid on it.  We were able to confirmed that the battery, screen, and clickwheel were all in good working order, but the iPod would hang when trying to play any music or video.  Sounded like a perfect opportunity for a RainyDayProject.

Since it rained most of last week, we spent some time repairing and upgrading the broken video iPod.  We took the iPod apart and installed a new CPU board, changed the click wheel to a red one, and replaced the drive with a larger 80GB unit.  This week we'll post the results of all that work.

Today we'll show how to open the case and remove the internal hard drive.  Later on in the week, we'll go deeper into the disassembly of the unit until the entire iPod has been completely taken apart.

The first step to opening the case is to work from the clickwheel end.  Prying around the screen end would likely result in a cracked LCD.  The case is held together by friction, so it is all about creating a small opening and gradually making it bigger all around.  Since our case was already pretty scratched up, we used a thin putty knife.  Others have used a guitar pick or a plastic tool designed for opening the case so as not to accidentally scratch the case.  

Once we had the case open, we noticed the back will not open flat until the battery cable was detached.  We found it easier to work the cable loose if the iPod was placed facing down, as it was more stable.  A pair of needle nose pliers made disconnecting the cable easier, but if your fingers are small, you may be able to reach in and pull the cable free. 

Once the back was removed, the innards of the iPod were accessible.  Later this week, we will post the steps of the the rest of the disassembly process.  There were a few tricky areas, but in general it was pretty straightforward.  We'll also point out a few insights we gleaned from the dissection, which may be worthy to note as you consider whether or not to take yours apart.  [Permalink] - Wan Chi Lau

BTW...just a reminder, the "Make it work again!" contest ends soon.


[Dec] [Nov] [Oct] [Sep] [Aug] [Jul]

[Jun] [May] [Apr] [Mar] [Feb] [Jan]

....... 2007 ......

[Dec] [Nov] [Oct] [Sep] [Aug] [Jul]

[Jun] [May] [Apr] [Mar] [Feb] [Jan]

....... 2006 .......

[Dec] [Nov] [Oct] [Sep] [Aug] [Jul]

[Jun] [May] [Apr] [Mar] [Feb] [Jan]

....... 2005 .......

[Dec] [Nov] [Oct] [Sep] [Aug] [Jul]

[Jun] [May] [Apr] [Mar] [Feb] [Jan]

....... 2004 .......

[Dec] [Nov] [Oct] [Sep]


Featured Review*

MFA


RainyDayBuzz*
   
 
GET GEAR*


Rainy Day Magazine is a Publication of Rainy Day Entertainment© 2008
case label case and battery battery in case battery bottom power check inverter side