|
|
|

RainyDayMagazine's content can now be licensed for your print magazine or web site. Please contact us directly here. If you want to see something reviewed, then drop us a note with a link and we'll be happy to take a look.
|
| |
November 5,2008 (WowUsWednesday) |
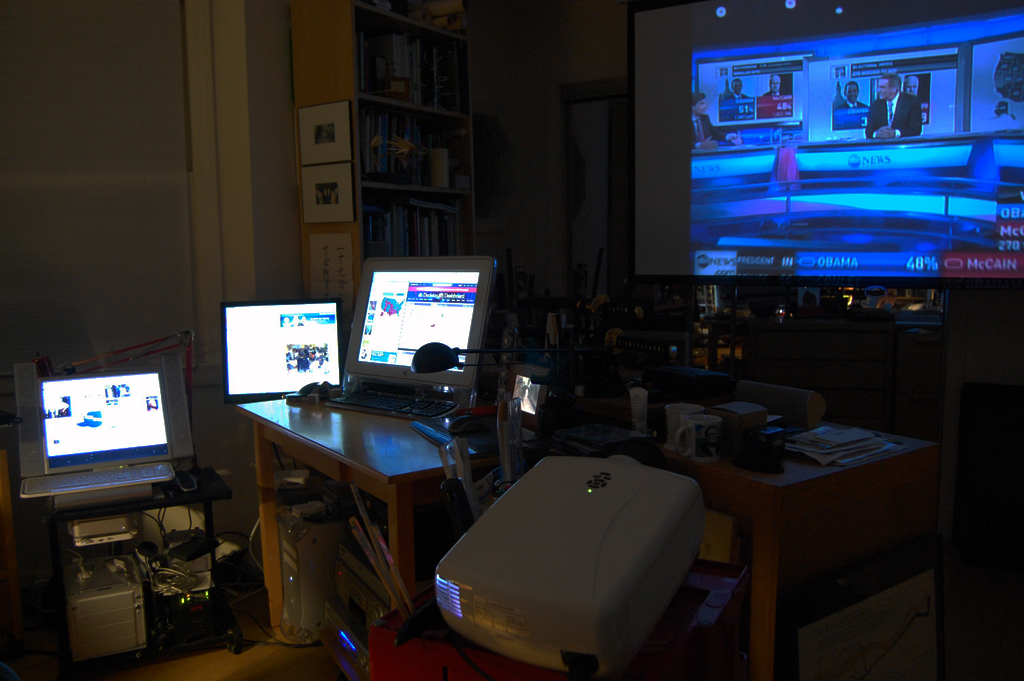
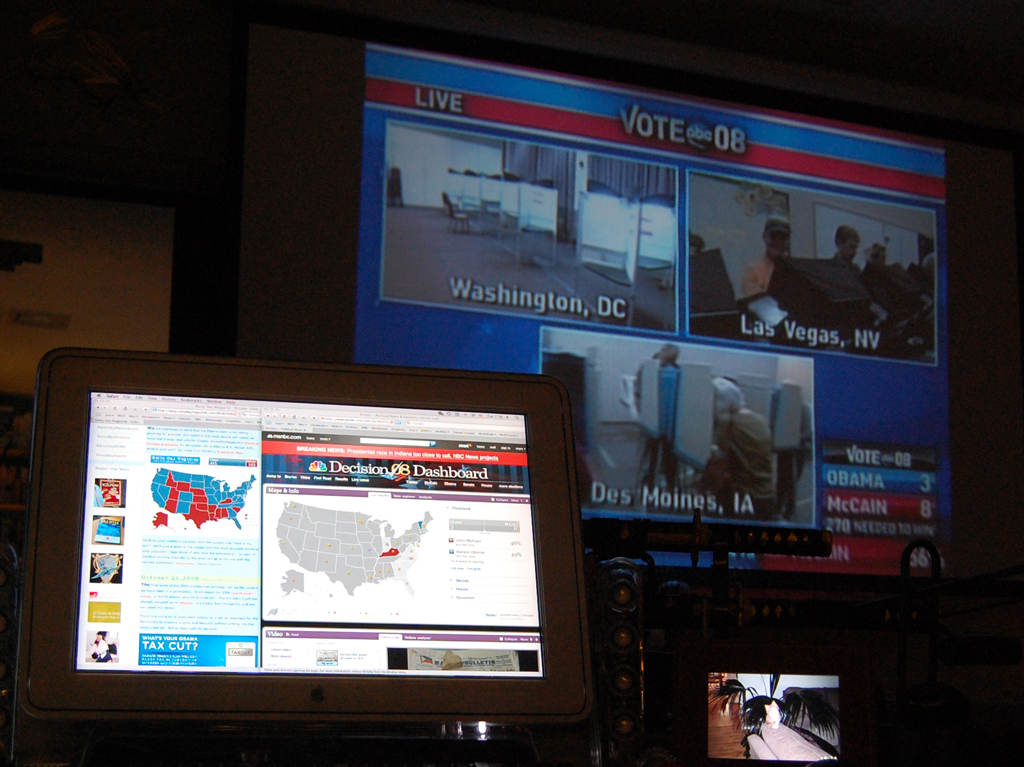
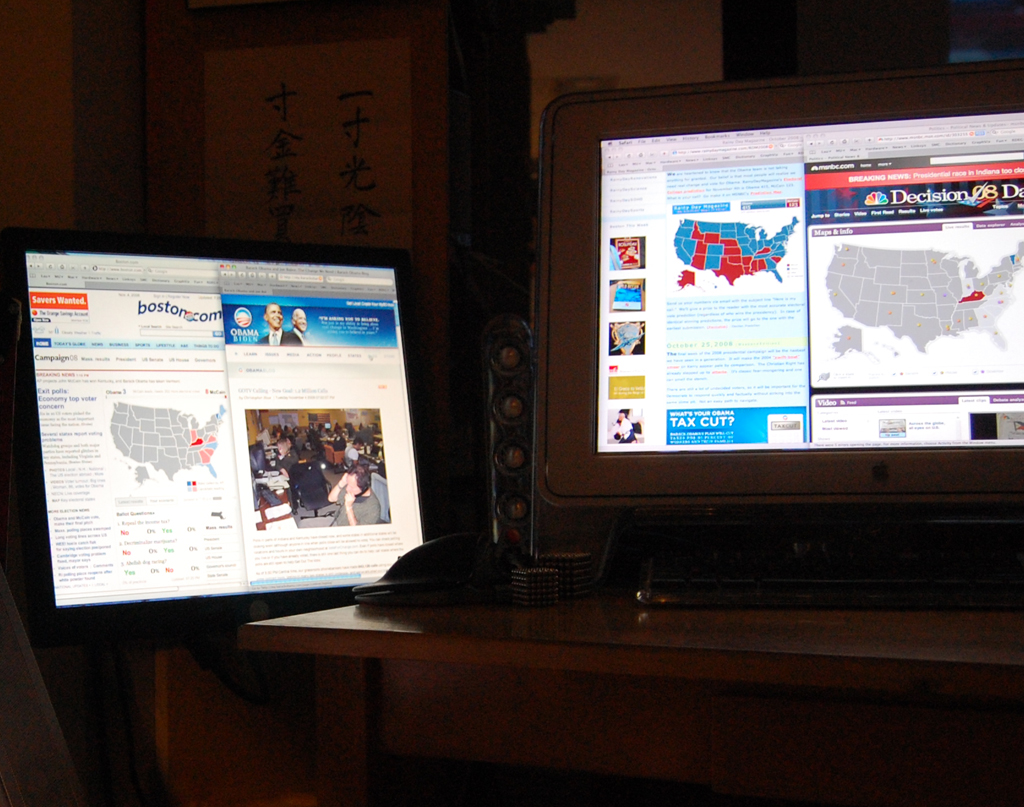
The RainyDayMagazine office was turned into an election night results center last night. We were tracking results from all of the major news sites and campaign headquarters in this historic election.

The wall screen was projecting a live news feed, other machines were tracking the real-time election results as they were posted from the various states.

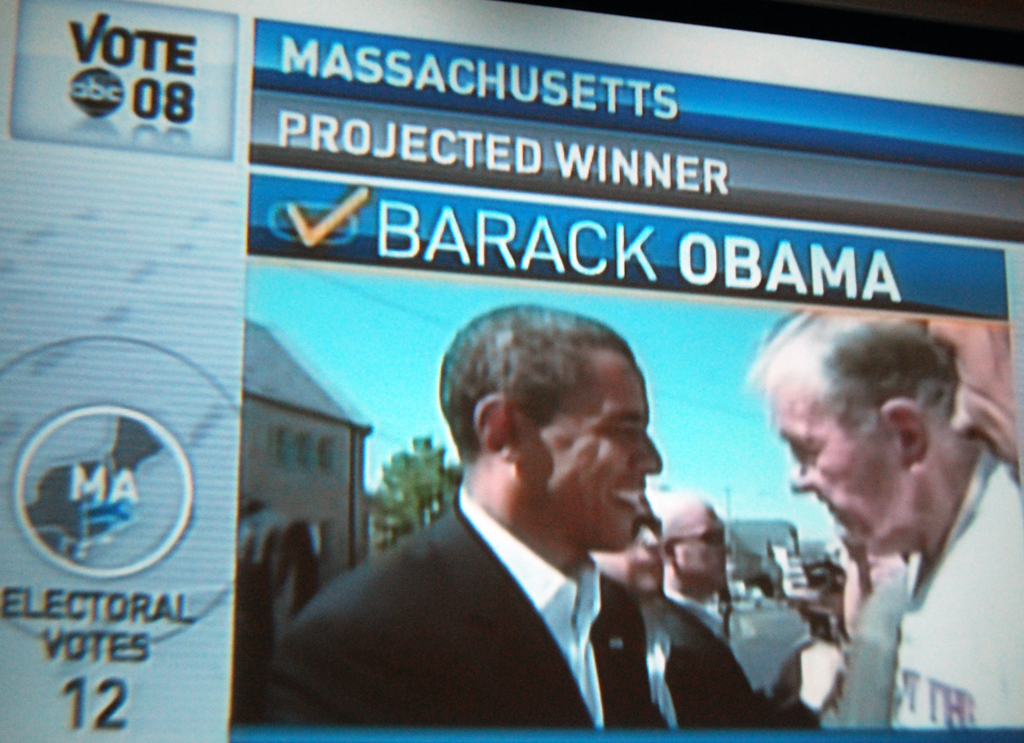
By 8PM, Barack Obama was projected to be the winner of Massachusetts. Folks were cautiously celebrating all over town. It was not yet clear how the night will eventually end, but it was starting to look like it would be a big night for the Democrats.

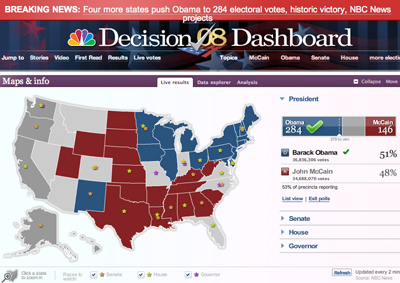
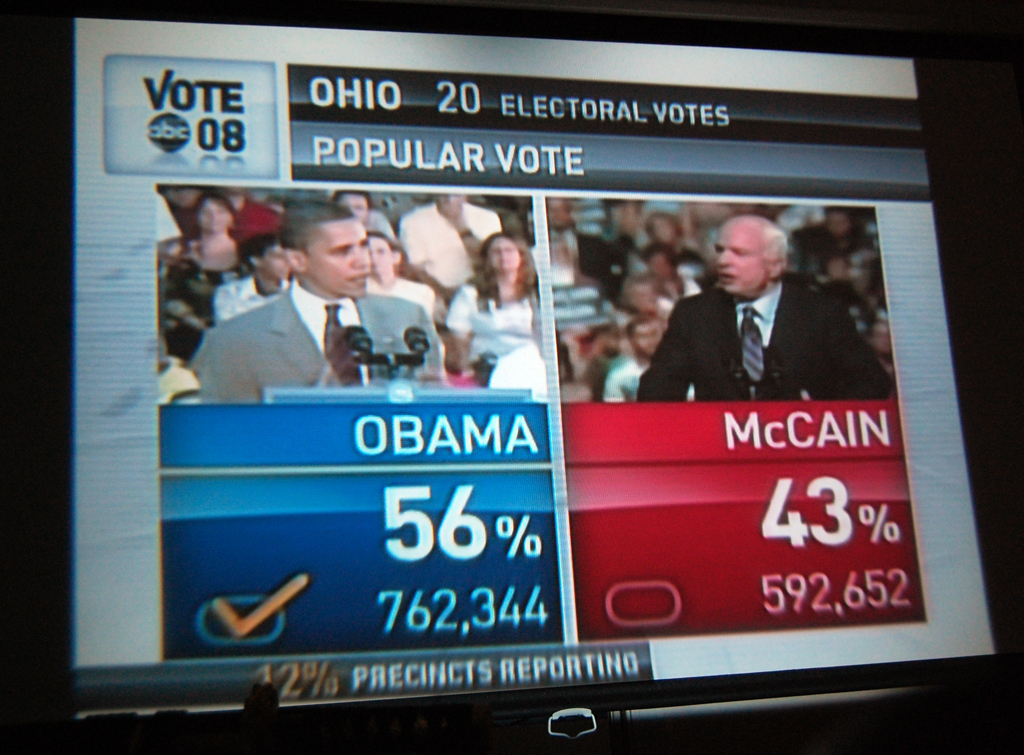
When the Pennsylvania and Ohio results came in for Obama, we knew it was going to be a huge night for the Democrats. All of a sudden, our prediction from a week ago did not seem so far-fetched.
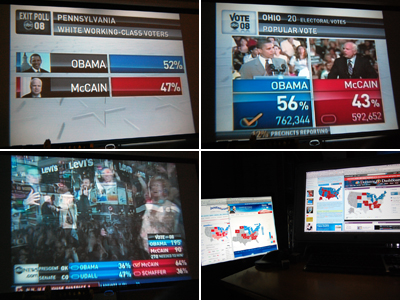
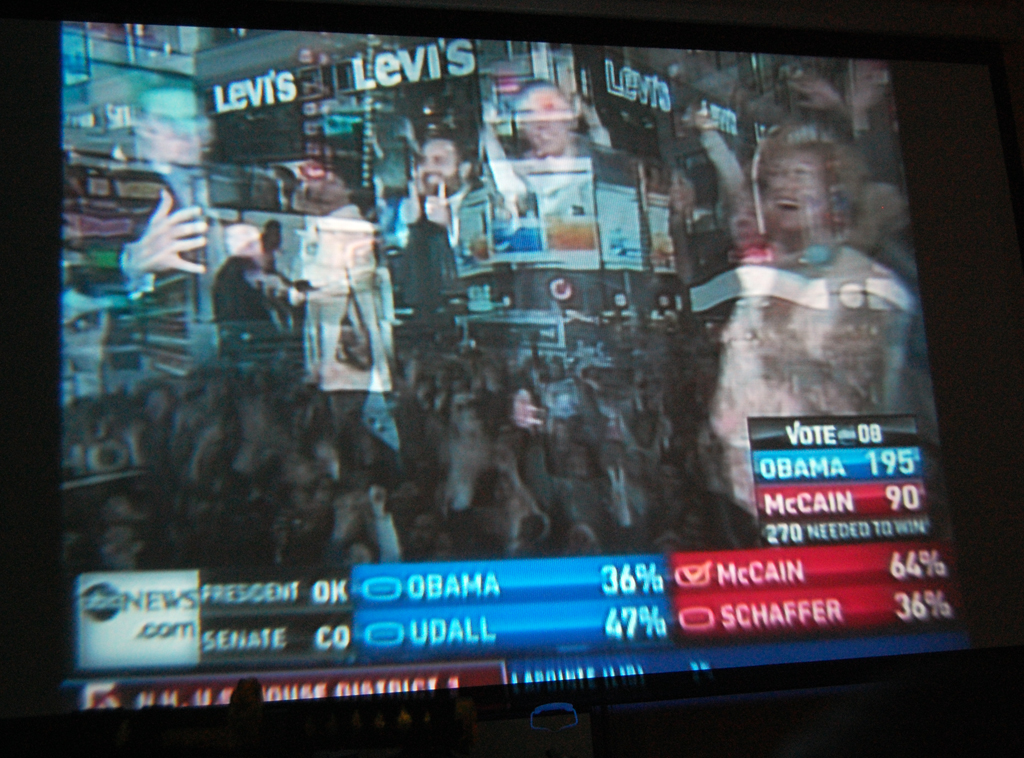
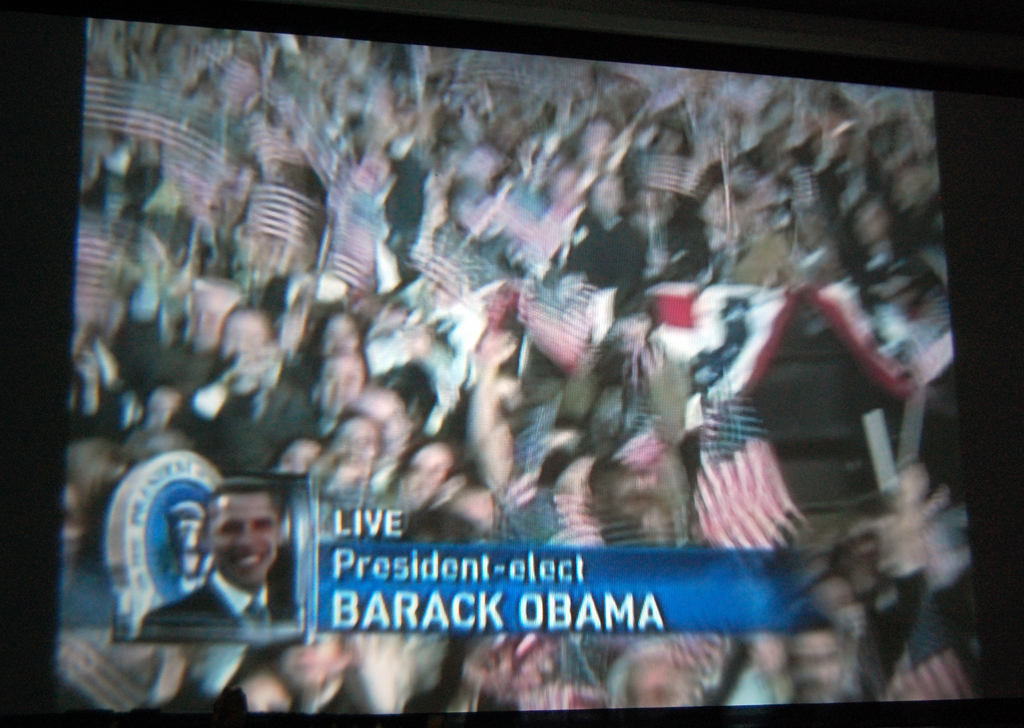
At 11 PM, MSNBC made the projection that Barack Obama would become the new president of the United States! A history making moment of which every American can be proud.

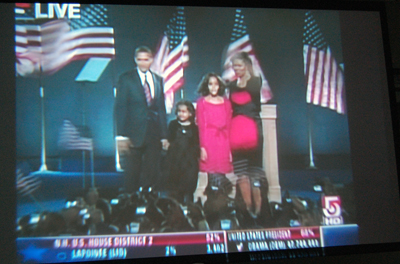
The easy part is over. Now comes the real challenge. There is a lot of work awaiting all of us. It is about changing things to make things better for everyone. Change is hard, change is scary, but we can only grow if we are willing to change. The country is ready for a change. The country needs a change. We are ready to get to work. President Obama, what do you need? [Permalink] - We Have A Winner
|
November 4,2008 (ElectionDayTuesday) |
Four years ago, the country elected a president which steered us down some pretty rough roads. Instead of changing course and getting us out of the mess, we were driven almost off the cliff. Today, the country will get another chance to select a new driver. Let us hope that collective wisdom prevails this time around and we elect somebody who knows how to drive, can read a map, and knows when to stop and ask for directions.
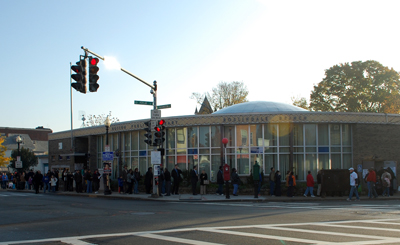
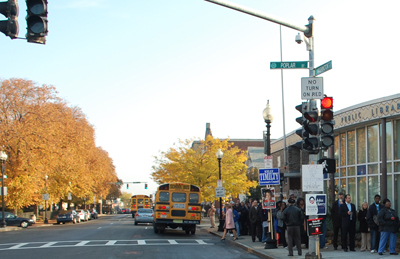
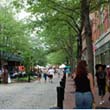
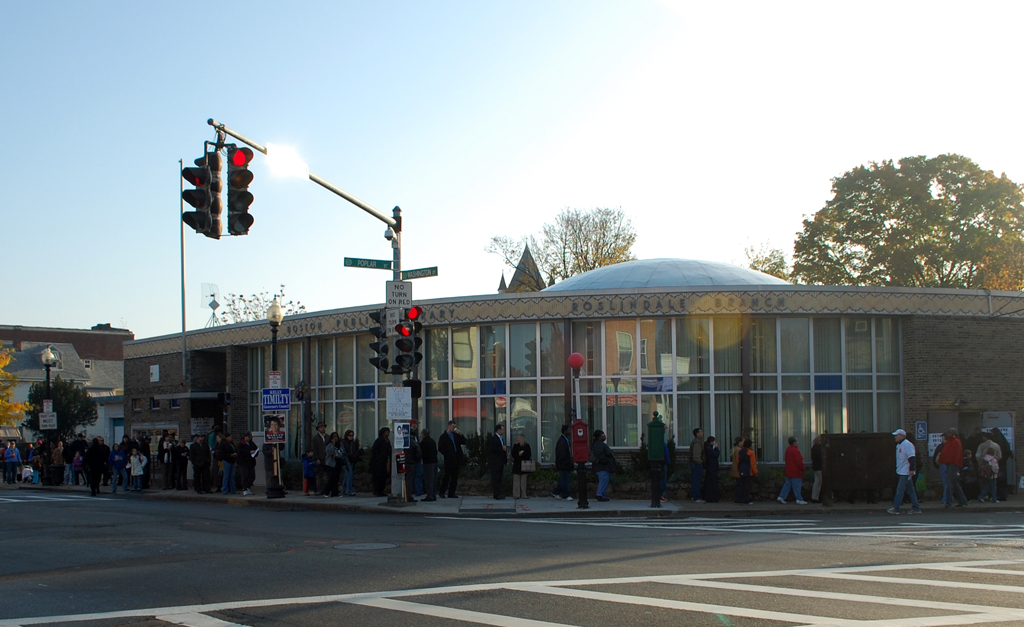
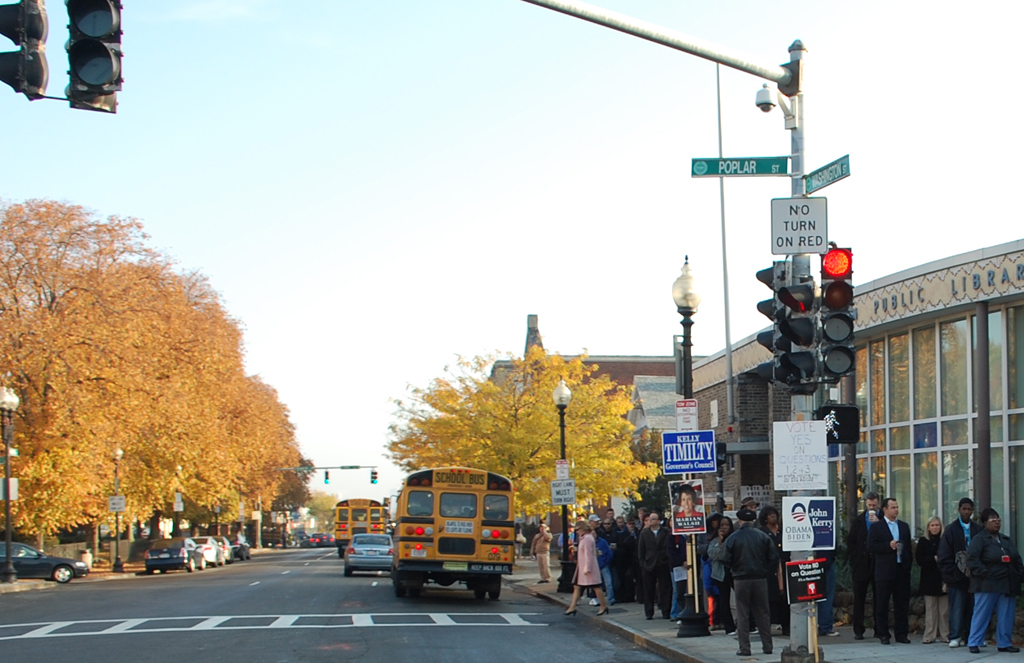
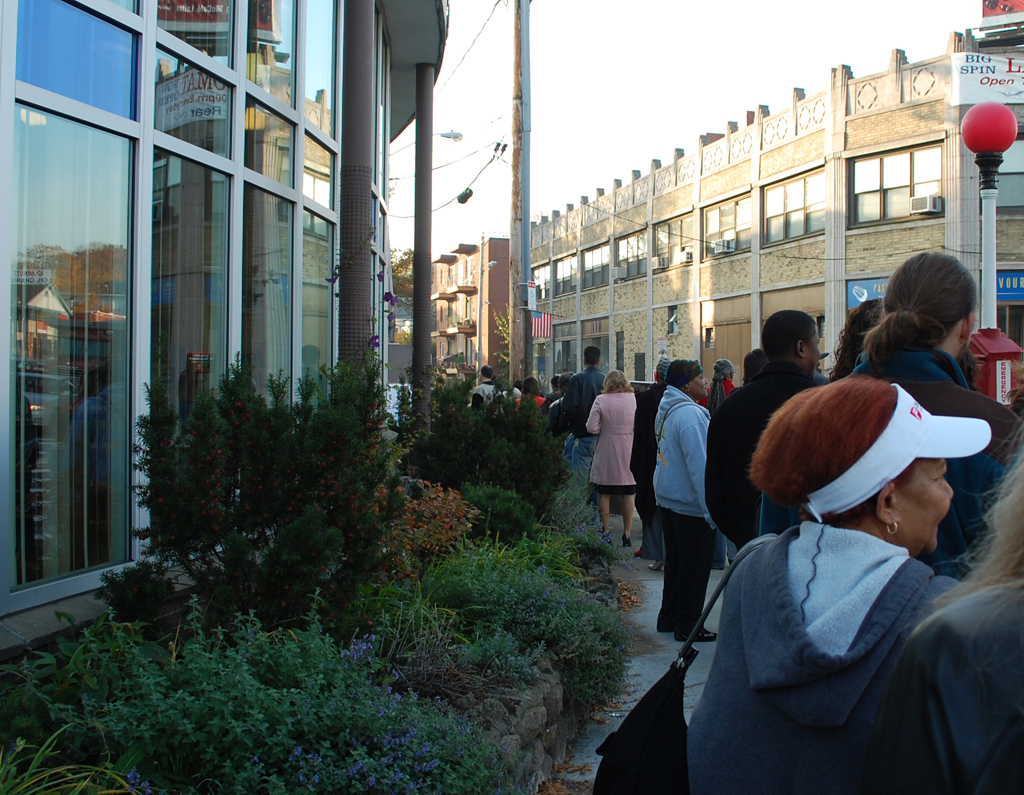
Even though some of us here are a bit under the weather, we got up early to go vote. We have voted in Boston for many years and we NEVER had to wait in line, until today. The line moved quickly and we experienced no problems at our voting location. We were done in about 20 minutes.
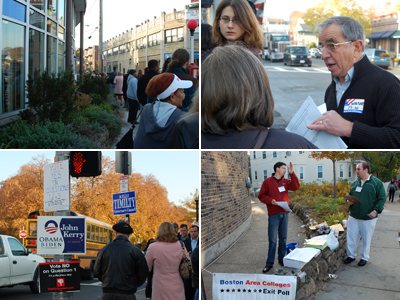
It was heartening to see all different kinds of people waiting in line to vote. Judging by the number of folks in the queue by 7AM this morning, it seems like the turnout for this election is going to be huge!
We made our election prediction over a week ago. By tomorrow we'll know if we were right. In any case, the country will have elected a new president. One thing we know for SURE, it will be a change for the better. How exciting is THAT? [Permalink] - Vote
|
November 3,2008 (ElectionEveMonday) |
If you need to know where you should go to vote tomorrow, just click on the image below and fill in the info. You'll get directions to the appropriate voting place for the address.
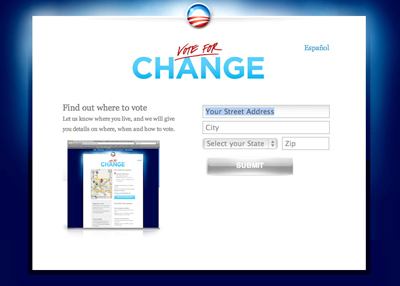
We'll be voting for change, but regardless of your particular political leanings, we hope you vote. It does count. [Permalink] - Vote For Change
|
November 2,2008 (WeekendEdition) |
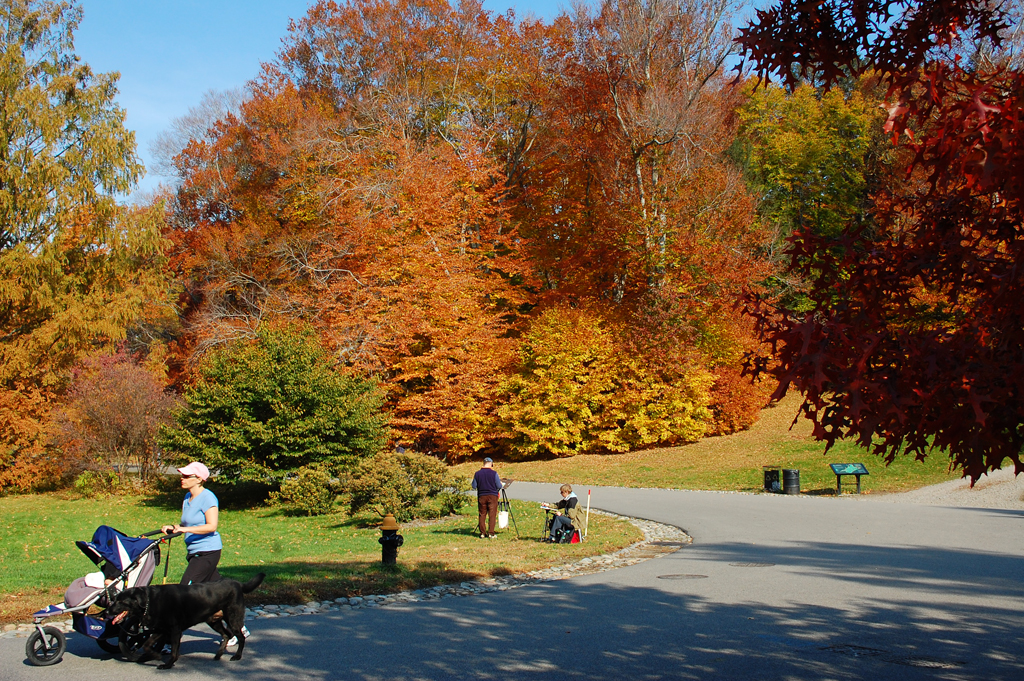
We arrived at Walden Pond early in the day, but since the clocks were turned back last night, it really wasn't THAT early. Most of the trees had already changed.
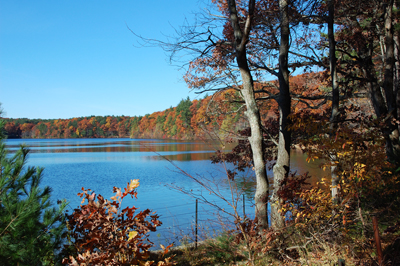
The colors have shifted toward a more muted set of orange and brown. There were still clusters of reds popping up in places around the pond.


This was probably the last weekend where there will be good color at Walden Pond. Most of the leaves will be gone by next week. If you want to see some of the remaining colors, you need to go soon. [Permalink] - Walden Pond Fall
|
November 1,2008 (WeekendEdition) |
One look out the window this morning and we knew the day was going to be a nice one. The colors in the RainyDayGarden started to turn about two weeks ago, but the the Japanese Maples are now just peaking. It was going to be one of those picture-postcard New England Fall days and we wanted to capture some of it on silicon.


We thought since the colors were so nice in the garden, they must be peaking at the Arnold Arboretum as well. We hopped on the Vespa and scooted down to see if we were right.

Because of the wet Summer many of the trees still had their leaves. Bright yellow colors were everywhere. The Arboretum is a popular nature destination for many Bostonians but since it was still early in the day, it was not yet crowded. We took advantage of the temporary tranquility and got some nice panoramic shots.

By the time we were done shooting, more and more of the usual Arboretum goers (jogger, bikers, stollers) had started to appear. It was time for us to pack up and go get some food. All that hiking really works up an appetite!
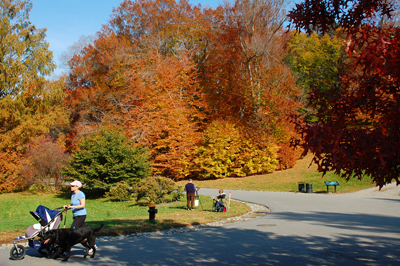
Today was a picture perfect New England Fall day. Apparently, a few painters agreed and were out capturing some of the Fall colors as well. If it is still nice tomorrow, we'll take a drive out to Walden Pond and see if we can get another shot of the heron. [Permalink] - Fall Colors
|
October 31,2008 (FoodFriday) |
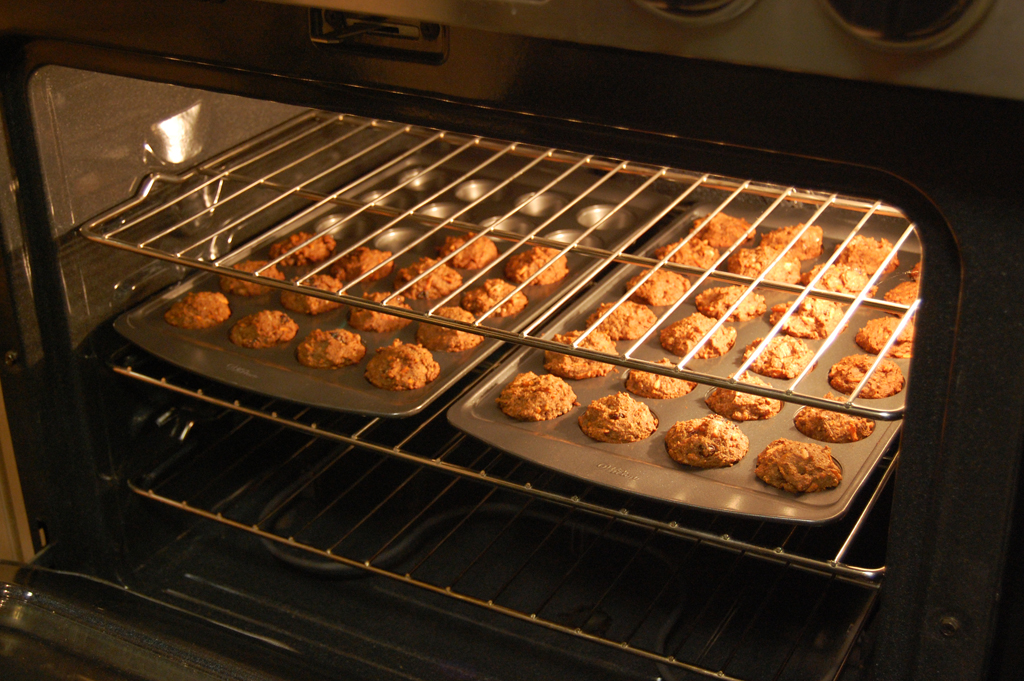
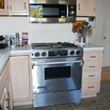
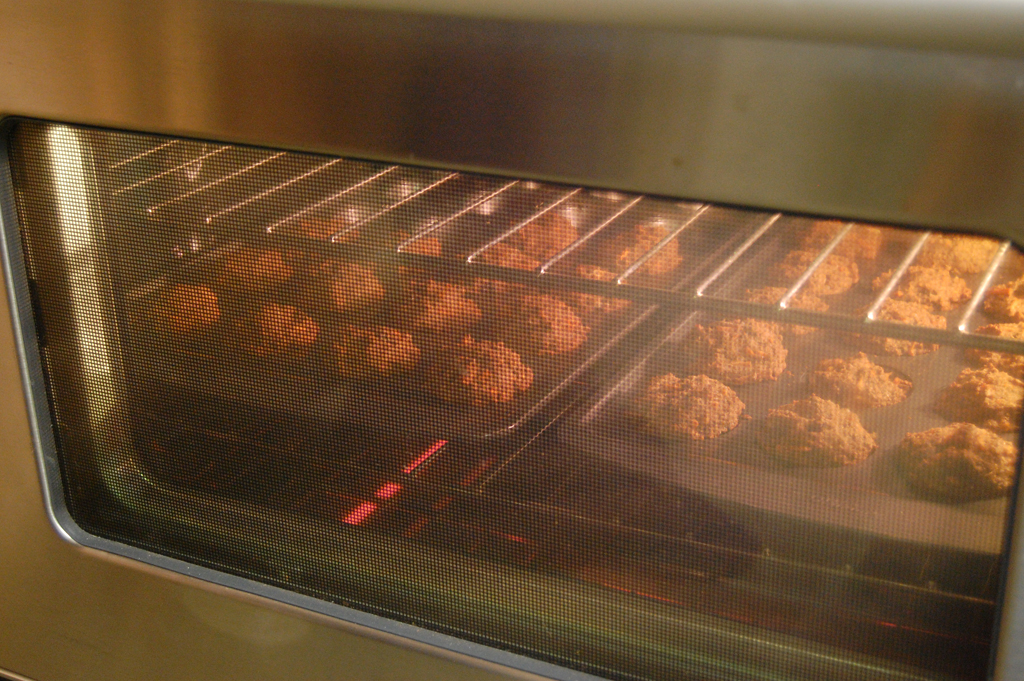
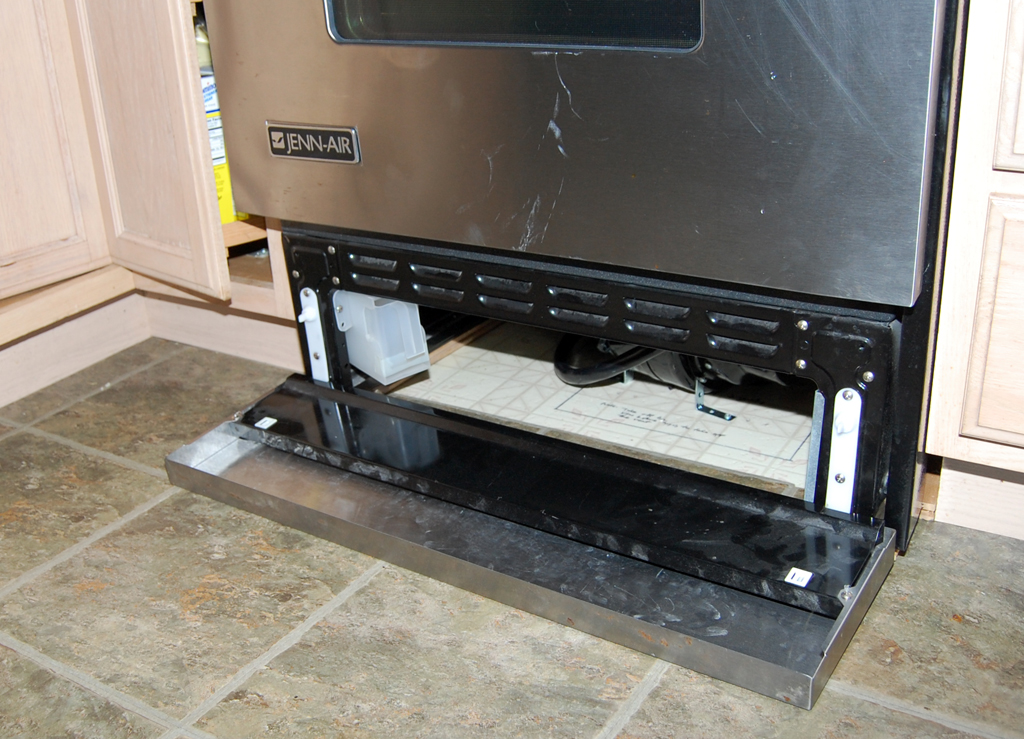
Now that the electric oven and gas burners of the new Jenn-Air range are all operational, it was time to give things a FirstUse test. Most of us were more curious about the convection oven, so we decided we'll check that out first. What would be a better test than to make some muffins? Of course, the folks in the RainyDayKitchen couldn't make just any muffins, they had to make healthy spelt-flour muffins. If you don't know what spelt is, just drop Carolyn a note. She will tell you all about it. Anyway, back to the oven...

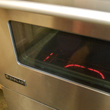
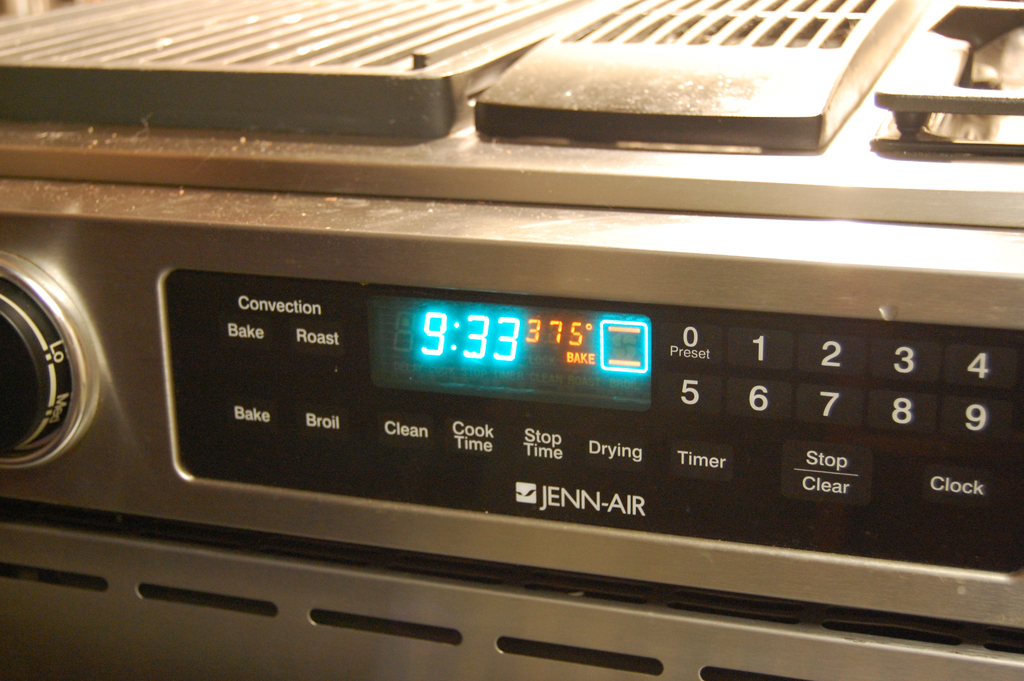
Working the oven settings was pretty straightforward (no manual needed): just hit the "Bake" button, punch in the desired temperature, and off it goes. The Temp Indicator gives the current reading and a "ping" sounds when the temperature has been reached. We gave up trying to figure out how to make the timer work. I guess we'll have to RTMF for that one.
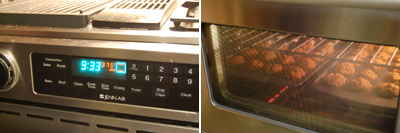
The oven came up to the desired temperature very quickly, which is a good reason for using 240V/50A. There is a convenient light switch for the oven so we could check on the baking without having to open the door.

The first batch of muffins came out perfect. Now that we know the oven works, we will use our standard rosemary chicken recipe and give the convection feature a try. [Permalink] - Jenn Air Oven FirstUse
|
October 30,2008 (ReModellingThursday) |
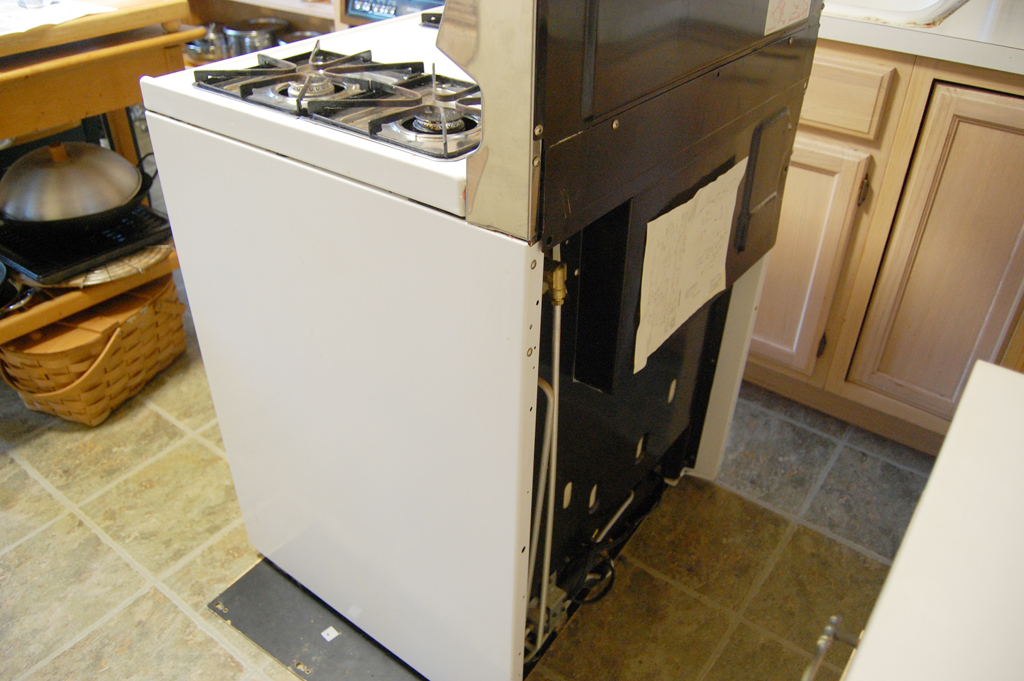
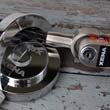
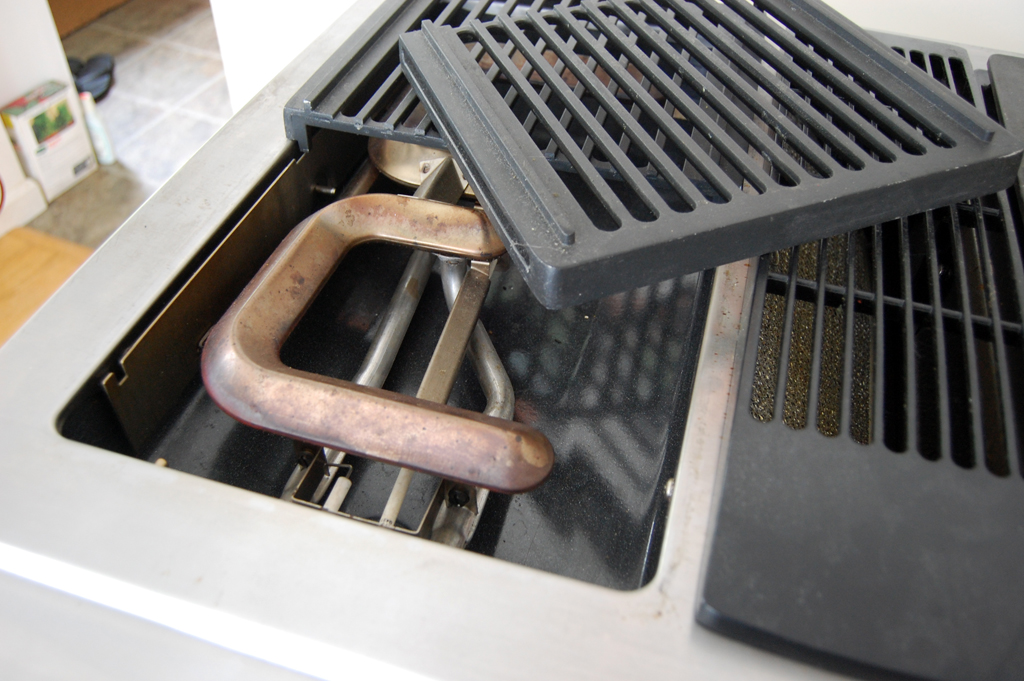
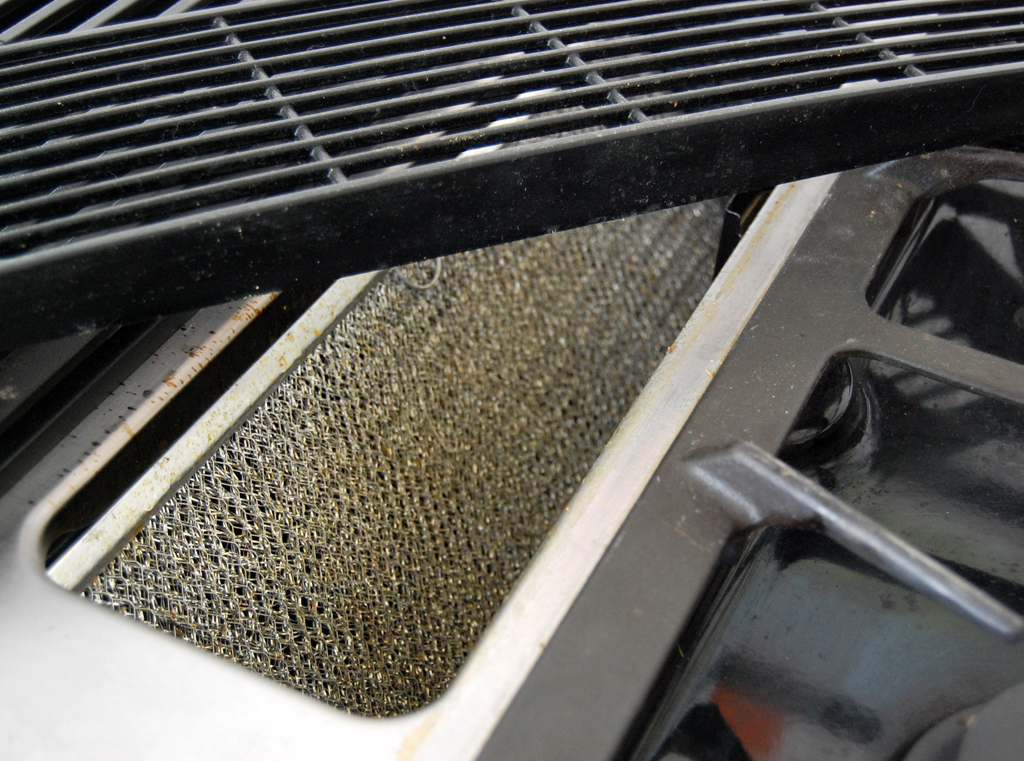
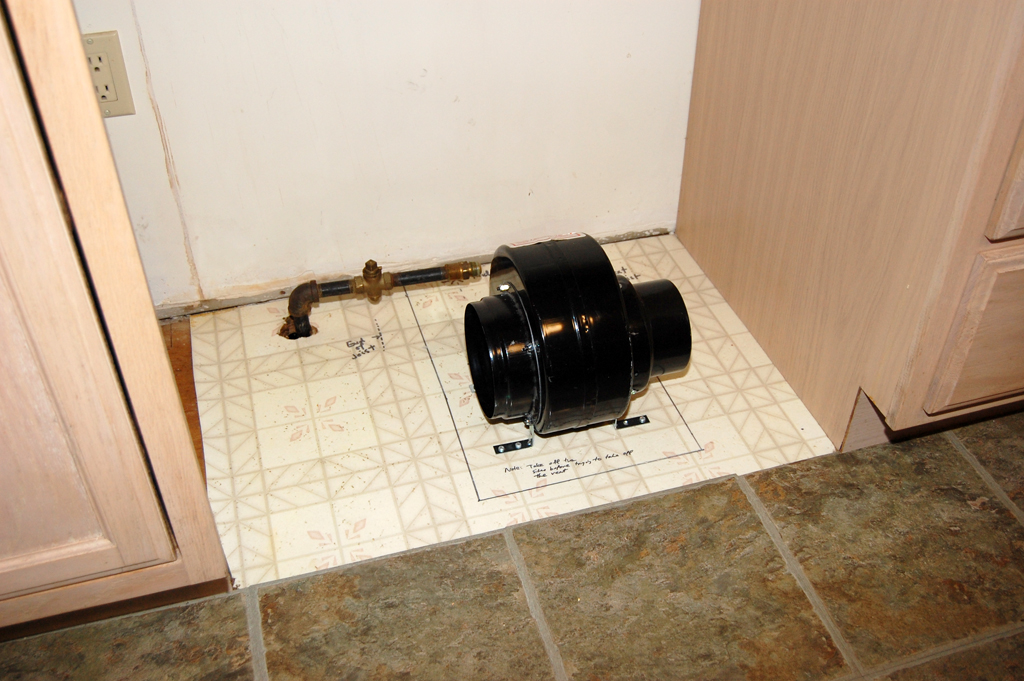
The Jenn-Air range we installed has a grill on the left side. To keep the smoke from the grilling from overwhelming the kitchen, there is a downdraft vent in the middle of the range.
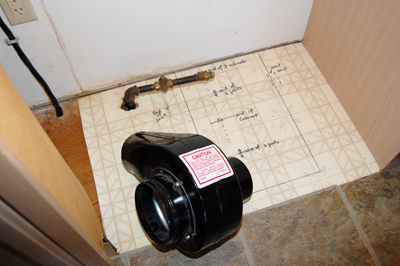
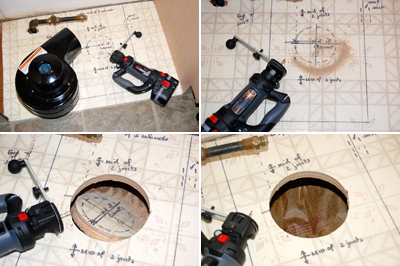
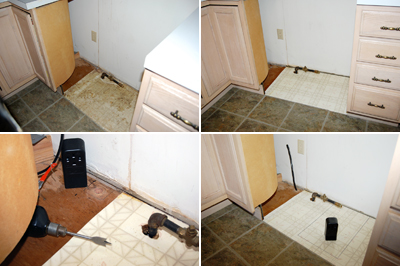
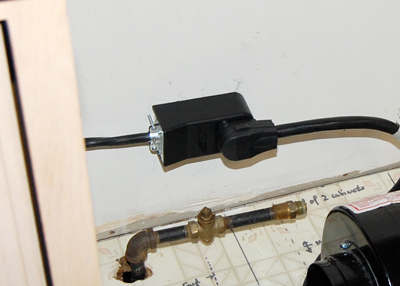
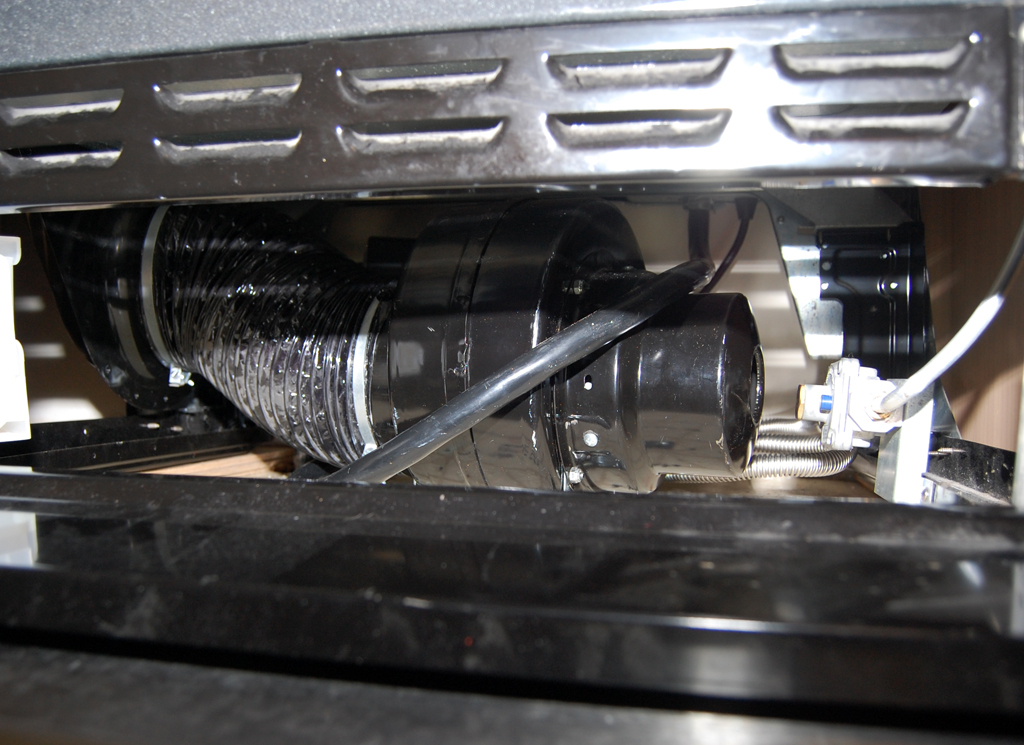
For the vent to work, a blower must be installed to suck the air down and out. This blower may be installed in a variety of ways. We chose to place it on the right side of the stove and vent the air down to the basement.
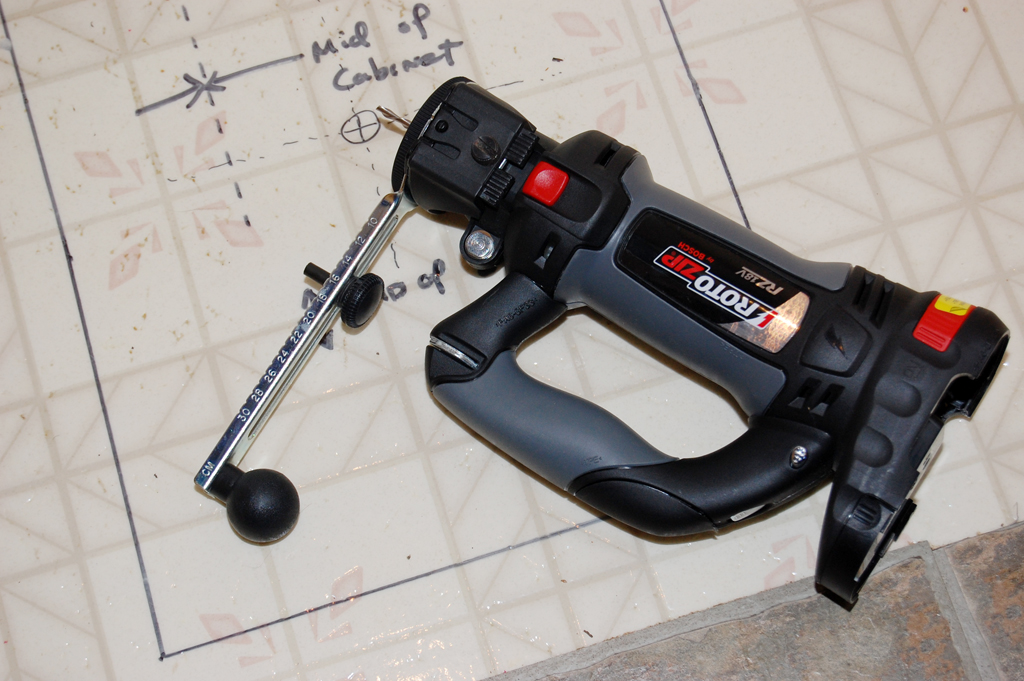
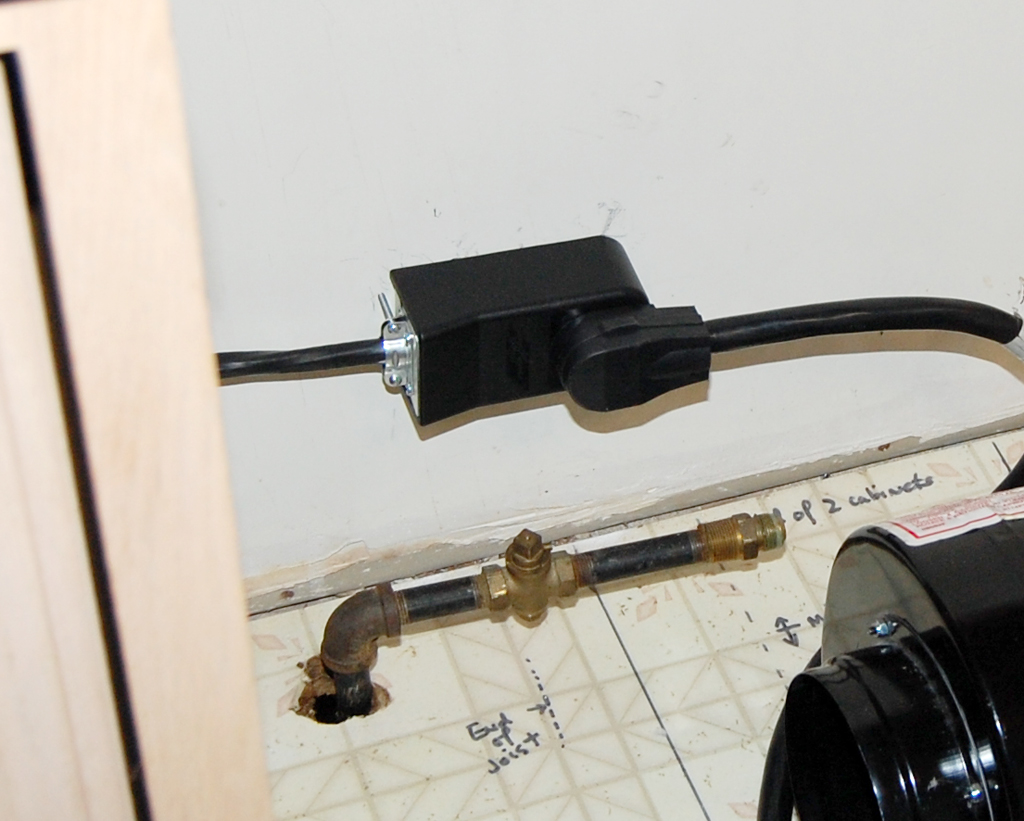
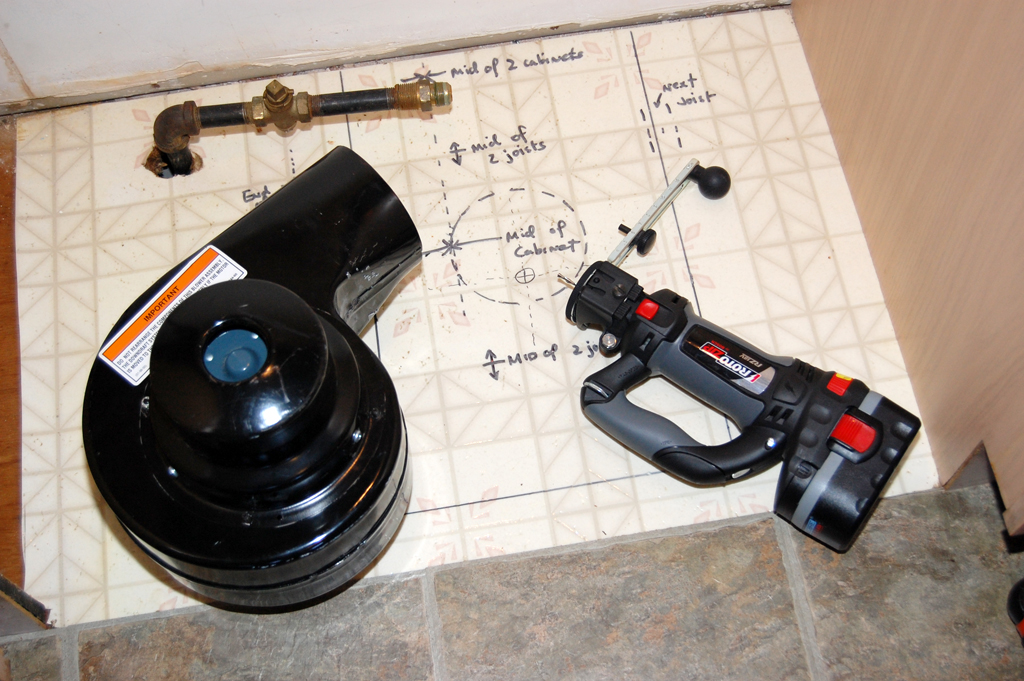
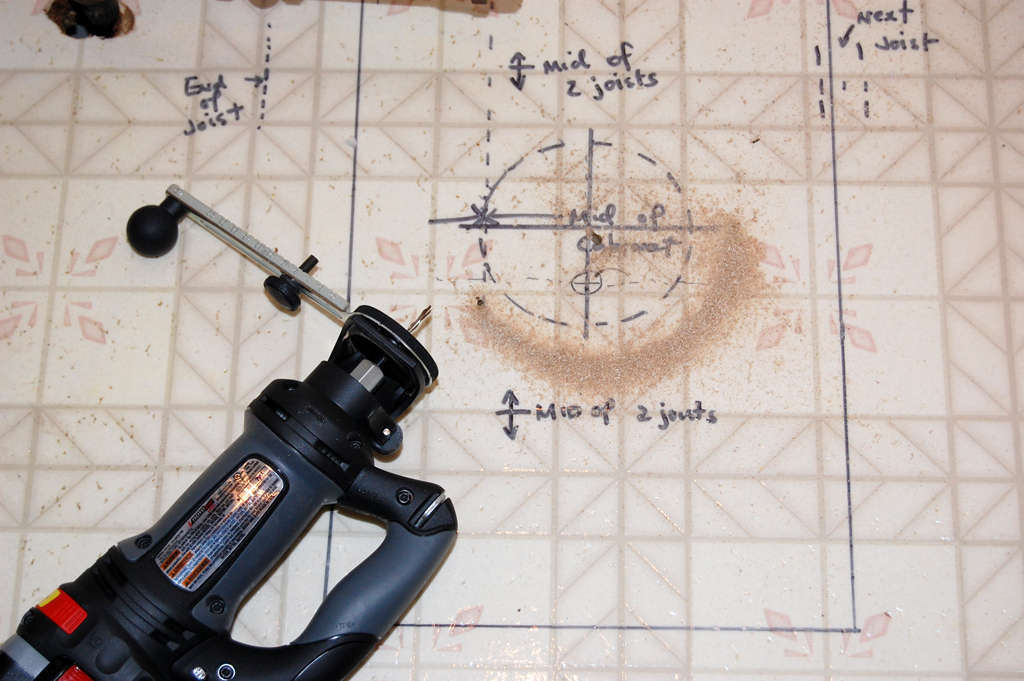
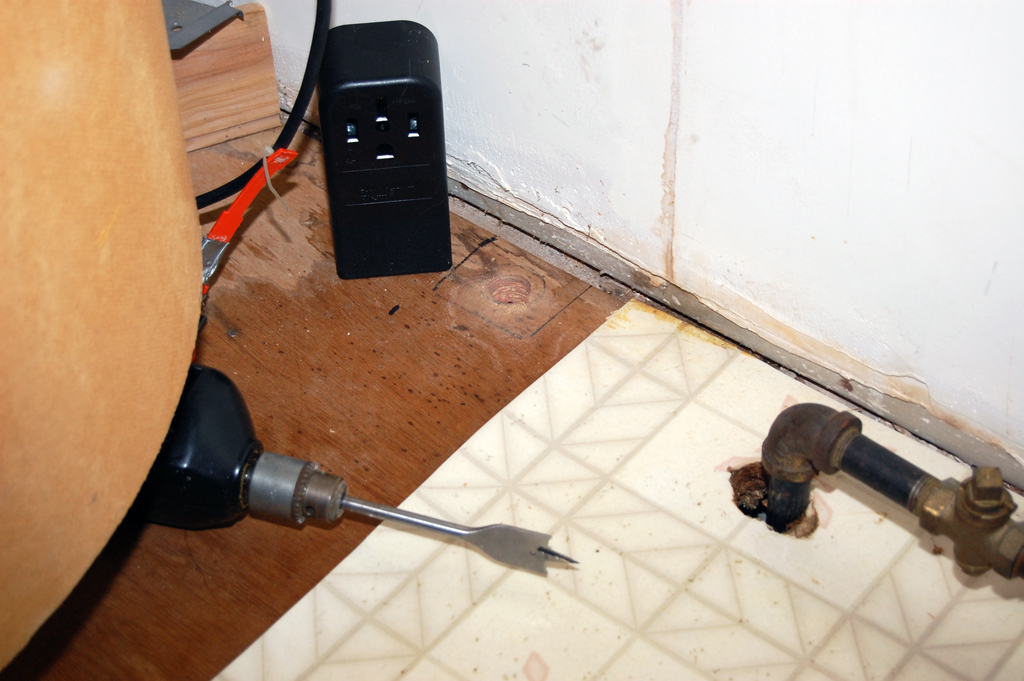
In order to vent the exhaust to the basement, a hole must be cut into the floor. The installation manual gave VERY explicit dimensions for the bounding box of where the blower may be placed.
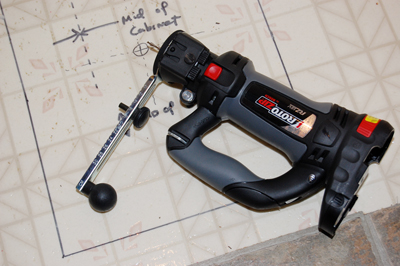
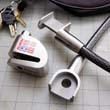
We spent quite a bit of time double checking our measurements before making the first cut. To make the cut, we used a RotoZip with a circle-cutting attachment. It was a LOT easier than using than a jigsaw. The RotoZip is quite an amazing piece of gear. We have had it for a few years and have always meant to do a more detail write-up on it.
Mounting the blower was more of a challenge, as we realized the mounting brackets were not among the various parts given to us by the seller. No matter, we came up with a pretty sturdy method using some 3" angle brackets. However, when we tried moving the stove in, we realized the blower was about 1/2" too high!
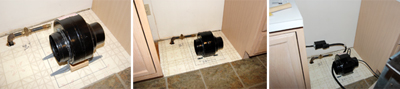
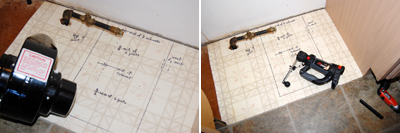
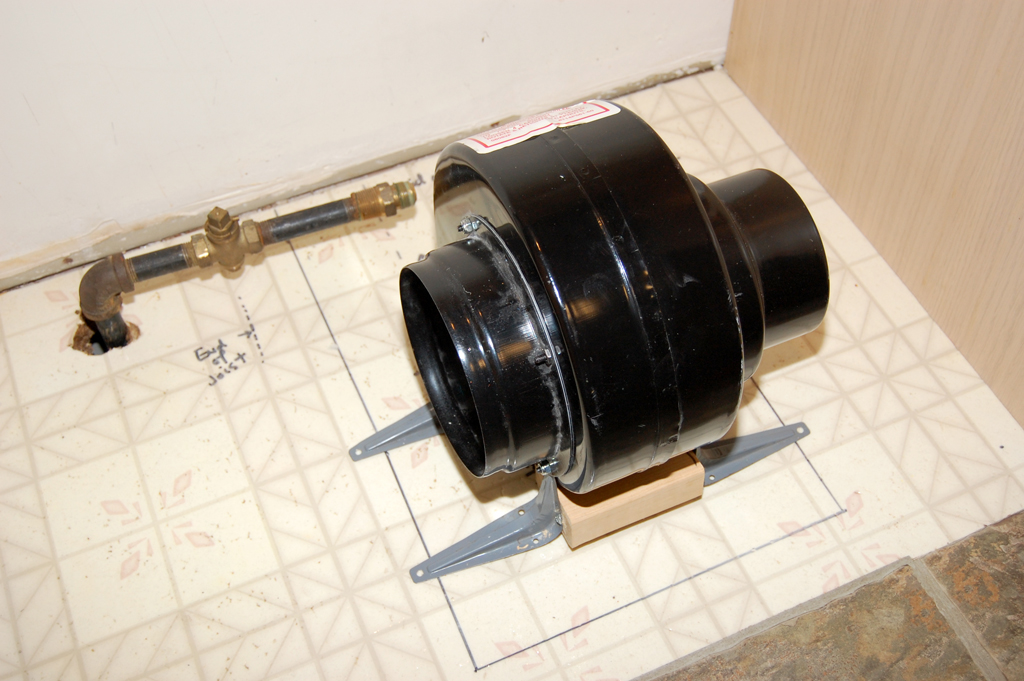
We reworked the mounting using some 2" L brackets and screwed everything down onto the floor. The blower felt very rigid and did not vibrate at all during our power-on test.
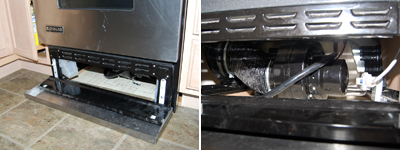
Once the gas line was hooked up and tested for leaks, we moved the stove into place. Everything fitted nicely underneath. The last step in this installation was to connect the vent outlet to the blower using the flexible hose. It took a little bit of crawling around but eventually we got it all attached and working. [Permalink] - Blower Installation
|
|
October 29,2008 (WowUsWednesday) |
We almost skipped over this item in our InBox about a really cool display technology demonstrated by Samsung at the 2008 FPD International Show. In the email was a link and an image of what looked like a print emerging from a really thin printer. We thought, oh look, they can print on plastic.
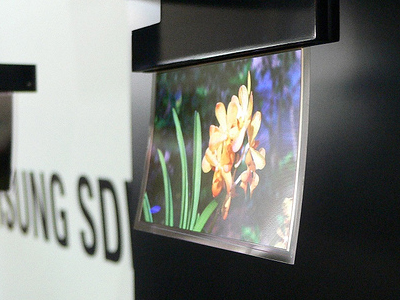
Upon closer reading, we realized the image above was of a super-thin (0.05mm) OLED color display. This Samsung display is so thin that it is flexible! One of the reasons why it can be so thin is that OLED technology, unlike that of the LCDs used in most flat panel monitors, requires no backlighting. The OLED pixels themselves can emit light. Eliminating the backlighting requirement also meant less power requirements (longer battery life, less weight, etc...). This is going to change things. [Permalink] - Samsung OLED
|
October 28,2008 (ReModellingTuesday) |
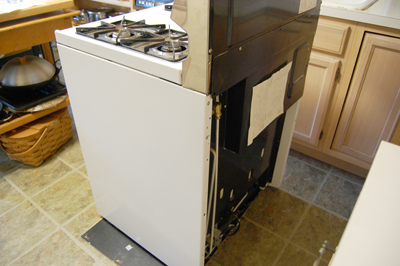
The old stove used gas for the burners and oven. It had a 120v line to power the timer and the oven light. The new JennAir is a dual fuel range - the burners use gas, but the oven is electric and needs a 240v line.
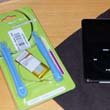
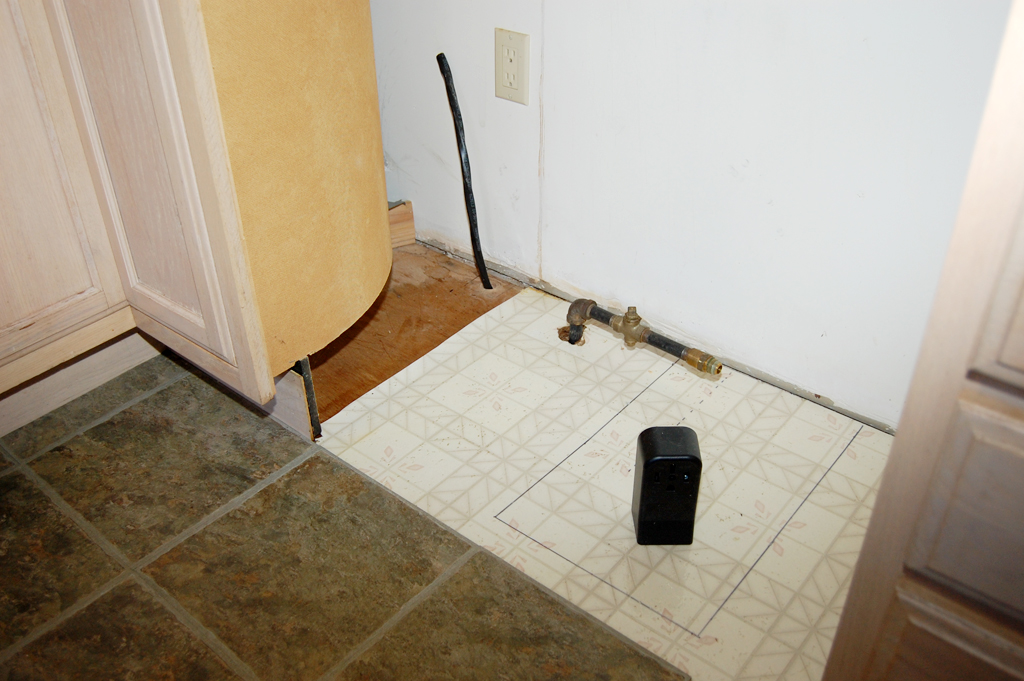
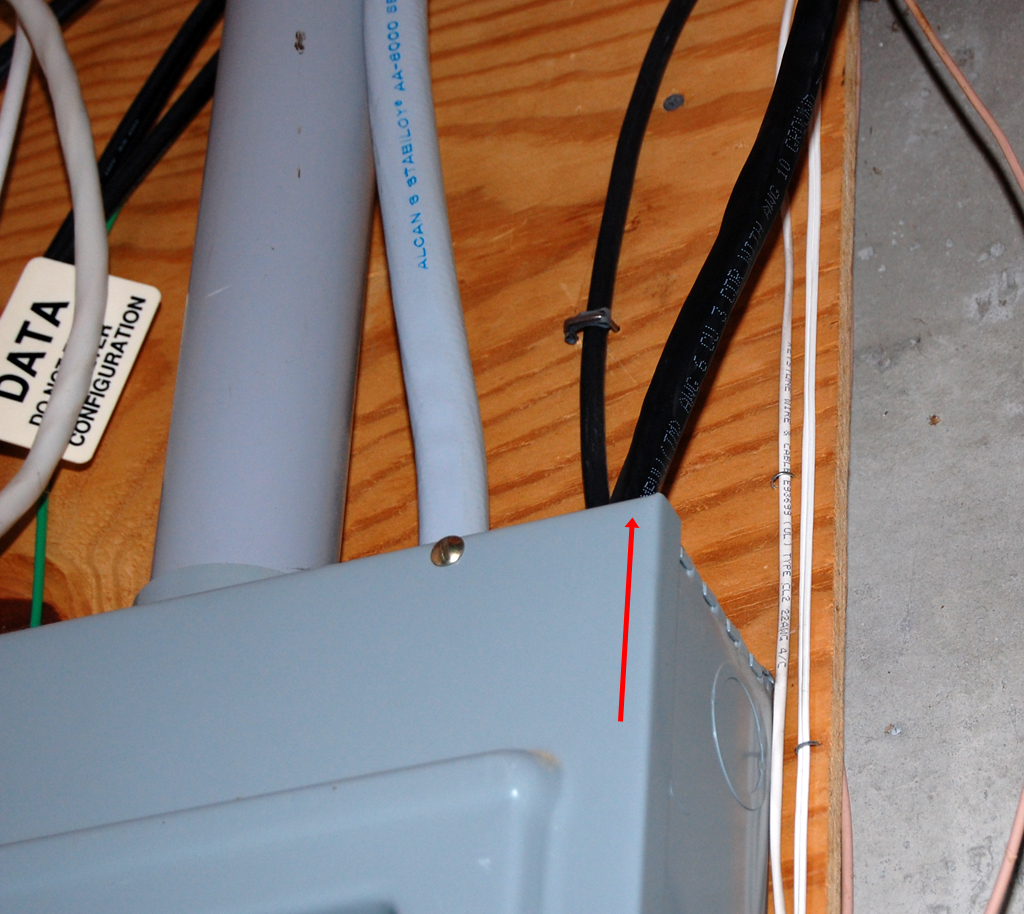
The installation of a 240V line should be done by a professional. However, it is still useful to understand the steps involved. We saved some money by geting all of the parts from Home Depot. First determine where the outlet should be installed. Second, make sure the hole for the cable is not blocked by a floor joist.
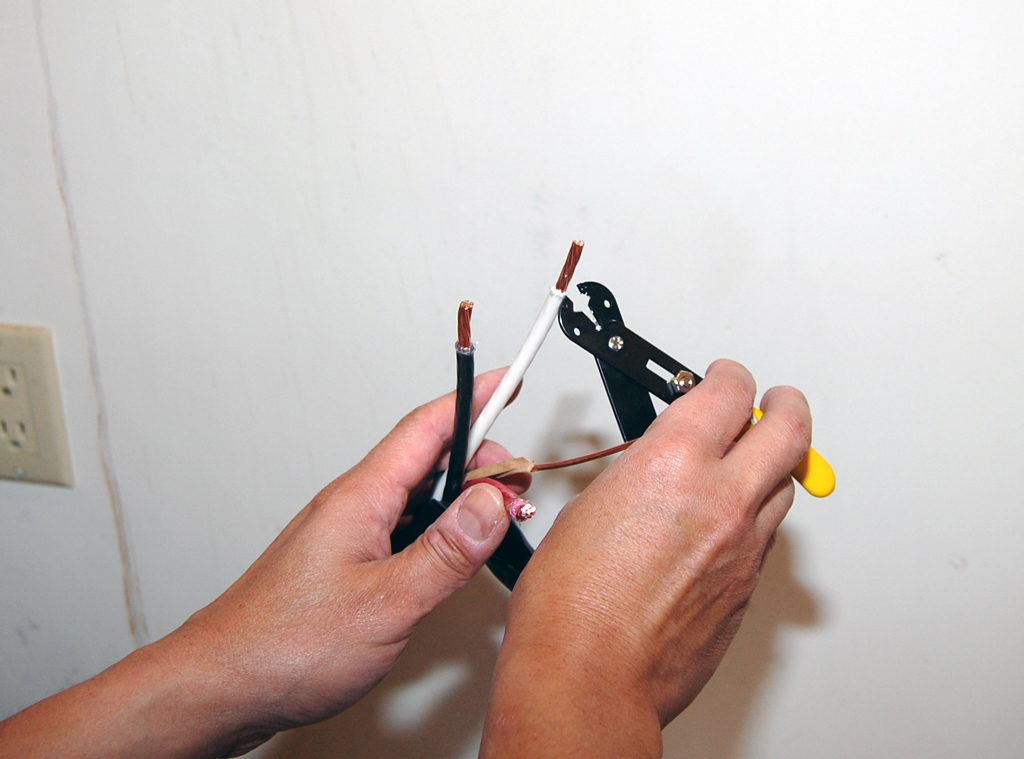
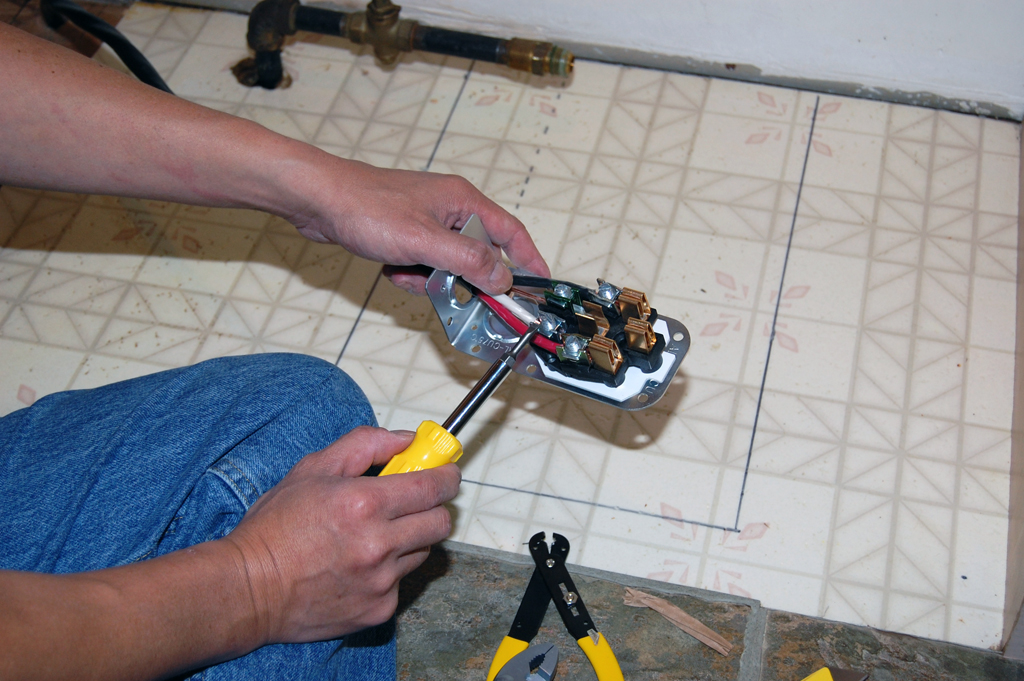
Third, strip the wires and attach them to the 240V outlet. Be sure to note the two hot leads, the neutral wire and the ground wire. One important point is that a 240V cable is VERY stiff. Make sure there is plenty of room for bending the cable should you need to place the outlet in a horizontal position.
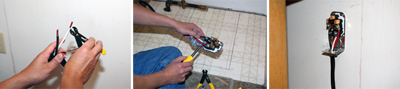
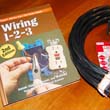
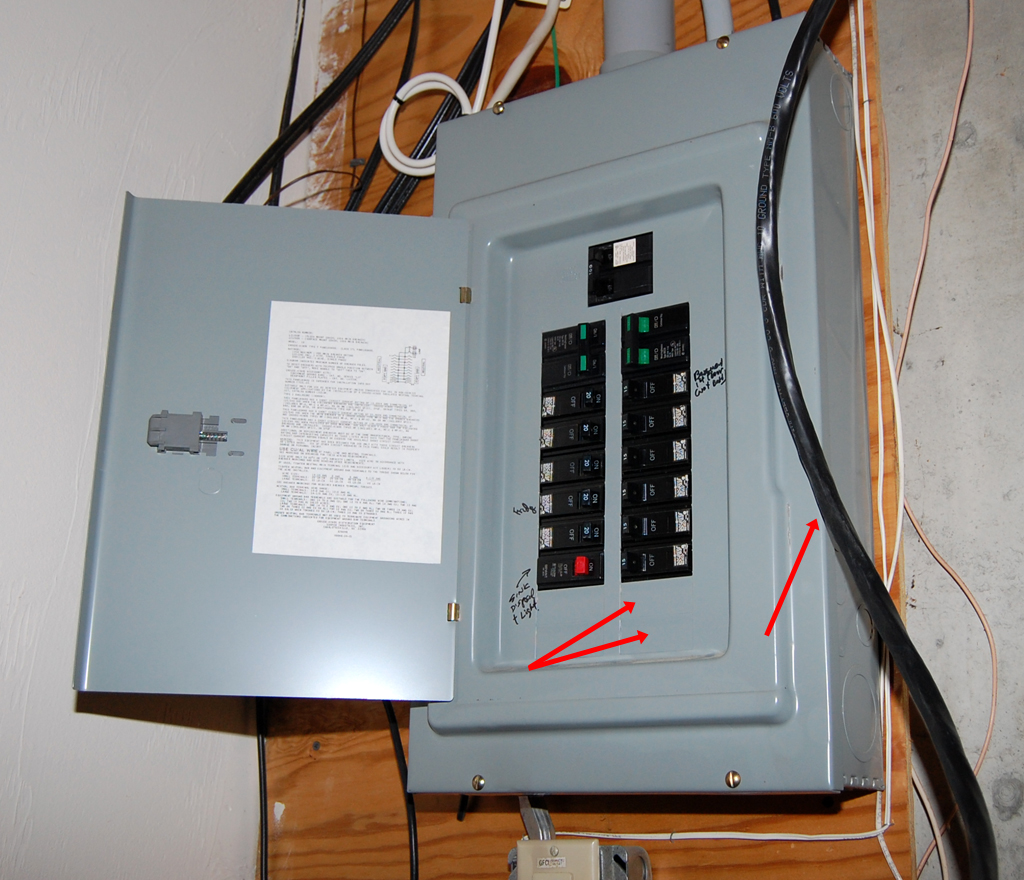
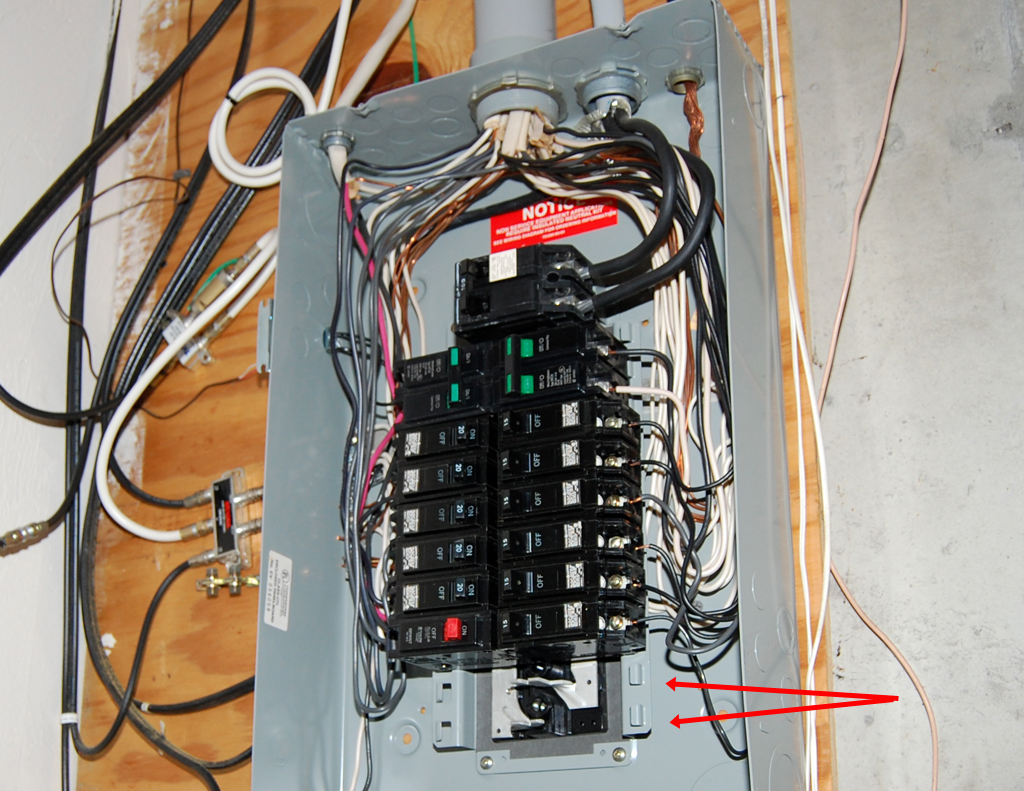
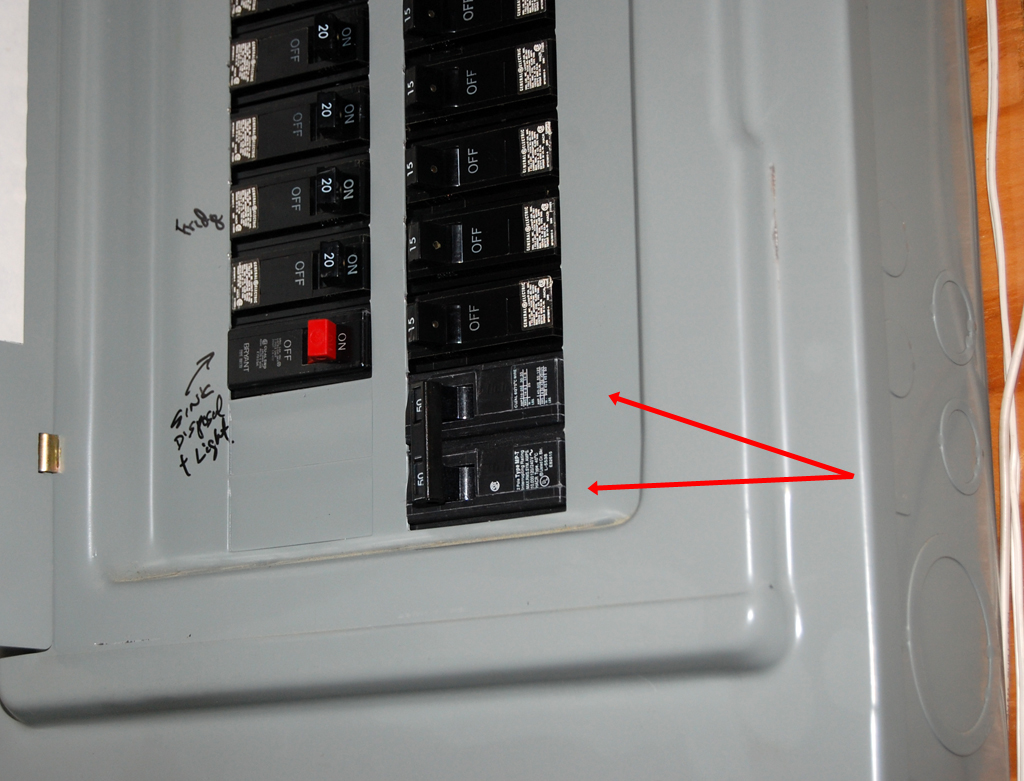
The last step in this installation is to attach the cable to the electrical panel. The panel may look confusing, but it is actually very simple. Two 120V lines from the power company come into the panel and everything taps off these lines.
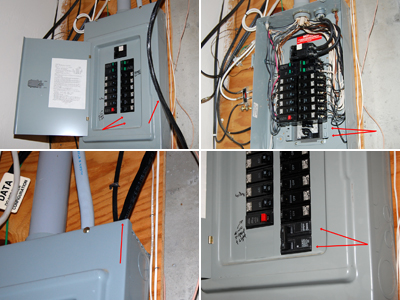
The new 240V 50A line required two new breakers to be added to the panel; each hot lead goes into its own breaker, the white neutral line goes into the neutral bar, and the bare copper ground wire goes into the ground bar.
With the 240V outlet installed and tested, we can now complete blower and the gas line installation. We ran into a few "gotchas" along the way, but nothing our installer could not work around. The installation was not difficult, but it is definitely not something folks should do if they are not sure what they are doing. [Permalink] - 240V Outlet Installation
|
|
[Dec] [Nov] [Oct] [Sep] [Aug] [Jul]
[Jun] [May] [Apr] [Mar] [Feb] [Jan]
....... 2007 ......
[Dec] [Nov] [Oct] [Sep] [Aug] [Jul]
[Jun] [May] [Apr] [Mar] [Feb] [Jan]
....... 2006 .......
[Dec] [Nov] [Oct] [Sep] [Aug] [Jul]
[Jun] [May] [Apr] [Mar] [Feb] [Jan]
....... 2005 .......
[Dec] [Nov] [Oct] [Sep] [Aug] [Jul]
[Jun] [May] [Apr] [Mar] [Feb] [Jan]
....... 2004 .......
[Dec] [Nov] [Oct] [Sep] |
|
|


