We prepped for a huge storm yesterday, and while New York and other states got hit pretty hard, things kind of fizzled out up here in Boston. It rained a bit in the morning and snowed lightly for the rest of the day, but there probably wasn't more than a few inches of the white stuff on the ground when it was over...hardly even worth breaking out the shovel.

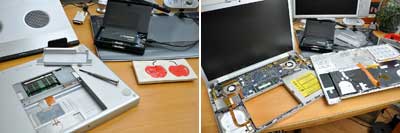
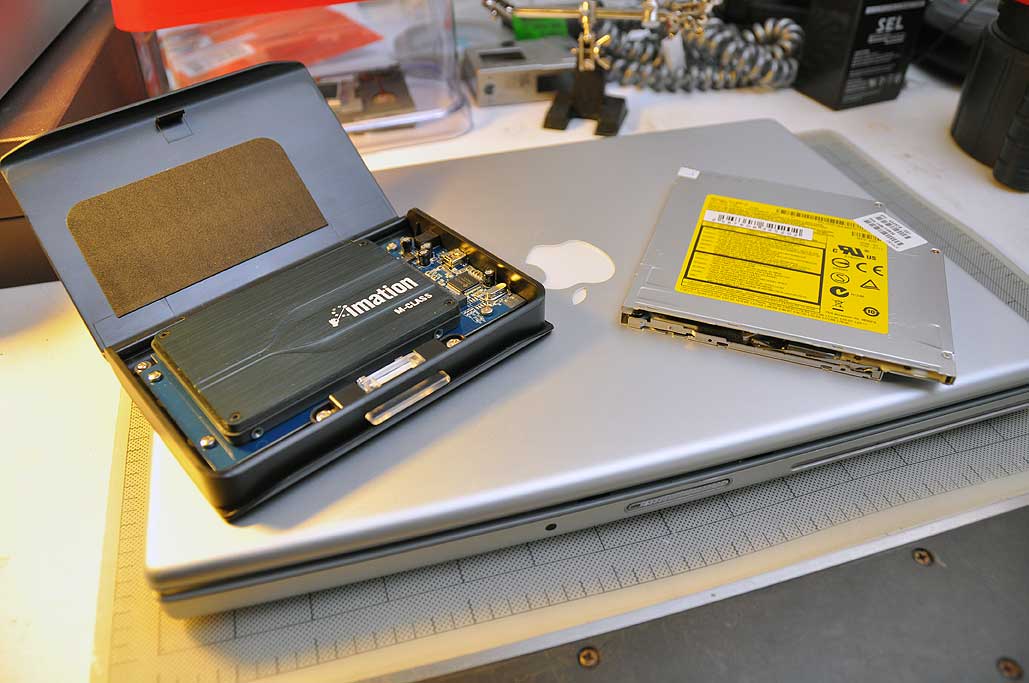
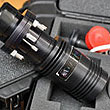
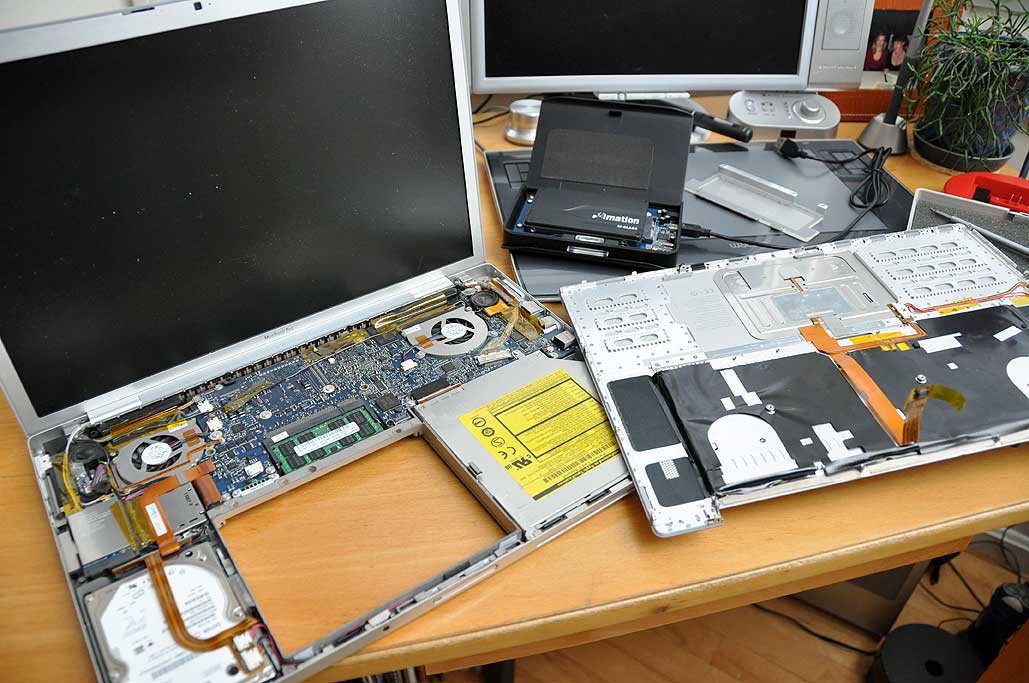
To make sure we had something to do while riding out the storm, we scheduled a few MacBook Pro upgrade projects for yesterday. The first project was to swap out the internal hard drive for the imation SSD. Since we were going to have the MBP open, we thought we would also upgrade the combo drive (which had been making some pretty bad grinding sounds) to a SuperDrive.
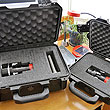
As with many of our past projects, when we needed a part, we headed to the PowerBookMedic.
The site is well organized, which helps us quickly find the exact part we need.
They have everything (parts, instructions, service) needed to get our laptops, iPods, and iPhones
up and running again.
When we fixed our MBP's keyboard
we did a fairly detailed write-up on the disassembly of the MBP. We refer readers to those instructions and will not repeat them here.
Instead, we will focus on the specifics of removing the hard and CDROM drives in this article. Tomorrow we will show the installation and tests.
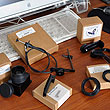
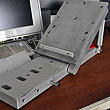
From experiene, we found that it pays to get a good quality set of torx and mini screwdrivers, a few pairs of tweezers, and have a clean place to work. Tiny screws will be dropped. Finding them will be much easier when there isn't a lot of clutter around.

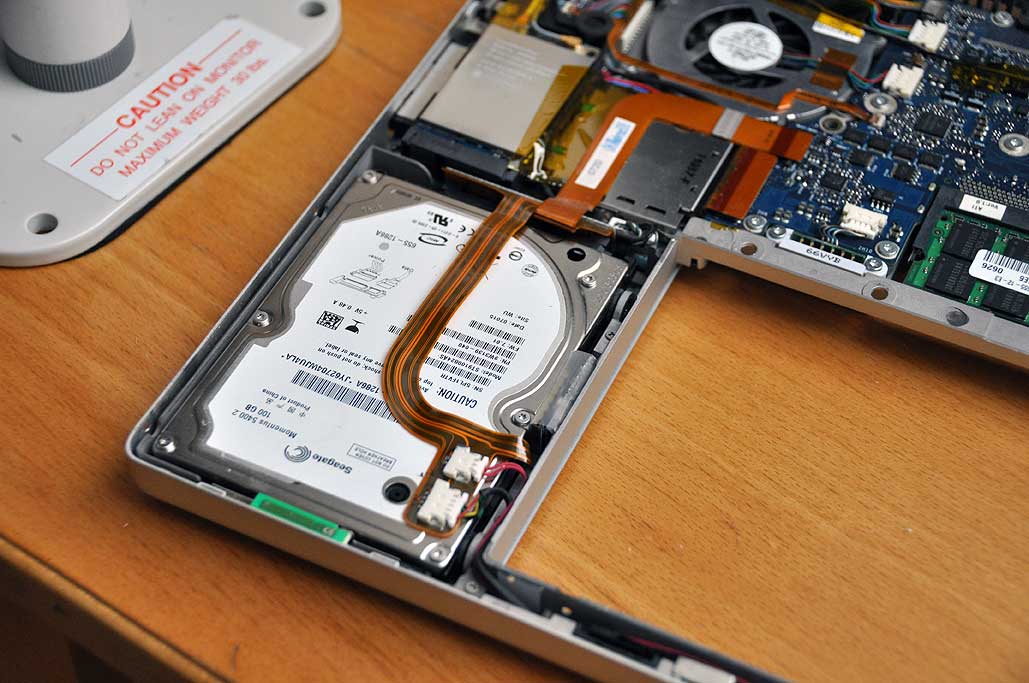
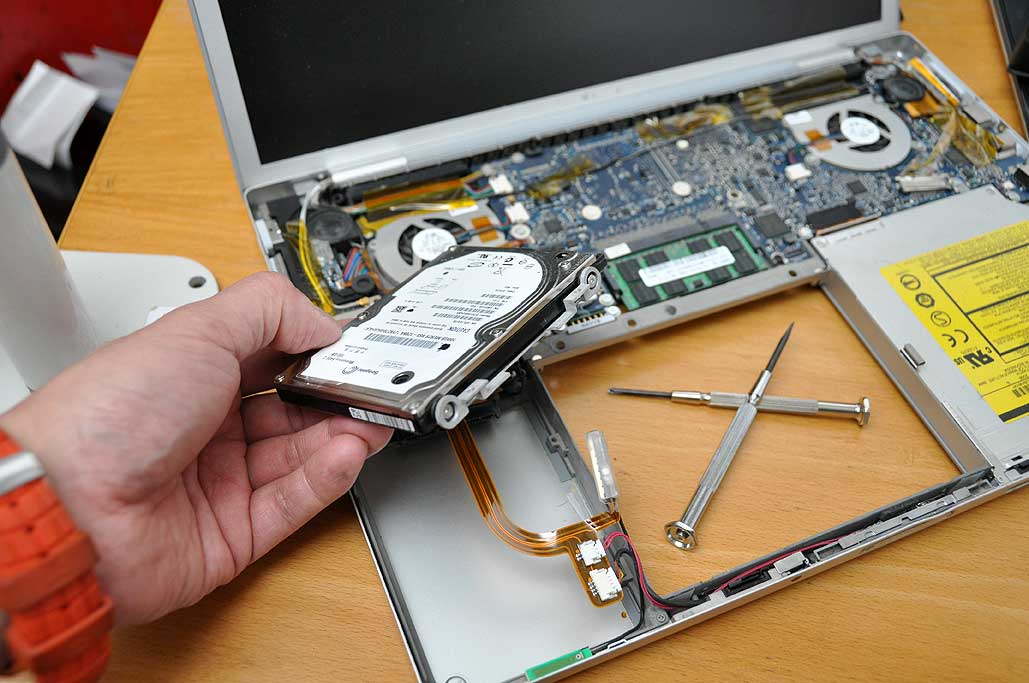
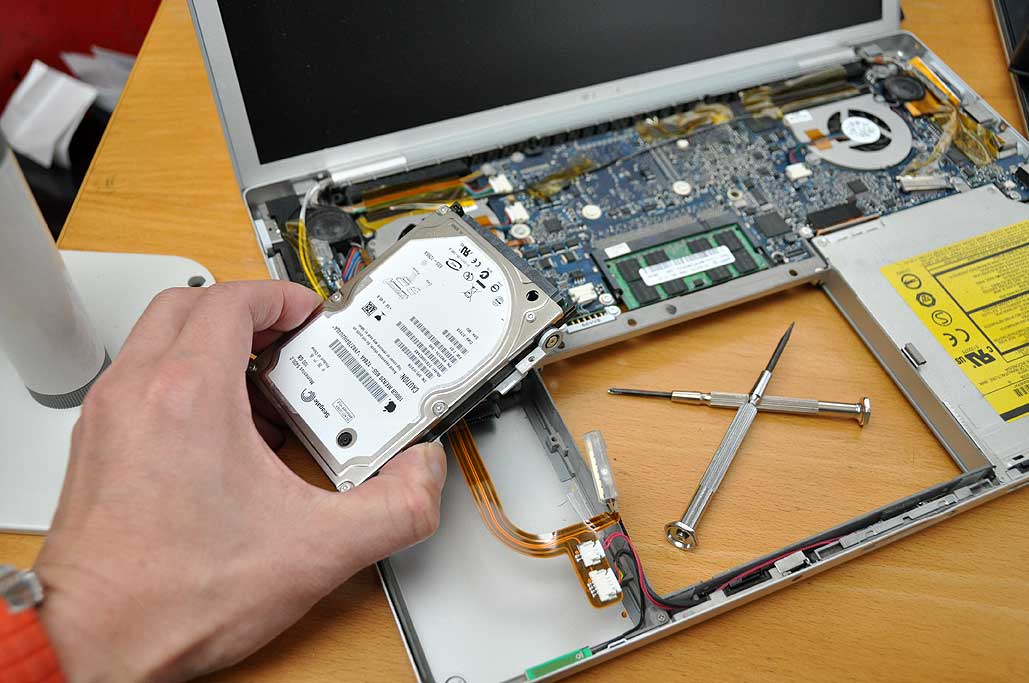
Once the lid has been lifted, the removal of either the internal hard drive or the CDROM drive is relatively easy. Both drives are attached to mounting brackets. The brackets are secured to the frame of the laptop by just a few screws. As one can see, things are packed pretty tightly in the laptop. The tricky part to removing either drive is to do as little as possible and not to break any of the things jammed around these components.
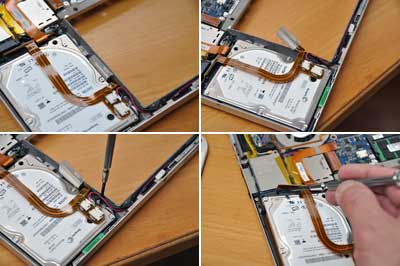
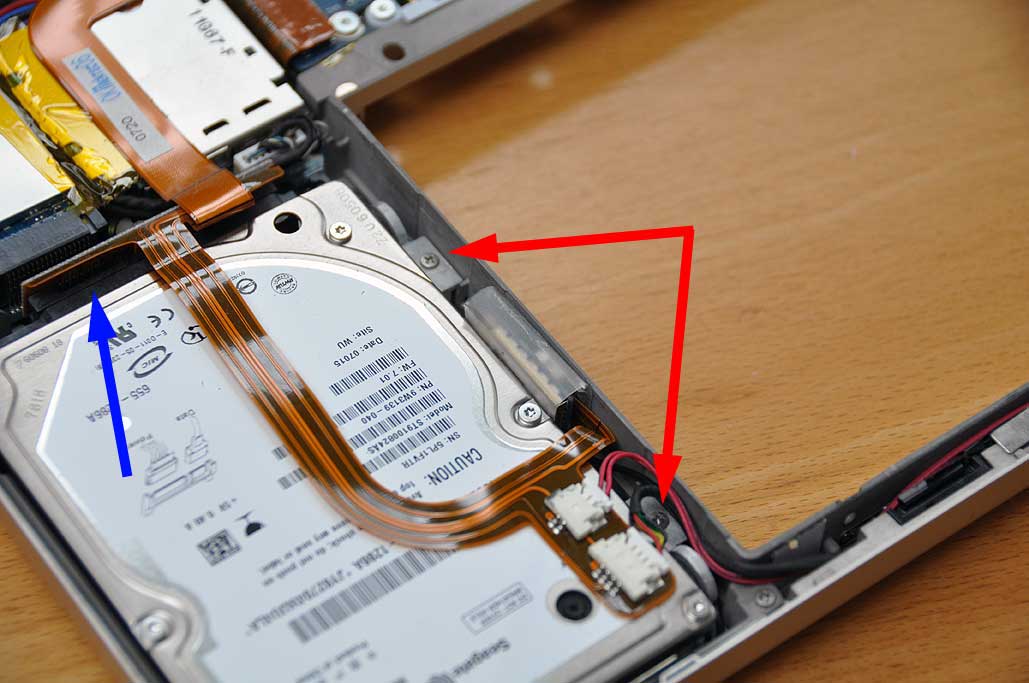
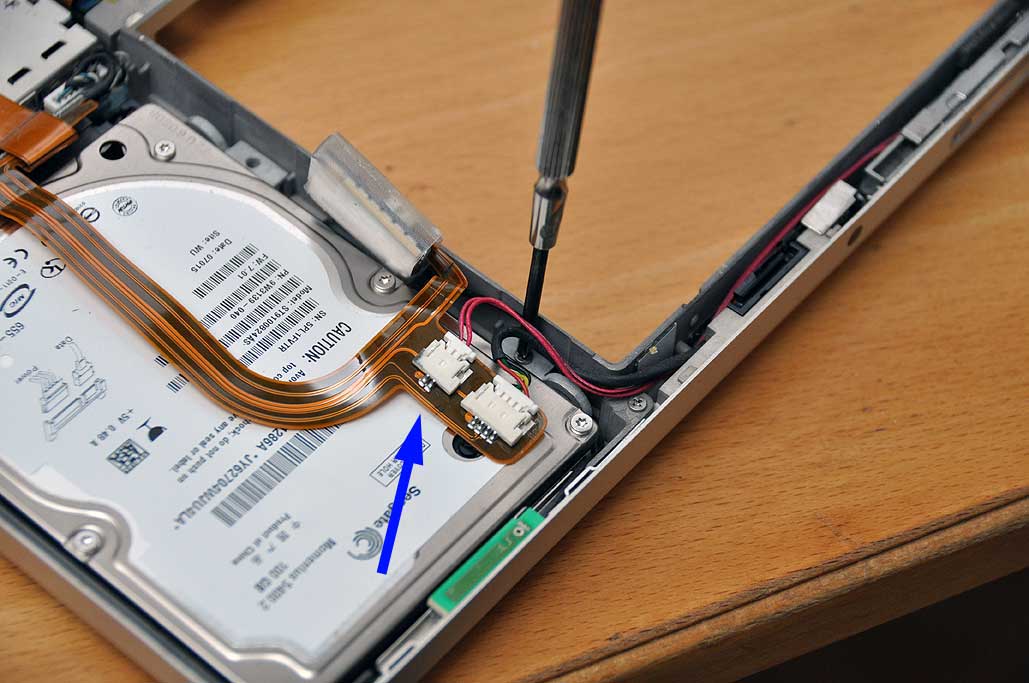
There are two things to move (Bluetooth antenna, ribbon cable) aside and three items to remove (two screws on the right side, the connector at end of the drive).
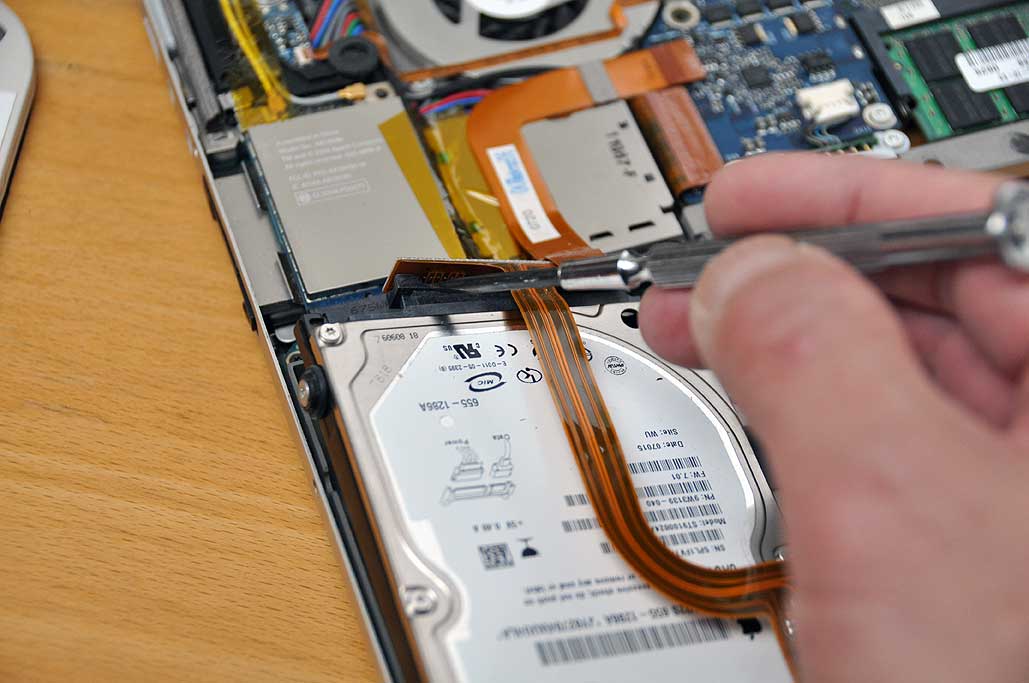
The antenna block was just wedged in. It came out without any problems. Our cable was attached with some two-sided tape. We used a wide flat-head screwdriver to gently lift it off the drive.
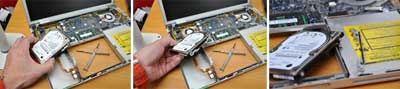
Once the ribbon cable has been moved, connector freed, and the screws out, there will be nothing else holding the drive in place. Note that the mounting bracket is only held in place by the screwed-in rubber shock absorbers on the side. We found it easier to lift from the right side. Space is tight so care must be taken in lifting out the drive. With the drive removed, we are ready for the SSD installation. Tomorrow we'll show how we removed the ComboDrive, installed the SSD and SuperDrive, and put everything back together. [Permalink] -MacBook Pro Internal Drive Removal
|


