RainyDayMagazine's content can now be licensed for your print magazine or web site. Please contact us directly here. If you want to see something reviewed, then drop us a note with a link and we'll be happy to take a look.
Boston was blanketed with over a foot of snow from the storms on Friday and Sunday. We did not venture into the city all weekend, but did manage to make our way to the Arnold Arboretum on Sunday for a walk.
The day's forecast was for freezing rain and we wanted to get some photos of the snow before things turned sloppy. By the time we got out of the car the storm had picked up and visibility was starting to drop.
Inspite of the storm, the Arnold Arboretum was teaming with activity. Folks were out hiking, x-country skiing, and walking their dogs. Even the cardinals were out flitting about and making a racket :-)
A few days ago we mentioned that we carry our gear in Kata bags when we go out. This weekend was a perfect example of why. Even in a blowing snow storm, the Kata sling protected our gear and the all weather shield let us shoot unhindered.
By the time we finished our walk and made it back to the office, the plow had came by and cleared the main drive. However, a lot of shoveling was still left to be done. If we don't clear things out now, the freezing rain may make it impossible to shovel later.
After some discussion, we decided it was easier to just feed the birds, leave the snow on the Boxster, and go inside and make some espresso. We can always work from home tomorrow.
The roads may be covered in a sheet of ice for a few days if the temperature does not start climbing. That would be a bit of a problem as some of us have yet to start our Christmas shopping!!! [Permalink]- First Storm
December 20,2008
There were plenty of photography accessories reviewed in 2008. We expect to continue this trend in 2009. The best of the lot were chosen for this year's RainyDayMagazine Holiday Gift Guide. All of the items were tested using the Nikon D40, but there should be a version which will fit most of the popular camera brands. As with the other RainyDayGiftGuides, clicking on an item in the photos will bring you to that item on Amazon. Occassionally it may bring you somewhere (hint, hint) even better.
When we purchased our D40s, they came with the 18-55mm as part of the kit. But we wanted a longer zoom so we picked up the 55-200mm Nikkor VR lens. Both lenses have turned out to be real workhorses, but the 55-200mm VR lens has performed beyond expectations.
The D40 camera body has a built-in flash, but often a stronger light is needed. The SB-400 external strobe is compact, quite powerful, and designed for the new Nikon digital SLRs. For more control over lighting, American Recorder's Photo Studio In-A-Box sets up quickly, comes with everything needed (lights, backdrop, tripod) for a desktop photo shoot anywhere, anytime.
Digital cameras have a host of automated features which allow the photographer to concentrate on the composition rather then the technical details. However, it is the control over those "details" which is the reason why many of us opt for SLRs rather than point-n-shoot units. Lensbaby 3G lenses give photographer the kind of control no other lenses can. Go here to find out more. Go here to get one.
Other useful accessories readers may want to consider putting under the tree are items to power the camera (PowerGrip), protect it from bumps and bruises (CameraArmor), or to keep the camera dry (Kata E-690) during those inclement outdoor photo shoots. If the sun is too bright to read what's on the LCD, then a Delkin eFilm Shade will take care of the problem. We have one on our Nikon D40 24/7.
We can personally recommend these camera and photo accessories because we use them, sometimes everyday. If you want gear that can stand up to use but won't break the bank, then check out this collection. Happy Holidays. [Permalink]- RainyDay Photo Gear Guide
December 18,2008
Our staff has reviewed a lot of camera bags over the years, but we have stopped reviewing bags from makers other than Kata this year. It is not that other makers don't have good camera bags, it's that we think Kata makes the best ones out there.
We have used them to carry all kinds of digital and film cameras: small point and shoot like the Canon S100, larger fixed lens such as the Canon S2, and full size SLRs similar to the Nikon D40. They are also perfect for small telescopes and video gear.
If you have a small point and shoot camera and want to have quick access to it while on the move, then the S-312 sling case is what you will need. If you want the same type of mobility and access with a larger SLR, then the T-212 Torso pack is what we would recommend.
For those with a lot of gear, Kata makes many different sizes of shoulder cases, waist bags, and backpacks. Many of these can be combined to form a larger functional system (sling + waist, sling + backpack, etc...). We use Kata bags to carry our gear every time we go on location. We would not carry our gear in anything less. Neither should you. [Permalink]- Photo Bags Gift Guide
December 4,2008
Last weekend we posted a movie of a series of drawings done by our intern. Quite a few readers asked how we did it. So on Monday, we did a quick tutorial on how we used iMovie for the project. Coincidentally, we had been taking a series of photos of a Christmas cactus in the process of blooming.
We took two photos every day for about a month. Today, we put those 60 photos together into a time-series movie using the same technique shown on Monday. After putting the sequence together, we realized a few more photos each day would have made the sequence smoother. These series are easy to make, but for best results, it is best to mount the camera on a tripod and leave it in one place for the duration of the shoot (and not bump into it). There are lots of interesting potential time-series subjects...just look around, out the window, or under the bed :-) Give this RainyDayProject a try. You may be surprised at what you will see when you put it all together. [Permalink]-Time Series
December 3,2008
idee has some great approaches to searching for just the right photo from amongst the millions which are freely available on the web. The one we really like is the Multicolr Search Lab.
The color gradient on the right is the selector for the set of images which will appear on the left. Click on a color tile and the searcher will bring back a set of images relevant to that color. There is no control over the image's content.
If you need to search for images of a certain color, the Multicolr Seach Lab tool is exactly what you need. A lot of fun things can be done with a tool like this. Go ahead. Show us what you got! [Permalink]-Multicolr Search
December 1,2008
We got a bunch of emails asking what we used to make the Teapot Series movie we posted yesterday. Since a movie is just a bunch of still images shown in sequence, pretty much any series of images can be made into a movie. There are a few free utilities available on the Web which will take JPEGs and turn them into a movie. However, if you want to have transition effects, music, and a title, iMovie is the easiest option. iMovie is one of the software applications that come with all new Apple Macintoshes. It is also available as part of the iLife software package. We would not even bother attempting it on a PC.
To make the Teapot Series movie, we took a series of still images of the drawings and resized them in Photoshop. The images were imported into iMovie, laid out in the desired sequence, and transitions added. iMovie takes advantage of the Mac's system-level drag-and-drop capabilities so it is all very intuitive.
Adding titles and a sound track were just as easy. iMovie has a fairly rich set of titling options (fonts, effects, sizes). Just type in what you want, drag the effect to the desired location in the timeline, and you are done. The sound track may be selected from any files in the iTunes library. There is a convenient button to add the track at the beginning, but the track may be attached to any point in the movie.
The last step in this photos-to-movie project was to export the movie by "sharing" it at an appropriate size (TV, Web, eMail). Our images were at a higher 1024x768 resolution, but we wanted the movie to be small enough for fast download and emailing. We used the "Web" option and created a file around 1MB, which will download in a few seconds for anyone with a broadband connection.
Making a movie from a series of photos is an interesting way to show them off. There are some things which cannot be easily controlled or adjusted using iMovie (color, multiple audio tracks, etc...), but the application has all of the features we need for most of our movie projects. Our next project is a time-lapse series of some Christmas cacti which have just started to bud. It should take about a week and we should have it finished just in time. [Permalink]- iMovie From Photos
November 30,2008
One of the many assignments our visiting intern/art student had to complete by Monday was a series of charcoal drawings. It meant we had to clear off a corner in the office and gave her some space to work, but she was quiet as a mouse all weekend.
It's messy work, but our girl was up to the challenge. The exercise was to do the pieces quickly, to learn to see the essence of the shape, and to develop the technical skills to capture it in quick fluid strokes.
Our intern/art student finished 29 pieces during her visit. While she was hoping to have 50 of them done by the time she had to leave, it was enough for us to put together a quick movie to show the work.
Someone mentioned that Wacom had sent a few of their new graphics tablet over to us last week. They thought it might be interesting to see what someone with talent would be able to do with one of these new-fangled digital tools :-) So our intern went back to school with a new Bamboo graphics tablet and promised to send us some comments when she has had a chance to put it through its paces. [Permalink]- Charcoal Teapots
November 29,2008
Many of you expressed interest in the quality of the video coming from the Wild Planet ATV-360. So today, we loaded the batteries (6AA in the vehicle, 6AA in the remote controller) and let Sarah take it for a spin.
There are a lot things to power: video display eyepiece, external mic, video camera, and remote controller. The camera on the vehicle is not remotely controlled. Its desired angle must be manually adjusted. Being able to control the angle remotely would be very helpful, but for cost reasons, we can understand why they left it out.
Getting accustomed to driving the vehicle by looking through the eye piece was not as hard as we first thought. It took no time for Sarah to get comfortable in maneuvering the ATV. We all took turns and were surprised at just how easy it was to steer.
The black and white video came through without any lag. We took a shot through the eyepiece to give you a sense of the quality of the image. However, it was actually a LOT sharper than what you see here and certainly sufficient for steering the ATV remotely.
The ATV-360 was surprisingly easy to learn (it took just a few minutes) to control. Being able to see from the vehicle's point of view has a lot to do with that. An obvious extension to this mobile video vehicle would be IR night-vision capability. We don't think it would take that much to add the feature. In fact, it will likely be our first hack to this fun toy. [Permalink]- Video ATV FirstUse
November 25,2008
Every so often we get something in the office that looks like so much fun that we would rather play with it than do the photo shoot. Then someone reminds us we are grownups and need to set an example for the interns.
A box with the label Spy Video ATV-360 showed up on our desk yesterday. At first we thought the folks at DARPA had inadvertently sent us something from their lab, but the Wild Planet logo on the packaging clued us in that we would not be compromising national security if we opened the box.
The Spy Video ATV-360 is a remote-controlled mobile video probe which can send images back to a head-mounted display (HMD). The controller communicates with the ATV wirelessly. The HMD is wired to and is powered by the controller.
The entire setup (ATV and controller) requires 12 AA batteries. This is not surprising as shooting videos on the move is probably fairly power intensive.
We are eager to see what the images look like through the eye piece. There are so many potential ways we can get ourselves into trouble with this thing!
There is alot of potential to this "toy" as a source of parts for DIY projects. We'll play with this some before we let the guys with the screwdrivers have a go at taking it apart. What would you build if you had one of these to take apart? [Permalink]- Video ATV 360
November 19,2008
Some of us here were alive in the 60's. A few of us can even remember what happened in the 60's. When a reader sent us a link to NASA's newly re-digitized version of the EarthRise photo, one recognized it as the iconic image from the Apollo 8 mission.
However, our resident philatelist was not too sure. He claimed it was different than the stamp which was released in 1969. The next day, he brought in the stamp to prove he was not just talking crazy. He then proceeded to "treat" everyone to an unexpected and somewhat lengthy dissertation on the joys of stamp collecting.
The b&w image of EarthRise was actually from a 1966 Lunar Orbiter mission. It was the first EarthRise image ever. NASA re-released the photo as part of their Lunar Orbiter Image Recovery Project. Go here to see more cool "recovered" NASA moon photos.
BTW, fascinating as stamp collecting may be, we all agreed that it was definitely not as cool as collecting coins, especially if the coins were krugerrands :-) [Permalink]- Earth Rise
November 10,2008
The large maple in the RainyDayGarden dropped all its yellow leaves this weekend. It made for some interesting Fall photos. However, it was a bit bland so we asked one of our interns to come out and be a model.
Buffy kindly agreed to pose in exchange for some tasty treats. The best thing about working with a cat is they take directions really really well. Unlike dogs, a cat will sit motionless, turn when asked, and lay down on command.
The only down side with cats is they have low endurance. Buffy was exhausted after four poses and took a nap for the rest of the morning on location.
When we went back out a bit later, she was still asleep under a pile of leaves. We left her out there and went back inside to do some napping of our own. After all, taking photos is pretty hard work as well! [Permalink]- Buffy in Leaves
We have dropped them in streams, knocked them of ledges, and watched them tumble down the side of a trail. We just picked them up, dusted off the dirt, and never gave them another thought. They are low maintenance tools which have always worked when we've needed them. The Surefire is brighter than most flashlights ten times its size, but is small enough to slip into pockets and the side of the Kata bag. The Skeletool, like the Surefire, is always part of the kit.
The Skeletool, besides being extremely useful, is easy to take along. There are so many ways to carry it. It is small enough to fit in pockets, hooked onto belt loops, or clipped onto the side of most things.
Another tough tool we sometimes pack is a good pair of binoculars. We have smaller ones, but most of the time we grab the Brunton Echo. The smaller ones are easier to carry, but the Brunton is the brightest of the lot. Afterall, the whole point is to be able to see better. So, now that you seen some of our "tought tools," tell us about your favorites! [Permalink]- Tough Tools
November 2,2008
We arrived at Walden Pond early in the day, but since the clocks were turned back last night, it really wasn't THAT early. Most of the trees had already changed.
The colors have shifted toward a more muted set of orange and brown. There were still clusters of reds popping up in places around the pond.
This was probably the last weekend where there will be good color at Walden Pond. Most of the leaves will be gone by next week. If you want to see some of the remaining colors, you need to go soon. [Permalink]- Walden Pond Fall
November 1,2008
One look out the window this morning and we knew the day was going to be a nice one. The colors in the RainyDayGarden started to turn about two weeks ago, but the the Japanese Maples are now just peaking. It was going to be one of those picture-postcard New England Fall days and we wanted to capture some of it on silicon.
We thought since the colors were so nice in the garden, they must be peaking at the Arnold Arboretum as well. We hopped on the Vespa and scooted down to see if we were right.
Because of the wet Summer many of the trees still had their leaves. Bright yellow colors were everywhere. The Arboretum is a popular nature destination for many Bostonians but since it was still early in the day, it was not yet crowded. We took advantage of the temporary tranquility and got some nice panoramic shots.
By the time we were done shooting, more and more of the usual Arboretum goers (jogger, bikers, stollers) had started to appear. It was time for us to pack up and go get some food. All that hiking really works up an appetite!
Today was a picture perfect New England Fall day. Apparently, a few painters agreed and were out capturing some of the Fall colors as well. If it is still nice tomorrow, we'll take a drive out to Walden Pond and see if we can get another shot of the heron. [Permalink]- Fall Colors
October 19,2008
We took advantage of the nice weather this weekend and went for a drive. About 40 minutes from the city is Shelborne Farm. Folks head there on sunny Fall days because it is the place to go for picking apples... ALL kinds of apples.
Apple picking is a great way to spend a day, and afterwards you get to go home and bake a pie. The trails are well marked, there are plenty of things to see and do, and when you have had enough, you can walk to the farm stand and get a hot cup of hot cider (and a donut).
Picking the apples is the easy part. The hard part is choosing what kind of apples to pick. There are dozens of different kinds at any given time. We know nothing about apples, but anything with the name "delicious" went into the bag.
After a few minutes of picking, we understood the meaning of the phrase "low-hanging fruit." While easier to pick than the ones requiring a ladder, the unpicked low-hanging ones tend to be either bruised or already bitten by, something. And the ones on the ground? Just leave them for the squirrels.
There is more than just apple picking at Shelborne Farm. There are pony and hay rides, a petting zoo, and even a tractor track for any tykes brave enough to get in the rink. It was kind of ticklish to feed the llama.
After an hour of walking up and down the different aisles of apples, we were ready for something hot to warm us up. Judging by the line at the farm stand, quite a few others had the same idea.
There won't be many more days with fantastic colors like the one on Sunday, so if you want to take off early and go for a walk, we won't tell :-) [Permalink]- Apple Picking
October 17,2008
A few weeks ago, we drove to Manhattan to have brunch with our friend Kathy. It was kind of a gray day and we were not quite sure what to do before heading back to Boston. We had heard there was an art installation of "waterfalls" around the city. One of them was under the Brooklyn Bridge. Since we were on the East Side, we decided to check it out.
We had always seen the Brooklyn Bridge from far away as we crossed over from Long Island to Manhattan. This was the first time we've ever seen the Brooklyn Bridge up close. The best view of the waterfall was from the Manhattan side.
We parked the car and walked along the path next to the bridge. Next time we'll have to walk across the bridge and get some photos from that perspective.
At the foot of the bridge on the Manhattan side is the South Street Seaport. It is quite the tourist destination any day of the week and especially so on the weekends.
We strolled around for a while, but decided that we were still too full from brunch to eat anything else before heading back to Boston. If you find yourself in NYC and are looking for some place fun, head downtwon to the Brooklyn Bridge. You'll find something to fill your day. [Permalink]- Brooklyn Bridge
October 16,2008
It has been a year since we first reviewed the Sanyo eneloop batteries. During that time, we have been using them in our cameras, electronics, and every other piece of gear that takes AA or AAA batteries. The eneloops have performed so well that we have stopped using any other kind of AA and AAA batteries.
When we heard Sanyo had introduced some "adapters" for the eneloops, we were eager to check them out. What we found was that Sanyo has put together an interesting package they call a "Travel Pack" consisting of a charger, AA and AAA eneloops, C-size and D-size adapters, all neatly contained in an organizer.
The adapters are plastic shells sized to fit a AA eneloop battery so it can be used when a different battery form factor is required. This is a very clever solution for times when a different size battery is needed and not available.
The eneloops are the best rechargeable batteries we have ever used. They charge up quickly, retain their charge, and are powerful enough for today's power-hungry electronics. If you are currently not using rechargeable batteries, you should. If you are using rechargeables, but they are not eneloops, you should switch. They are THAT good. [Permalink]- eneloop Travel Pack
October 13,2008
Columbus Day is usually the last day where many shops and restaurants stay open in Maine. We like going up there for this weekend because the rental prices are quite inexpensive. The bugs, as well as most of the tourists, are gone. The weather is still warm enough during the day that we can drive with the top down.
It was certainly a great day for continuing our lobster roll "research." We noticed lobster prices were around $3.99/lb, even in the more expensive places like Kennebunkport.
This was the lowest lobster prices have been in quite some time. Clearly, others were also taking advantage of the rates as The Clam Shack was doing a booming end-of-the-season business.
As usual, the weekend went by too quickly. Next year our plans are to go to Monhegan Island for Columbus Day. It is a small island, but there should be plenty of room that weekend. Feel free to come join us if you can! [Permalink]- Columbus Day
October 12,2008
We have been waiting for the right opportunity to photograph InTheWild using the Wicked Laser. We brought it with us to Maine, hoping there would be a few clear nights so we could get some photos of it in action.
At first, we had a little trouble keeping the laser from moving. It took a bit of trial and error to get the shutter timing right, but once we got it worked out, the shots came out a lot sharper than we thought they would.
Some were skeptical that the laser would be able to be seen at night, but there was enough dust in the air to make the laser visible. It was quite amazing to be able to point at individual stars with the Wicked Laser.
The beam is very bright and will be easily visible at dusk. We didn't want to do this photo shoot in the city for obvious reasons. It is not a toy and must be used responsibly. The Wicked Laser is very helpful for pointing out things in the sky and will be a pretty useful addition to anyone's astronomical toolkit. [Permalink]- Wicked Laser InTheWild
October 4,2008
Anything related to photography is always of interestes to everyone here at RainyDayMagazine. We are always eager to help promote the art and craft of this topic, especially in the area of digital photography.
For those of you just starting out in digital photography or those interested in making the switch from film, Digital Photography from the Ground Up by Juergen Gulbins does an excellent job of covering the basics, ranging from storage cards to image output options.
Gulbins also touches on some general photography topics such as composition, lighting, and equipment handling. He pays special attention to those areas where digital equipment differs from film. For folks interested in selling on sites such as EBay, the section on close-up and still setups will be especially helpful.
A reasonable portion of the book is devoted to the topic of image editing. Image editing is, of course, one of the major advantages of working in the digital domain. The book covers the "how-tos" of using such features as tonal adjustment, blurring and sharpening filters, and the like.
Besides discussing the fundamentals of digital tools and techniques, more advanced topic such as how to shoot panoramas are also covered in this book. Obviously there are a lot more to any of the subjects touched on by Gulbins in this book, all of the discussions were sufficient to enable those interested to get started and explore deeper on their own.
Juergen Gulbins' book definitely does a good job of covering the basics of digital photography. It is a good intro to the digital craft for the beginner and a reasonable reference for those making the switch from film. Advanced amateurs may want to check out Rocky Nook's other more indepth offerings. [Permalink]- Digital Photography From the Ground Up
October 3,2008
Digitial photography exploded into the mainstream about ten years ago. The crossover point was when a $300 digital cameras was able to produce images of acceptable quality. Today, an excellent digital SLR camera kit can be had for around $500. That price point means many folks interested in digital photography can now afford the gear.
Shopping for photography gear is fun, and learning how to use it is even MORE fun! Rocky Nook is a publishing house which puts out some excellent titles, covering all aspects (basic, advanced, etc...) of digital photography.
Some of us have been around since the start of it all. A few even worked on one of the first commercial digital imaging programs for the Mac. So when they are excited about these books, we know there must be something to them :-)
Regardless of whether you are just starting out or an advanced digital photographer, Rocky Nook's collection will have something of interest to you. We will be giving readers a more detailed look at these and some of their other offerings this month. We know you'll find these books useful; we did. [Permalink]- Rocky Nook Collection
September 17,2008
TheHarvest Moon has been in the New England sky for the past few nights. However it has been hidden by the cloudy weather. Being the optimists that we are, we had the telescope set just in case the cloud movements cooperated. Our patience was rewarded by a brief appearance around 10:40PM.
We took a series of photos of the full moon using our normal setup (Nikon D40, angle viewer, Meade 2045). The angle viewer definitely made it easier to make fine focus adjustments of the telescope. However, we noticed that some of our past shots were ruined by some vibrations from pressing the shutter button.
In an effort to eliminate that problem, we purchased a remote trigger to fire off the shot. After shopping around, we purchased this one on EBay. The cost? $5 ... and that included the shipping from China!
Our earth-based astrophotography images may not be as cool as this one from the Hubble telescope, but we are slowly learning and having a lot of fun doing it. If you are looking from some new photographic challenges, we urge you to give astrophotography a try. It is surprisingly addictive! [Permalink]- Harvest Moon
September 8,2008
When we last left our disabled Celestron CG-5 mount, we were flummoxed as to why our bypass of the power switch did not bring the unit back to life. Upon closer inspection, we finally understand the problem.
There was some kind of lacquer around the contacts of the power switch. It worked when we clamped our bypass to the solder points on the BACK of the board.
Once we confirmed that the power switch was the problem, we had a few options. Celestron quoted us $35 for the board. It was a fair price if we wanted to just replace the entire board. However, this problem could be resolved just by bypassing the switch with a wire.
What we could not confirm at this stage was whether or not the rest of the electronics were functional. We had to reassemble the unit and test it with the controller to see. This is a pretty well laid out mount. Getting the two boards back into the holder and reattaching everything was pretty simple.
We all held our breath when we plugged in the AC power. The power LED came to life and the display on the controller started scrolling text. Yay!!! At least all the electronics appear to be working.
Now that we have confirmed that the electronics are "alive," we need to hook up a telescope to the mount to see if it will actually point to something. According to a few readers, this mount will also accept a GPS accessory. It might be an interesting accessory to check out at some point. [Permalink]- Celestron mount revived
August 26,2008
There was a Celestron CG-5 ASGT mount for sale on Craigslist a few weeks ago. The seller had too much equipment and was looking to pare down his collection. We had been looking for a GoTo mount, so we worked out a reasonable price and drove for about an hour from Boston to pick it up.
The mount, parts, and tripod were exactly as described. We were set to do the deal when the seller thought it would be useful to power it up and demo some of the basics. Well, long story short, as with all demos...what worked perfectly 10 minutes ago will break once you try to show it to someone else.
After fiddling with it for about 20 minutes, we decided something must have fried after his last potential-buyer demo. Since we had come all that way, it seemed a shame to go home empty-handed. The mount was in great shape and we thought it would make for an interesting repair article. I mean, how complicated could these things be anyway? So we worked out a new price and droe the CG-5 to its new home to see if we could bring it back to life.
Once we got back to the office, we took a closer look at the mount. The unit is heavy and well constructed. It appears all of the electronics were contained in the plastic housing wrapped around the core. We identified three screws holding the casing together.
Removing the three screws required three different tips. Once removed, the case came apart easily, exposing gears, a motor, and some circuit boards.
Since we had no idea what to expect, we went slowly and documented every step. Fortunately, the construction was fairly straightforward and quite roomy.
All of the circuitry were on one side. The board with all of the sockets were screwed down to the cover. Removing the screws freed the board. The other circuit board was held in place by some internal slots and was easily freed by gently sliding it out. Three connectors connected the two boards together. The connectors are all the same so we made sure we noted their original positions.
With the power board freed, we were able to confirm there was power coming out of the AC adapter and going into the board. The switch definitely did not appear to be working. The odd thing was when we bypassed the switch, the LED still didn't power up. This was a surprise but unfortunately, we will not have time to follow up on that until the weekend. To get things rolling, we placed a call to Celestron for a quote on how much it would cost to replace the electronics. Word on the Web is they are REALLY slow in responding. We'll see how this works out. Anyone with a broken CG-5 with some good electronics parts out there? [Permalink]- Celestron CG-5 ASGT mount
August 24,2008
The image on the left is the one taken on Friday night and the one on the right taken on Saturday. We took both using the Nikon D40 and the Meade 2045 telescope.
One parameter we did not control for in this comparision was the exposure time. The exposure time will affect the amount of noise and contrast in the image. We know the one on the right was taken at 1/30th of a second. It is fairly obvious by looking at the craters that we were able to achieve a sharper focus by using the angled viewfinder.
The images below show approximately the same area on the moon. The one on the right definitely shows greater detail. It was likely due to better focusing, but we may also have been better at not disturbing the shot. We'll eliminate that variable in the future by using a remote trigger.
This outing made us realize we need to adjust and "lock in" the focus on the viewfinder when it is still light out. It was tricky trying to both focus the viewfinder and the telescope as we couldn't tell whether one or both were out of focus at the beginning. [Permalink]- More Moon Shots
August 23,2008
Last Thursday night we made our first attempt at photographing the moon using the Nikon digital camera coupled to the Meade 2045 telescope. The results were acceptible considering we really didn't know what we were doing and were learning as we went. One thing we did notice was that getting the moon in focus via the viewfinder of the camera was not that easy. In this day and age of "autofocus", the viewfinder is more used for composition than for critical focusing.
The Olympus angled viewfinder is a high quality piece of gear. Most of the parts are made of metal, no play in any of the parts, and the action is smooth. On the side is a lever for flipping between the two magnification levels of the viewfinder.
We did encounter a slight problem when trying to mount the Olympus viewfinder on the Nikon body; the channel in the frame of the eyepiece was not narrow enough. We considered a few different options (changing the frame, finding an adapter, etc...) but finally realized that if we deepen the channel, things should fit together. So out came the Dremel and the routing tip. However, just in case we were wrong, we decided to make the adjustment to the Delkin shield instead of to the camera.
We made the changes slowly and did test fits with the Delkin shield detached from the camera. After a few tries, we got it properly fitted.
The angle viewfinder should enable us to both see the image more clearly and better adjust the focus on telescope before taking the shot. We are eager to give this setup a try. It is still clear out so we should be able to take some more shots of the moon tonight. We'll post some comparisions tomorrow. [Permalink]- Angled viewfinder
We had to wait until after 11:30 before going outside because we were watching the first ever Olympics BMX finals in the office. By the time we got things set up, the moon was high in the sky. It was past full, but plenty of craters were still clearly visible.
We took a whole series of shots at different exposures. The best ones were with the shutter at around 1/30 of a second and using the self-timer mode. Focusing was a lot trickier then we had anticipated as the image through the viewfinder is kind of small, making critical adjustments more of a hit-or-miss proposition. Nontheless, we got a few reasonable images. Here is one at full res...check out those craters!
This outing was much more successful then we would have expected. Using a digital camera had a lot to do with that. The ability to quickly check the exposure was critical for us getting good images as we had to use the manual mode for the shoot. The various books we have been reading on astrophotography also helped quite a bit. We learned a lot from this first attempt. There is a long way to go before we can hope to get images like the one we posted on Wednesday. [Permalink]- Moon shot
August 21,2008
The weather has been perfect this entire week, warm during the day, cool at night, and not a cloud in the sky. Taking advantage of the remarkable stretch of good stargazing conditions, we have been taking the Meade telescope out every night.
Mostly we have been looking at Jupiter and the moon. As we are just starting out in Astronomy, we spent a great deal of time playing with all of the different eyepieces and getting a better understanding of the basics of the scope. However, our eventual goal is to get comfortable enough the telescope to take some photos with it.
When we purchased this Meade 2045, it came with accessories for attaching a camera to the telescope. One is a normal T-mount with a Nikon adapter. The other is an Off-Axis guider (OAG). The OAG has a small mirror to reflect an image up to the eyepiece so one can check and correct any tracking problems during long exposures.
For photographing closer objects such as the moon, we'll be attaching the Nikon to the scope using the T-Mount. This is a quick and simple setup and is the same for the T-Mount and the OAG: the camera adapter is threaded onto the mount, the mount is threaded onto the telescope, the camera twist-clicks onto the adapter like you were attaching a regular lens.
Once everything has been mounted, focus can be done through the camera's viewfinder. Note that the Nikon D40's autofocus will not work when attached to the telescope, as the focusing mechanism for this camera is actually in the lens, not the camera body. We'll post some of our first attempts later this evening. [Permalink]- Astrophoto prep
August 20,2008
No doubt some have heard about the "Bigfoot" carcass found by a couple of yokels. The incredible part of the story is not their claim that they "found" Bigfoot, but their thinking they could get away with it. One of these guys is actually a police office, for god sake. Has he never seen CSI on TV? But this post is not about that. It is about the fact that if folks want to find something amazing all they have to do is just look up in the sky!
We don't remember who sent us this image of a "heart" made of stars, but we filed it away because we thought it would be perfect for a "WowUsWednesday" post. There is no need to go making up fake "discoveries" using a rubber gorilla suit. There are plenty of wonderous things waiting to be discovered just by looking up!
We know the Olympics are still going on, but both the full moon and Jupiter are high in the New England night sky this week. Jupiter is so bright that it is easily visible to the naked eye at dusk.
Clear skies and warm weather seemed a perfect opportunity for us to setup the Meade telescope and use it for a FirstLook at both the moon and Jupiter.
When we purchased this Meade telescope back in March, it came with a few cases of accessories (objectives, filters, etc...). In this FirstLook, we hope to try all of the eyepieces to understand their differences.
Since we are not that familiar with this telescope, we thought it best to assemble it inside and then move it out. The scope was pretty simple to put together. Just three screws and it is ready to go. We will not be aligning it or using the automatic tracking this time out. We just want to see what we can see :-)
With the scope out at the front of the building, we pointed it at Jupiter, and was treated to an amazing sight. We could clearly see the bands of Jupiter and some of is moons. We have alot to learn about using this telescope, but we will be bringing it outside every opportunity we have. Even in the middle of the Boston, with all of the street lamp and ambient light, there are still a lot of things to see in the night sky. [Permalink]- Meade 2045 FirstUse
August 5,2008
TheOtterBox 3500 is a great container for our Lensbaby gear. It is clear, crush-proof, and water-tight. We have had it out in the field for a month now and the setup has worked pretty well. Each individual Lensbaby item was protected by its own pouch. This prevented the gear from scratching each other when in the OtterBox. But, getting to them was a bit of a pain.
We thought, wouldn't it be great if there was an insert for the OtterBox which we could customize for the Lensbaby and its accessories? Then someone remembered we had saved the excess foam removed from the Pelican case. We could definitely use that for this project!
As it turns out, the foam was perfect. To get the rough dimensions, we placed the case on the foam and ripped off a block thta was sized just a bit bigger than the interior the box. Removing the corners enabled the block to fit better. We cut the block such that the foam filled about half of the OtterBox.
We tried a few layouts and found the one above to be the most workable. Since the foam blocks have been precut, removing the interior pieces were fairly easy. Our recommendation is to keep testing the fit after each removal. It is easier to take more foam off then to put it back on.
The whole process took just a few minutes. We also "evolved" the layout a bit during the course of fitting the various pieces into place.
The apeture wand was moved to the left and the macro lenses moved from the center to the right side. The two telephoto lens attachements were too close together when placed directly across from each other, so we staggered them to give them a bit more room.
We are going to try this configuration out for a few weeks and see how it works out. If we don't like it, we still have the mirror half of the foam for another go :-) [Permalink]- OtterBox insert
August 4,2008
We have been having a LOT of fun with our Lensbaby gear. For the first few weeks, we were just using the main lens without any of the close-up or telephoto attachments, learning how to get the focus to the spot we want. There are a lot of possible adjustments to the Lensbaby.
The various knobs took a little getting used to as they all have the same feel. To use them properly, you have to look to make sure they are the ones you want. All of these experiences with the lens and accessories had been in the studio.
Recently we have been spending more time with the close-up attachments. Some of the images weren't planned, but they turned out interesting nonetheless.
In July, we started to take the lens out of the studio more and more. To protect the lens, we packed it in the original box. One thing we quickly noticed was that the form-fitting plastic box that came with the lens was not really designed for use in the field.
Our solution to the problem? Pack everything in an OtterBox 3500. The box is waterproof to 100 feet, crush-proof, and airtight. There are even different colors to choose from. The clear version seemed the best choice for this application as it would let us easily see if anything was missing.
With the Lensbaby gear stowed in the OtterBox, we could now pack it with our other field gear without having to worry about accidentally damaging it. We are shooting a lot more with the Lenbaby now that we can easily take it with us. Tomorrow we'll show one simple customization we've made to the OtterBox which allowed us to even better protect and and access the Lensbaby gear when shooting out InTheWild. [Permalink]- OtterBox Lensbaby case
July 26,2008
After two weeks of dry weather, the RainyDayGarden was desperate for some rain. What's the saying? "Be careful of what you wish for?" Well, we had four days of heavy intermittent thunder showers last week.
Everything received a much needed soaking and they all perked up when the sun came out this morning. The rain gauge had registered closed to two inches of rain just from yesterday's late day shower.
Once the sun had warmed things up, the garden came alive with activity. Buffy and Eliot quickly got tired of chasing the bees and butterflies and curled up somewhere for a nap. We went in search of "bug pics." It didn't take us long to get a variety of shots of grasshoppers, bees, and other flying insects crawling on the blooms.
The rain was timed perfectly for the Queen Anne's Lace which pops up around the garden about now. This plant can be a bit invasive. Some even consider it a weed. We don't mind it so much because of the big white lacy flowers. Unchecked, they can spread quickly and grow quite tall. They are very hardy and attract a lot of bees and butterfies. So we tend to let them be unless they pop up in the middld of something or look out of place. [Permalink]- Wan Chi Lau
July 8,2008
Since we got so many emails asking for more examples, we decided to post few more from our RainyDayGarden series. These were all shot this past weekend using the Casio EX-F1 on a tripod.
We also got a lot of email suggesting additional video ideas. Many of them we have thought of already, some were too odd to attempt even for our intrepid interns, still others were down right illegal in most states. However, we thought seeing more ideas would not be such a bad thing. So if you have an idea for a video, drop us a note with the subject line "Shoot me, baby!" We will select three of the best ideas. One for each frame rate (300, 600, 1200). The winners will get something fun from out pile of stuff. The contest ends at the end of the month. [Permalink]- Wan Chi Lau
July 7,2008
The RainyDayPhotography folks had access to the Casio EX-F1 digital camera this weekend. We had heard about this camera's unique high speed shutter and wanted to see if it is as cool as it sounds. We spent a few days with the camera. It was not enough time to sample all of the cameras functions, but we did get a feel for the high speed movie modes.
The image of the bumblebee hovering next to the purple cone flower is a frame pulled out of the 300 fps capture. Click on the images below to see the actual movies of insect (bumblebee, dragonflies) movements at this capture speed. The wing beats are still a little blurry, but definitely WAY better than one can do with any conventional camera or video recorder.
Posted here are series of bumblebees and dragonflies in flight at different frame rates (300fps, 600fps, 1200fps). The image size decreases with the increase in frame rate. This is one of the tradeoffs. The other is light sensitivity. A lot more light is needed to get a good 1200fps movie. None of our indoor ones shot using 1200fps were any good using conventional lighting.
A few obvious lessons learned from our brief encounter with the EX-F1. A tripod is a MUST if you want to get a usable movie. Bright lighting conditions is necessary, but movies captured in direct sunlight is too harsh and contrasty. Match the frame rate to the action. 1200fps is great for getting dragonflies in flight, but not necessary for a "bouncing ball" movie :-)
The Casio EX-F1 is an intriguing camera which opens up a lot of photographic opportunities for those interested in "sampling" the world at a higher frame rate. We have a lot more ideas than time, but unfortunately we had to return the camera today. Maybe we'll get access to another one soon and give those ideas a try! [Permalink]- Wan Chi Lau
July 5-6,2008
There are many new digital cameras on the market and more coming every day. Most have good image sensors. Many have the ability to capture movies. SLR models enable users to change and use different lenses. However, until now, NONE of them allows photographers to do what the Casio Exilim EX-F1 will allow them to do. Intrigued? Well, then read on.
The Casio EX-F1's package is similar to mosty digital cameras: camera, lens hood, battery charger, USB cord, remote trigger, and software.
The body is slightly smaller than our Nikon D-40. It has a 6MP sensor, a 12x zoom lens (36mm-432mm), and lots of other impressive specs.
The layout of the buttons and controls are logical and accessible. The camera feels comfortable and maneuverable. The integrated grip is contoured to fit nicely for right handed users.
At this point, you may be thinking, what is so special about this camera? Well, how about a shutter speed of 1/40,000 sec? 60fps burst mode? 1200fps movie mode? You can pick up your jaw now.
What kind of photos one can capture with a camera capable of 1200 frames per second? How about the wing beats of a dragonfly? Or the motion of a hovering bumblebee? Skeptical? Come back on Monday and we'll show you some clips from our weekend's FirstUse outing with the Casio Exilim EX-F1. And yes, it is a good idea to get a large SD memory card to use with this camera. [Permalink]- Wan Chi Lau
July 2,2008
Boston got a lot of rain during the last week of June. This meant the RainyDayGarden really got a wet base heading into the typically drier month of July .
The orange day lillies started to bloom this past week. We love photographing the lillies and took their blooming as an opportunity to play around some more with the Nikon D40. In this outing, we wanted to experiment with the apeture-priority settings and get some experience manipulating the depth-of-field (DOF). Using the "Auto" mode, the camera will usually pick a combination which will give the best focus for the area of interest. This typically mean favoring speed over a greater depth-of-field.
We waited for an bright cloudy day to minimize the contrast. There were also minimal breeze to disturb the flowers. By selecting a smaller aperture setting and thus increasing the depth-of-field, we were able to almost get both the bug and the flower in focus.
In general, we found the Aperture-Priority mode quite intuitive to use. The thumb wheel used to set the aperture was easy to manipulate. Information about the current settings was available both in the viewfinder and on the rear LCD. The graphics in the LCD representing the current aperture size were interesting, but not accurate enough to replace the numbers. Of couse, what is missing with the D40 is a "LiveView" or a DOF preview feature.
We also played a little with the the shutter-priority mode, but were not successful in clearly capturing the bumblebee in flight. The shot we were after was to have the body in focus and the wings a blur. A bit more practice and patience may be needed before we can get that shot. [Permalink]- Wan Chi Lau
June 27,2008 (FotoFriday)
We had always wondered how they got this shot of the Porsche zooming into the future. Some here thought it was Photoshopped, but other thought it was done by zooming during the exposure. Tricky to do either way.
When we were at Tesla Motors last week, we thought we would take advantage of the opportunity and try to do something similar with the Tesla Roadster.
Any idea how we did it? If you do, drop us a note with the subject line "It's a Tesla, baby!" In the body of the email, tell us what we used to create the effect. The prize is a CD of high rez images from Porsche. Contest ends at the end of June. If you need a hint, you have not been reading RainyDayMagazine consistently this month... yes, that was a hint :-) [Permalink]- Wan Chi Lau
June 16,2008 (MoreLensbabyMonday)
One way we like to test gear is to see if we can set it up and use it without reading any directions. Well-designed gear is intuitive in their layout, interface, and usability. The Lensbaby is such a piece of gear.
In this FirstUse, we want to show some of the photos we took with the lens just after a few minutes of messing around. It is a tribute to how well thought out the knobs and controls are on this strange looking lens.
I went home for Father's Day this past weekend and took the lens with me. Remembering the discarded collection of old models collecting dust in the attic, I thought it would be interesting to see them through the Lensbaby. After seeing the results, everything (silk flowers, paintings) became possible subjects :-)
It was easy to see the effects of manipulating the focus plane because the results can be seen in the view finder. Estimating proper exposure took a little more trial and error. Being able to shoot digitally definitely made working this type of lens much easier. I now have much more appreciation of those who shoot with a field camera!
As with a field camera, with the Lensbaby, there is no autofocus. Apeture is controlled by physically changing discs with different size holes. Shutter speed is maually controlled via the camera. The Lensbaby mounts like any other lens, but the similarity to most modern lenses ends there. We'll have more comments about using the Lensbaby after some of the other folks here have had a chance to play with it...assuming they can convince me to hand it over. [Permalink]- Wan Chi Lau
June 13,2008 (FabulousBabyFriday)
Hey! Its's Friday the 13th! Suppositely it was not such a great day in history for the Knights Templar. However, for us here in the RainyDayMagazine office, it is a fabulous day. Why? The Lensbaby, baby!!! As always, click on any of the images to see a larger version.
Today, we will be taking a FirstLook a the Lensbaby 3G, the wide angle, telephoto, and macro accessory lenses. The Lensbaby and the various accessories are designed for photographers who want to explore and play with focus an depth of field in their photographs.
The macro, wide angle, and telephoto lenses are well constructed screw-on attachments for the Lensbaby. All are made with glass and metal. Each comes with its own pouch and lens cloth.
By altering the angle of the lens in relations to the image sensor, precise control of focus and depth of field is achieved. This will enable some very interesting effects. We will have first hand comments in our upcoming FirstUse review.
Lensbabies are available for most of the major camera mounts. The one we have is for Nikon. We will be testing it out with our D40. Obviously, this is not an autofocus lens. What it will be is a whole lot of fun!
Next part of this FirstLook series of the Lensbaby 3G and accessories will examine how all these pieces fit together and what they look like mounted on the Nikon D40. Those of you who look closely may even get a chance to win something (hint, hint). [Permalink]- Wan Chi Lau
BTW, the Lensbaby is the "mystery device" in the photo from Wednesday. Those of you who followed the instructions will have had your email filtered to the correct folder. We'll take a look at them this weekend. A winner will be picked from the ones with the correct answer at the end of June. Answers sent today will be filtered to the "other" place.
June 12,2008 (TechThursday)
Digital video editing used to take an entire studio. With the MacBook Pro, a large external drive, and iMovies software, one can turn any room into a digital video editing studio.
Recently, our copy editor Carolyn needed to edit a few hours of training footage for a client down to a something more coherent. With all of the photo shoots going on and gear strewn everywhere, she decide to claim the only unoccupied surface available, the table in the RainyDayKitchen.
Set up was easy: one USB cable from the laptop to the drive. Carolyn finds the Saitek mouse with a scroll wheel to be a good editing accessory. It is easier to scrub the frames back and forth using the scroll wheel then with the trackpad.
The important thing about working with a lot of video is to have plenty of contiguous disk space. It speeds up the reads and writes to the drive. Ten minutes of DV footage takes up about 2GB. This external drive can store about 40 hours of video. With a MacBook Pro and the Iomega UltraMax 500GB drive, we can really have a video editing workstation anywhere! [Permalink]- Wan Chi Lau
June 11,2008 (WhatIsItWednesday)
A LOT of cool stuff shows up at the RainyDayMagazine office. Once in a while, something so different shows up that it has everyone asking... "Oooh, what IS that?" If you know, or think you know, what the item to the right of the Nikon is, drop us a note with the subject line "I know what landed on your desk!" In the email, provide a link to the product company's website.
The contest ends when we post the FirstLook review of the item. All correct answers will be tossed into a hat. At the end of the month, we'll select a winner and give him/her something fun from our pile of goodies. As always, if you were a past winner, you know what you need to do if you want to enter again. Good luck! [Permalink]- Wan Chi Lau
June 10,2008 (TTLFlashTuesday)
Light is a critical for photography. Getting enough of it is not always so easy. Our Nikon D40 has a built-in flash and it's suitable for a lot of situations. We added the SB400 flash module to our kit for when we need to paint a larger area. However, neither the built-in flash or the SB400 is strong enough to light up a room.
In order to get that kind of coverage, we looked to the Sunpak PZ42X. This unit is not as compact as the Speedlight SB400, but it is quite a bit more powerful and a lot more flexible.
The Sunpak unit has a head which may be rotated and angled for a wide variety of bounce options. The head of the SB400 can only be angled up, but it cannot be rotated.
Integrated into the top of the PZ42X is a diffusion lens for wider light dispersion and greater coverage. This is especially useful when shooting with wide-angle lenses.
The front of the unit has an AutoFocus assist lamp to help the camera focus in low light situation. The LCD panel and mode controls are in the rear. The large locking ring is easy to rotate even in tight quarters.
The flash takes 4AA batteries and has a recycle time of 3.5 seconds between flashes. Access to the compartment is from the side. This makes it easy to change batteries even when the unit is mounted.
We will, of course, use our favorite rechargeable batteries to power up this Sunpak flash. FirstUse reports of both the small Nikon SB400 and the larger Sunpak PZ42X will be posted later on this Summer. Look for it to see if bigger is better. [Permalink]- Wan Chi Lau
May 30,2008
Last week Improv Everywhere pulled off an impressive early "Happy Birthday" well-wishing event for the Brooklyn Bridge. 700 folks gathered, inspite of the rainy weather, and participated in a camera flash wave across the bridge.
There are a lot more photos on the Improv site of this and other "scenes of chaos and joy in public places." Enjoy and have a great weekend! [Permalink]- Wan Chi Lau
May 21,2008
Just when we had finally gotten rid of all of our Canon cameras we came upon this site...on how to hack tons (advance histograms, access raw formats, unlimited video, etc...) of Canon cameras!!!
Apparently, folks at CHDK (we are guessing it means Canon Hacker Developer's Kit) has pretty much figured out how to mess with firmware common to many of Canon's digital cameras.
The best part is the hack is loaded via the flash card and does not permanently override the on-camera firmware. So to back out, all you need to do is to remove the software from the SD card! If you have a Canon camera and want to access some of it's "hidden" capabilities, go check out the CHDK site and hack away! [Permalink]- Wan Chi Lau
May 13,2008
The pop-up flash on the Nikon D40 camera is suitable for a lot of low light situations, but sometimes a few more photons than what the built-in unit can supply are needed.
For those situations, the Nikon SB-400 Speedlight unit is the perfect solution. This flash module is compact, fast charging, and built specifically for the new Nikon digital cameras.
It uses two AA batteries. The head tilts up for bouncing off the ceiling. There is a locking pin for securing the unit to the camera body. The overall size and balance of the camera is preserved when the unit is mounted.
This is a quick FirstLook of the SB-400 module. We will have a lot more examples of this unit's capabilities when we have had more time playing with it. [Permalink]- Wan Chi Lau
May 11,2008
We reviewed the Trek-Tech VersaMount almost exactly a year ago. During that time the VersaMount has lived up to its name. Folks here use it all the time in combination with the TrekPod for both our studio and outdoor photo shoots.
The best part about the VersaMount is its ability to be placed anywhere along the length of the TrekPod. We got the rotating head (MagMount) to make the exact positioning of the camera faster and easier, even at odd angles.
Shots of insects in flight are fairly difficult to get, but gear such as the VersaMount and TrekPod make them a lot easier to capture...the fast autofocus on the Nikon D40 didn't hurt neither :-) [Permalink]- Wan Chi Lau
May 10,2008
Mornings are the best time to be out photographing flowers. The air is stiller, the light is not too contrasty, and most biting insects are not yet feeding :-)
One thing to be careful of when shooting early in the morning is that dew and moisture are still everywhere. While droplets on the leaves and petals make the shots more interesting, all that wetness is not so great for the gear.
The Kata E-690 Element Cover was designed with such assignments in mind. With the cover on, the camera is protected and we can still freely manipulate all of the controls.
We were quite happy with how easy it was to set up, use, and get the E-690 cover on and off the camera/tripod rig. The drawstring in the front opening made it simple to get a good fit around the lens.
The sleeves on the sides are long enough so a good portion of the arm may be inserted and the drawstring pulled closed around it. Our question to you readers out there is...how would you cinch close BOTH ends? [Permalink]- Wan Chi Lau
May 9,2008
We have been reviewing a lot gear for the RainyDayPhotography folks lately. Many of you have been asking for more of the same. Well, get ready for a weekend full of photo gear and gadgets!
Since our weekend begins on Friday, we'll start with a look at an item (Element Cover E690) from Kata designed for those who won't let a little rainy weather get in the way of their photography.
Camera equipment and water never got along well. This is especially true for digital SLRs. Kata designed the E-690 Element Cover to be both compact and easy to use. The cover has openings on both end, a large zipper, and a clear top/rear panel. There are drawstrings at all opening for a snug fit and for keeping things out.
The cover will fold up flat for transport. It will fit easily in most camera bags. Next time the weather turn on us, this cover should be able to keep our camera well protected. [Permalink]- Wan Chi Lau
May 7,2008
It has been sunny these past few days. The irises and tulips are loving the rays. We thought it would be a great opportunity to take advantage of the light and see what the Nikon D40's kit lens can do on getting up close and personal, at least with the flowers blooming out in the RainyDayGarden :-)
We took most of these shots early in the morning using the 18-55mm lens with the camera on a tripod. Our first close-up test was not too structured. We just wanted to get a feel for what we can expect at different zooms. Click on any of the images to see the larger versions.
The three images of the purple tulip are all the same shot just cropped and saved at different resolutions in Photoshop. You can see the details at full resolution here.
The red tulips shots give an idea of the range of subtle shades which can be resolved with the D40/18-55mm lens combo. How to print these subtle shades is a problem we tackle another day!
Close-up photos are not difficult to take, but does require a sturdy tripod, good lighting, and a lot of patience. Some readers have asked about creative accessories (specialty lenses, close-up filters, etc...). Many of these will give the photographer additional creative control of the image capture process. We will be taking a look at some of them in a few weeks. [Permalink]- Wan Chi Lau
May 5,2008
Carolyn recently obtained access to a brand new Nikon D60 as part a consulting gig. The RainyDayPhotography folks here managed to convince her to let them play with it by promising that they would not take it apart :-) They did a quick look and found some obvious upgrades. Whether these changes are worth the extra money is not yet clear.
On the surface, the two cameras looked almost identical. Internally, the D60 has a larger sensor density (10MP vs 6MP). The camera software came with a few refinements: rotating LCD grapics, sensor cleaning on power-off.
There are probably other software upgrades, but they will have to look at the D60 more closely before they can comment on them. The D60 kit now comes with the newer 18-55mm AutoFocus lens. This version has the "vibration reduction" feature which we love in the 55-200 AF lens.
With access to all of the new gear and with more coming, we are looking forward to a very "photographically-active" Spring and Summer.
We want to remind readers that at the end of the May we'll be giving away two prizes. Read all about it here. Send your answers to us before the end of May. We'll pick the winners on June 1st. [Permalink]- Wan Chi Lau
Apr 30,2008
We were right about the weather yesterday. It rained all day and the plants in the RainyDayGarden loved it. We took advantage of a brief pause in the rain to do some more tests of the Nikon D40 and lenses.
May is just around the corner and we are all looking forward to the warmer weather. This Winter felt a lot longer because we skipped our annual Spring Break trip to South Beach. We won't make that mistake again! [Permalink]- Wan Chi Lau
Apr 25,2008
Since we got a good bunch of emails from folks commenting on their color preferences regarding the Camera Armor, we thought we would post some shots of the black version.
There were also a few requests for more close-ups... so here are some of the back and side. Note the details of the mold on the buttons. This is particularly important from a usability perspective.
It is Friday and we don't want to make you all think too hard, but we would be interested in knowing if there IS a good reason for one color over the other. So let us know your preference and WHY. We'll give out two prizes at the end of May for your efforts. One winner will get something for the most innovative reason for the use of a color. Another winner will be just because they were lucky.
BTW, April still has some unclaimed RainyDayPuzzler prizes... hurry, the end of the month is almost here! [Permalink]- Wan Chi Lau
Apr 20,2008
There are numerous wilderness trails around Keene NH. The Chesterfield Gorge is just a few minutes drive from the center of town.
It was a perfect day for a hike. The air temperature was in the high 50s when we headed out. Most of the snow had melted, but there were still enough on the ground that we had to be mindful of our steps.
The hike to the gorge was less than a mile. Once there, we were free to climb around the rocks and walk along its edge.
We carried in two D40s, three lens, and assorted accessories using two Kata bags. The Kata bags (T-212, W-92) were very comfortable and easy to use during the hike. We found wearing WaistPack on the hip made it easier to get things in and out. It also served as a nice resting place for the hand.
We REALLY like the T-212 TorsoPack. The pockets of the T-212 were angled and well positioned, enabling us to quickly retrieve whatever piece of gear we needed.
We found it quite stable to have the weight of the gear in front. General ventilation was also good as we did not heat up much even though there was a fair bit of climbing around.
The final piece of gear we would like to mention is the TrekPod. This hiking pole/tripod is a great piece of gear to have on a hike. The more we used the TrekPod, the more we appreciated its versatility. Many of the shots we got on this hike would not be as sharp if it wasn't for the TrekPod. Go here if you want to check out the original TrekPod review series.
Carolyn spotted an interesting growth of a tree around a large rock. We spent the rest of the hike talking through the various possible scenarios which could have gave rise to this odd formation. If you have theory, drop us a line...we would love to know your thoughts on how this tree/rock formation came to be.
This hike was a good way to start the day. We did a longer trek later in the day and learned some interesting things about Carolyn's level of comfort with Wan's wilderness orienteering skills, but that's a story for another day :-) [Permalink]- Wan Chi Lau
Apr 18,2008
We got a lot of questions and a few "interesting" comments after we posted the FirstLook of Camera Armor. Some of the questions we'll address today. Others we'll tackle next week. In this post, we will show how to fit the Camera Armor on the Nikon. We will also show the actual fit of the Camera Armor on the Nikon.
To fit the Camera Armor on the body, the lens must be removed. Put the body cover on to keep dust from getting on the sensor during the installation.
Next is to attached the clear LCD cover. The plastic piece will shift around, but will stay in place once the flexible skin has been installed.
The Camera Armor is very stretchy. To install, start by sliding it over the top of the body, work it over the knobs, and shift the opening into place. The fit is tight so don't be afraid to pull things into place. The lens protector on the other hand just slips on to the rim.
The lens protector does not interfere with the focus or zoom functions when installed. The pop-up flash is also not impeded by the skin in any way.
We are very impressed with the overall fit of the Camera Armor and are eager to see if the buttons are as easy to manipulate under actual use. We'll be taking the camera out on a hike this weekend and will report back on the Camera Armor's performance in the FirstUse writeup. [Permalink]- Wan Chi Lau
Apr 17,2008
A few days ago we gave you a quick preview of the Delkin Pop-Up Shade. The purpose of this accessory is to shield the D40's LCD so it will be more visible under bright light conditions. Today, we'll give you a more detailed look at what it looks like attached to the D40.
The Delkin Pop-Up Shade is made to integrate with the overall look and function of the camera. There is a clear shield for the LCD. The cover is spring-loaded and will stay open when lifted.
The Pop-Up Shade was very simple to install. All the prep needed was the removal of the rubber cover which covered the viewfinder. The shade clips over the exposed rim and may be easily removed without tools.
Here are a few views (left, top, right) of the Delkin Shade on the Nikon D40. Click on any of the images for a closer look. Note the custom fit of the Shade. All of the buttons on the left of the LCD are still easily accessible.
The shade may be easily poped up by lifting it from the bottom. It will add a few inches to the overall length of the camera when extended.
We are impressed with the quality of this Delkin accessory. The unit is well designed, was easy install, and looks OEM. In our FirstUse report, we'll take the camera outside and get some shots to show the difference in the LCD's viewability with and without the Pop-Up Shade. [Permalink]- Wan Chi Lau
Apr 15,2008
Yesterday we gave you a quick look at a few Nikon accessories. Today, we'll take a closer look at Made Products' protective Camera Armor skin.
The Camera Armor is made from a proprietary silicone that is heat stable to over 400ºF. The feel is soft, cushiony, and easy to grip. The details of the molding are very exact. Click on any of the images for a closer look.
Included in the kit is a lens protector and an LCD shield. Like the skin, the lens protector is made out of silicone. The LCD shield is custom formed, but out of clear plastic. It covers the entired LCD panel and the buttons on the left. The shield must be use with the Camera Armor because it is held in place by the tight fitting skin.
When the Camera Armor and the LCD shield are in place, all of the buttons on the Nikon D40 should still be accessible. We'll see when we have the Camera Armor on the camera. [Permalink]- Wan Chi Lau
Apr 14,2008
TheKata bags are great protection for the Nikon D40 in transit. When it is out of the bag, MADE Products' Camera Armor will protect it against the inevitable bumps and splashes.
These elastomeric silicone shields are custom molded for each specific model. The kit comes with a one piece shield for the body, a lens guard, and a hard plastic cover for the LCD.
The Camera Armor come in black or smoke color. The one here is the smoke version. We thought it would contrast better for showing where it protects the D40. The black version may blend better with the camera. We'll show how to install the Camera Armor next week.
Another useful accessory is a "shade" for viewing/reading the LCD when out in bright sunlight. Delkin Devices makes a snap-on unit which attaches by sliding over the viewfinder.
The Delkin Pop-Up Shade works just like those on a classic Hasselblad camera. The sides spring out and hold the cover open to form a three-sided shield, making the LCD readable in all conditions.
Delkin Devices also offers a quality Nikon D40 replacement battery with the same specs (1100mAh, charge control, short circuit protection) as the OEM version and comes with a 2 year warranty. We'll let you know how they hold up under actual use. [Permalink]- Wan Chi Lau
Apr 11,2008
When we took the Nikon D40 out for the first time, we chose the Kata W-92 waist pack for the outing. It worked just fine, but we realized that for times when we don't need to carry any other accessories (extra lens, external flash, etc...) it was actually too much for our needs.
We went back to the Kata site and looked around to see if there was something which would be a middle ground between a backpack and a waist pack. It was then we came upon the T-212.
The T-212 is a "sling-style" bag designed for active photographers. It offers gear protection, easy access, but with a minimum of bulk. Another plus with the Kata T-212 is it's a part of Kata's integrated EPH System.
The pack can stand on its own, but it is designed to function with other Kata bags (W-92, R-102) for times when you need to be both mobile AND well equipped. We'll have a FirstLook of this innovative camera bag later on this month. [Permalink]- Wan Chi Lau
Apr 1,2008
Many readers have written to us complaining about the large image files created by their new digital cameras. The biggest gripe is the constant need to get larger and larger memory cards. Another problem is that file transfer will literally grind to a halt when they try to send a 5MB image over the Internet using their 14.4KB dialup connection.
Tomorrow, we will be showing RainyDayMagazine readers how to downgrade a Canon S2 image sensor from 5 MegaPixels to 2 MegaPixels by transplanting a Canon S100 sensor into the S2.
The advantages to a smaller image sensor is not just smaller file sizes, but less resolution. Lower resolution means things like facial imperfections (wrinkles, lines, etc...) will not be as well defined. We expect all professional fashion and model photographers will be downgrading their equipment in the future. [Permalink]- Wan Chi Lau
Mar 30,2008
It was a bit windy, a little cold, but Spring is definitely on the way. We thought a stroll through the Arnold Arboretum in Jamaica Plain would be a perfect opportunity to tryout the Nikon D40.
The goal of this outing was to get a feel on how the camera handles on one of our typical assignments. All of the shots taken in this trial were done using the default "Auto" setting. The flash came on when the camera thought it was needed. All we did was compose the shot and press the shutter button.
We used the 18-55mm lens for all of the building, interior, and landscape shots. The wildlife shots were taken with the 55-200mm and without a tripod.
The camera was easy to handle, even with gloves on. The buttons were logically placed. Focusing was quick and responsive. There were no problems with shutter lag or recovery.
The Nikkor 55-200mm VR lens continues to impress us. We caught the robin above using the 200mm zoom and on the move. We knew the camera would under-expose the bird, but we wanted to see how well the robin would hold up after some image processing. The colors and details held together surprisingly well!
We wanted to show some examples of images (ducks, buds, bark) uncropped, unretouched, and in full resolution to show you what you can expect when shooting outside on a bright overcast day.
Everybody here was surprised by how much more detail the photos taken with the Nikon D40 had as compared to past Canon S2 photos. We didn't think the differences would be so dramatic.
In the next installment of our Nikon D40 review series, we will try out the various "pre-programmed" modes. [Permalink]- Wan Chi Lau
Mar 29,2008
Remember when we said not all memory cards are the same? We have some generic SD cards which we use for our GPS and other gadgets. We popped them in the D40 and went out side for a few quick shots.
When we tried downloading the pics, we got a "read error." Not really sure what the problem was, but we did eventually recover most of the images. This is NOT something you want with images taken on a trip or a job!
Before heading out, we loaded the Lexar Pro 4GB SD card. Since the card's capacity is greater than 2GB, the Lexar card uses the new SDHC format. Knowing most users' SD readers probably do not yet support this higher capacity format, Lexar conveniently included a SDHC reader. The reader will work with computer with an USB 2.0 socket.
The Lexar 4GB SDHC card is the same form factor as a regular SD cards and was recognized by the Nikon D40 without any problems. A 4GB size card will enable the capture of over 2000 images before reaching capacity. We'll post the results of our outing tomorrow. [Permalink]- Wan Chi Lau
Mar 28,2008
The weather forecast for this weekend is cold but sunny. Sounds like the timing is perfect for our first planned outing with the Nikon D40. But before we take it outside, we need to check out some "protective gear" for the D40 from inventory.
The piece of gear we always select first is the case. We expect to do some light hiking around town, so we will not need a full backpack. For day trips, our first choice is usually the Kata W-92 WaistPack.
The Kata W-92 is roomy, easily reconfigurable, and offers multiple carrying options (hip, grip, sling). It has pockets for IDs, credit and business cards, and is also very well padded all around.
When cameras were mechanical, while not recommended, dropping one was usually not a total disaster. Today's digital cameras are actually a lot more fragile. Not because they are not well made, but because the autofocus mechanism are often quite intricate. Strong knocks can and do throw the gearing out of whack. We know, we have taken enough of them (S-100, S2) apart :-)
The best protection against dropping a camera is a hand strap. They are inexpensive, simple to attach, and easy to use. We got these from a vendor (Fotodiox) on EBay. Definitely one of the "must-have" accessories for larger digital cameras.
The last piece of "protective" gear is perhaps the most important. Those of us who grew up shooting film know what you store your images on is as important as the camera used to capture the images. Back in the analog days, we used nothing but Kodachrome and Fujichrome film. In tomorrow's outing, we will be shooting with Lexar Professional SD memory cards in our Nikon D40.
In the digital age, some think all flash memory cards are the same. Our view is if something is going to be used over and over again, buy something that will last. Most professionals know that paying more for quality often ends up being less expensive in the long run. We have been using Lexar memory for a long time. Why? Because they last. [Permalink]- Wan Chi Lau
Mar 27,2008
All of the camera and telescope gear we've been accumulating these past few months have been toward building the ability to so some backyard astrophotography. Since we are all city folks here at the magazine, we needed something which would be easy to setup, not too complicated to use, and quick to take down.
To attach a camera to a telescope, the easiest way is to use an adapter. Adapters are available in two flavors, straight and off-axis. The straight T-adapter is just a tube threaded at one end for the telescope and threaded at the other end to accept a camera adapter. The off-axis guider is an adapter which is designed to enable easier focusing.
Astrophotography is a great reason to get out the old film gear :-) The adapters may be fitted for any type of SLR (film, digital), just make sure to get the appropriate camera mounts for your make of camera. We'll be trying it both with our old Olympus OM film system and our new Nikon digital unit.
We may try a to hook up a webcam or a small digital point-and-shoot camera in the future, but the combination we are going to try first is a portable scope with a film or digital SLR camera attached.
Saturn has been slowing tilting its rings toward for the past few months. Today is a bit cloudy and the forecast is even predicting some snow this evening. However, Spring is definitely on its way. We are looking forward to setting this rig up outside and seeing what it can see! [Permalink]- Wan Chi Lau
Mar 26,2008
We charged up the battery to the D40 last night before we logged out. This morning, everything was ready to go when we came into the office.
Some of you asked to see a side-by-side size comparison with the Canon S2. The Nikon D40 is a VERY light camera even when compared to the S2. The bodies are almost the same size, but once a lens is attached, the D40 is quite a bit bigger.
To show the image detail available from the D40 with the 18-55mm and 55-200mm VR lenses, we uploaded the full-rez versions without any cropping or color correction.
The three above (book, cat, pebbles) were taken using the default "auto" mode with the 18-55mm zoom. The action shot below was taken freehand using the 55-200mm at maximum zoom. Click on any of the images for the larger version. NOTE: download times maybe long if you have a slow internet connection.
We were tracking the head of the cat as it moved through the garden. Notice how sharp the eye is when the image is viewed at 100%...remember, the shot was done without a tripod and at maximum zoom! Suffice to say that we were suitably impressed with the performance of the D40, but were completely blown away by the quality of the shots captured using the Nikkor 55-200mm VR zoom. This is one awesome lens!!! [Permalink]- Wan Chi Lau
Mar 25,2008
We have been using the Canon S2 for most of the photography at RainyDayMagazine. The S2 was so good that we ended up getting a bunch of them. The S2 is small, inexpensive, and relatively simple to fix. However, we missed the flexibility and control of shooting with a SLR camera.
Today, we would like to introduce you to a new addition to our lineup. It is the Nikon D40. Some readers may know that Nikon has a few updates in this line (D40x, D60). However, we have compared the features and price of the updated models to the base D40, and we think this kit offers the highest value/cost ratio.
The basic kit (camera, accessories, lens) comes with a 18-55mm lens. In our package was also a 55-200mm VR zoom. This lens combo covers the typical range needed for most photo situations.
The Nikkor 55-200mm Zoom has built-in "vibration reduction" capabilities. This VR lens will enable the user to get steadier shots in low light situations. We are eager to try it out.
You know we'll have more coming soon once we've had some one-on-one time with the gear. As always, just click on any of the photos for a closer look. We hope you enjoy this FirstLook. Let us know what accessories you want us to check out for the D40. We'll let you know if they are worth your hard-earned cash. [Permalink]- Nikon D40
Mar 23,2008
Now that we finally managed to put together a working LCD screen, it's time to take it apart and finish the DIY-Cintiq project. The disassembly of the Dell LCD panel was a lot easier than the NEC unit, mostly because the Dell had a much simplier layout.
Unlike the NEC layout, the Dell's x-y flat cables are in parallel. This means it will not require any FFC extensions. We also noticed the joints of the flat cables on the Dell are reinforced. Care must still be taken, but the solder joints should be a lot sturdier.
After some careful work, the LCD was freed and ready to be overlaid on the digitizing tablet. To see if we broke anything, we reattached all of the electronics, hooked up the Vaio, and powered it up.
The Dell screen came on just fine. At this point, we are just happy it works, but we did noticed that the Dell's brightness was noticably dimmer than that of the Vaio. It may be a problem, but what we REALLY need to confirm is that the digitizer will work underneath the LCD.
Unfornately, we ran into a problem with getting the mouse or the pen to be recognized by the tablet. After spending most of the day on it, we came to the conclusion that we will have to put this project aside once again. - Wan Chi Lau (permalink)
Mar 14,2008
When we said we got the DIY-Cintiq screen working in January, we were a bit premature. It was true that we got power to the LCD, but we were unable to get it to actually display an image.
It might have been because we were using the 10 pin FFC in a 20 pin connector. We may have done something else wrong, but after playing with it for a few days without making any progress, we decided it was time to try another screen.
After a few EBay attempts, we finally managed to obtain two partially working Dell 1503FP screens. One does not turn on, the other has a damaged LCD. By taking parts from both, we were able to make one working screen.
With a working LCD screen, the DIY-Cintiq project is once again back on track. The digitizing tablet had already been disassembled and is ready to go. Hopefully we can get the LCD parts mounted in the next few days. - Wan Chi Lau (permalink)
Mar 12,2008
Thanks to all you readers who sent us info on our mystery Meade telescope! The general consensus is that the scope is indeed a 2045. Apparently, many of you 2045 owners love it because of its all metal construction and excellent drive mechanism.
The coolest 2045 info was a link from Brad M on the internals of the scope obtained via a CT Scan. ALL mechanical products should be scanned and their innards revealed in such a fashion! Brad, to show our appreciation for the awesome link, we'll send you the Skeletool once we are done with the review. - Wan Chi Lau (permalink)
Mar 11,2008
The interns were scanning Craigslist last week and came upon a listing in New Hampshire for a Meade telescope which looked good, but didn't come with any model number. Along with the mystery Meade in the photos was a heavy duty tripod and a lot of accessories (filters, camera mount, eyepieces). However, since it was a Schmidt-Cassegrain design we knew it was not an ETX series scope.
It was decided that the hour drive up North was worth the effort since Burt (the owner) sounded friendly on the phone and assured us the scope was in "like new" condition. Burt was not exaggerating, the scope was pristine. We made an offer and took the entire collection.
We managed to pack the entire lot into the Boxster (which meant someone hugged a tripod for 40 miles) and will be sorting out the pieces this week. After some initial investigations, we think the scope is a Meade 2045. If you think you know more about this unit or the accessories, drop us a note. The interns could use the help! [permalink]- Mystery Meade
Mar 10,2008
Are you a scuba diver? Are you interested in seeing up to 5 times more than your traditional mask allows? If so, check out HYDRO OPTIX’s MEGA DOUBLE DOME mask for a wide angle, clear view of the underwater world.
In the FirstLook review, we checked out the mask and its accompanying components. For the FirstUse review, Andy will give you his impressions of the mask on ... [More]- Hydro Optix
If you need to have easy access to lots of different gadgets, there is a Civilian Lab system which will suit your needs. If you want a system which is adaptable, Civilian Lab has a harnessing mode (chest, belt, thigh, etc...) which can accommodate the situation.
The construction and materials used are both very high quality. All of the external storage compartments have velcro closures for secure containment while still enabling quick access to the gear. The flaps are padded to give the contents bump protection.
The inside of the bags have even more pockets, slots, and openings for holding pens, probes, or whatever. The design is such that the contents are secure but accessible, a very important feature in bags for active users.
There are multiple ways to strap on these Civilian Lab harness bags. For extended use or when carrying a lot of weight, padded shoulder straps may be added to the harness to distribute the load.
Some here are wondering just how much gear can be loaded into this harness system. You'll see when we fill it up and take it out for a FirstUse test in the Spring. - Wan Chi Lau (permalink)
Mar 3,2008
Multi-lens, multiple-focus, 100 megapixel camera may sound like the realm of sci-fi. However, Adobe has already built a prototype to show off some of the capabilities of light-field photography.
This prototype works using 19 lenses to take images at multiple depths and angles simultaneously. Adobe's software will dynamically enable the viewer to select a combination of independent focal points in various portions of the images. A totally awesome concept. - Wan Chi Lau (permalink)
Feb 27,2008
There are many ways to disappear. One way is to blend in with your surroundings. Artist Desiree Palmen has been working on her own interpretation of "blending in" with these optical mind-benders since 1999.
Check out some of her more recent works below. We some humorous, some disturbing, but all thought provoking.
Today's pick was sent to us by Georgina. As always, we like to thank our readers for all the wonderful and fascinating "WowUsWednesday" submissions! Keep sharing them and we'll post them as time permits. - Wan Chi Lau (permalink)
Feb 26,2008
Recently we upgraded the Mac mini with the latest version of iLife. Getting the new iPhoto features was our reason for the upgrade. However, we soon realized that iMovie and iDVD also had some significant changes. However, when we ran those apps, we noticed the Mac mini ran a lot slower.
We traced the problem to the fact that we only had 512MB of RAM in the machine. As most readers probably already know, upgrading a machine's memory is probably one of the most cost effective way to increase its performance.
There are a LOT of memory vendors out there. They are NOT all the same. When we needed memory, we head to a company called RamJet. Their site is easy to use. The "memory locator" on the site will make sure you get the EXACT type of memory you need for your machine. The RamJet service is great and their memory modules are guaranteed for life. What more can one ask for?
This memory upgrade project is something that most readers should be able to do with no special tools. While opening the Mac Mini can be a bit of a challenge, the upgrade itself should be very simple. We'll show readers how to open it and upgrade the memory step by step. This is definitely a great project for a Spring rainy day. - Wan Chi Lau (permalink)
Feb 20,2008
Last August we mentioned that a group from Canada launched a balloon into near space and took some awesome images with a digital camera. Here is another such a project, this time by Alexei Karpenko. Alexei launched a payload with a GPS, a camera, and various sensors to an altitude of 30km using a high altitude helium balloon.
It seemed appropriate that this WowUsWednesday features another image from another stunning launch by amateur space explorers. Maybe Alexei will "accidentally" get an image of the satellite shoot-down :-) - Wan Chi Lau (permalink)
Jan 28,2008
We received the key part to the DIY-Cintiq project last week. Because of the size of the connectors, the FFC extender could not be fabricated in-house. We ordered the part from DIY-Beamer in Germany about a week ago and it showed up on Saturday.
Sharp-eyed readers will note that it is a 20 pin extender but a 10 pin FFC. This is because we were unable to find a vendor who sold a 10 pin version of the extender (thanks to contributor Jeff P. on the idea of using the two different sizes). If we are careful in inserting the cables, we should be able to get it to work.
First, we laid out the pieces of the LCD monitor (digital board, AC circuits, front control panel, etc...). After the parts were placed, we realized that the power cable connecting the DC and AC circuit boards would have to be extended. The rest of the day was spent in connecting the various components together.
Once everything had been connected, it was time to power up the laptop and see if the LCD would still come to life. Whew, it's ALIVE! - Wan Chi Lau (permalink)
Fortunately for us, Mouser Electronics sells these cables as single piece units. Unfortunately for us, we realized it would be next to impossible for us to solder the two connectors together manually. We'll need to find some other solution to connect the short cable on the board with the extension!
While the interns are off looking for a solution to the FFC extension problem, we thought we should at least confirm we could use the Genius 9x12 tablet for this project.
The Genius tablet was very easy to take apart. It is held together by machine screws in the back. Unlike the Wacom tablets, there were no double-sided tape on the inside holding the back to the electronics.
Once the back was off, getting the actual digitizing board out was just a matter of carefull removing a few anchor screws and unplugging the USB cable. With the board freed, it was time to see how well the LCD fits on top of the digitizing board.
The overlay was better than we had expected. It appears that we will be able to use the entire surface of the LCD. The next phase of this project is to find a mounting surface big enough to lay out the AC power supply and various other support circuitry for this RainyDayTablet. - Wan Chi Lau (permalink)
Jan 20,2008
A hard copy of Michael Covington's Astrophotography for the Amateur may be difficult to local at your local book store. We had to do a little digging on the Web before we were able to locate a used copy.
There are some paperback units floating around on Amazon and EBay. We wanted the hard copy because Covington's coverage of the topic is both theoretical and practical.
Covington's approach to the book is much more technical compared to Seip. For reader wanting a with a more indepth discussion on digital filtering (convolution, 3x3 sharpening matries, etc...) and other signal processing techniques, Covington covers these topics in a manner that is both understandable and relevant.
Astrophotography for the Amateur is both a great "how-to" manual as well as an excellent reference text. If you are serious about astrophotography and is looking for something which will give you a stronger theoretical background on many of the related topics (optics, scope construction, digital signal processing), then you need to make sure you have a copy of Covington's book within easy reach. - Wan Chi Lau (permalink)
Jan 19,2008
According to our YES Cozmo watch, there will be a full moon tonight. The timing is perfect as we had spent the weekend reading about astrophotography :-) We know what you are thinking... some of us REALLY need to get out more.
Let us assure you, the topic of astrophotography is the ultimate convergence of all things us true geeks love: it involves loads of technical gear, there is a fanatical (yet friendly) user base, and the topic is ripe with tons of hacks and project opportunities.
We have been researching this subject for our first RainyDayScience topic and have come across some excellent books we thought we should share with those who may be thinking along these same lines.
Amateur astrophotography has benefitted greatly in recent years by the availability inexpensive digital cameras. Webcam and small point-and-shoot digital cameras of exceptional quality may be had for less than $200! Stefan Seip has written an excellent introduction the use of digital equipment and techniques in this area.
The book covers the entire range of equipment (webcam, digital cameras, DSLR, special purpose Astro gear) available to the amateur astrophotographer. He discusses the relative benefits (image quality, ease of use) and trade-offs (cost, complexity) of each type of equipment.
Topics such as post-capture image processing and manipulation are also covered. There are some very interesting discussions on how to take advantage of the digital nature of the images to bring out details and colors not possible with traditional film techniques. We expect we'll be referring to this book frequently as we strive to improve our on our astrophoto shots. - Wan Chi Lau (permalink)
Jan 14,2008
The first snow storm of 2008 rolled into town late last night. It is expected to move through the New England region this morning and leave behind 8" of the heavy white stuff.
The world outside the office window is pretty much black and white at the moment. We may just take the day off and go shoot some photos in the Arboretum... - Wan Chi Lau (permalink)
Jan 10,2008(TechThursday)
The Eye-Fi product was brought to our attention a few months back by one of our readers. We were intriqued by a memory card with WiFi capabilities. Yesterday, we learned that the Eye-Fi card has won the "Last Gadget Standing" honors at the 2008 CES.
We do not have direct experience with the unit yet, but the idea is simple enough. The Eye-Fi card is a standard SD memory card which will fit in most of the newer small digital cameras.
Built into the SD card are the electronics of a WiFi transmitter. One would take photos normally with the camera. When it is time to transfer the images to the computer, there is no need to connect a cable because images are transmitted wirelessly. To further simplify things, Eye-Fi also let the user set things up so that it will upload the images directly to an image host/sharing sites (flickr, shutterfly, etc...). We'll see if we can get our hands on one to try out and report back on whether the Eye-Fi is as good as the buzz! - Wan Chi Lau (permalink)
Jan 7,2008
Judging by the emails offering free 15" LCD screens for the project we mentioned last Thursday, the DIY-Cintiq appeared to be an interesting topic to many readers. Thanks to all those that offered, but we had already purchased an NEC 15" LCD on Craigslist for the project.
The reason why this monitor was so cheap is the scratch on the screen. It's not very deep and should not be a problem for how we will be using the screen.
Removing the case was easy. There were mounting screws in the corners and near the stand. With the screws removed, the back case popped off revealing a metal frame encasing all of the electronics.
The next step is to extract the LCD from the metal casing. To get the casing off, we removed all of the visible screws and connectors, then flipped the screen up and place onto a flat surface and lifted it out.
With the LCD panel out of the way, the mounting screws for the AC power board and other electronics can now accessed. Removal of those pieces can wait until later.
The LCD panel was housed in its own metal shielding. This shielding must be removed or it will block the signal of the pen to the digitizing pad. Care must be taken from this point on as all of the circuit boards and delicate connectors are exposed. Once we realized that there were only a free tiny screws holding the frame in place, we were able to free the LCD panel witout any problems.
We ran into a small snag when we finally got the LCD out of the frame. We realized that the cable connecting the XY circuit boards will be too short to reach the connector when they are folded flat with the LCD.
Apparently figuring out how to connect up the two circuit boards is a problem something others have solved with their LCD related DIY projects. There are several sources (LumenLab, Mouser) for the right size FFC extension. Just make sure to order the right size cable and connectors. We placed our order this weekend, we'll continue with the project once the cables arrive. - Wan Chi Lau (permalink)
Jan 4,2008(FantasyFriday)
Quite a few readers noted that the DIY-Cintiq project mentioned yesterday was all well and good, but what they REALLY wanted is a Mac laptop which can function as a tablet.
These same readers also pointed us to the Axiotron Modbook, announced at MacWorld, which potentially could fill this niche. The concept is really cool... a MacBook + a Wacom tablet = MacTablet. We are HUGE fans of both the Mac and Wacom, so we REALLY hoping this concept moves from "Fantasy Mac" to "Fabulous MacTablet"!!! According to the Axiotron site, that day is now :-) - Wan Chi Lau (permalink)
Jan 3,2008
We have been testing a few graphics tablets these past few months. Many of them are from Wacom (Bamboo, Intuos). One is from Genius.
They are all very useful for drawing and image retouching. Some have extra features which make them useful for everyday computing tasks. The differences among them are size, response time, and cost. There will be a complete writeup near the end of this month.
Today, we want to point our readers to a DIY project we came upon while doing some research on the Wacom Cintiq. We have been considering purchasing one of these "on screen" tablets for a few years now.
Given what we'll be using it for, the price ($1000 to $2500) was always too high to justify. Apparently, this was shared by many others as well. We discovered there is a vibrant community of DIYers making their own "cintiq-like" tablets by grafting drawing tablets to 15" LCD monitors!
We now know what we are going to do with some of the tablets once we are done with our reviews! - Wan Chi Lau (permalink)

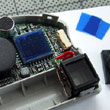

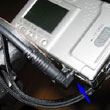
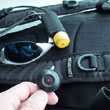


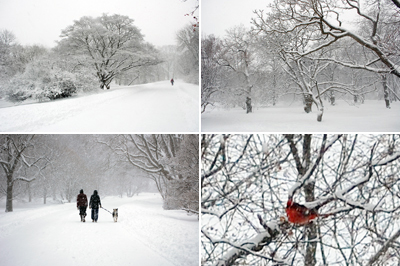


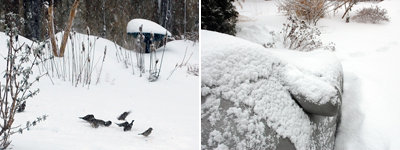
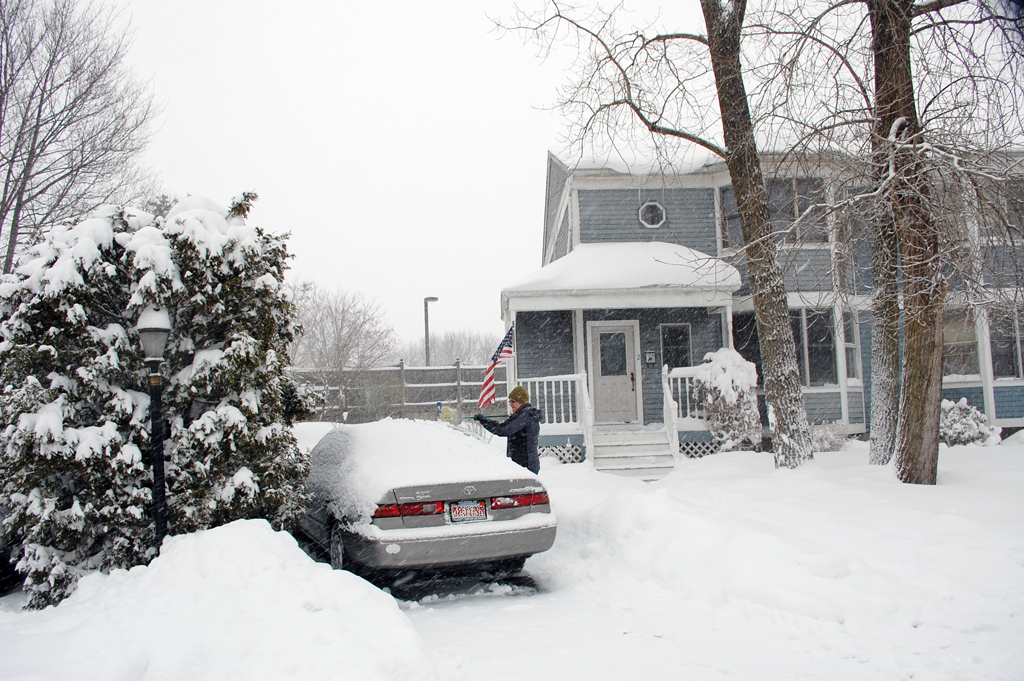

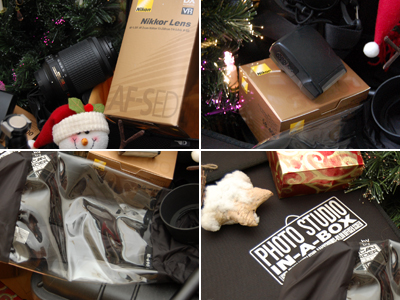
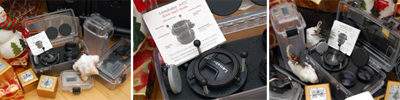
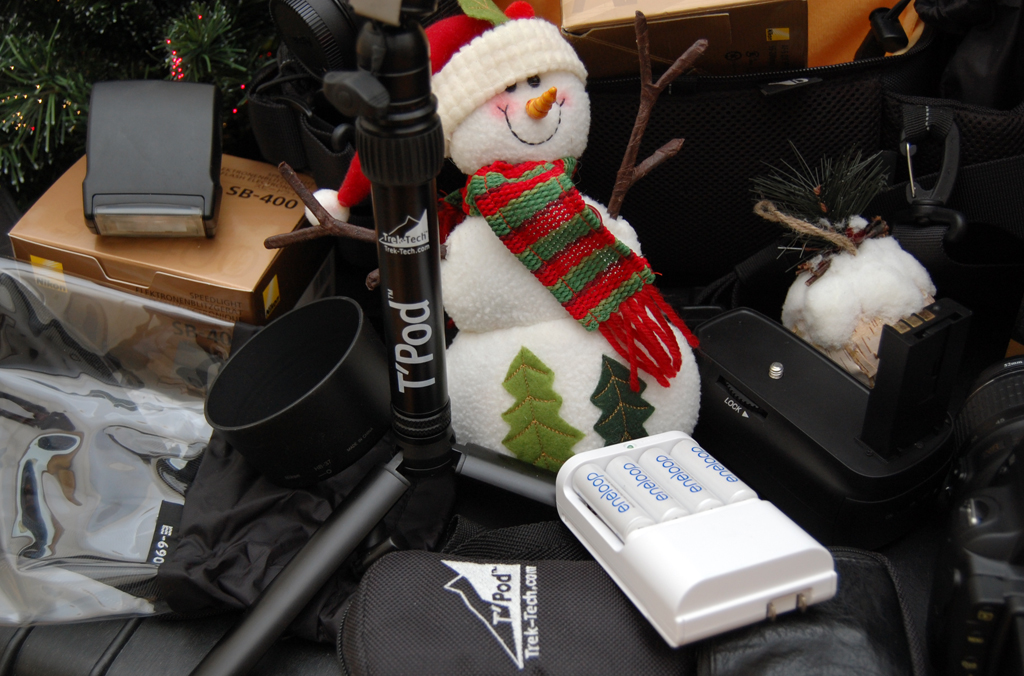
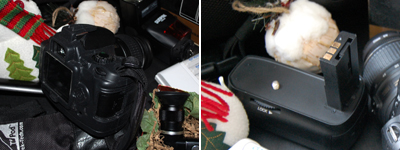
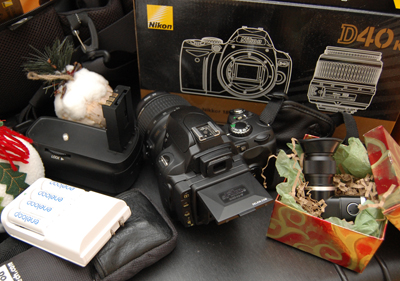
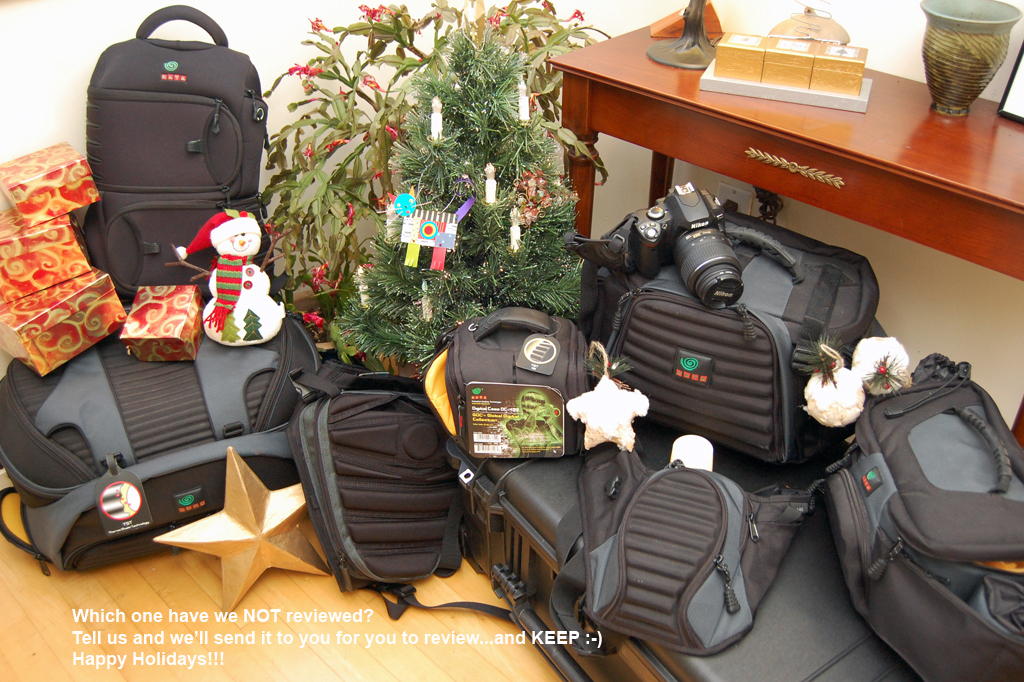
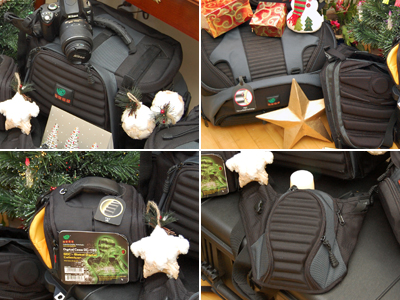
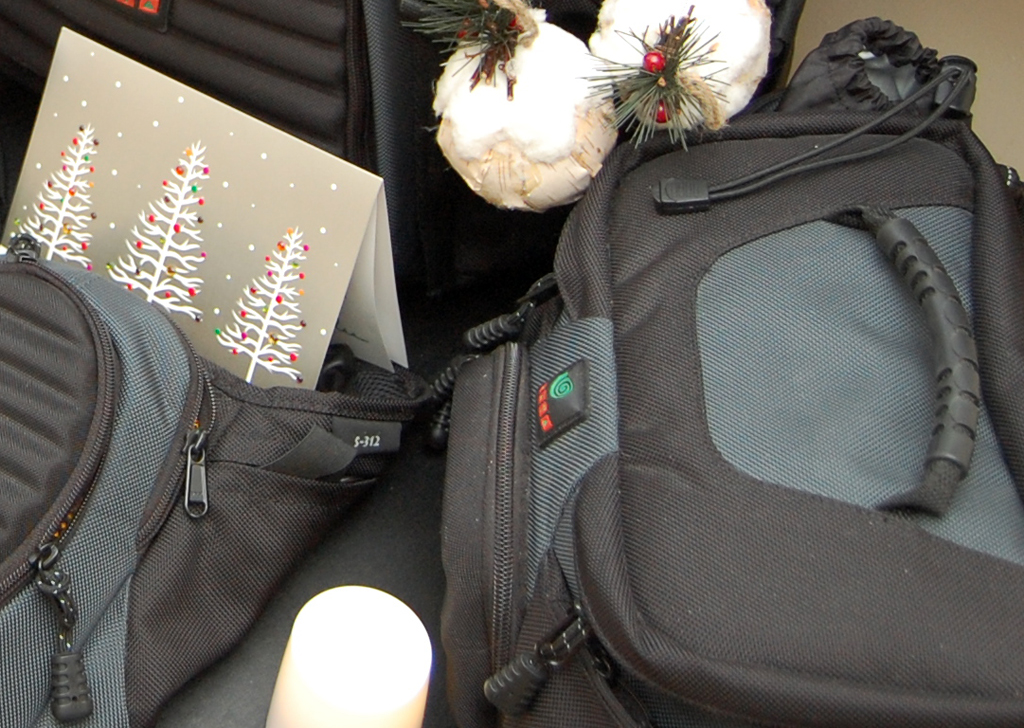
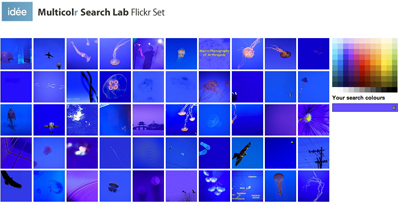

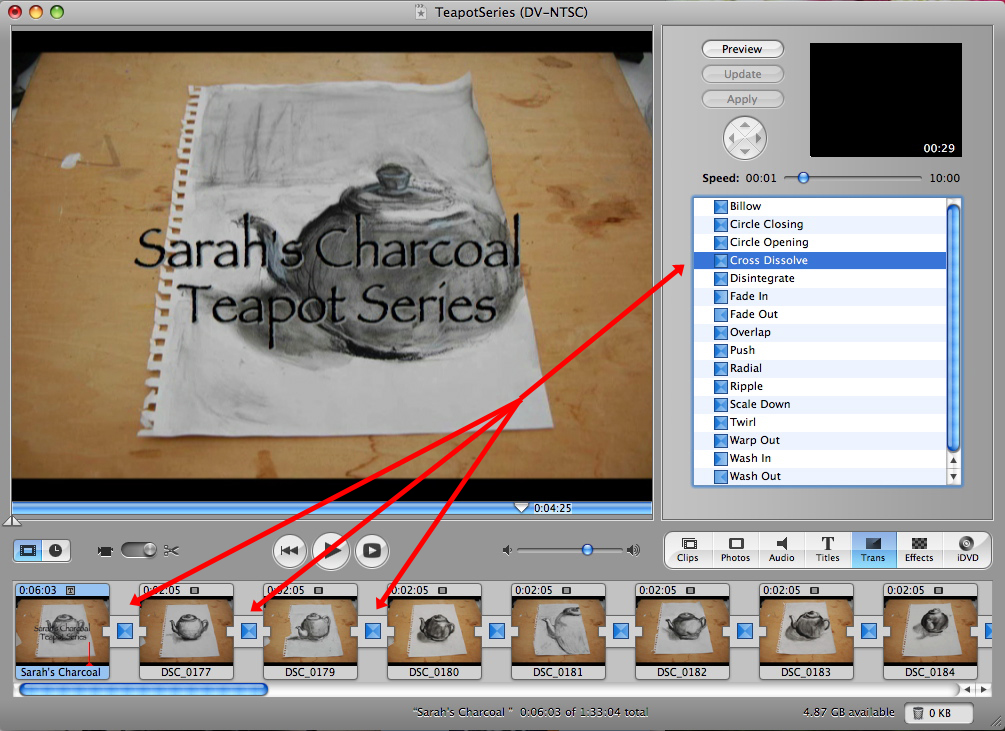
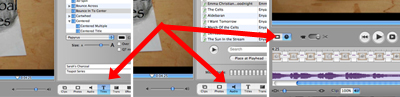

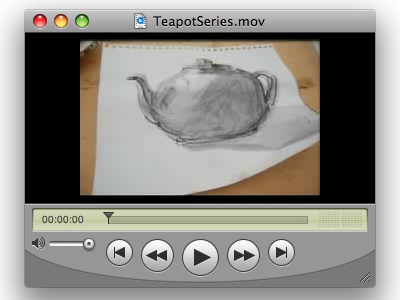
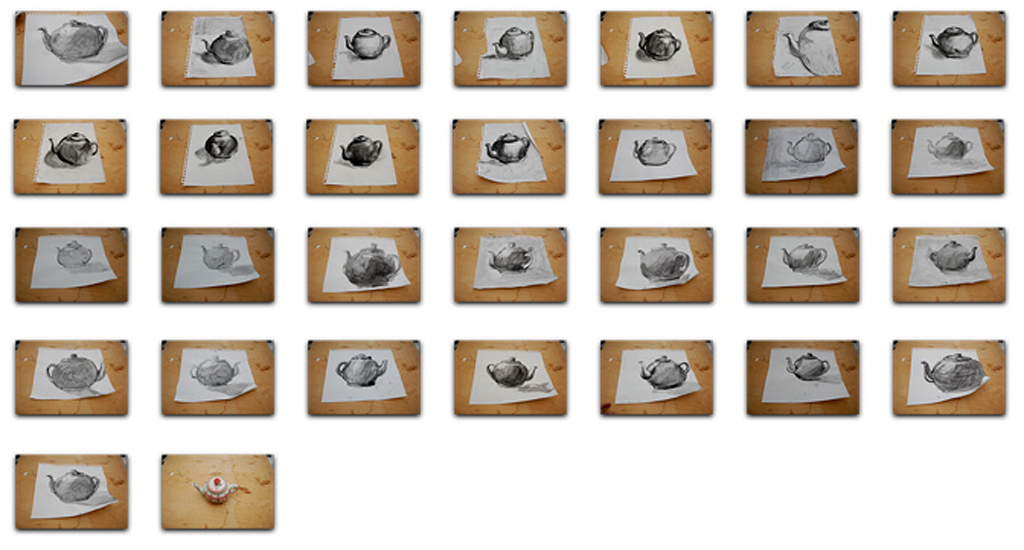


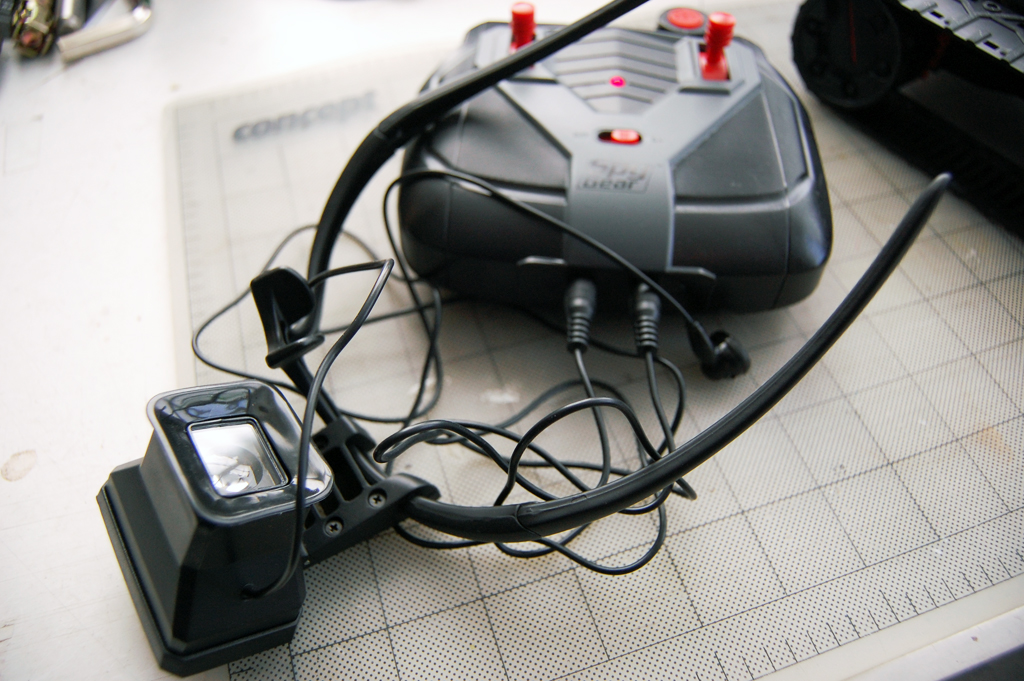
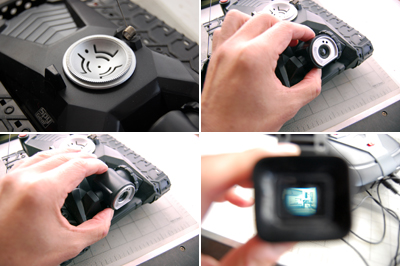

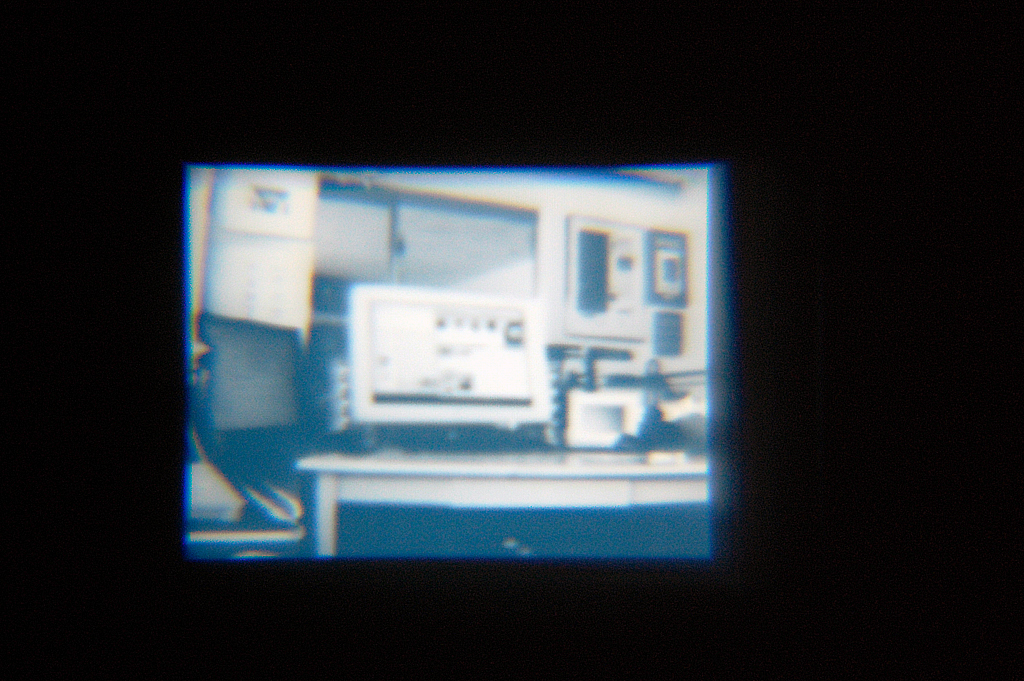
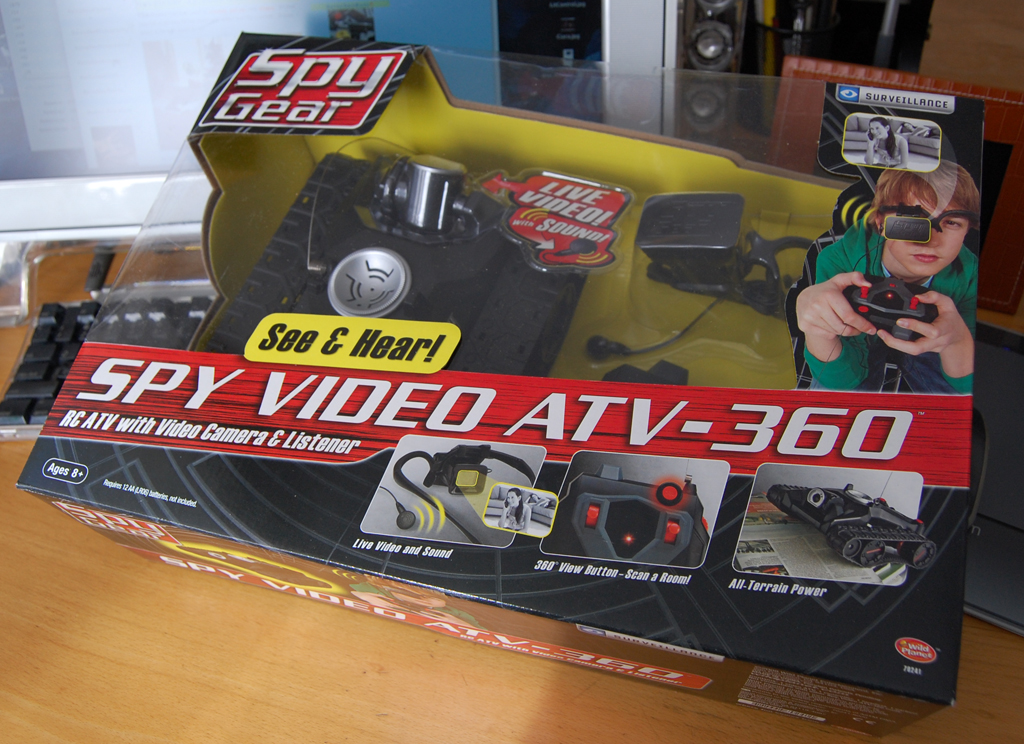
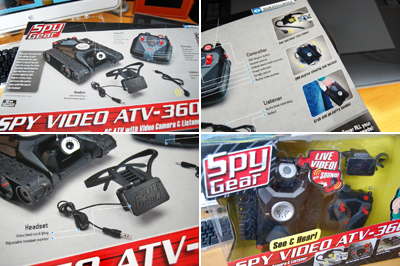
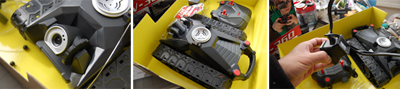

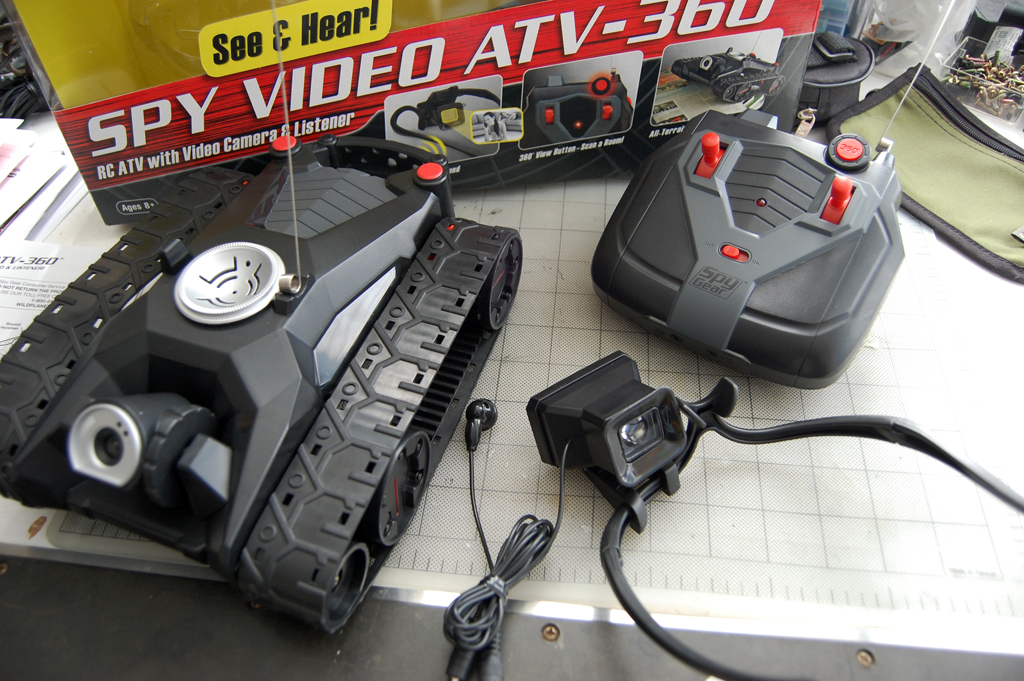
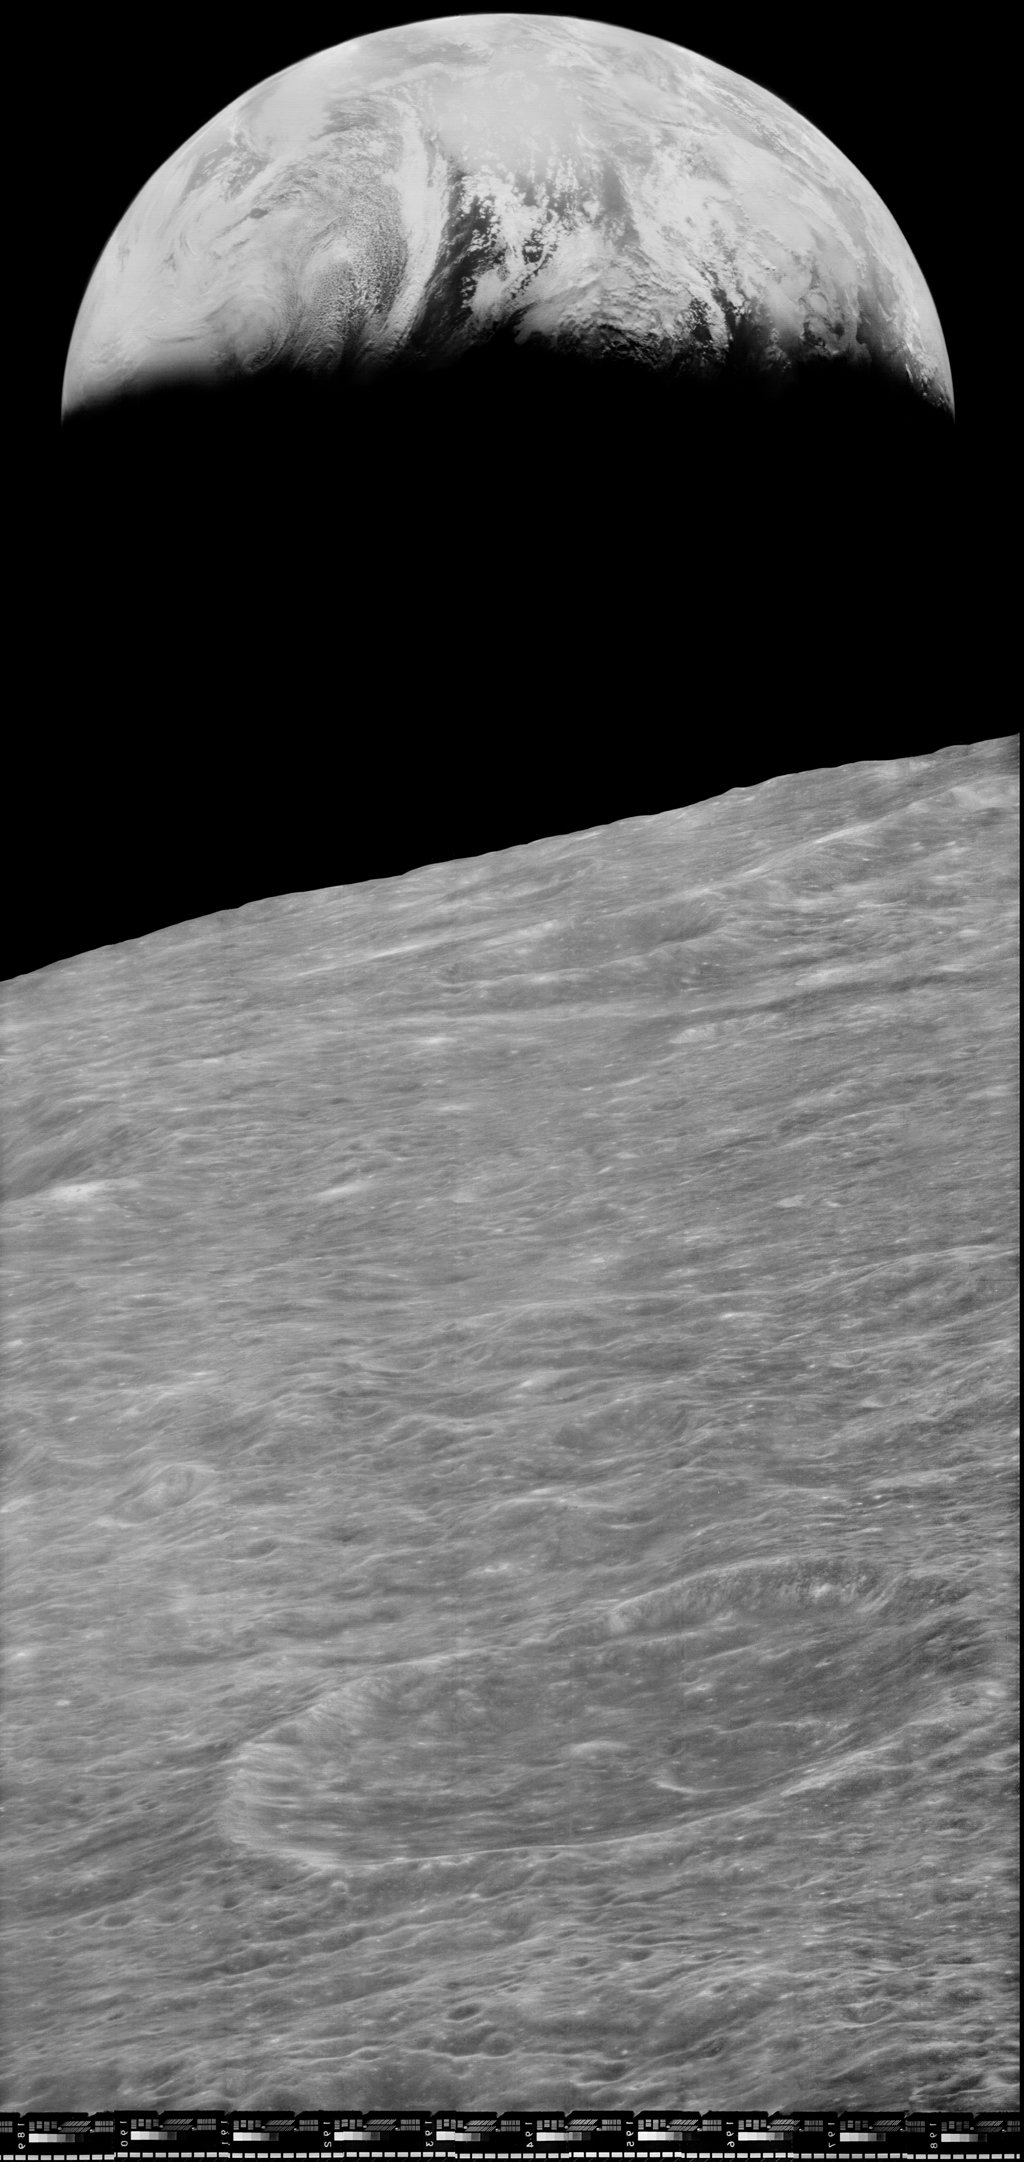
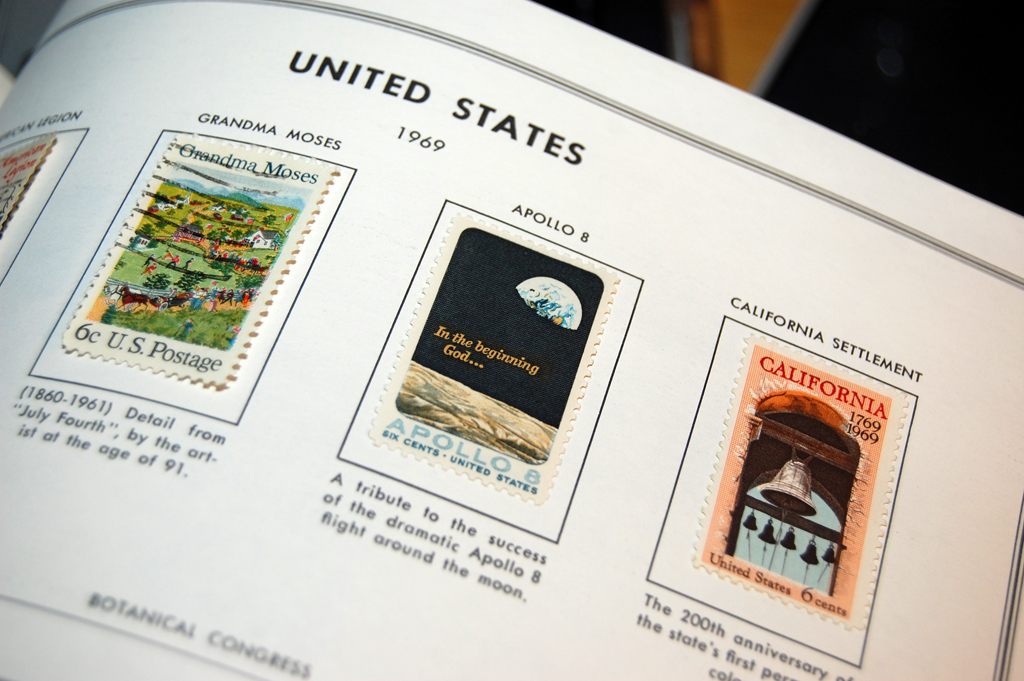


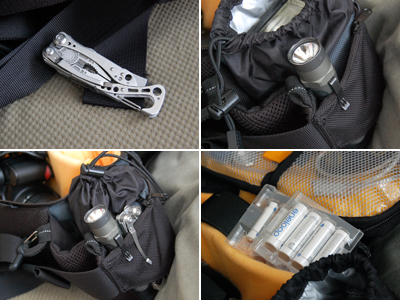
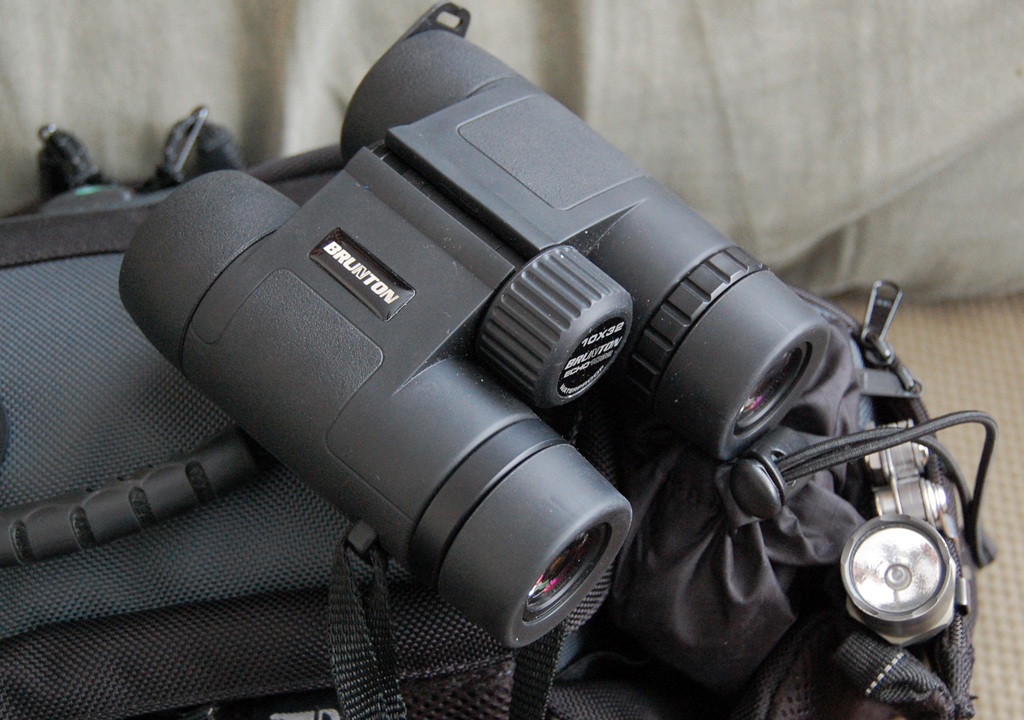


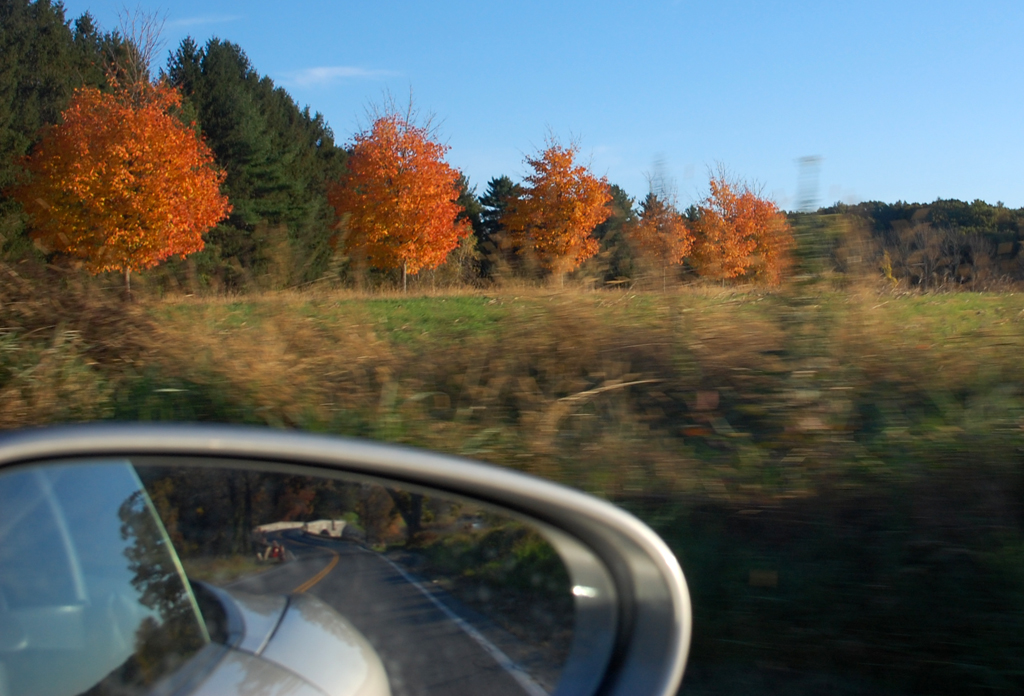


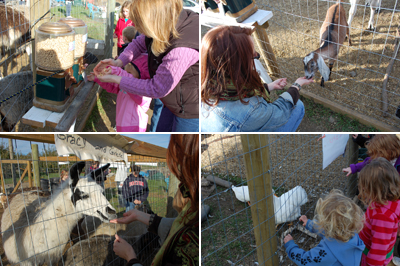
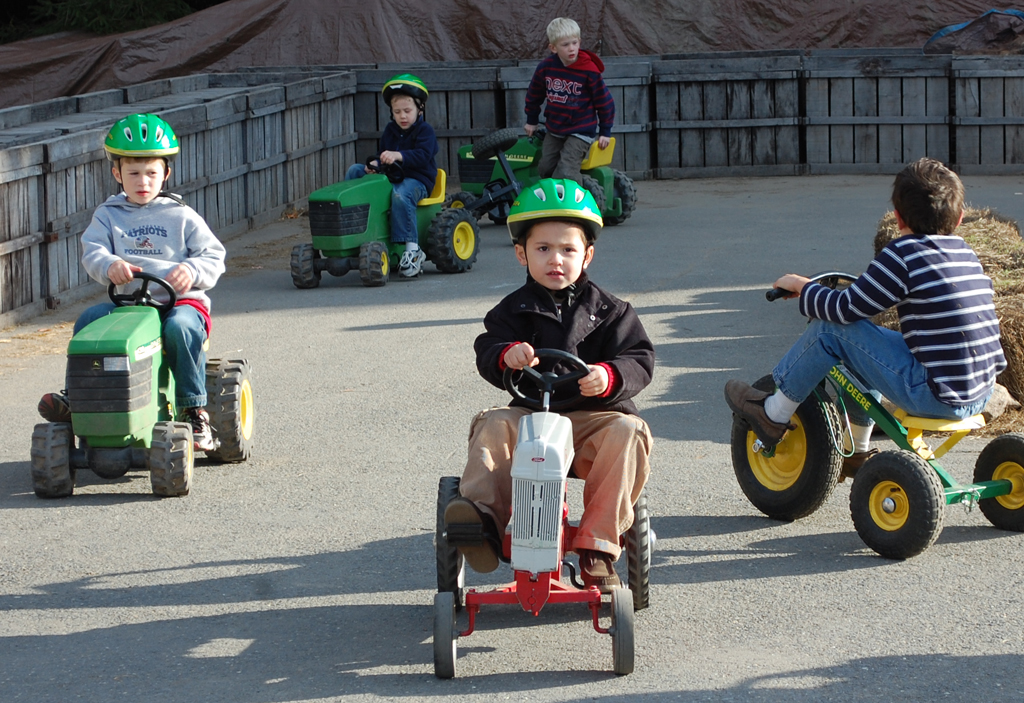


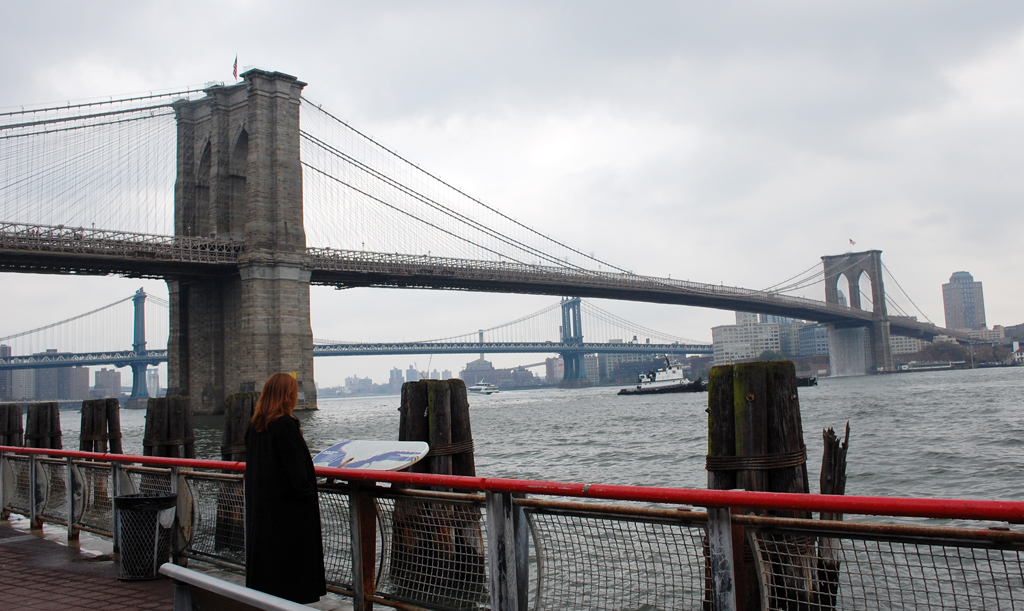
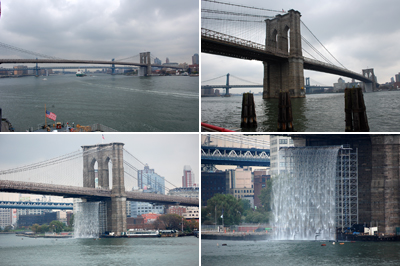


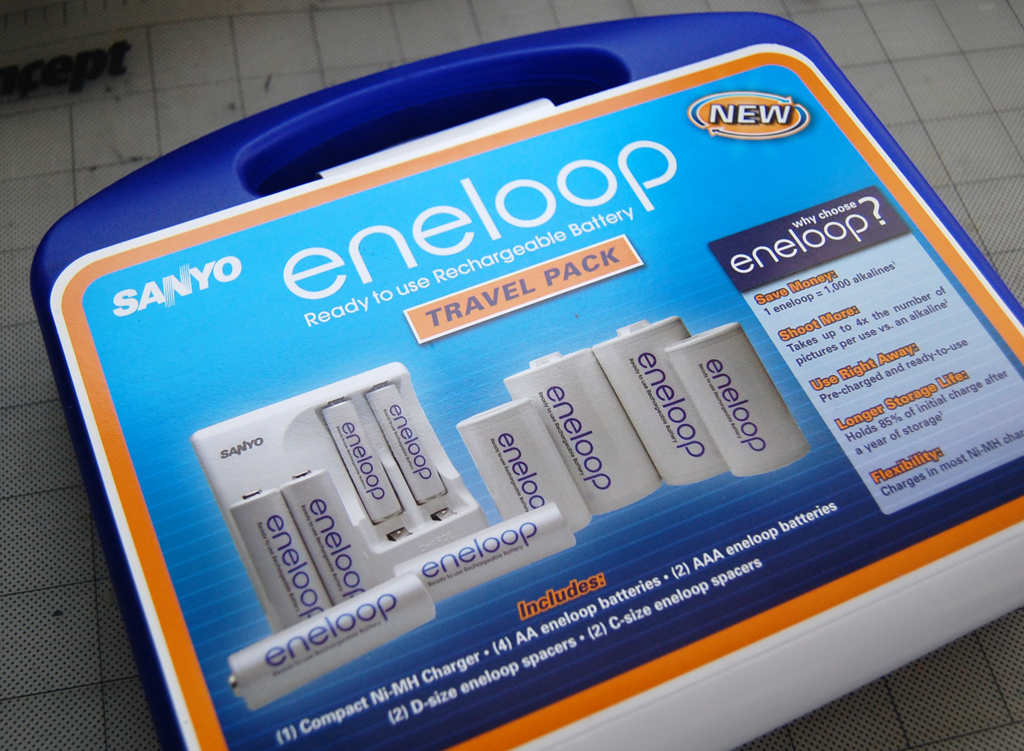

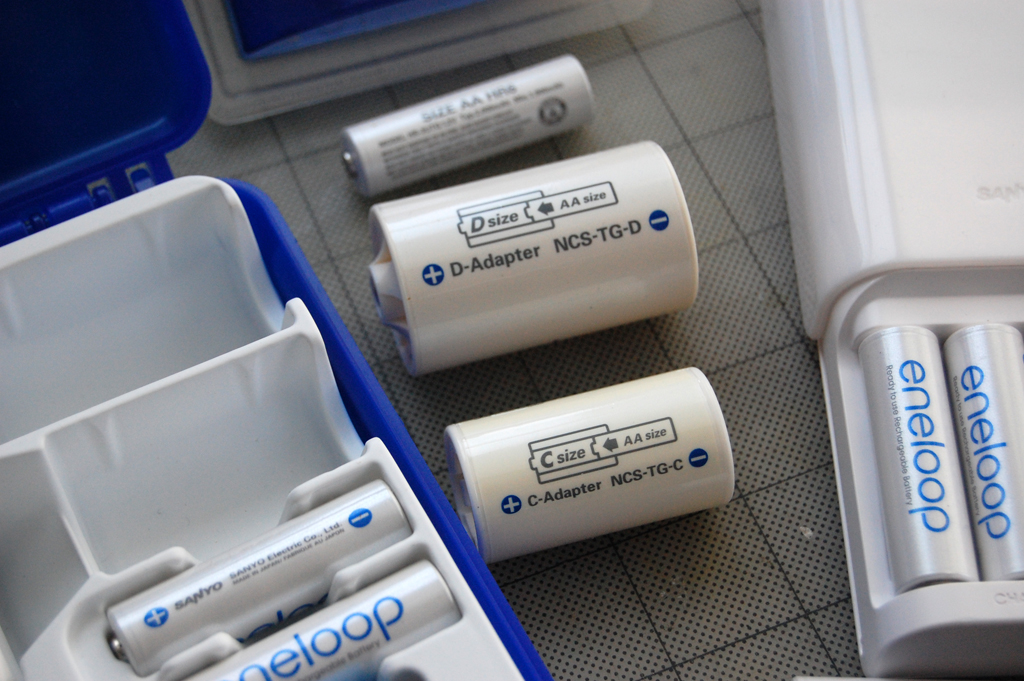
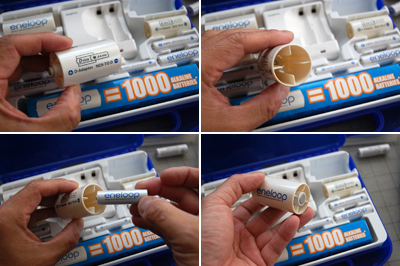
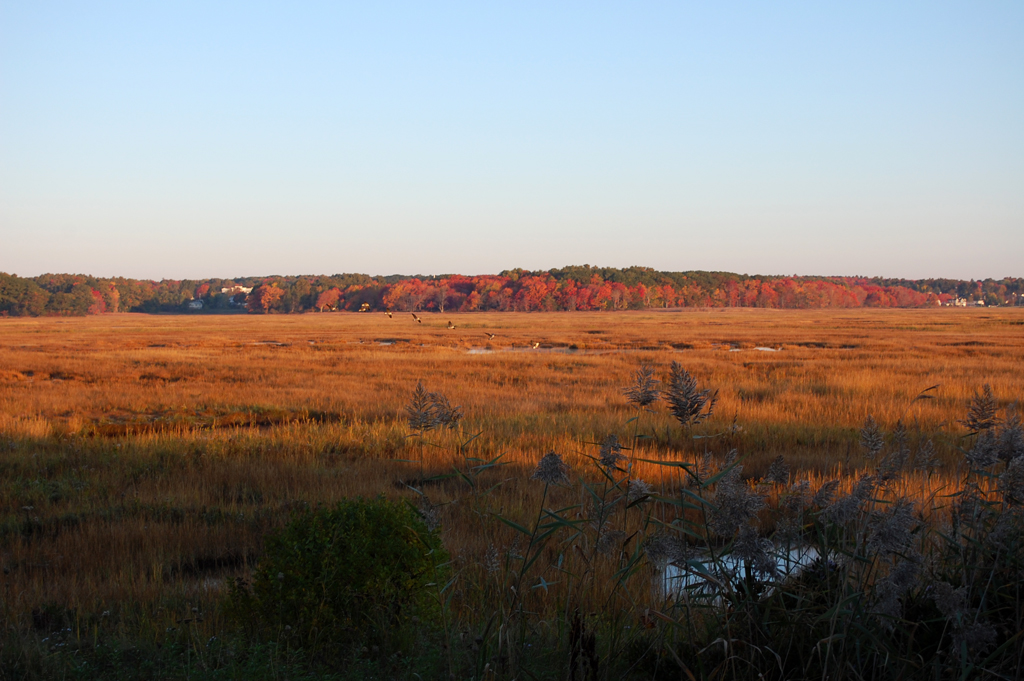


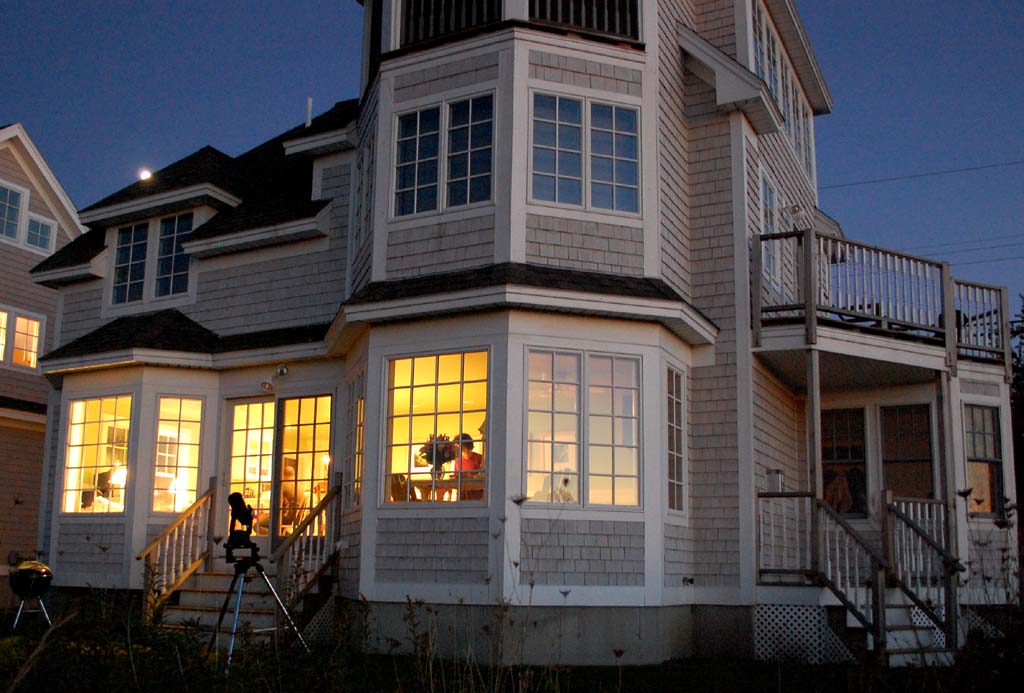
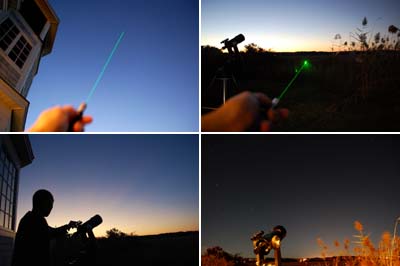
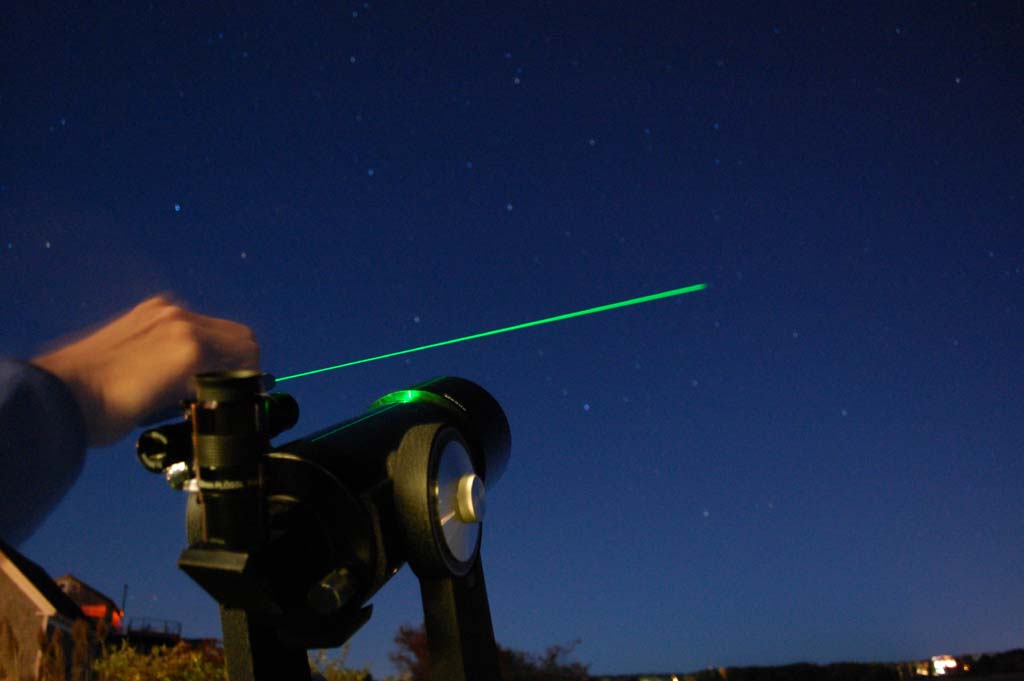
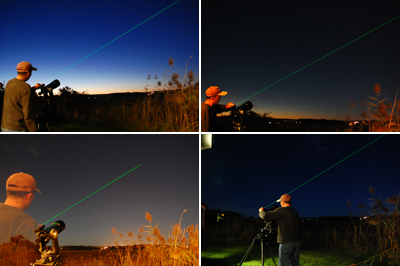
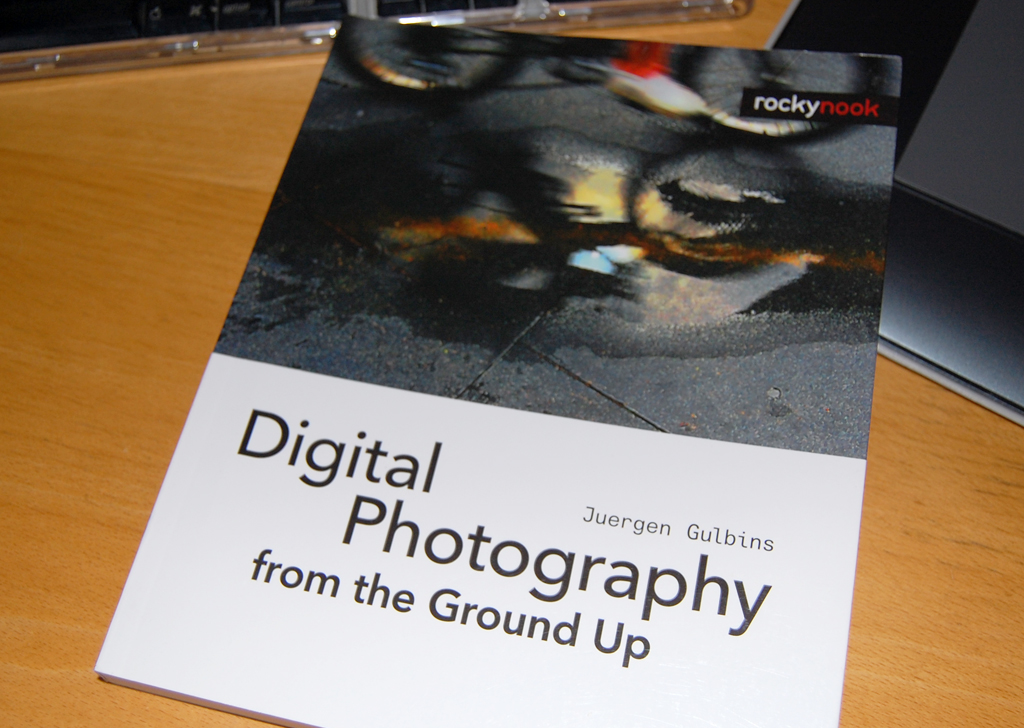

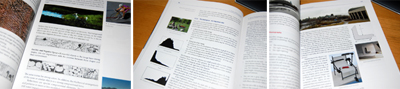
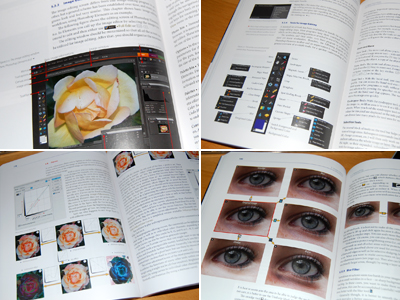
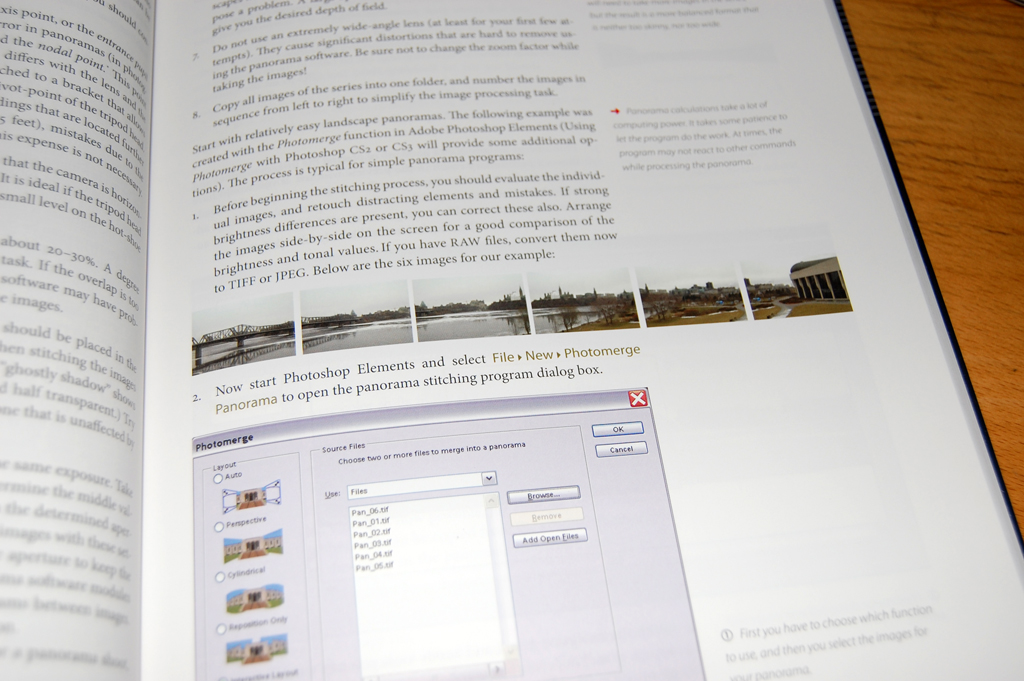
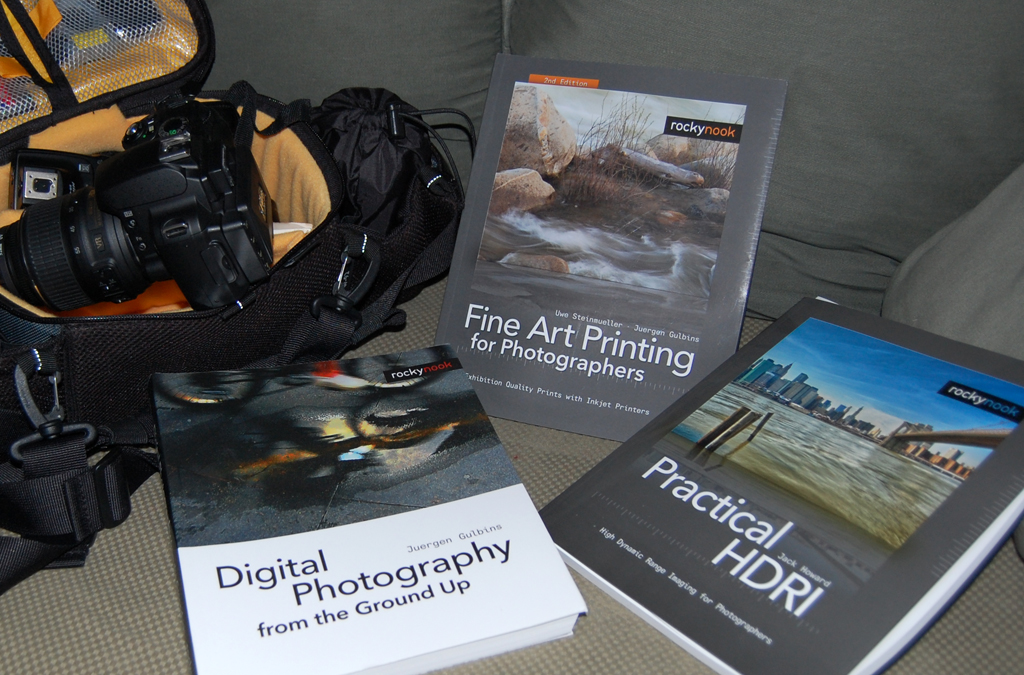

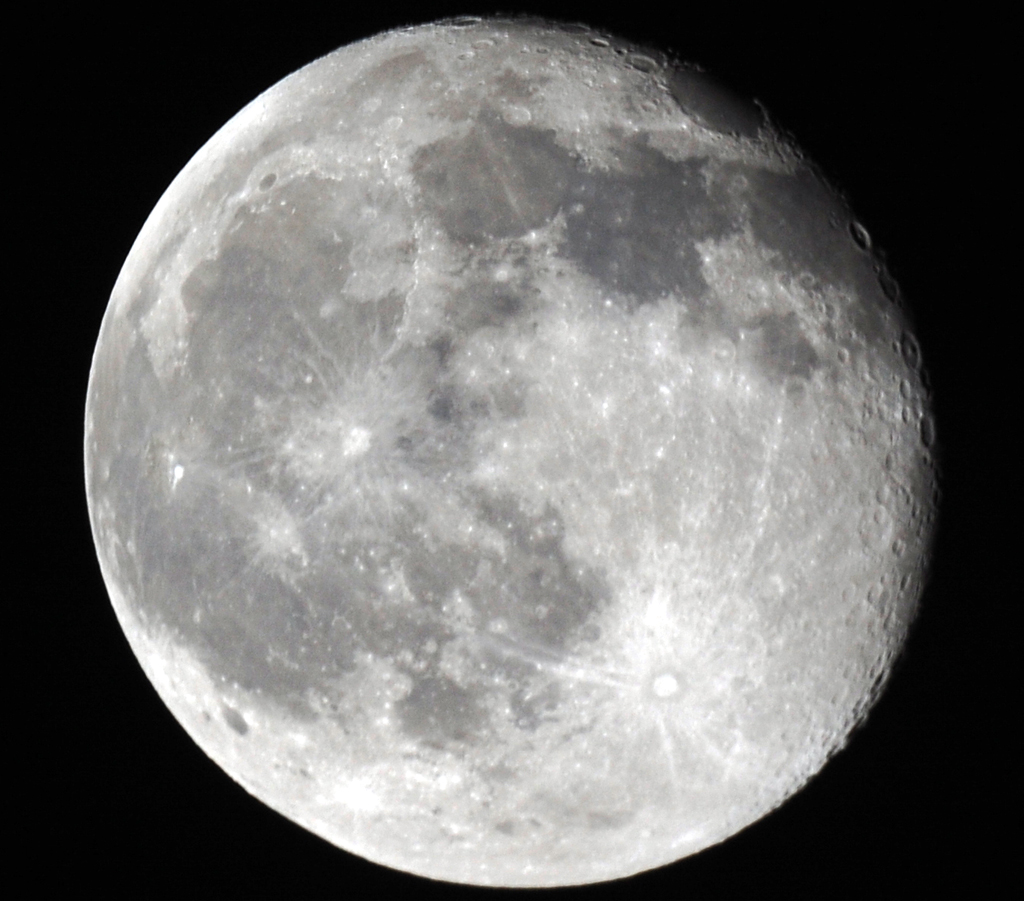
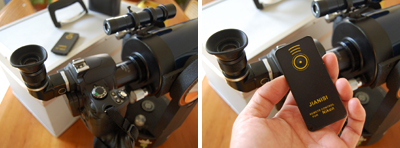

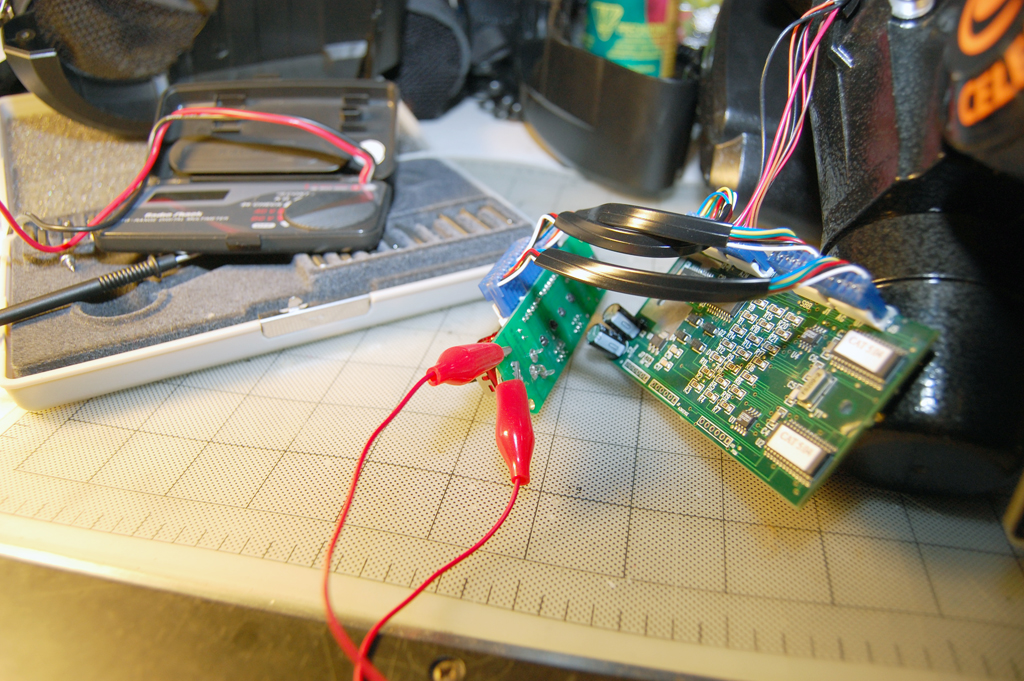


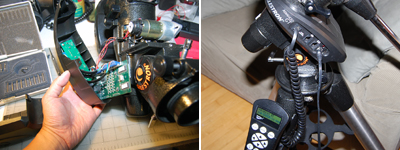
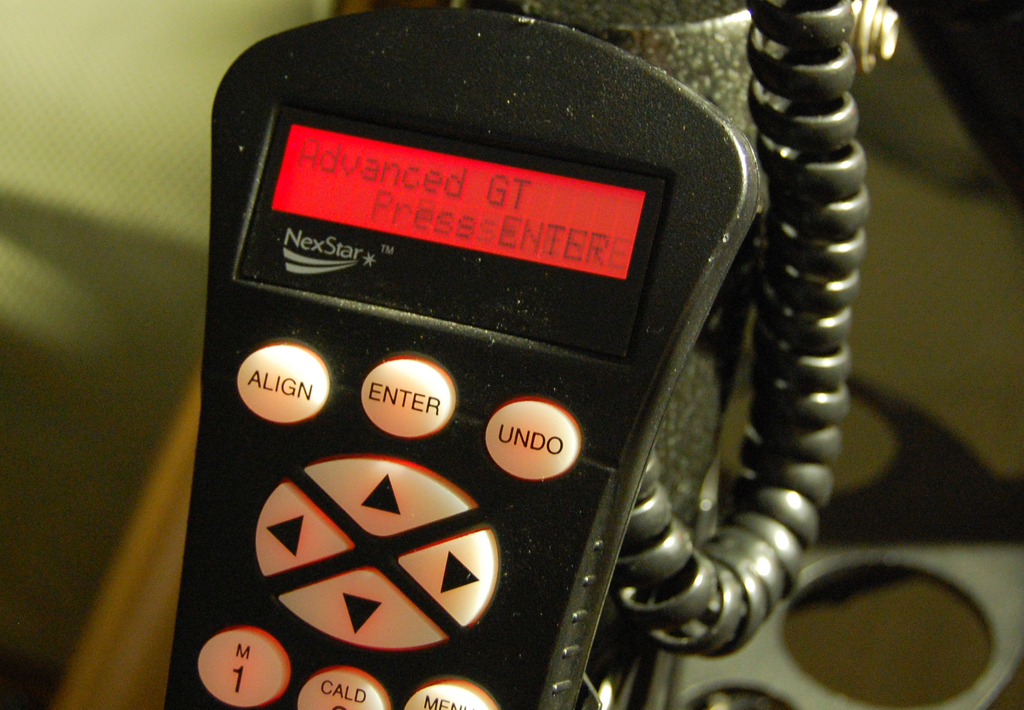
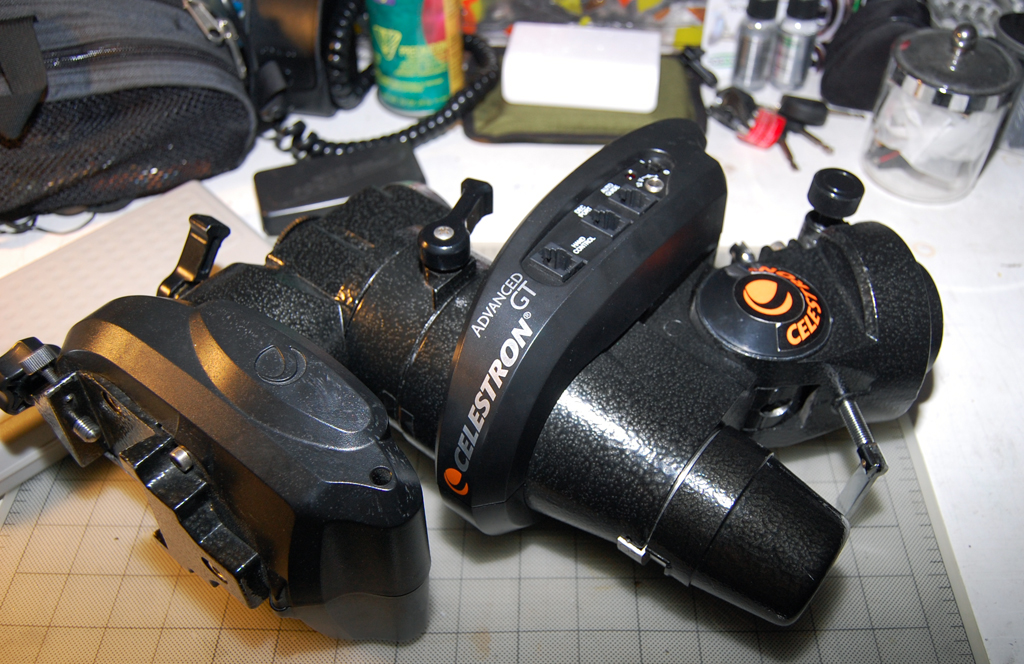
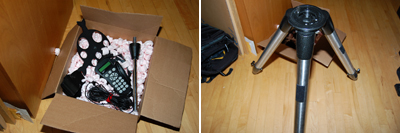
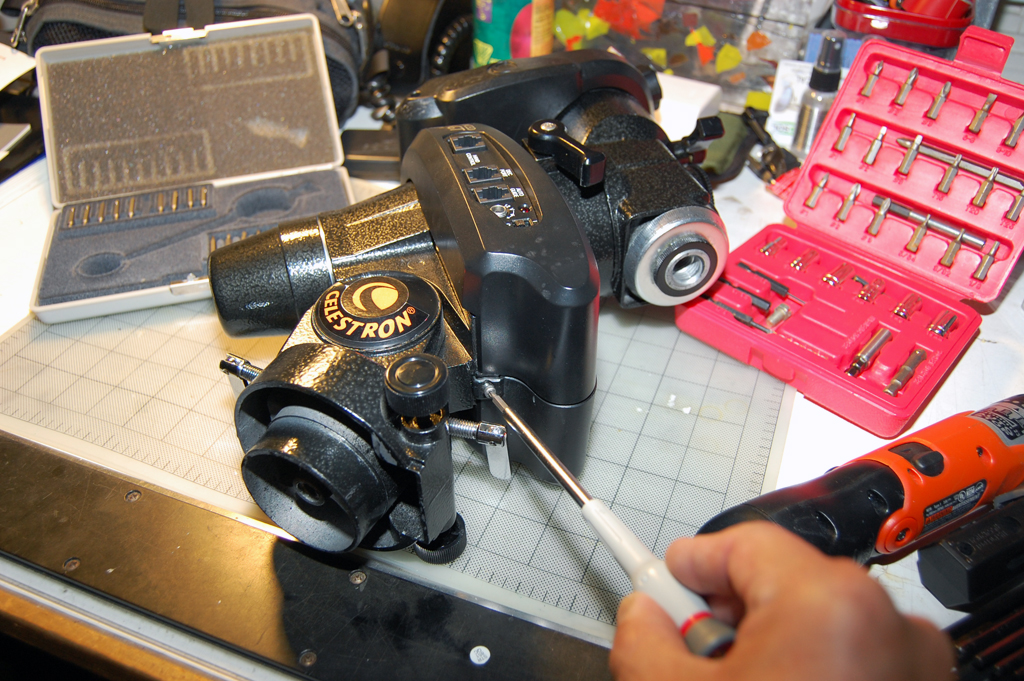
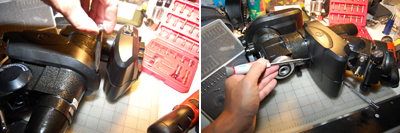


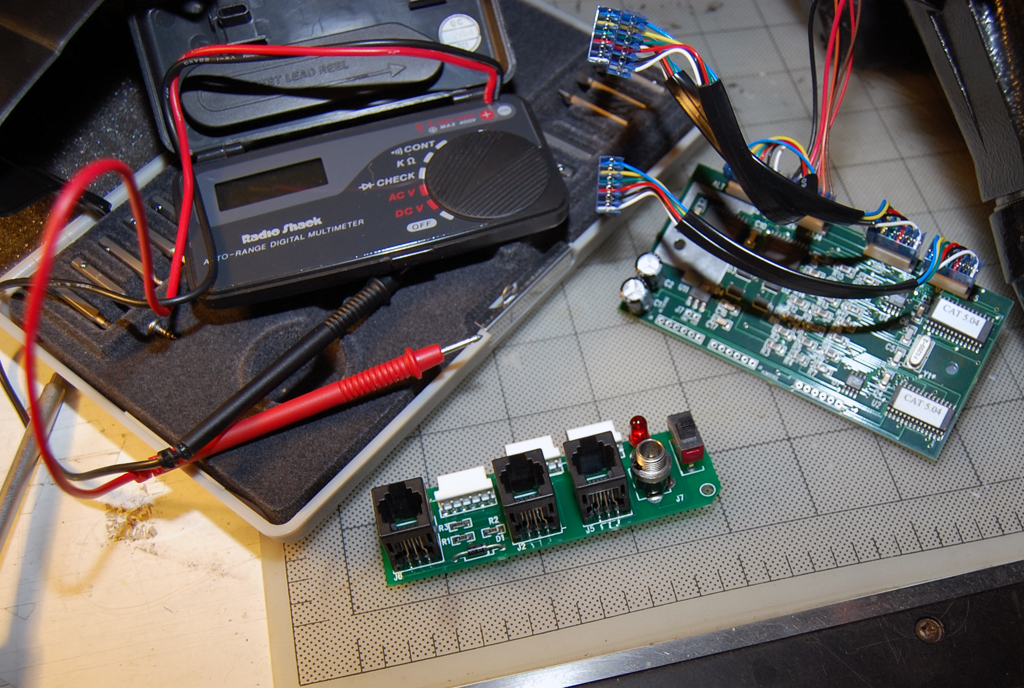

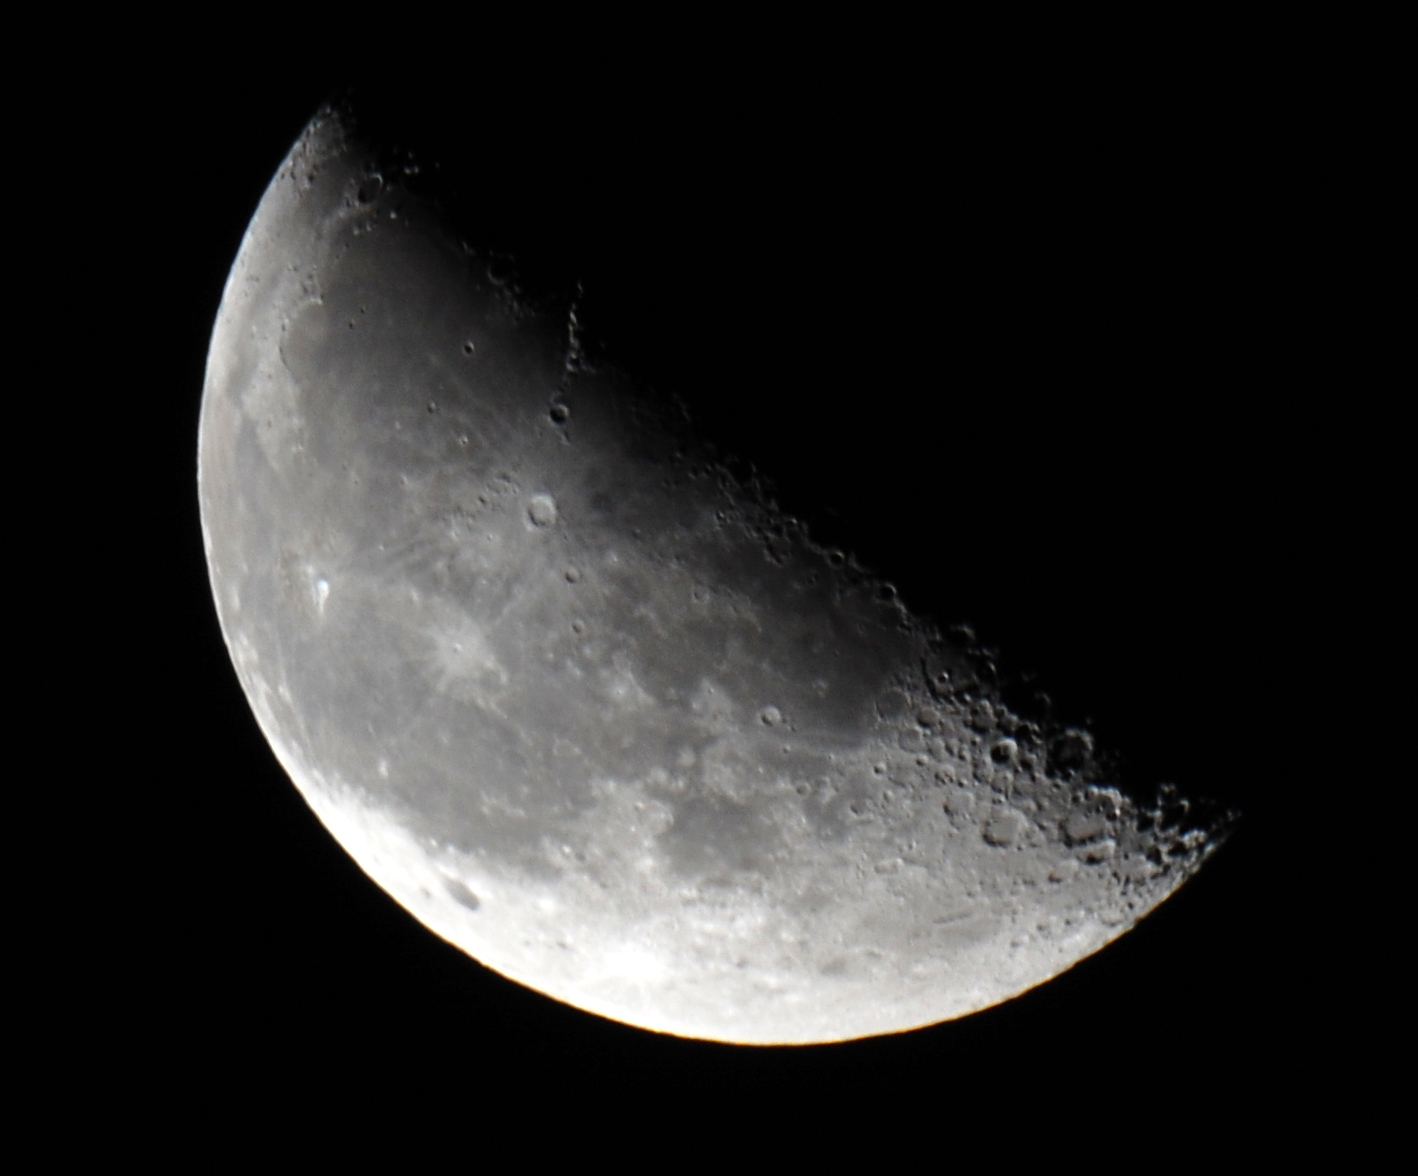

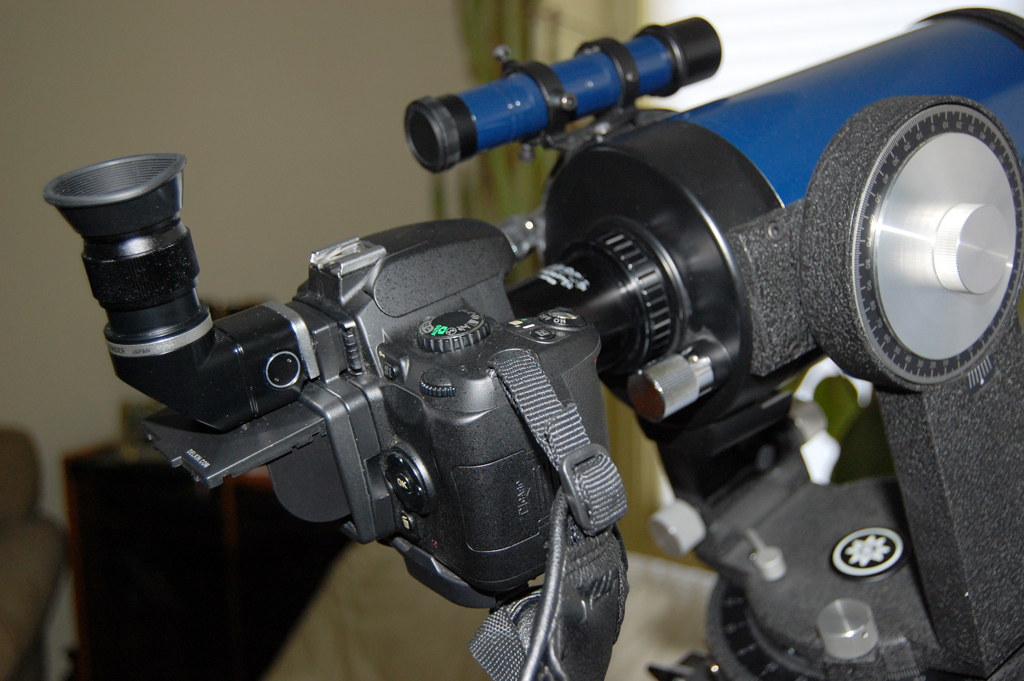
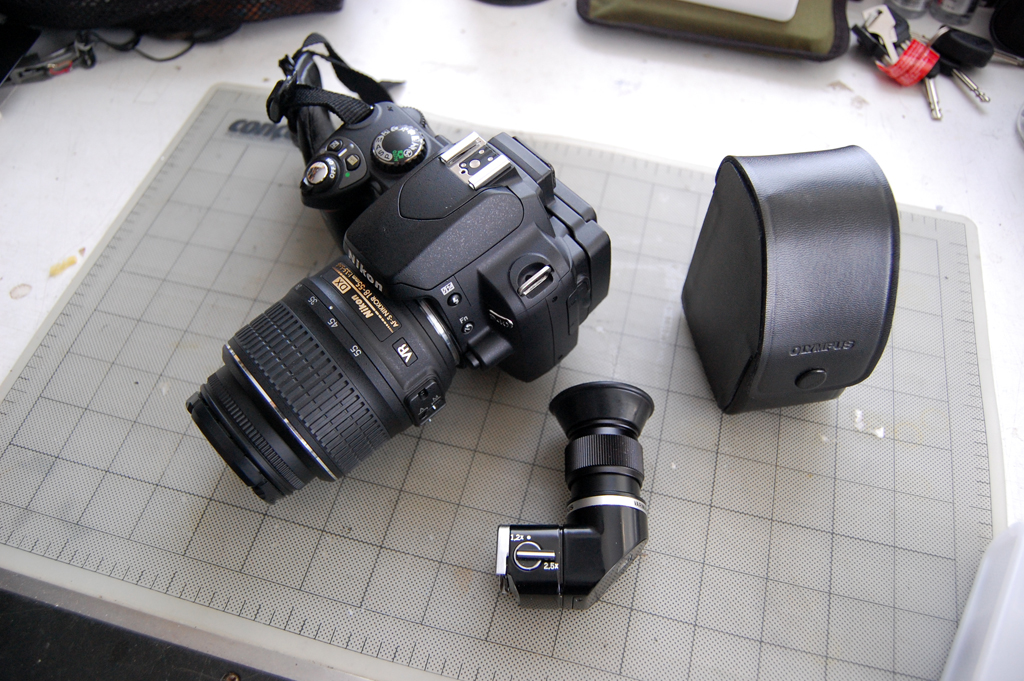
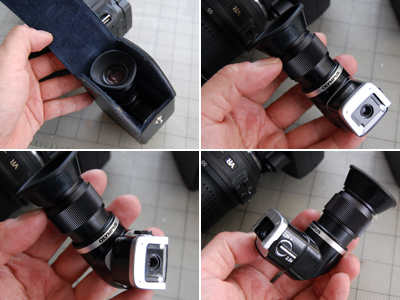

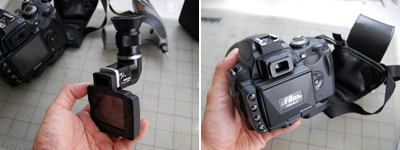
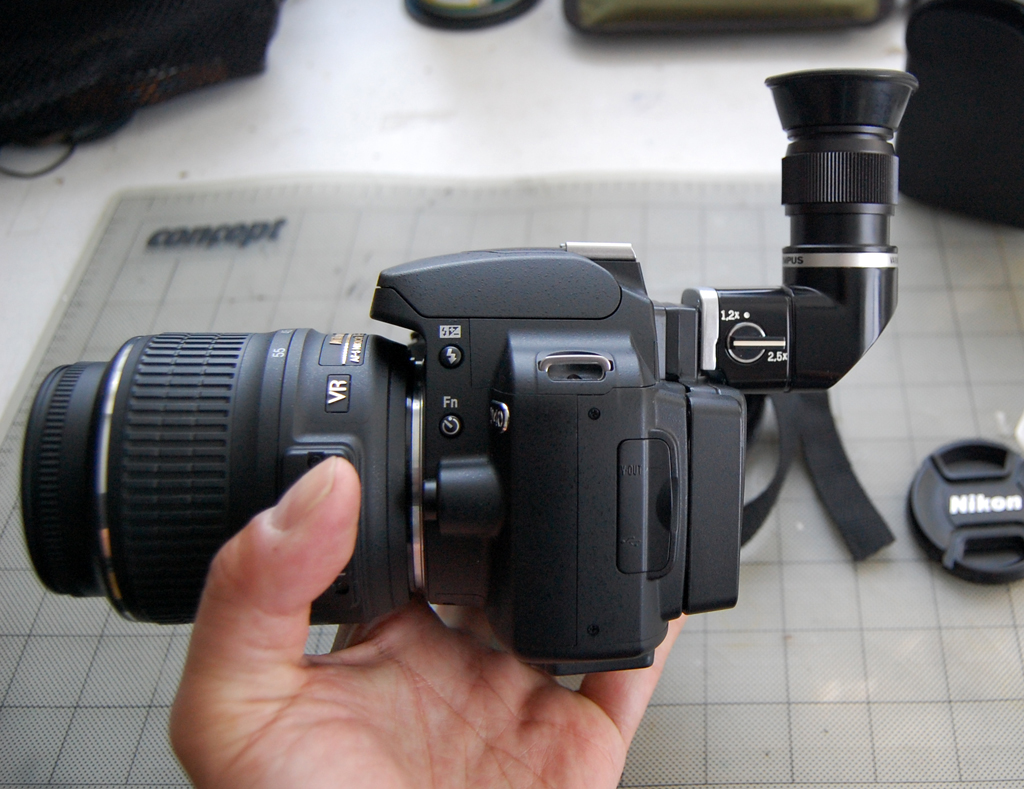
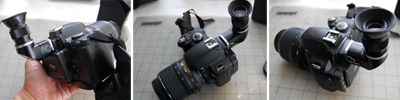
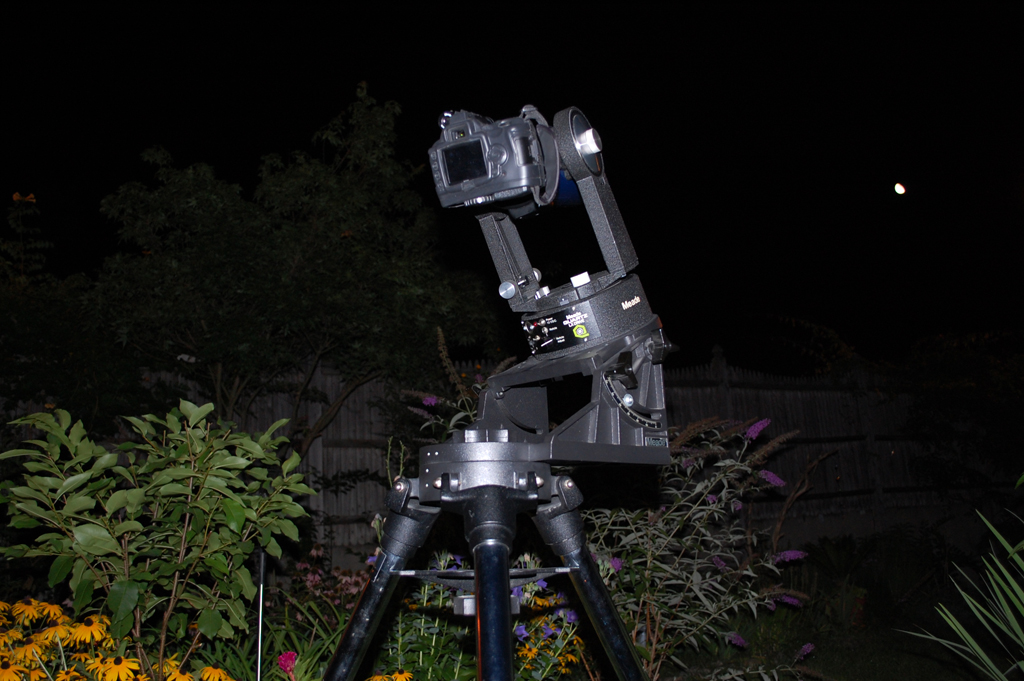
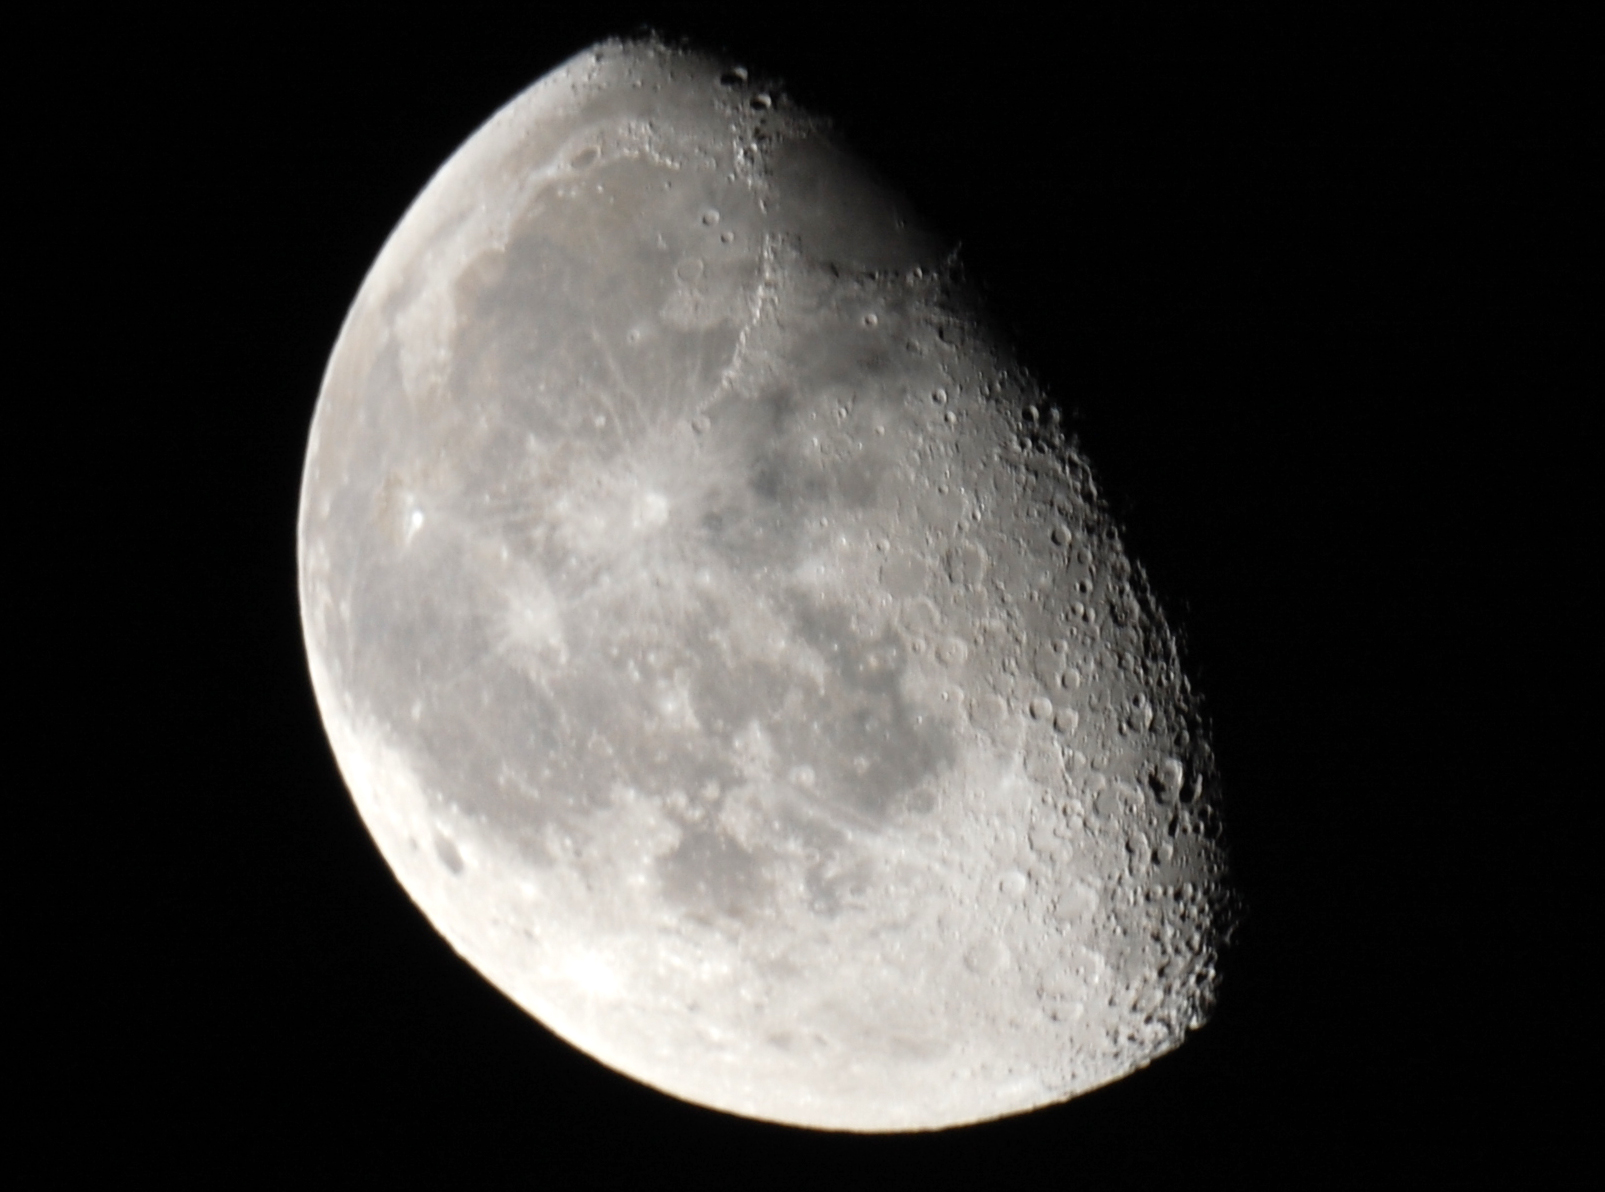
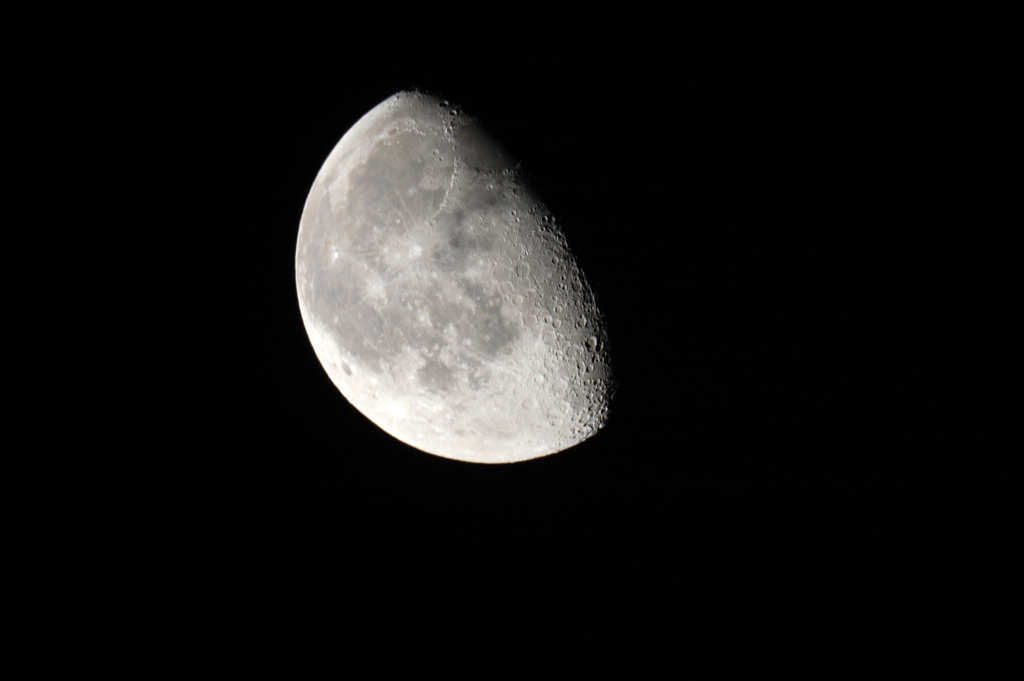
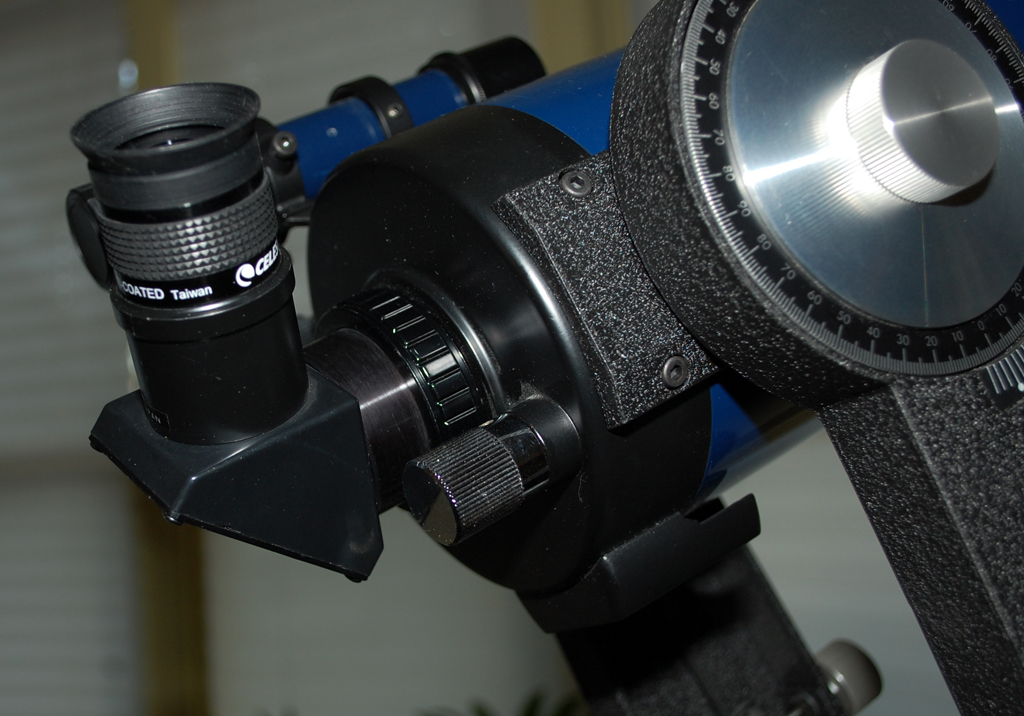
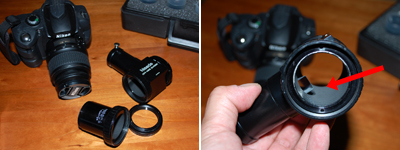
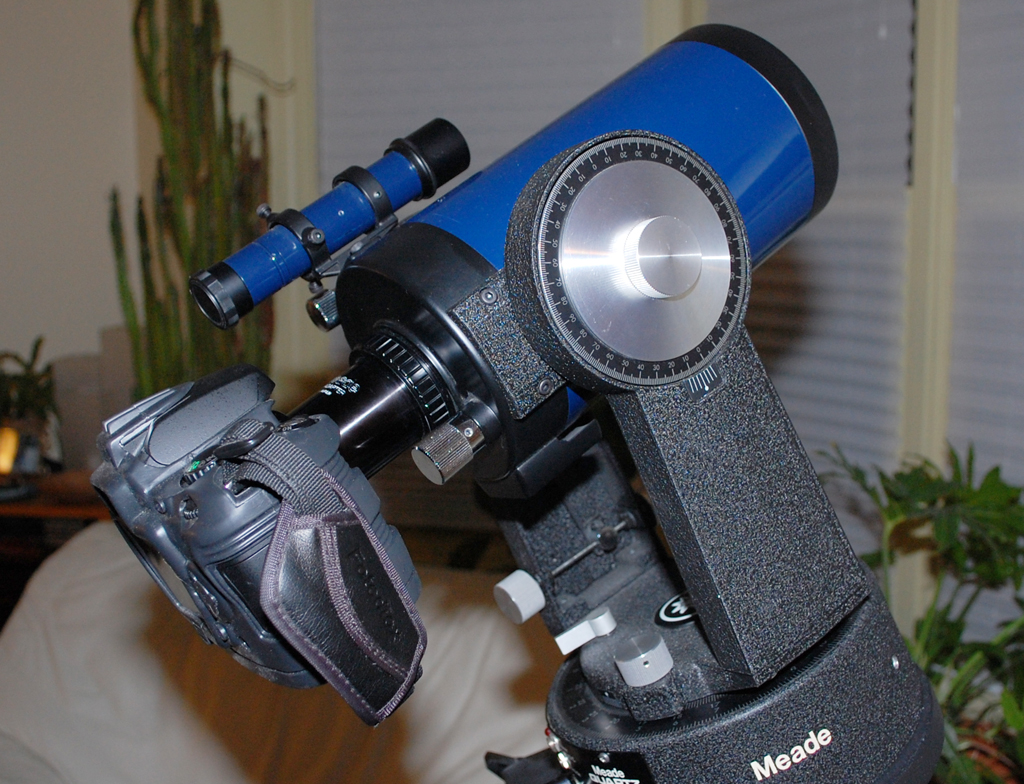


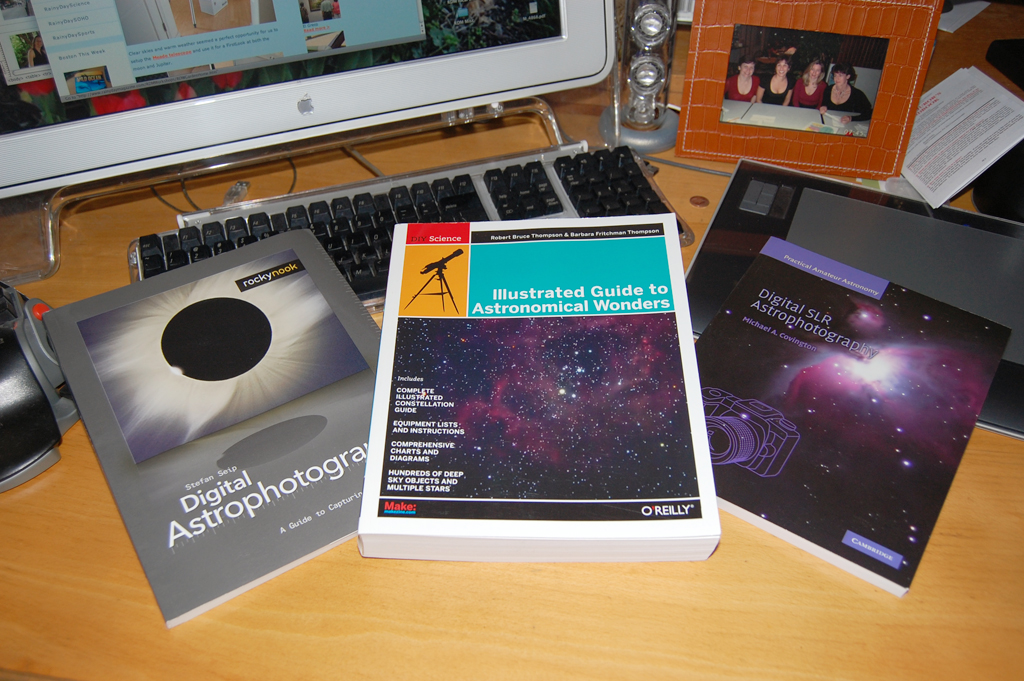
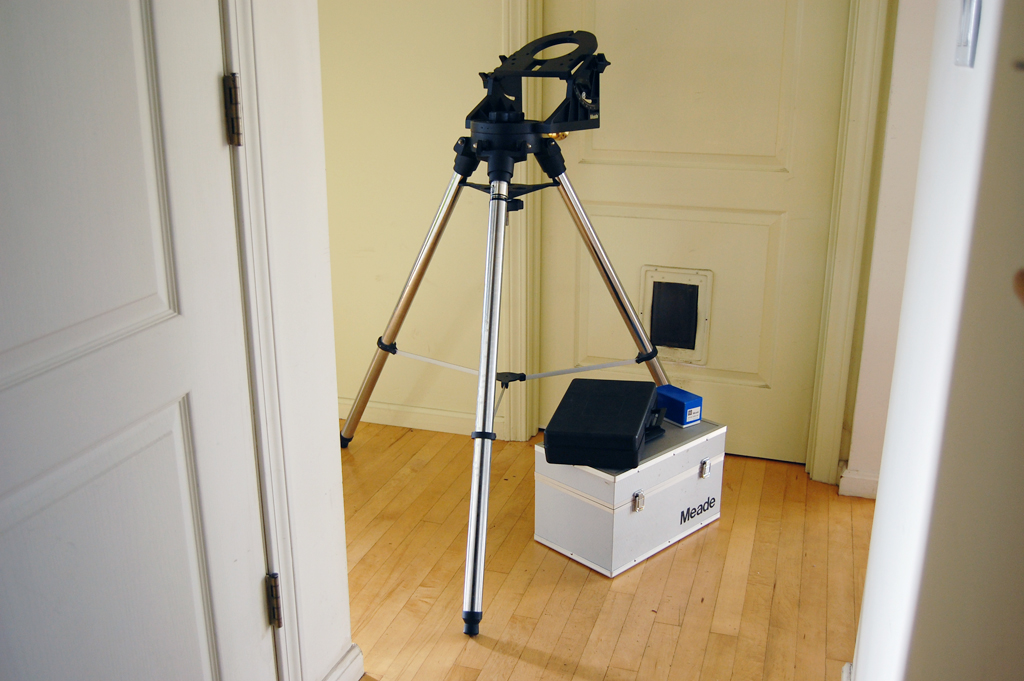
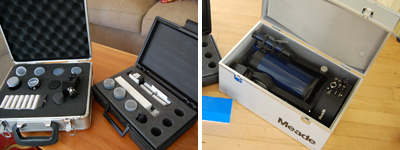
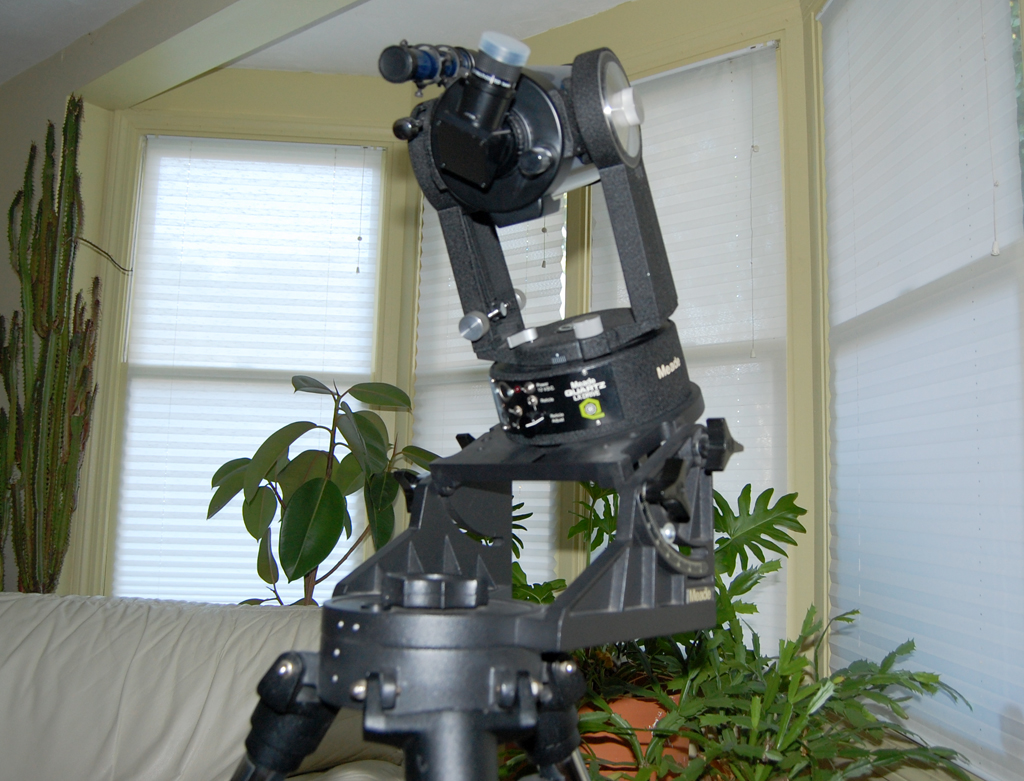
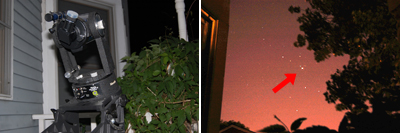

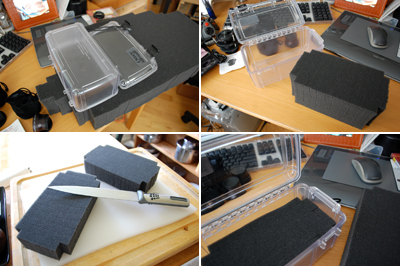
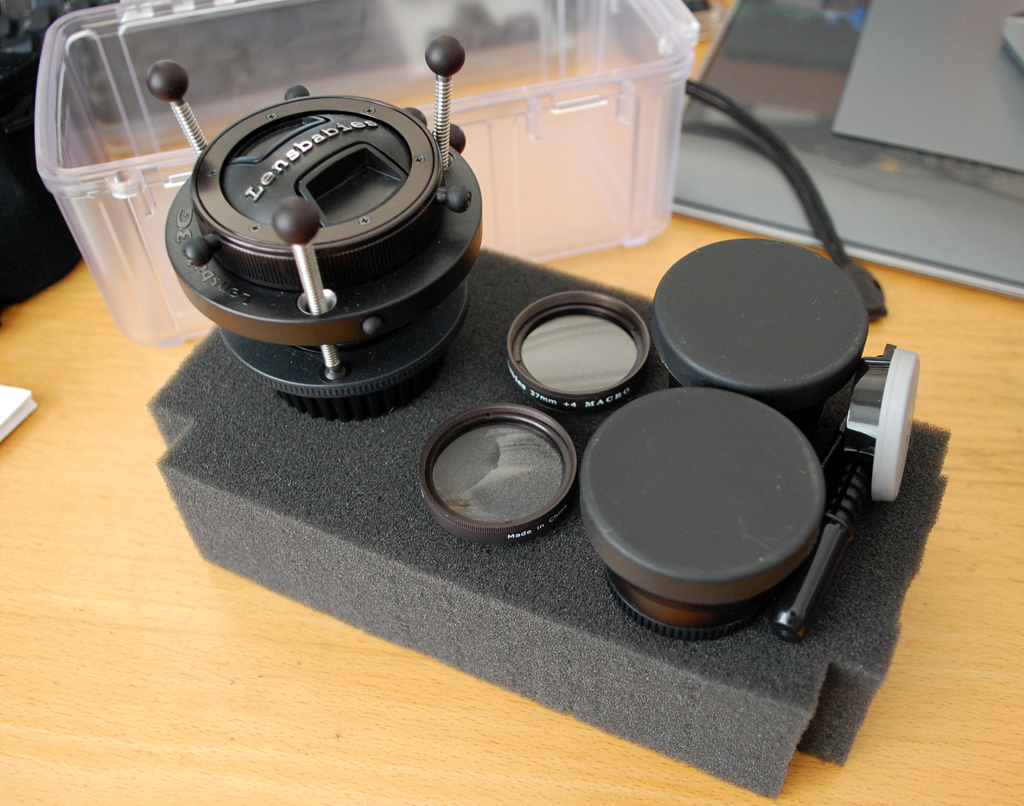
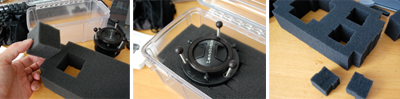
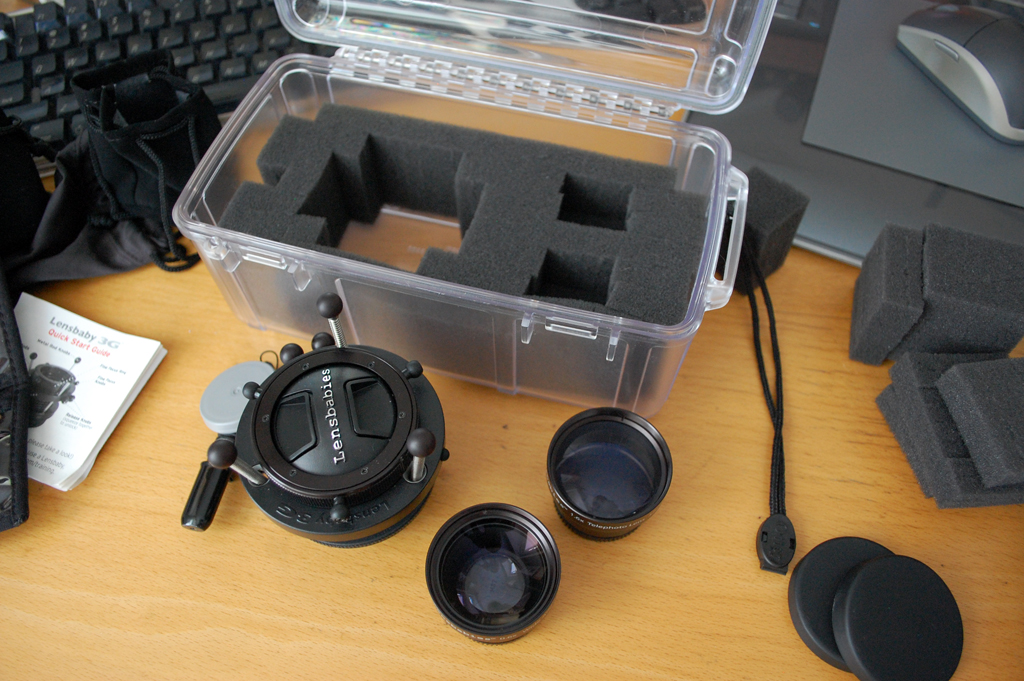
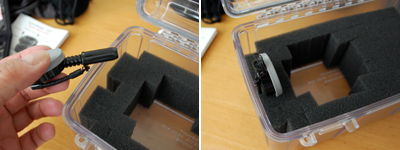
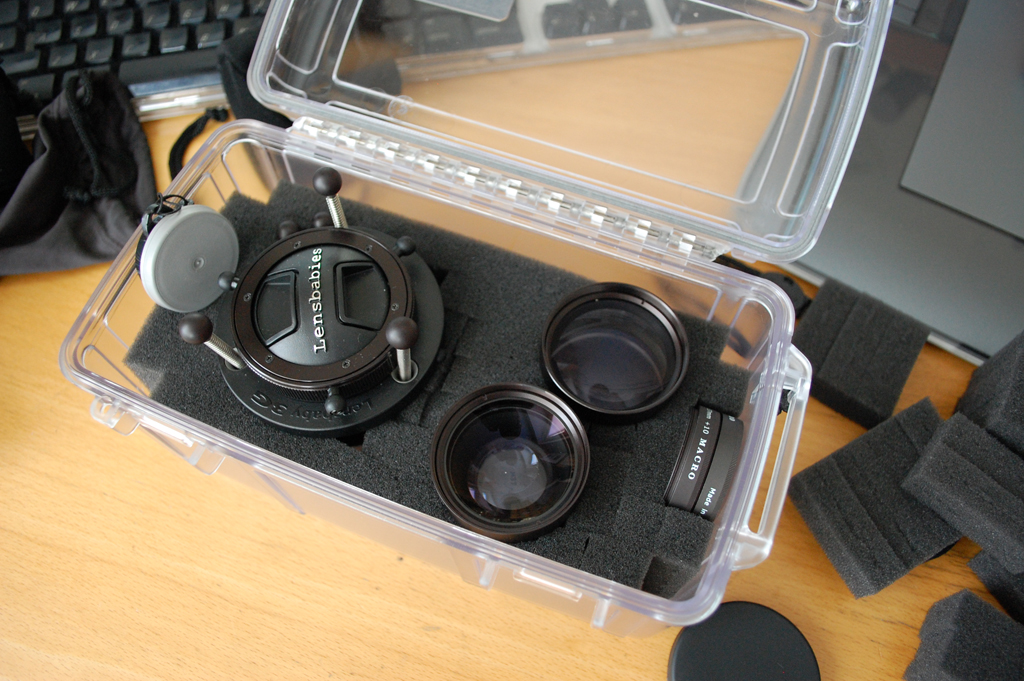
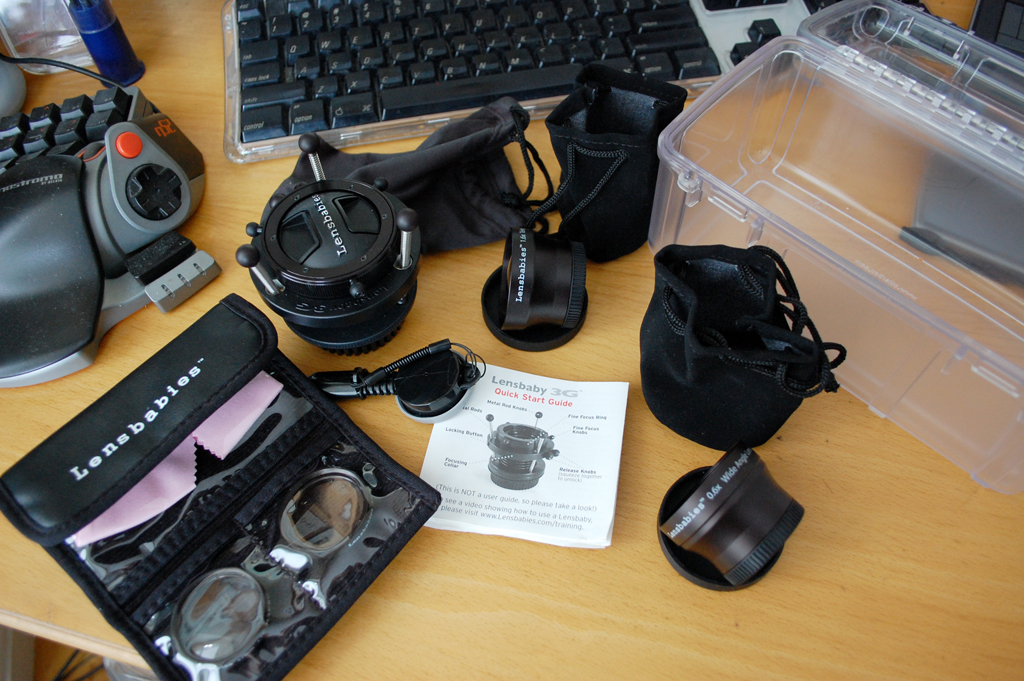


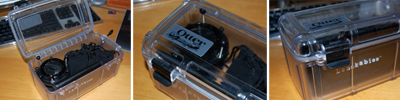

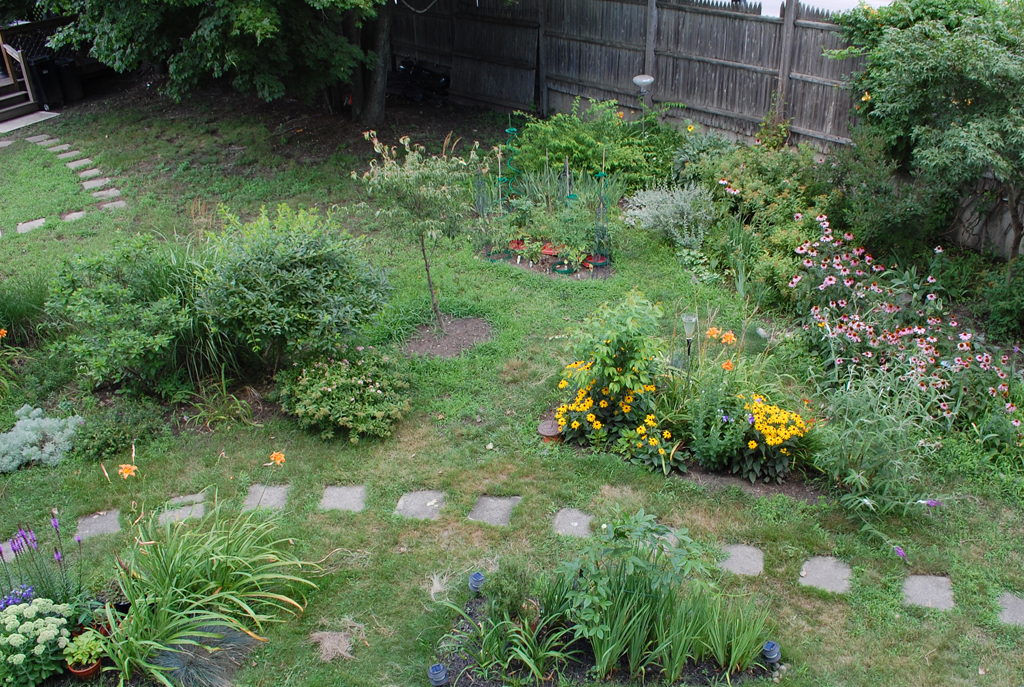


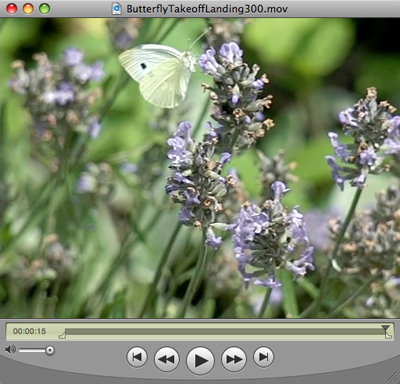
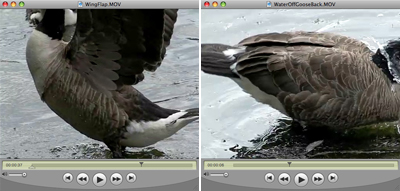

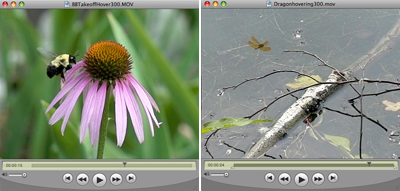
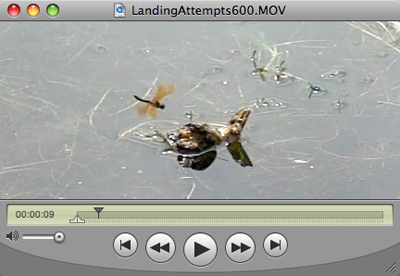
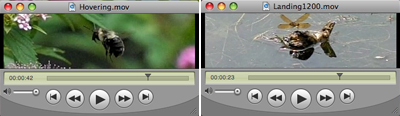
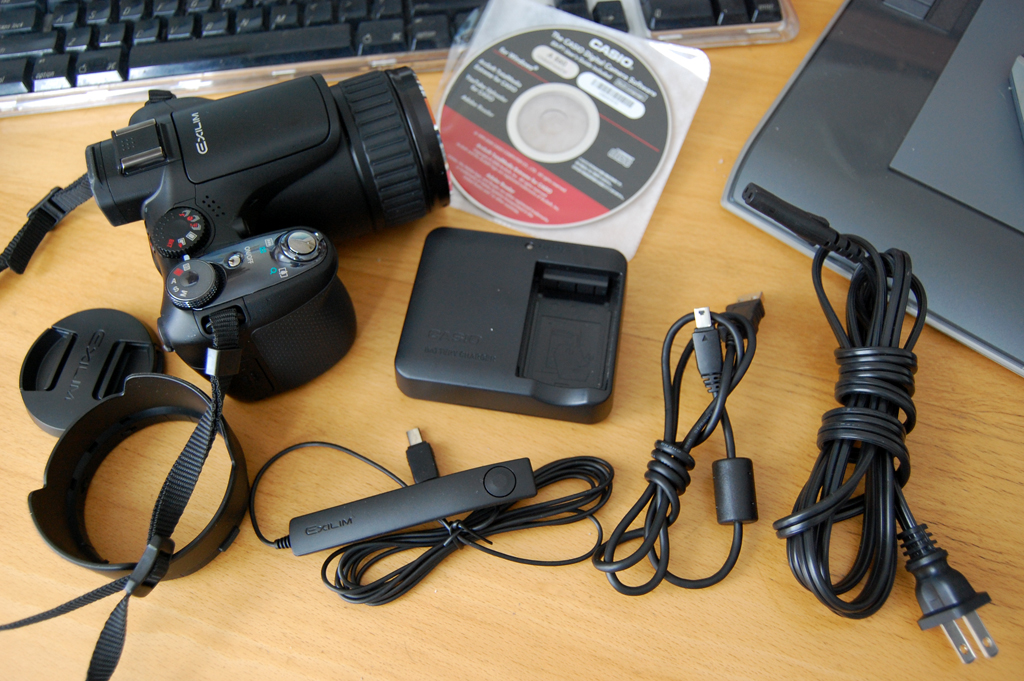
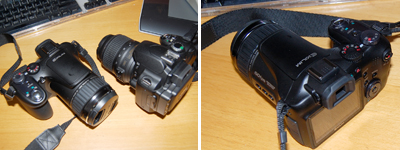
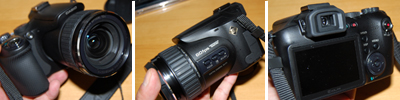
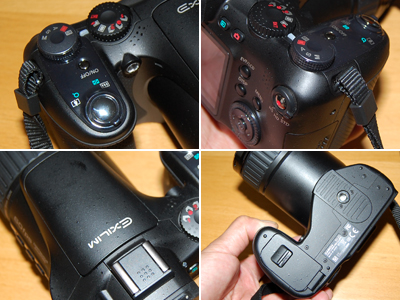
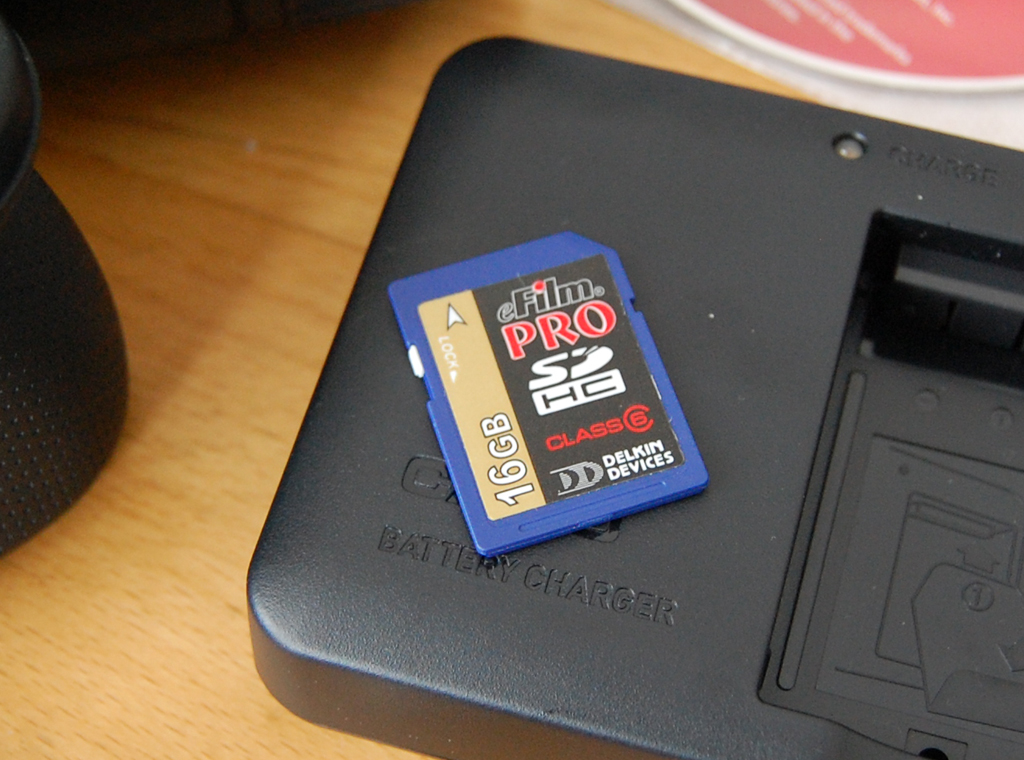


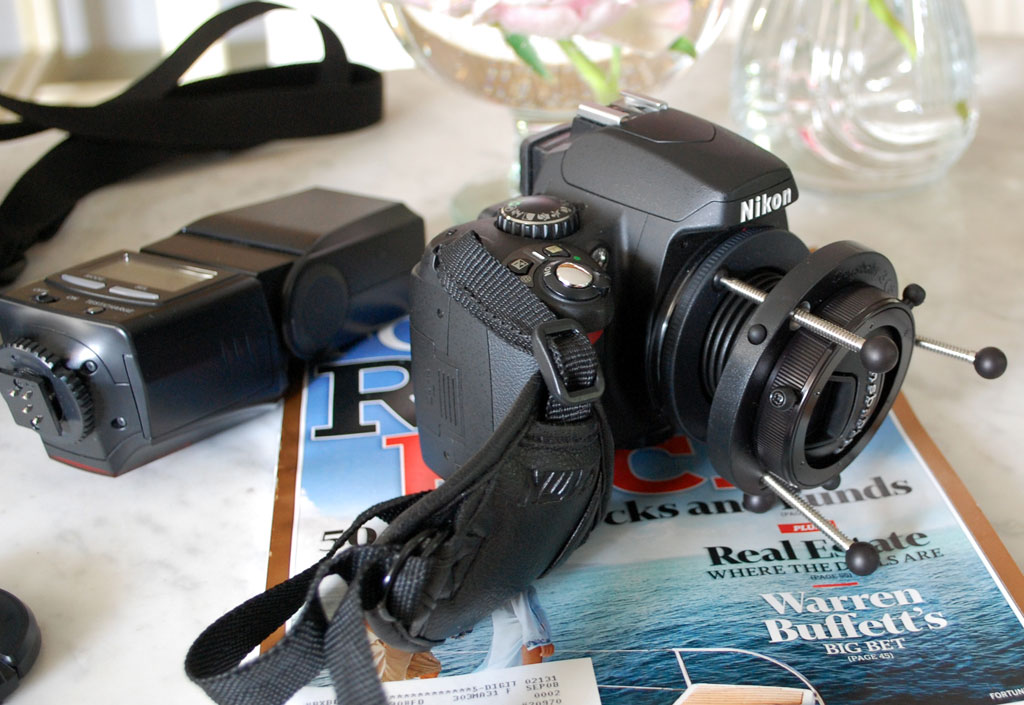


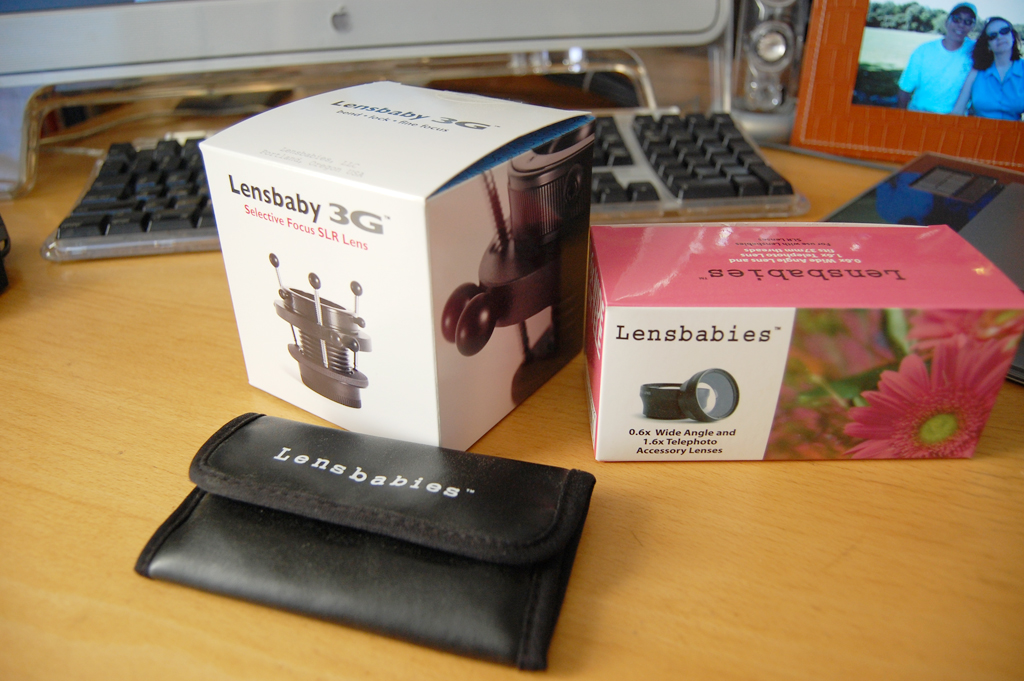
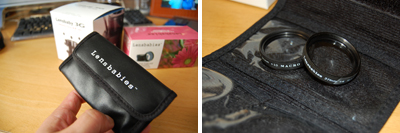

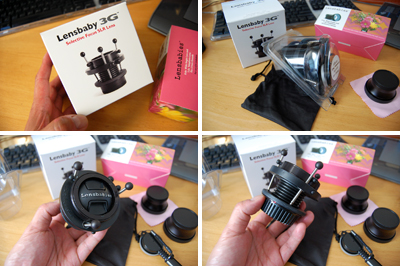

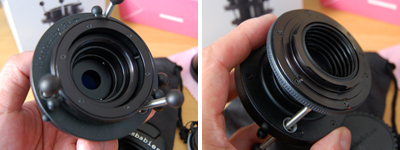
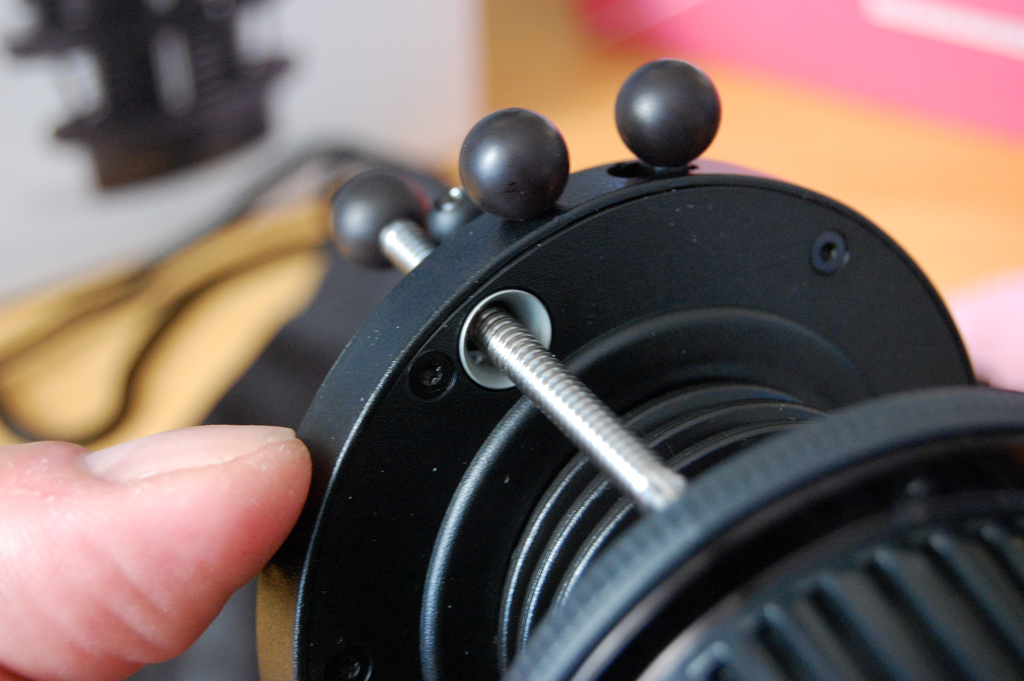
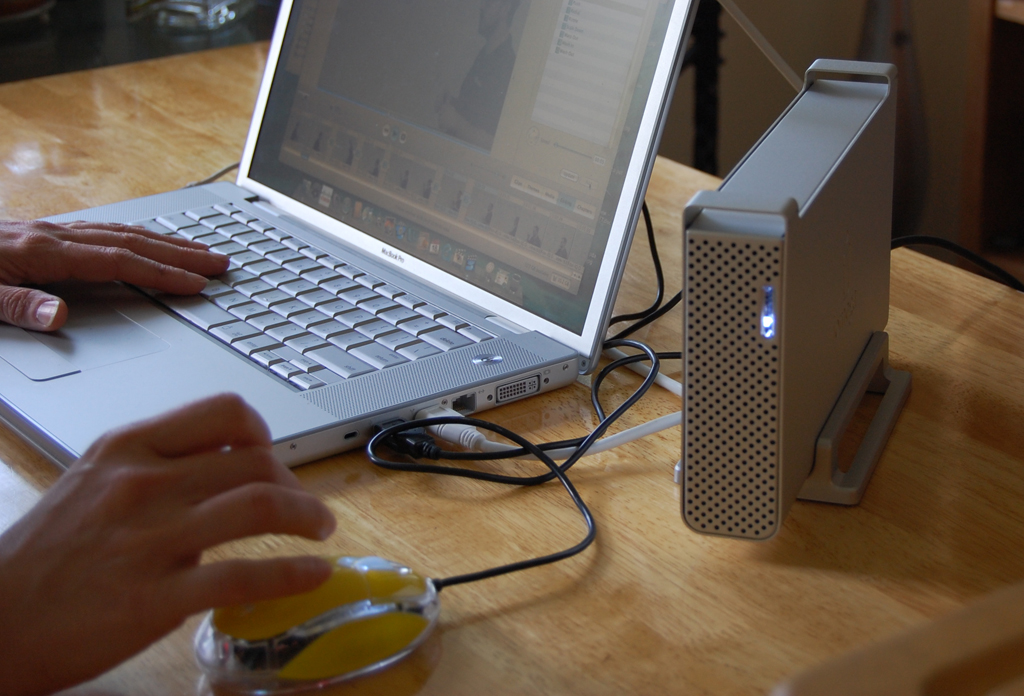
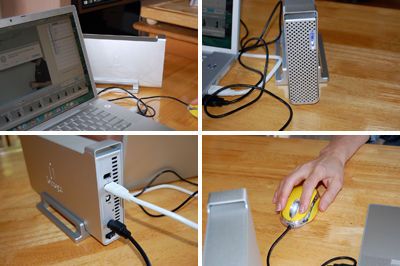
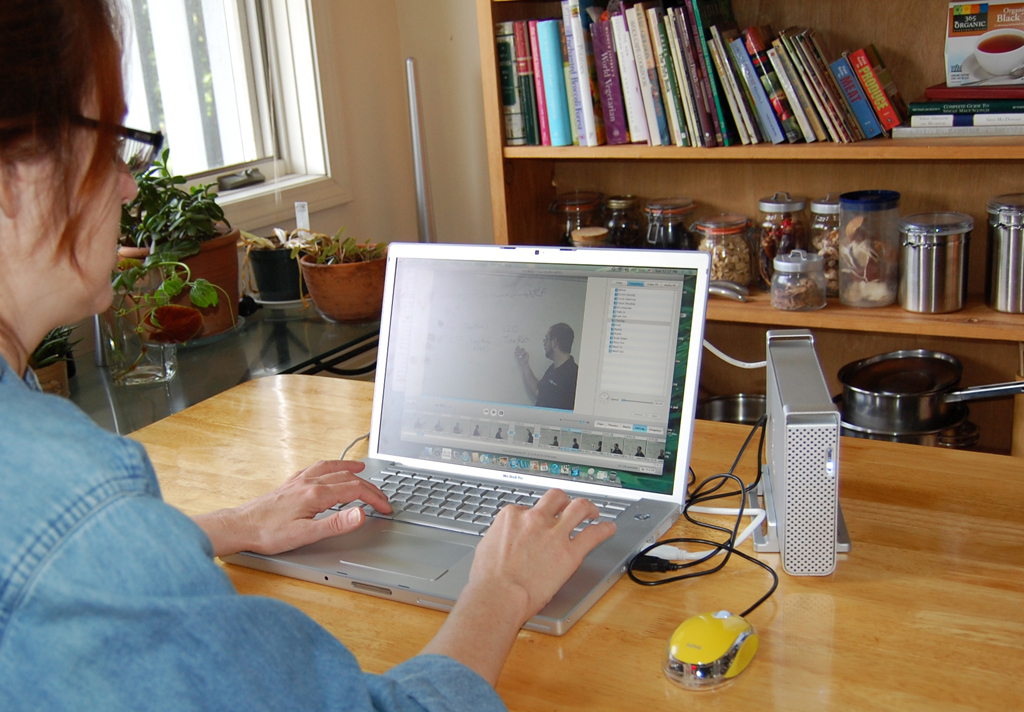
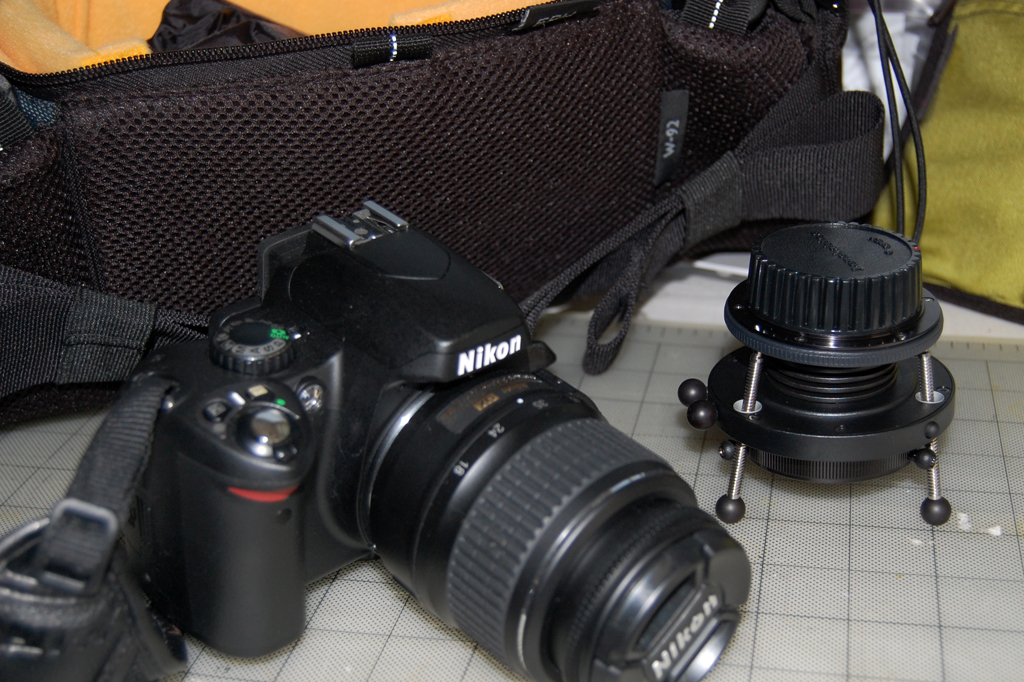
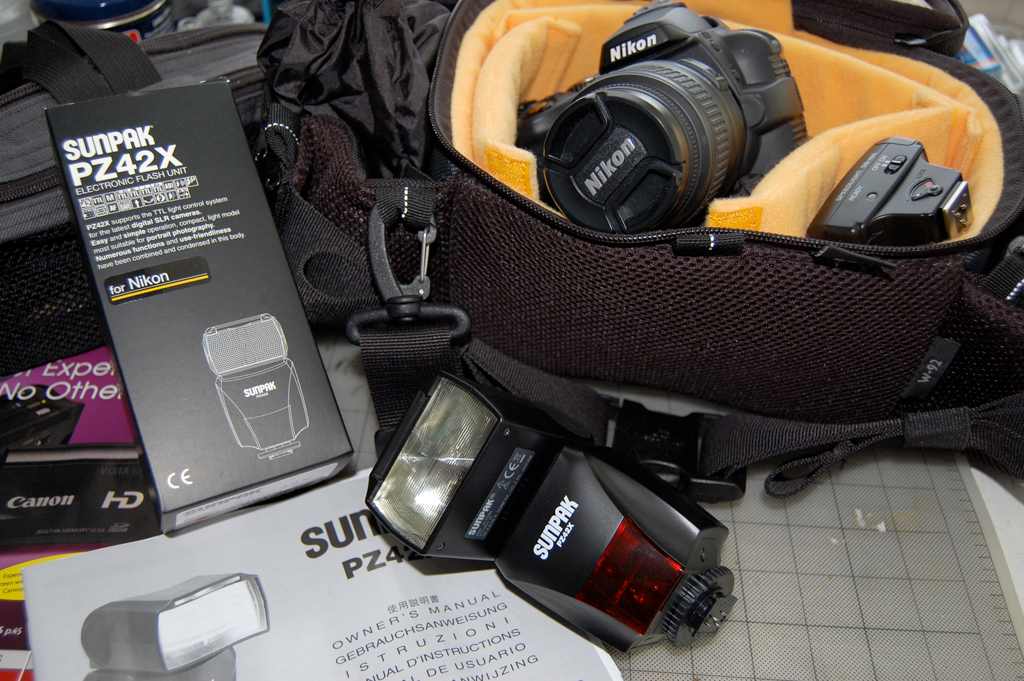
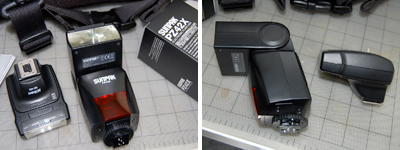
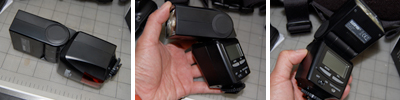
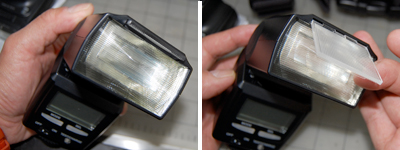
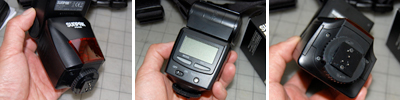
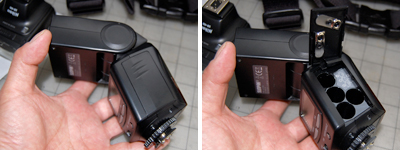
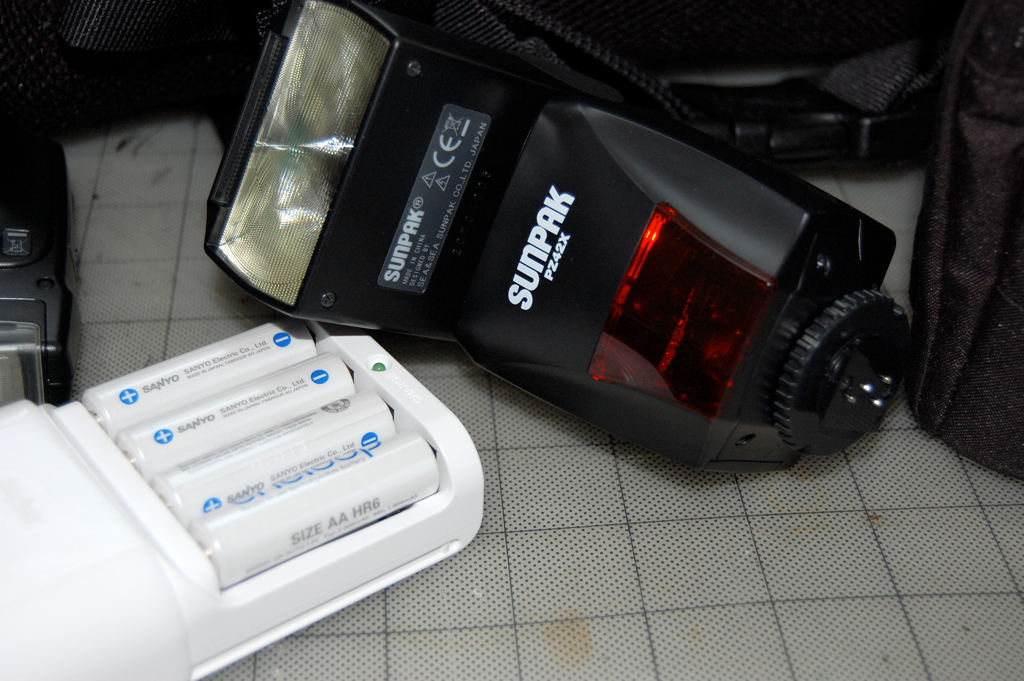

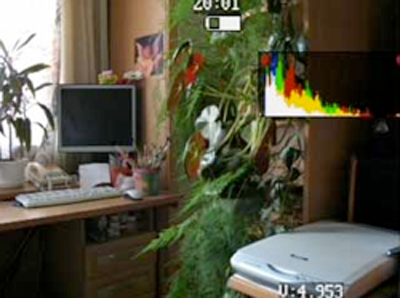
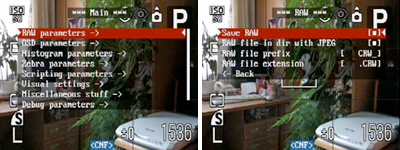
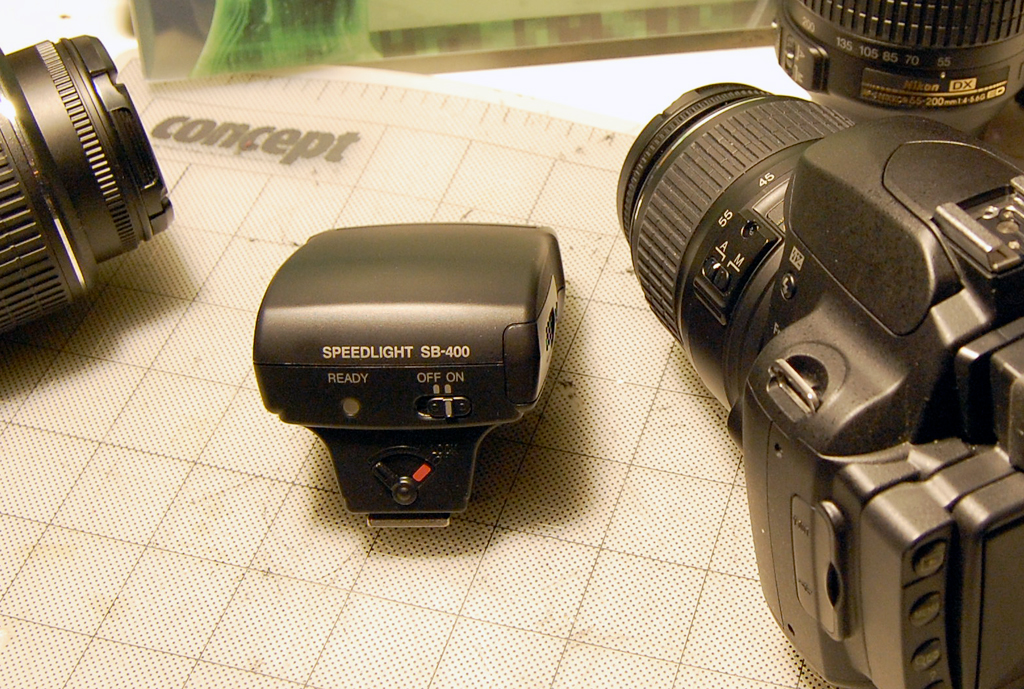

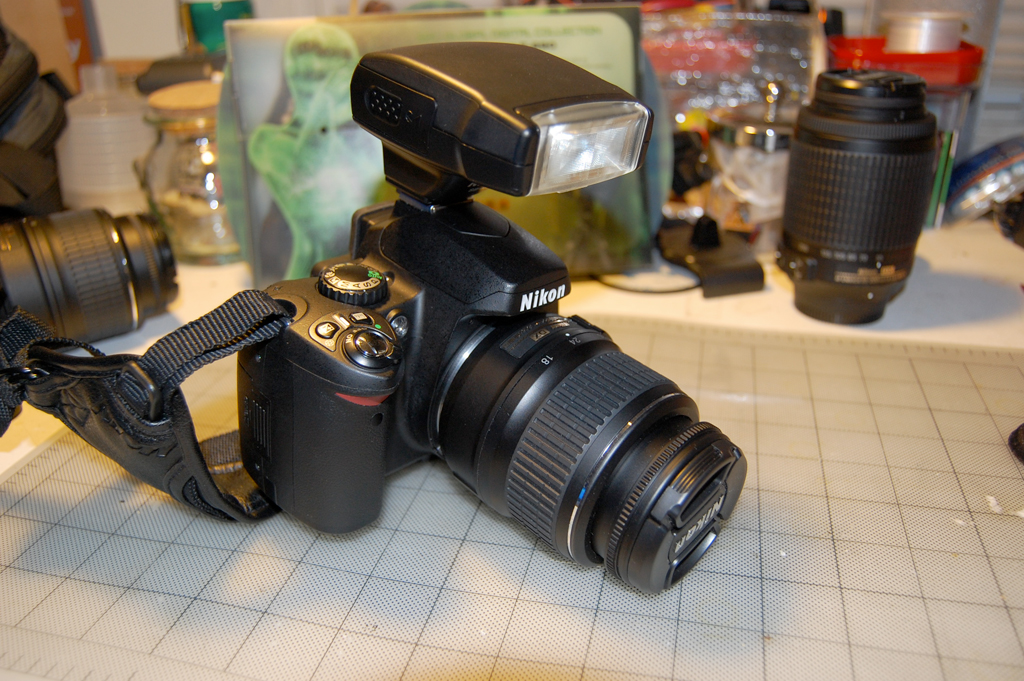
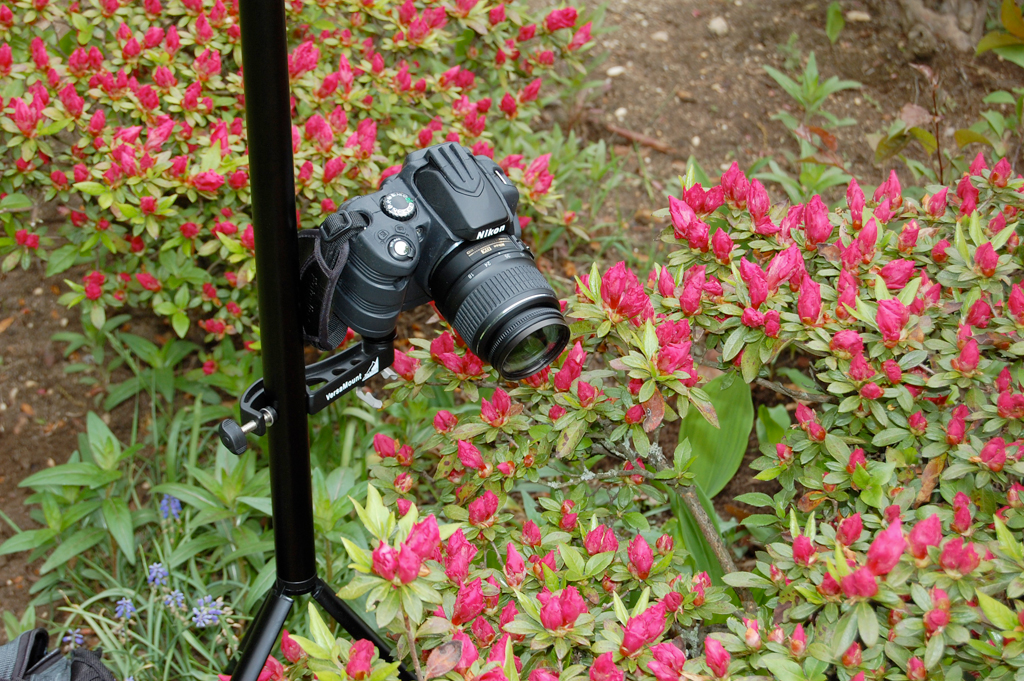
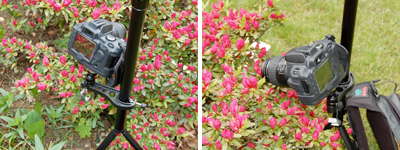

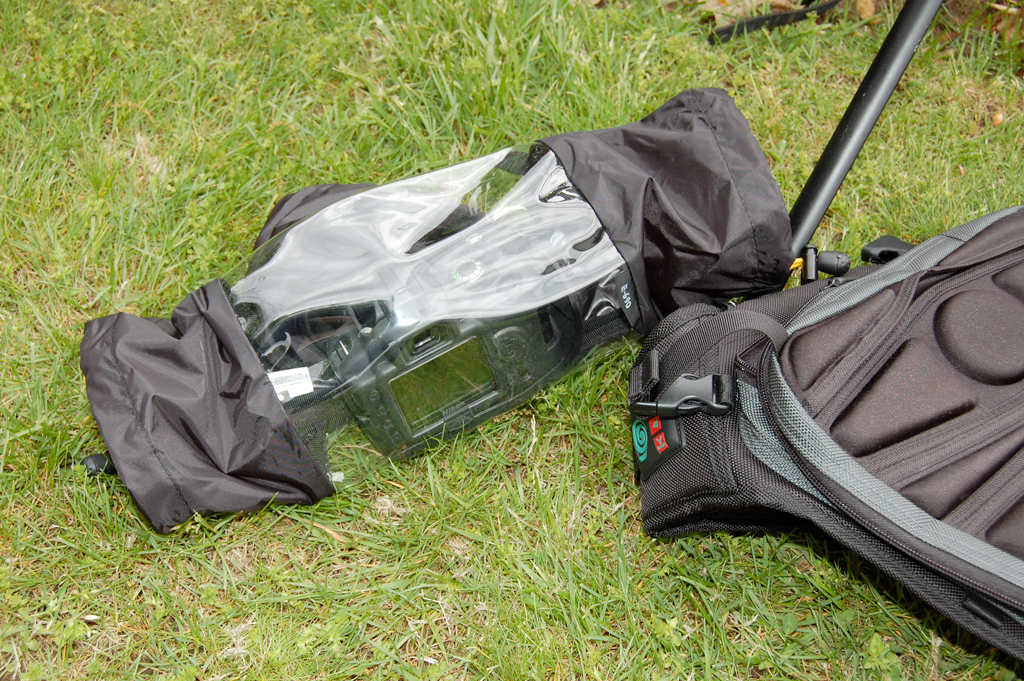
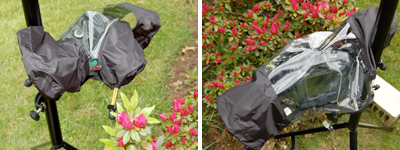
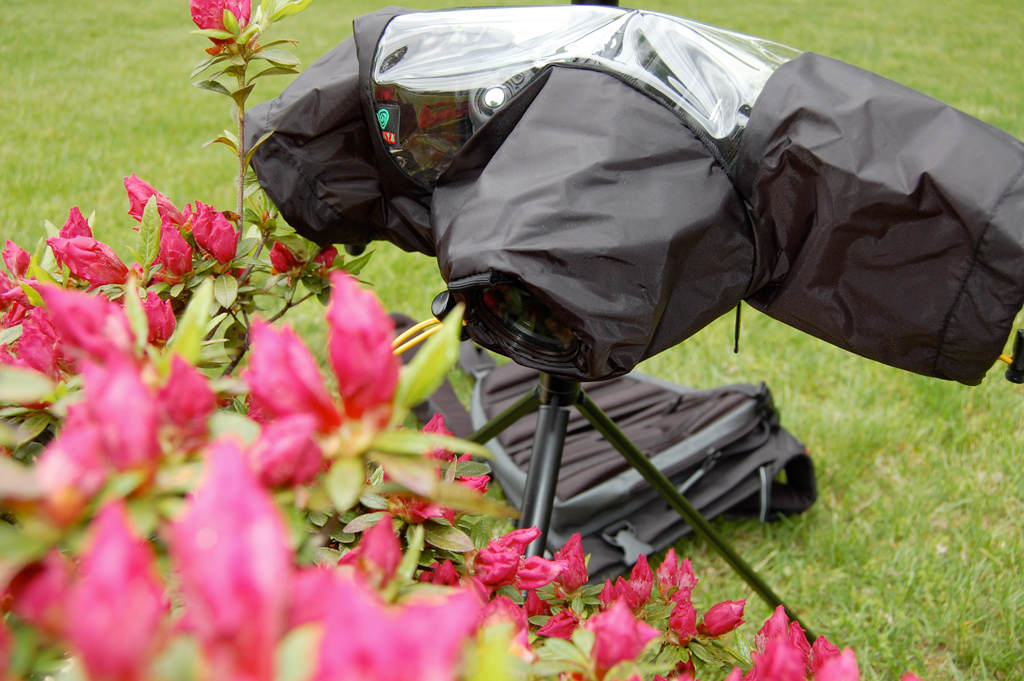

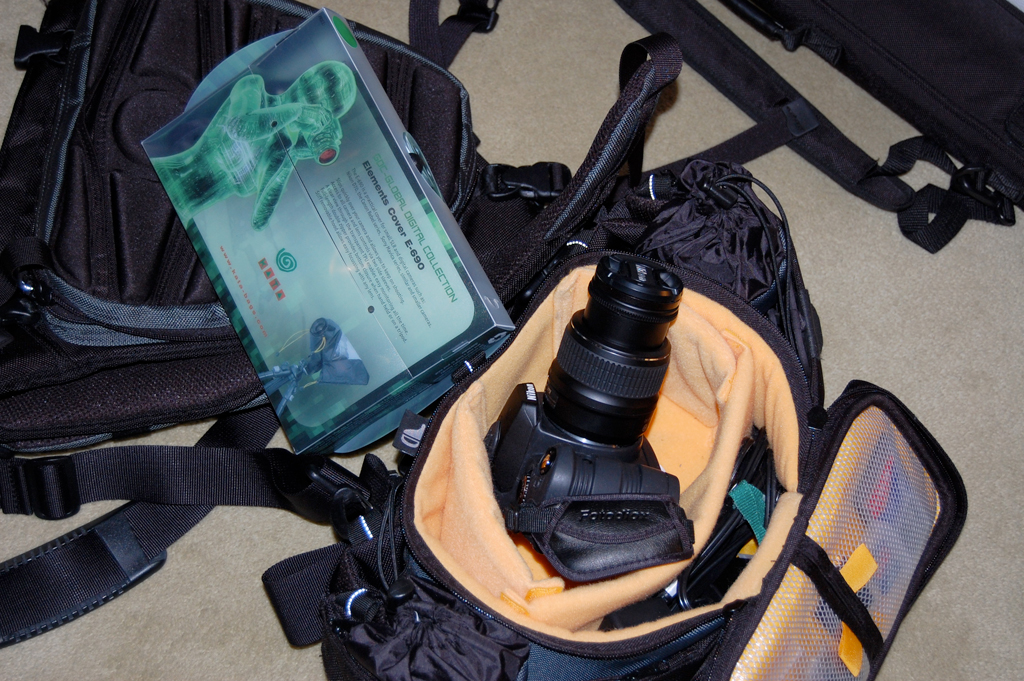
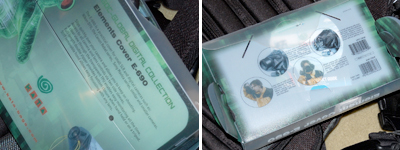
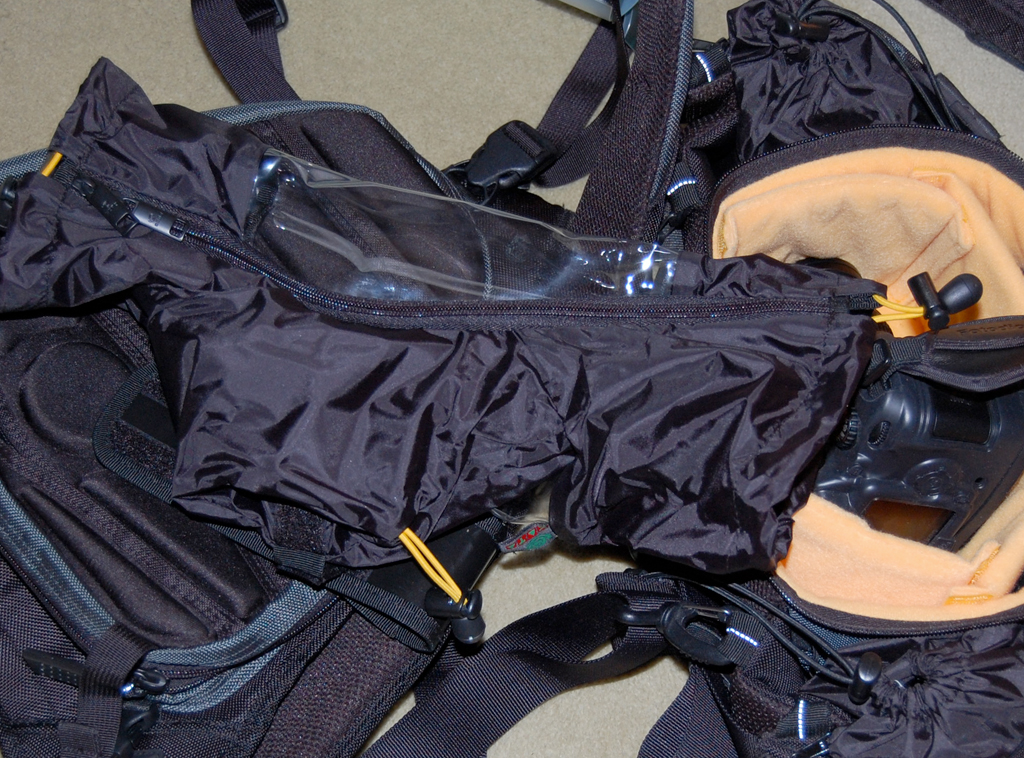


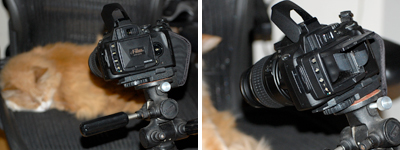


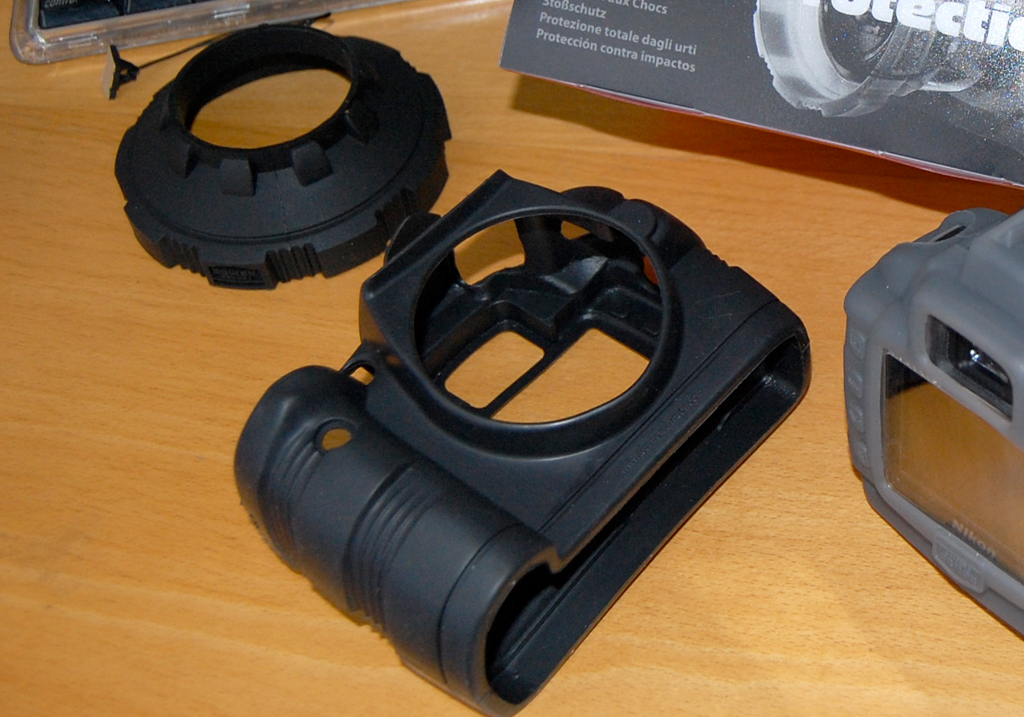
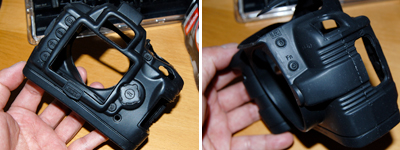
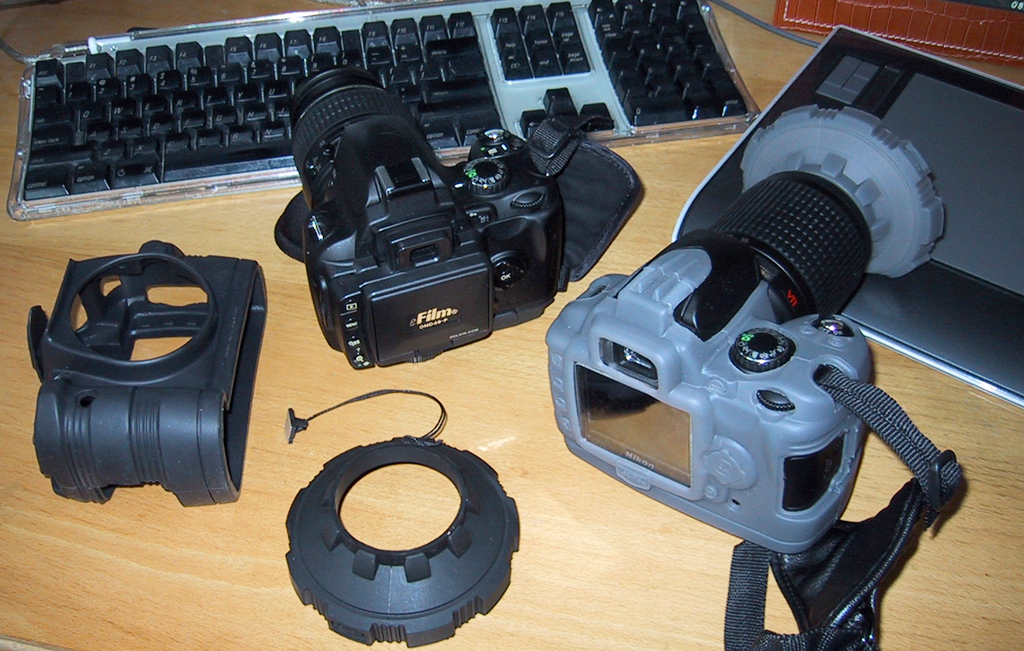


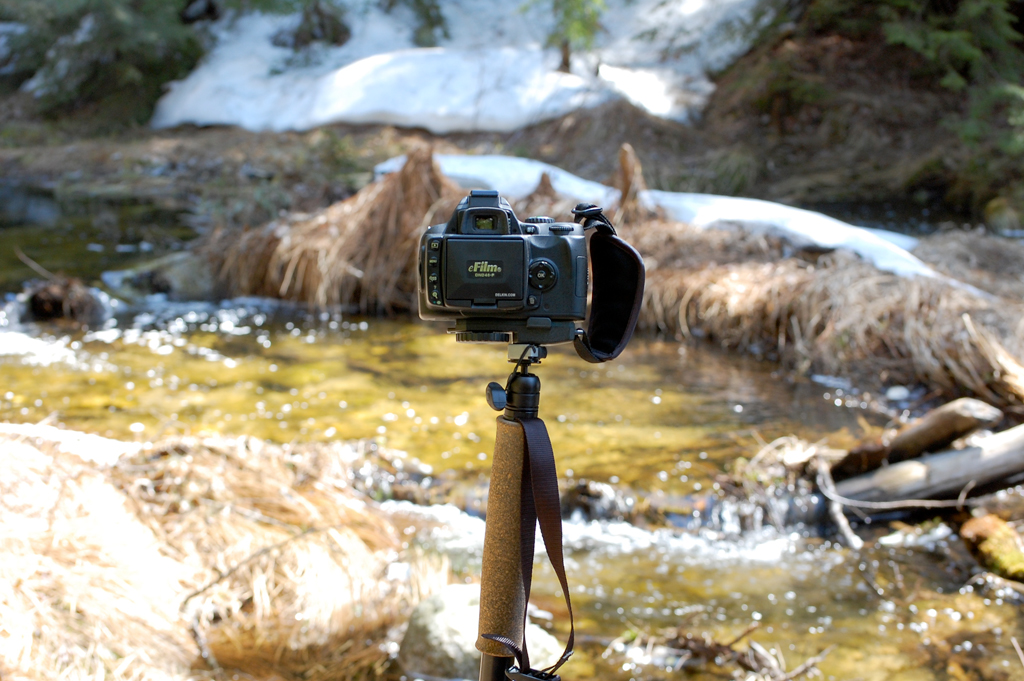


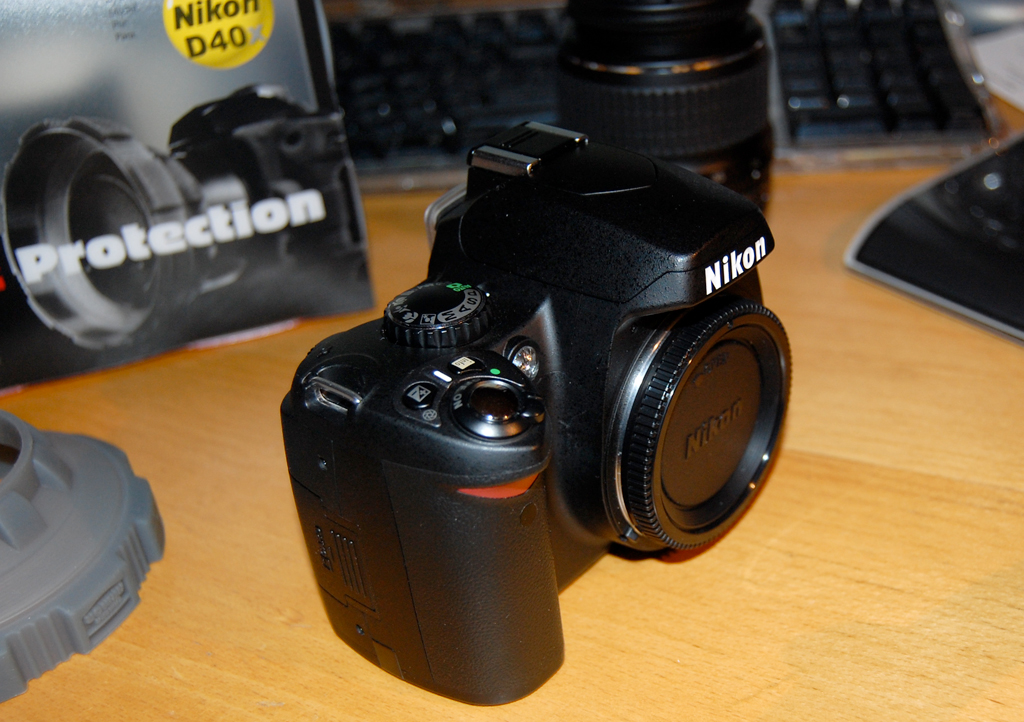
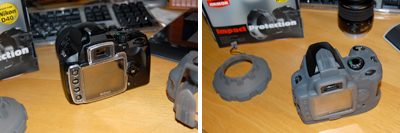
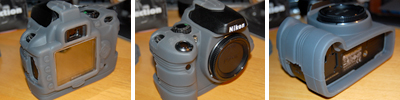
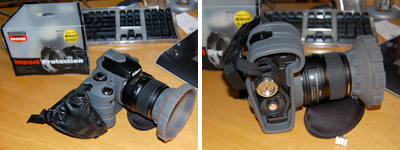
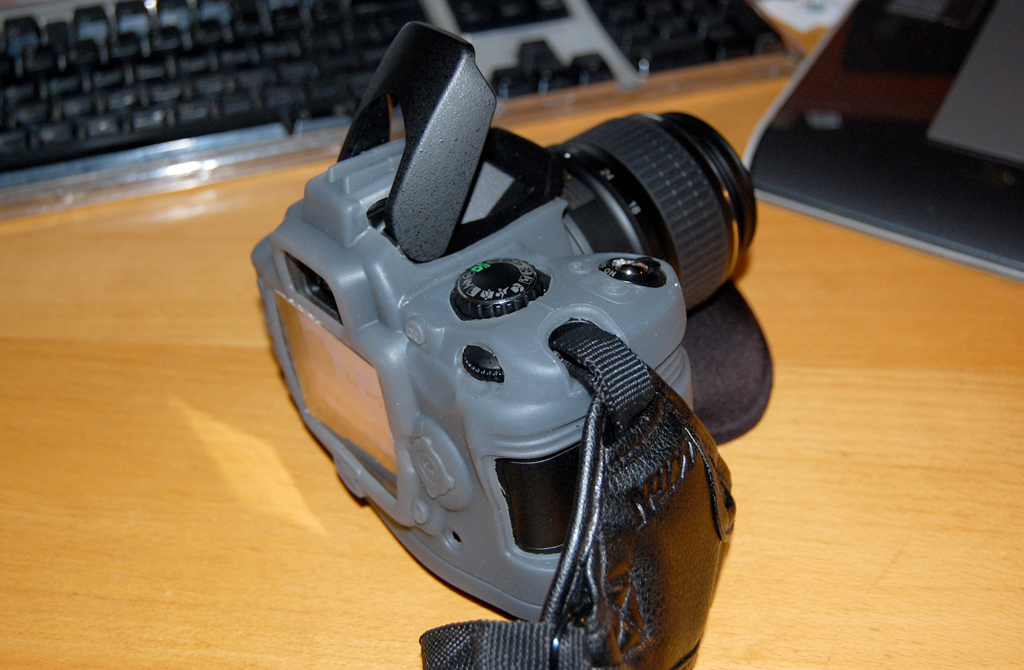
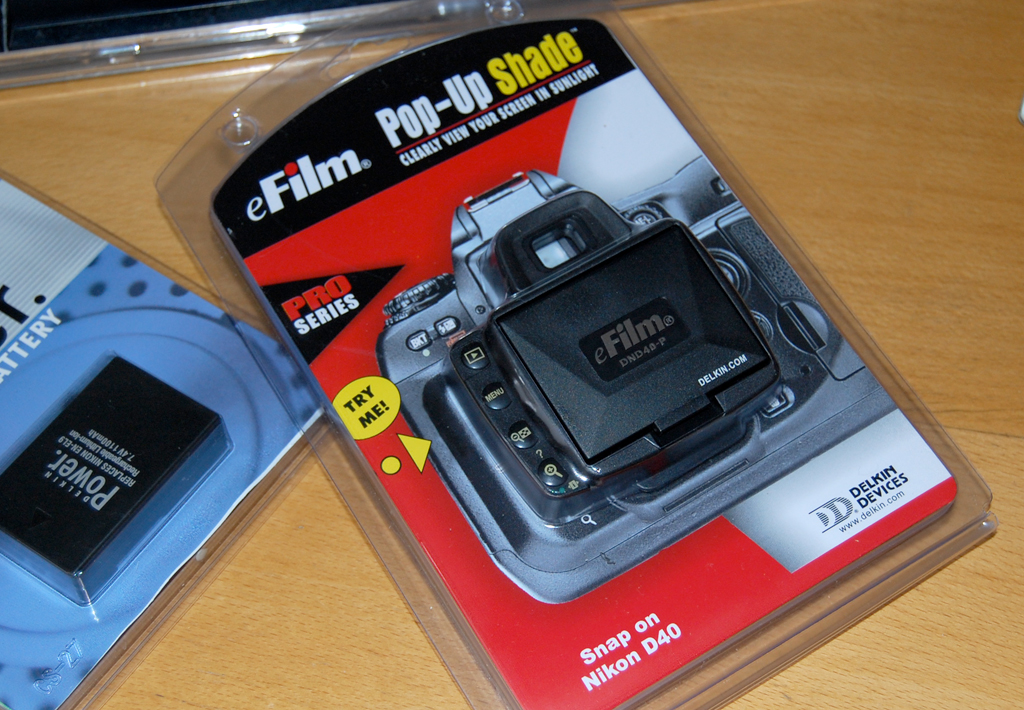
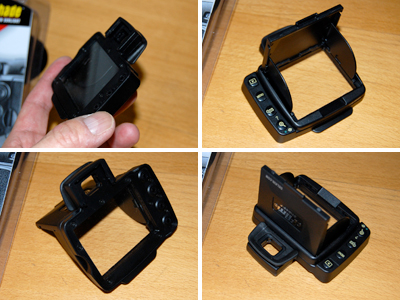
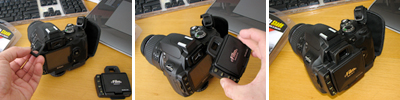
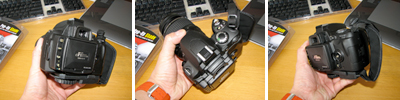

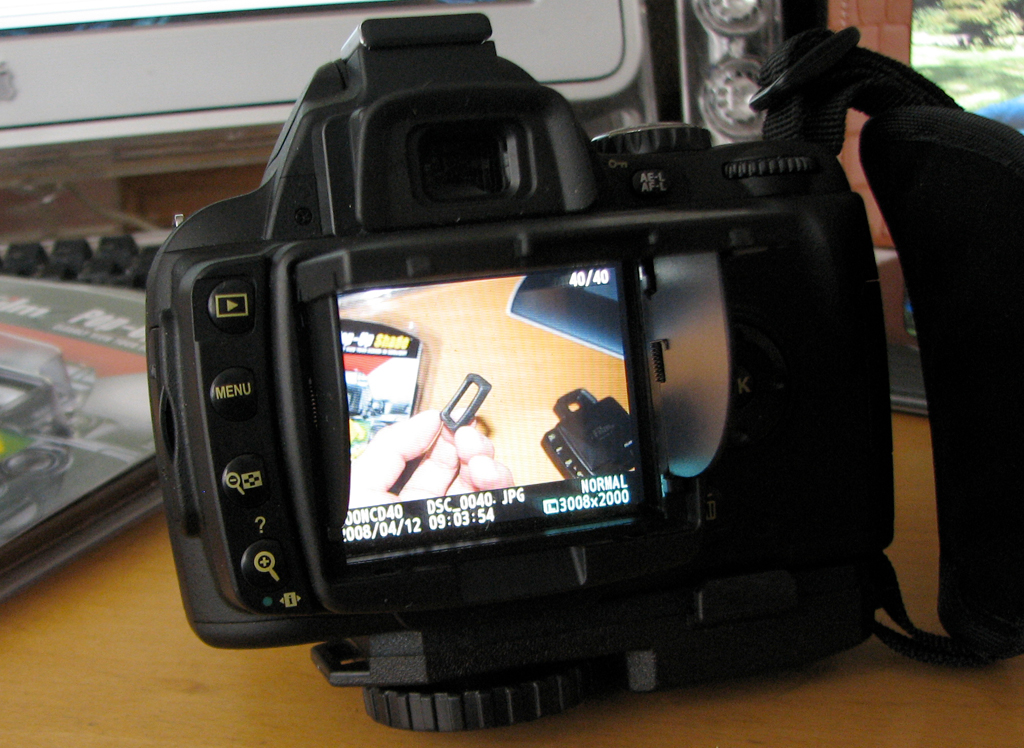
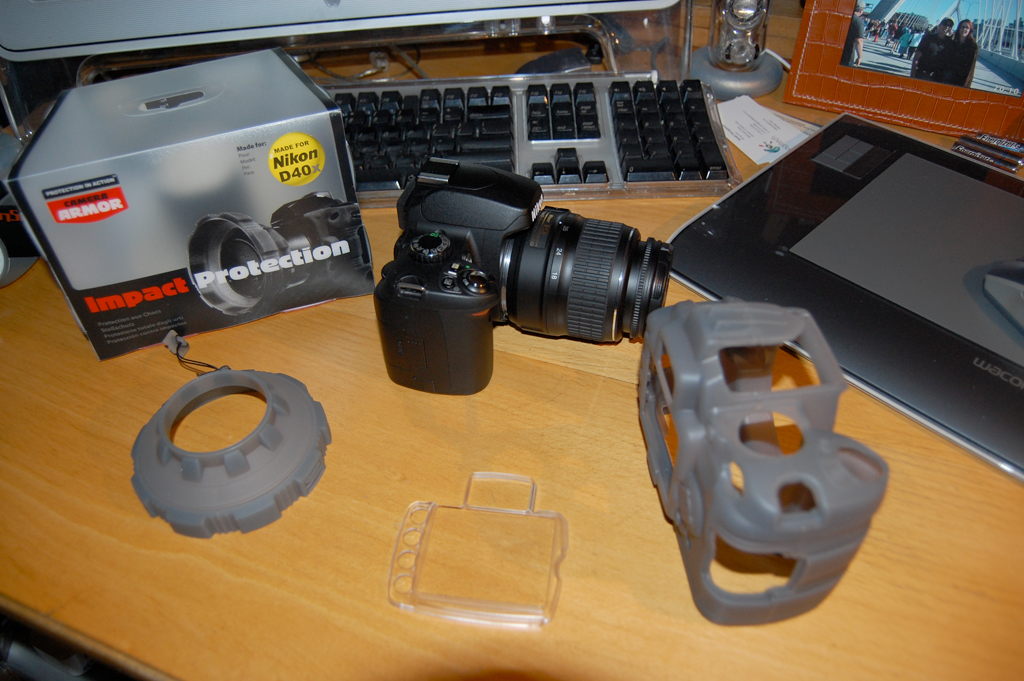
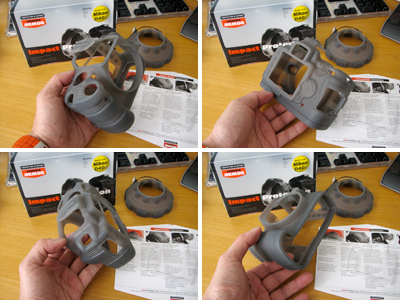
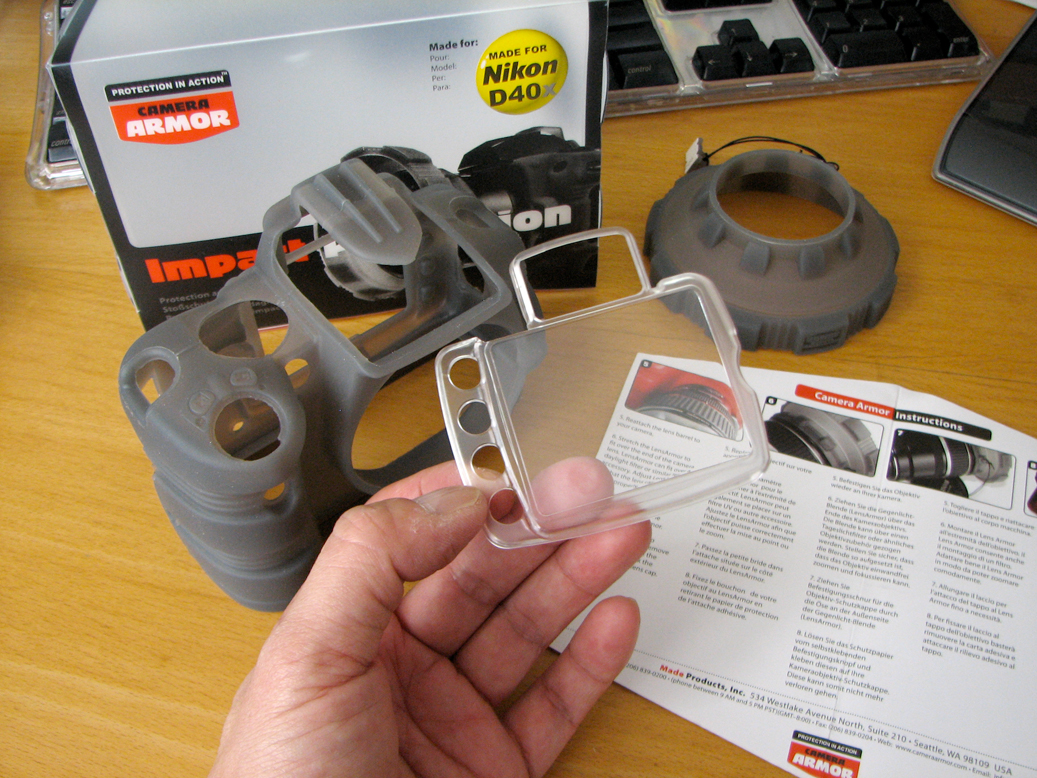
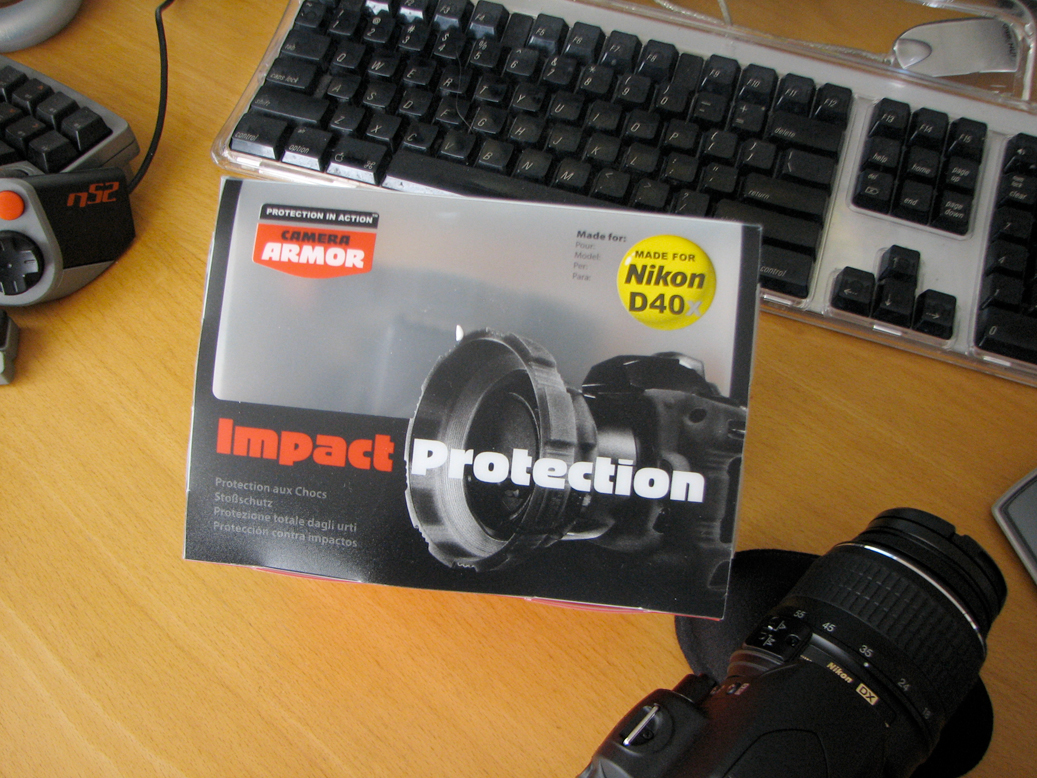
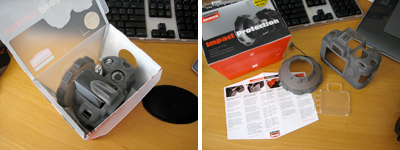
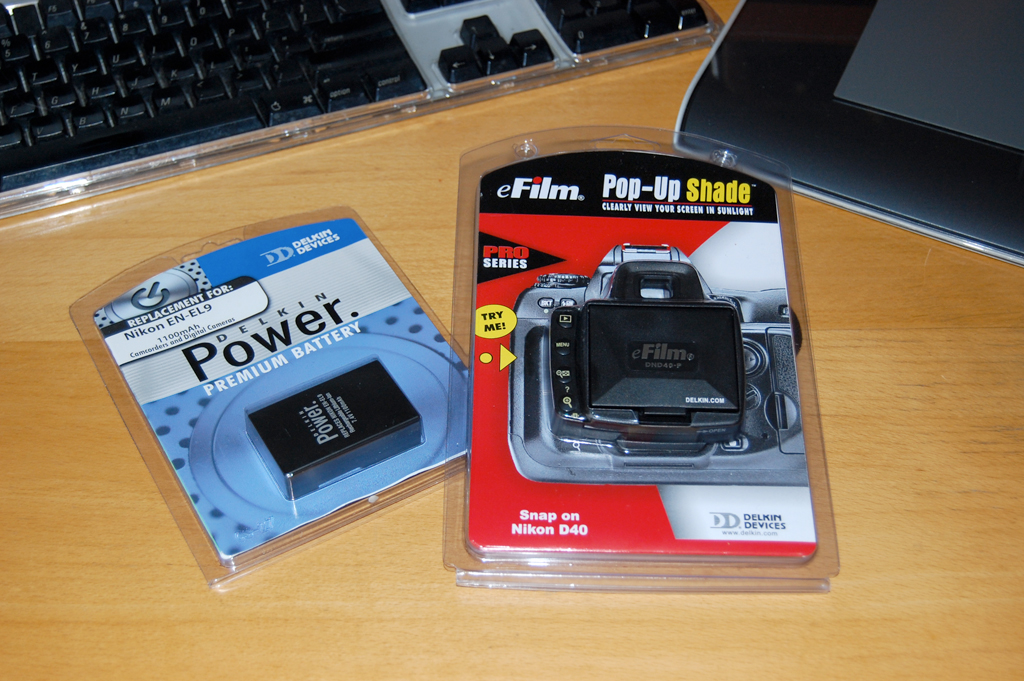
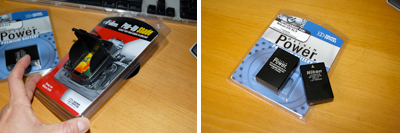
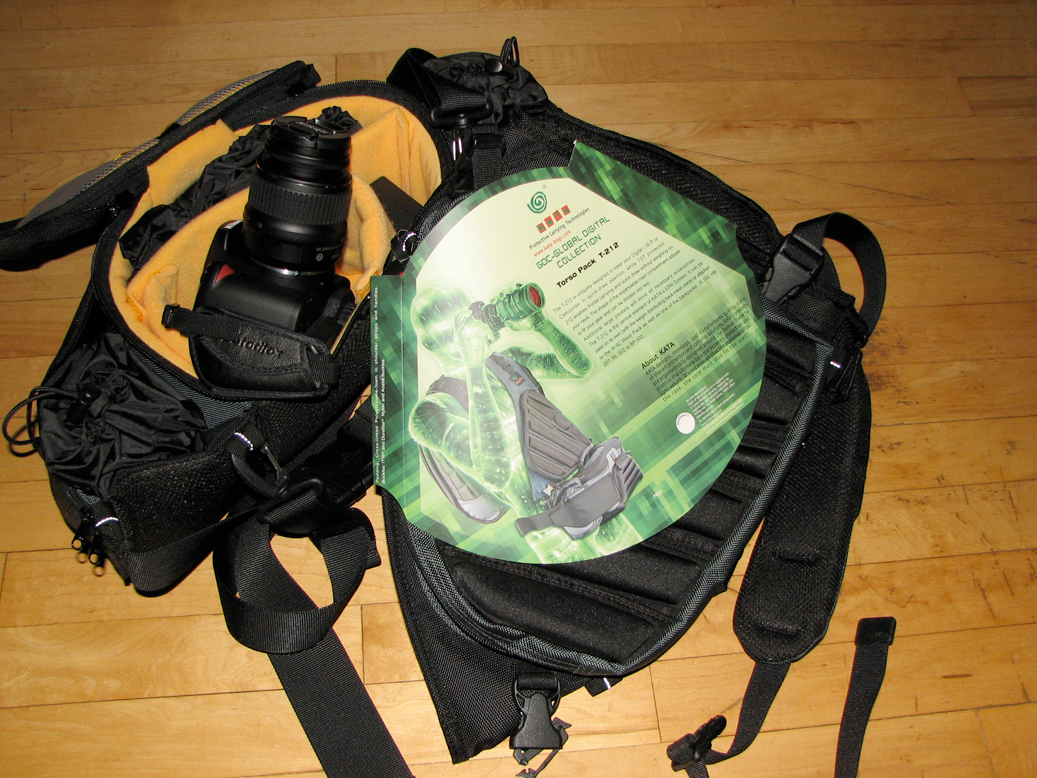

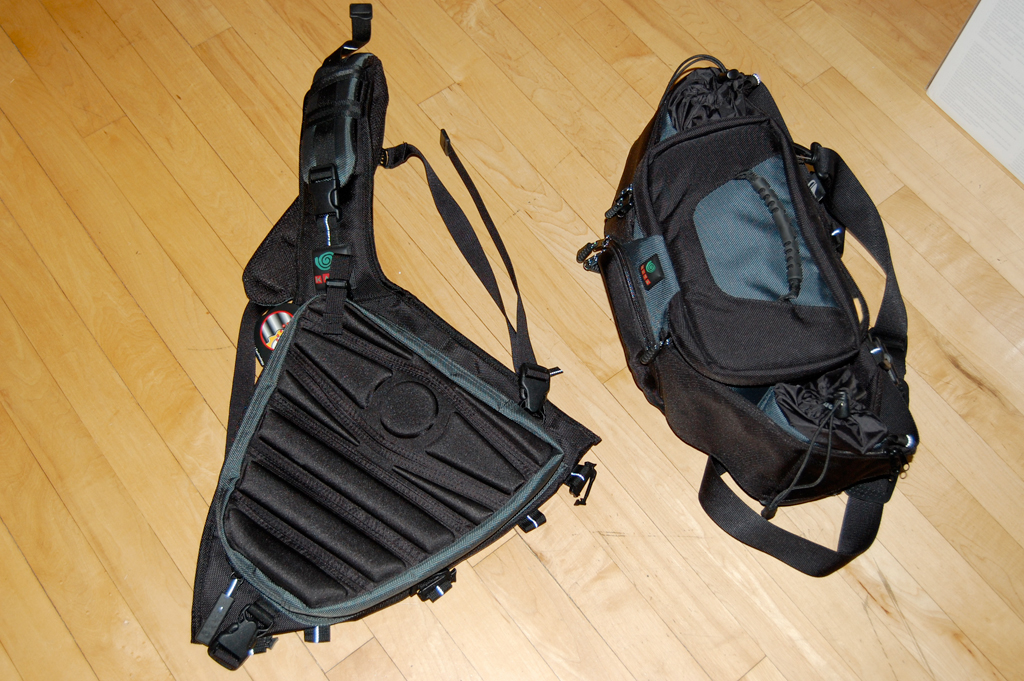
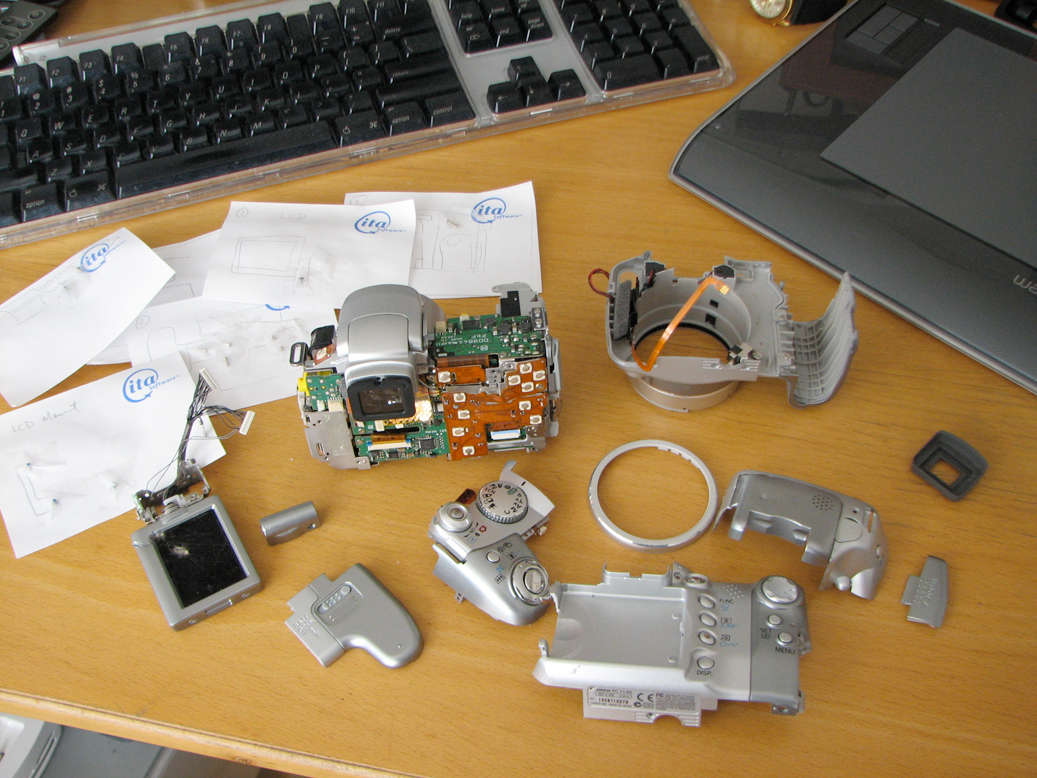
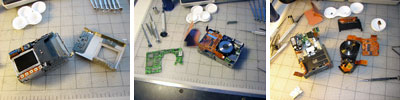


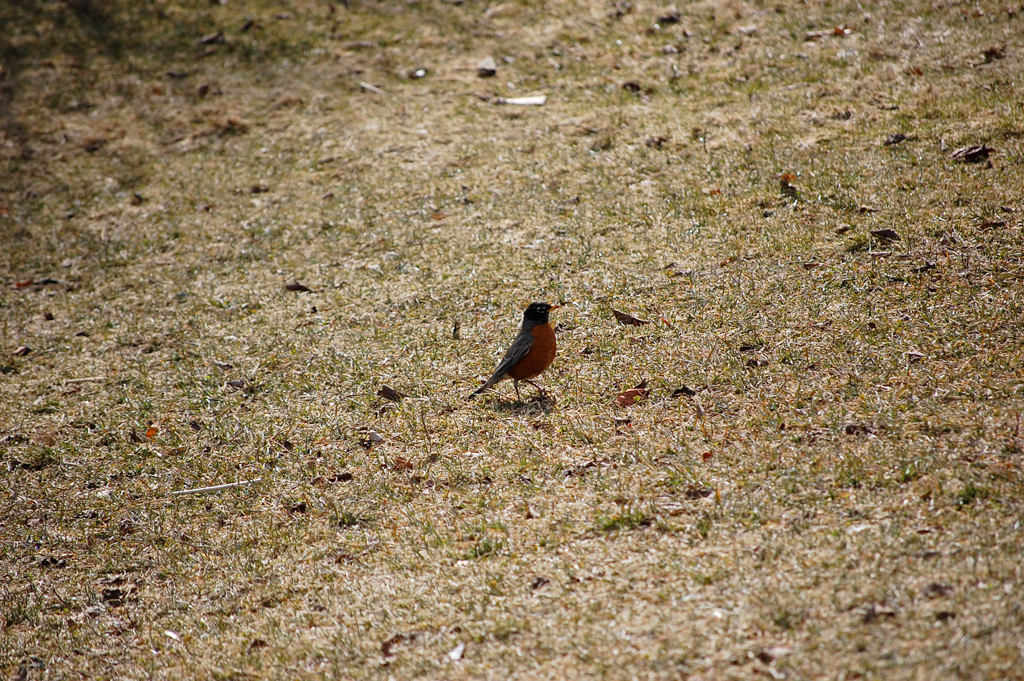
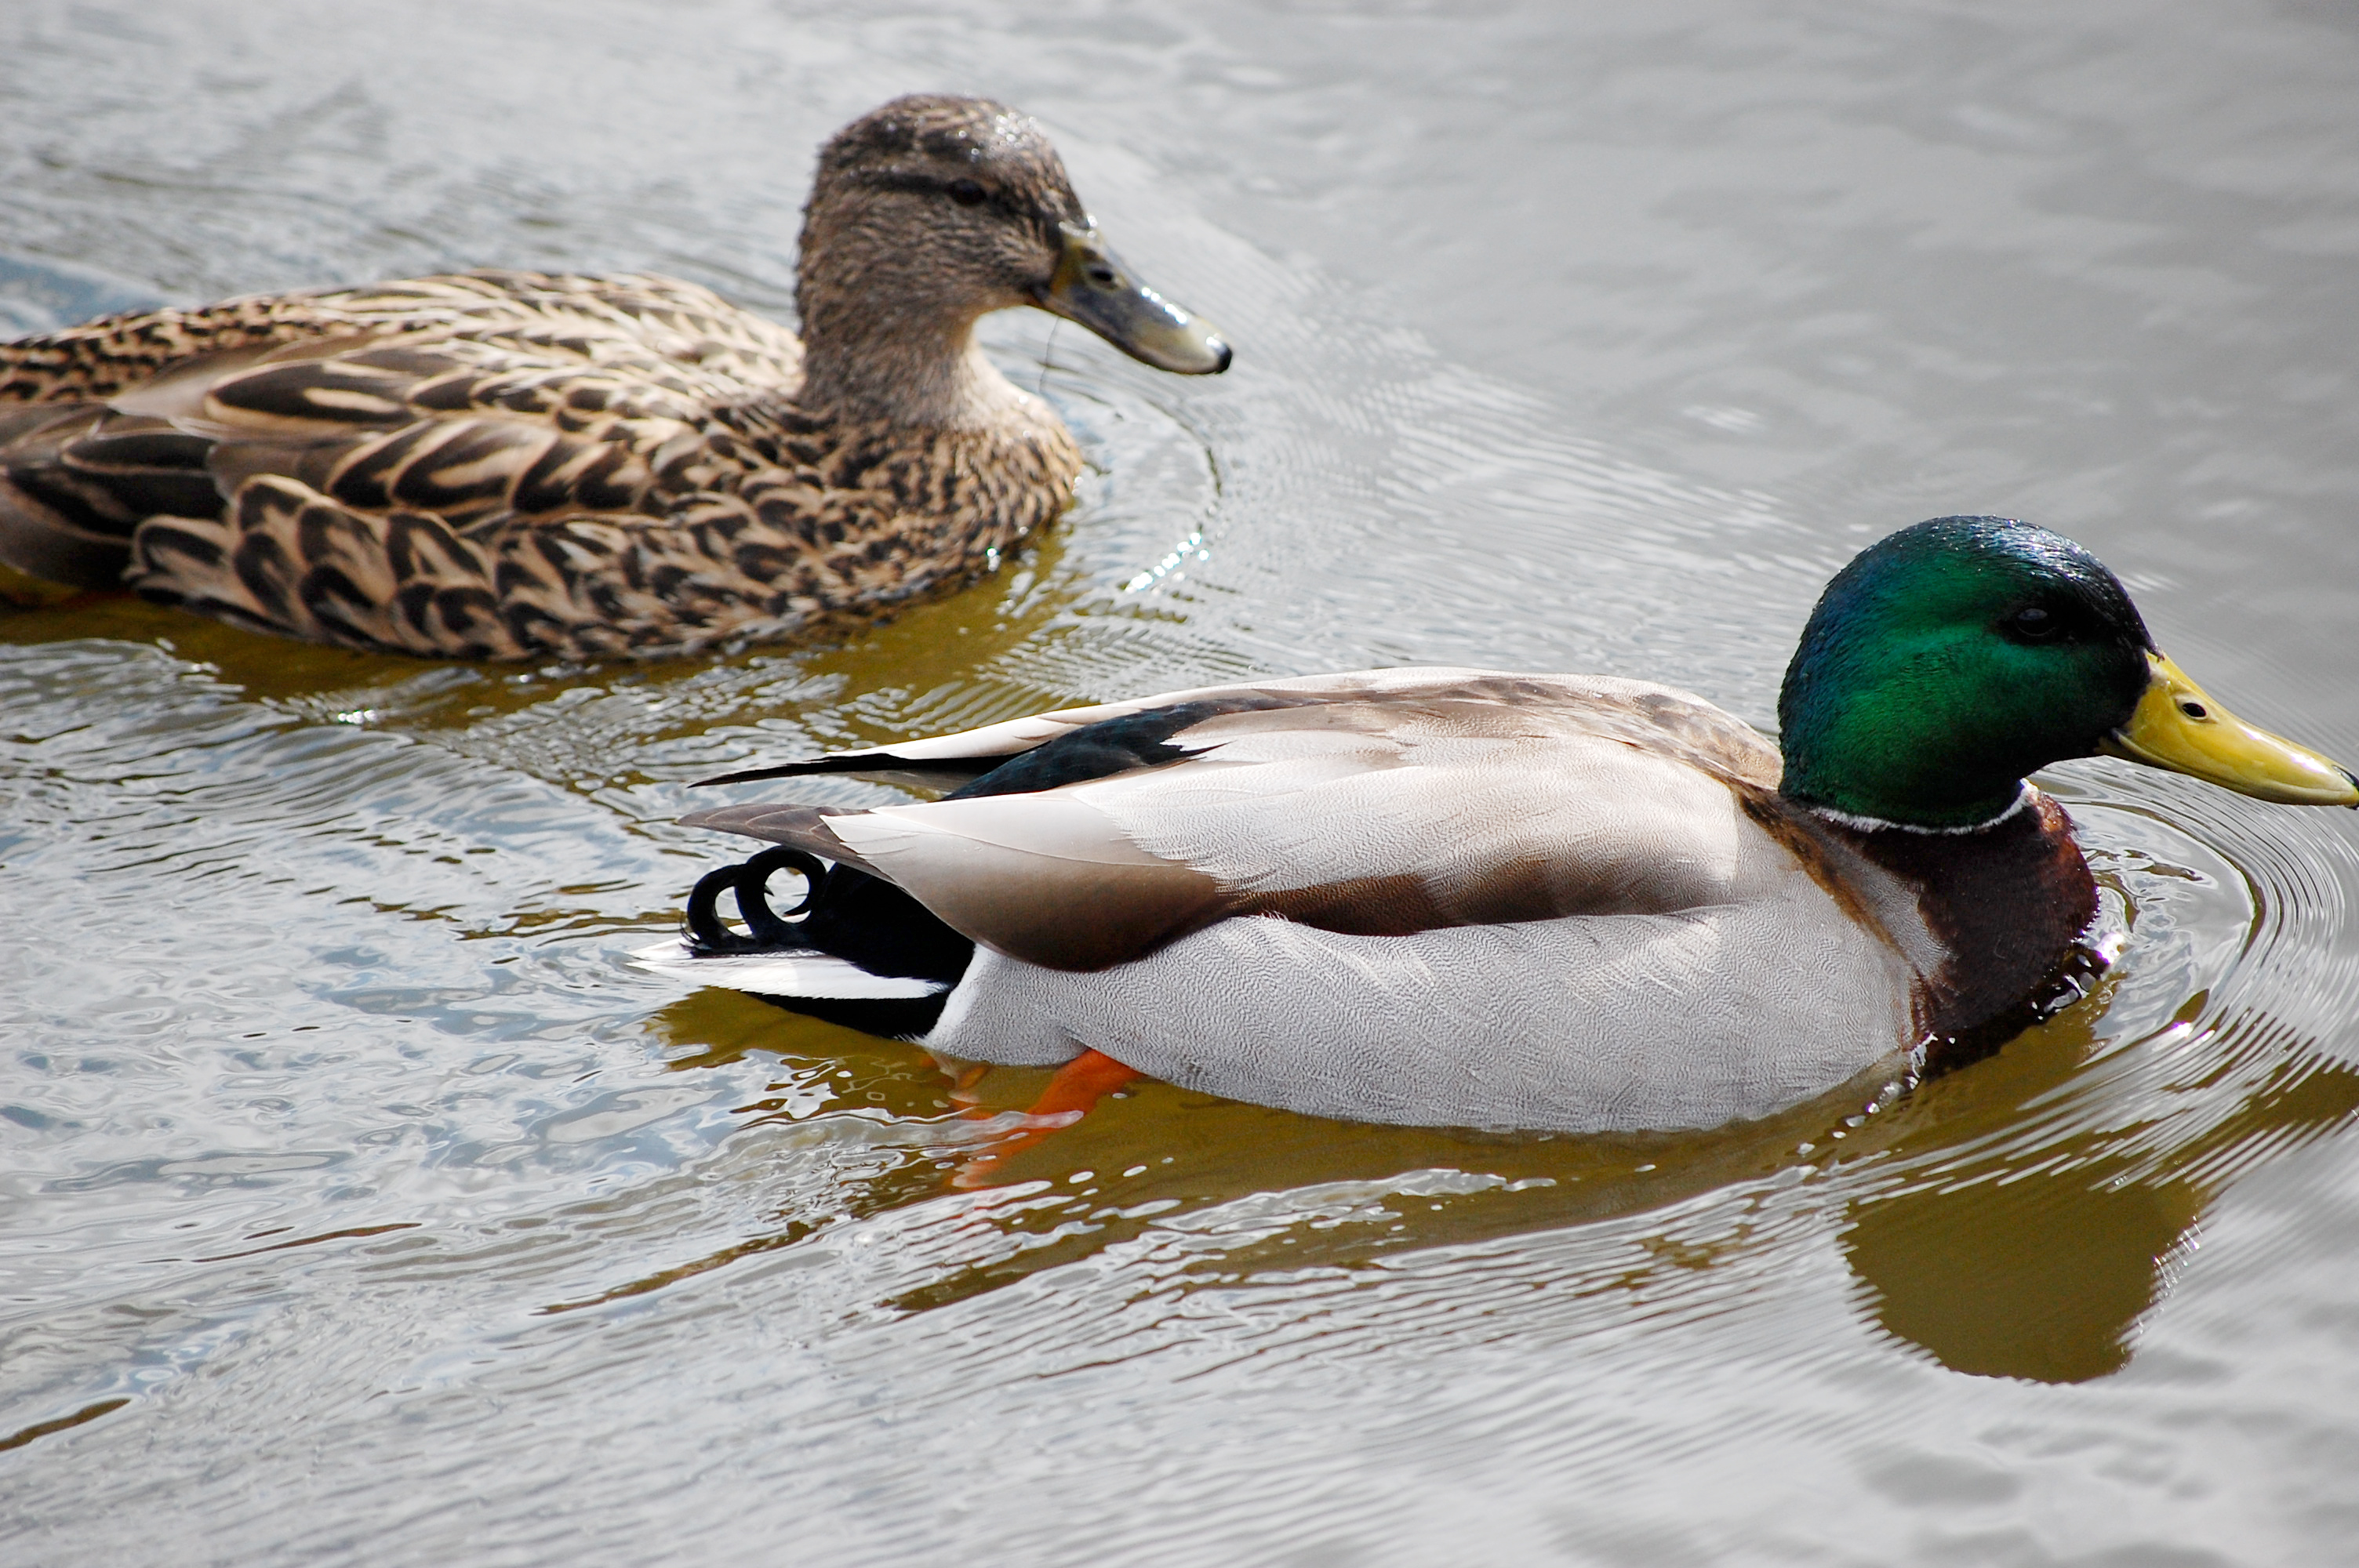

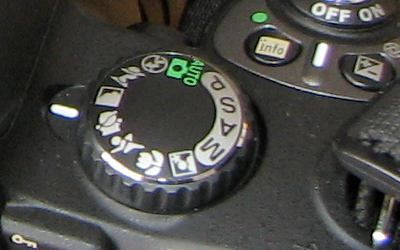
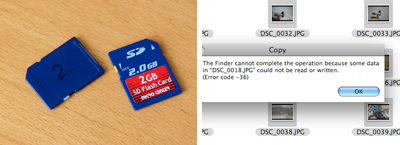

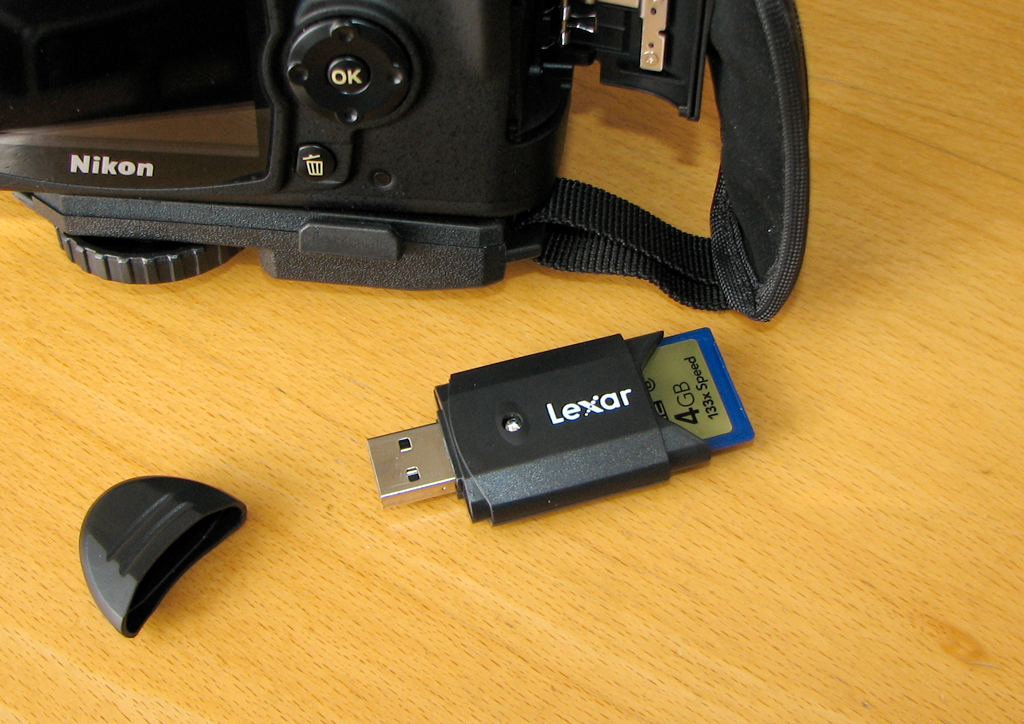
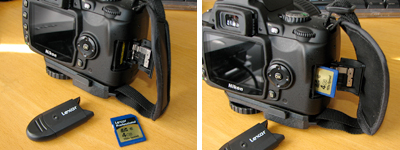
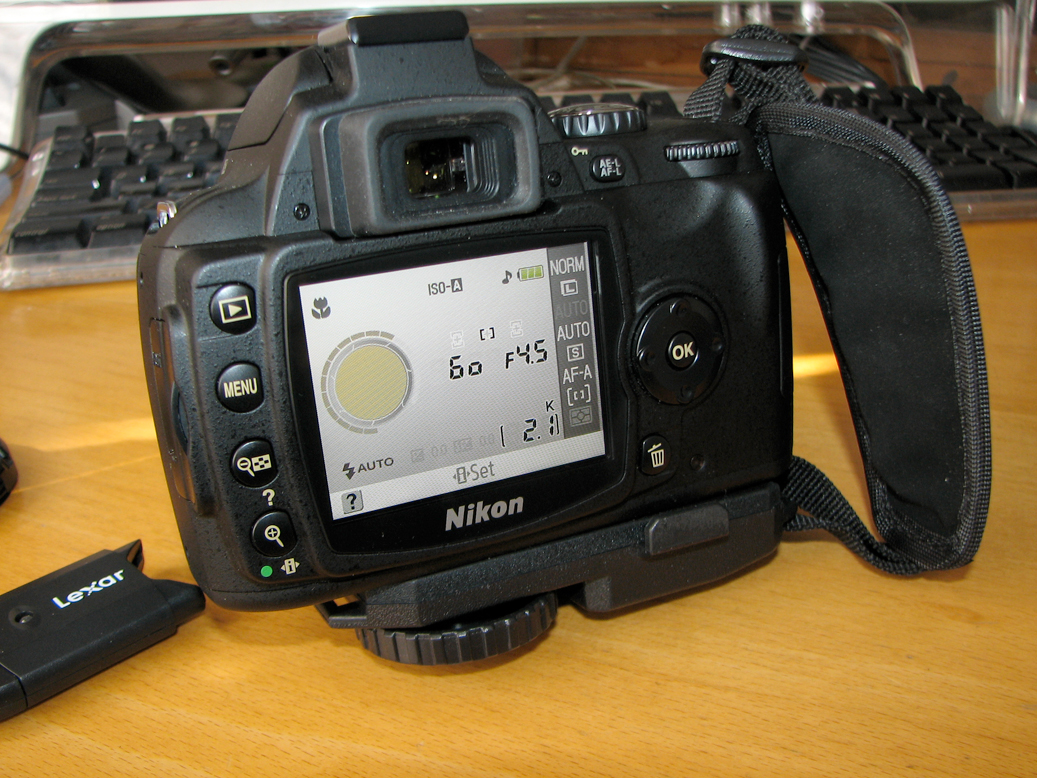
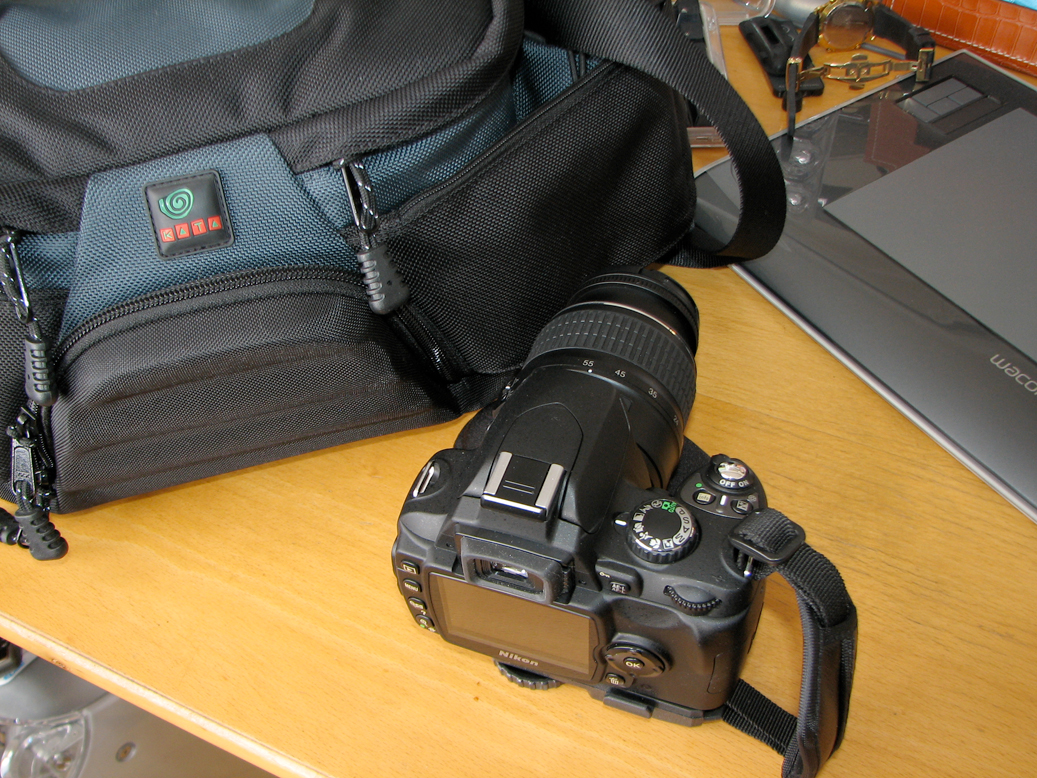
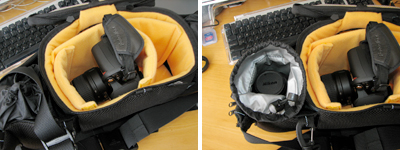
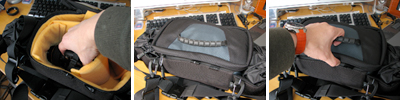
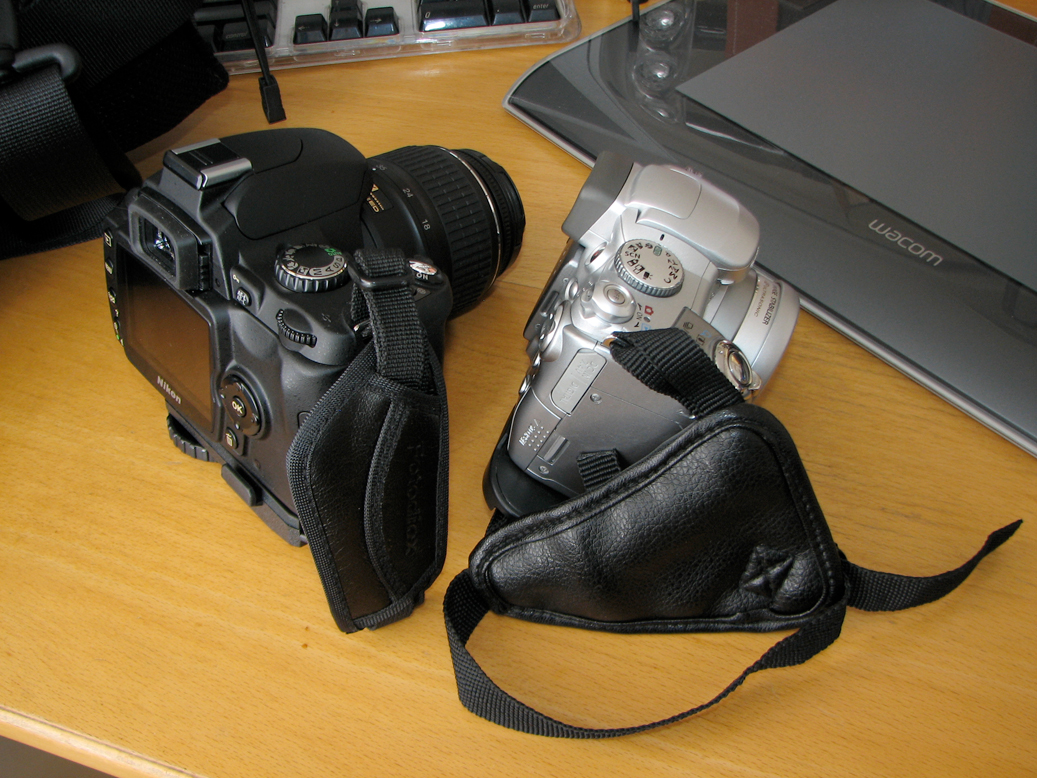
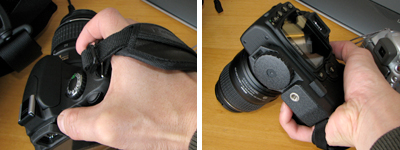
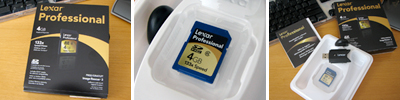
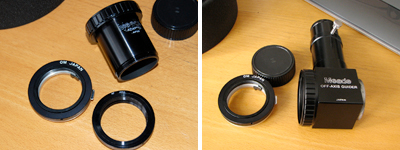

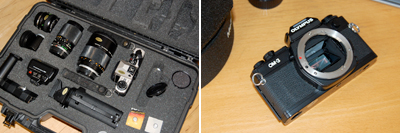
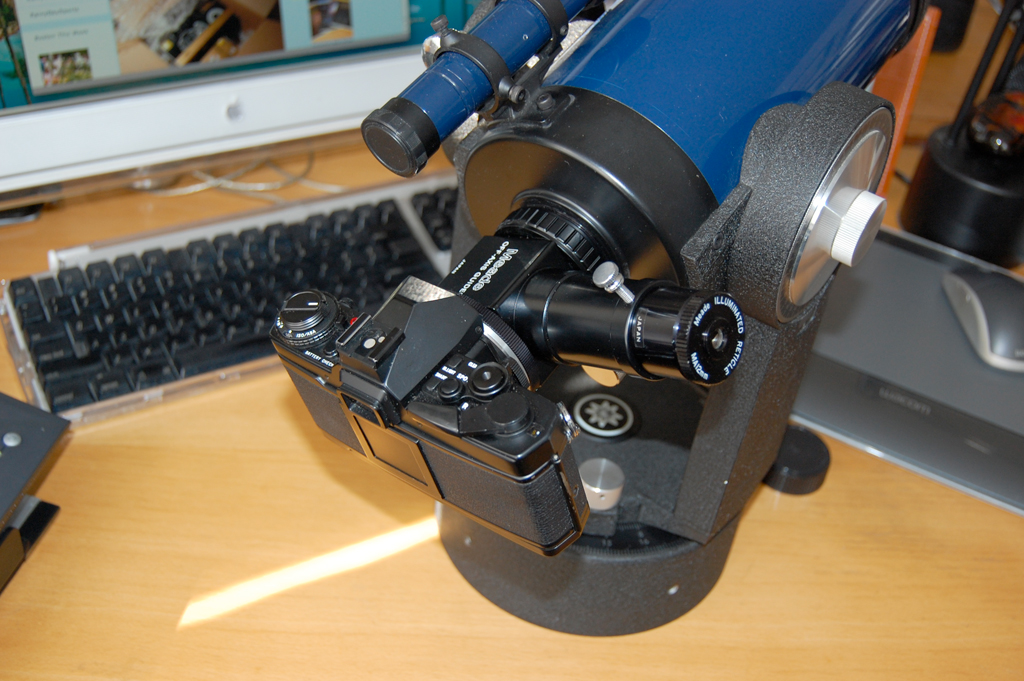
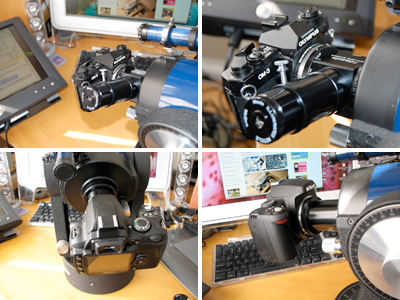
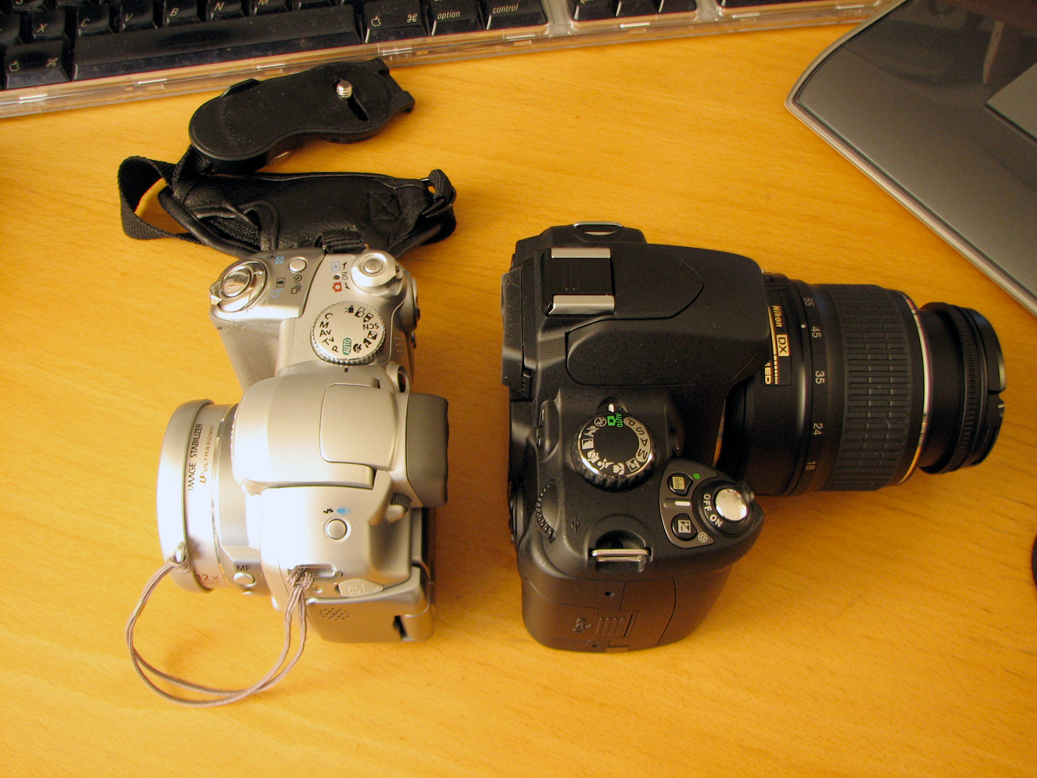
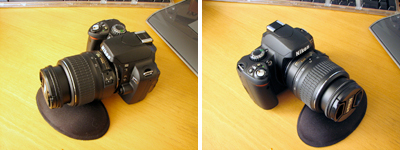


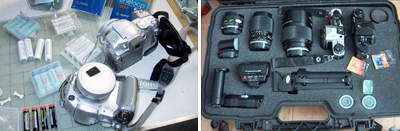
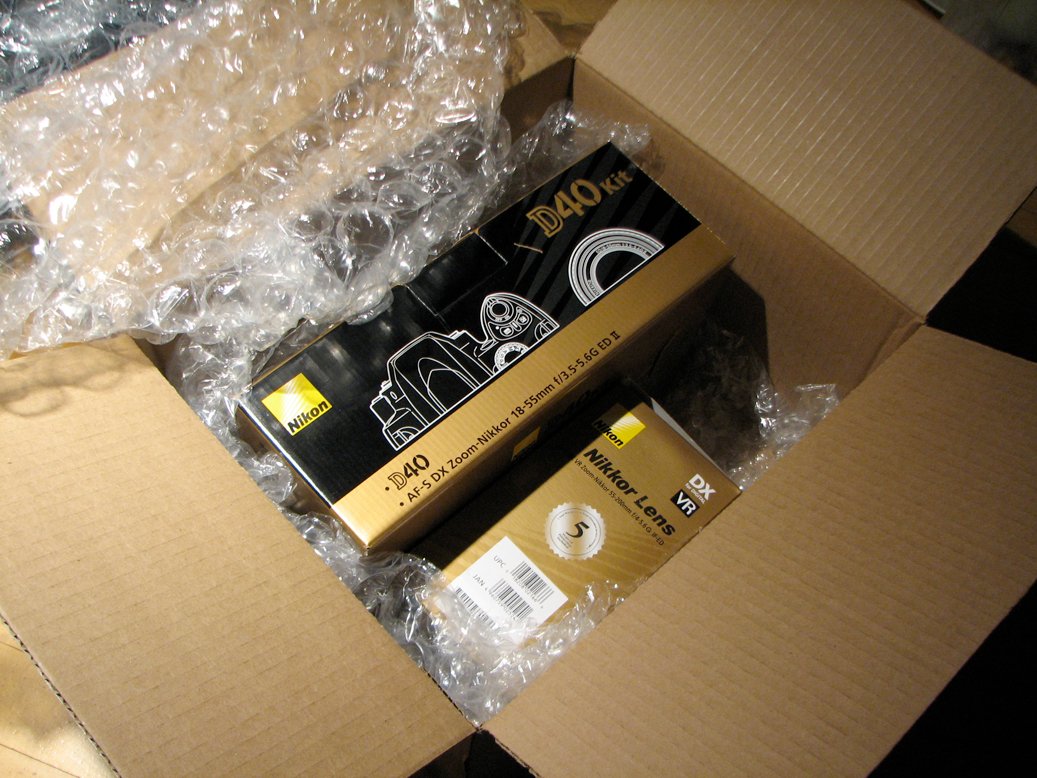
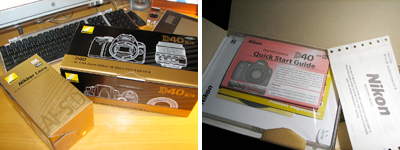
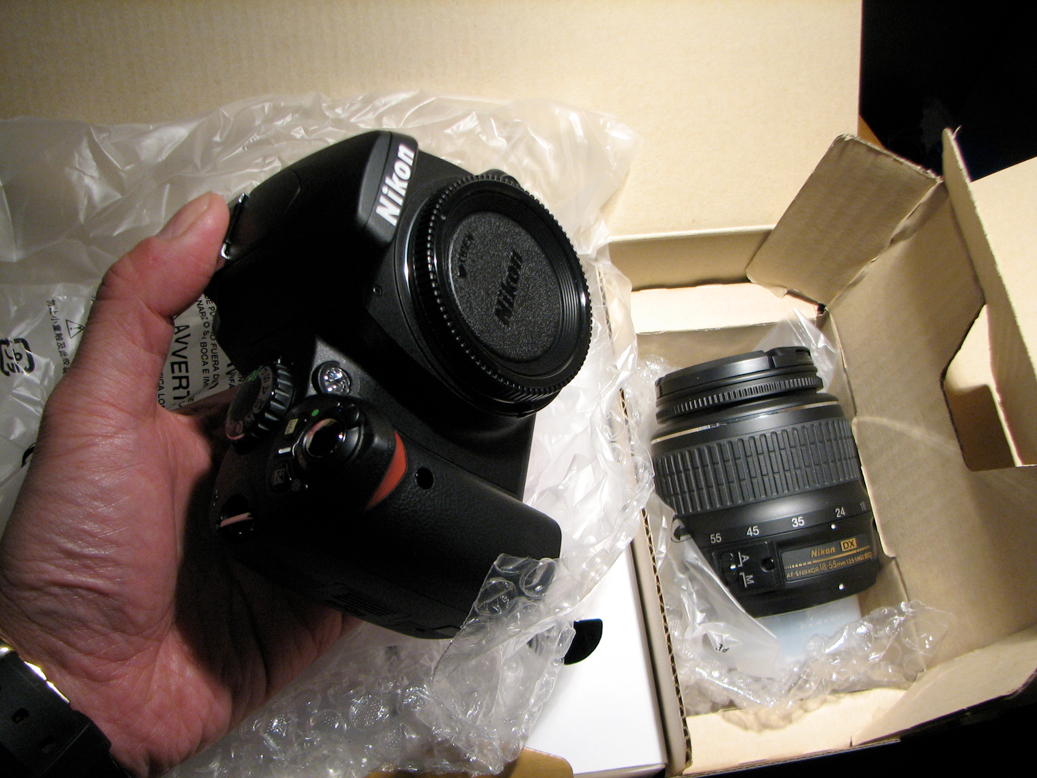
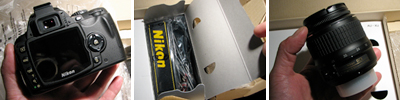
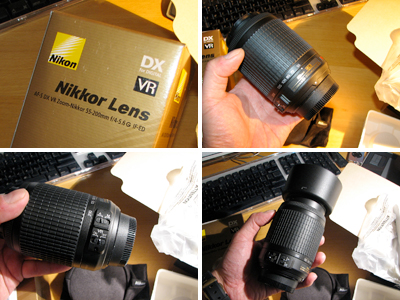
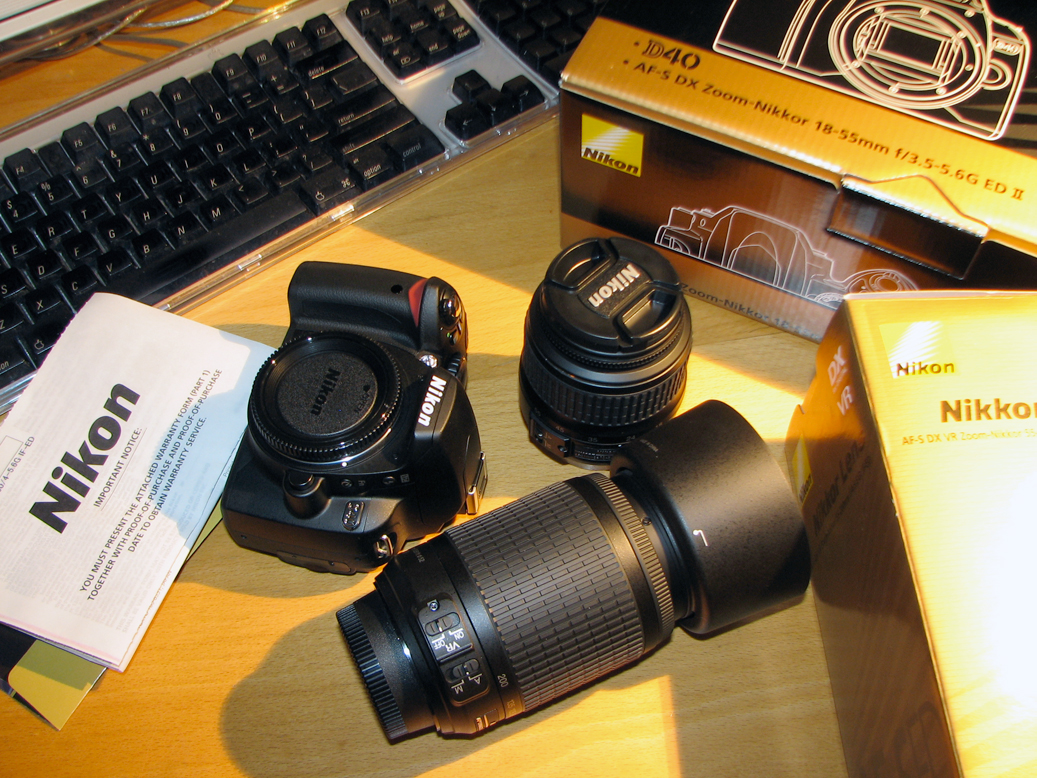
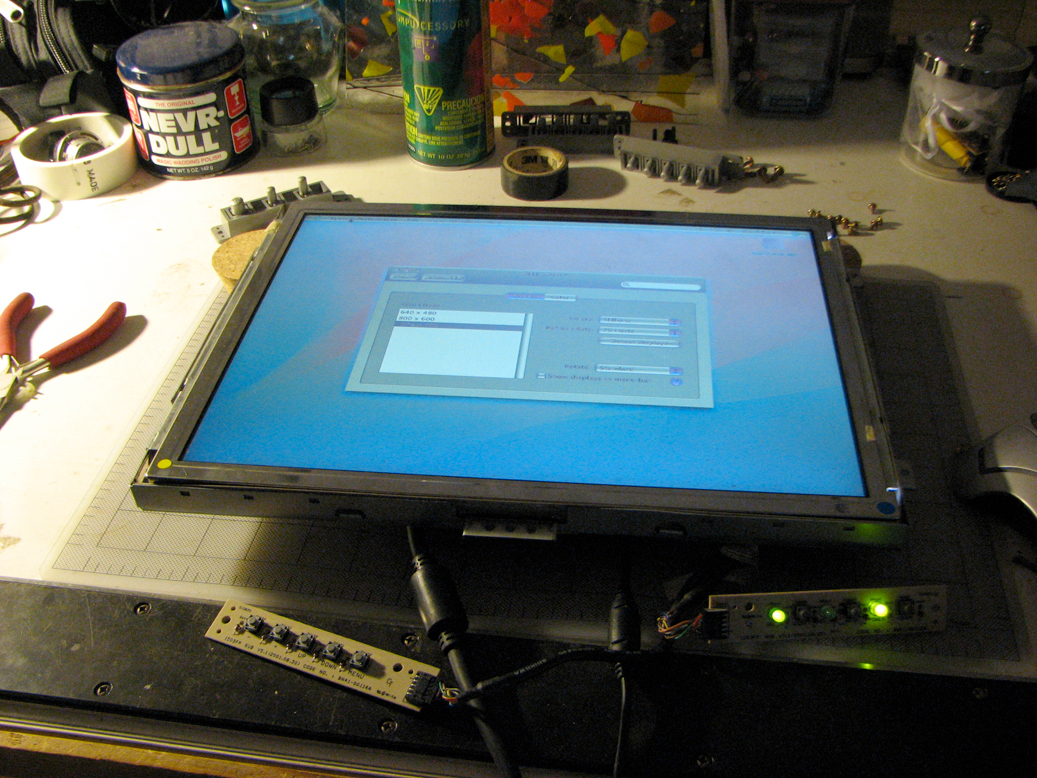
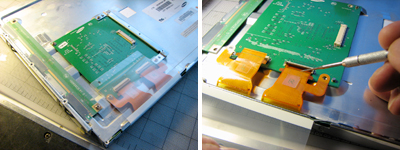
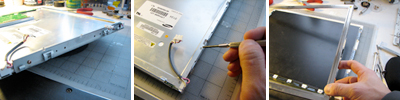

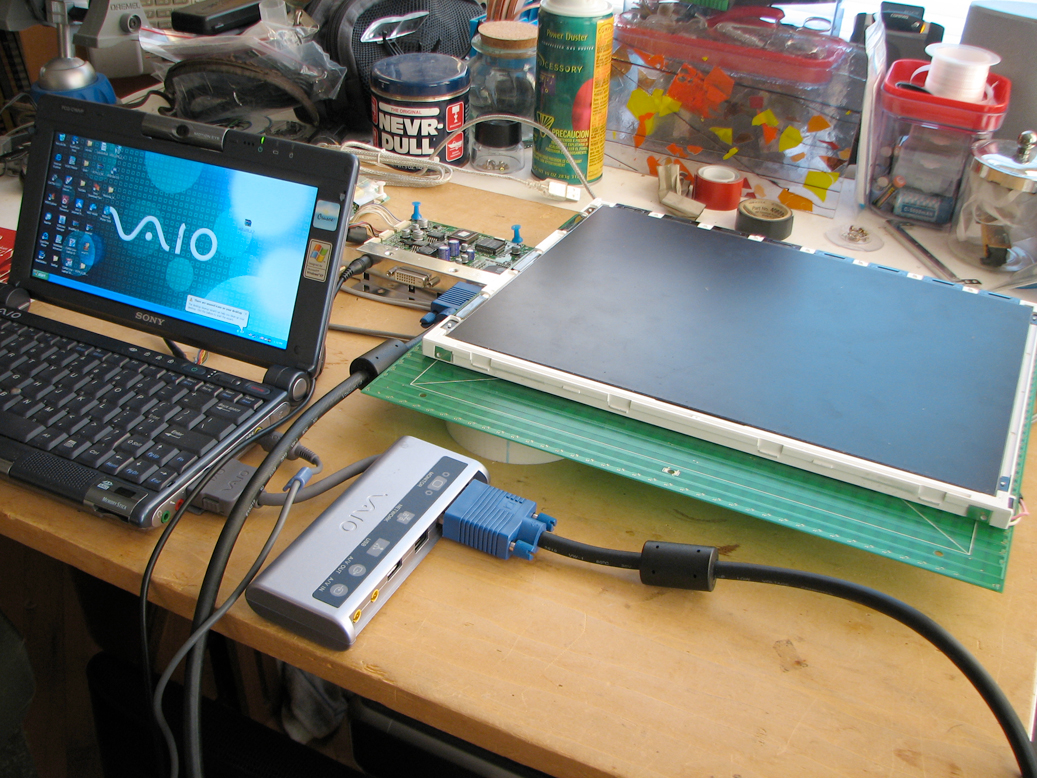
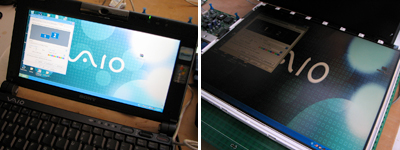
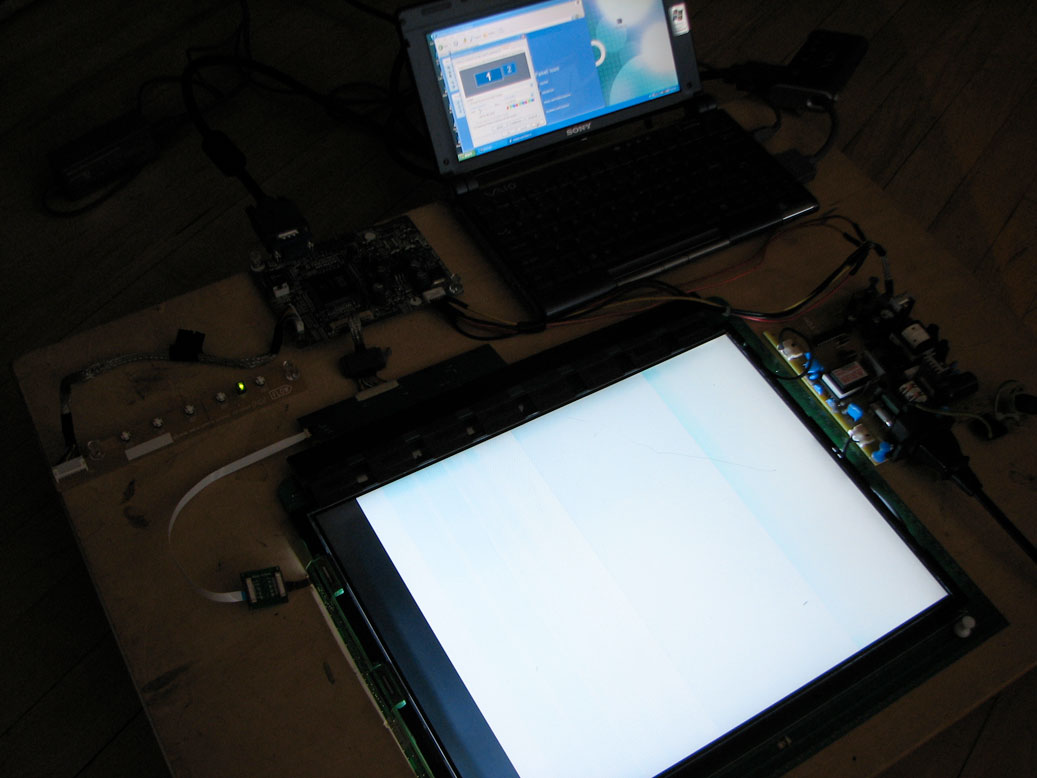
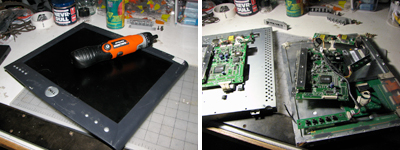
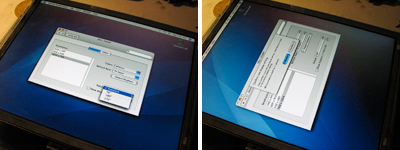
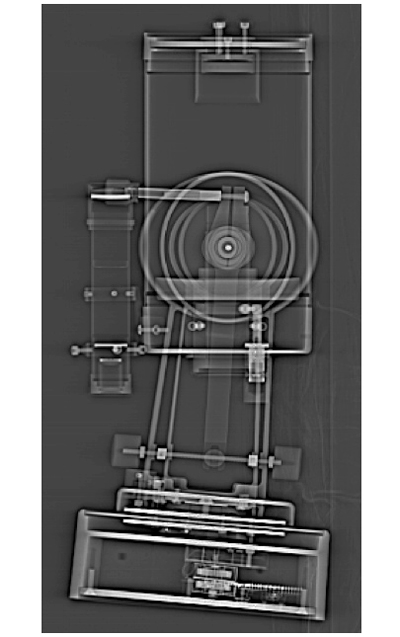
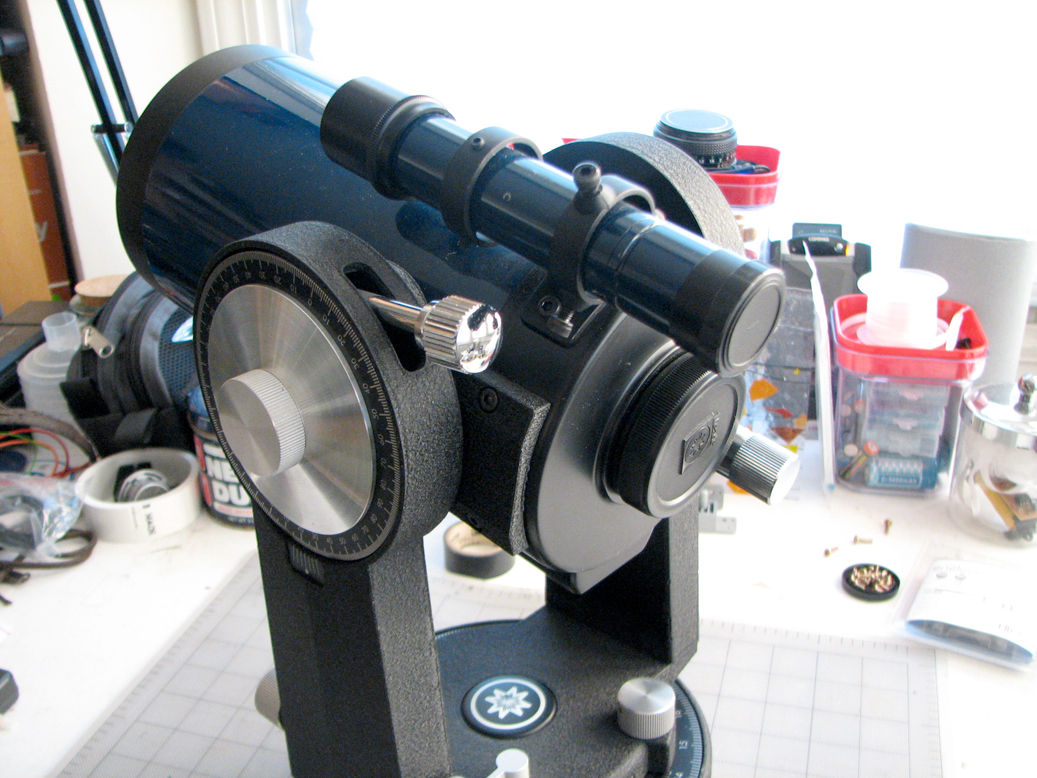
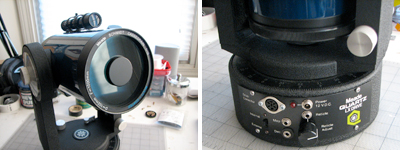
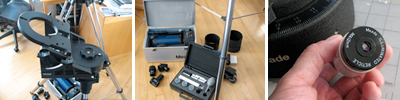
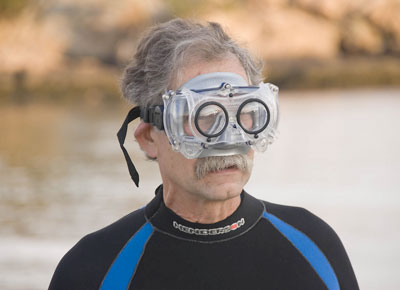
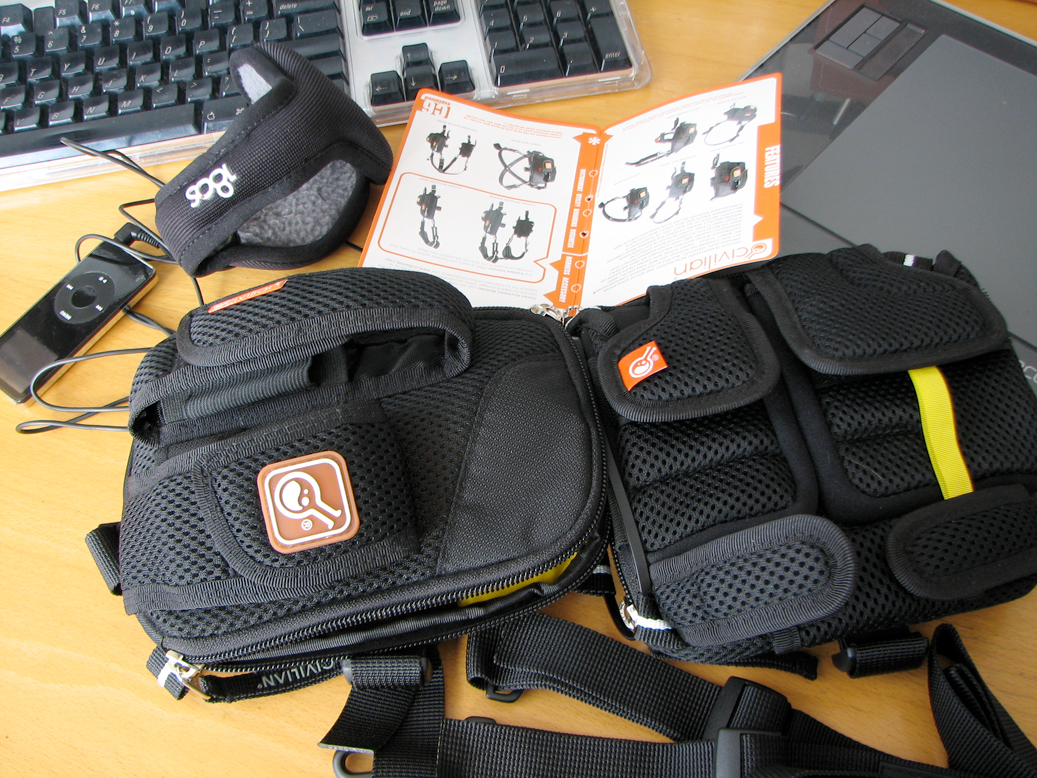
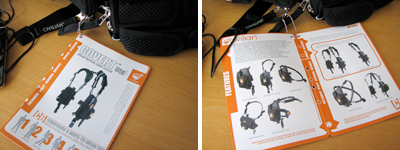

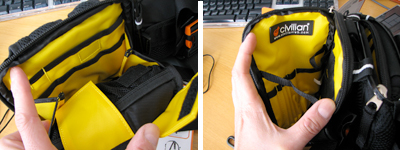
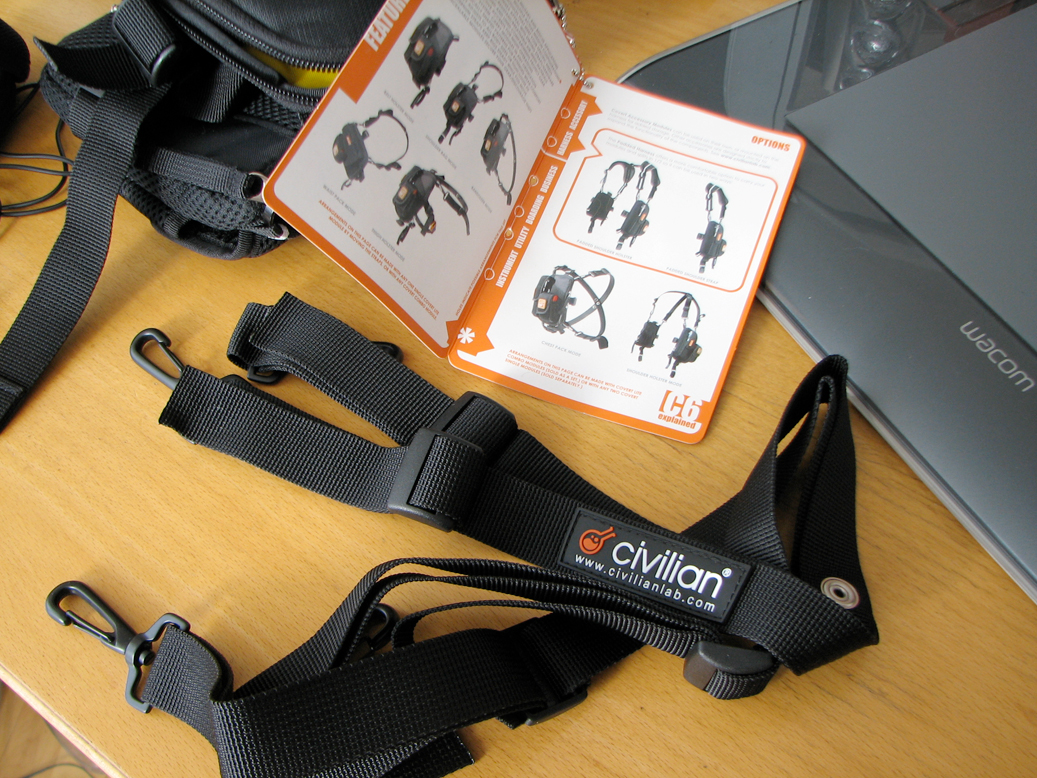


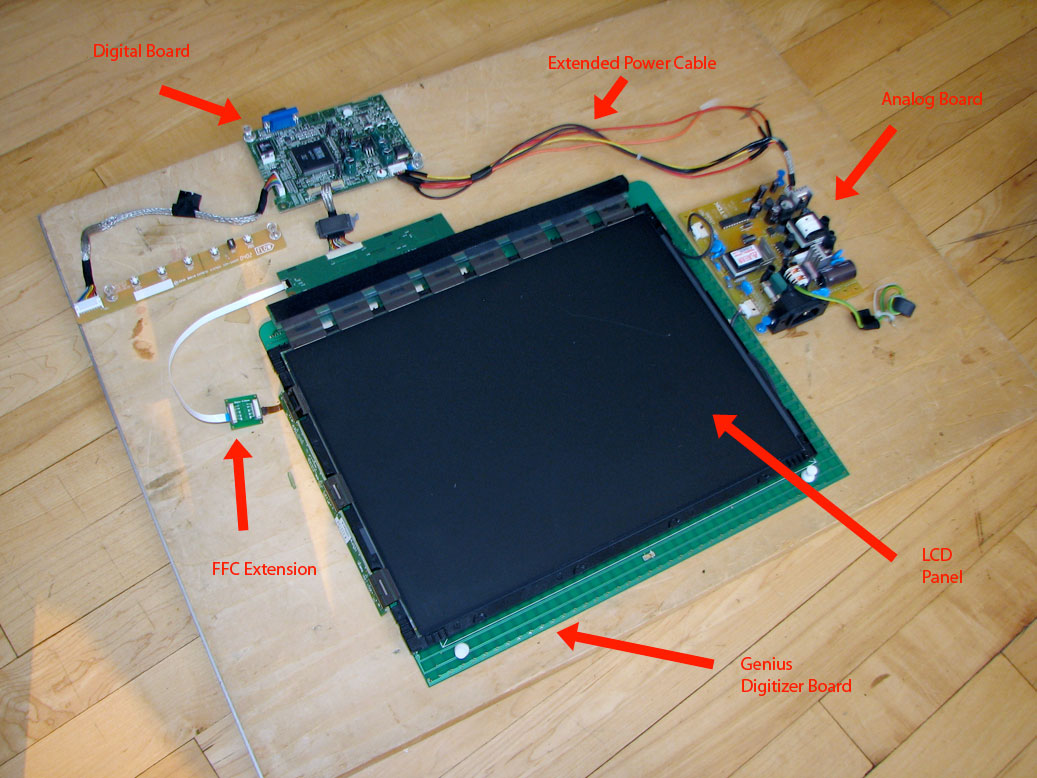
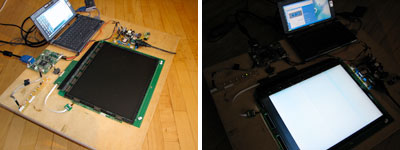
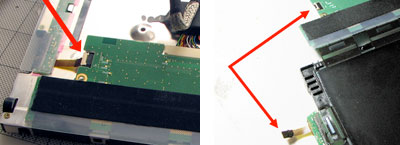
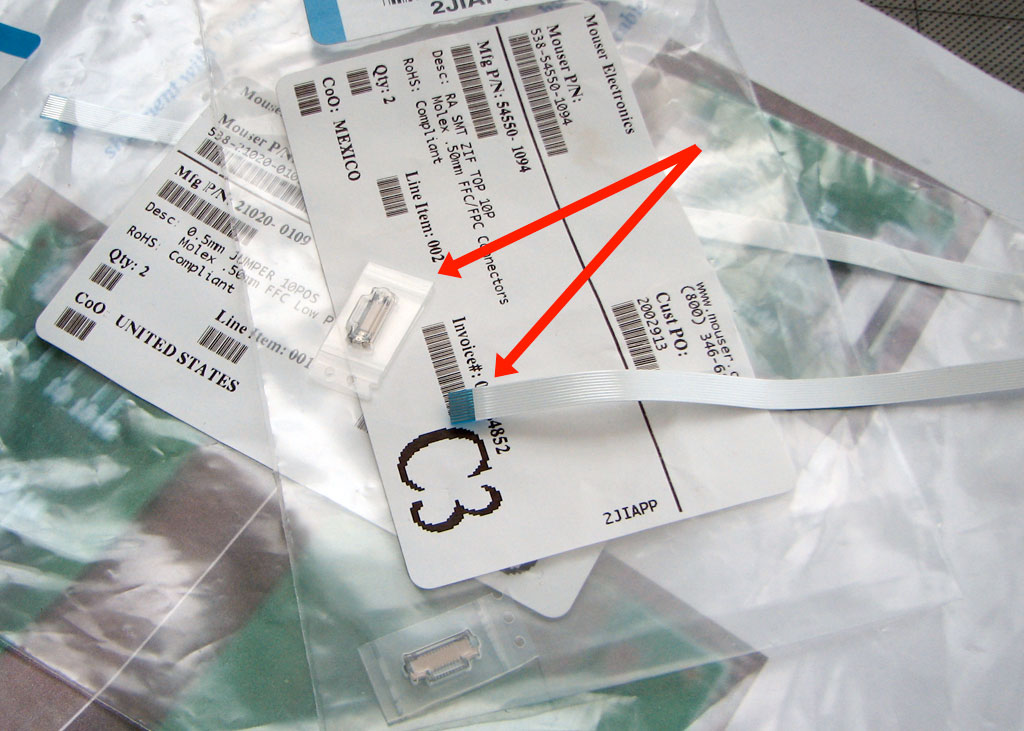
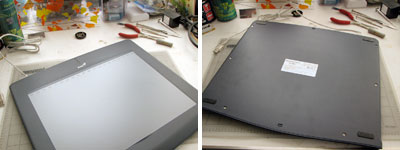
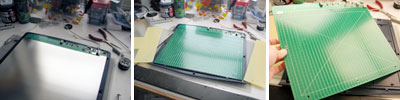

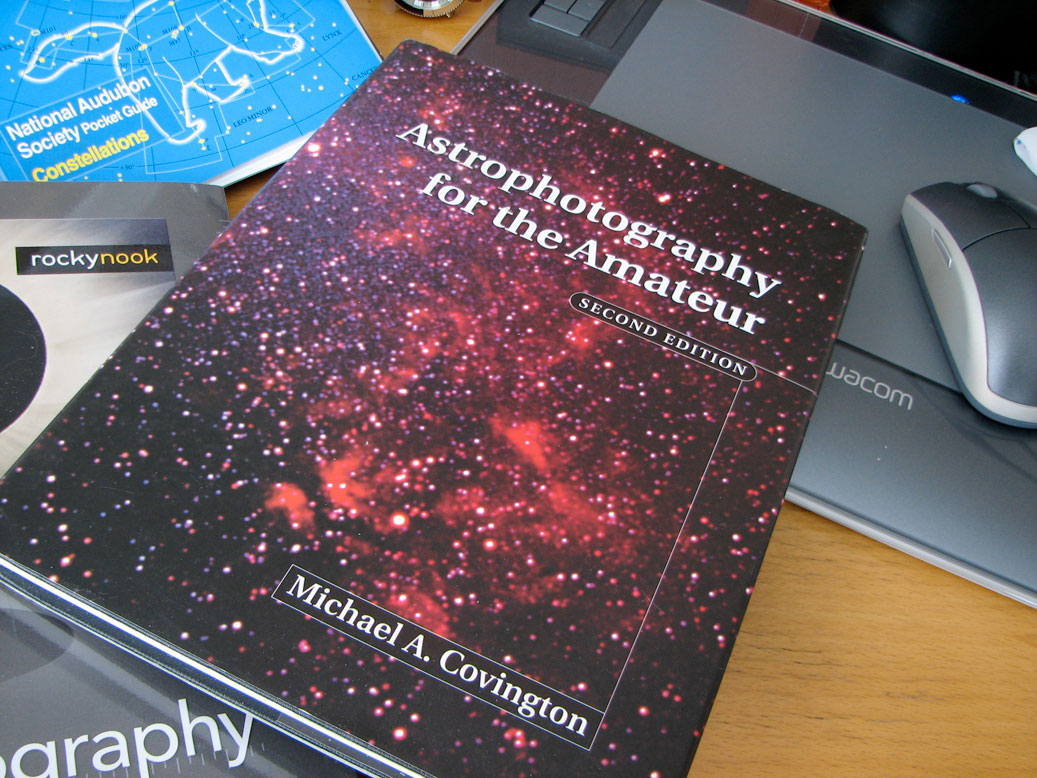
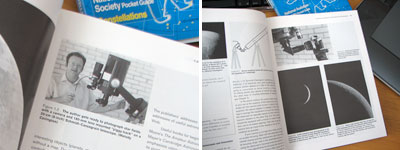
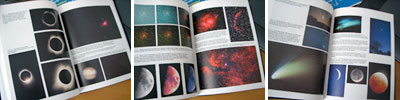
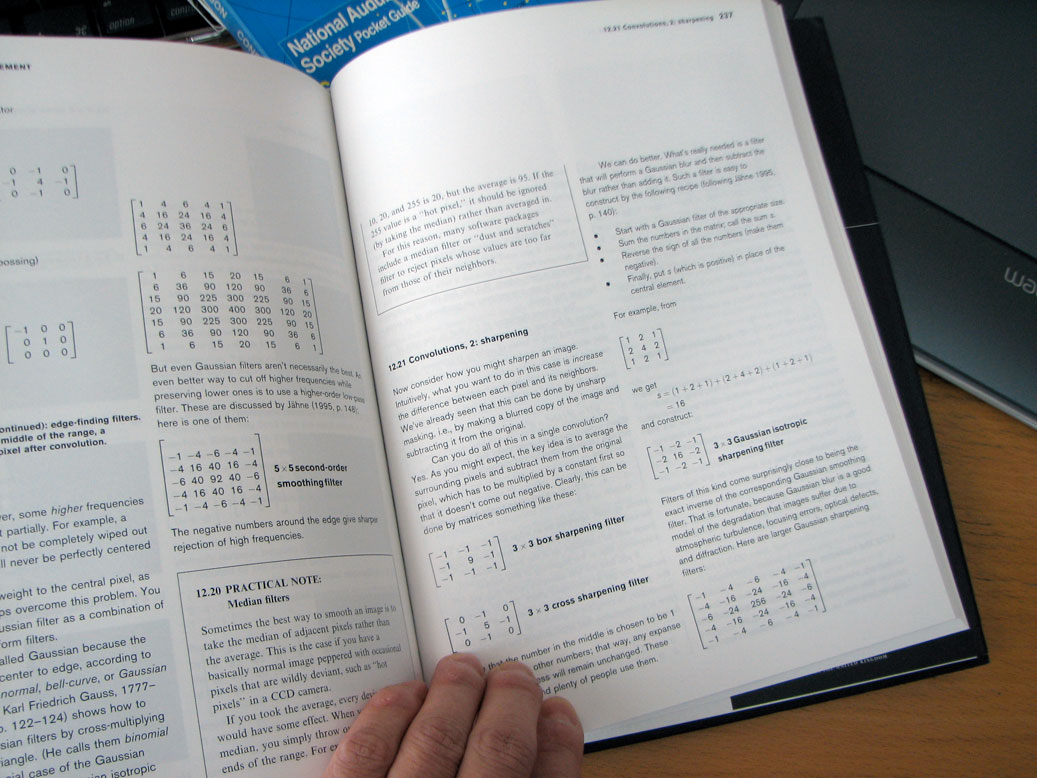

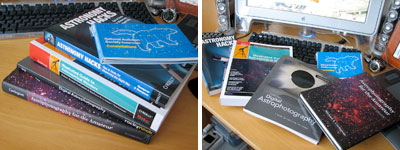
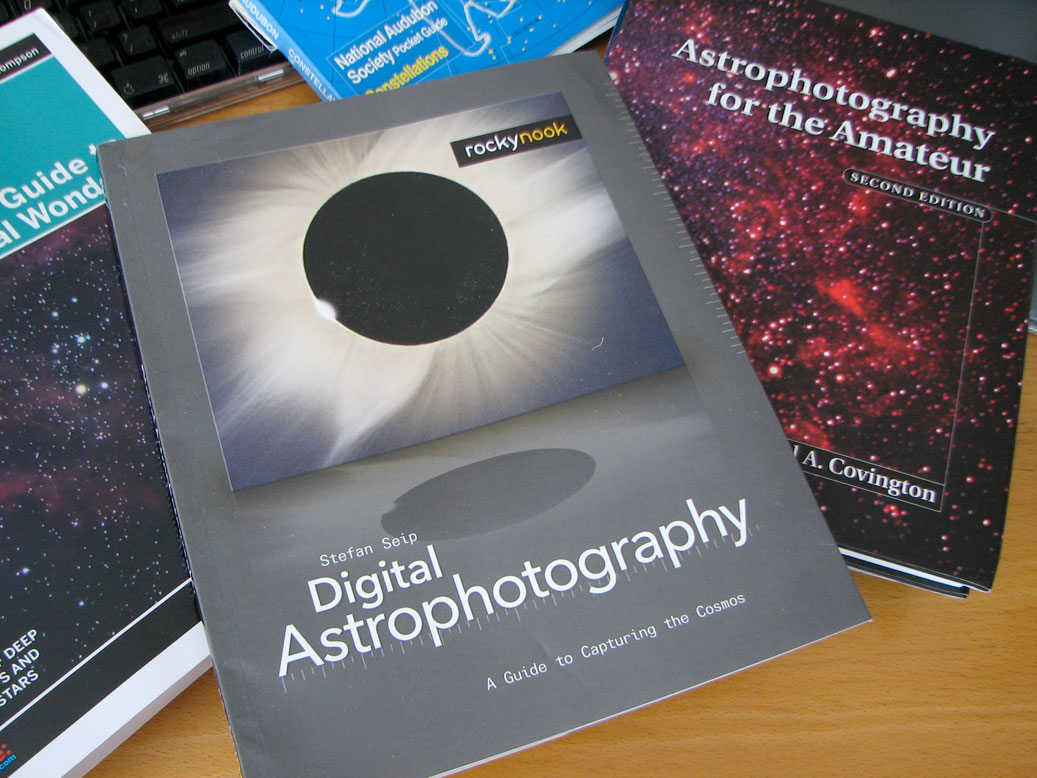
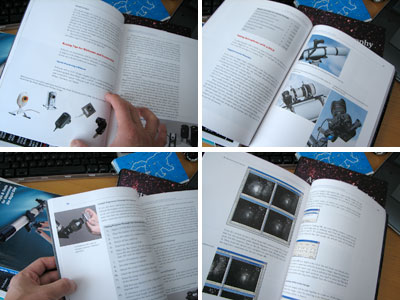
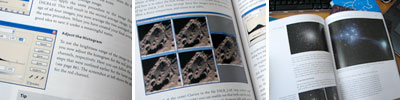

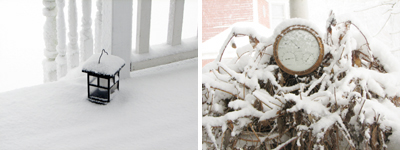


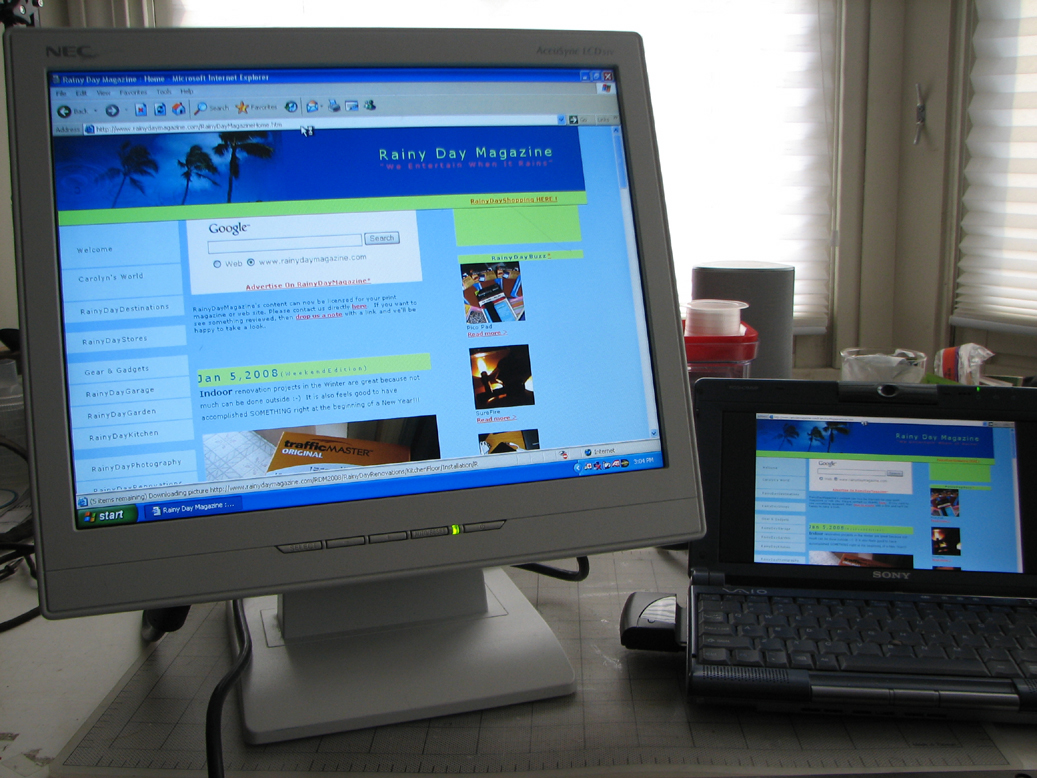

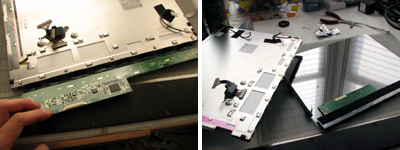

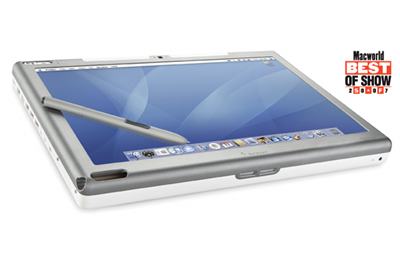


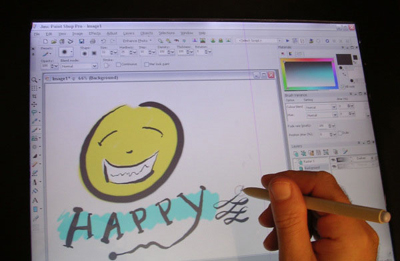


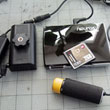


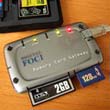
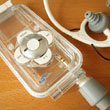


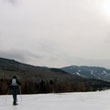


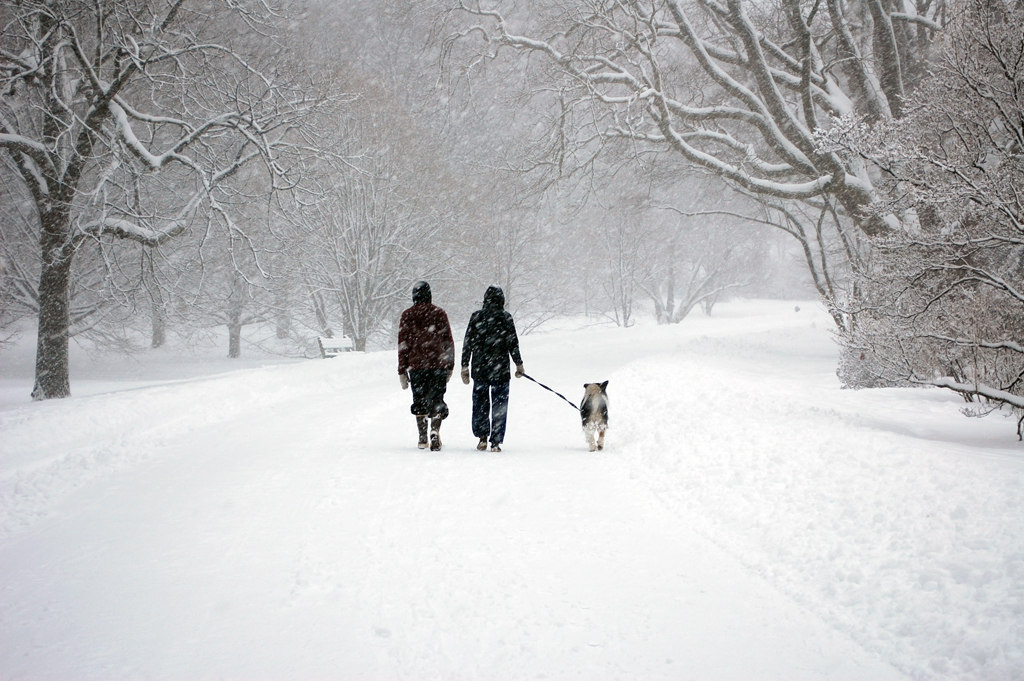
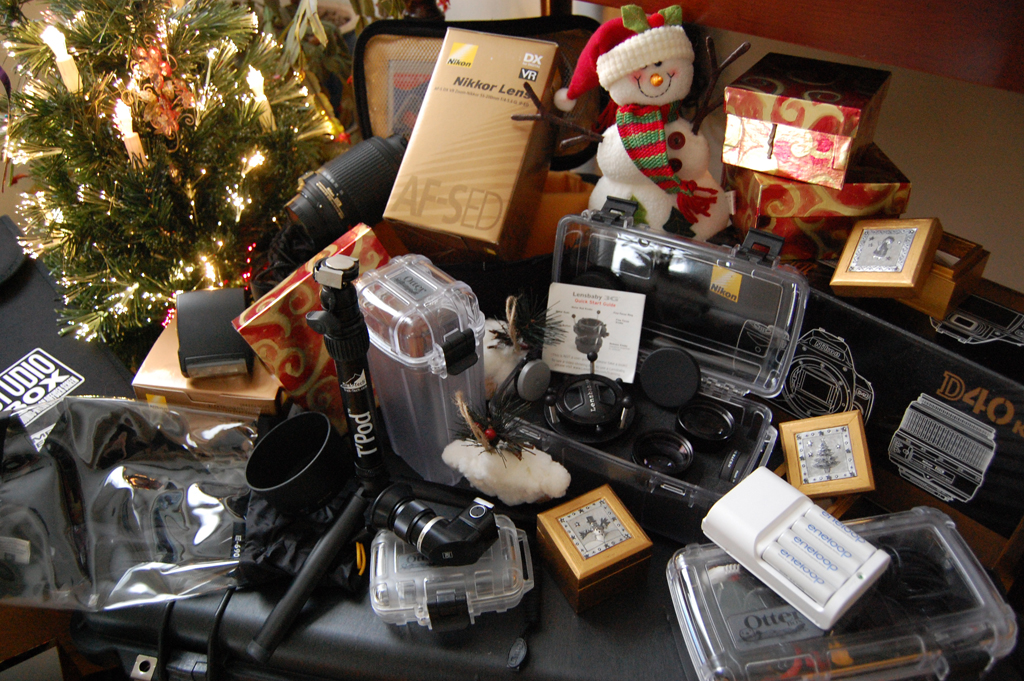
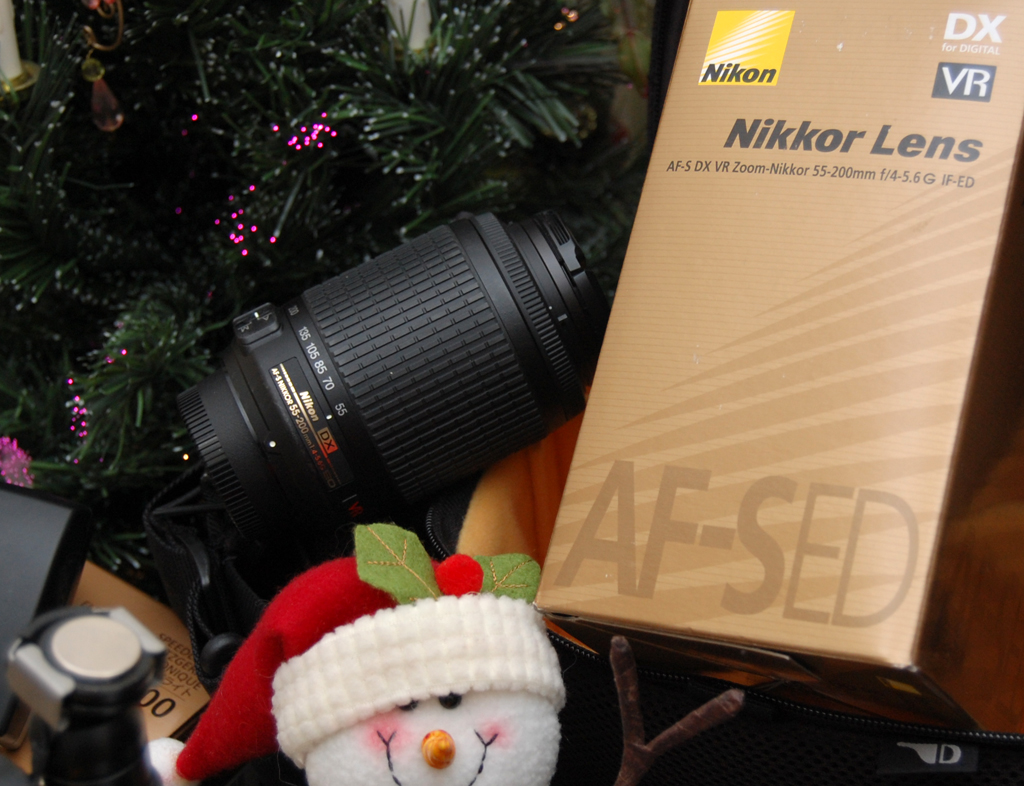
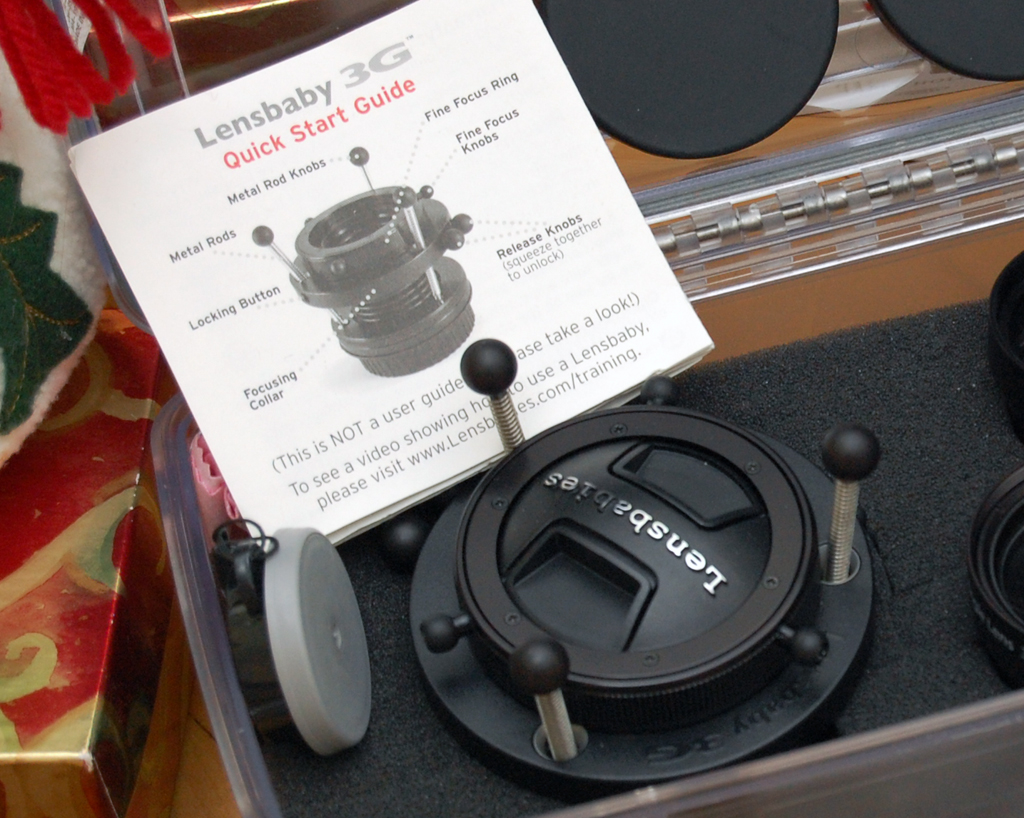
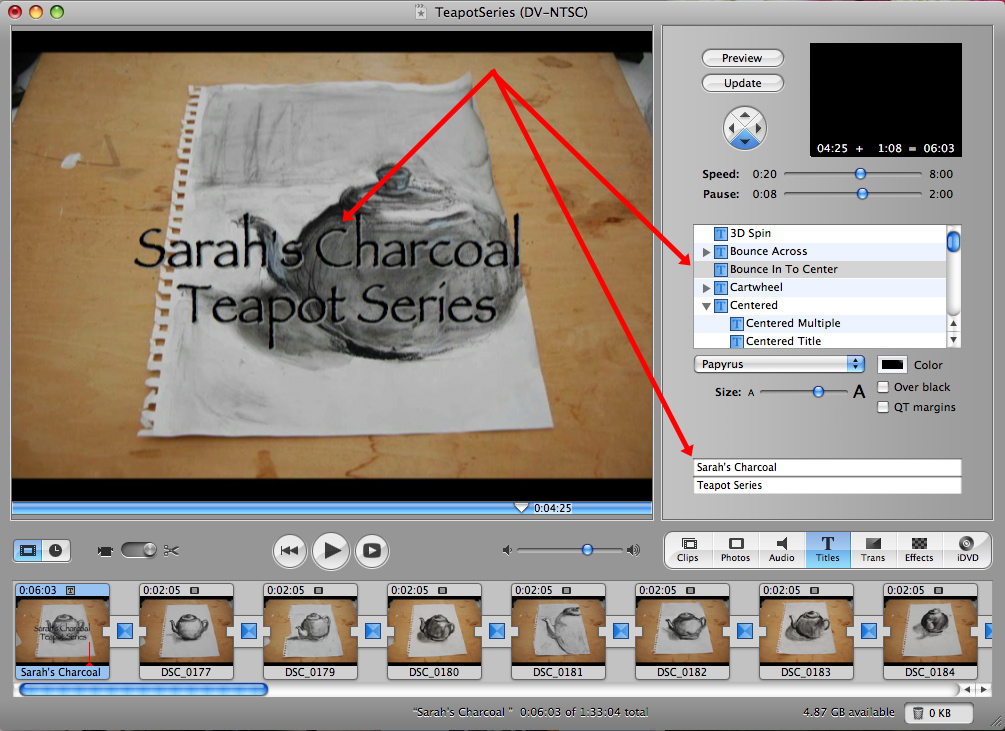
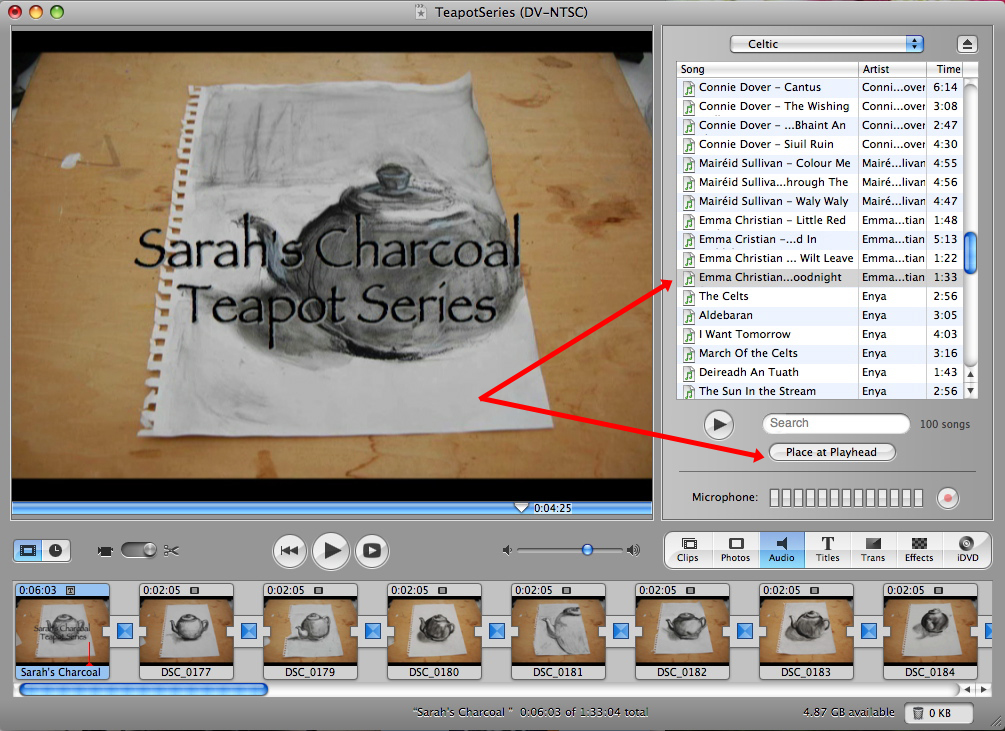
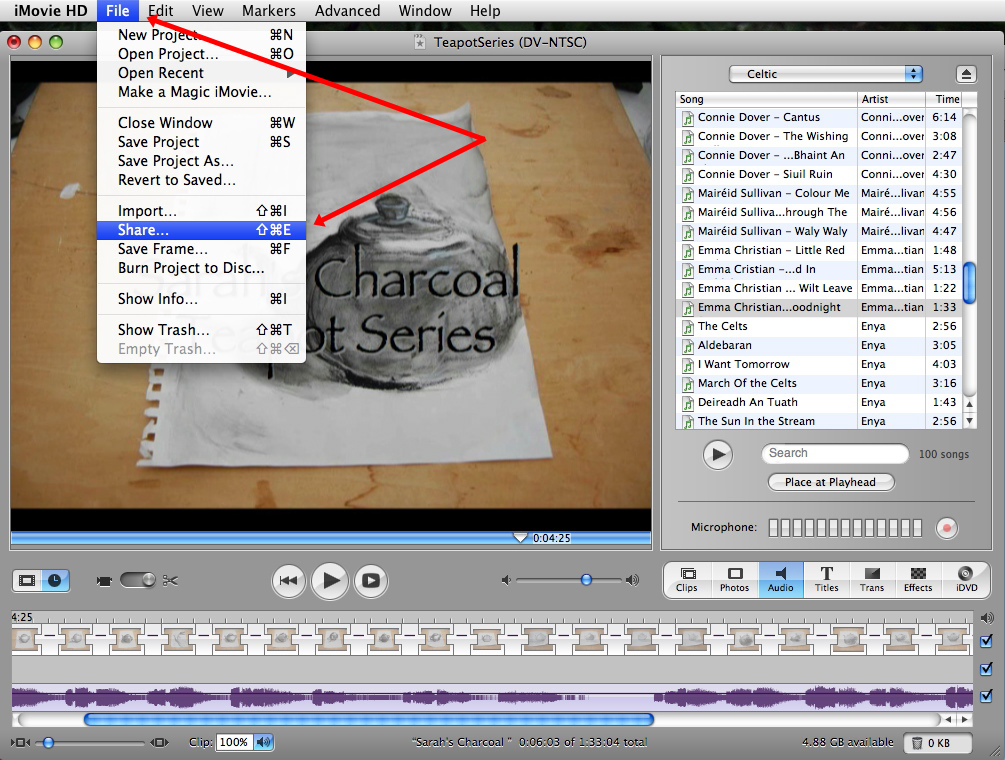
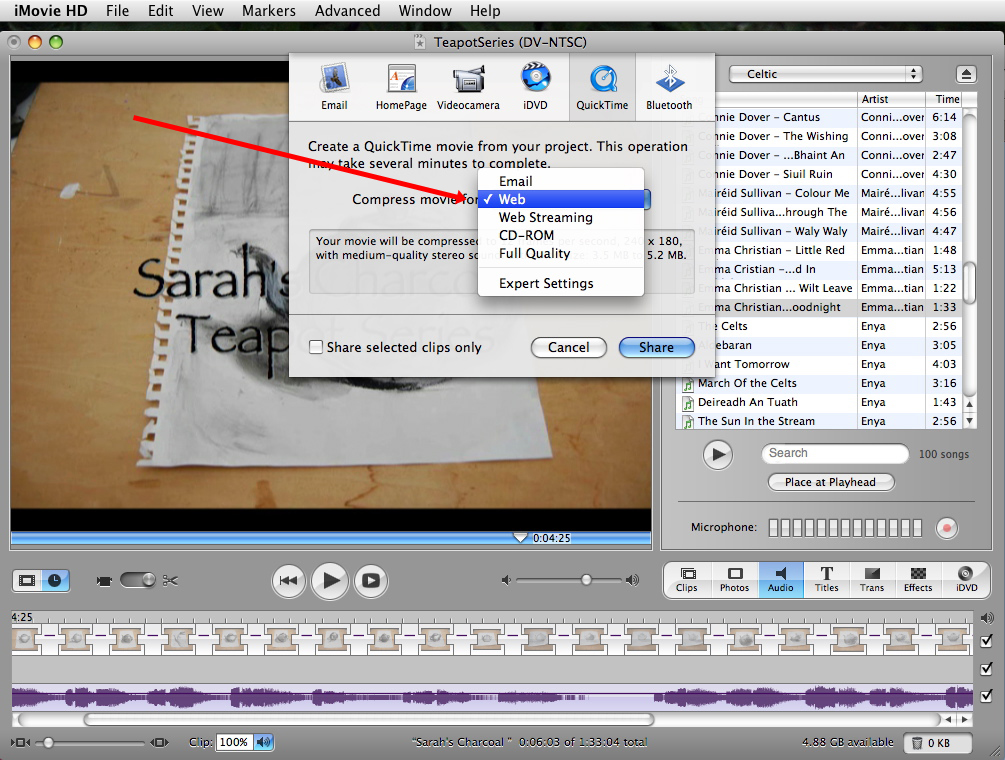
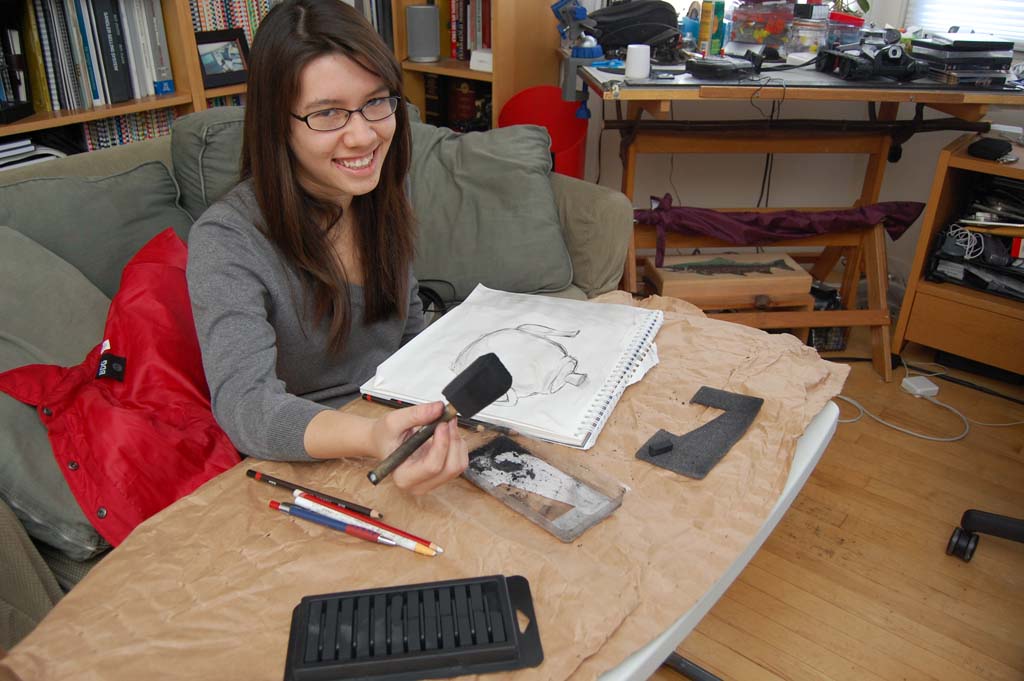
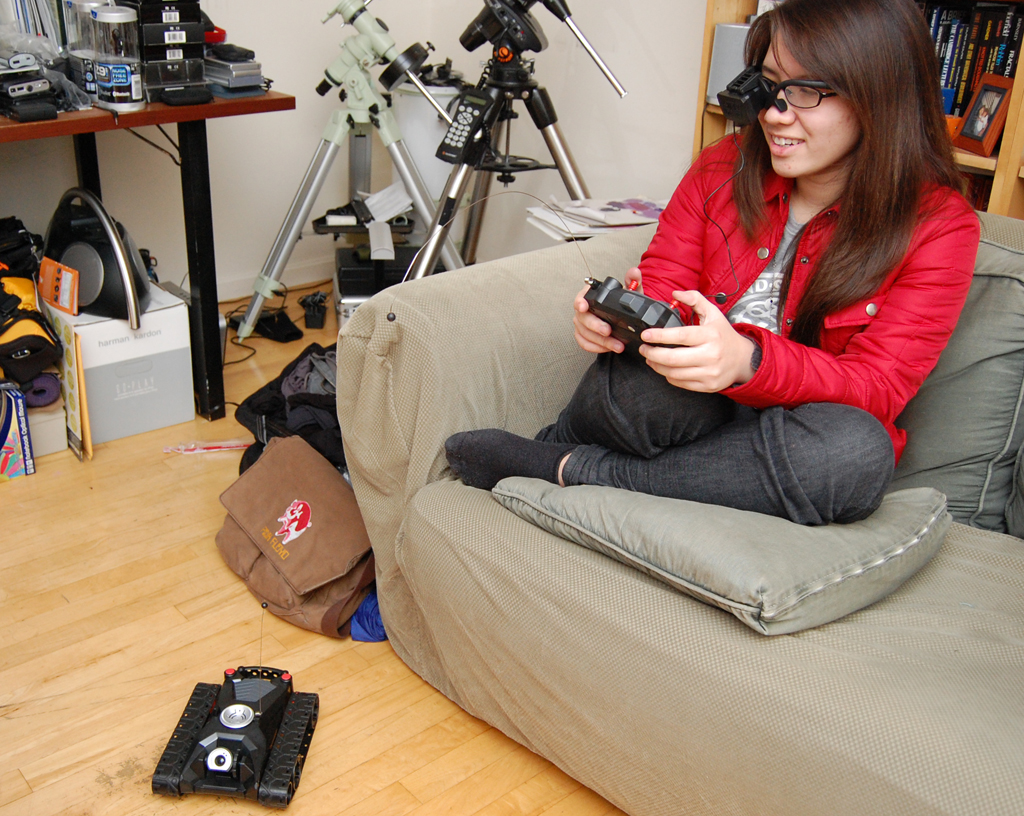
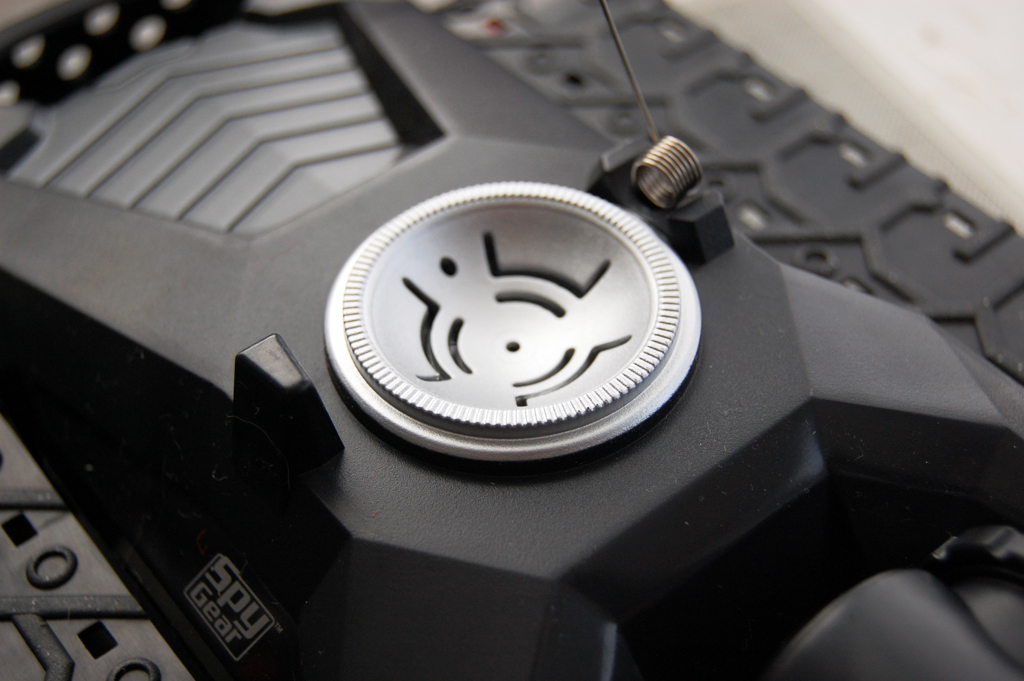
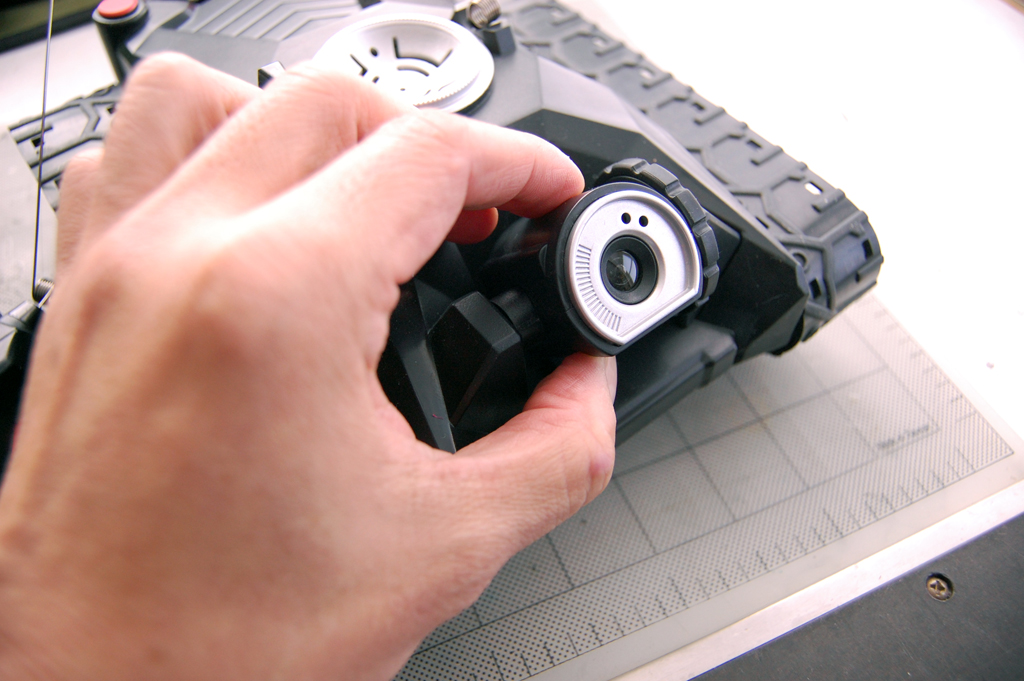
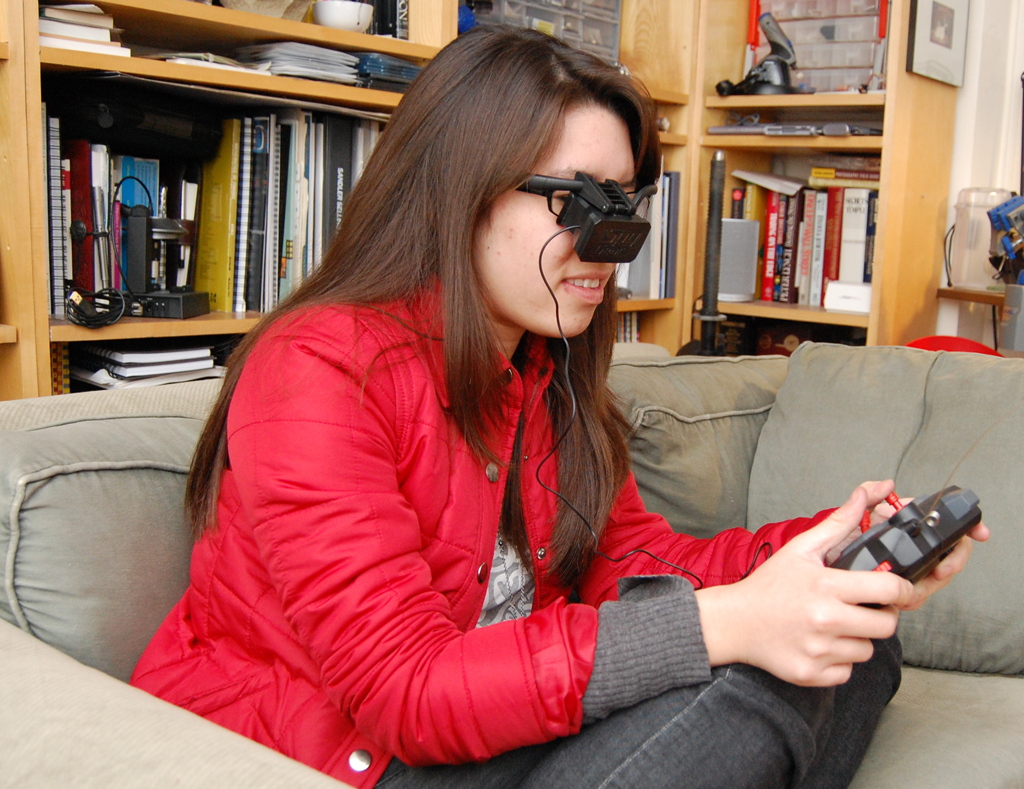
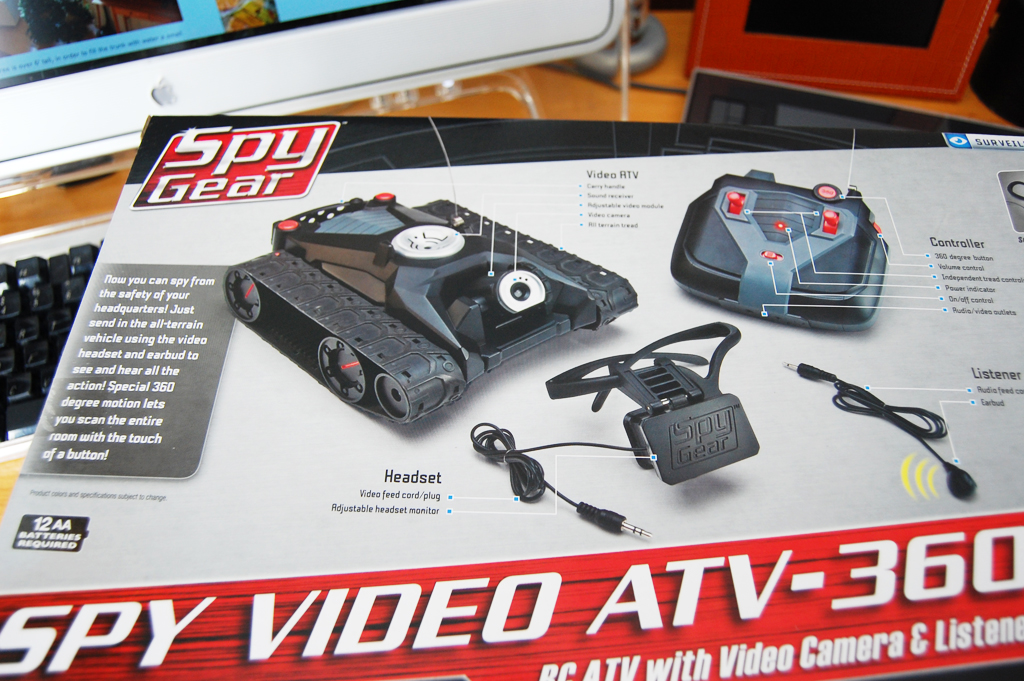
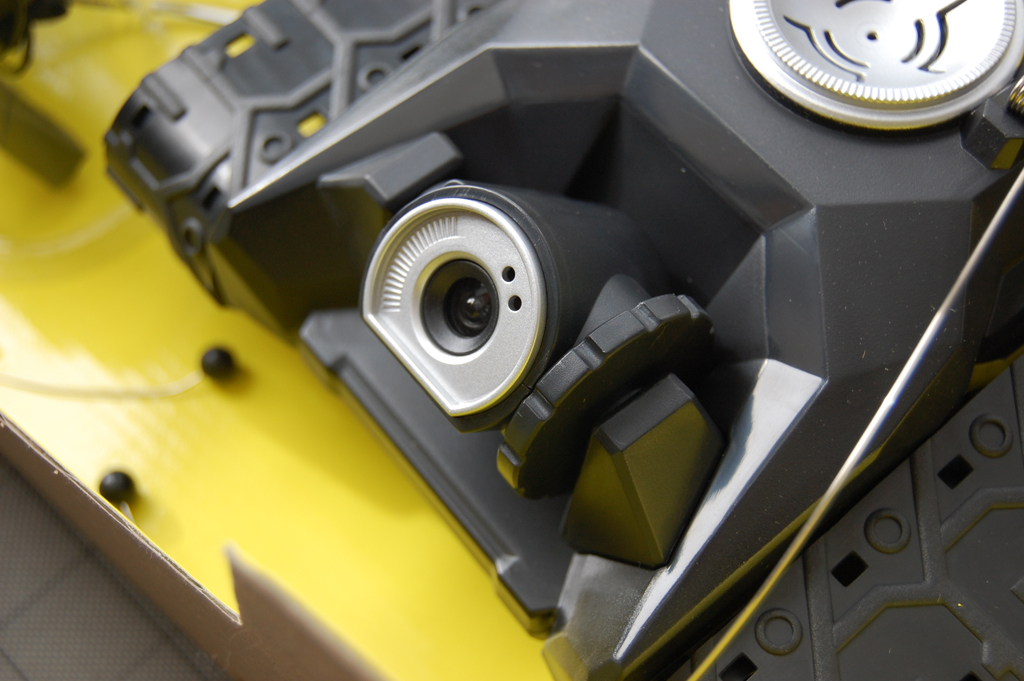
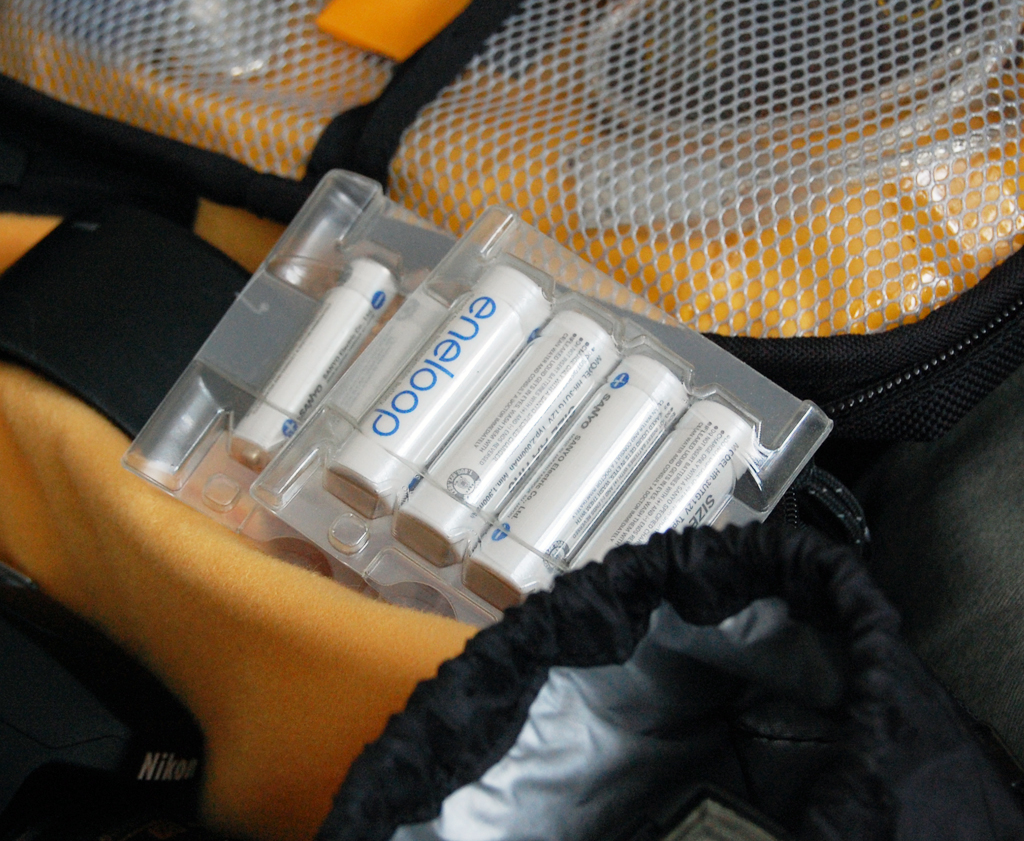
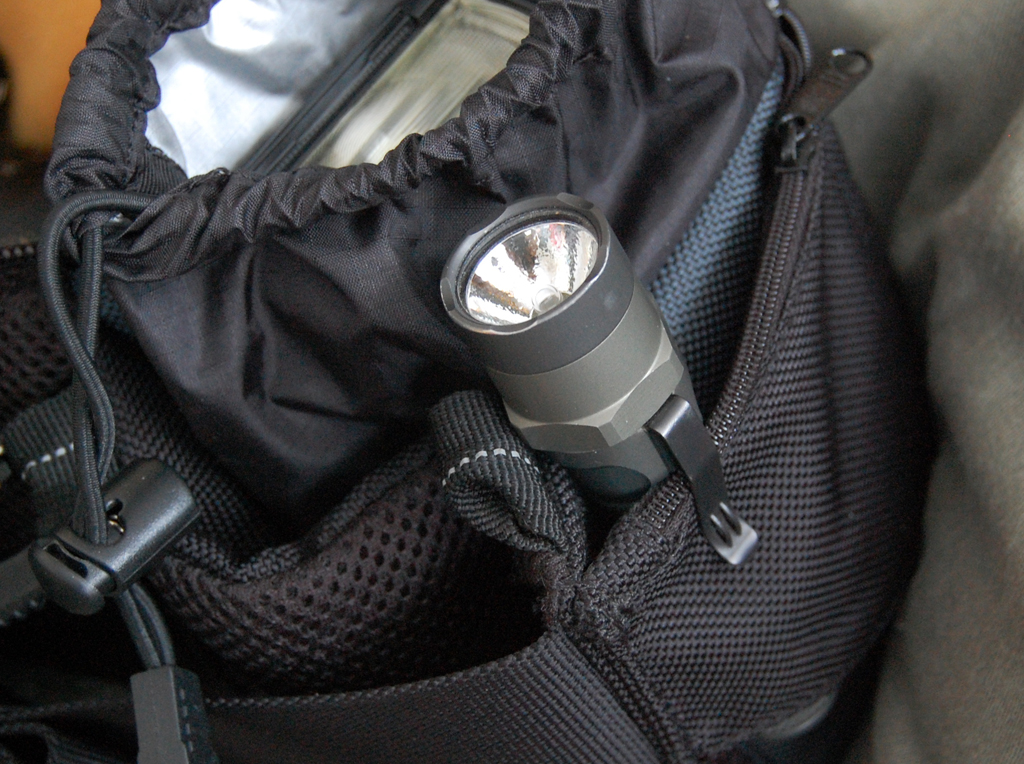
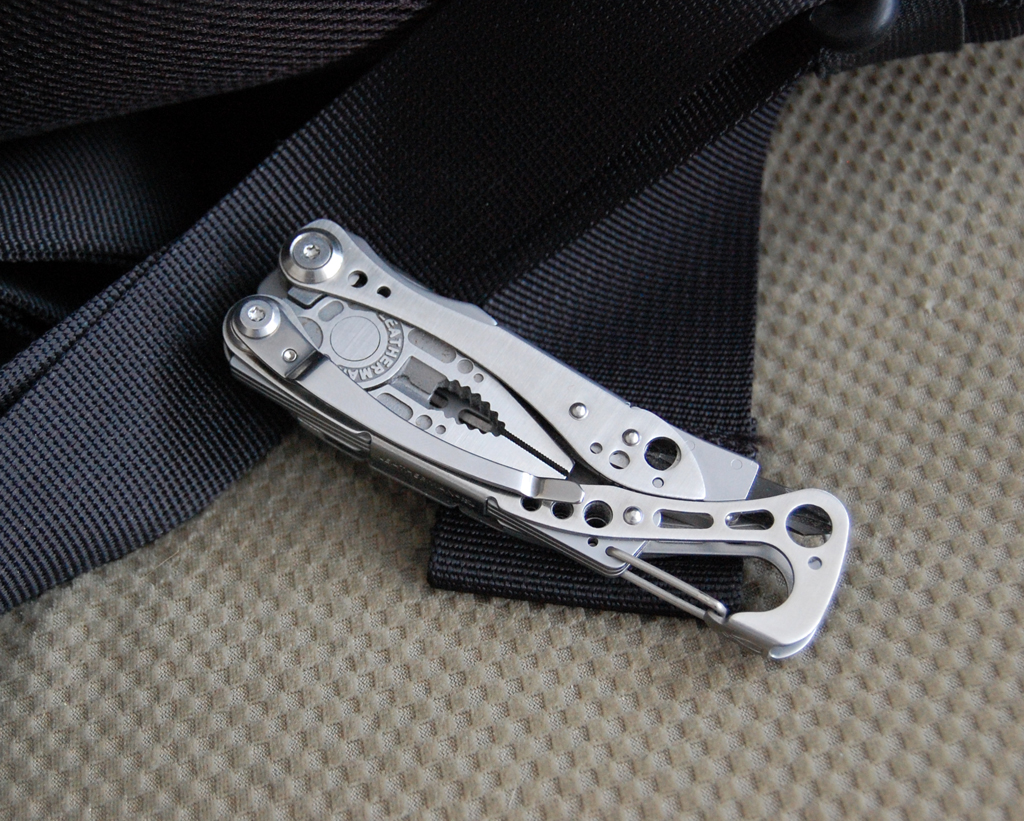
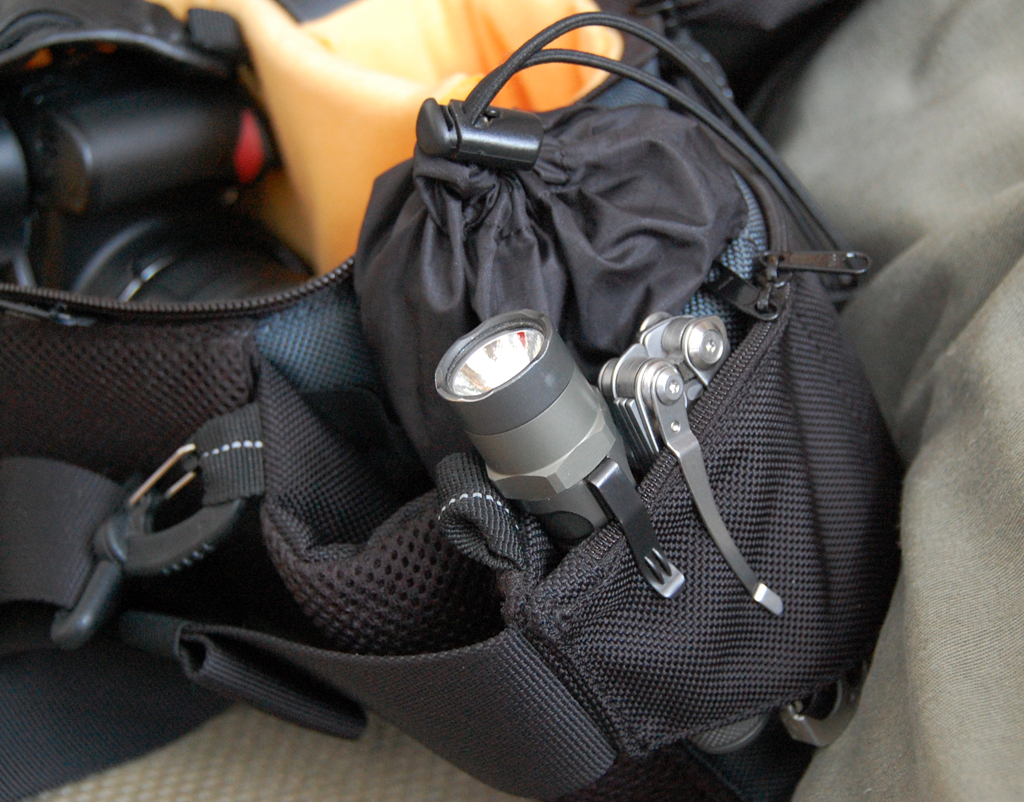
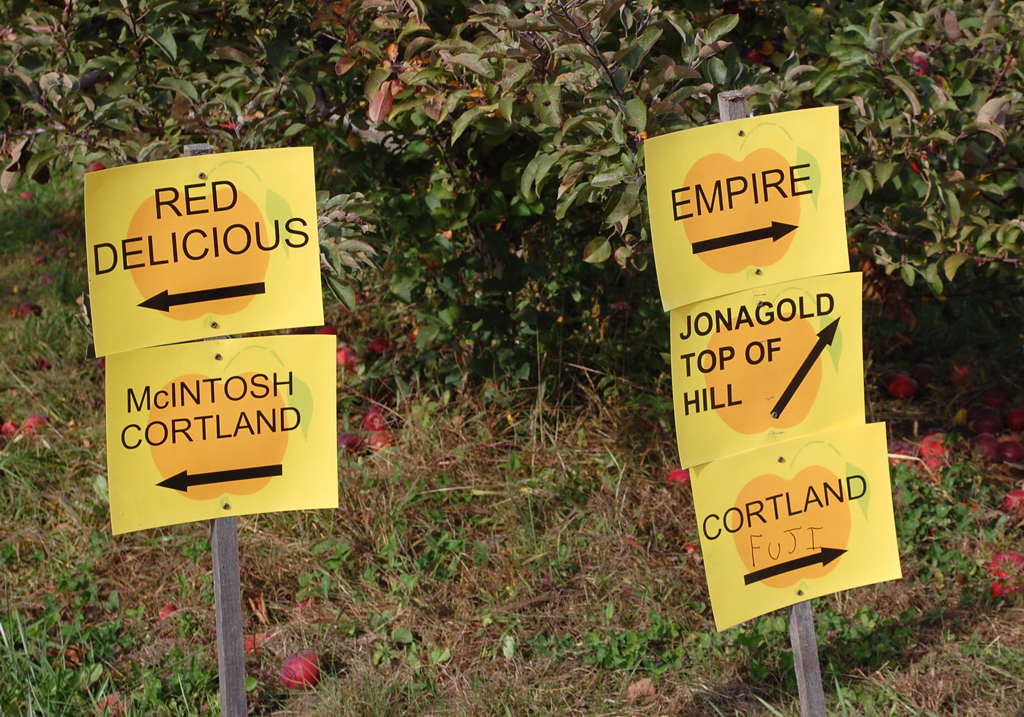
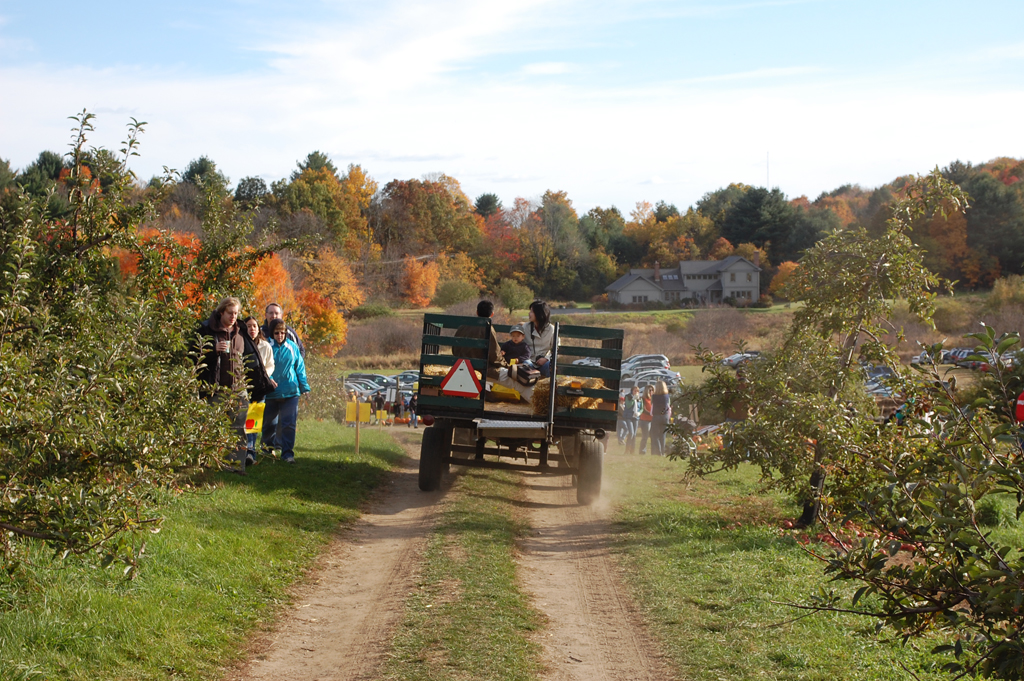
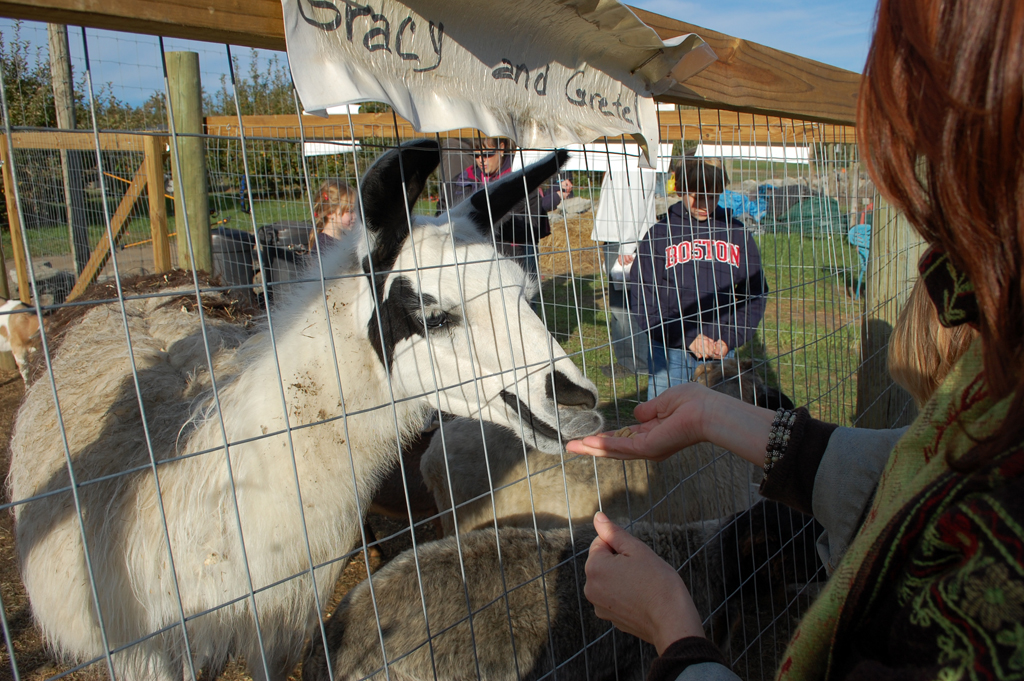
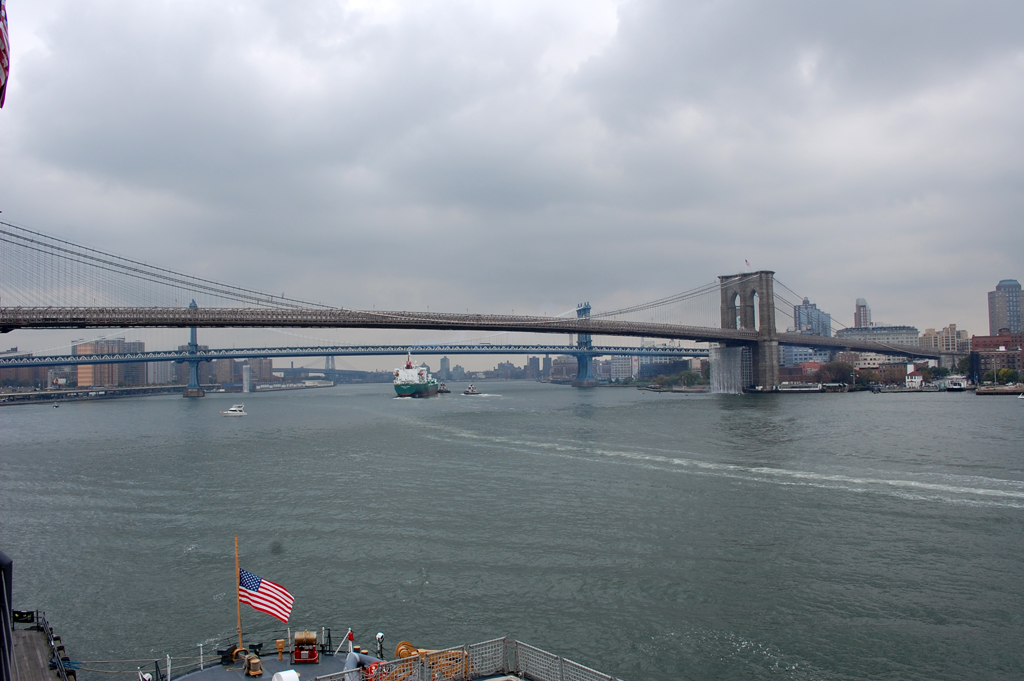
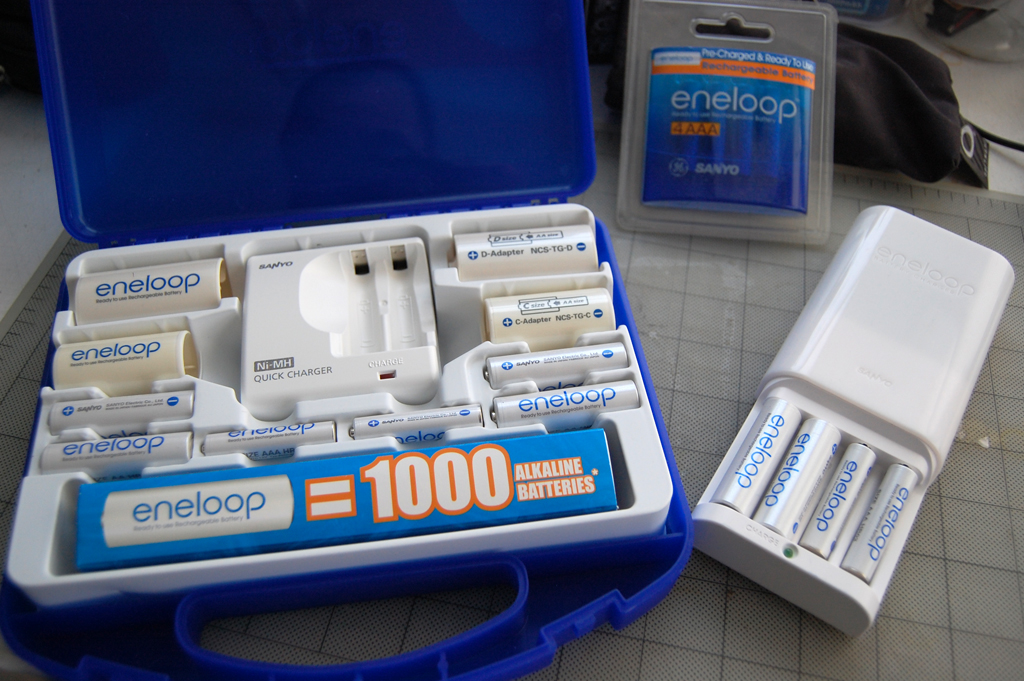
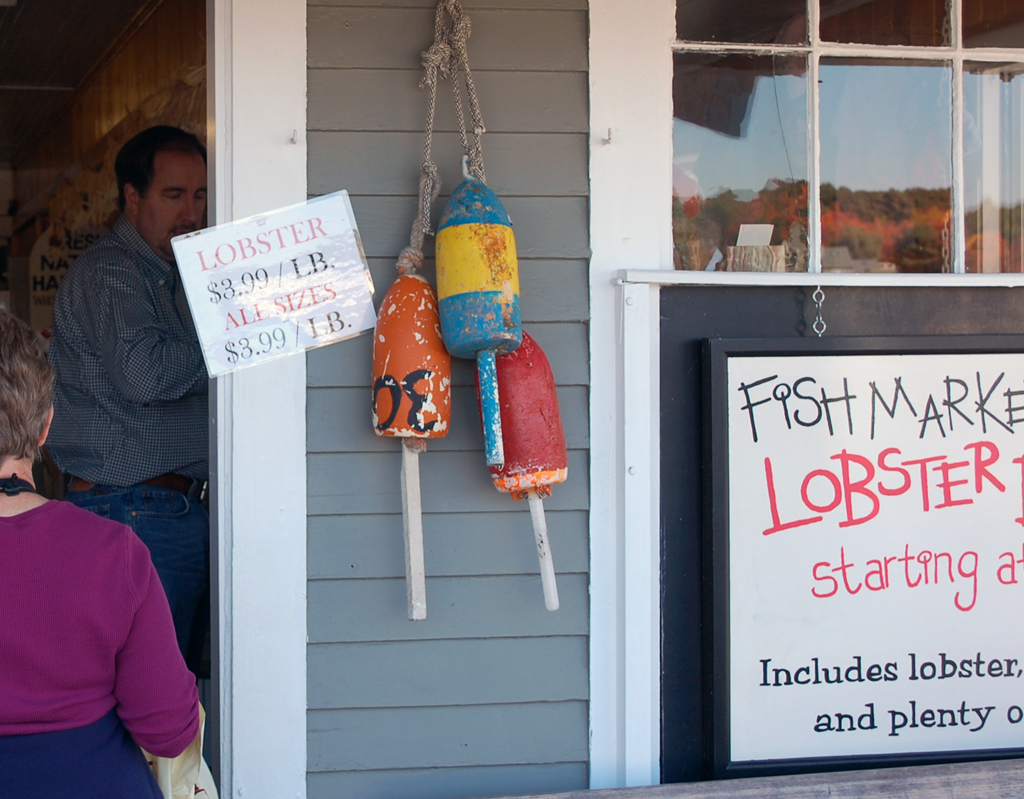
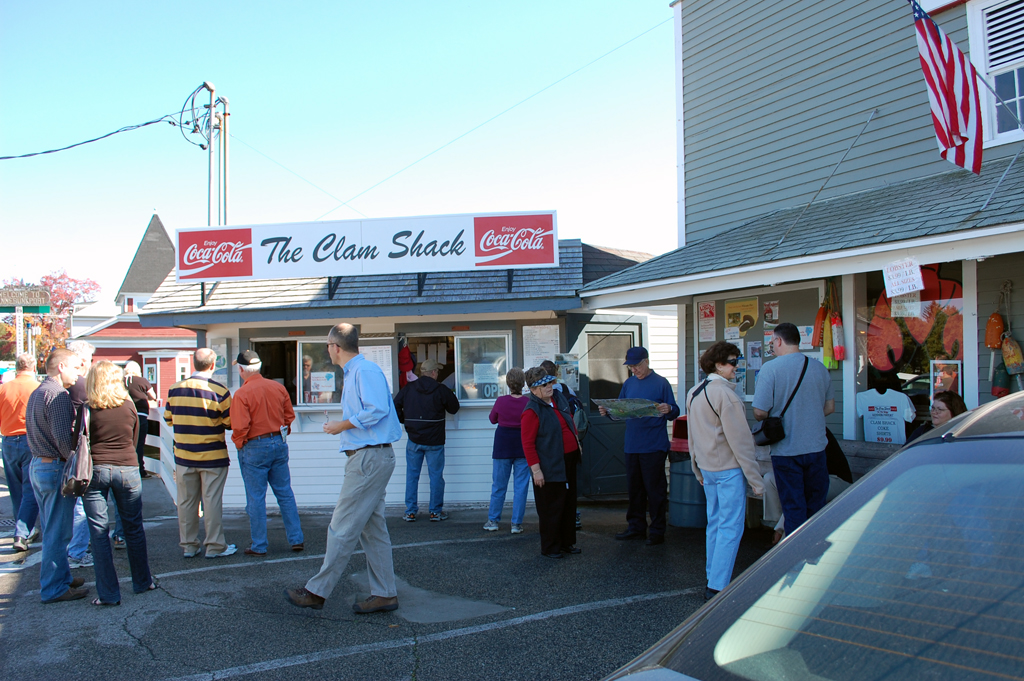
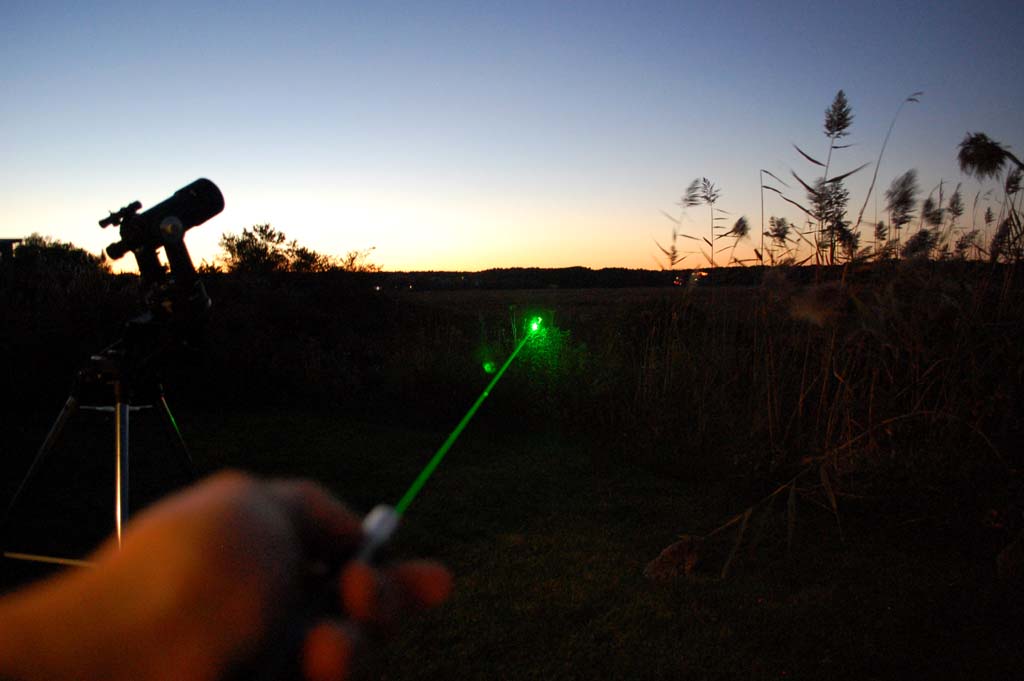
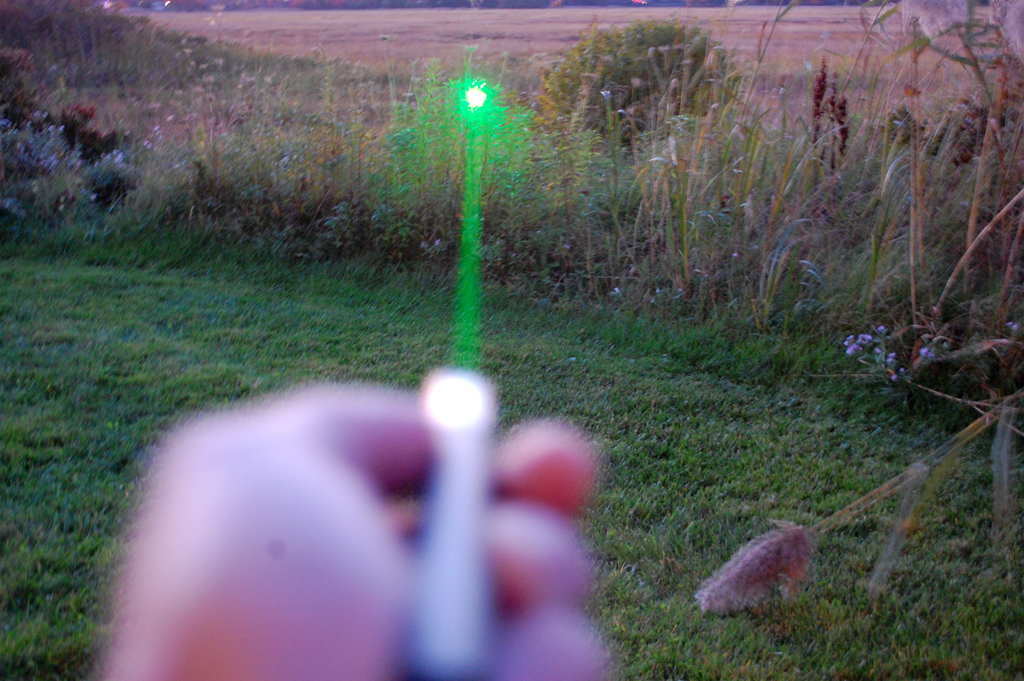
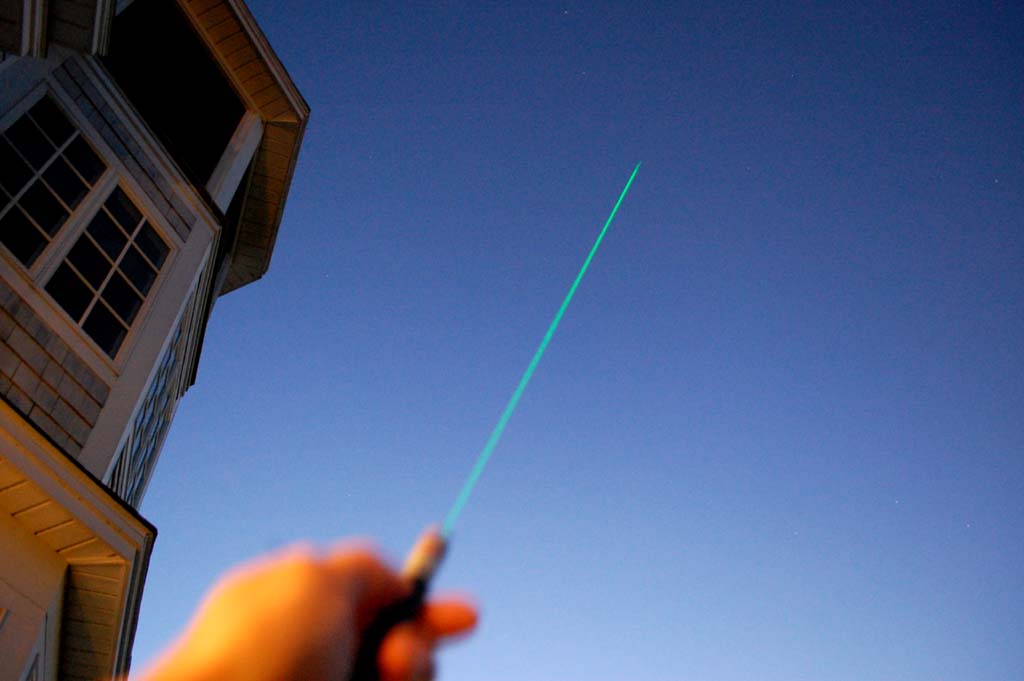
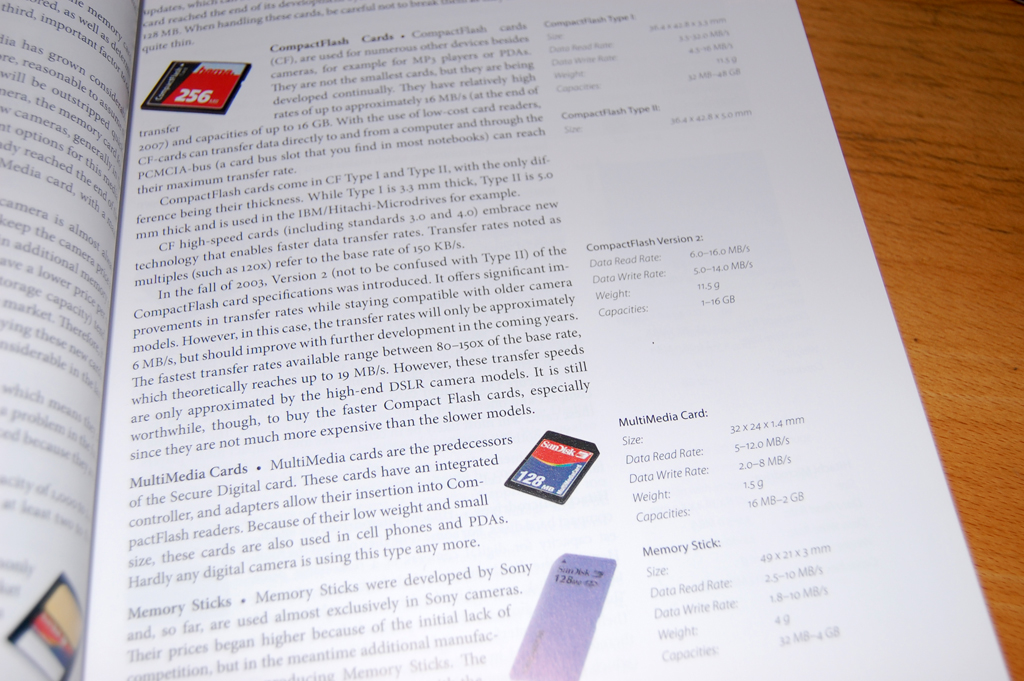
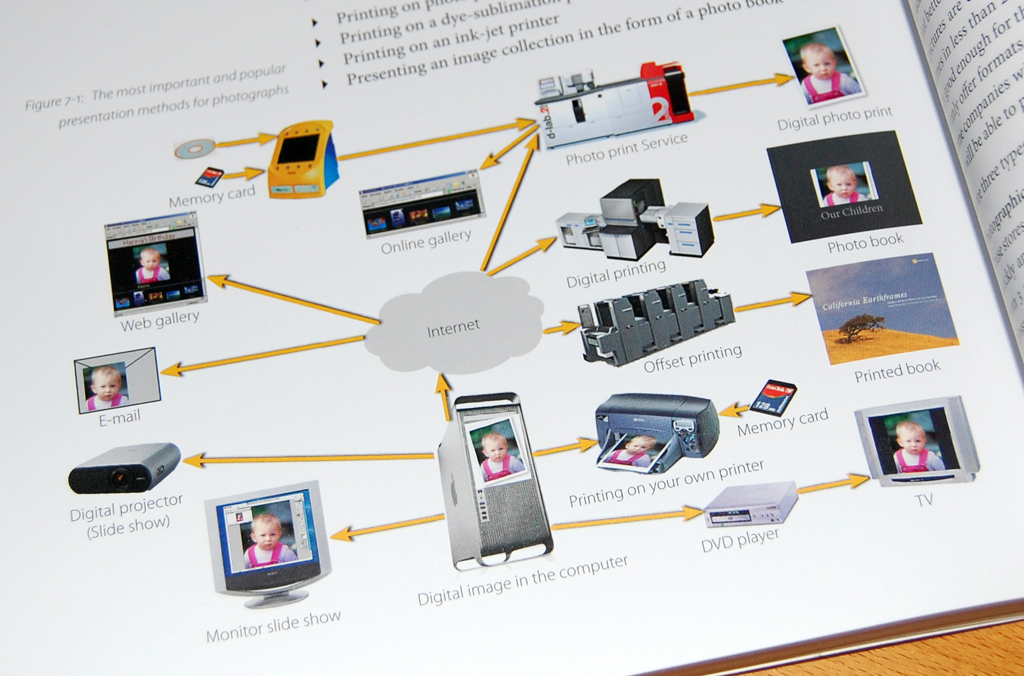
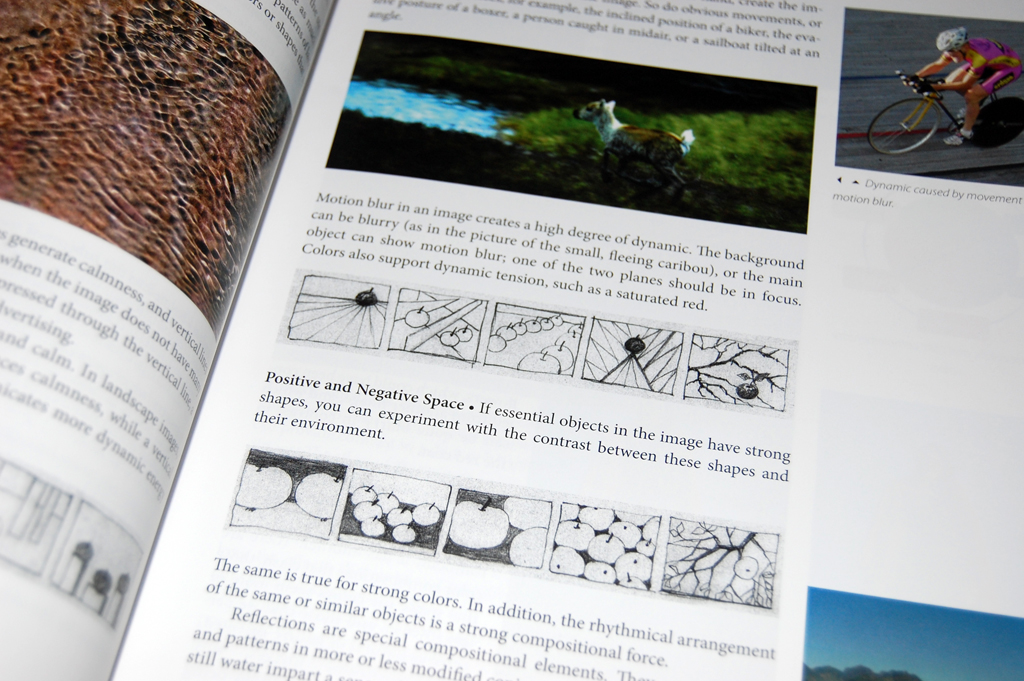
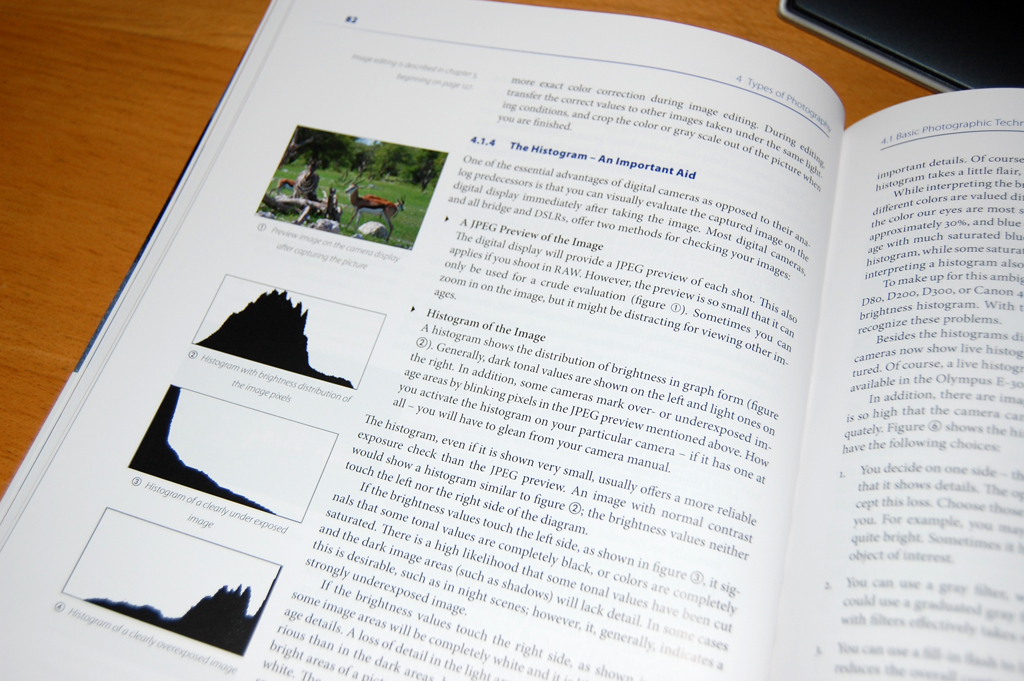
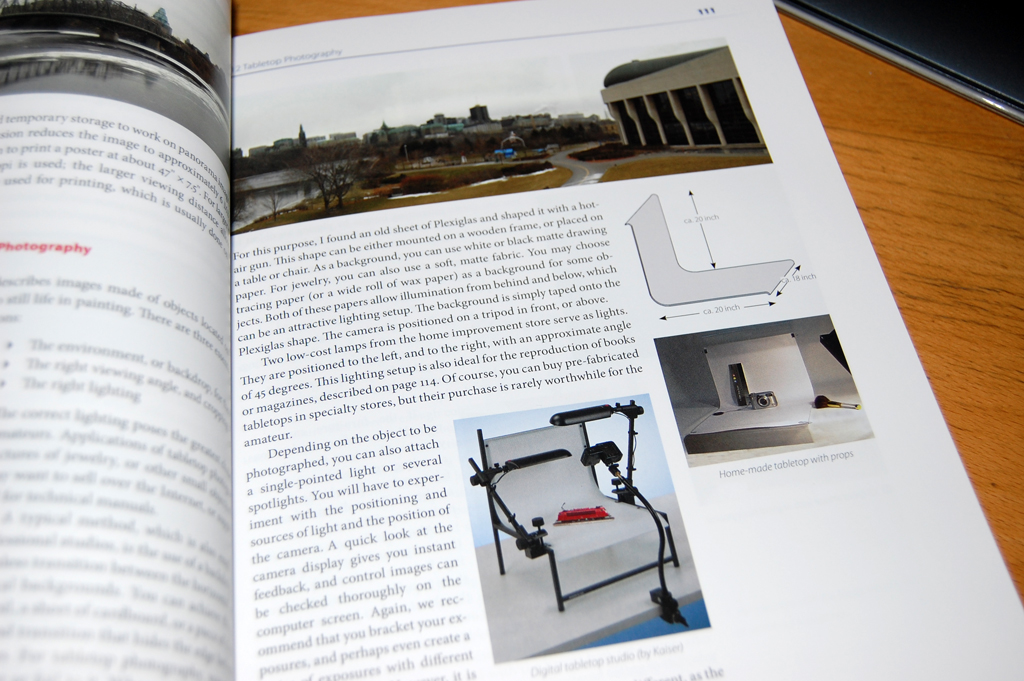
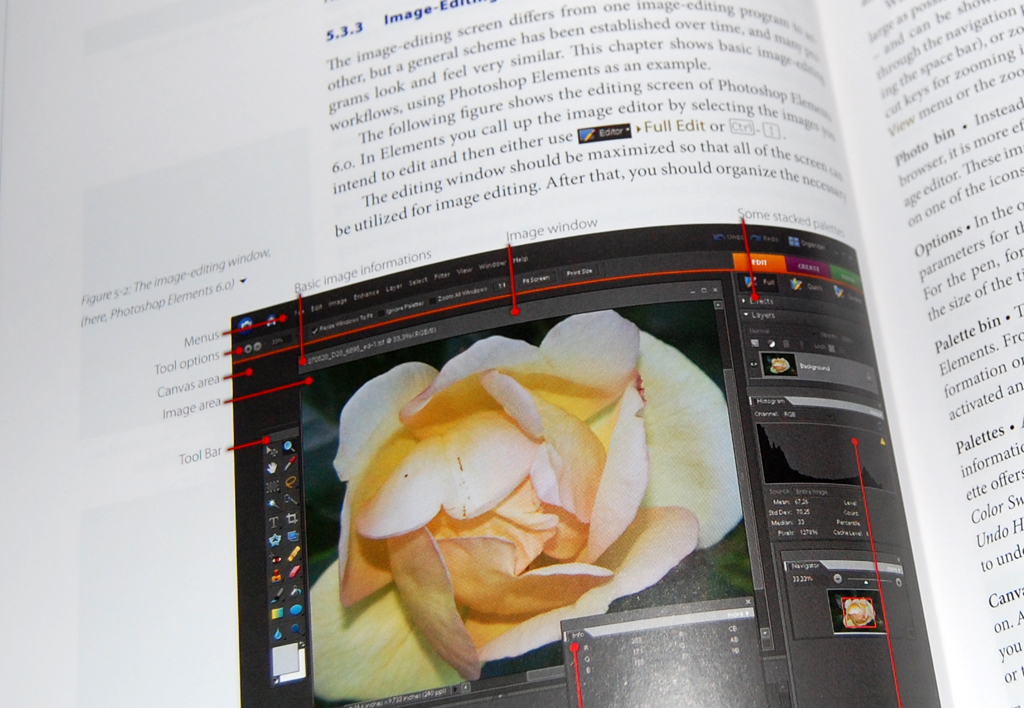
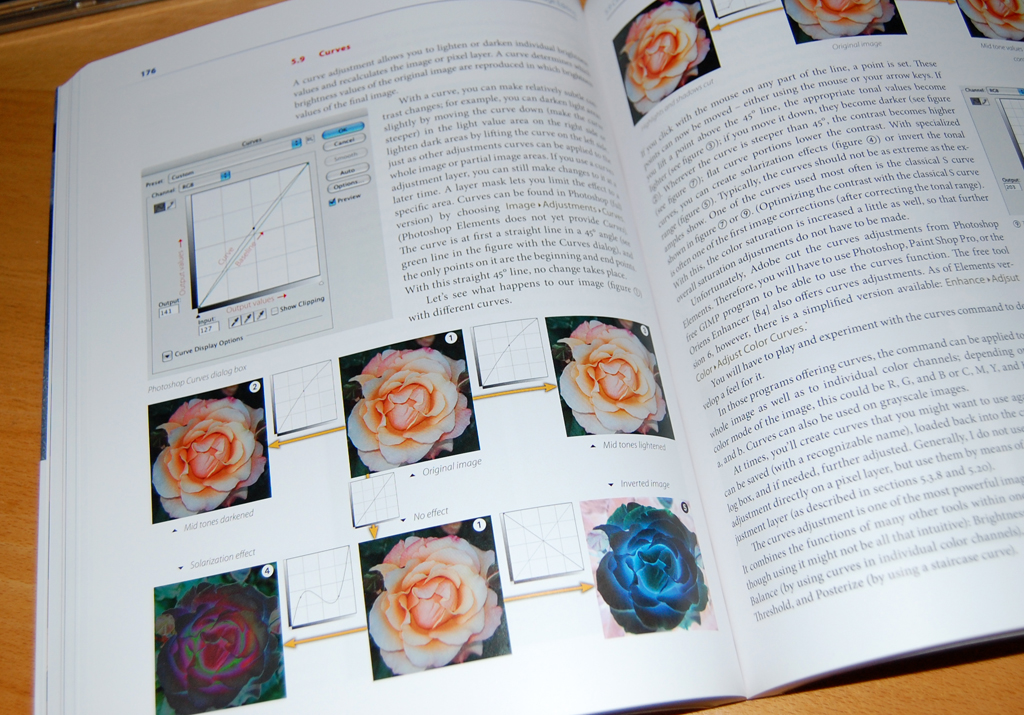
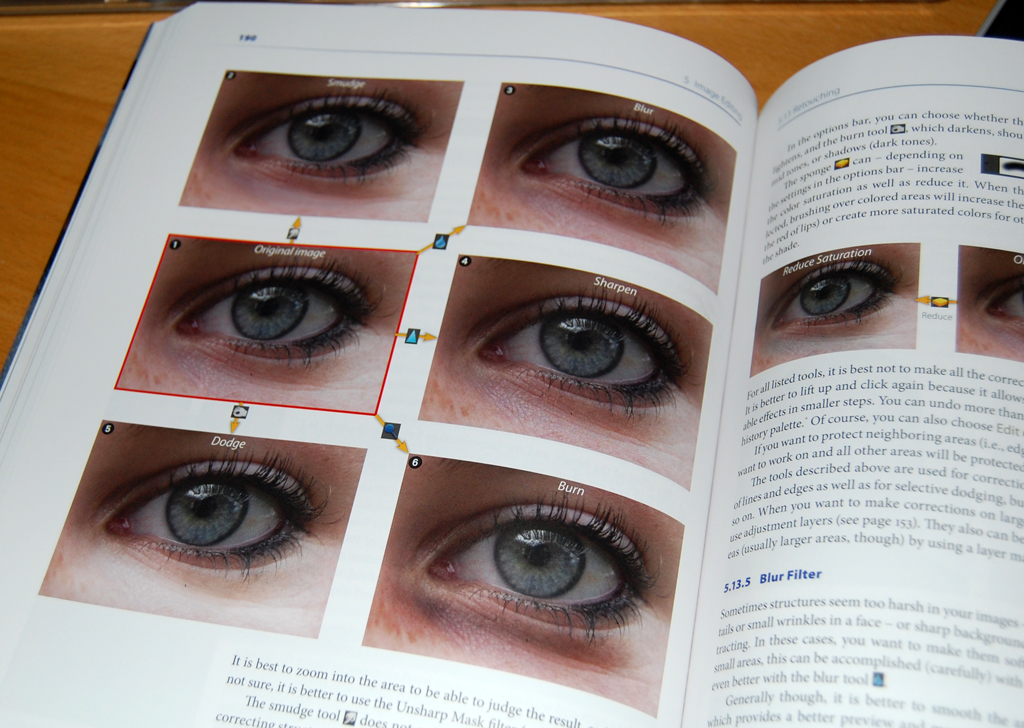
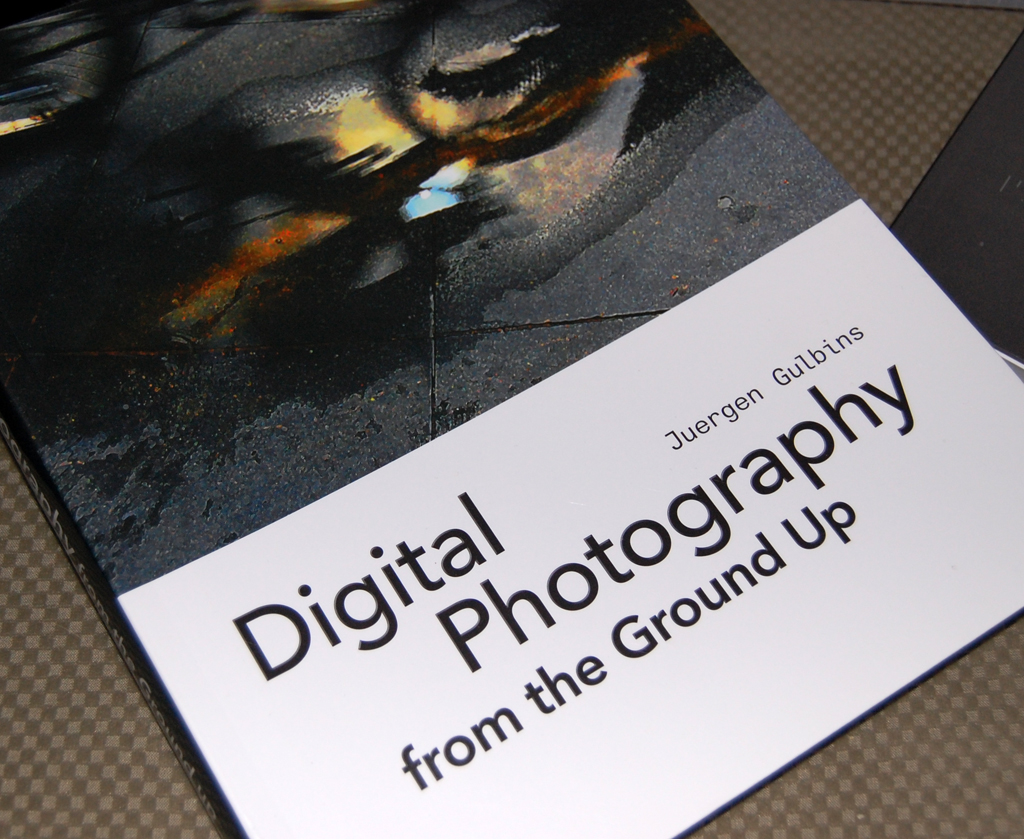
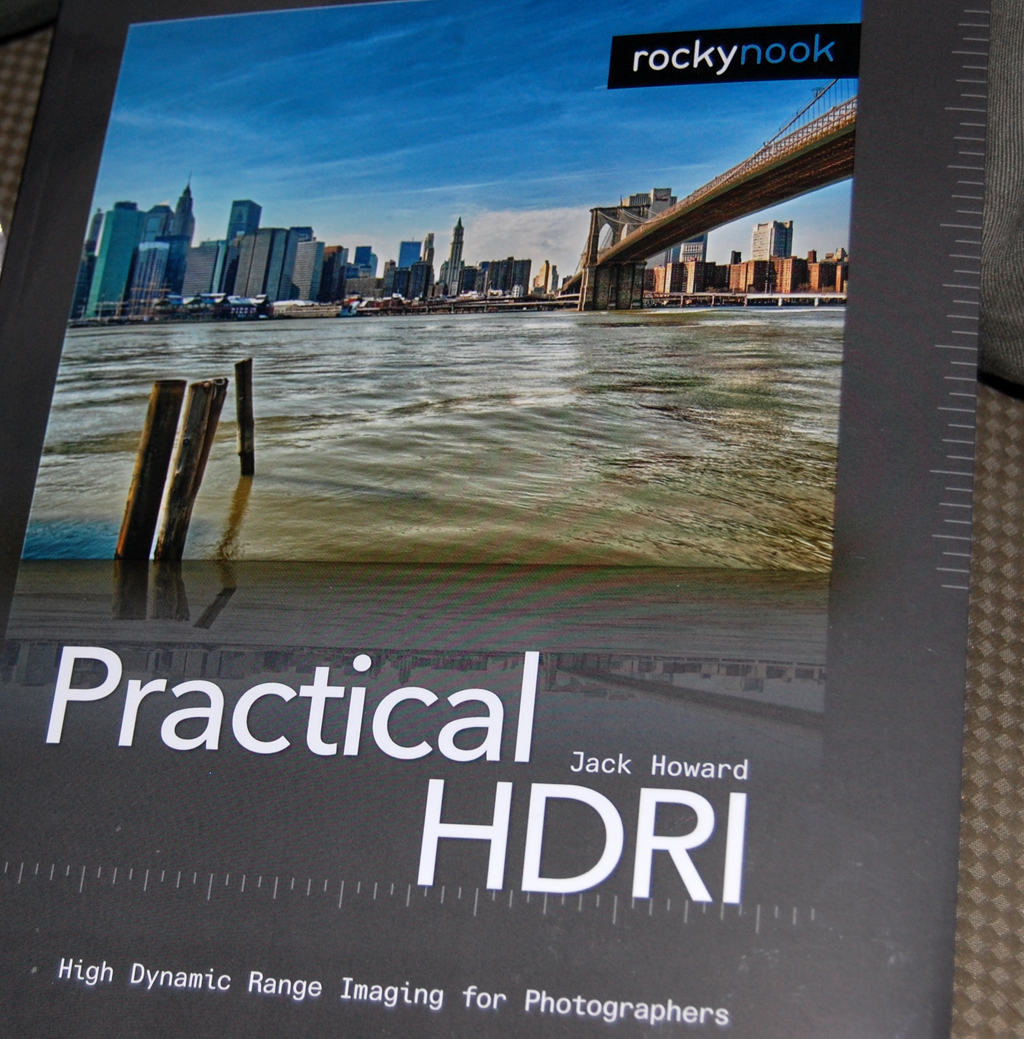
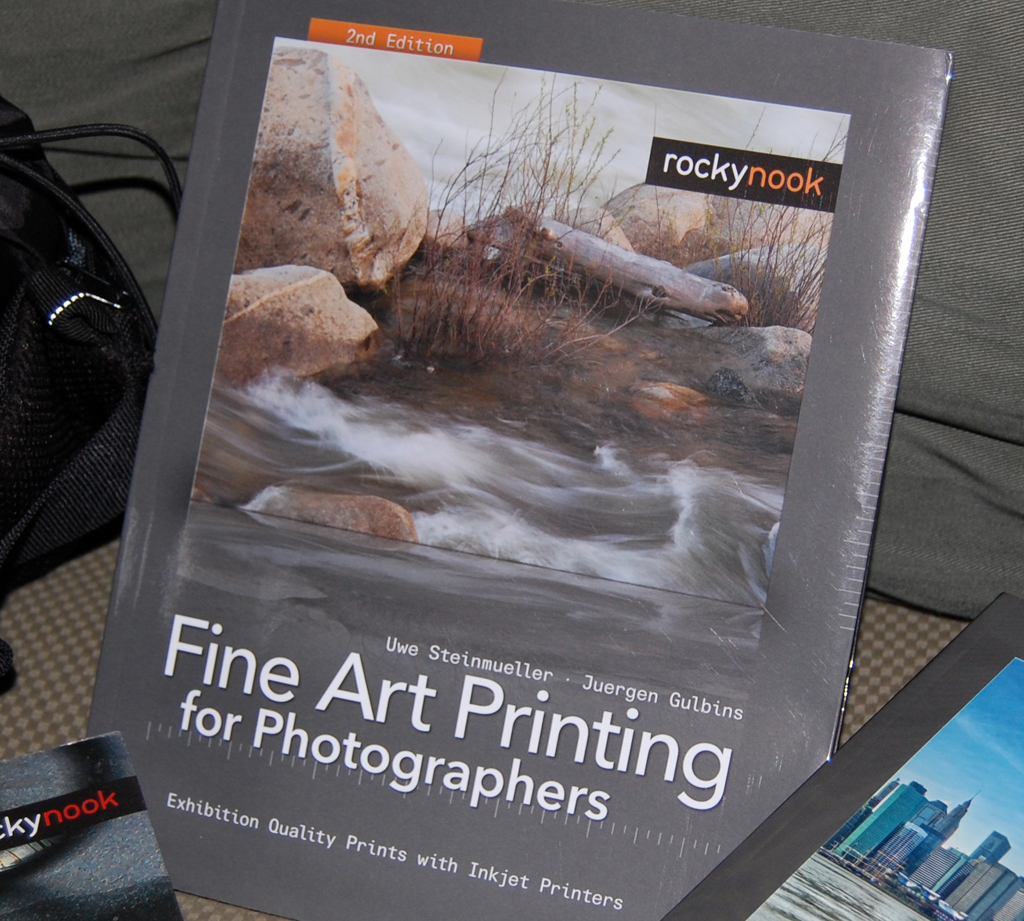
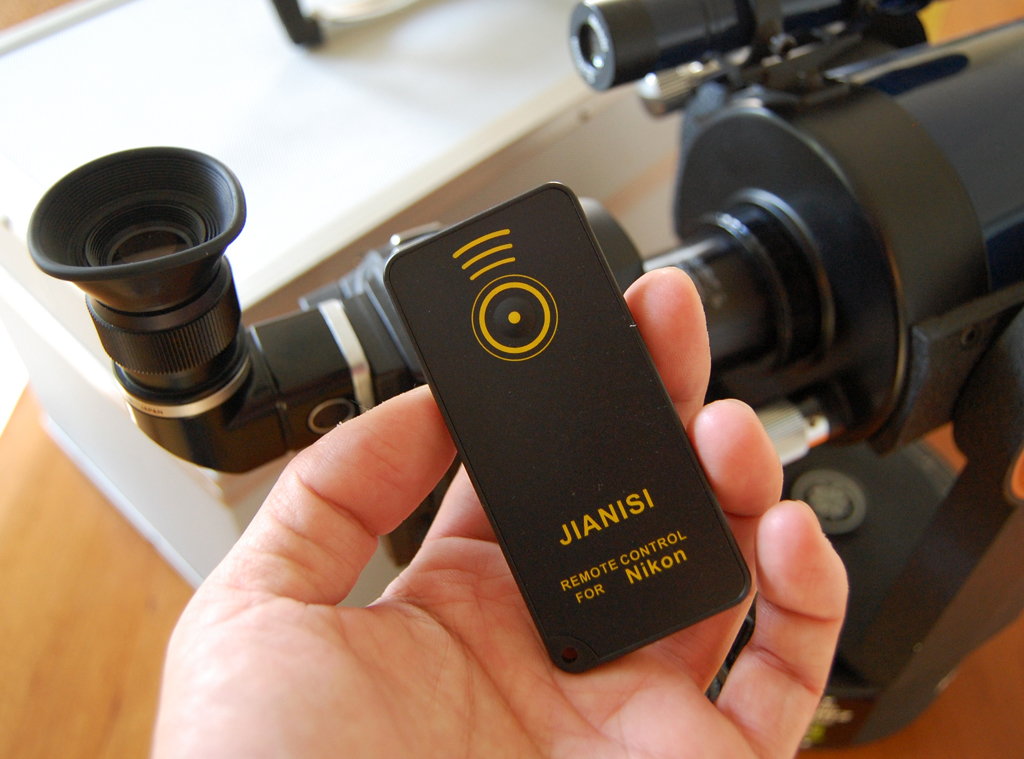
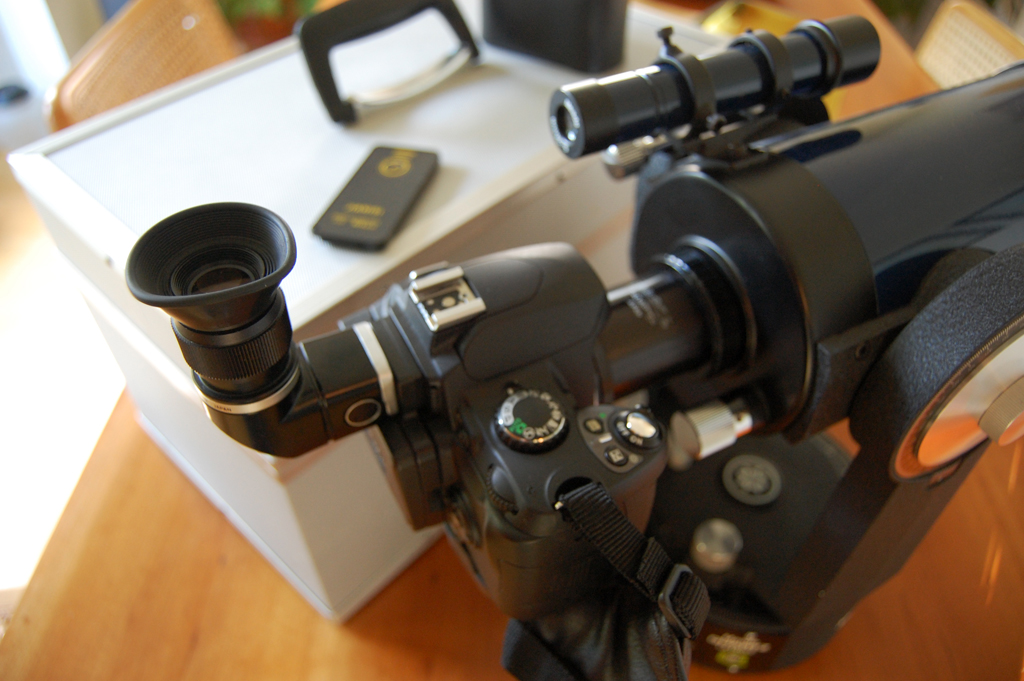
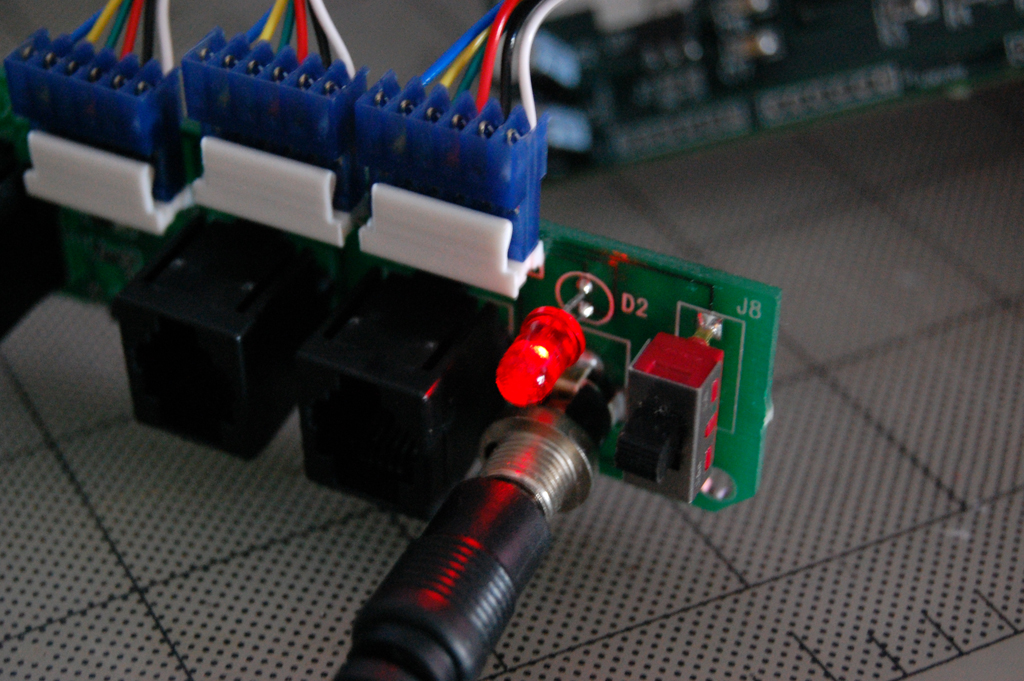
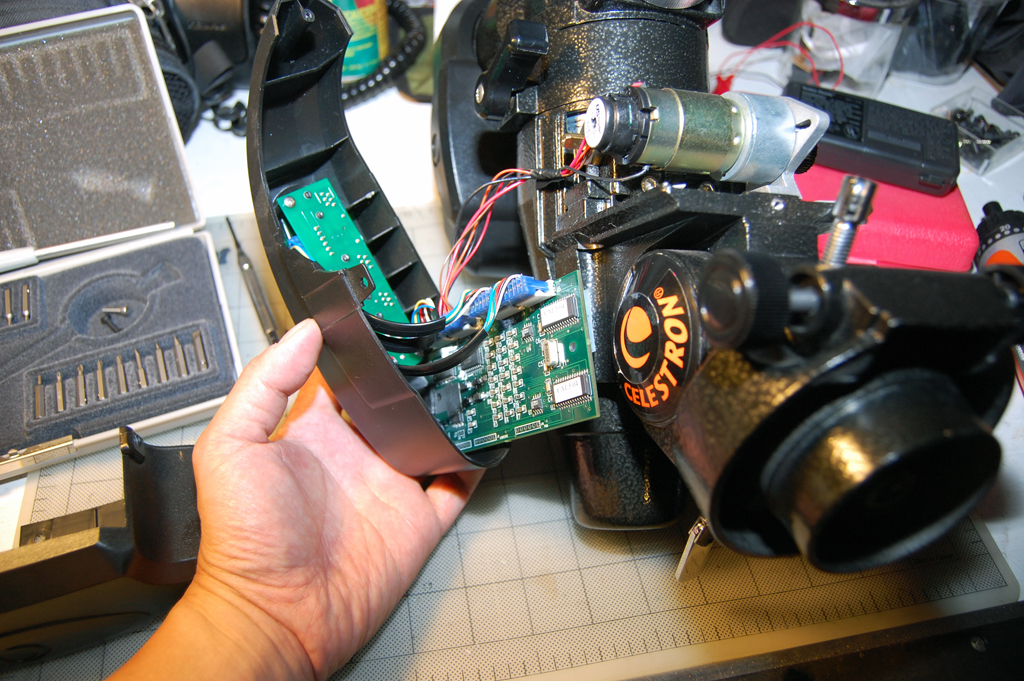
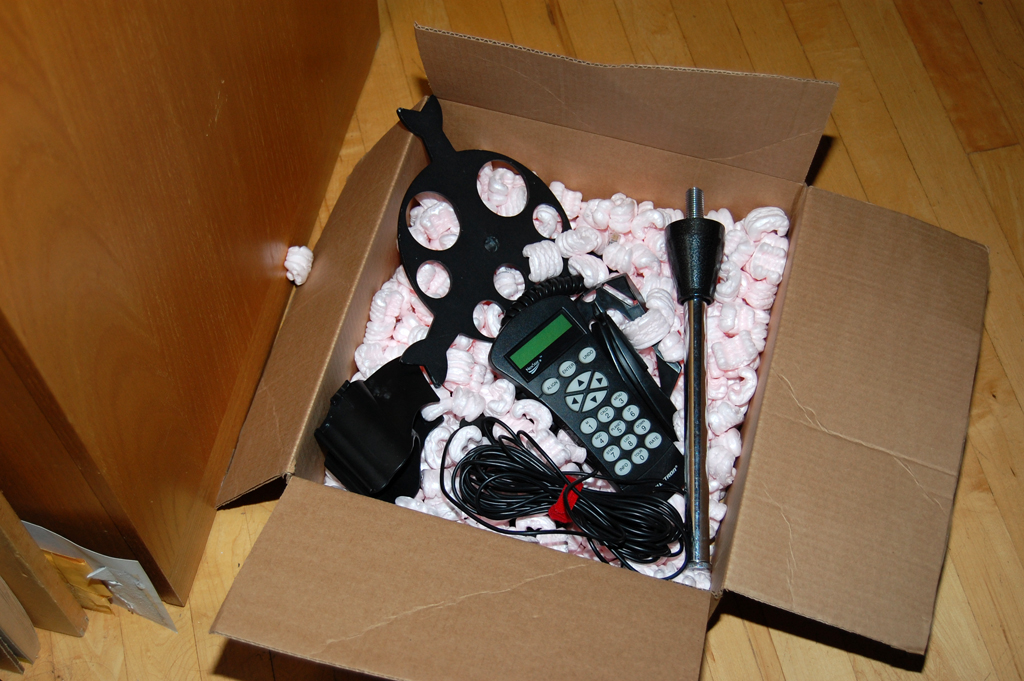
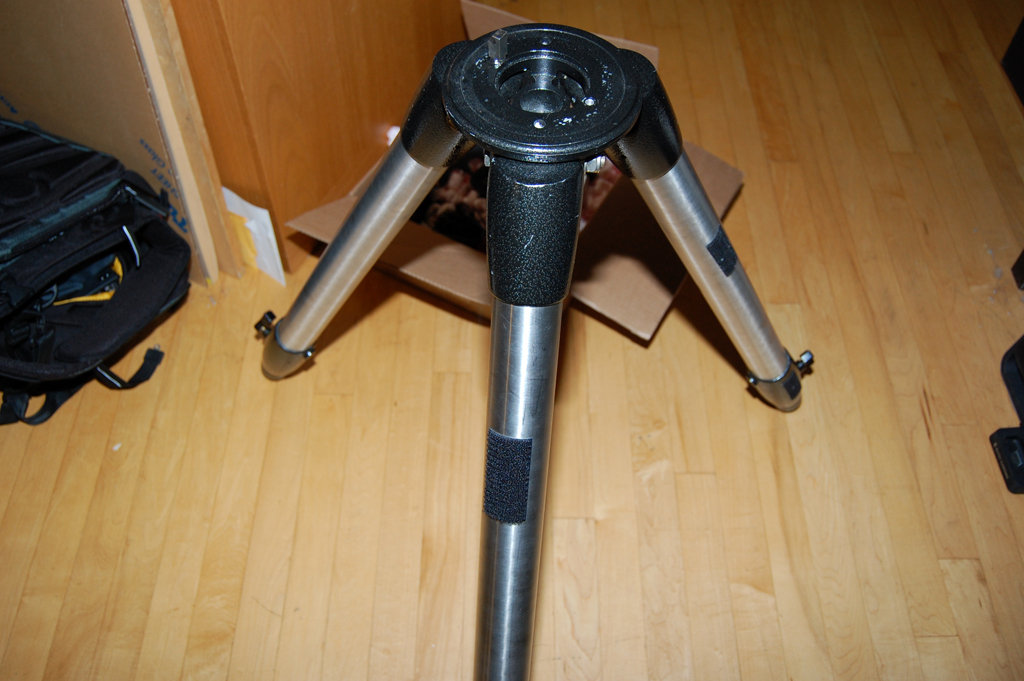
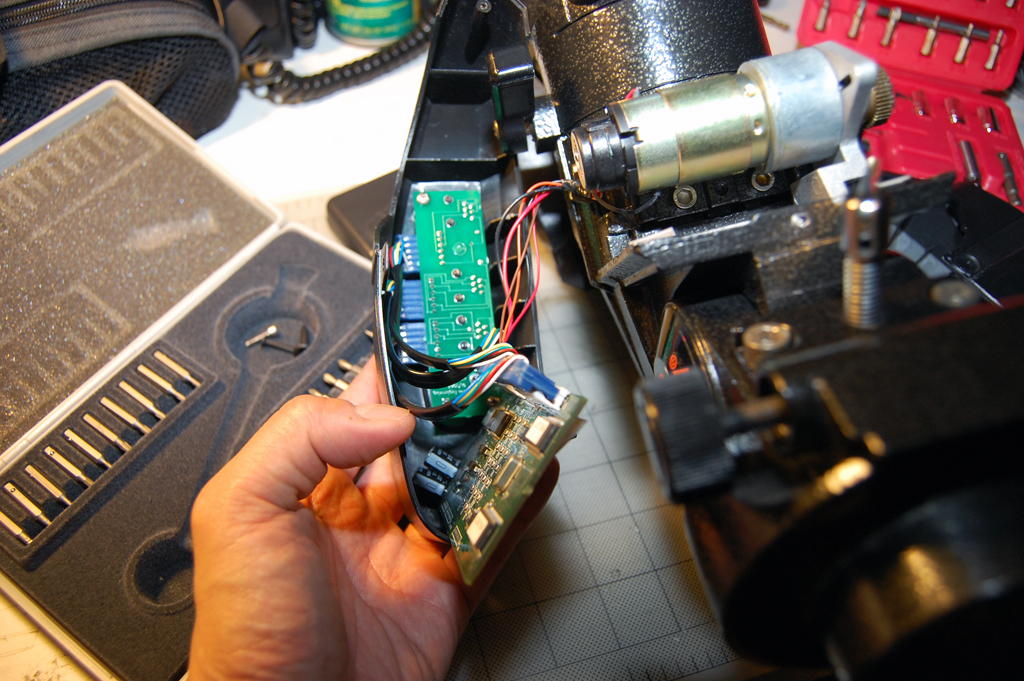
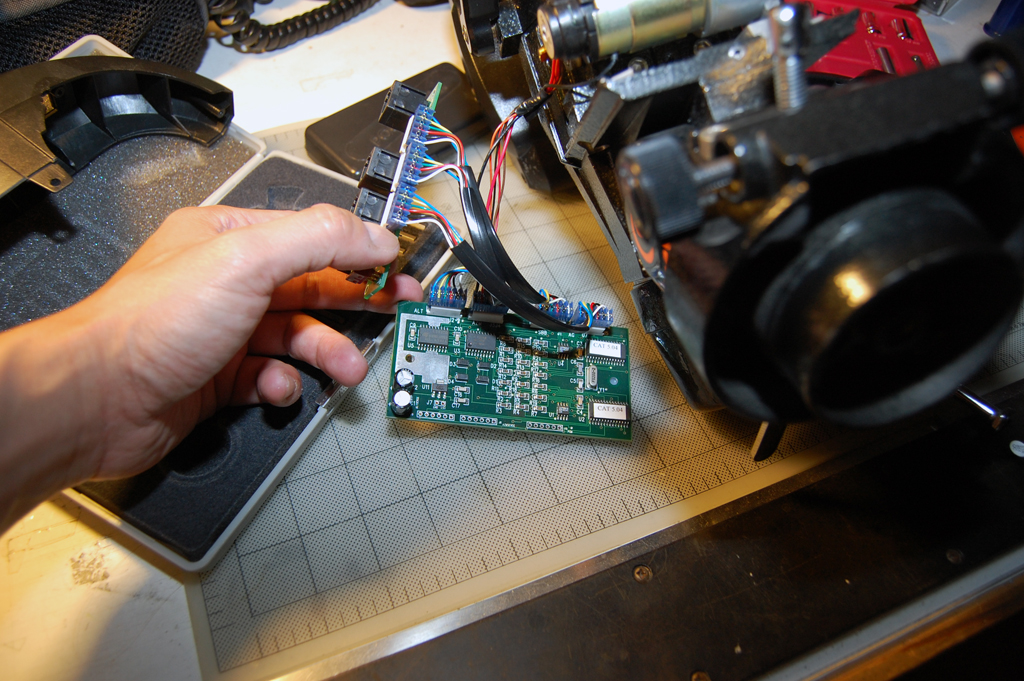
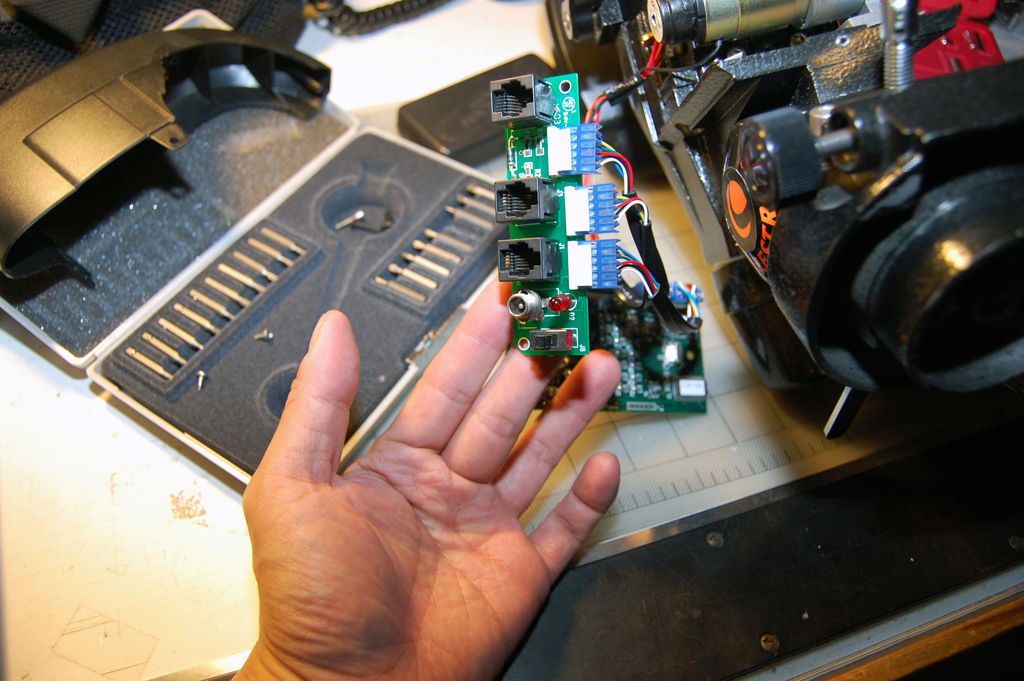
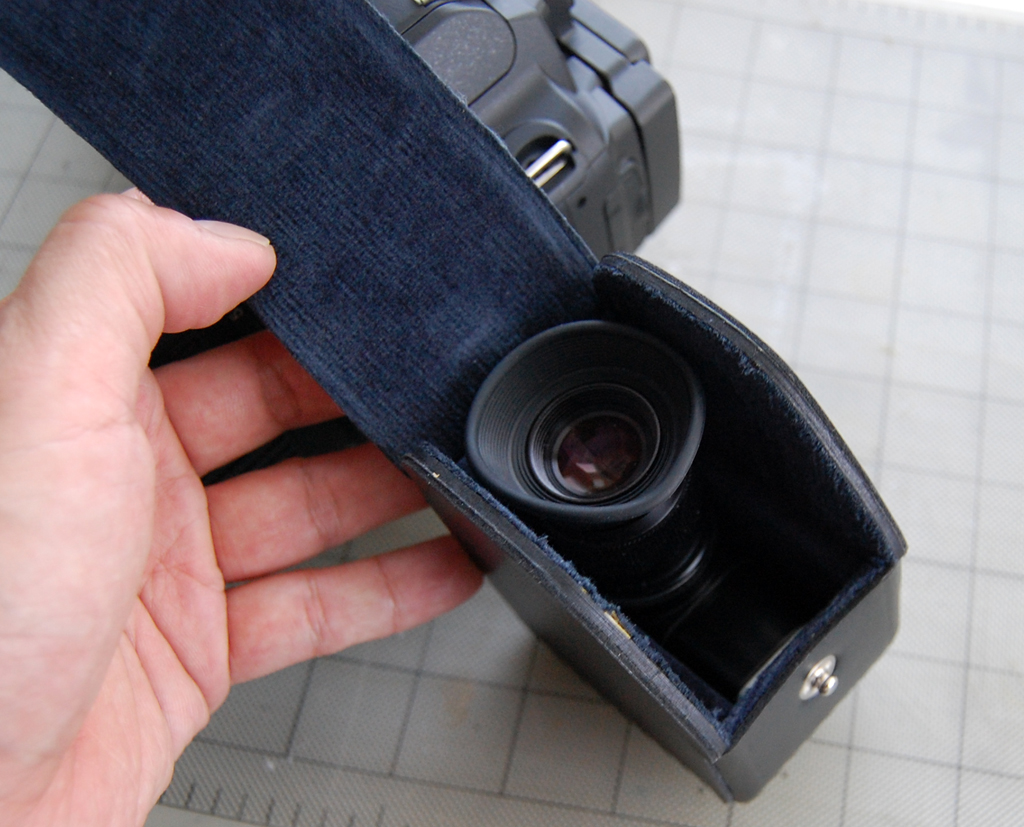
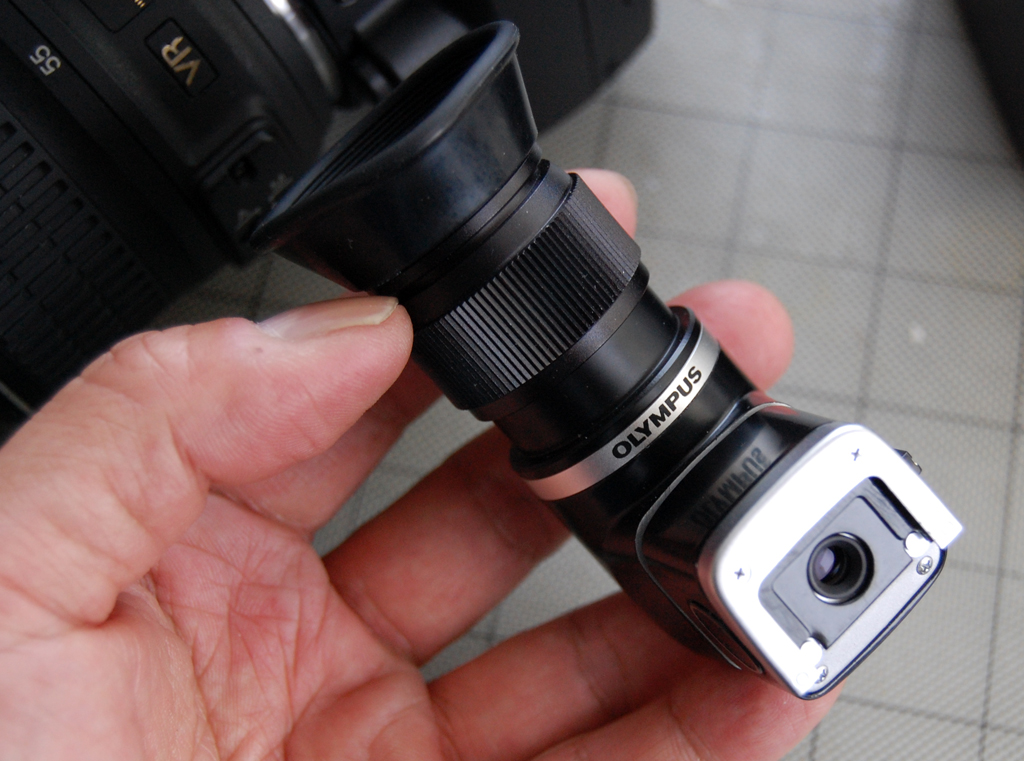
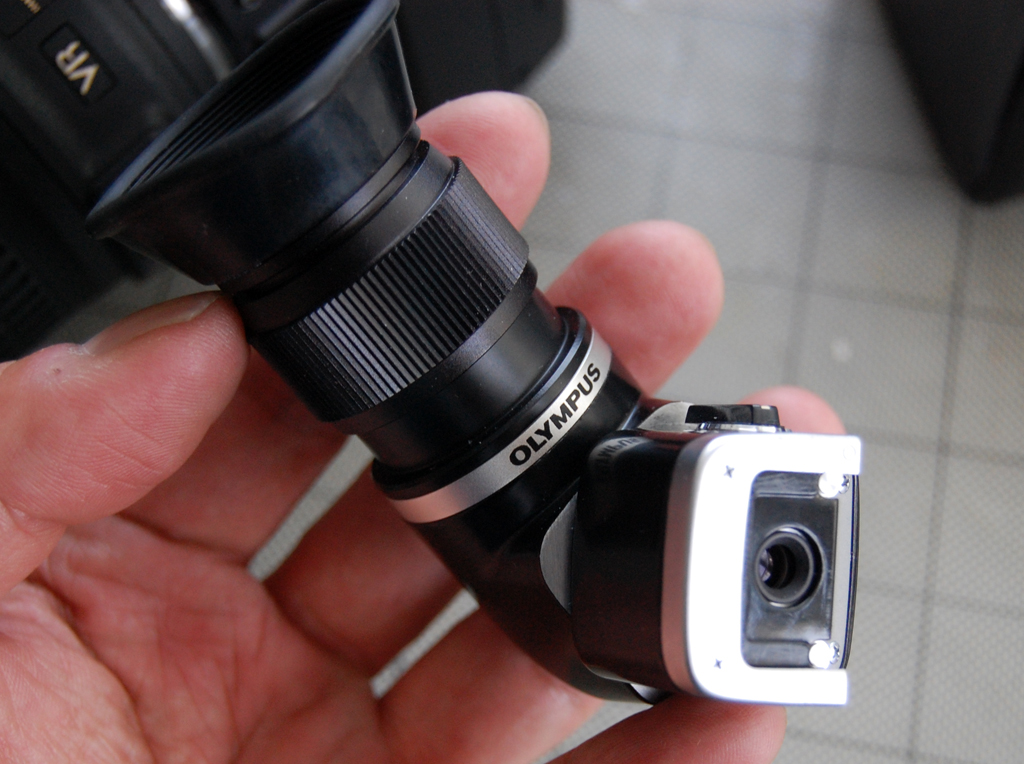
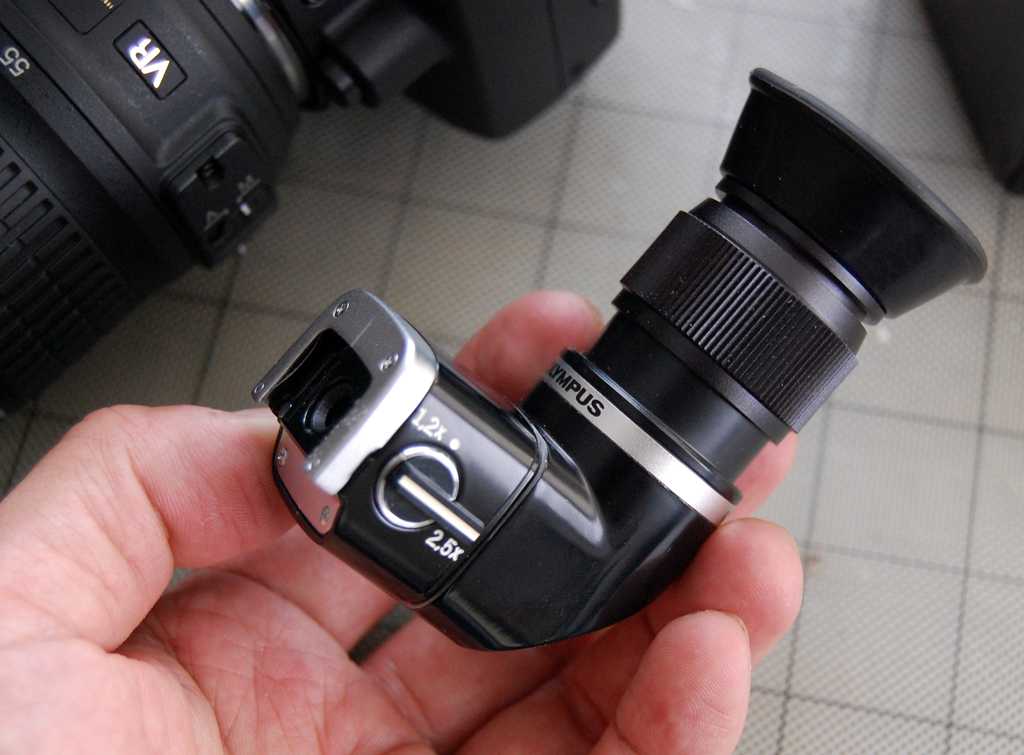
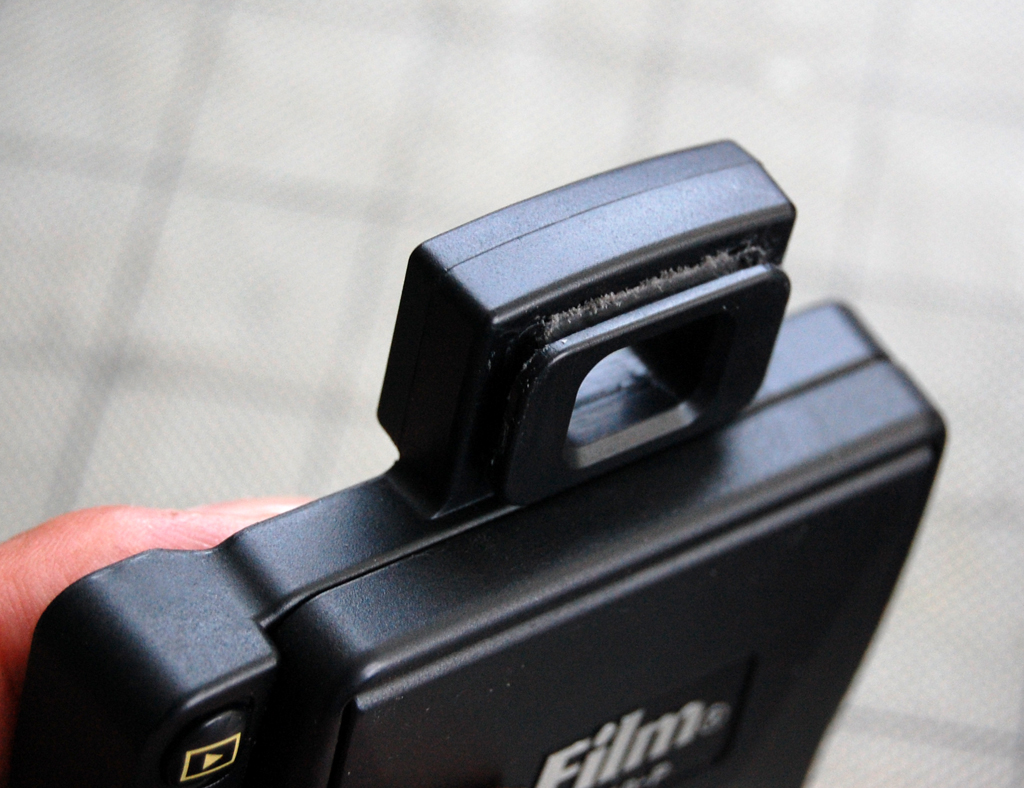
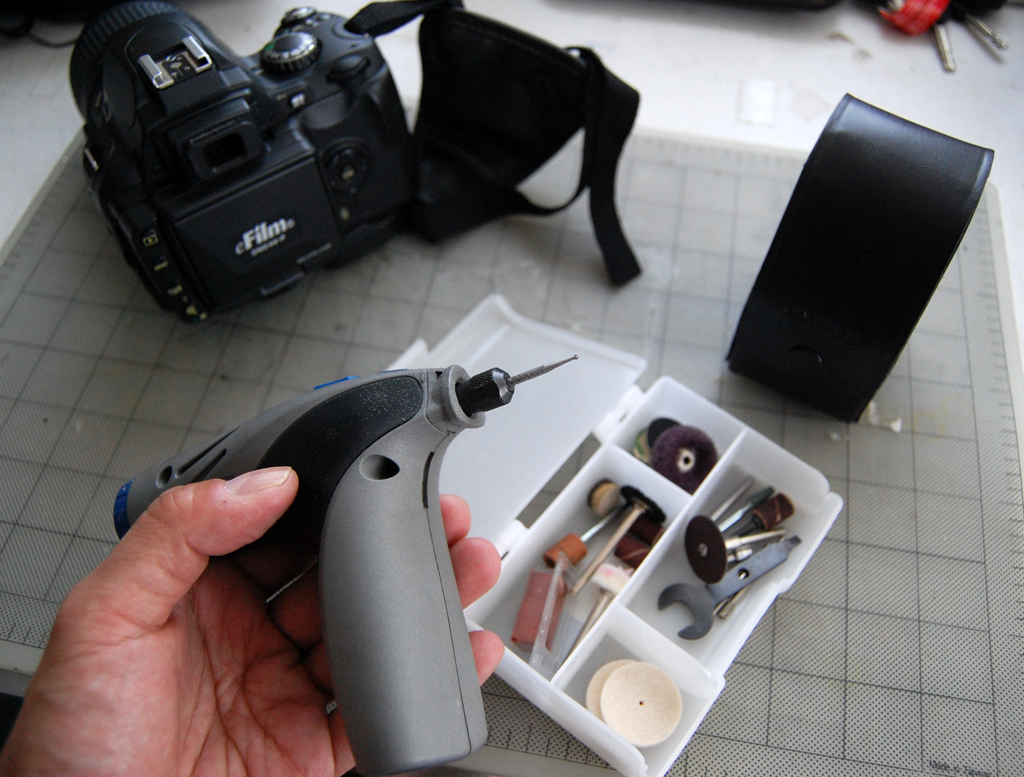
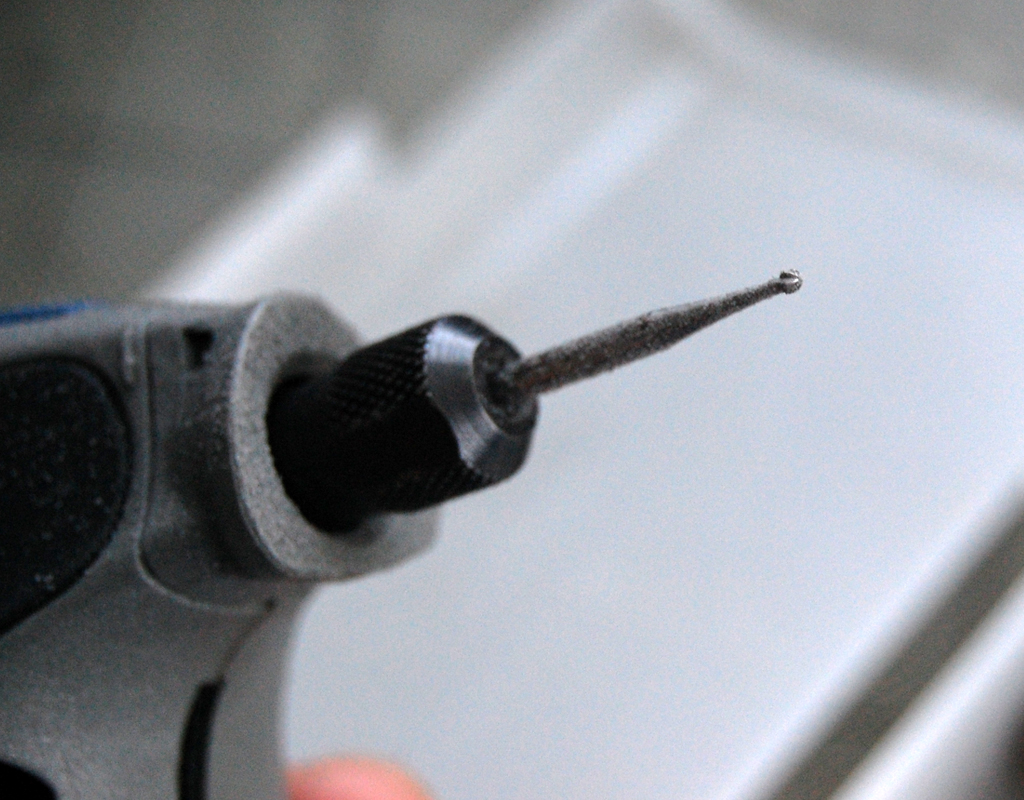
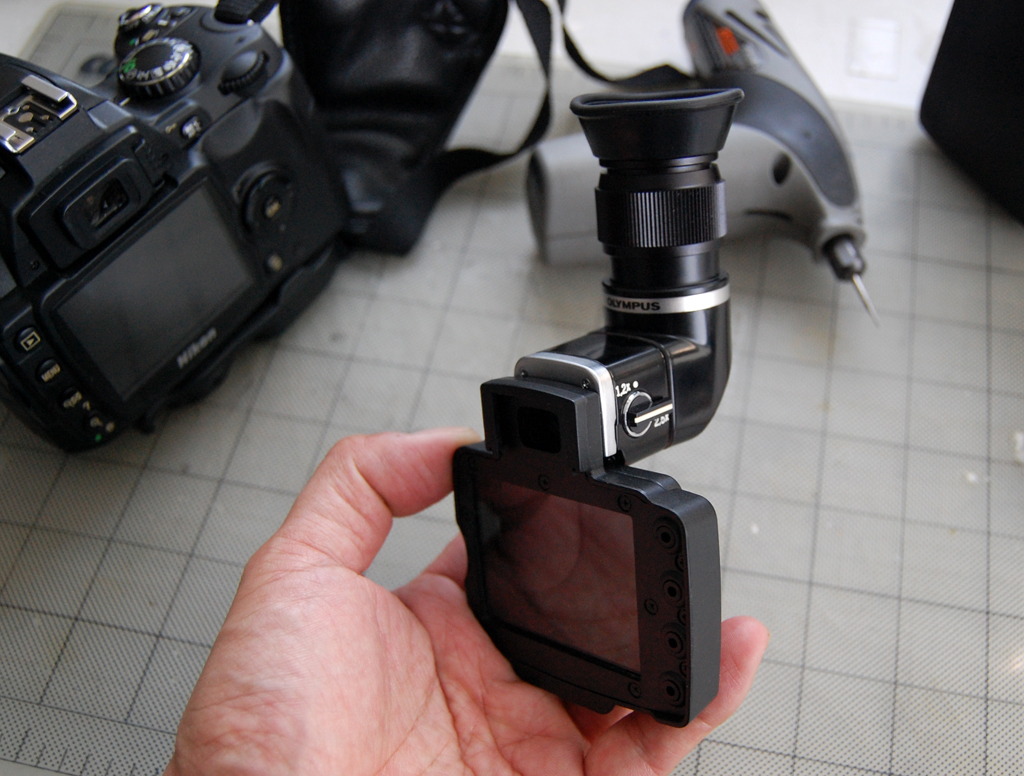
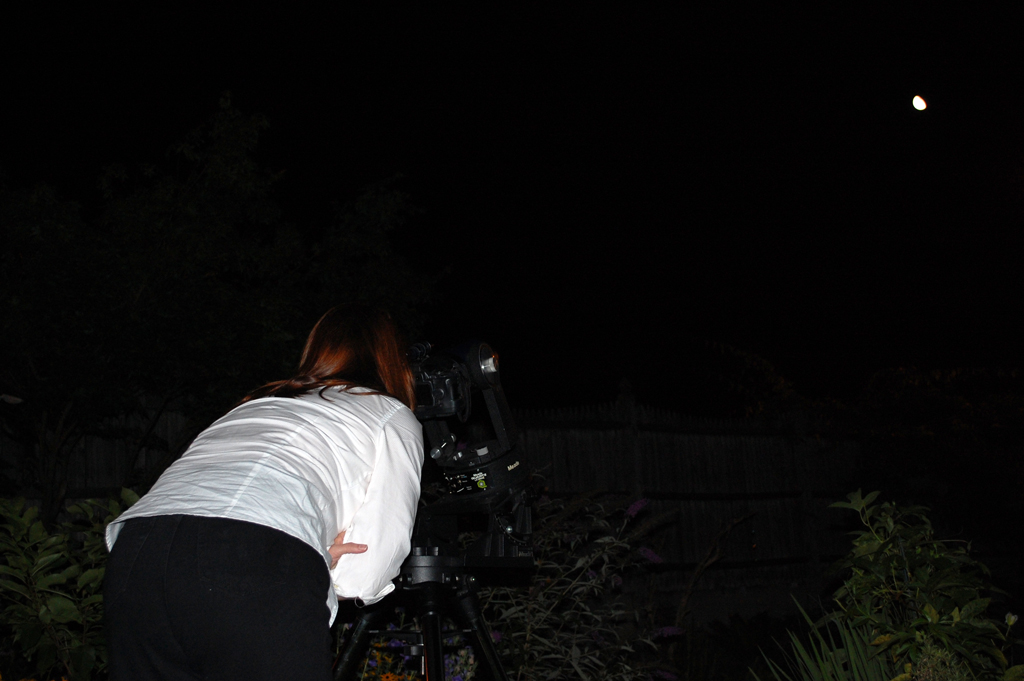
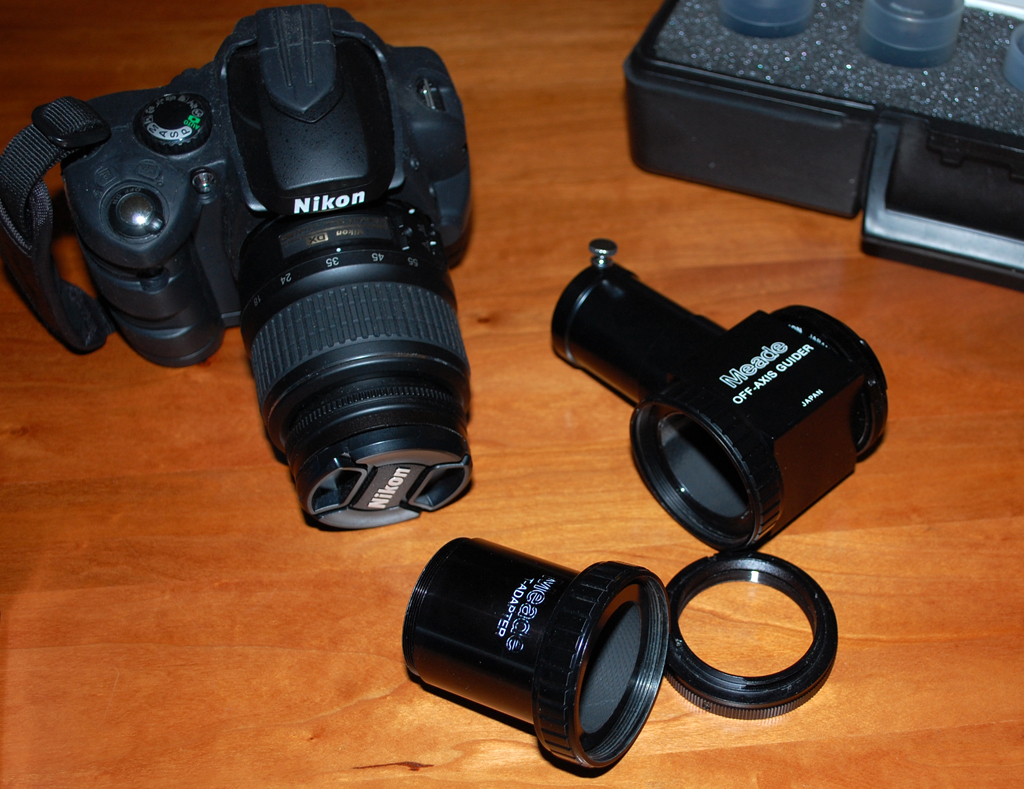
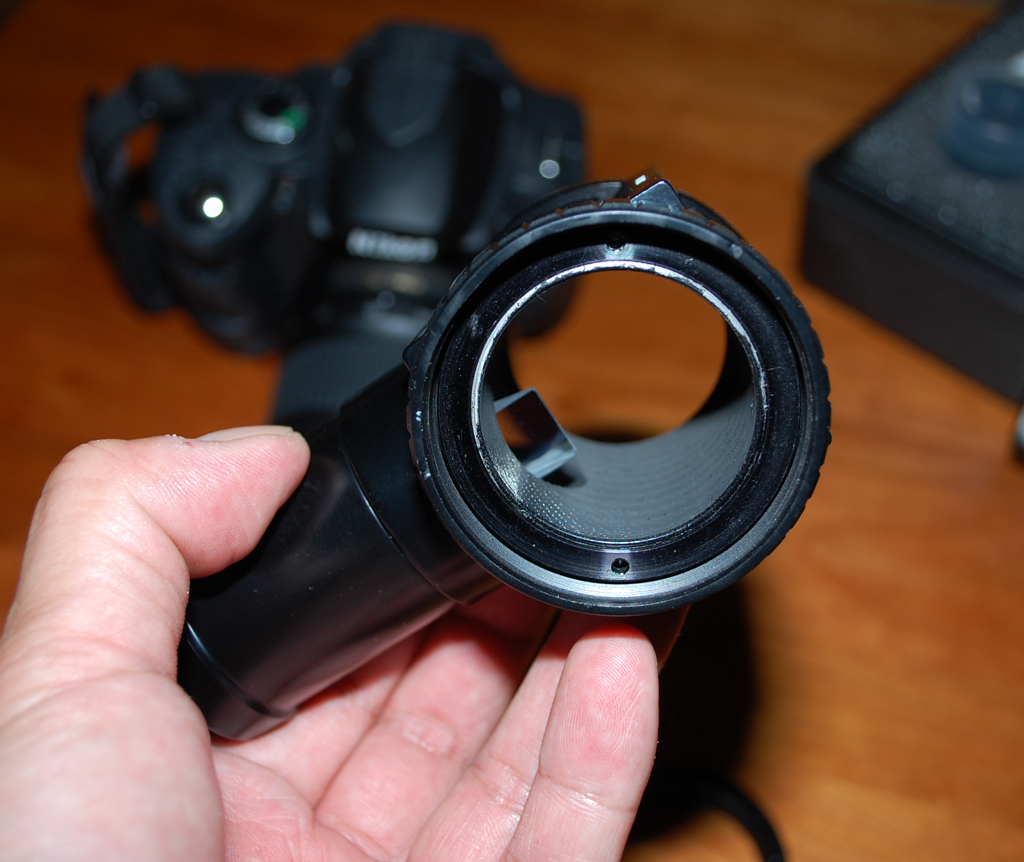
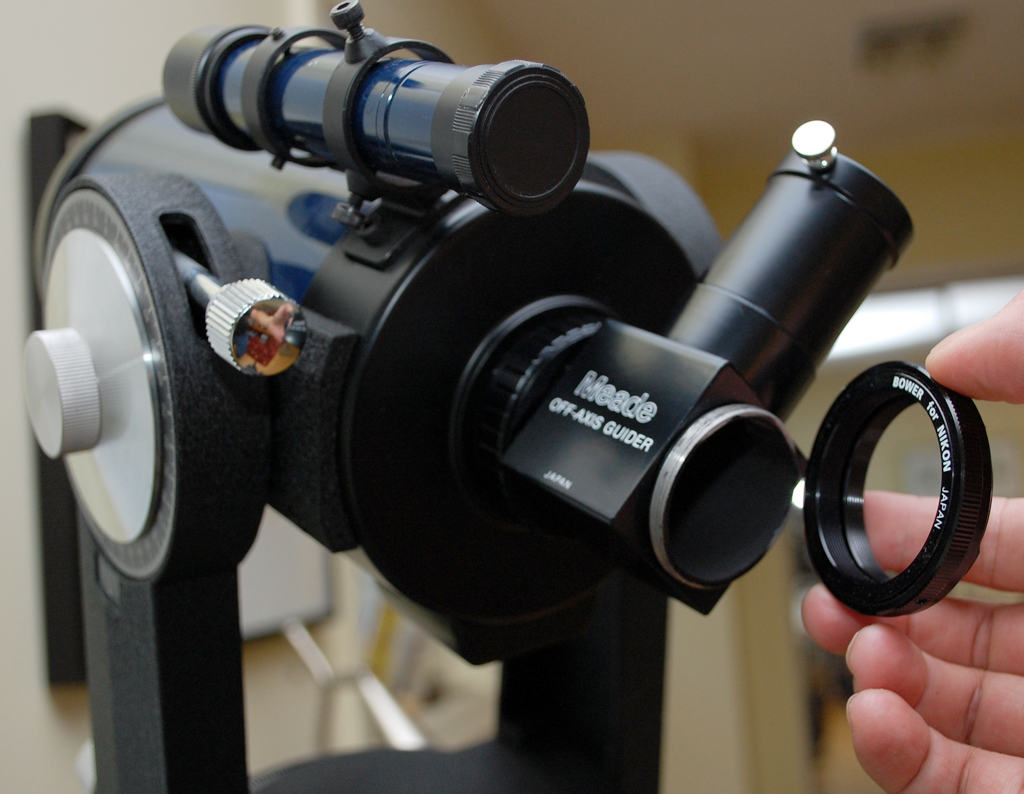
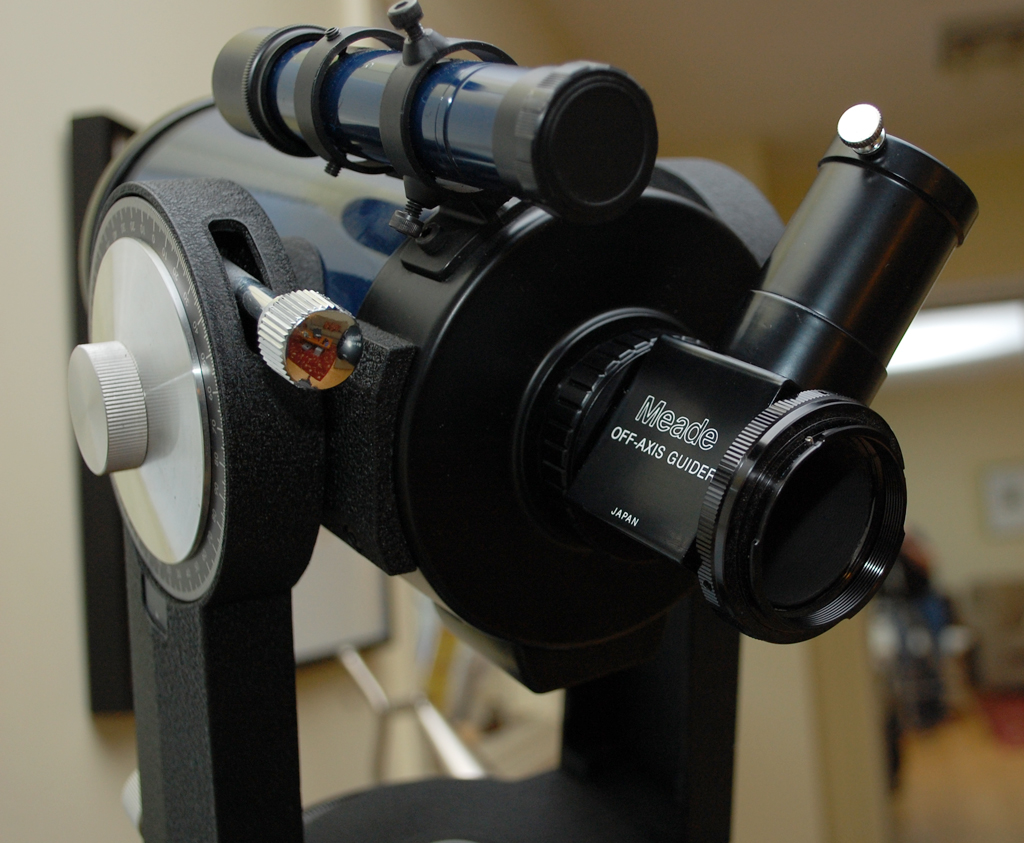
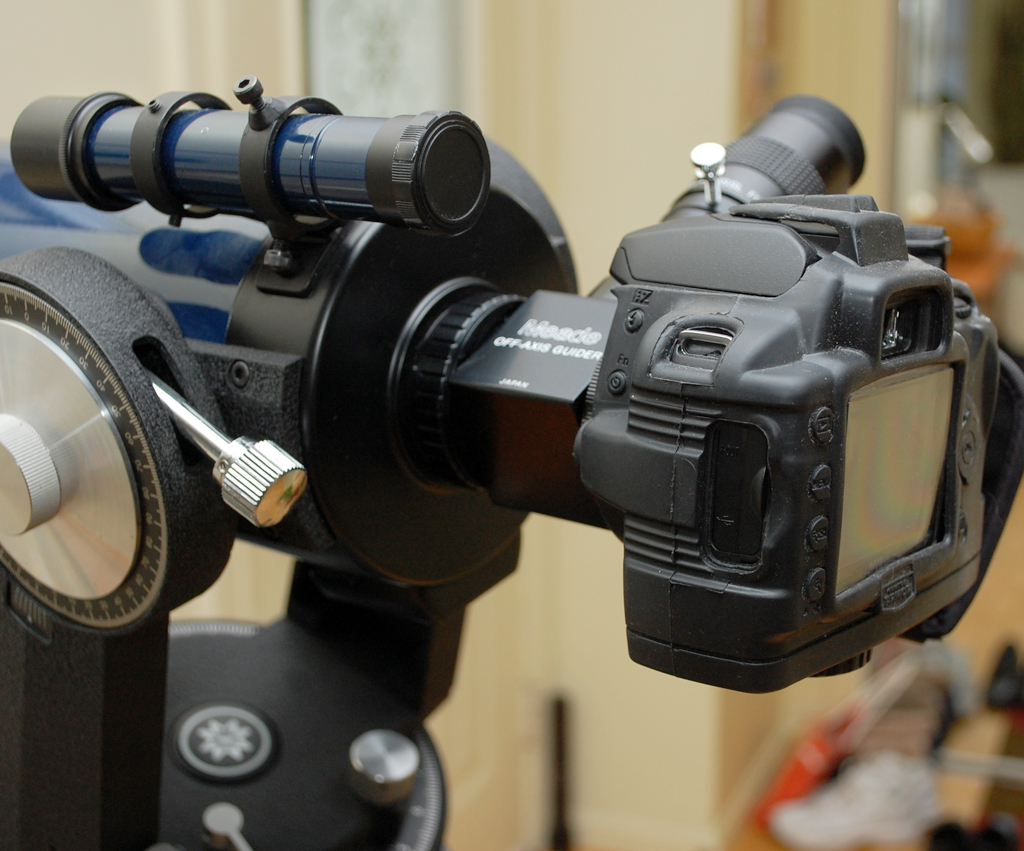
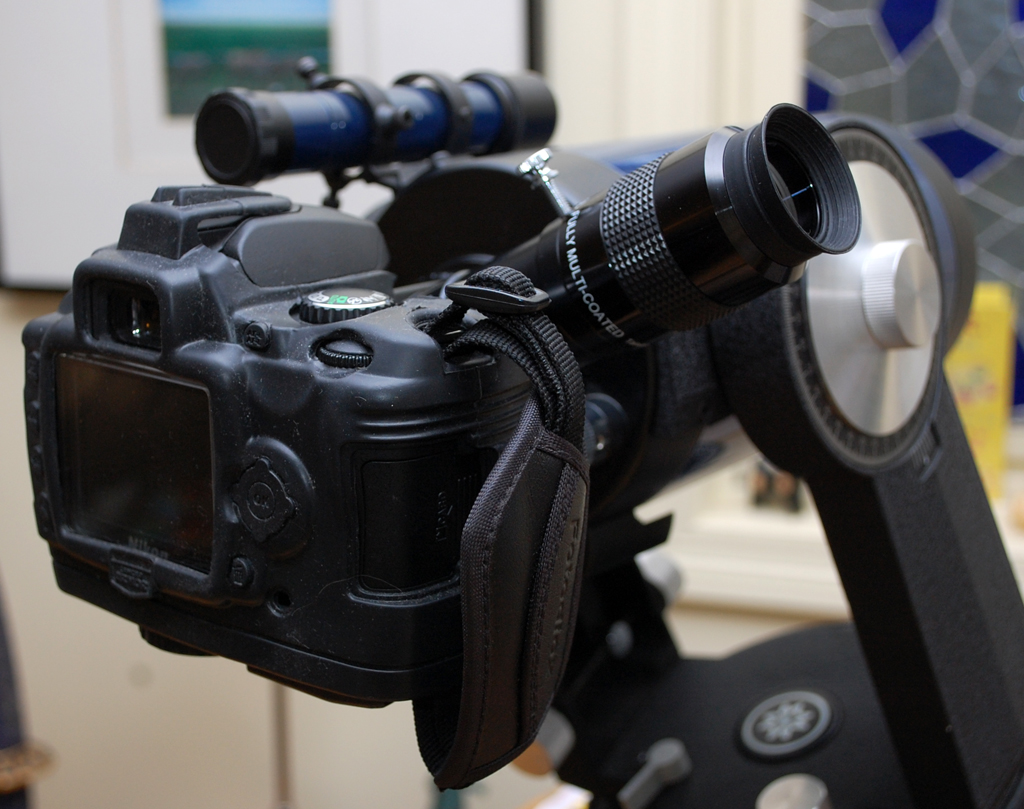
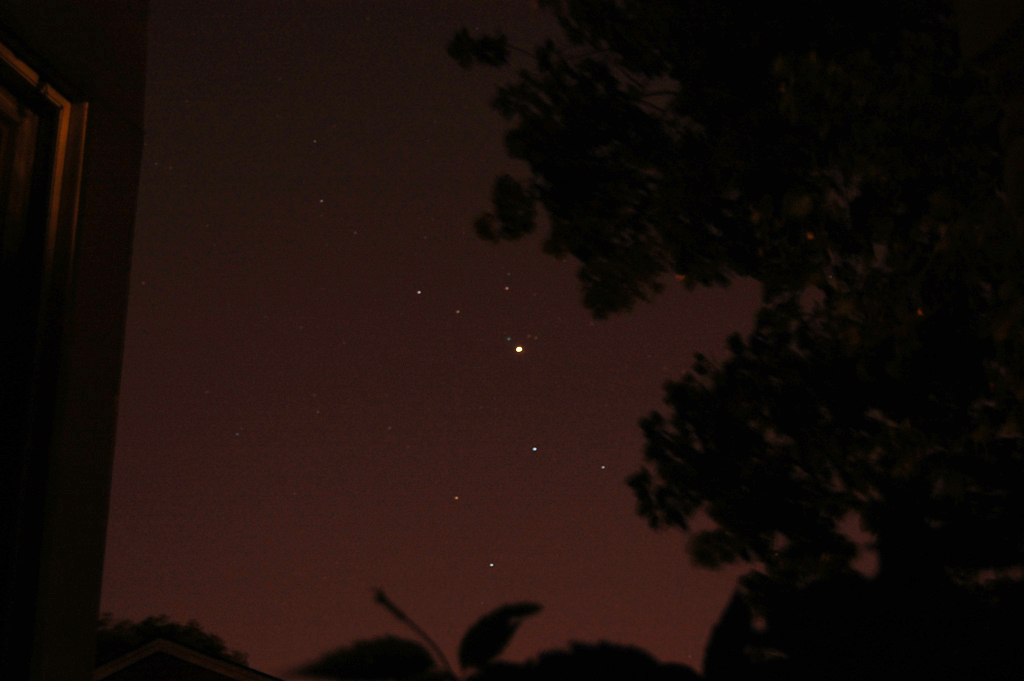
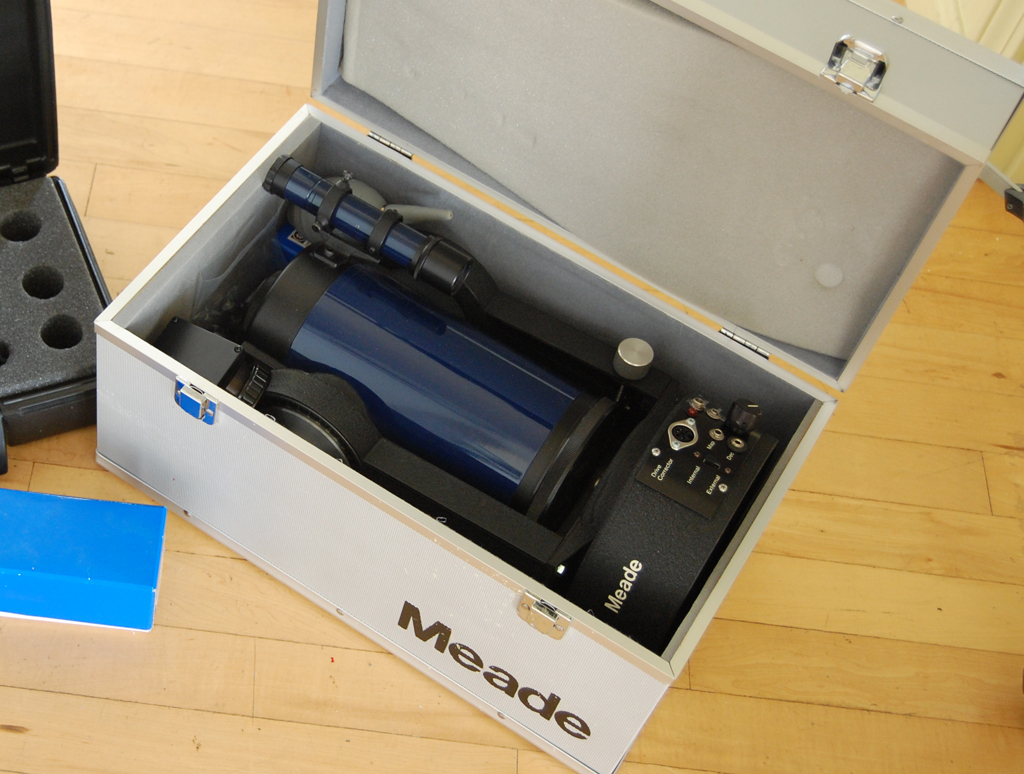
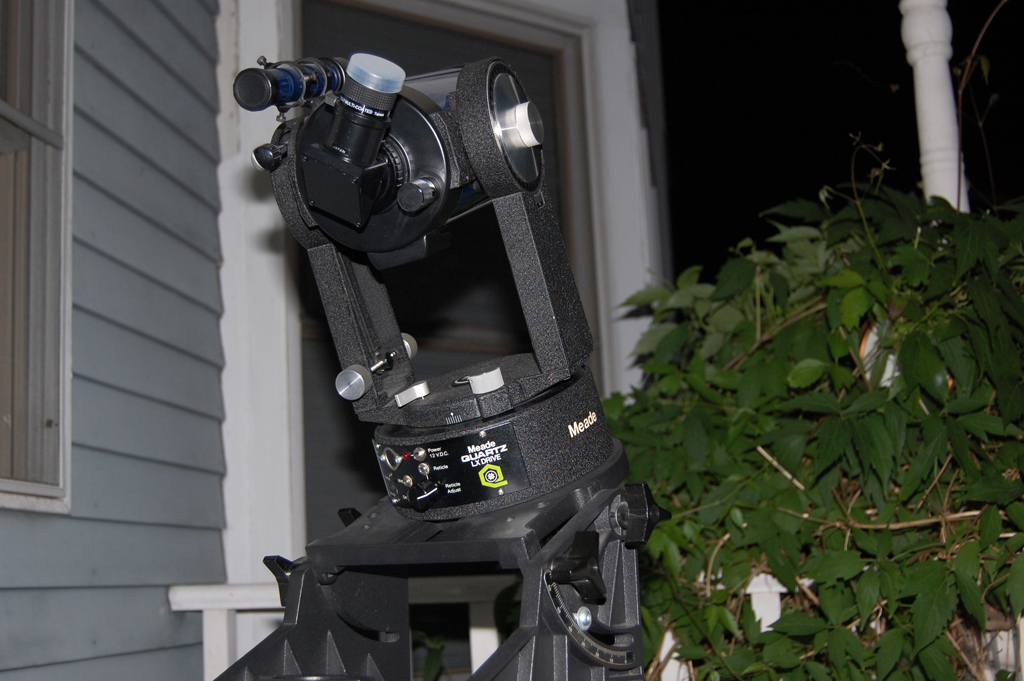
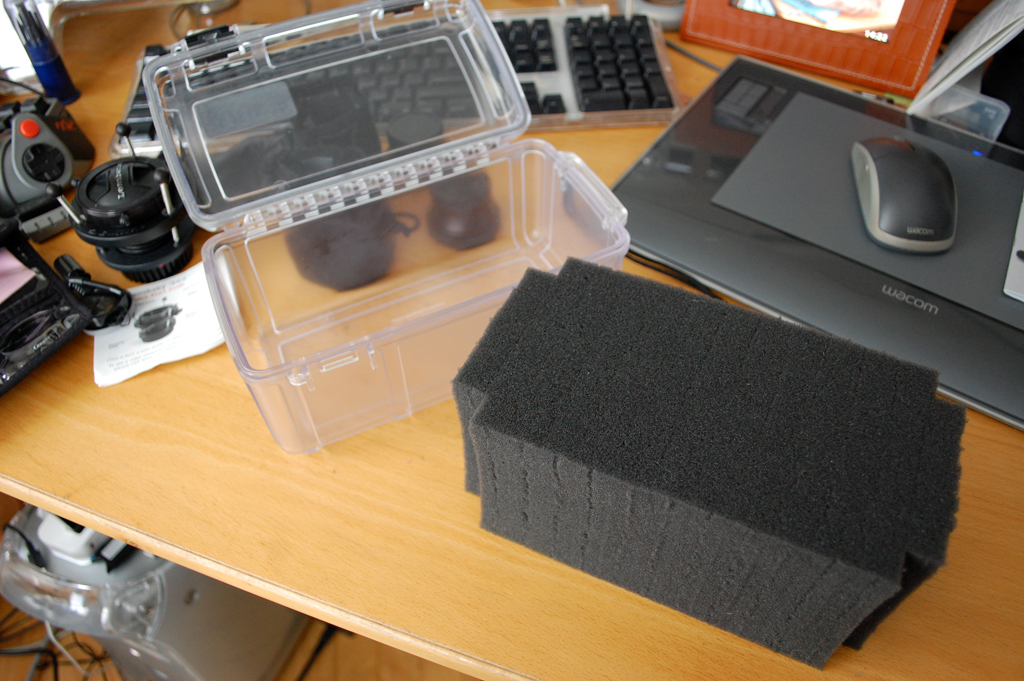
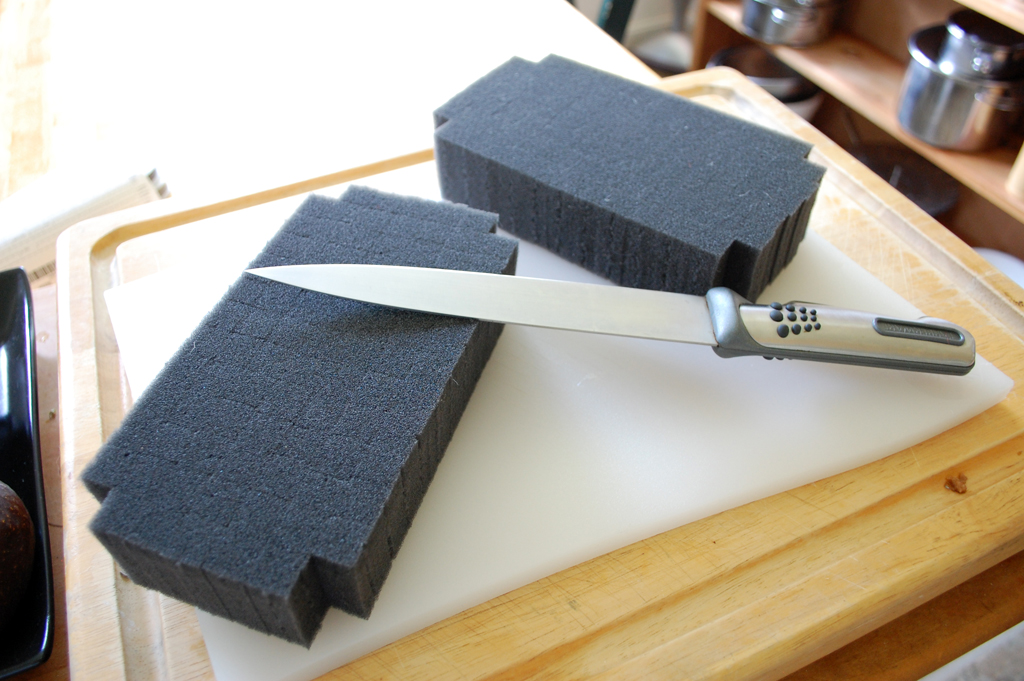
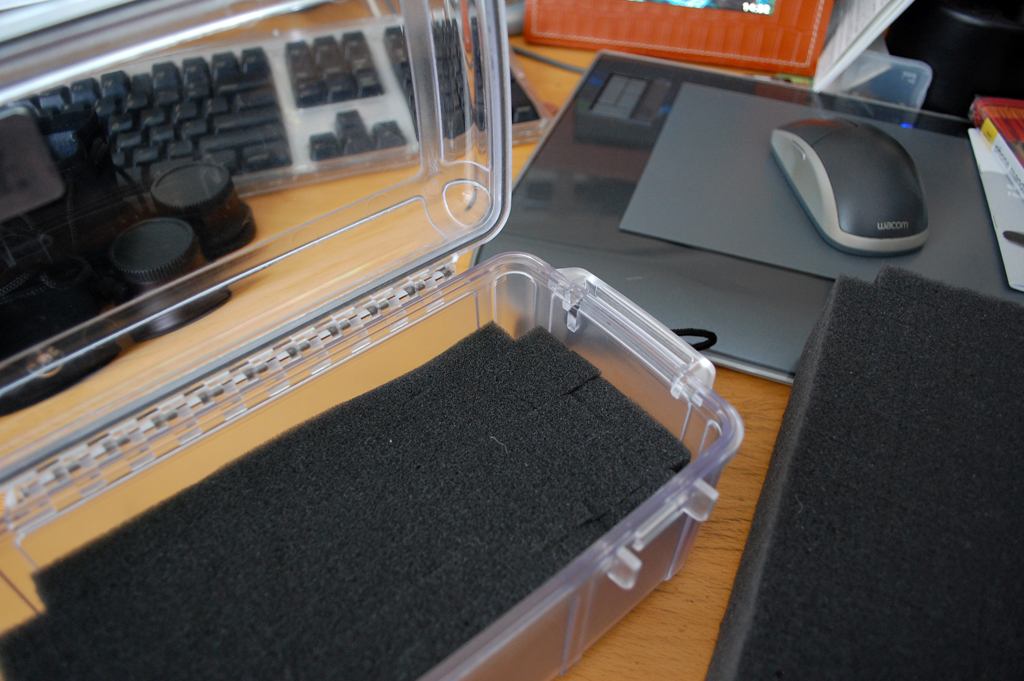
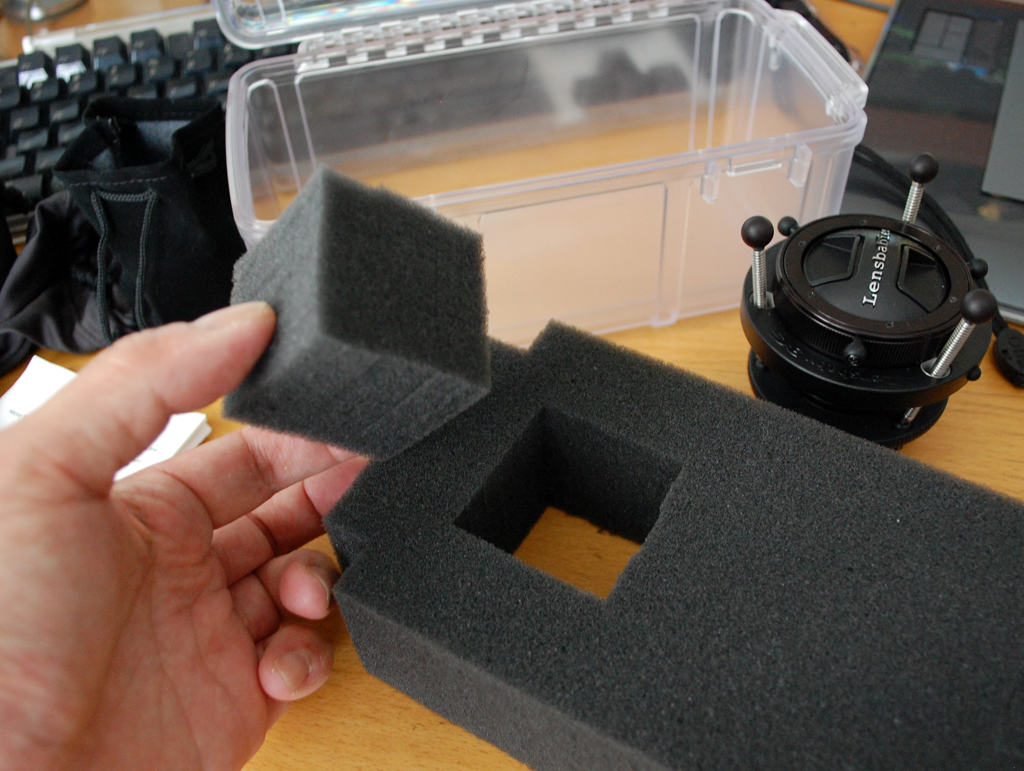
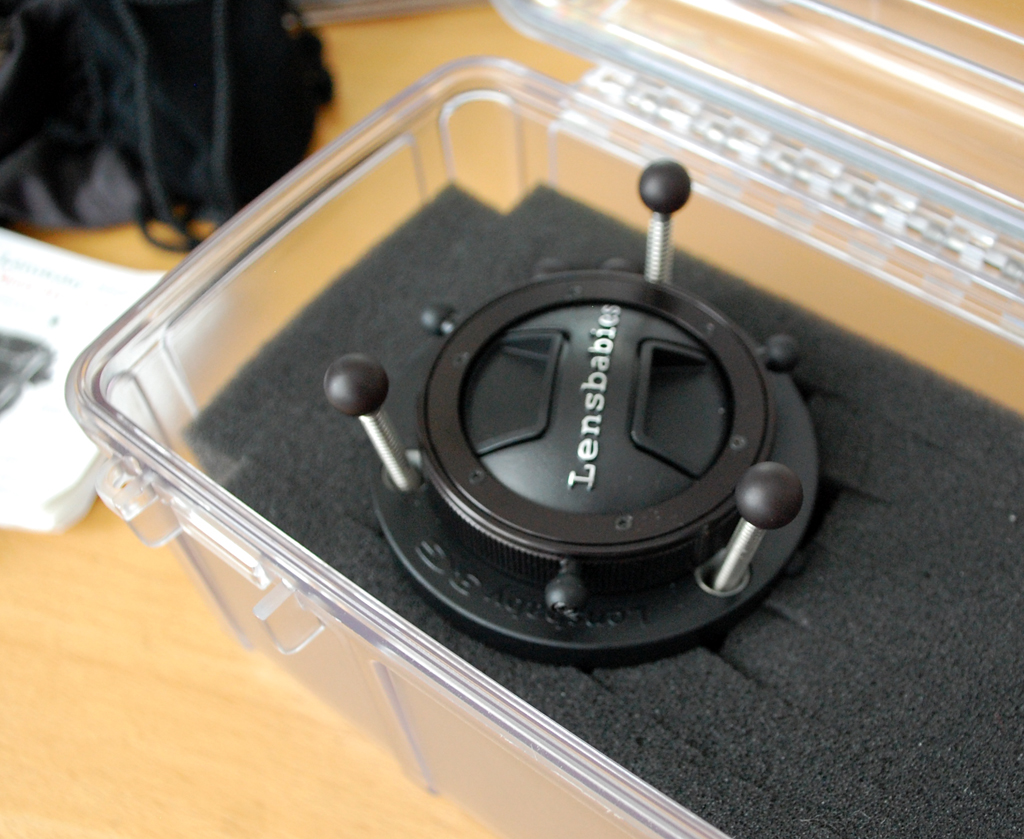
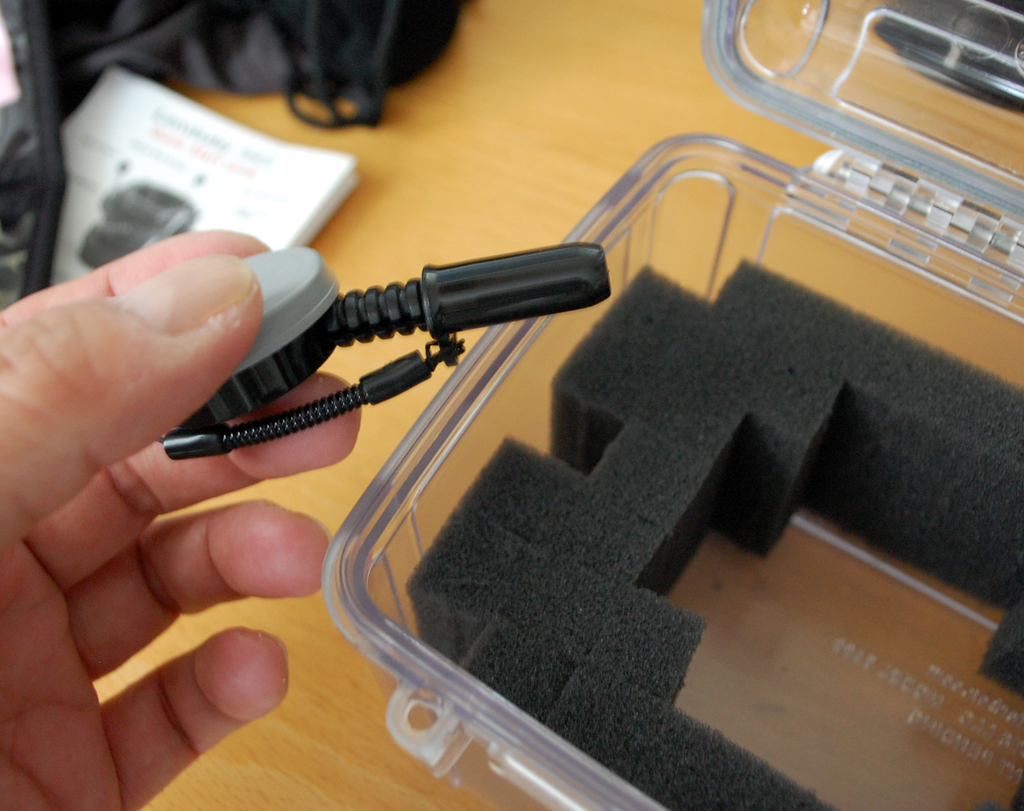
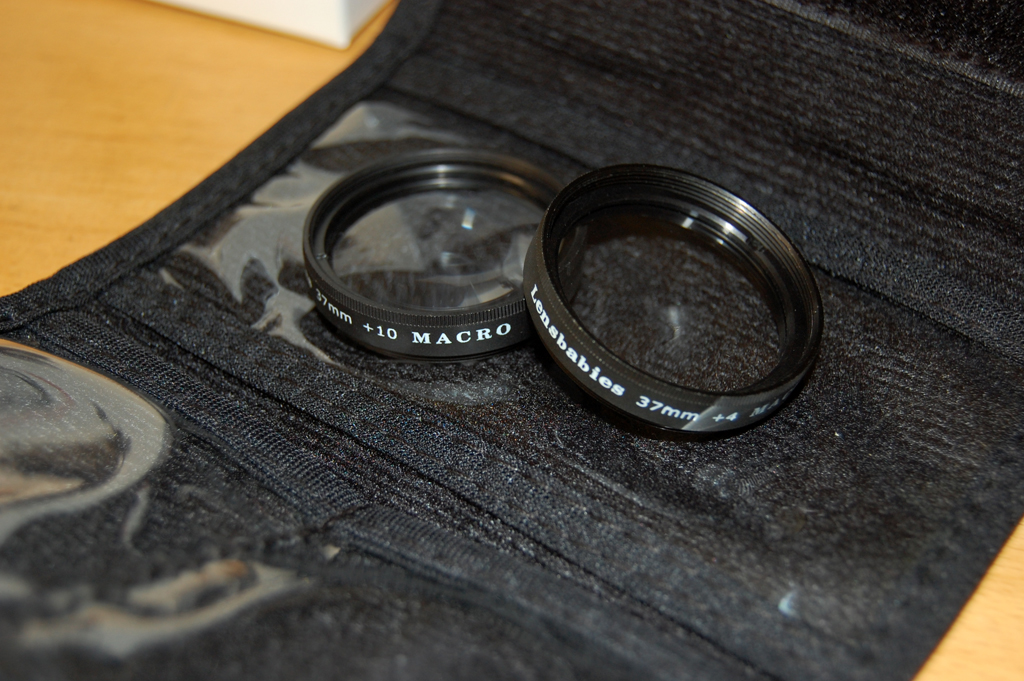
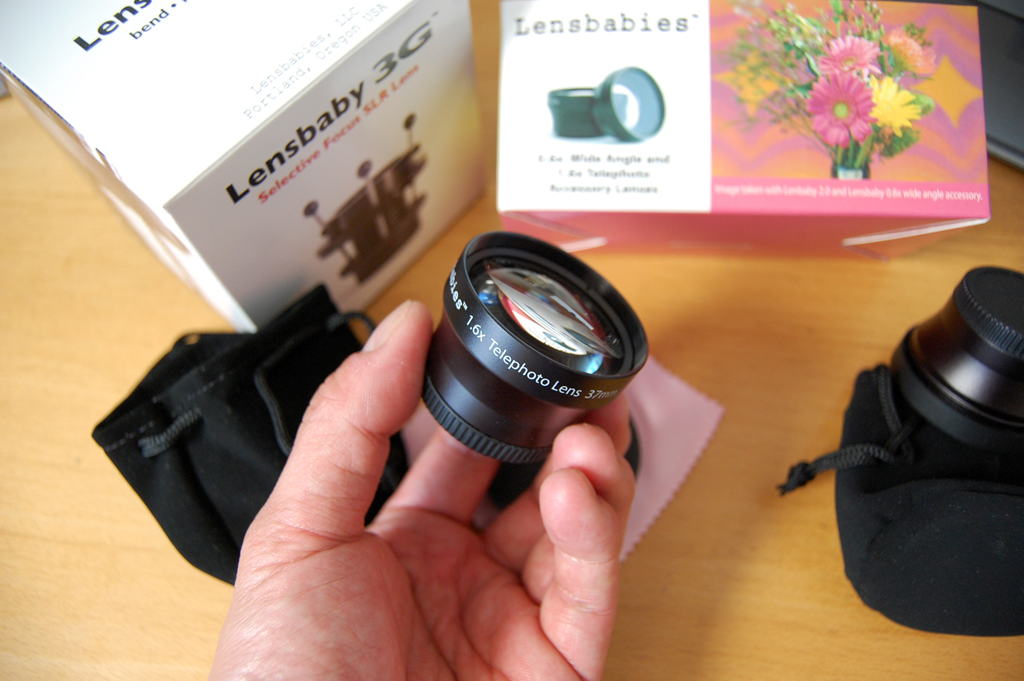
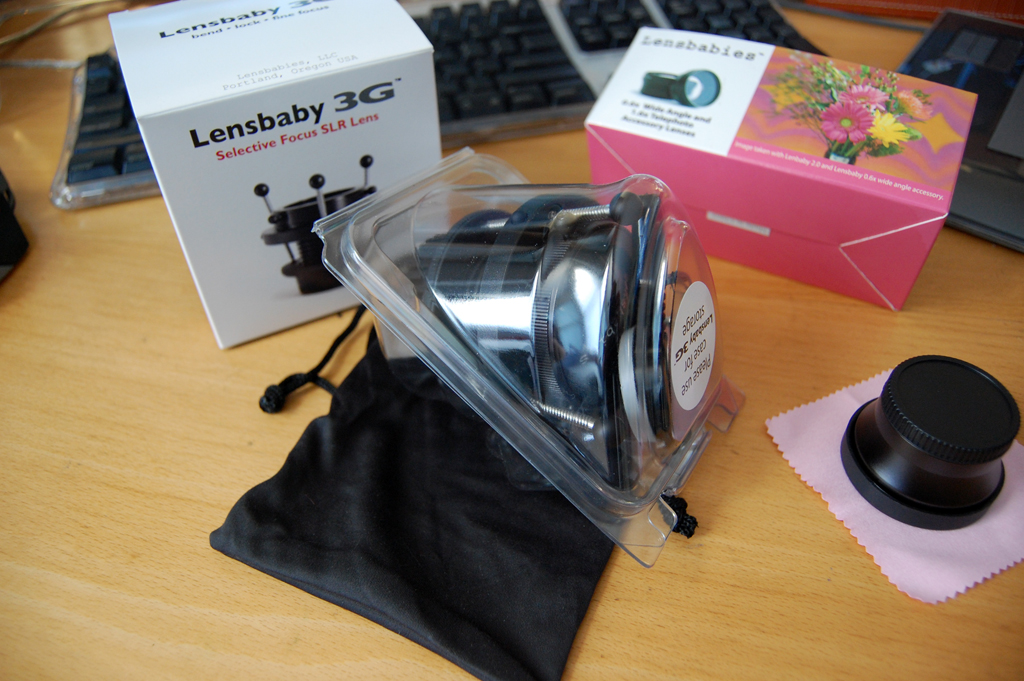
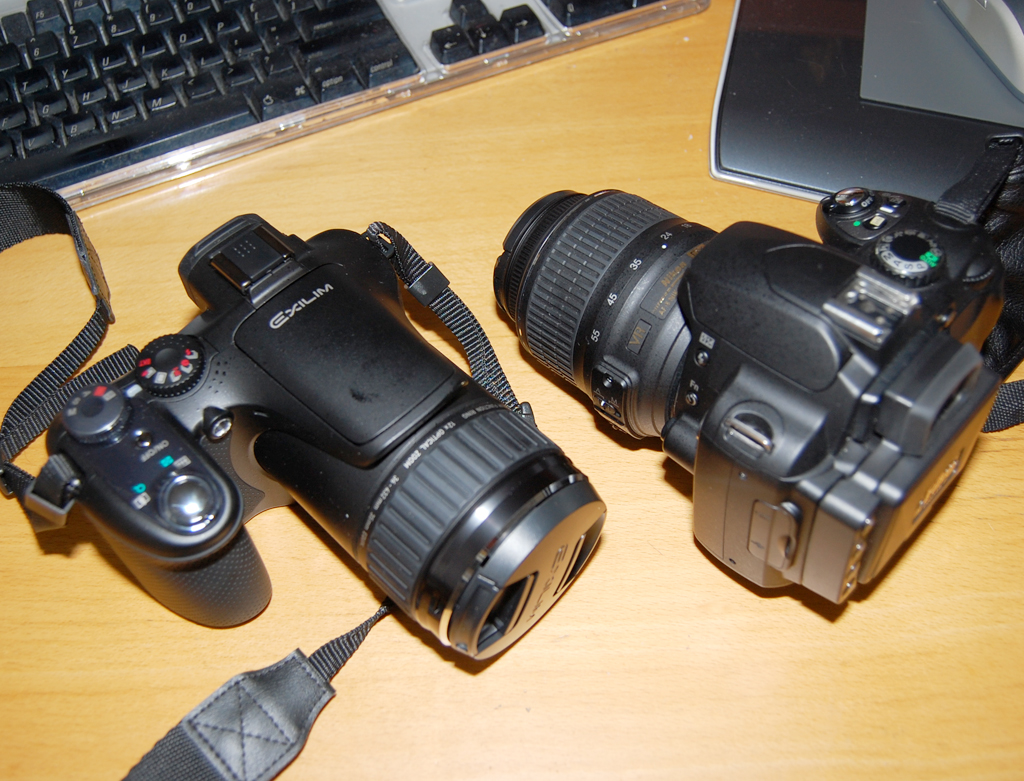
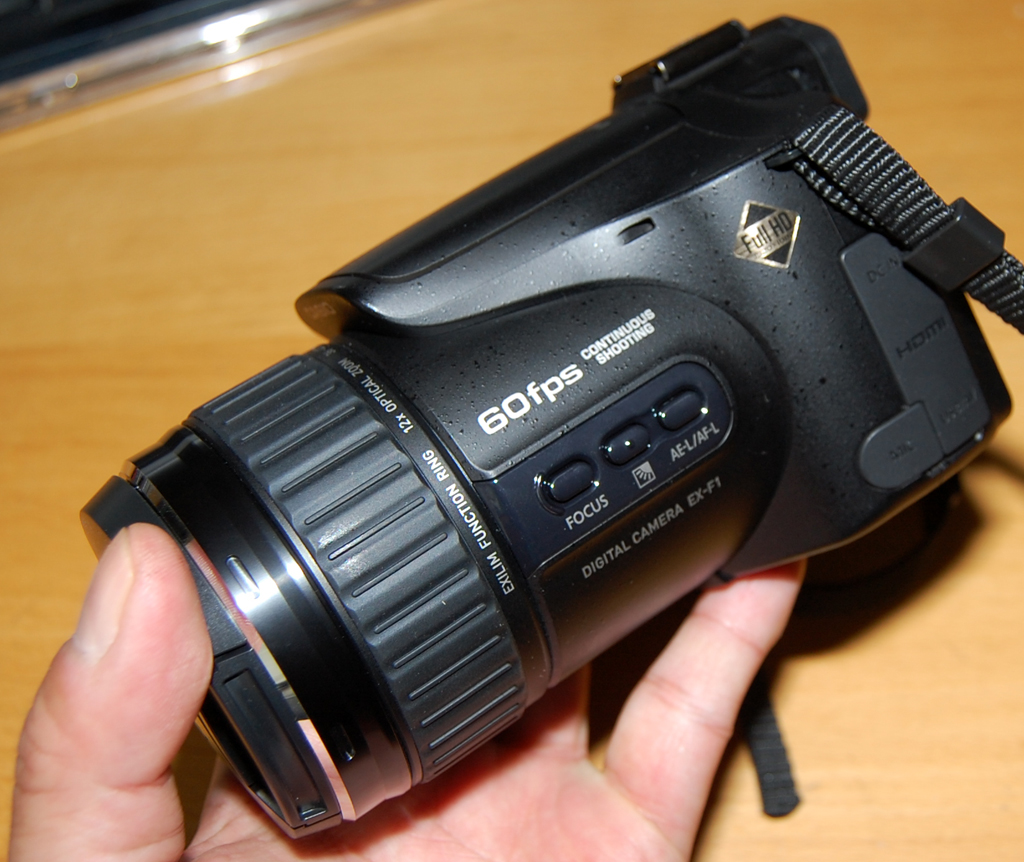
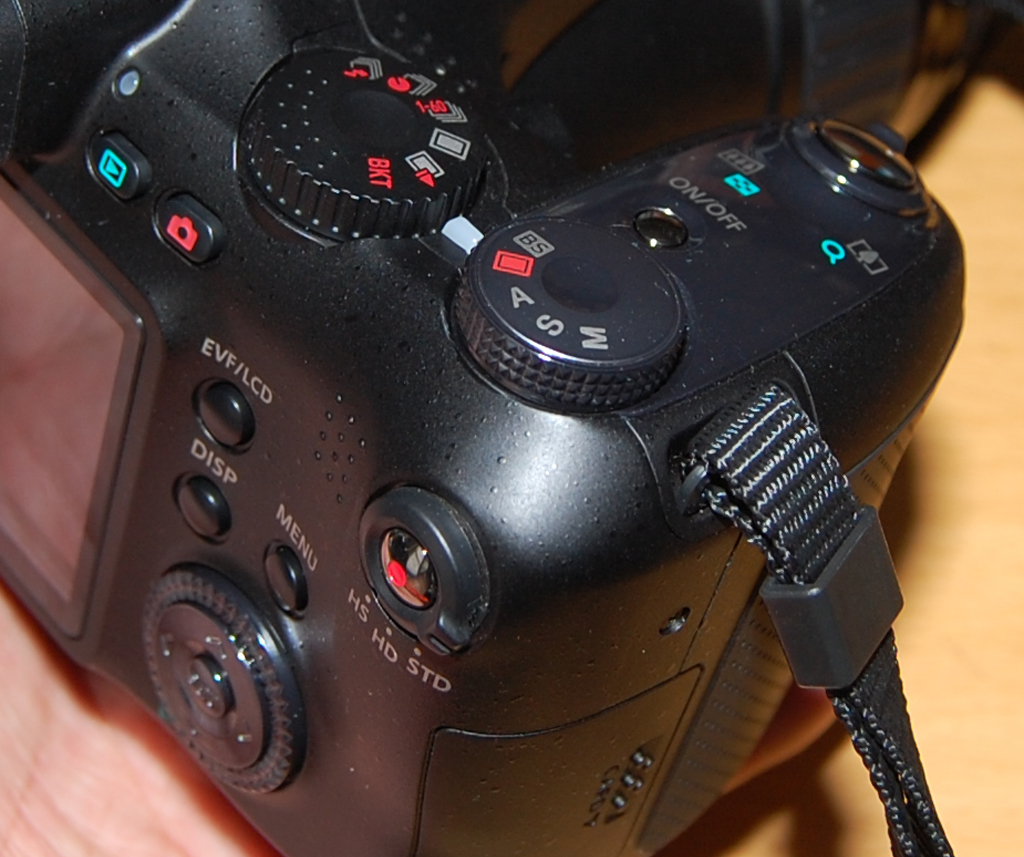
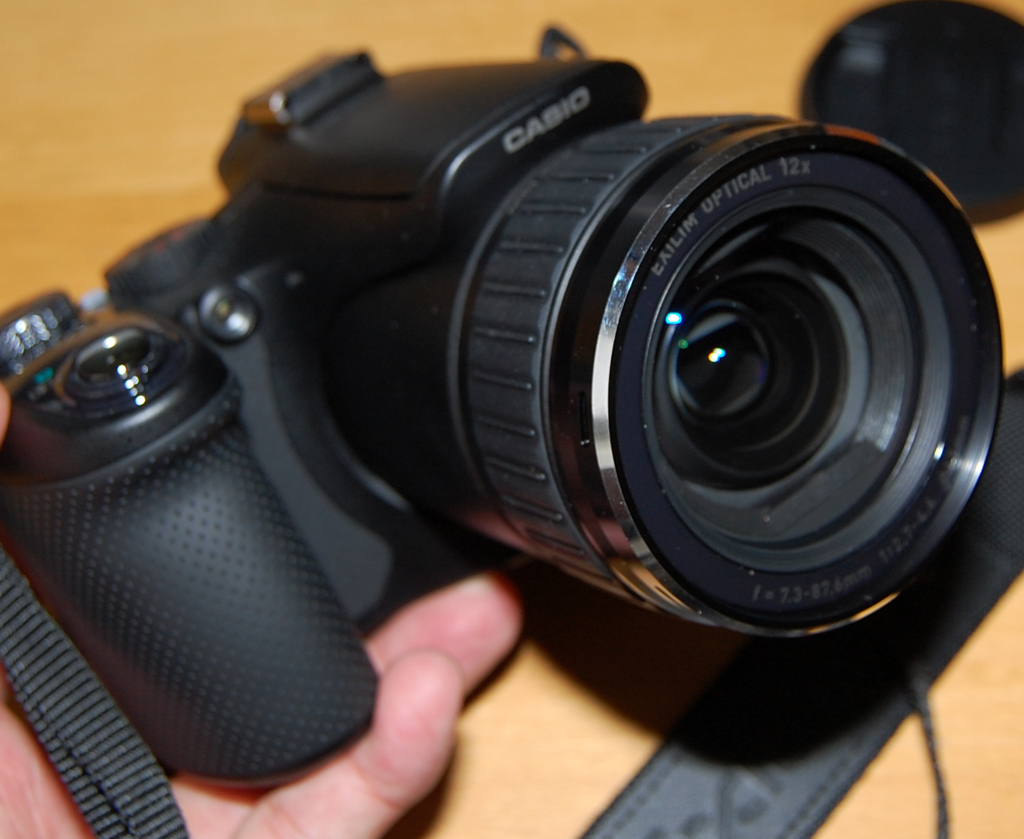
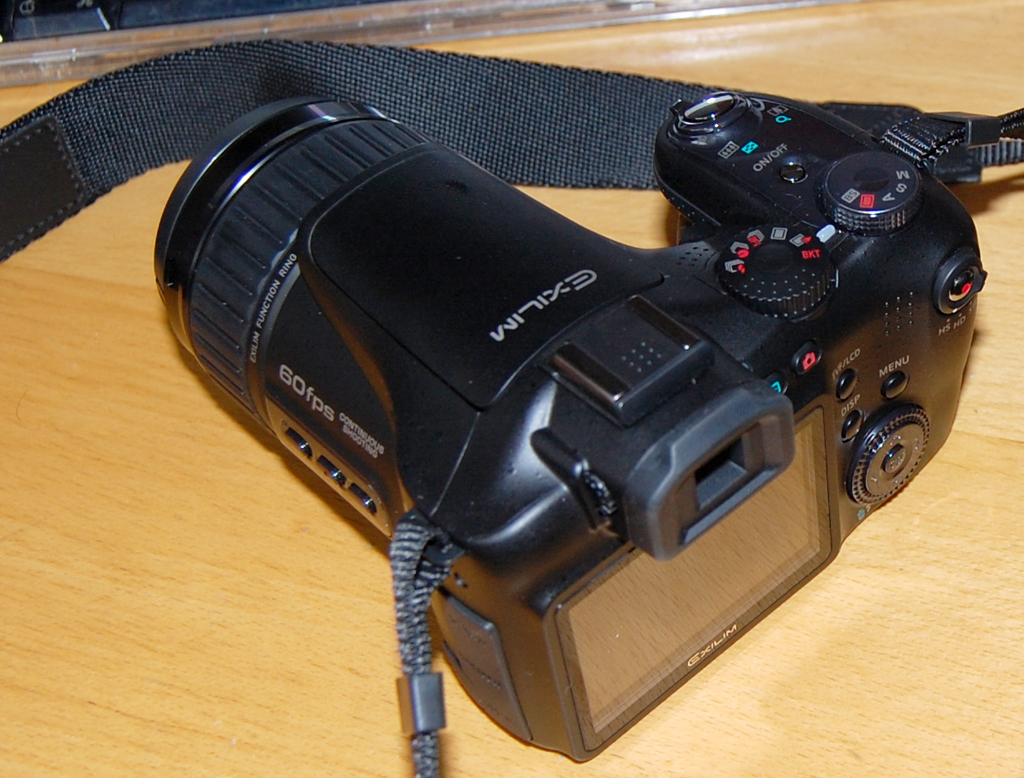
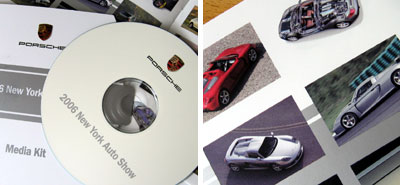
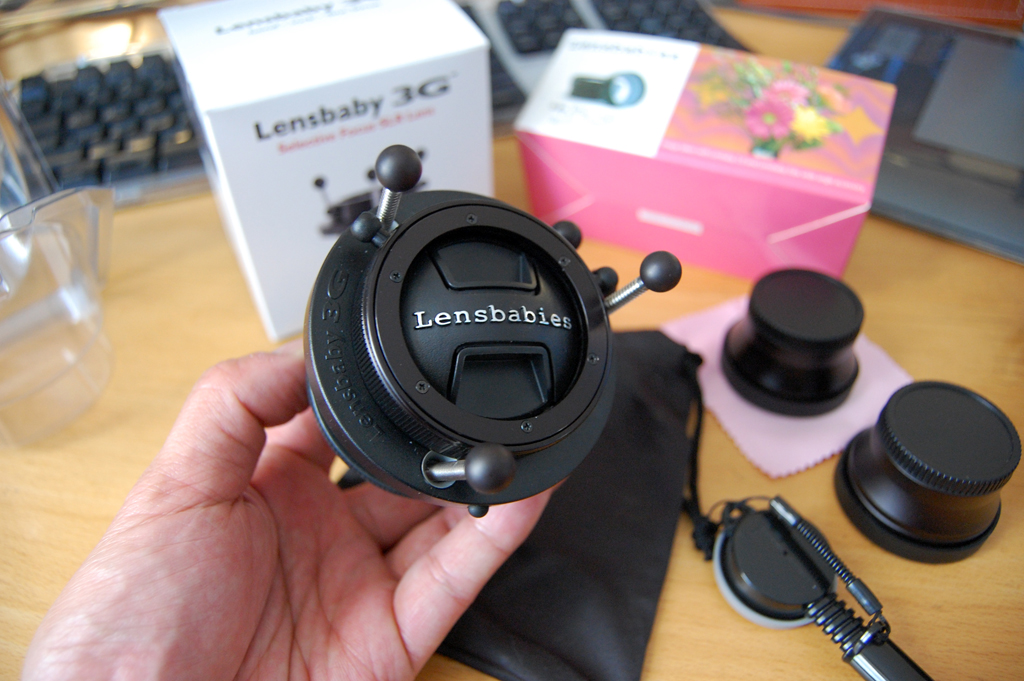
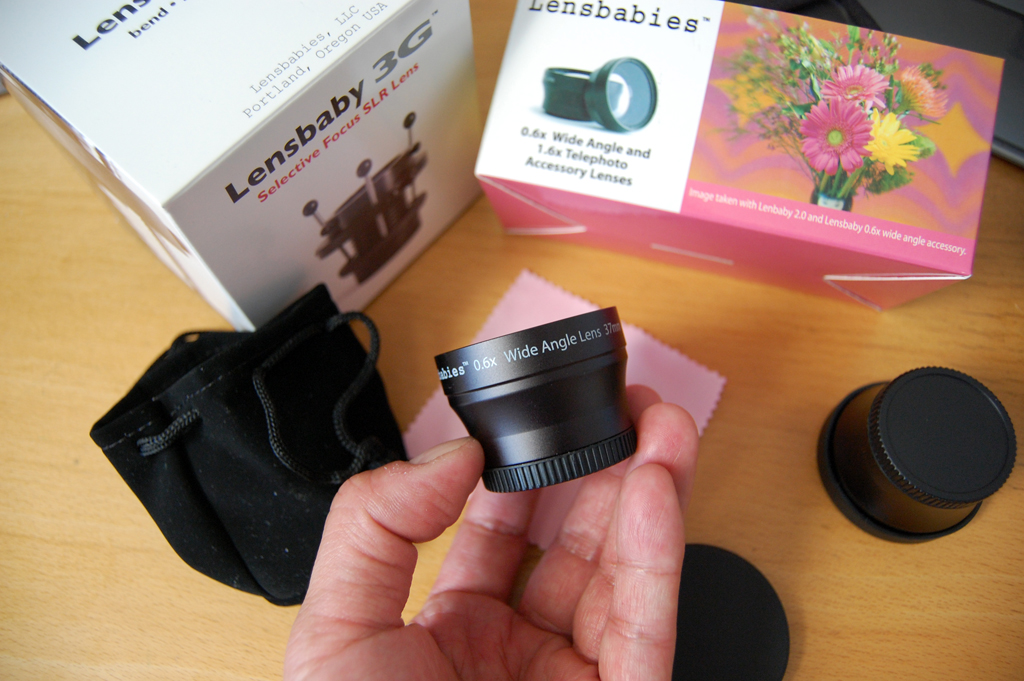
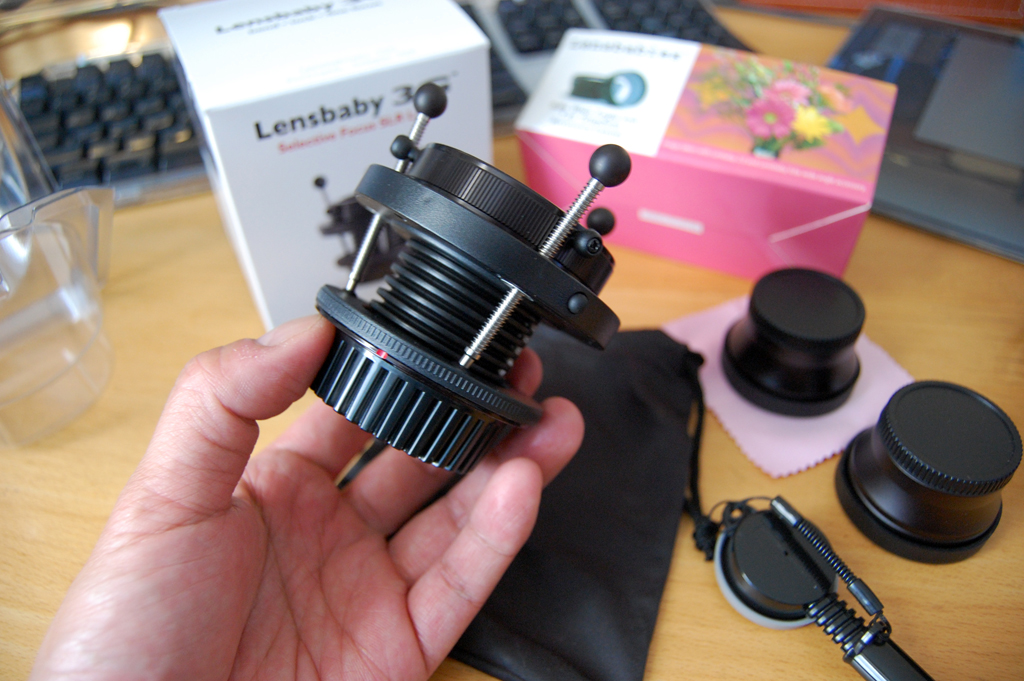
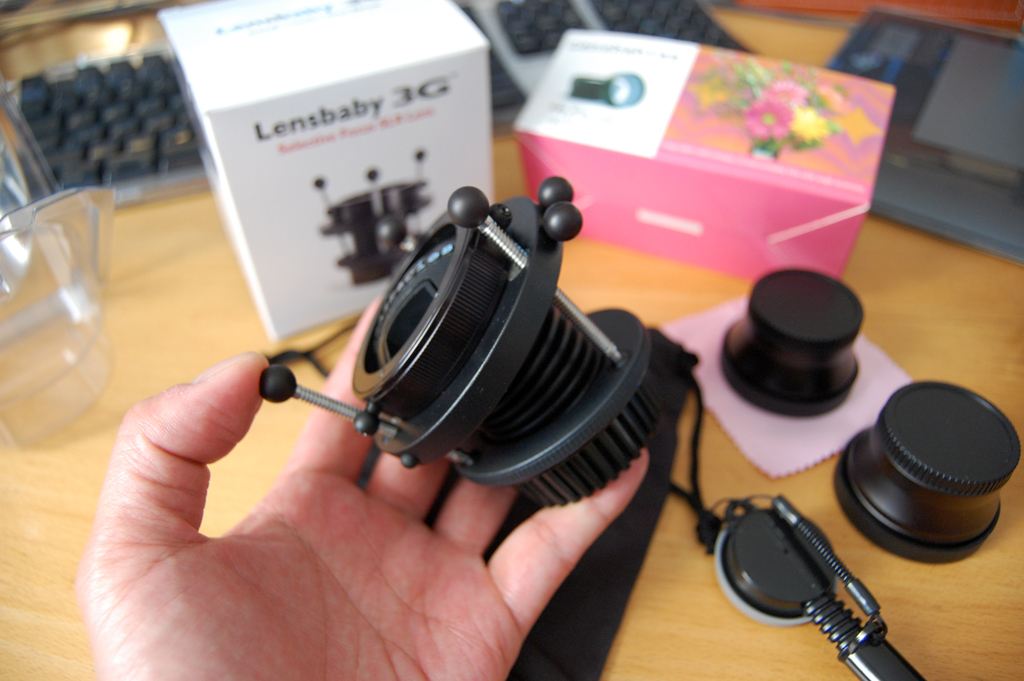
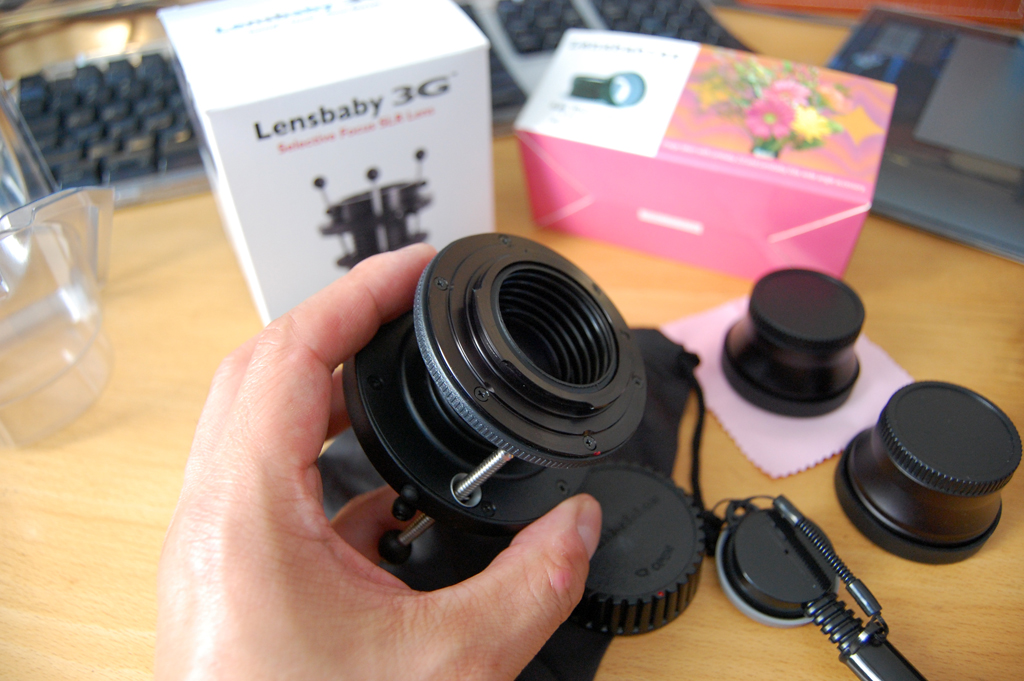
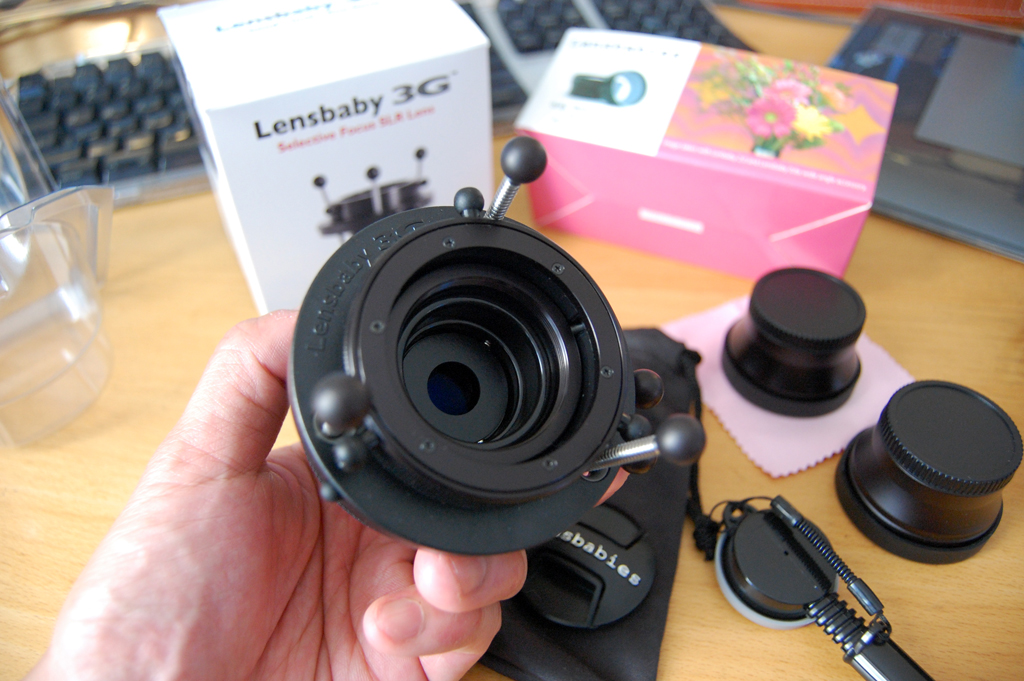
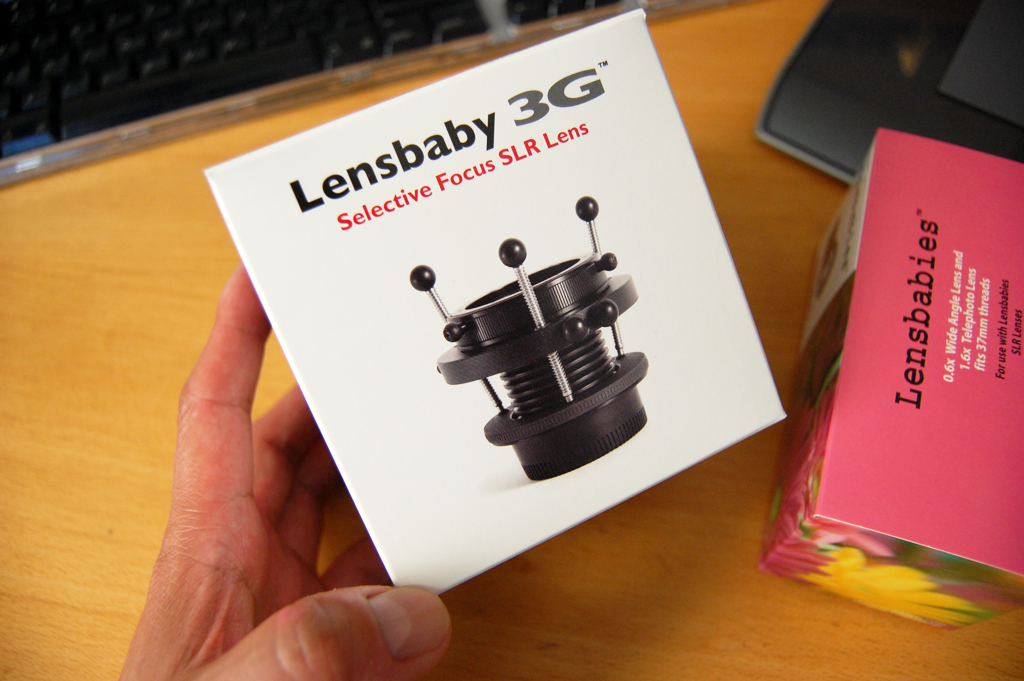
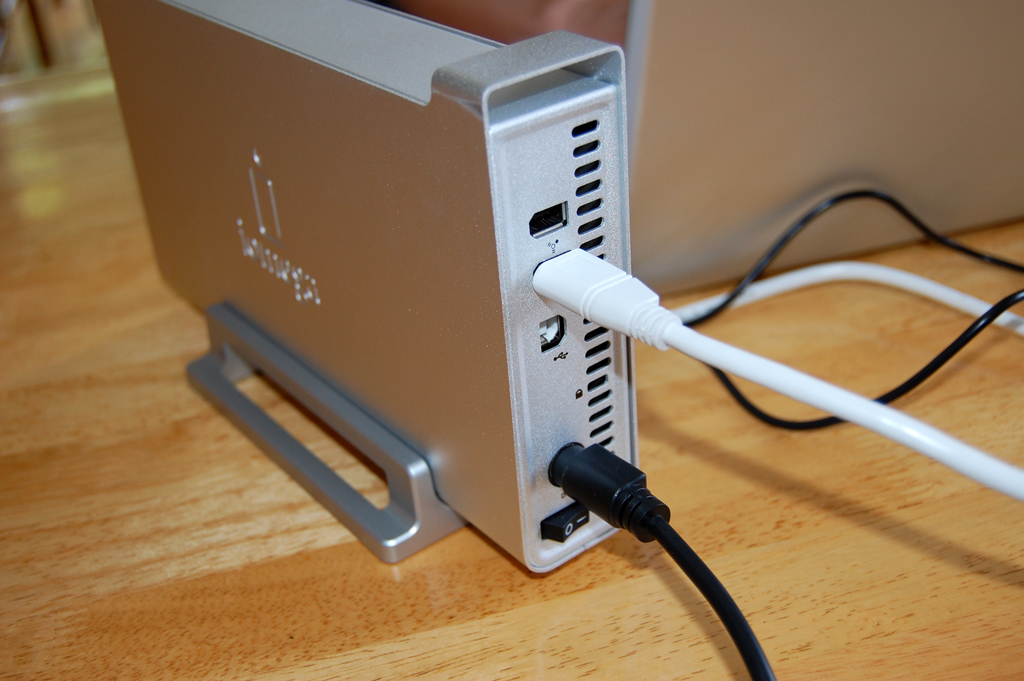
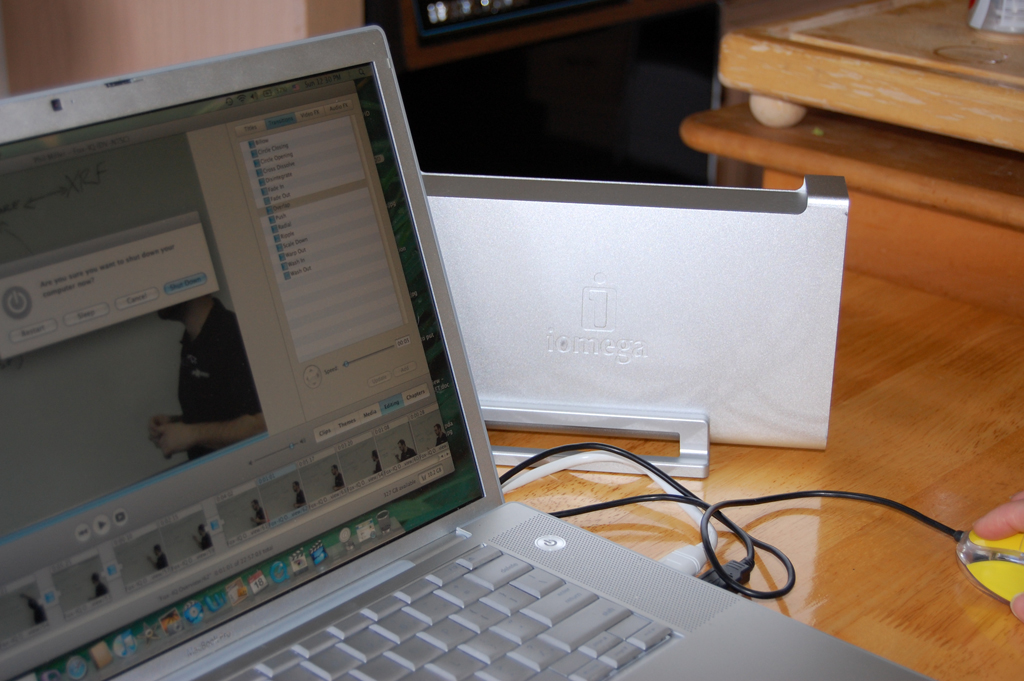
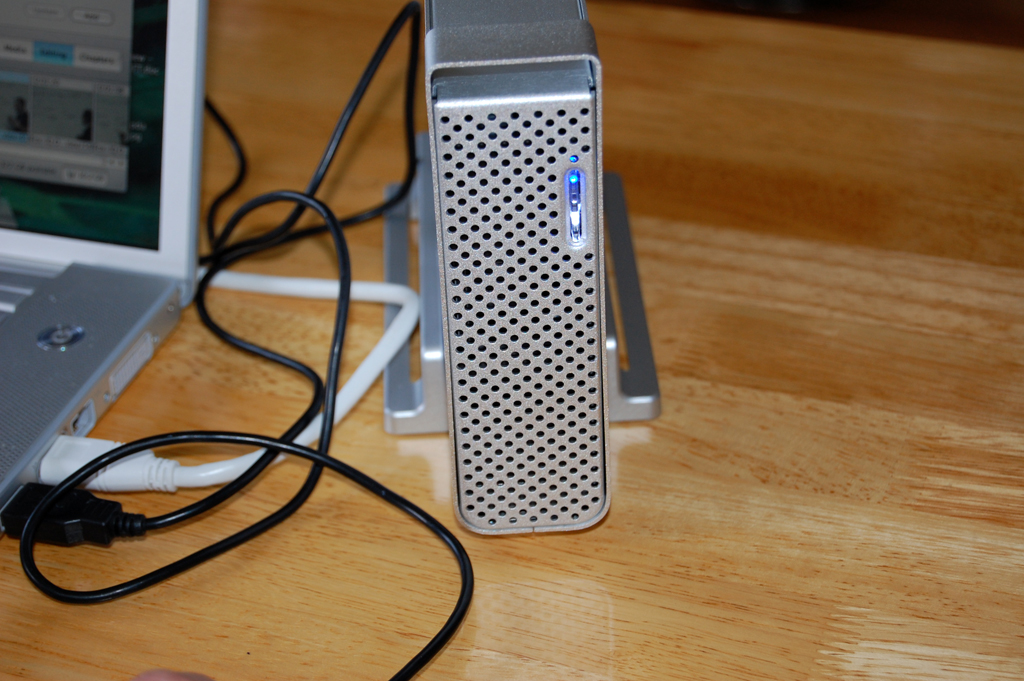
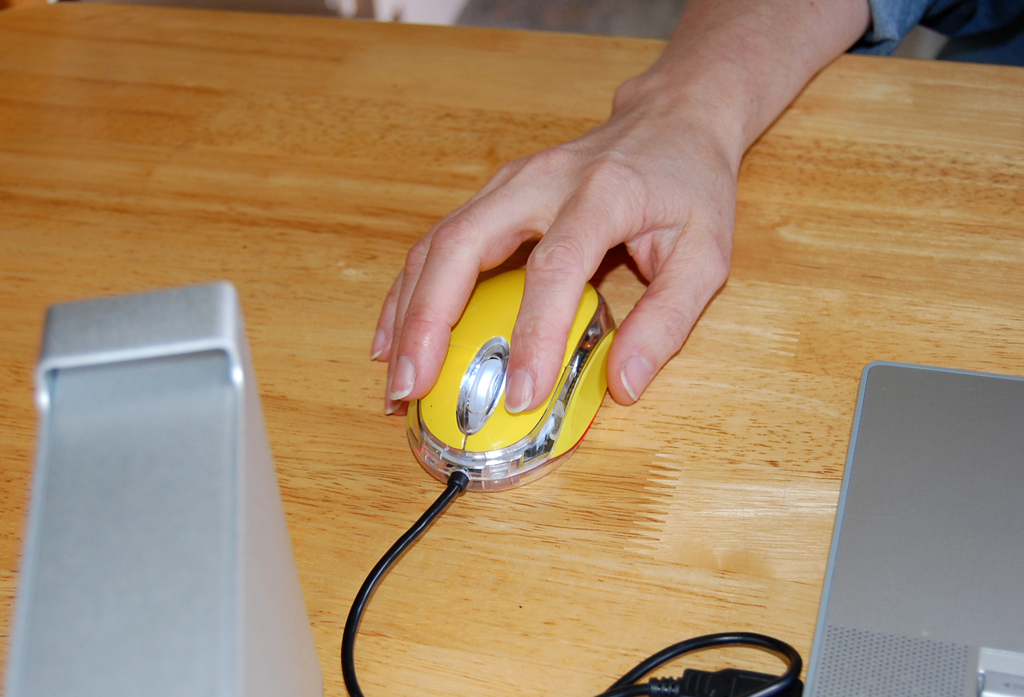
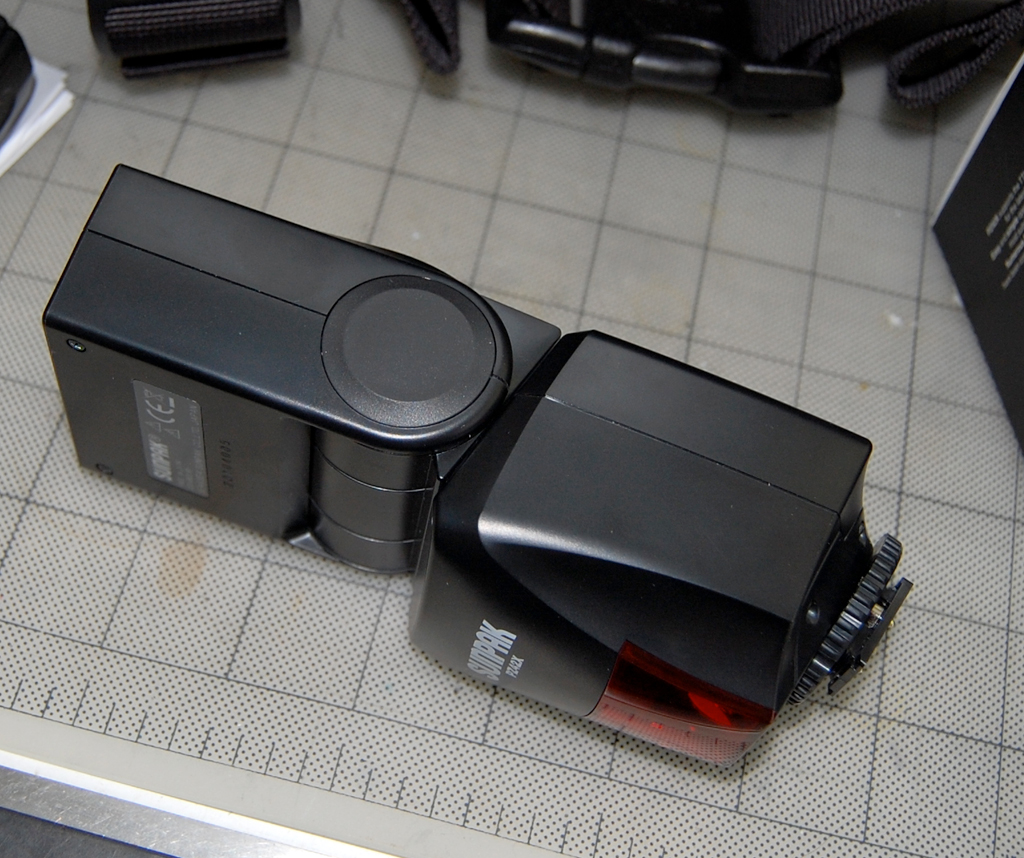
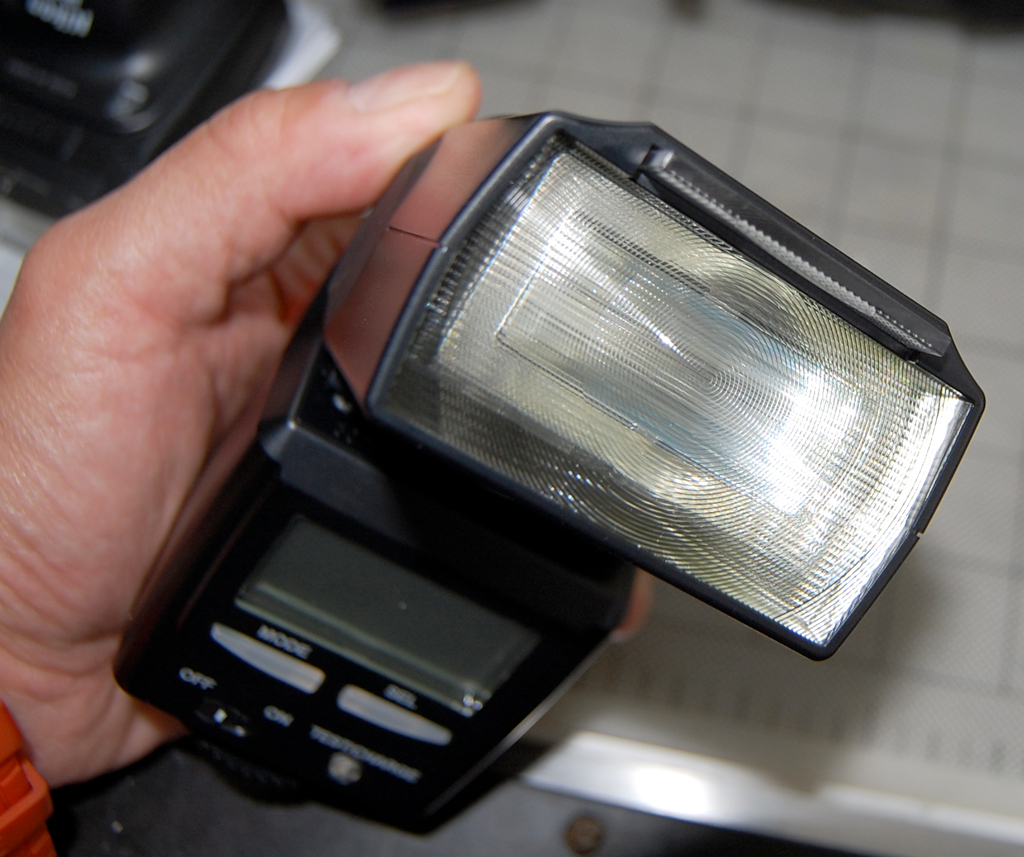
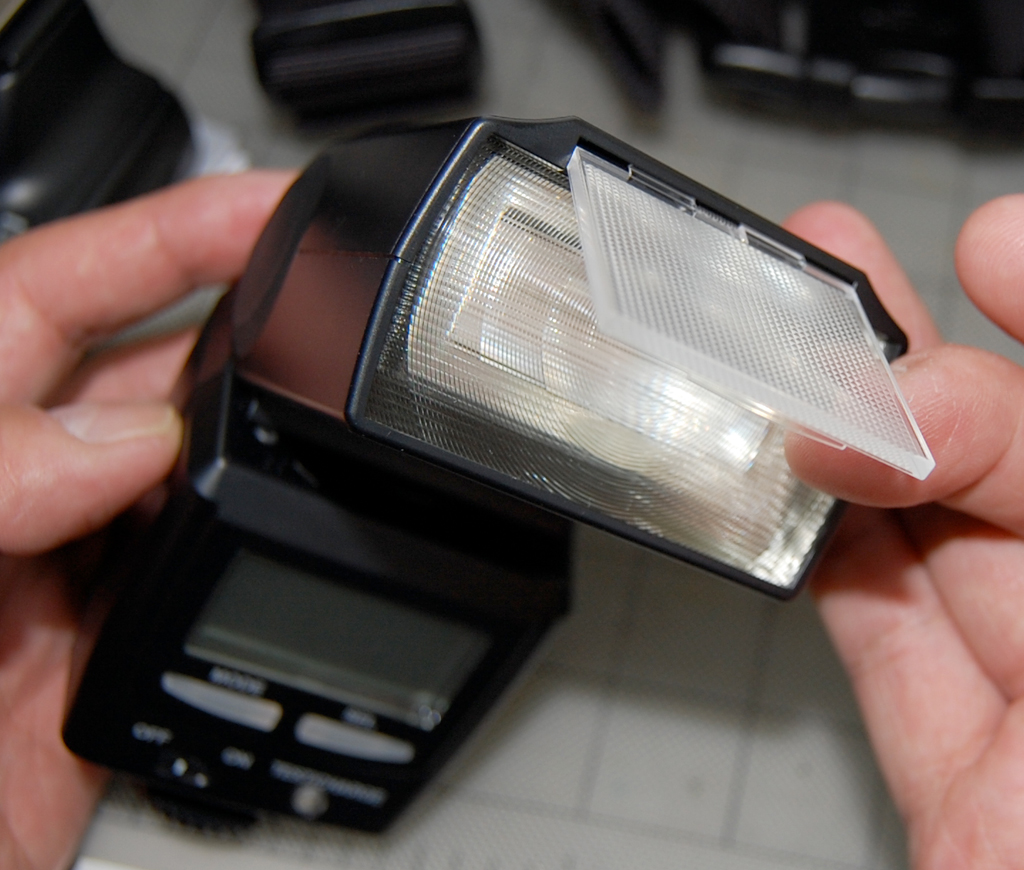
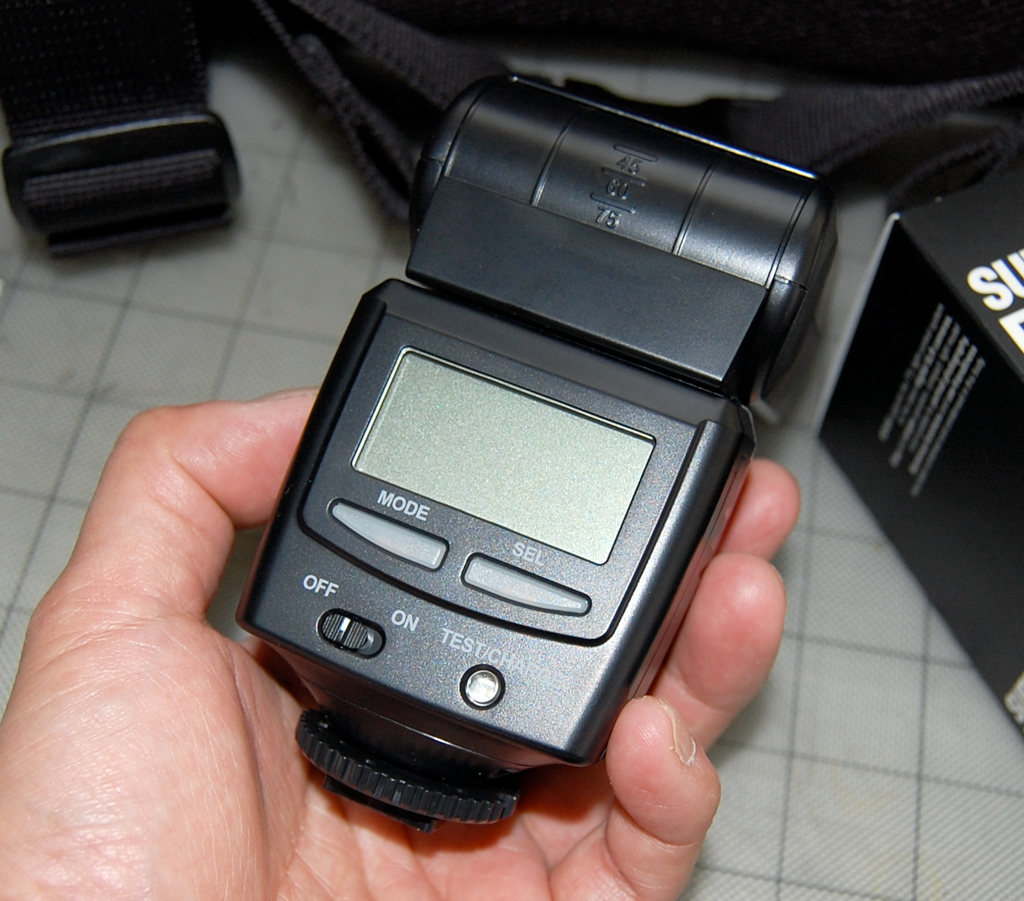
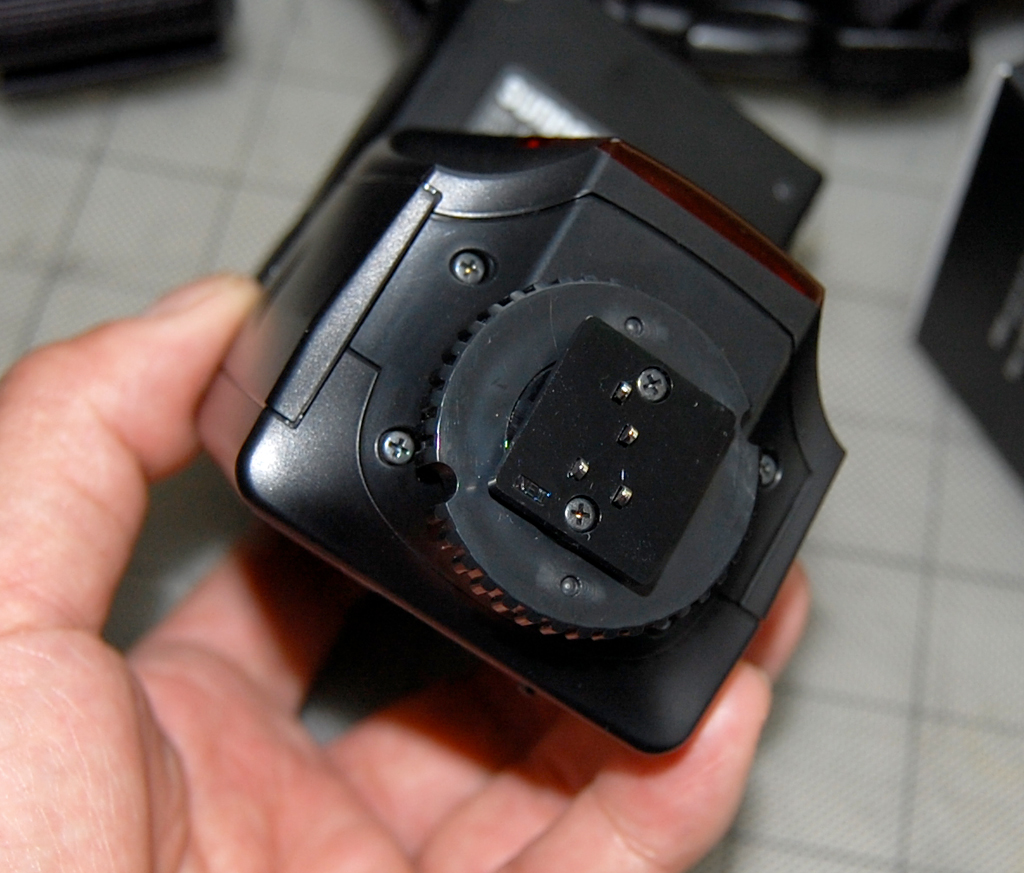
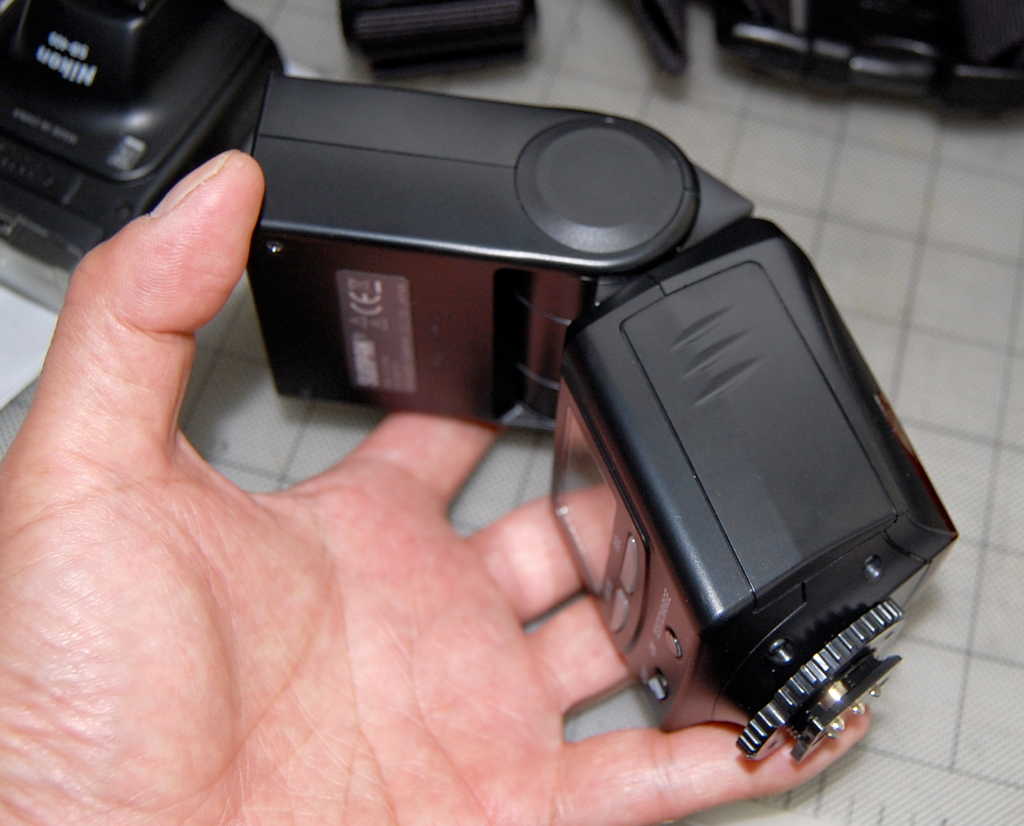
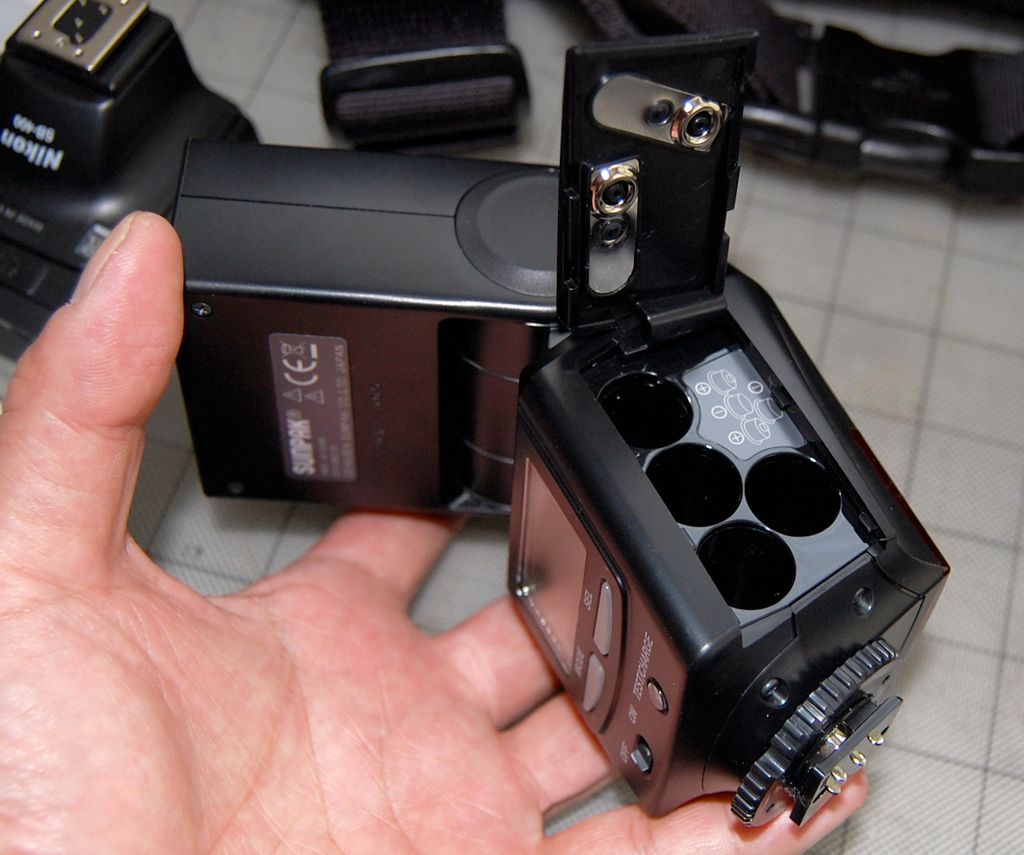
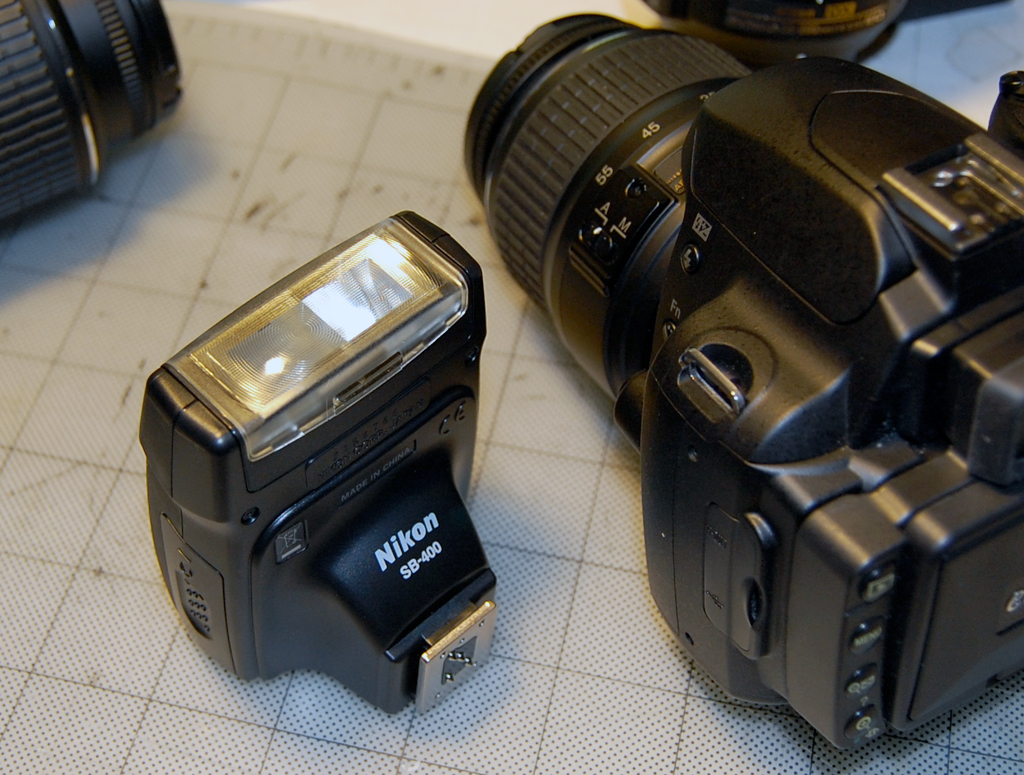
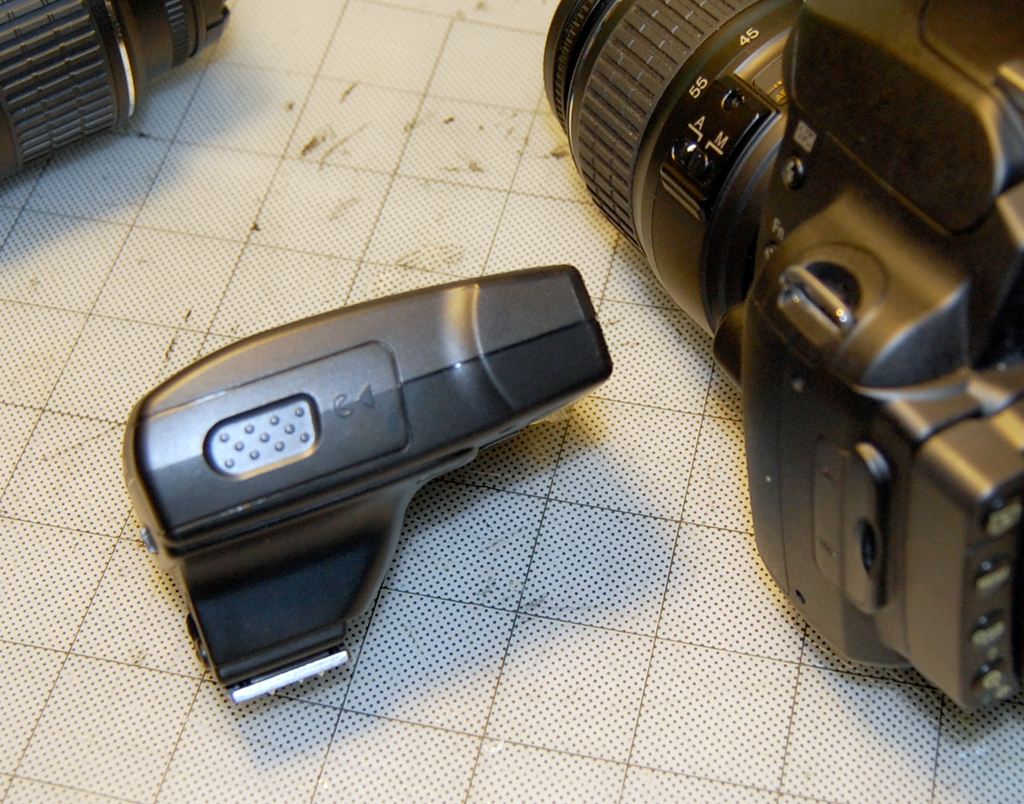
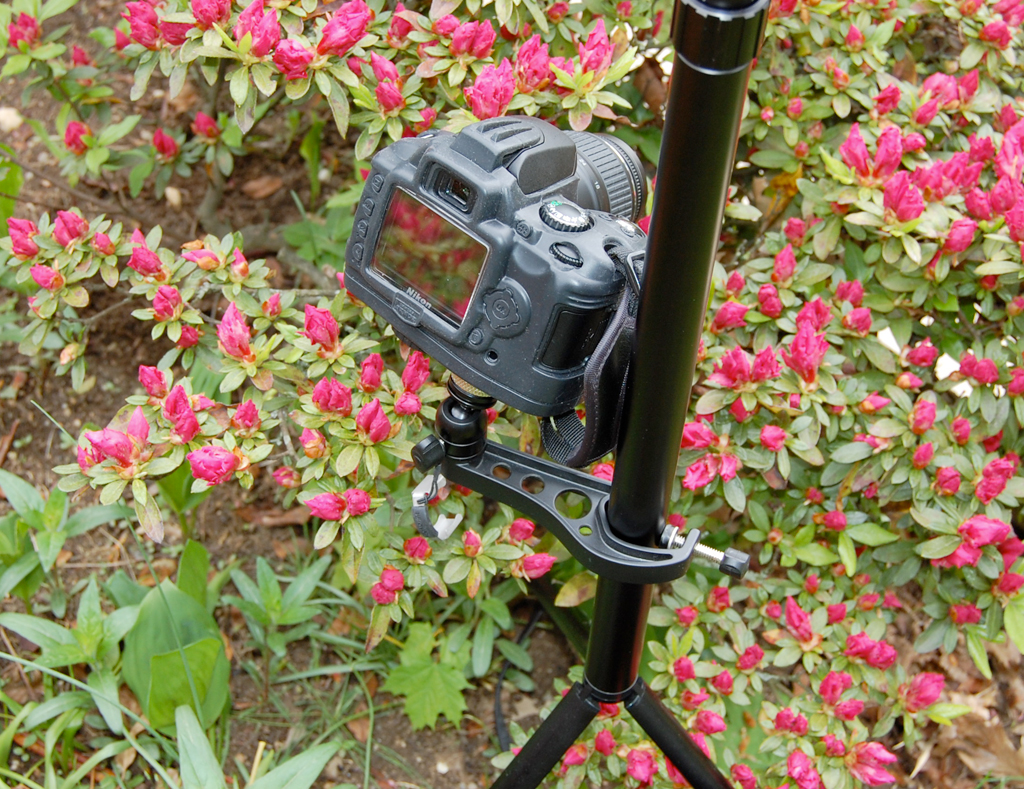
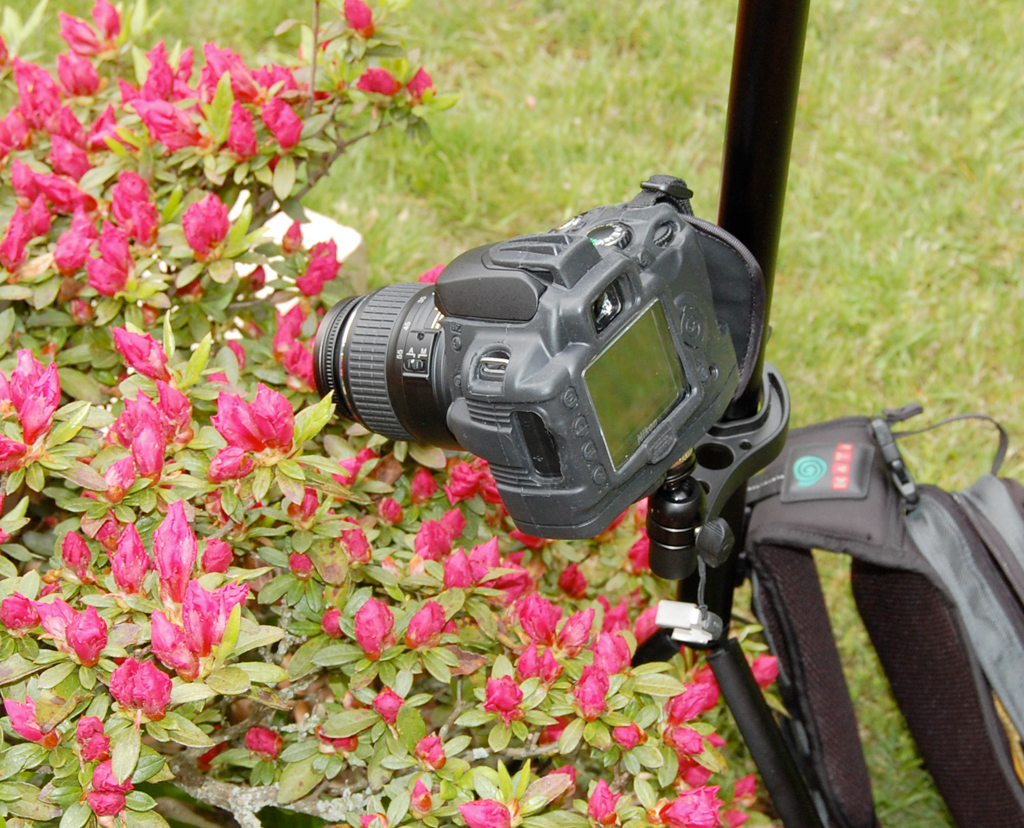
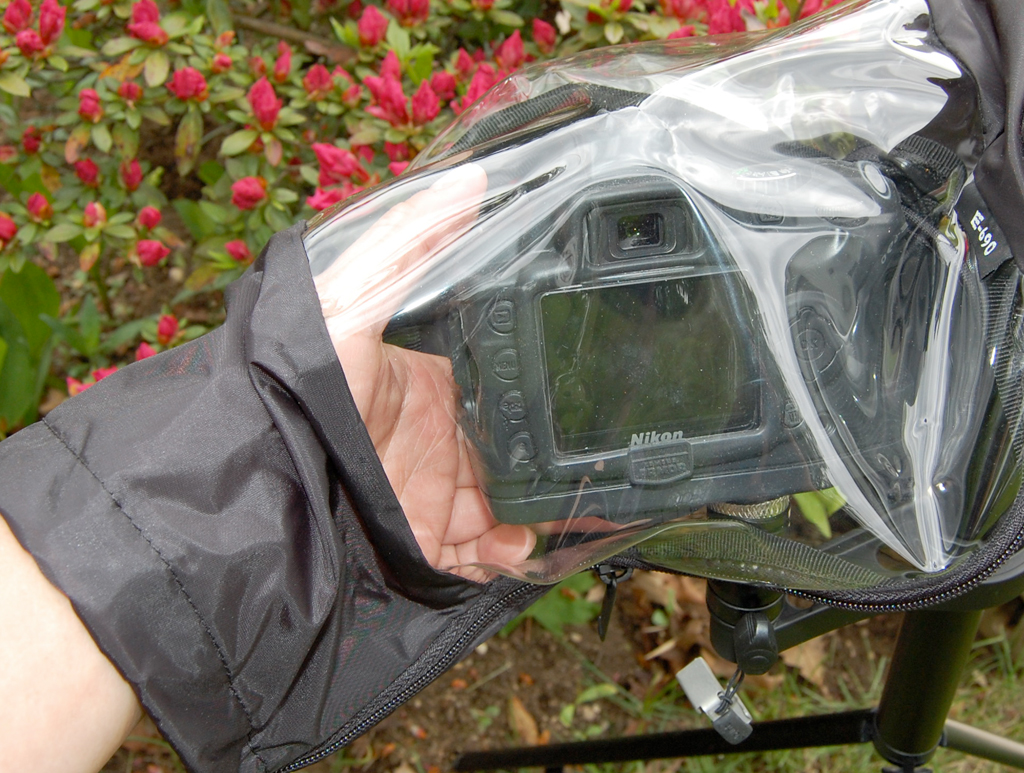
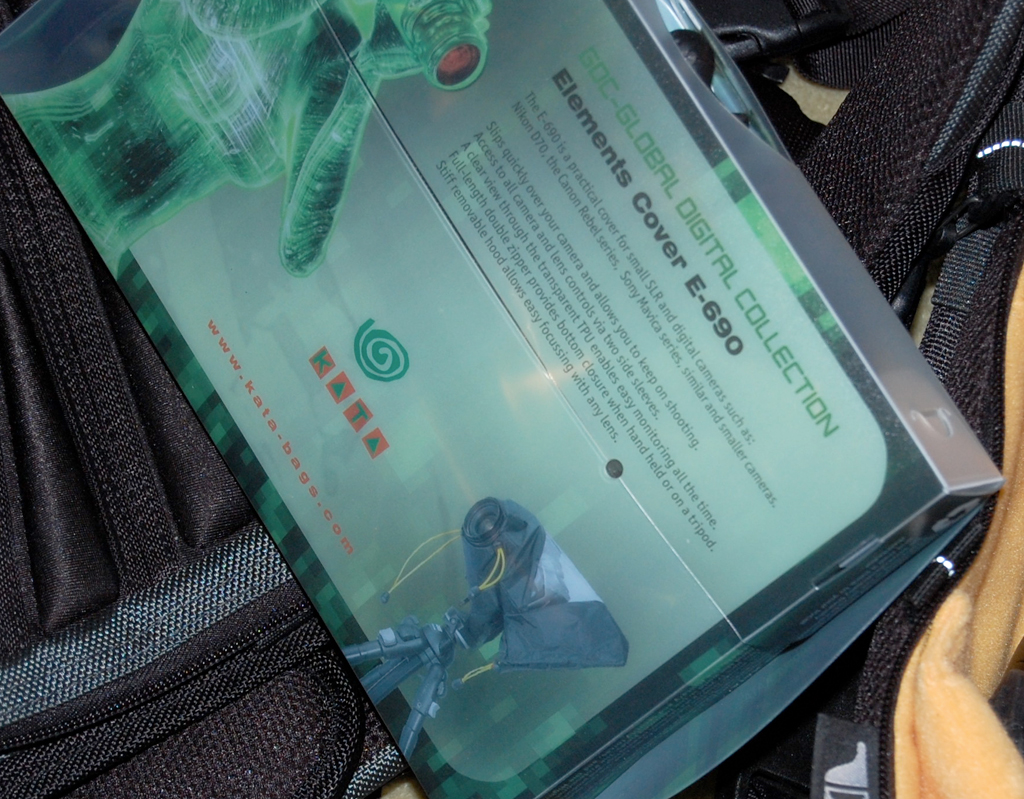
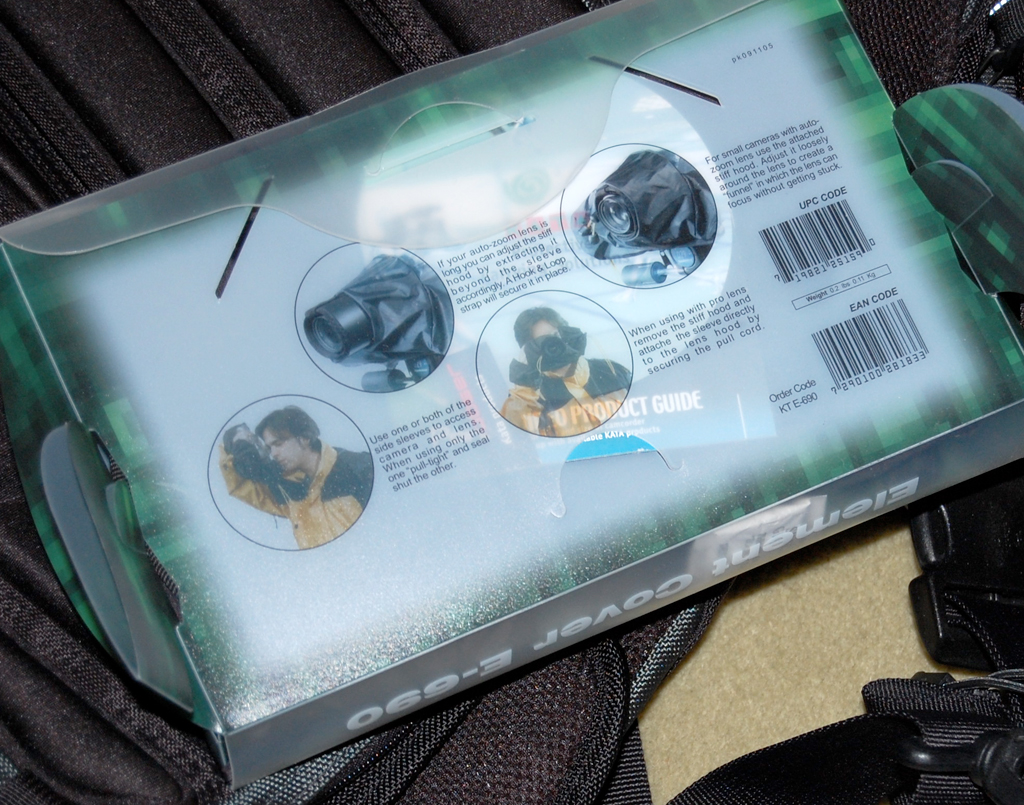
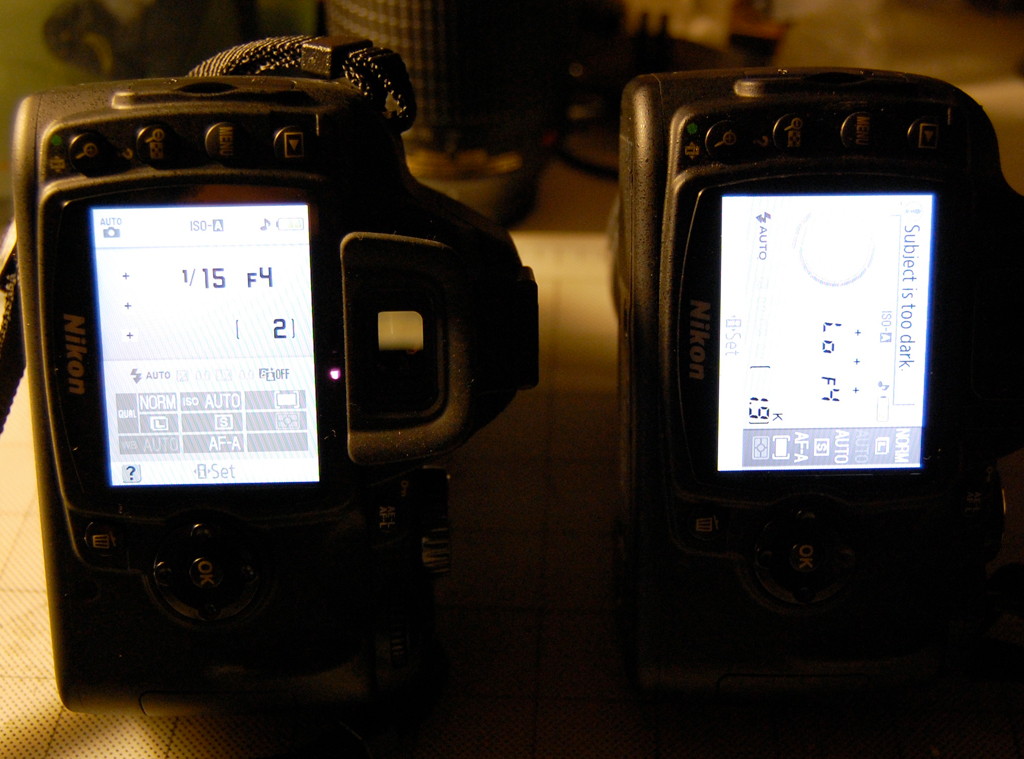
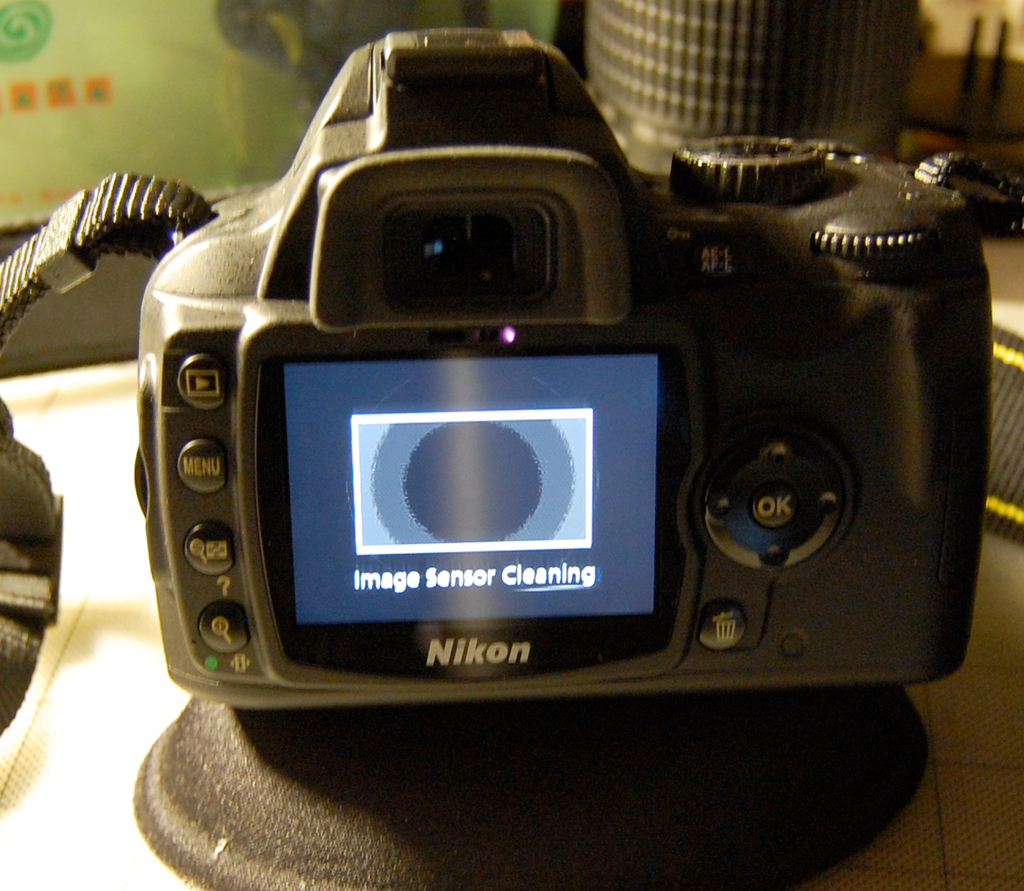
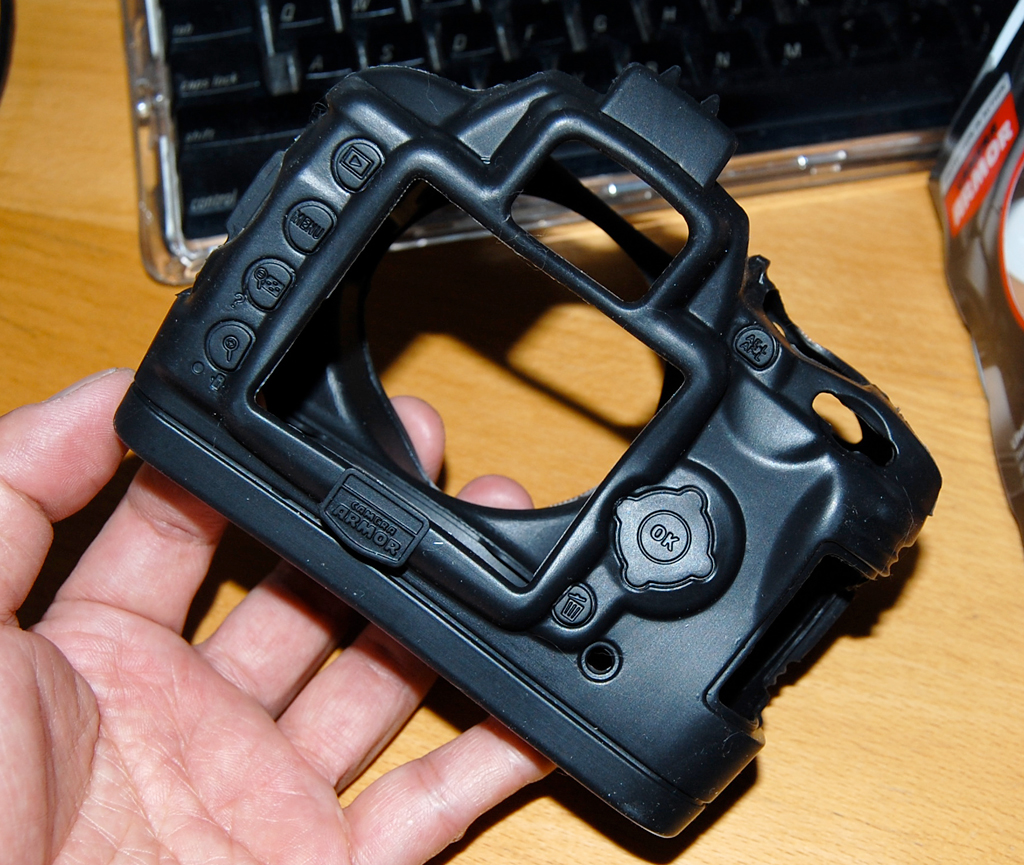
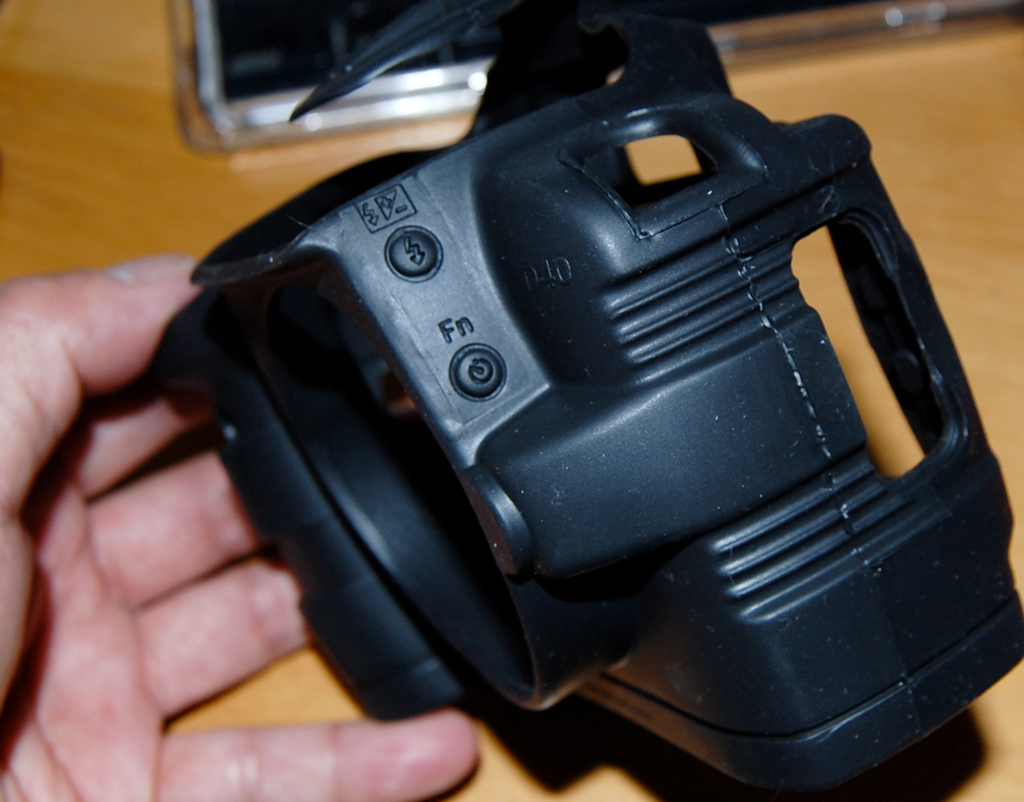
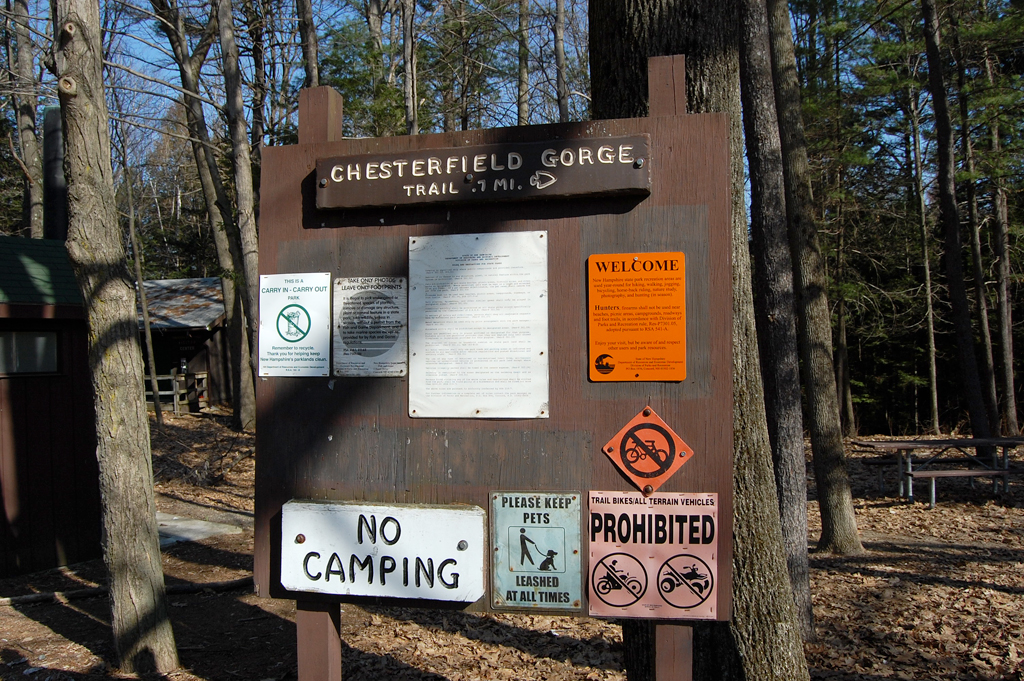
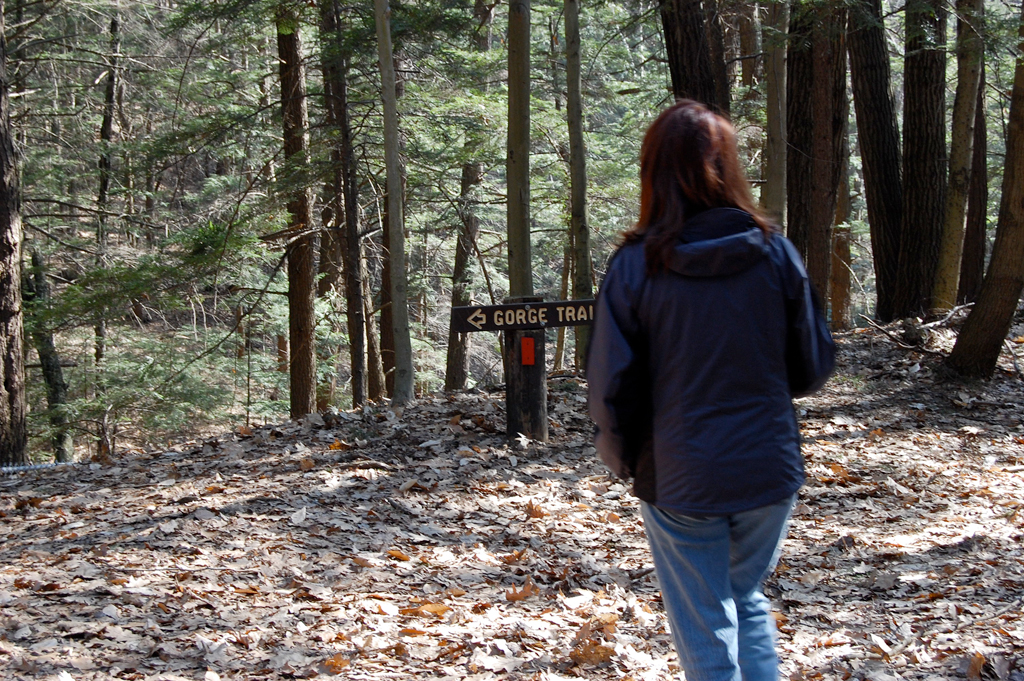
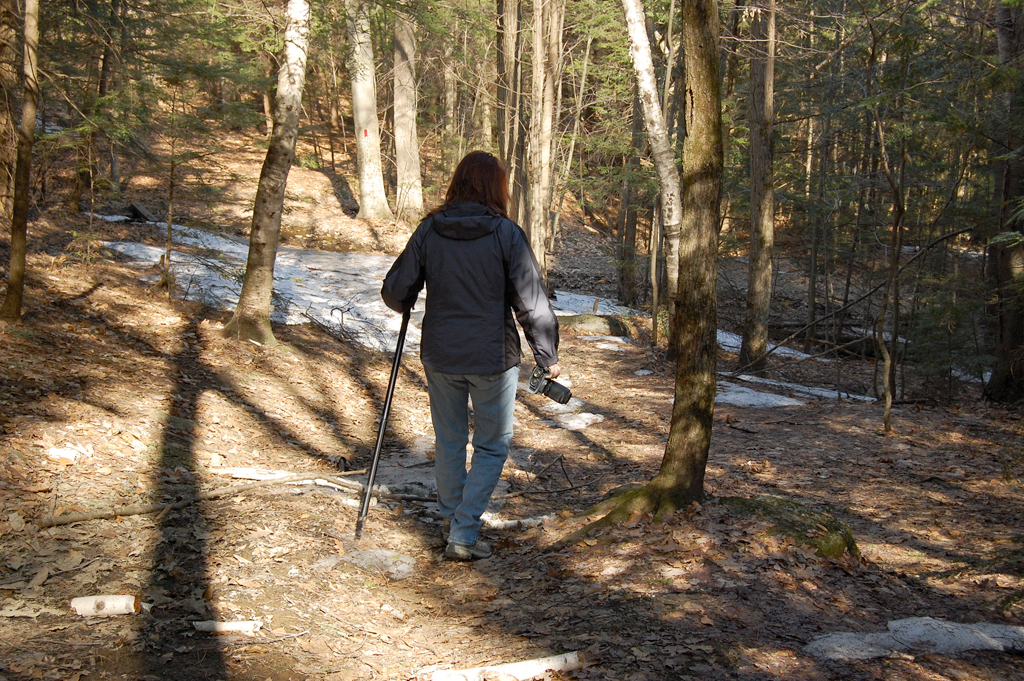
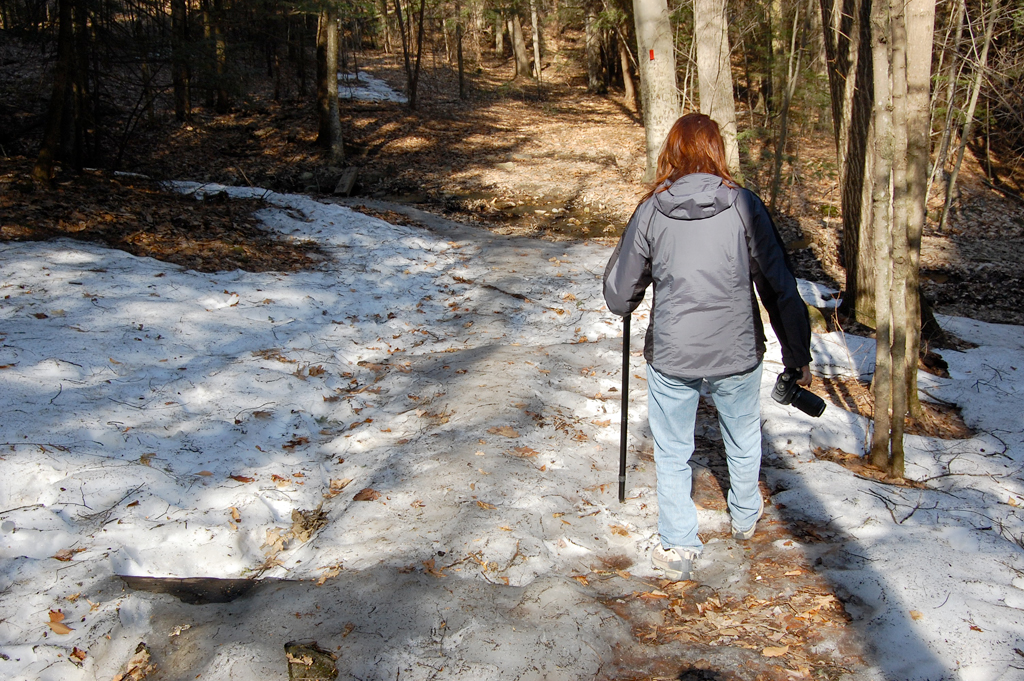
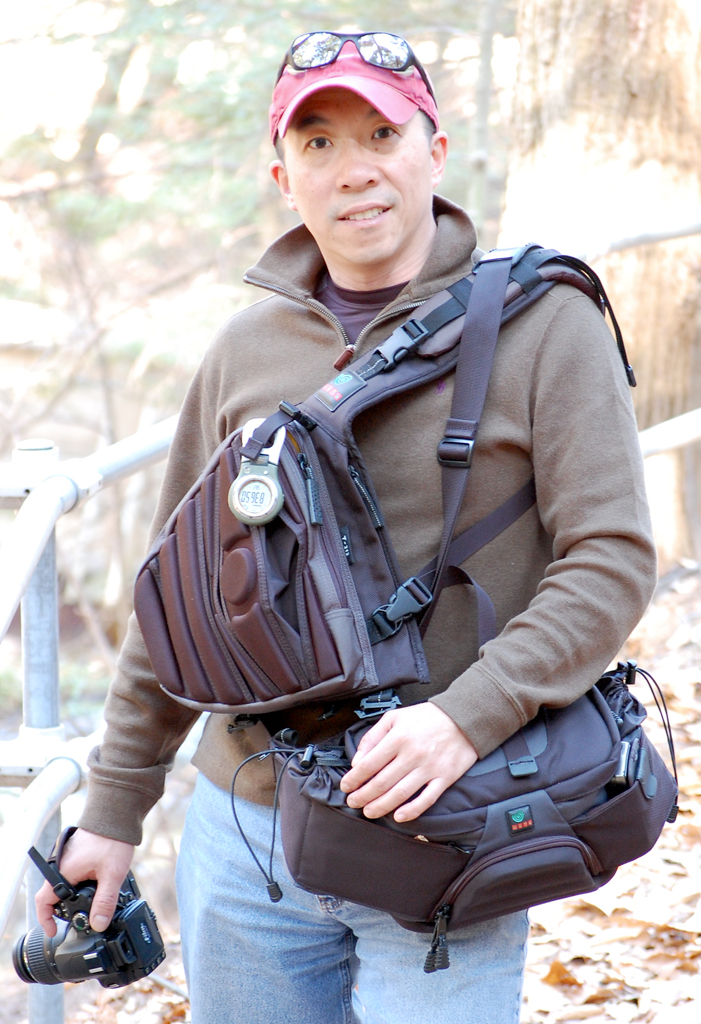
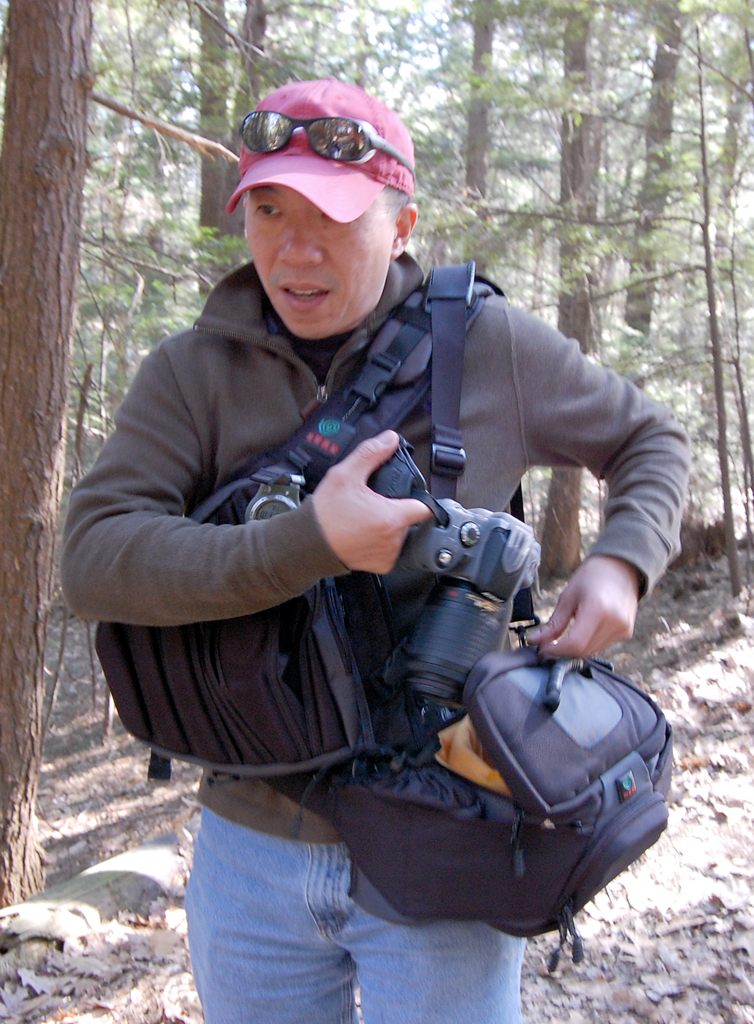
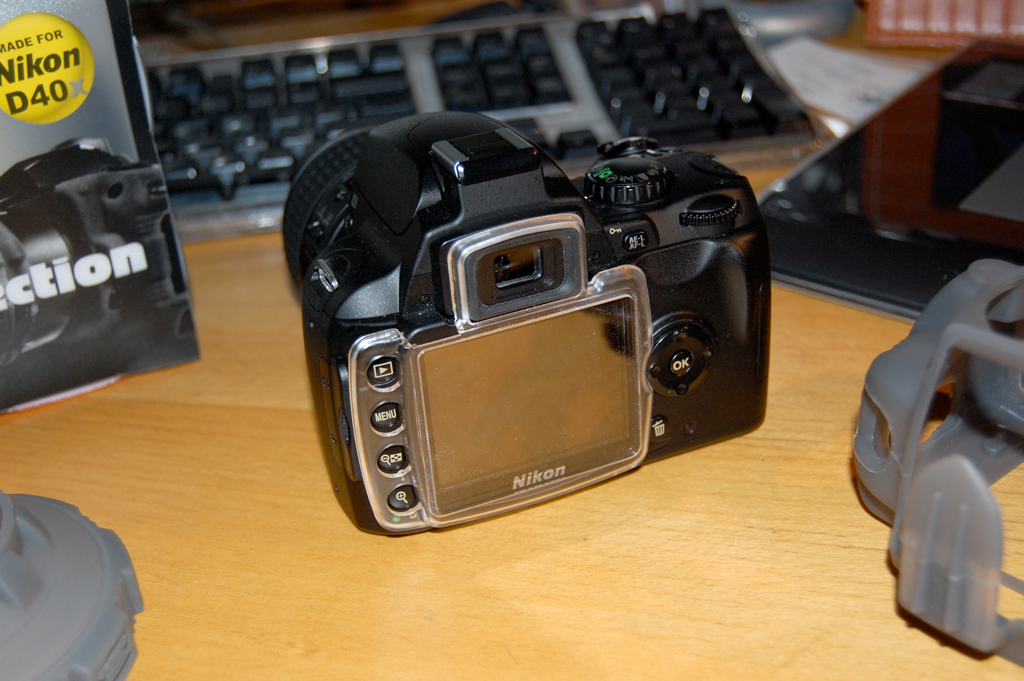
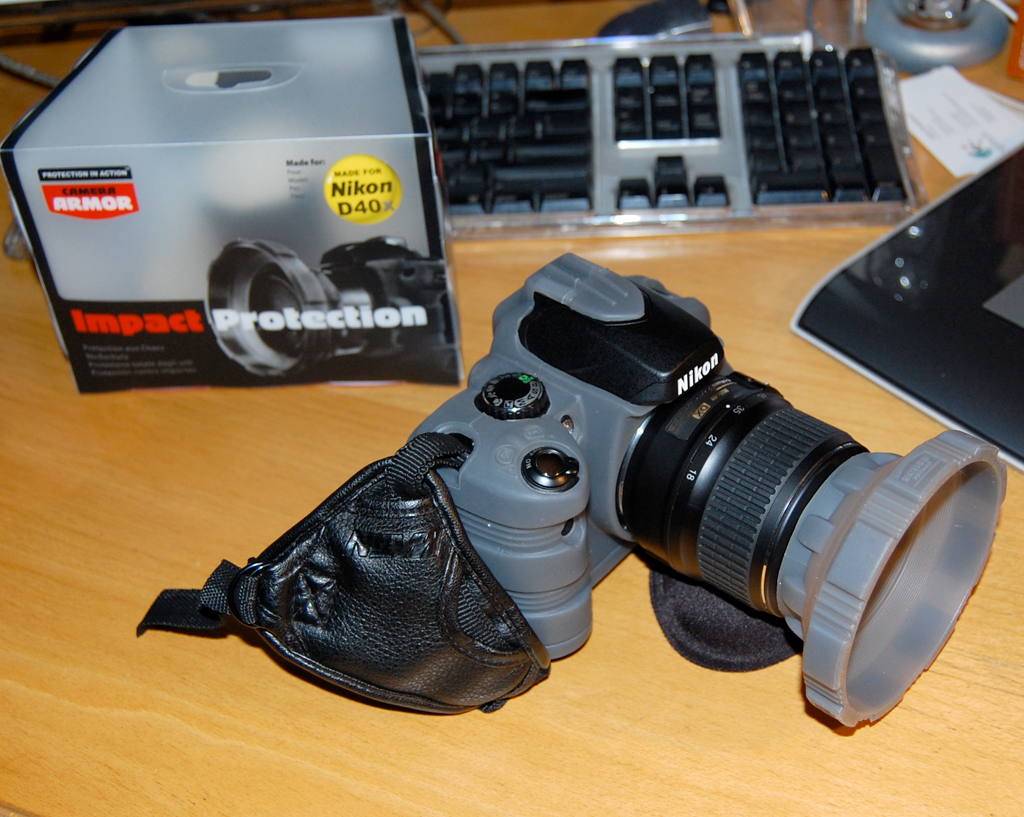
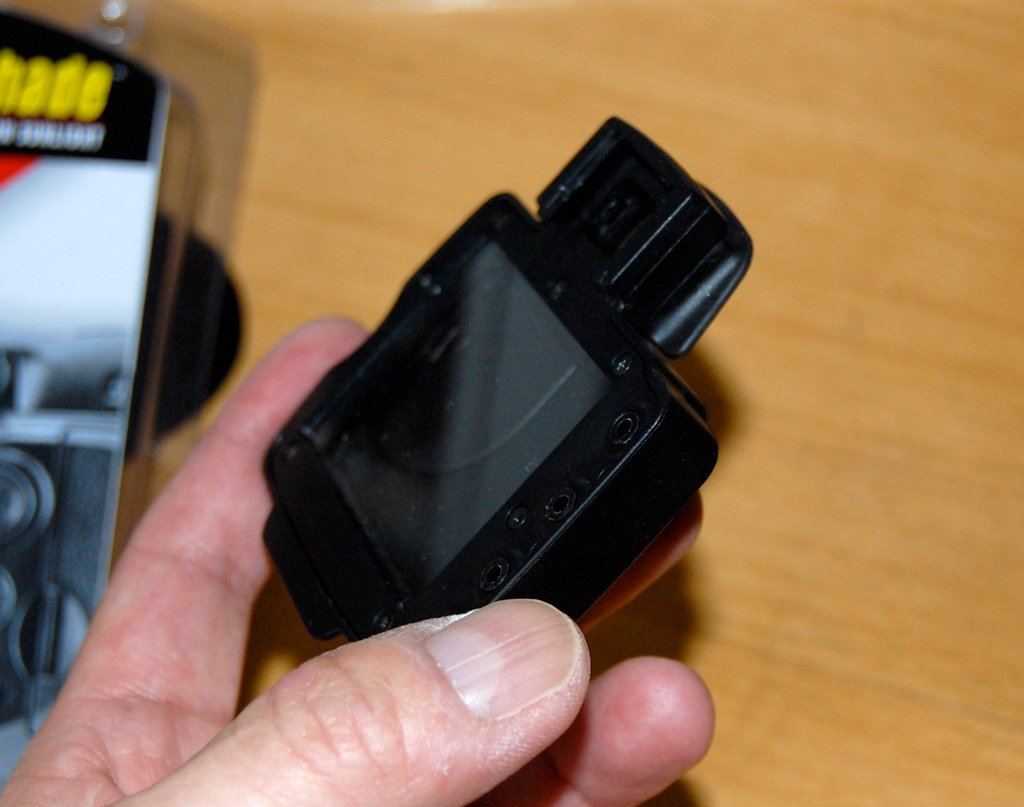
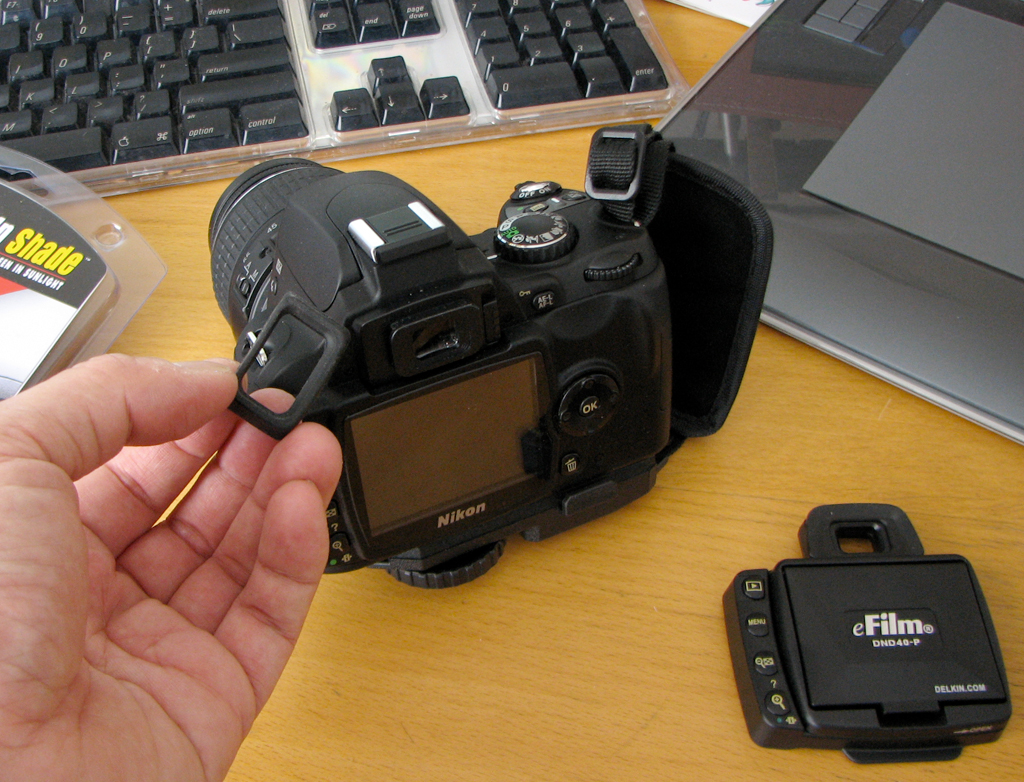
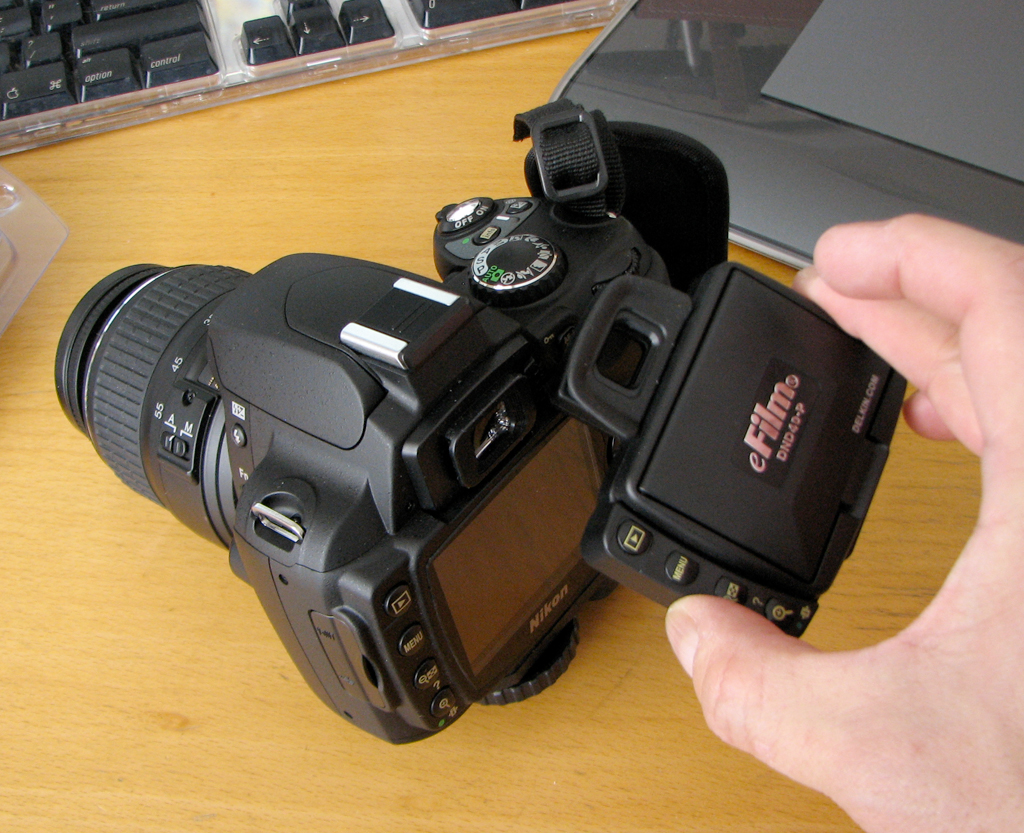
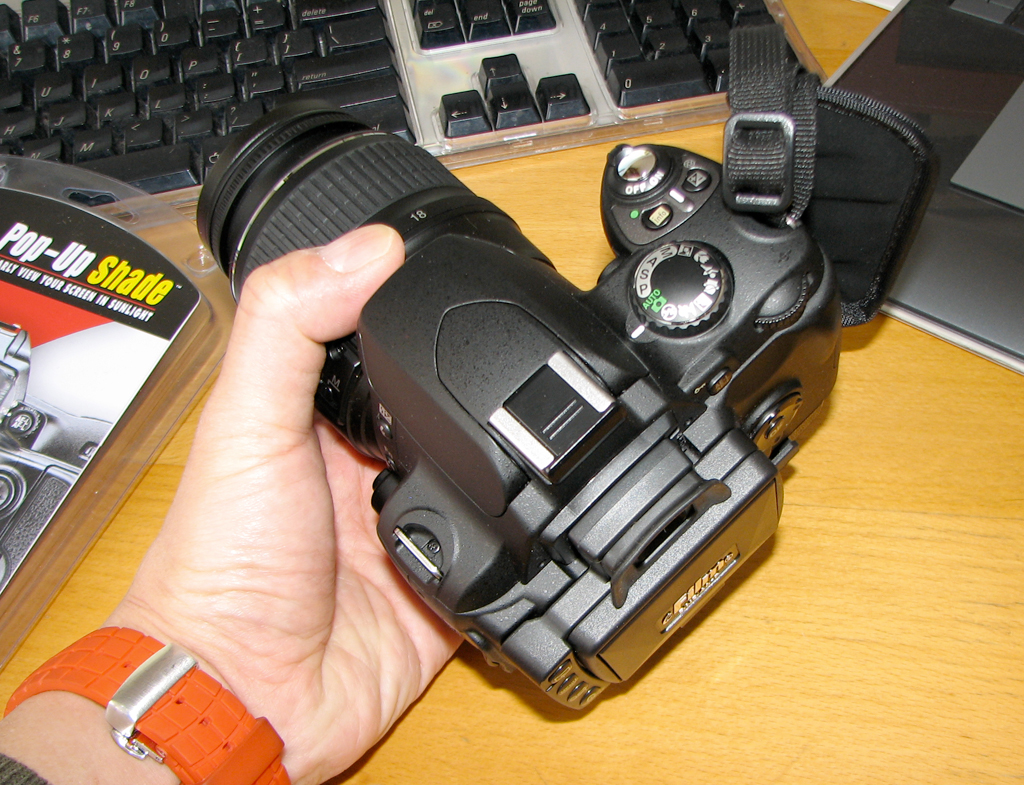
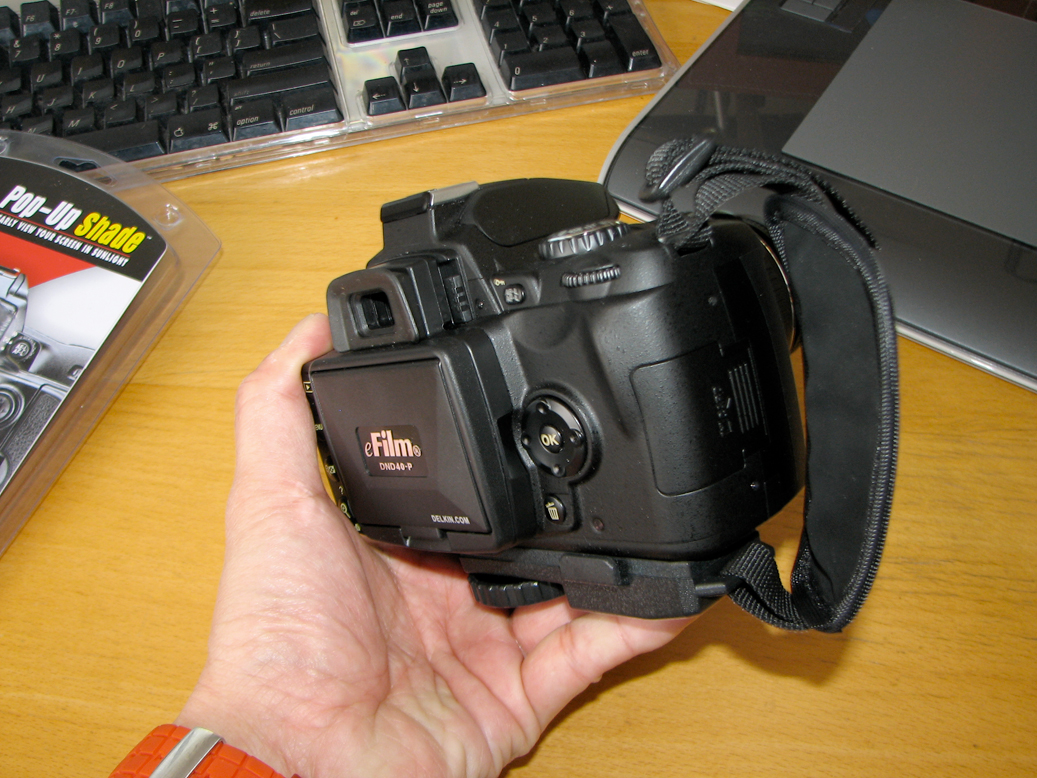
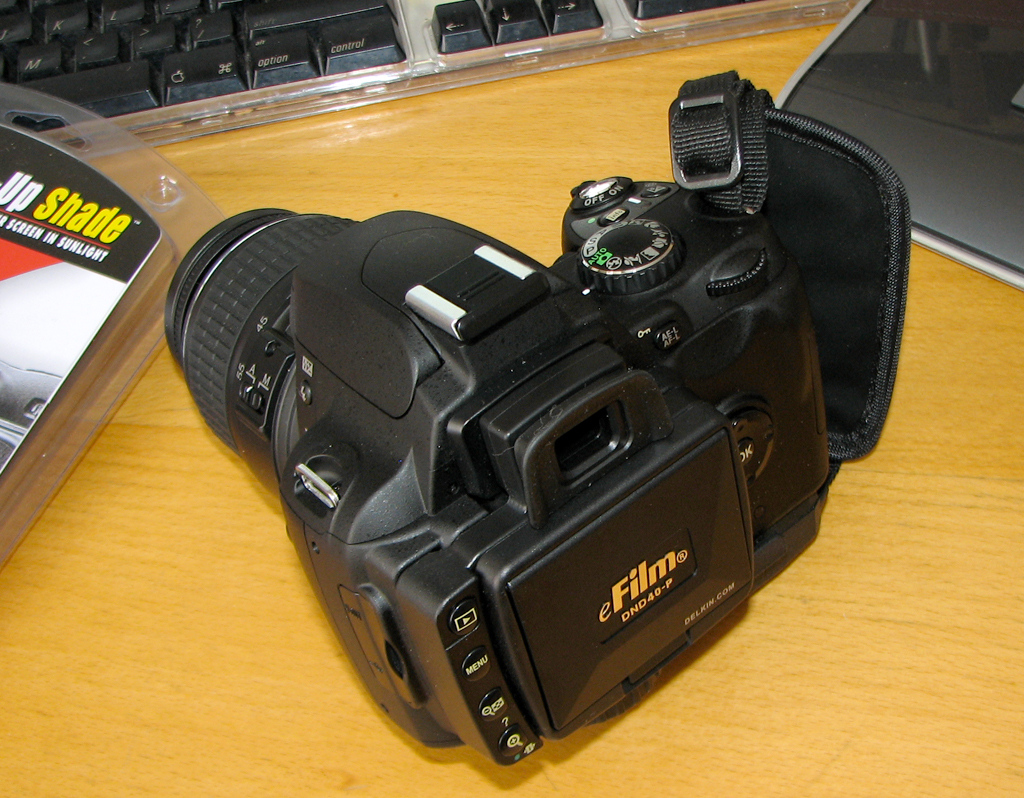
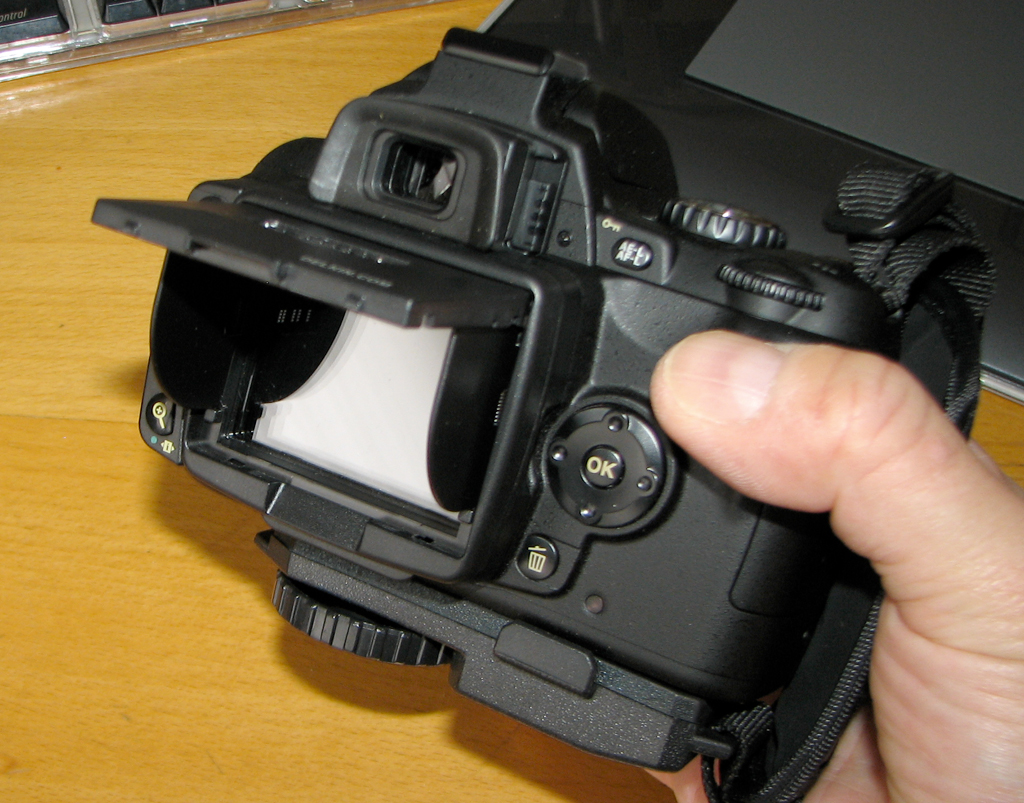
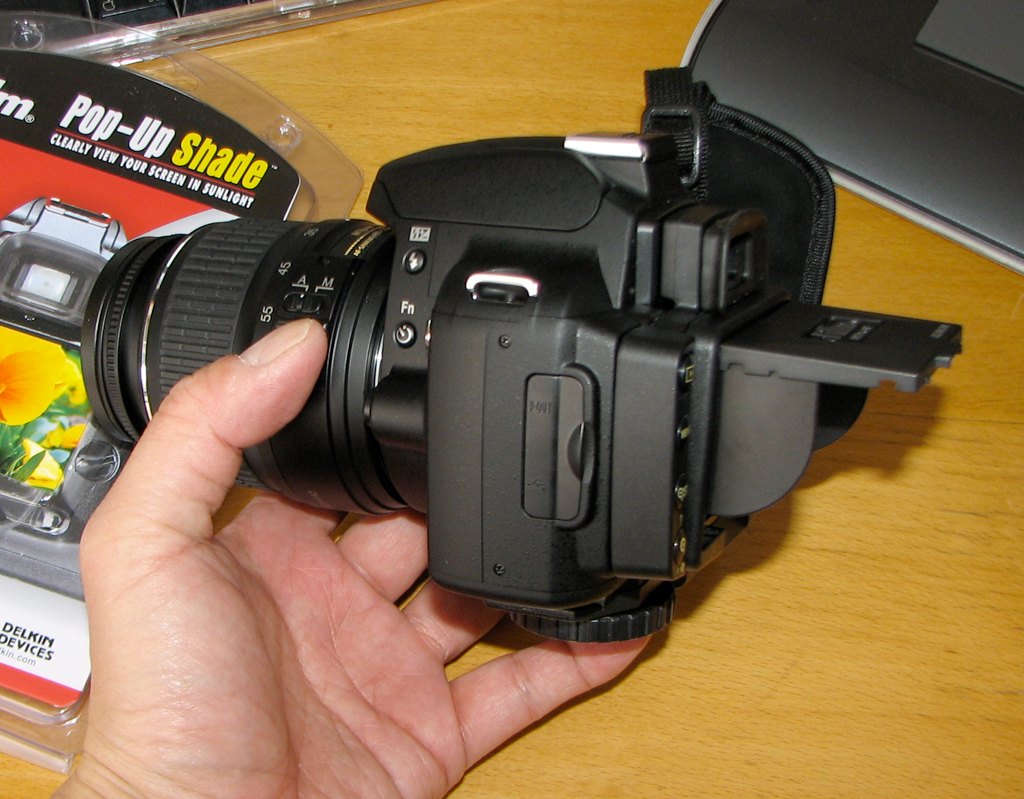
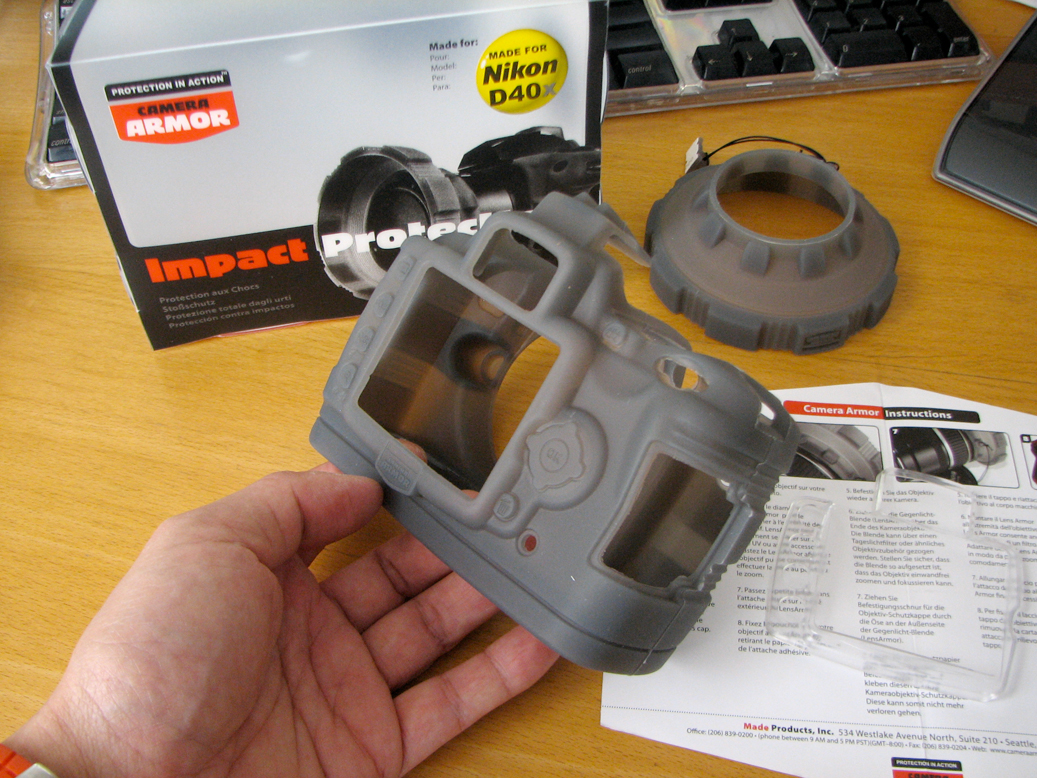
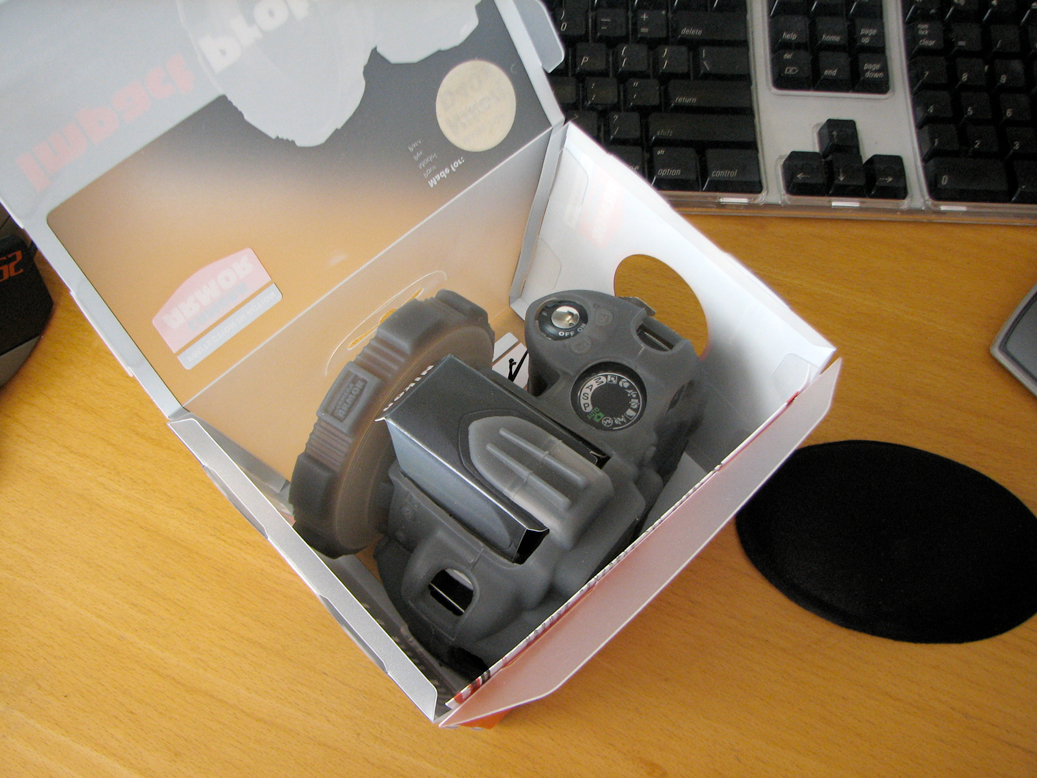
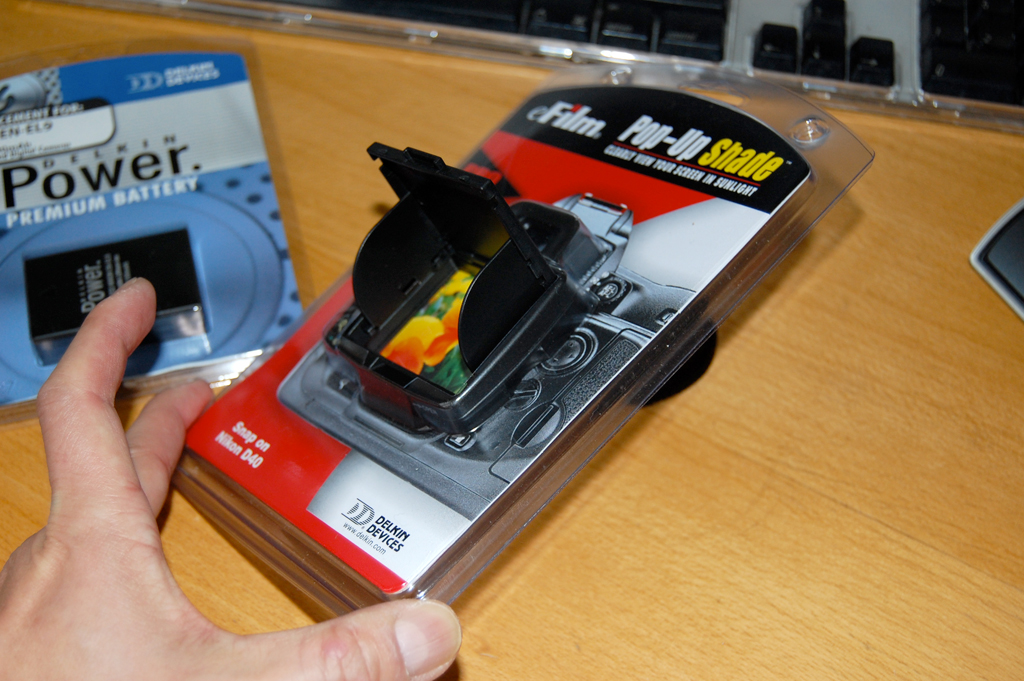
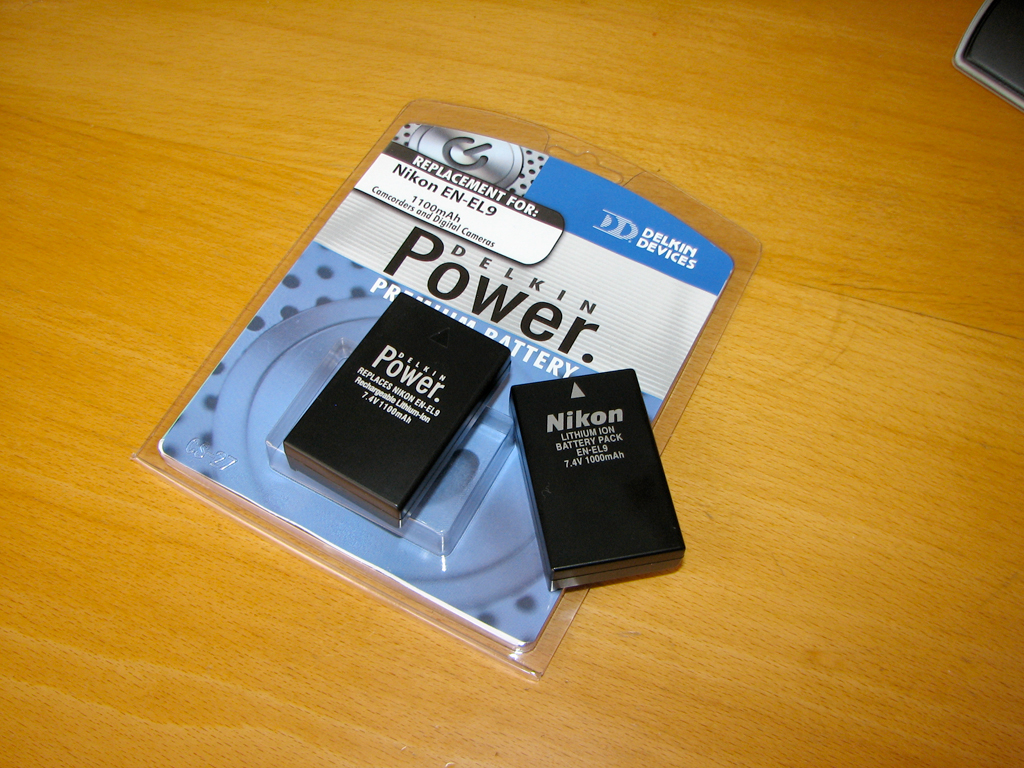
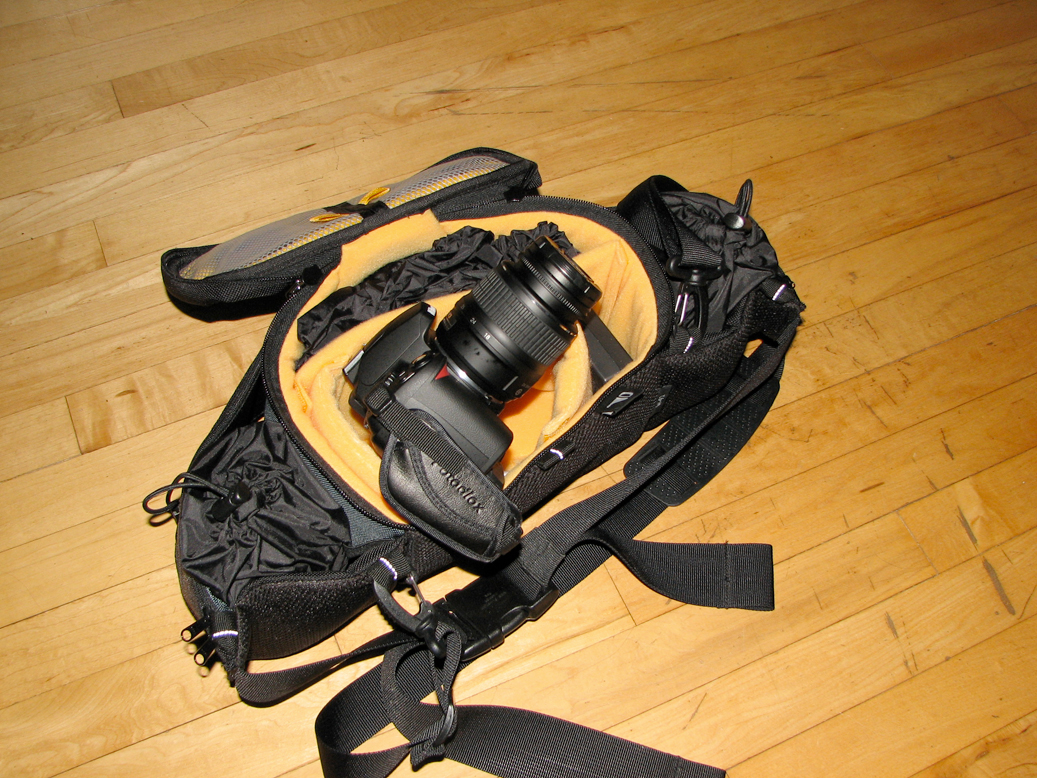
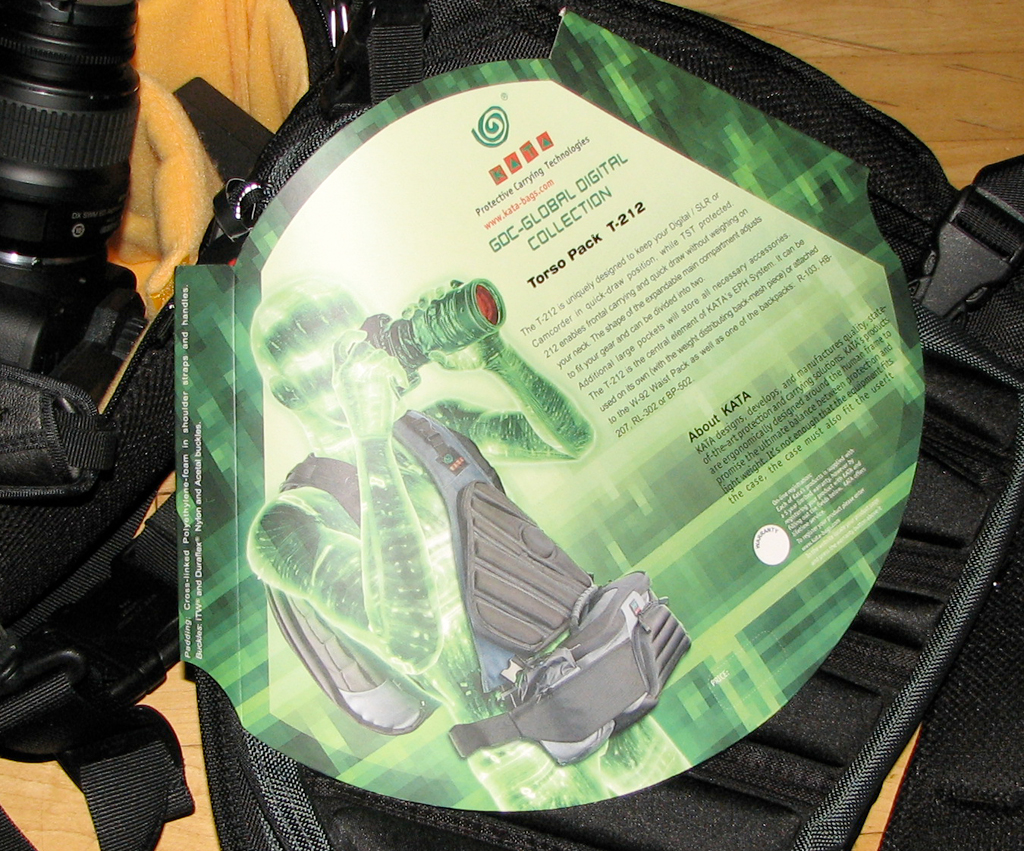
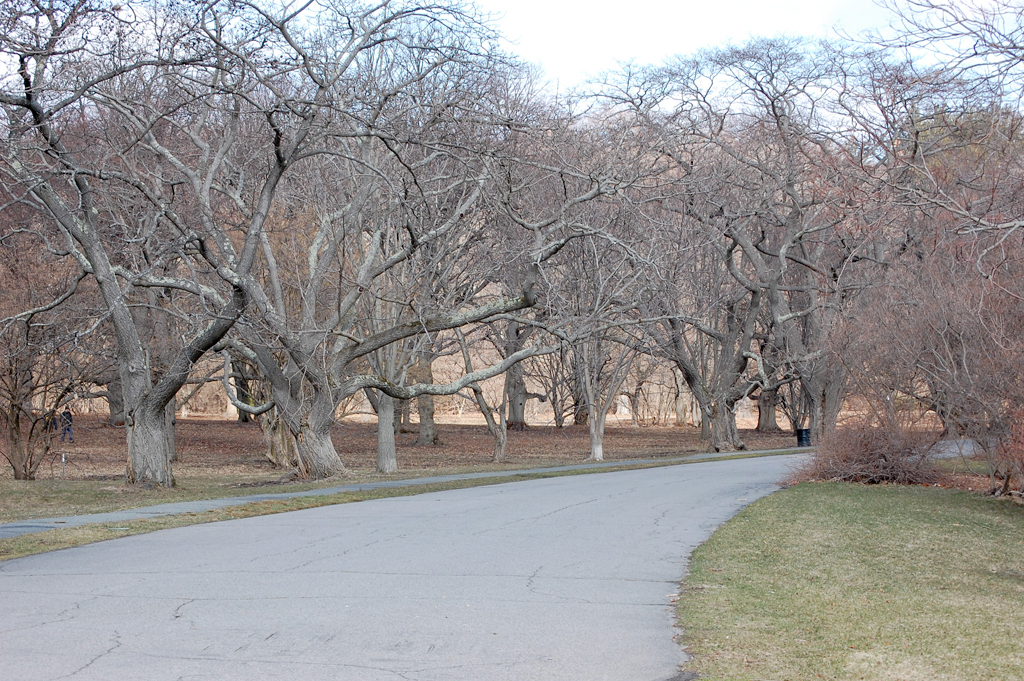
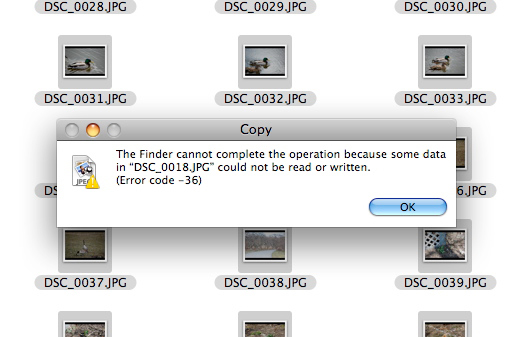
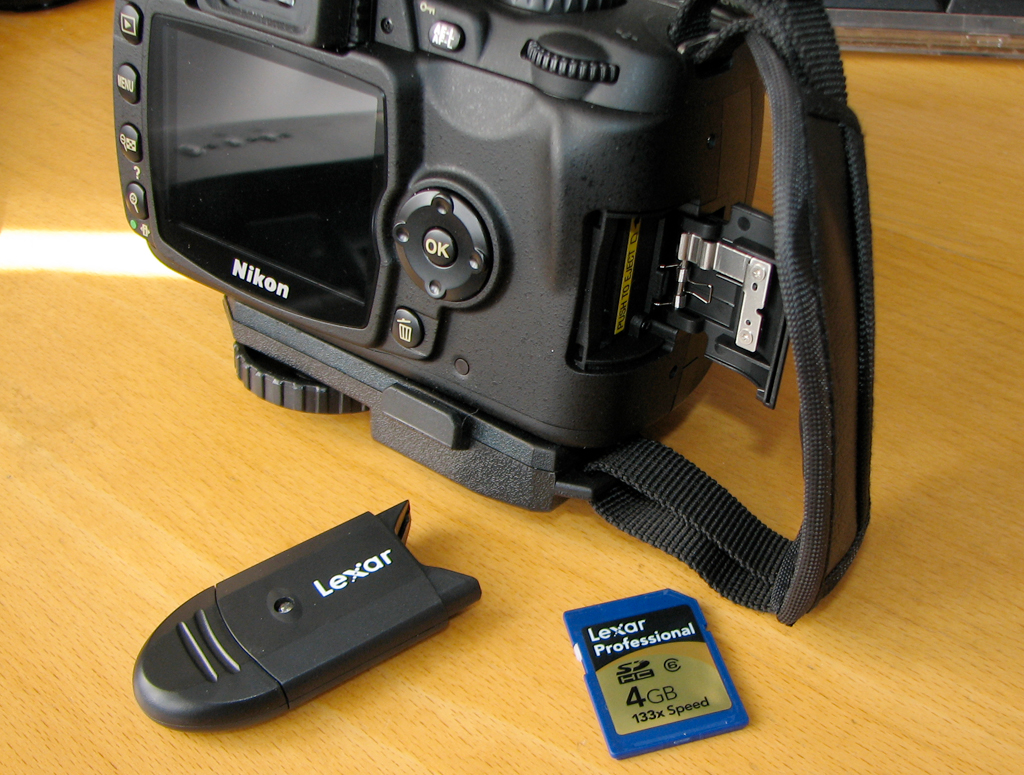
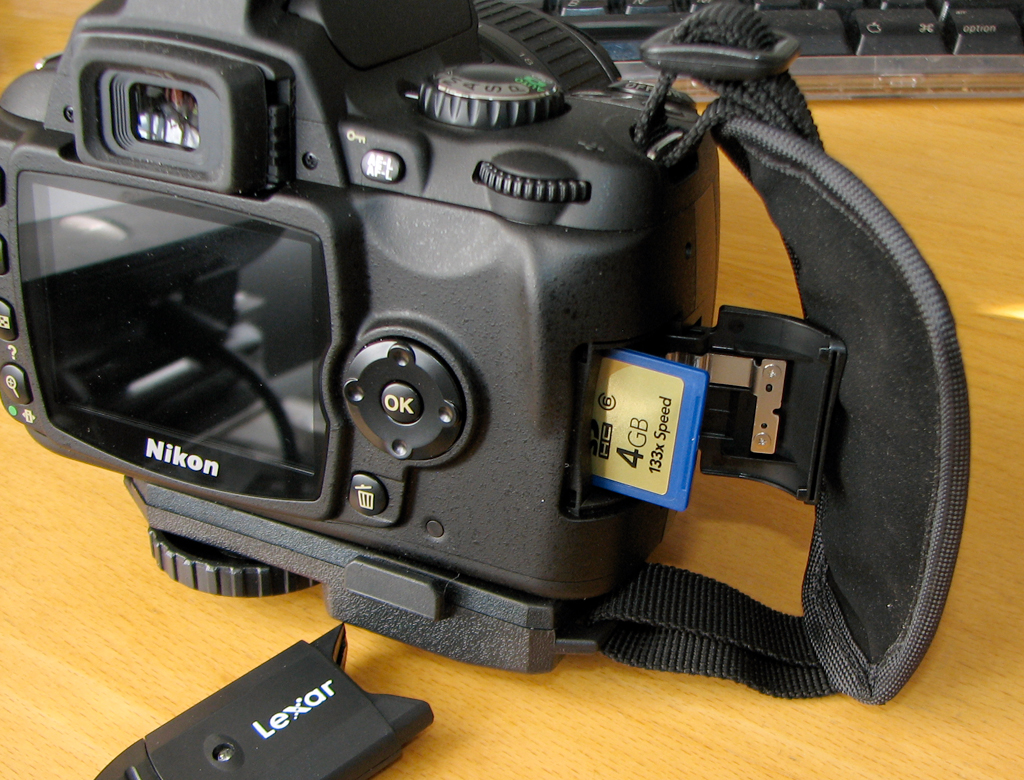
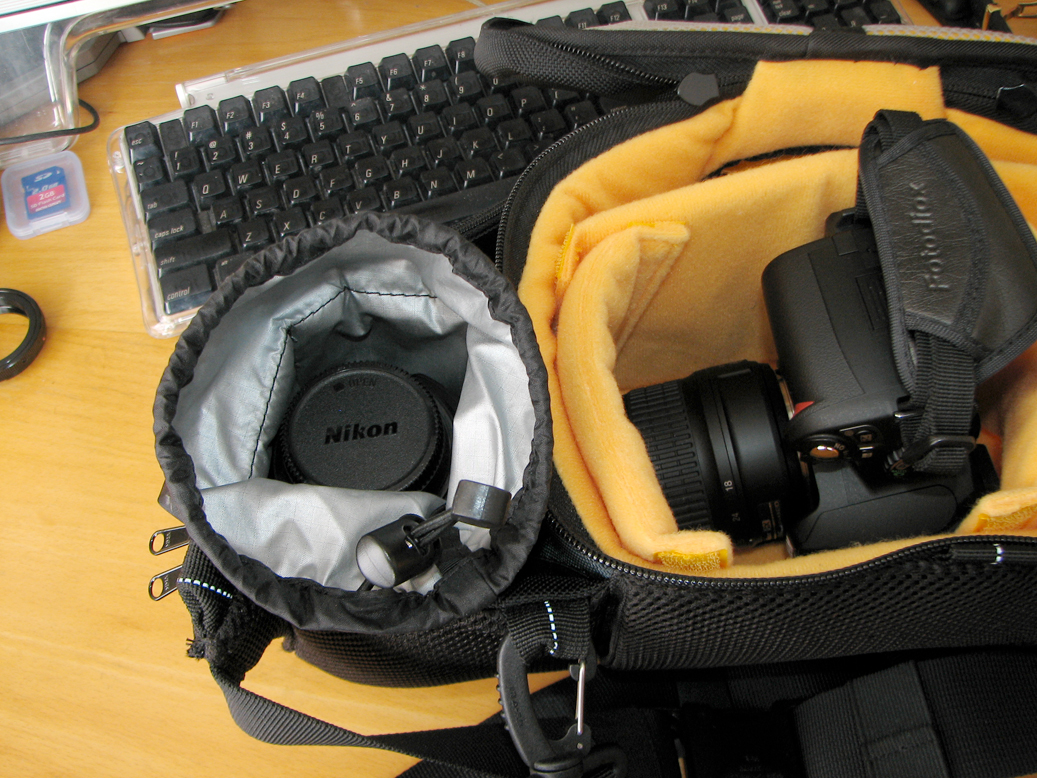
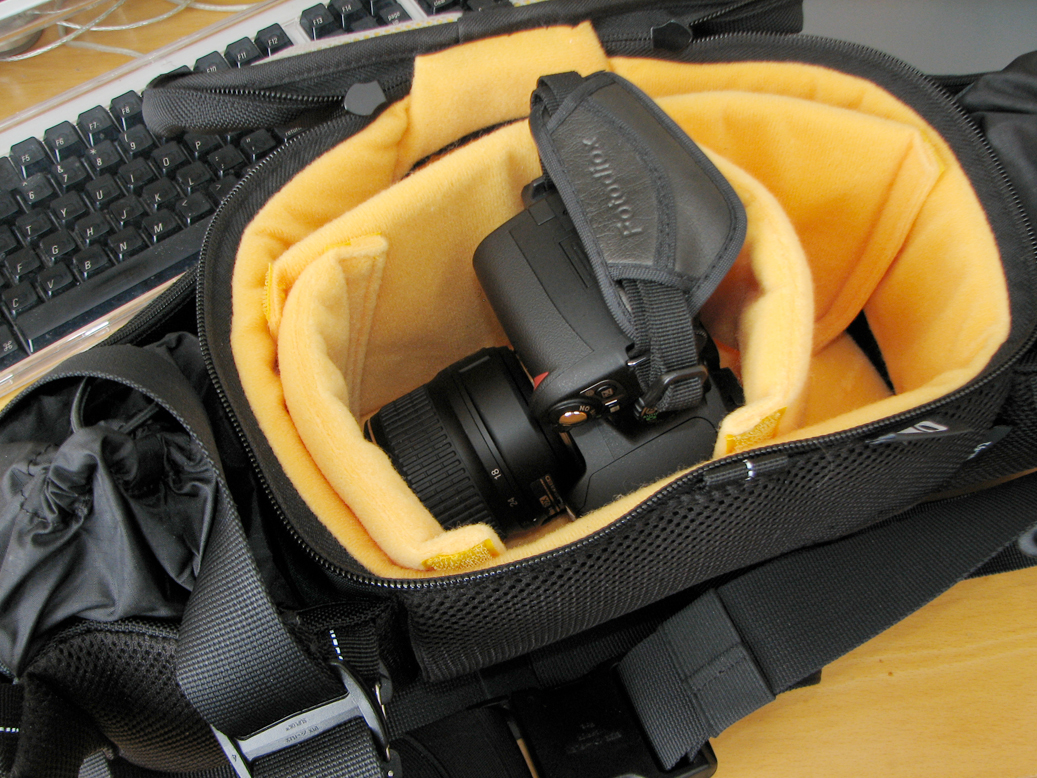
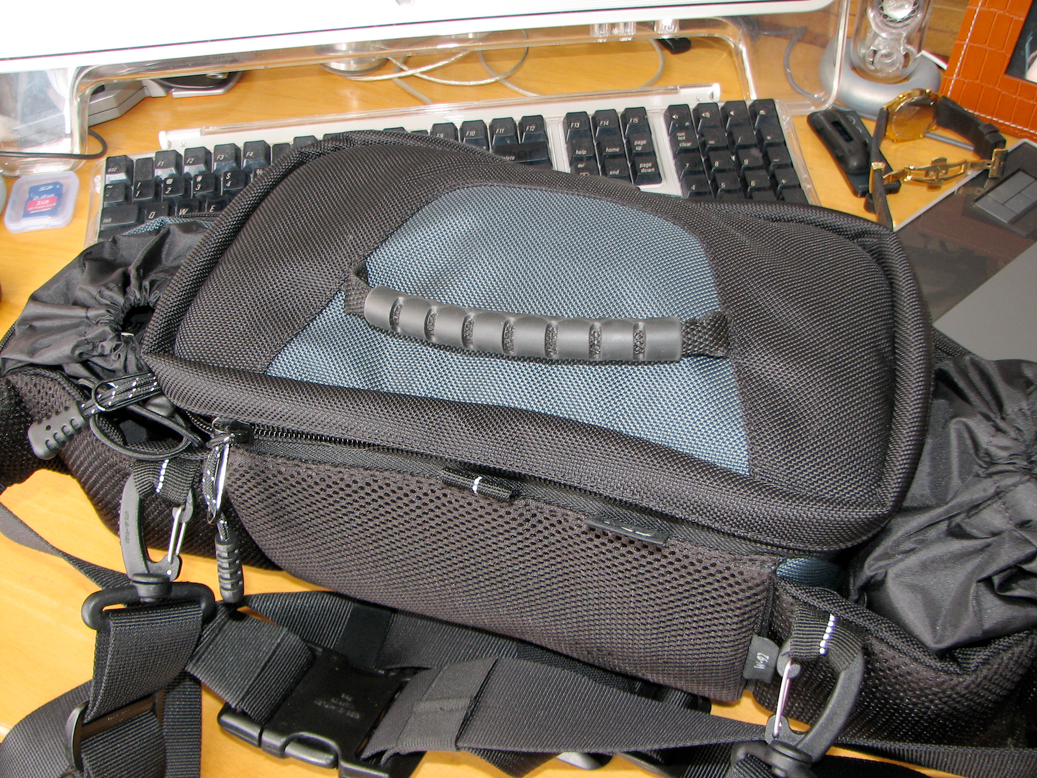
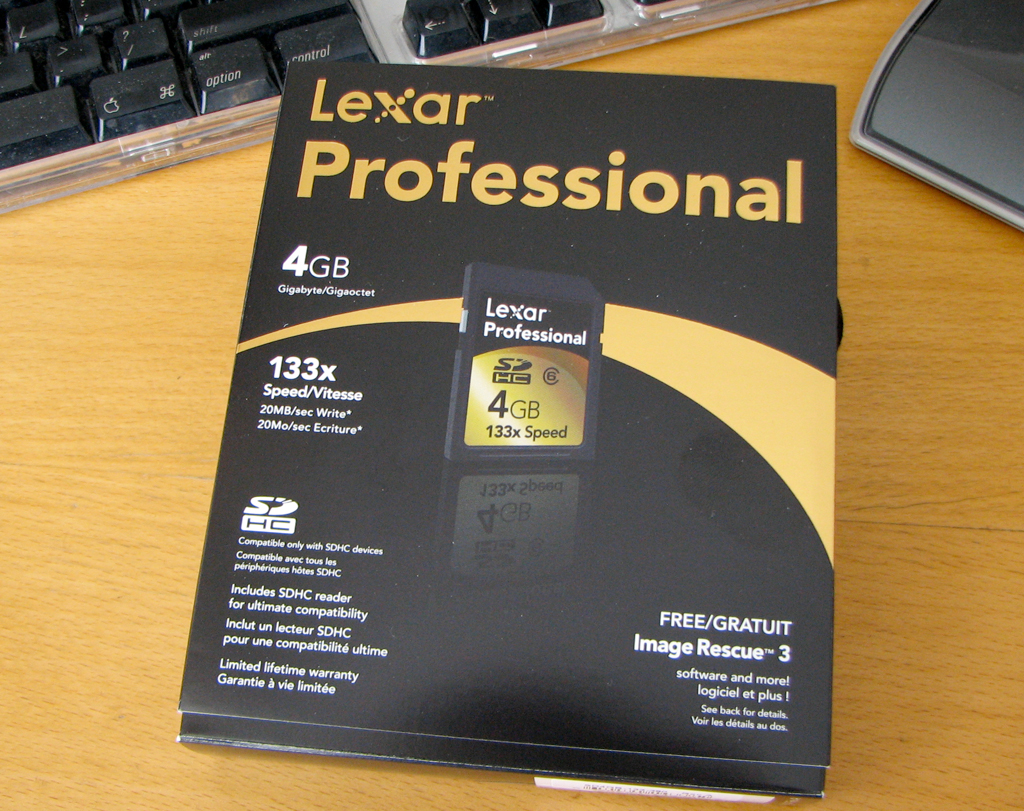
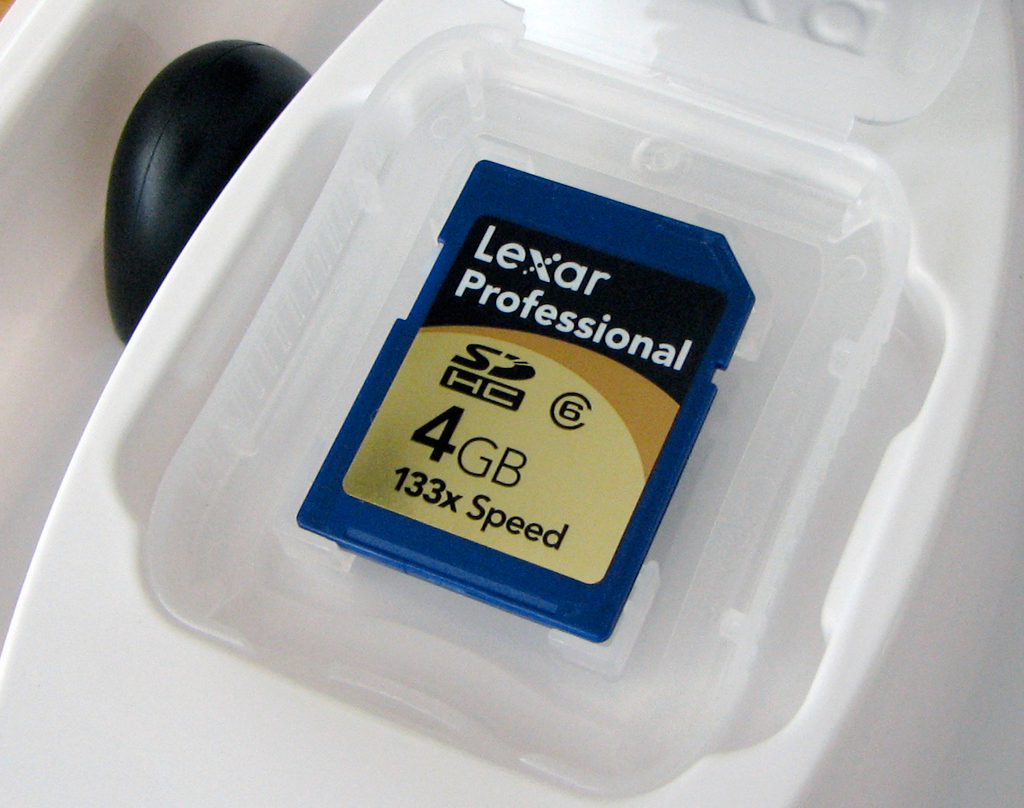
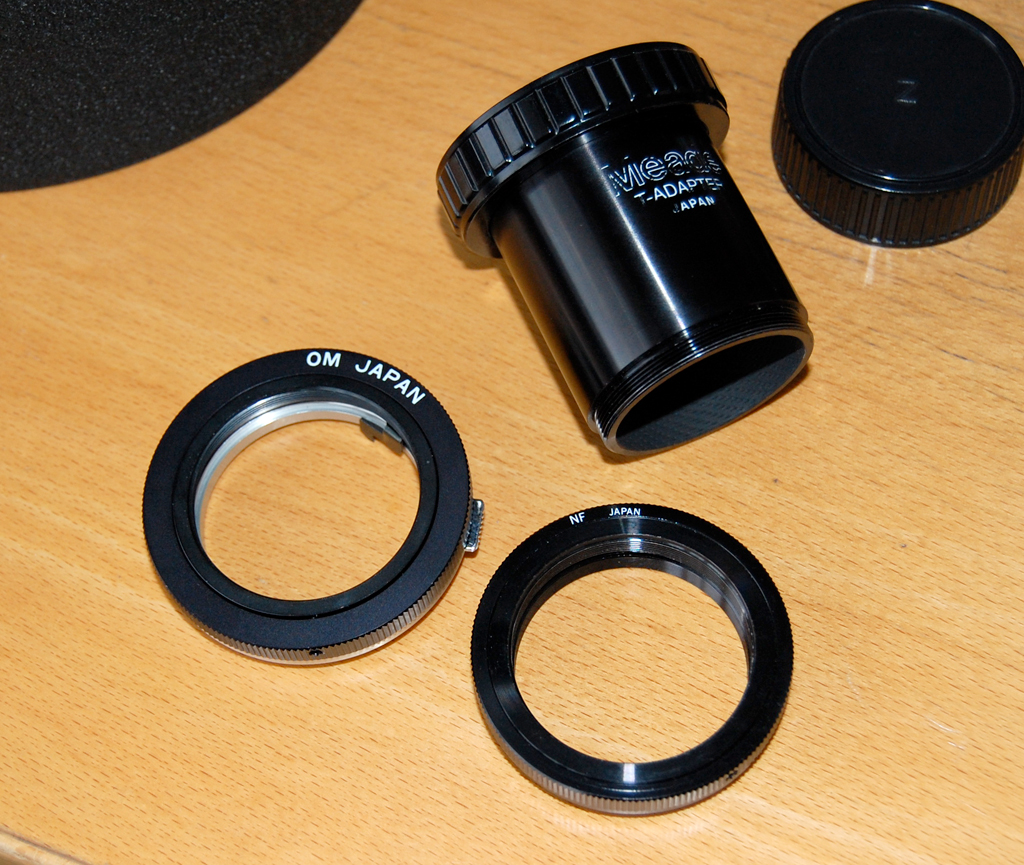
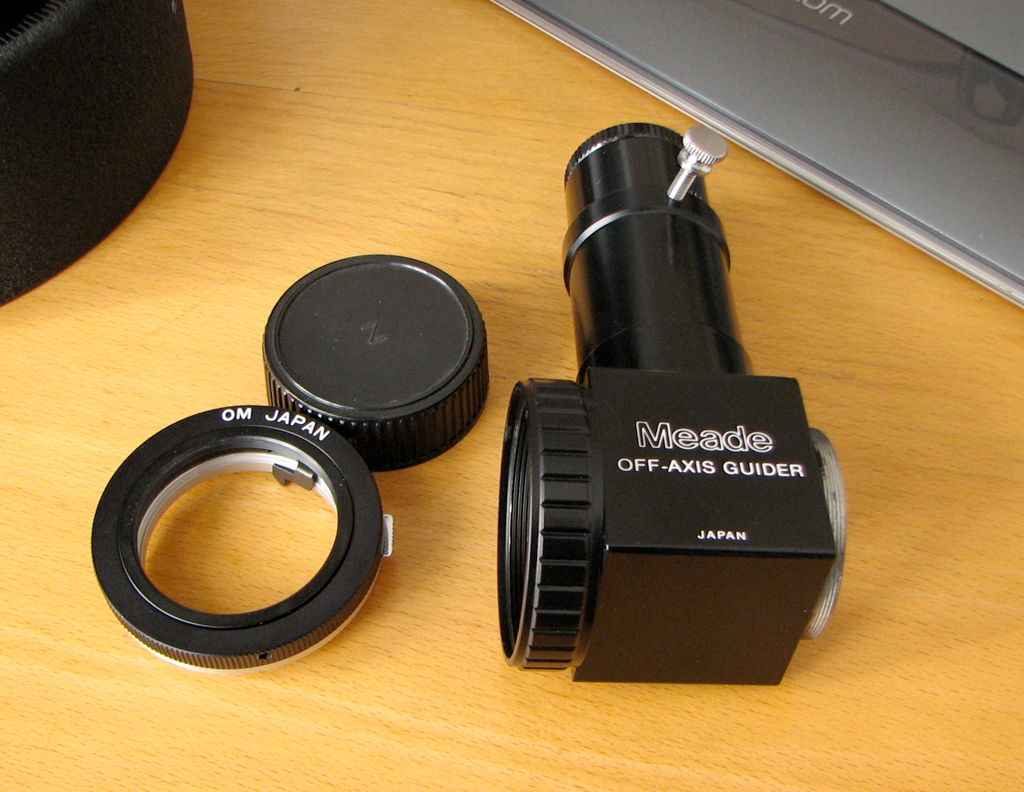
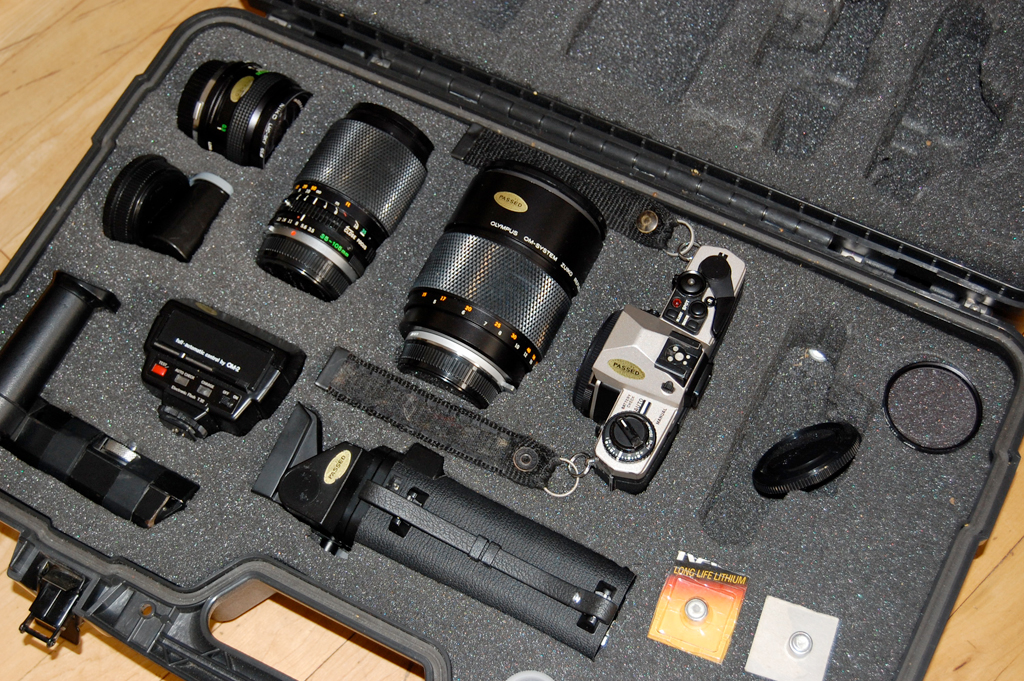
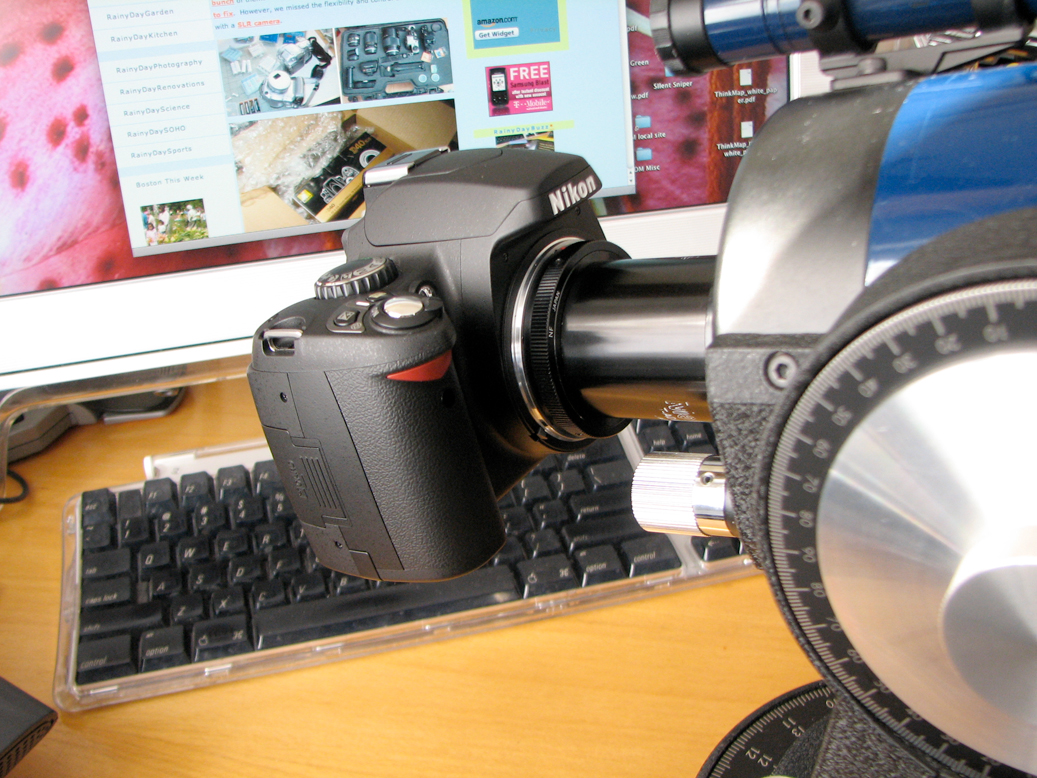
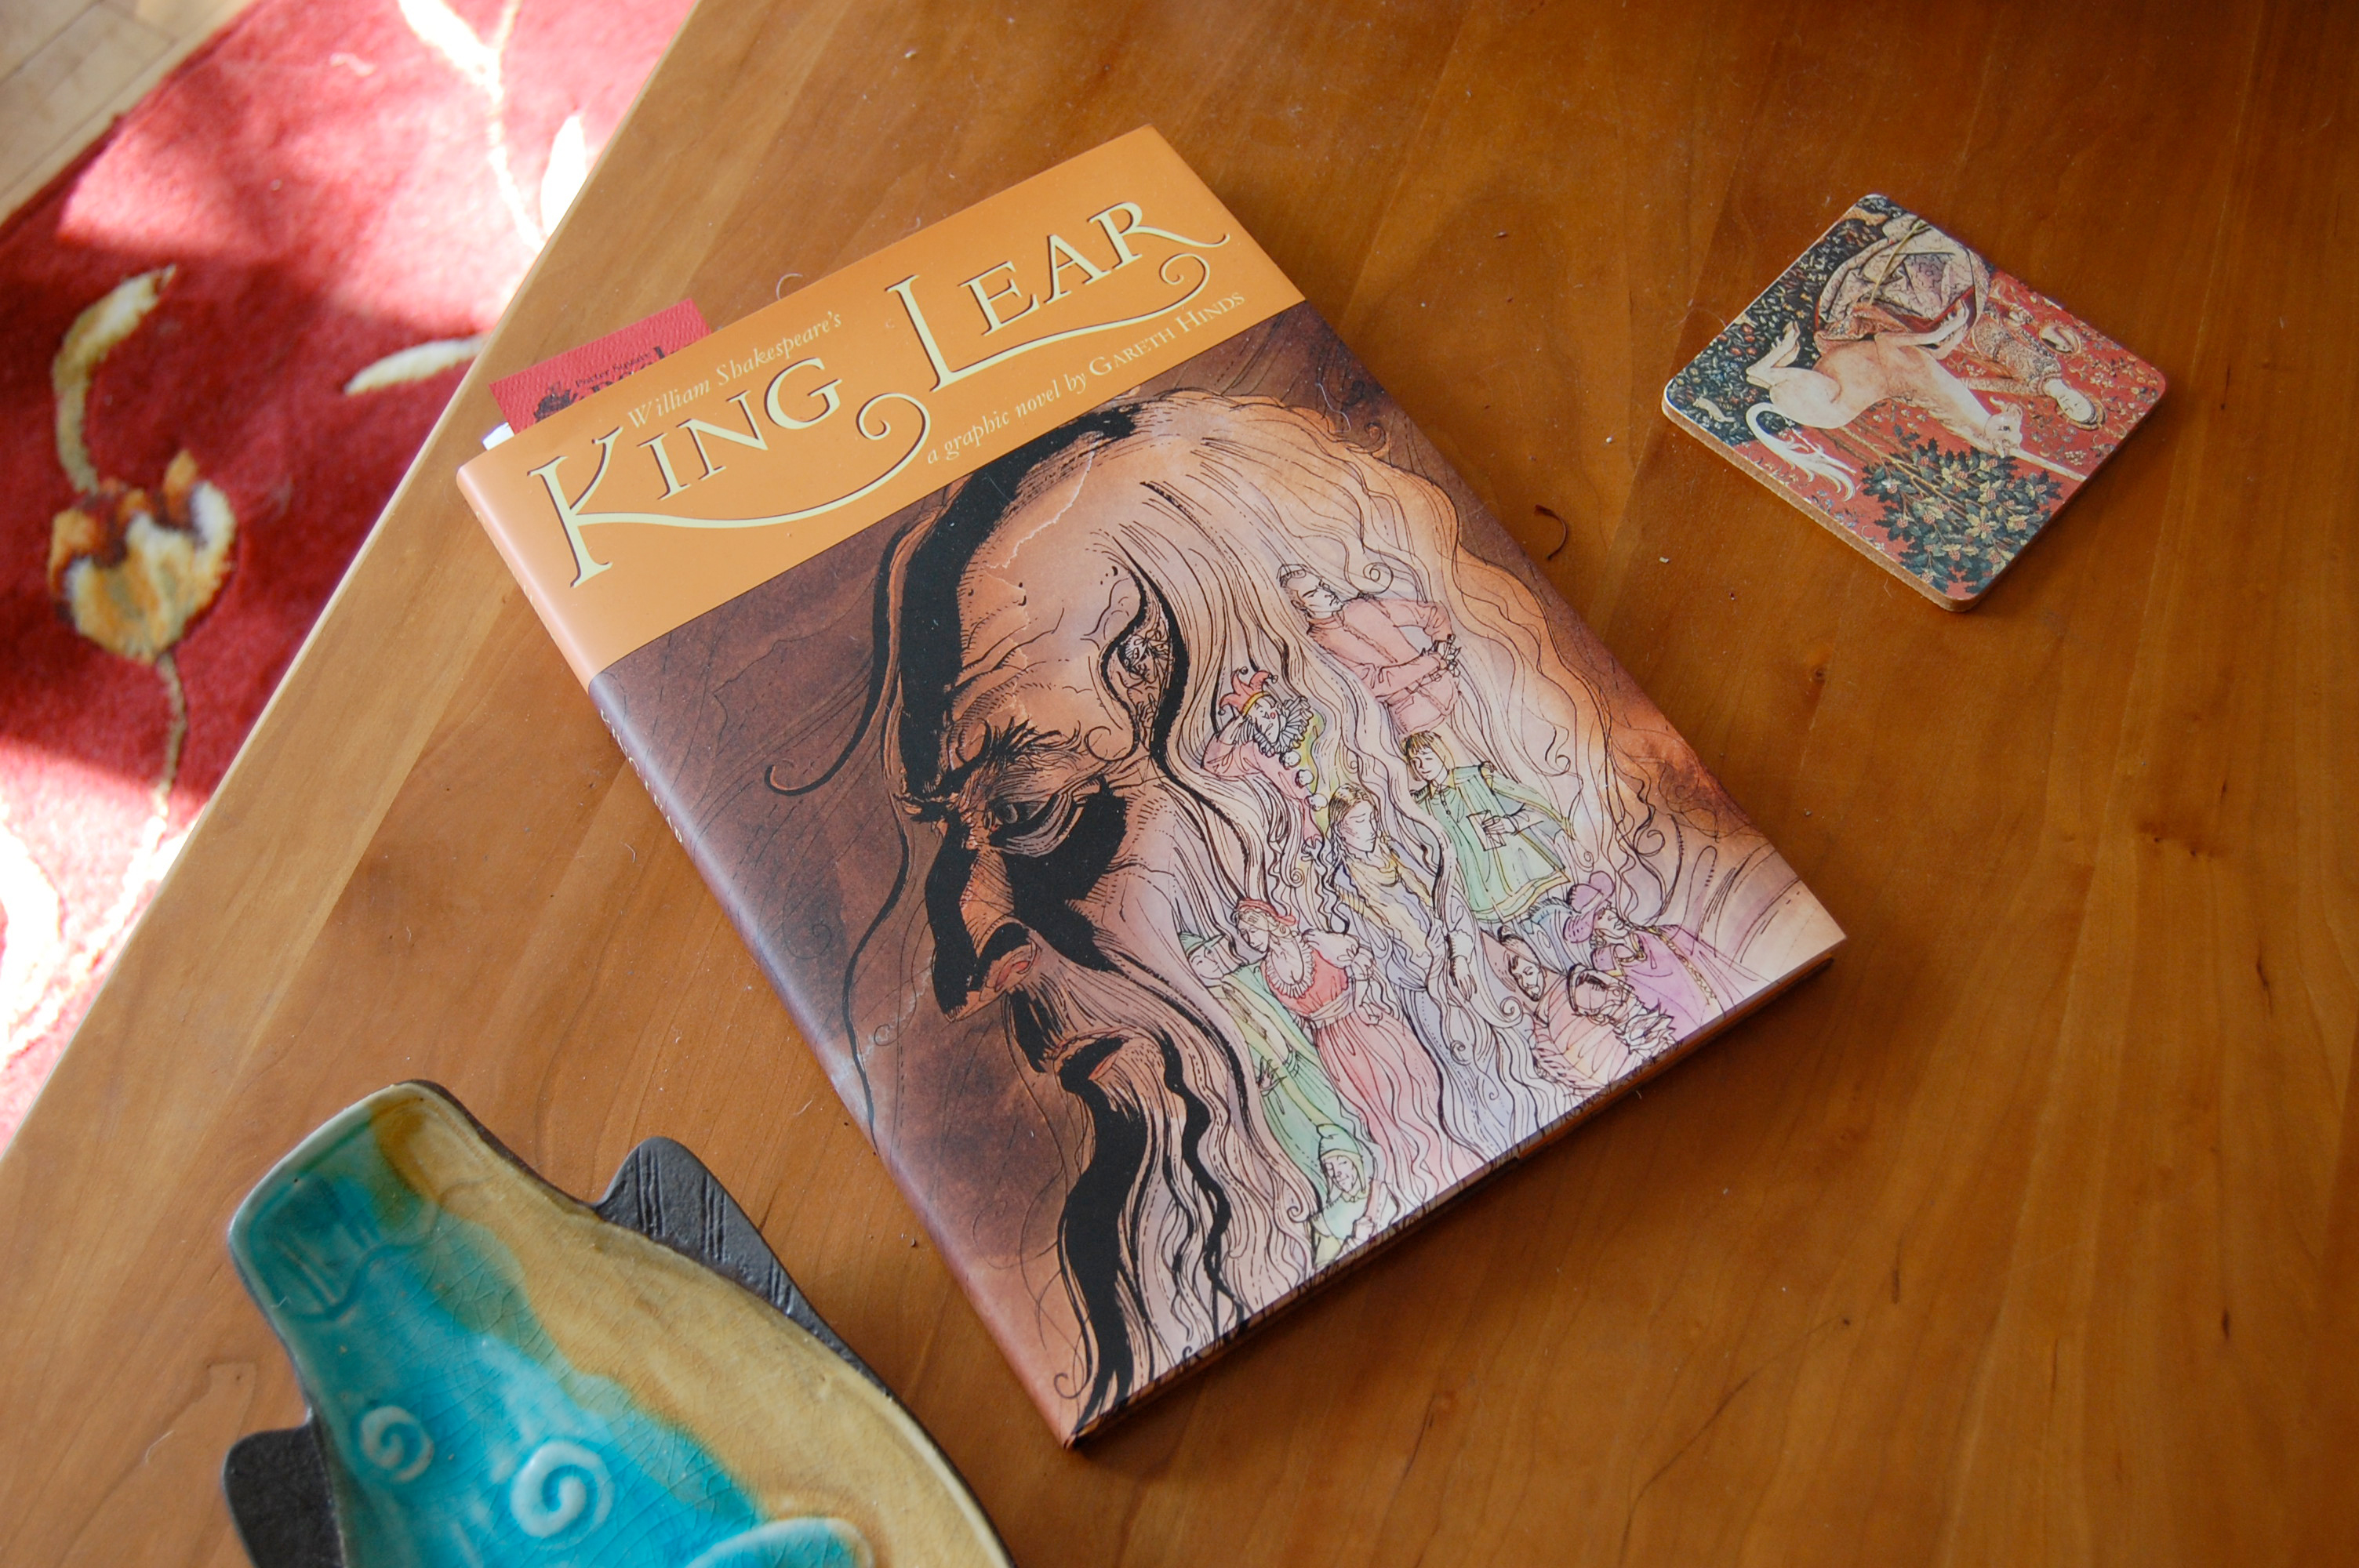
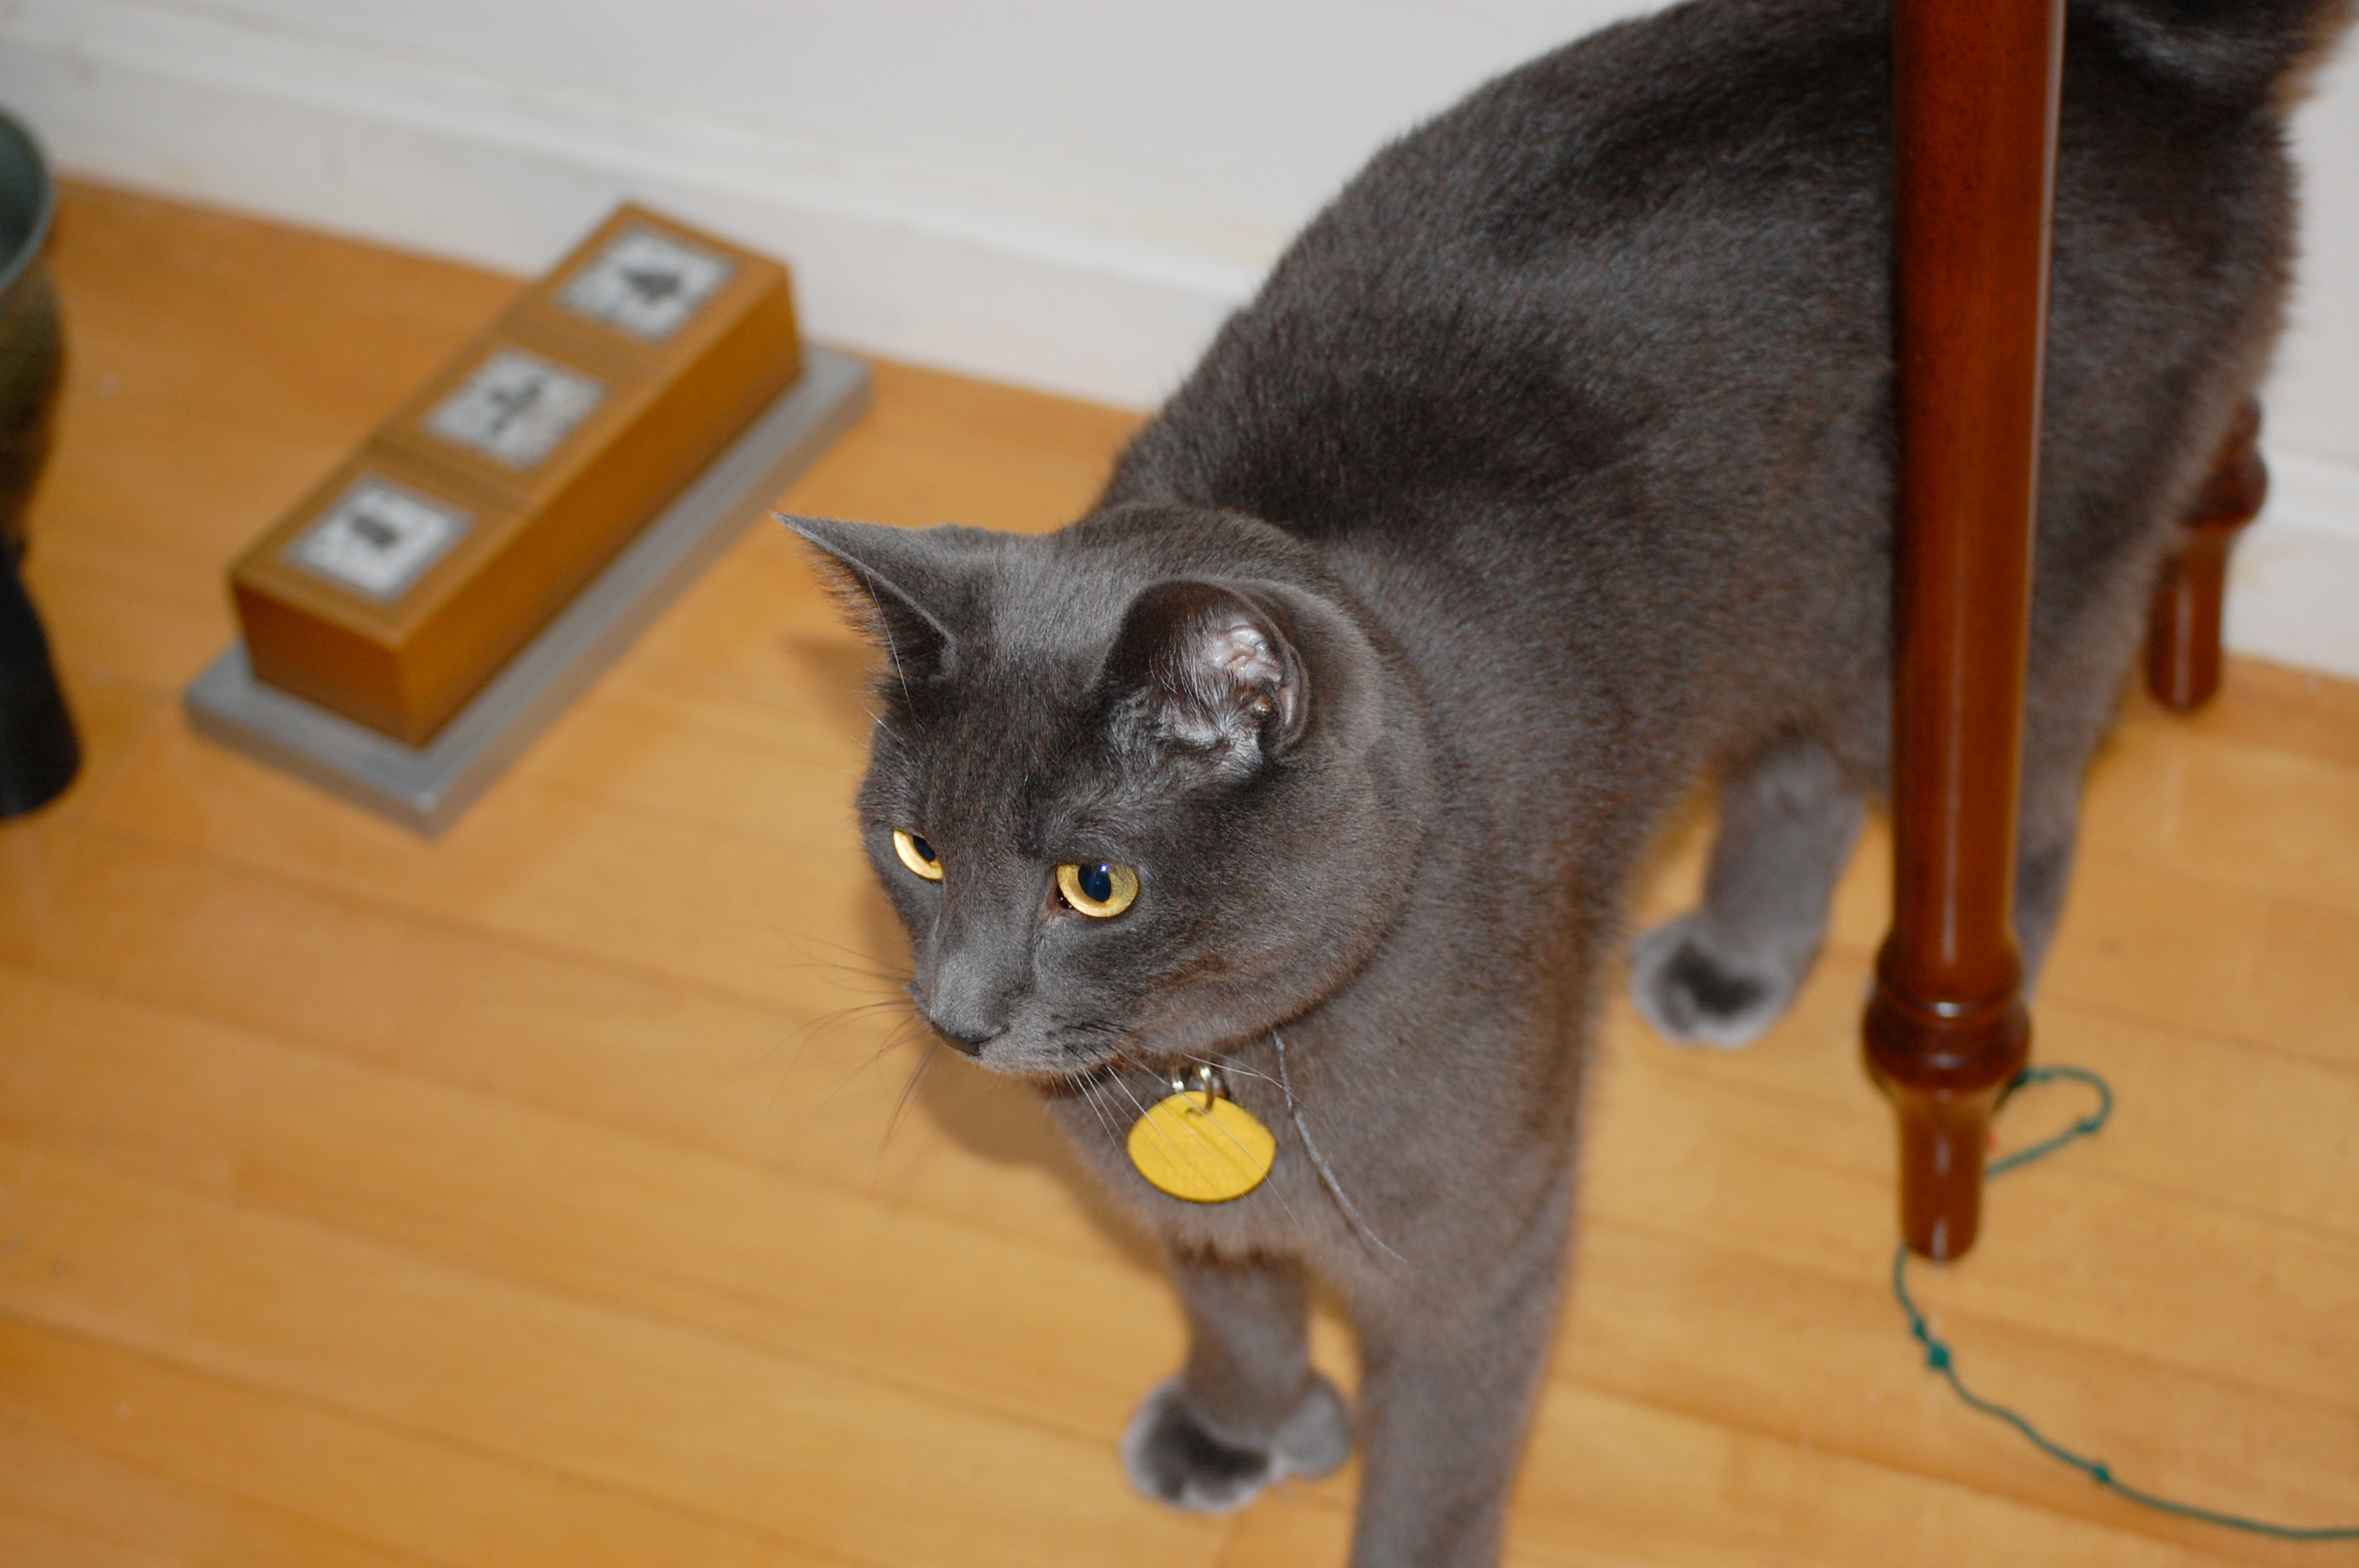
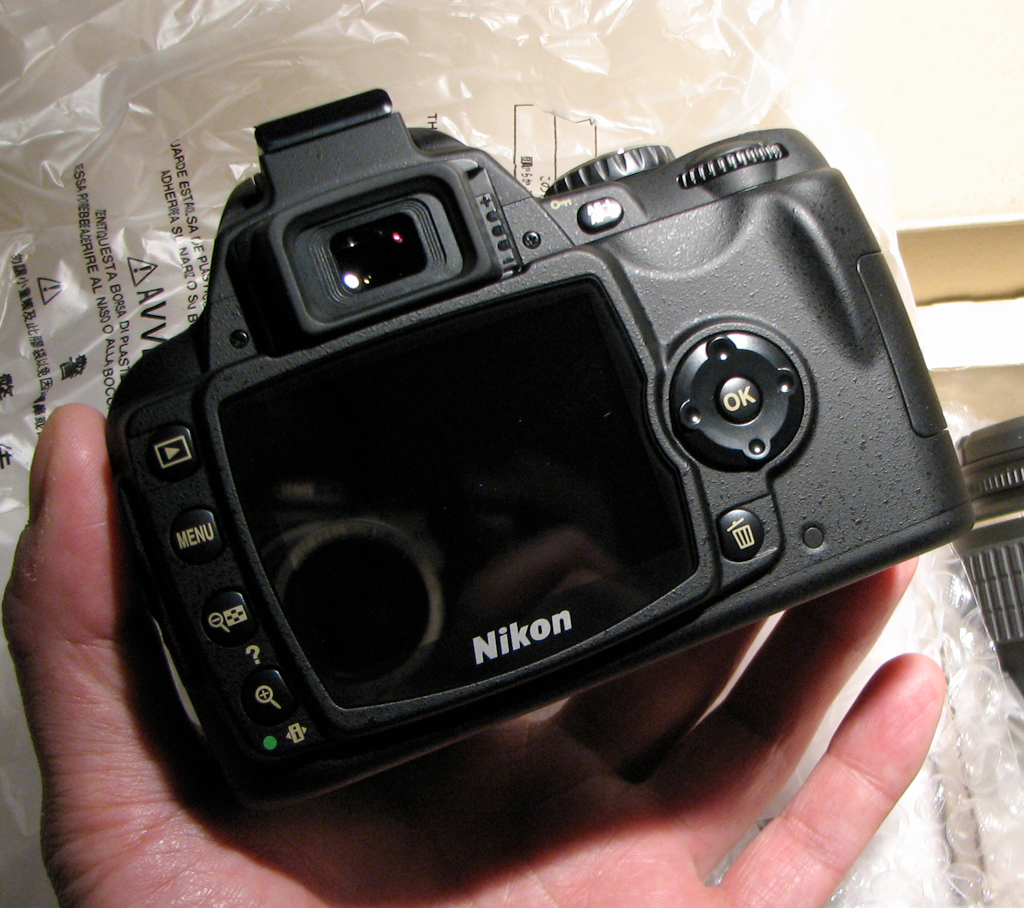
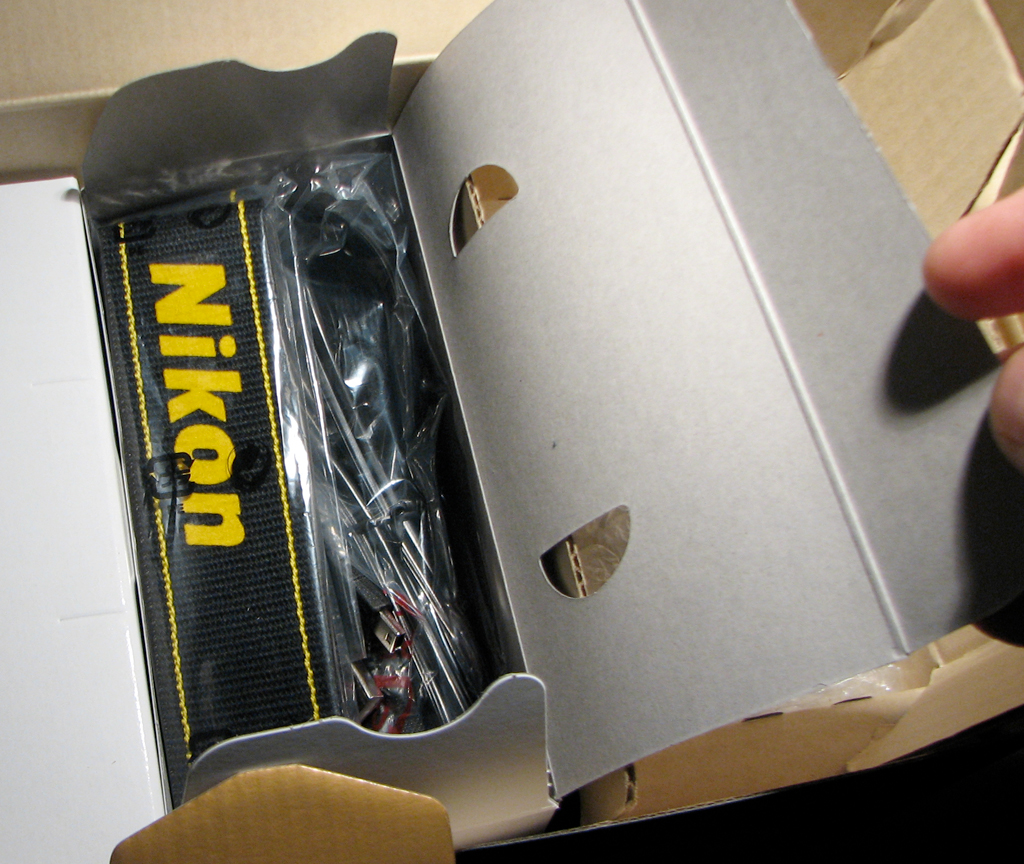
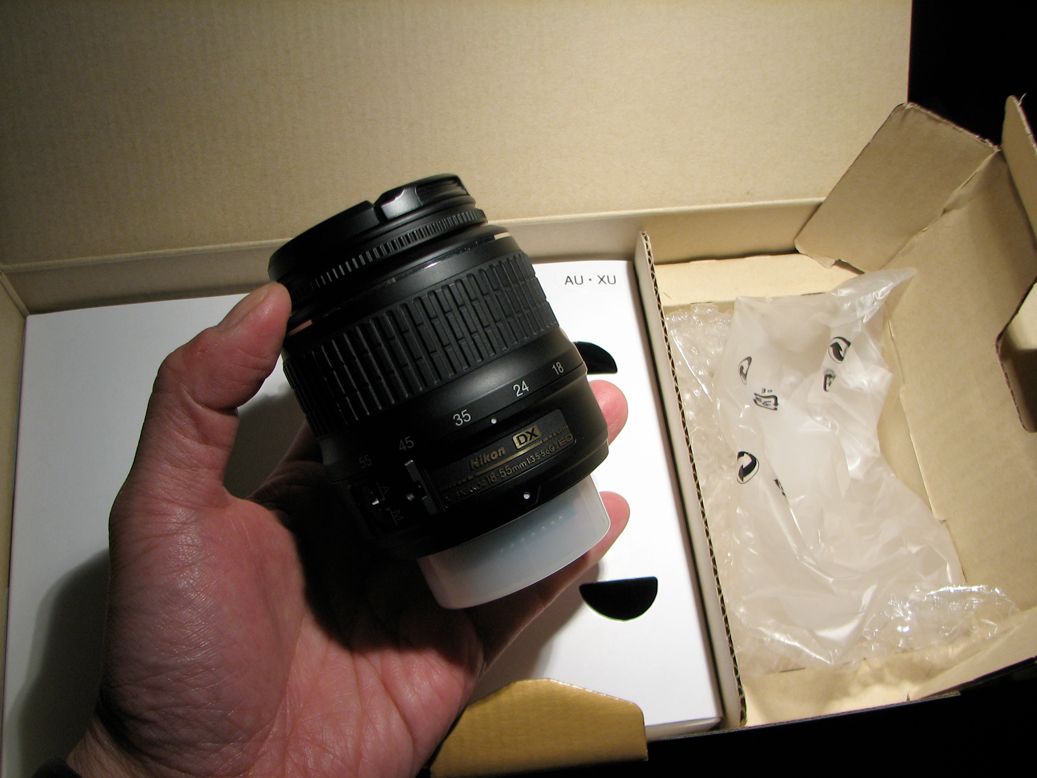
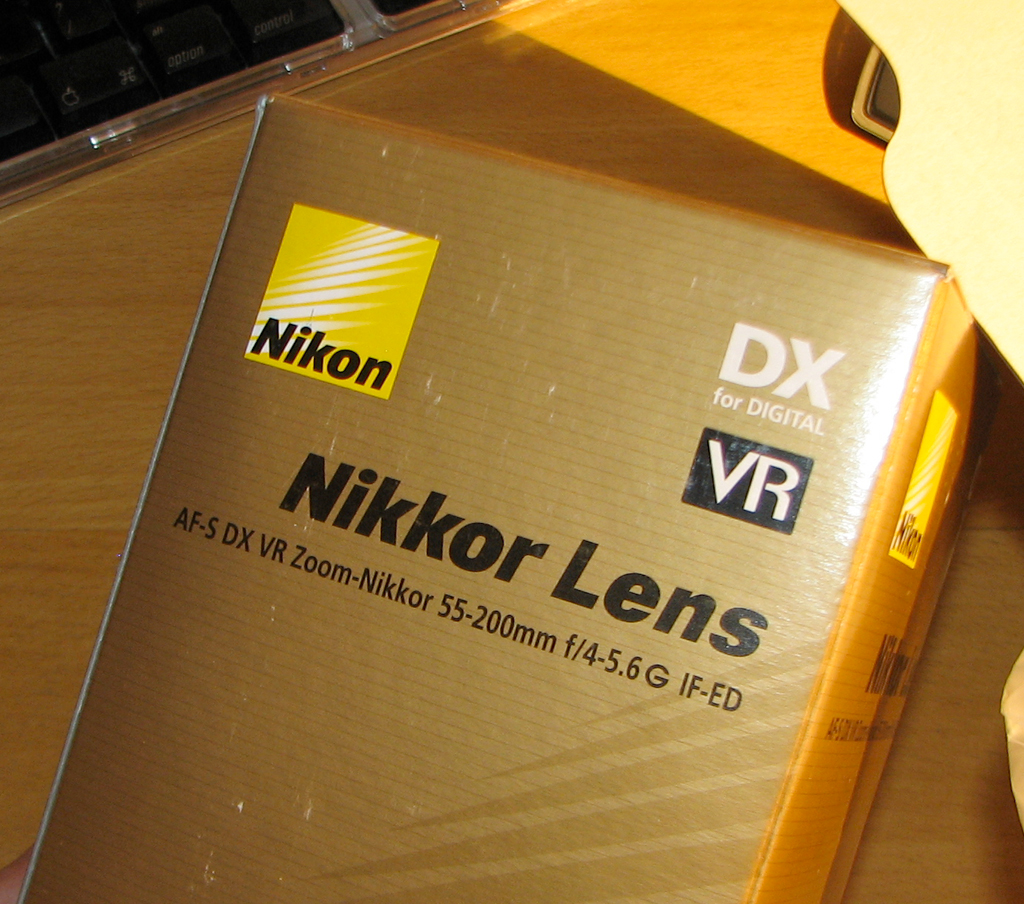
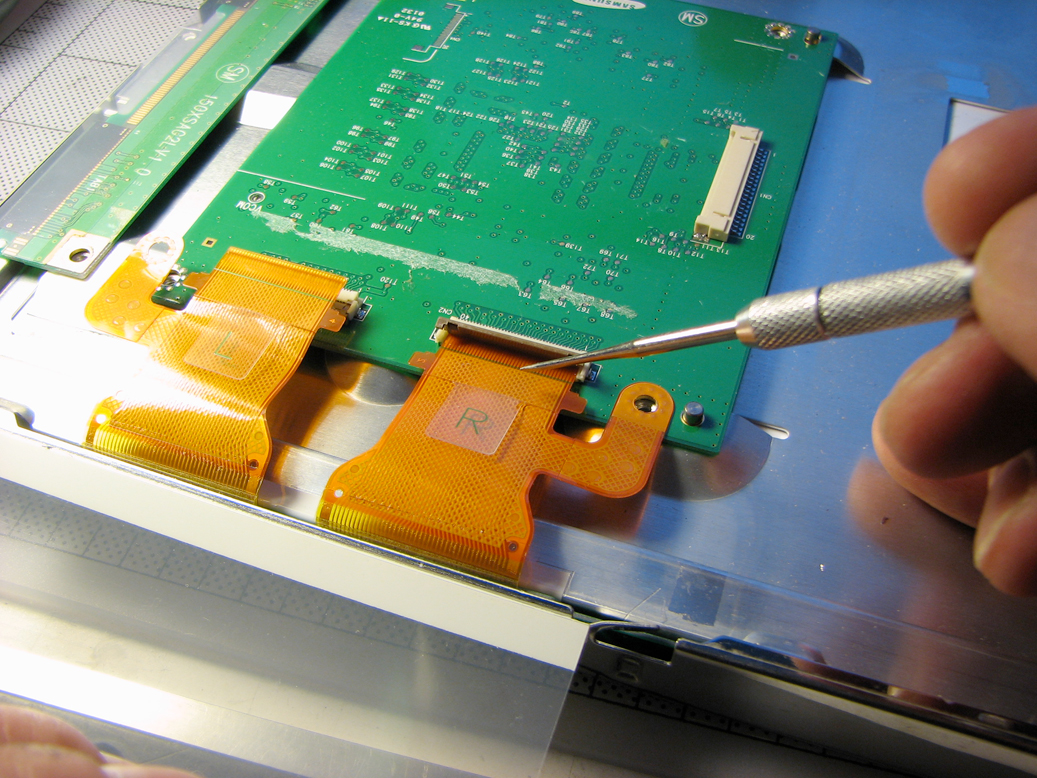
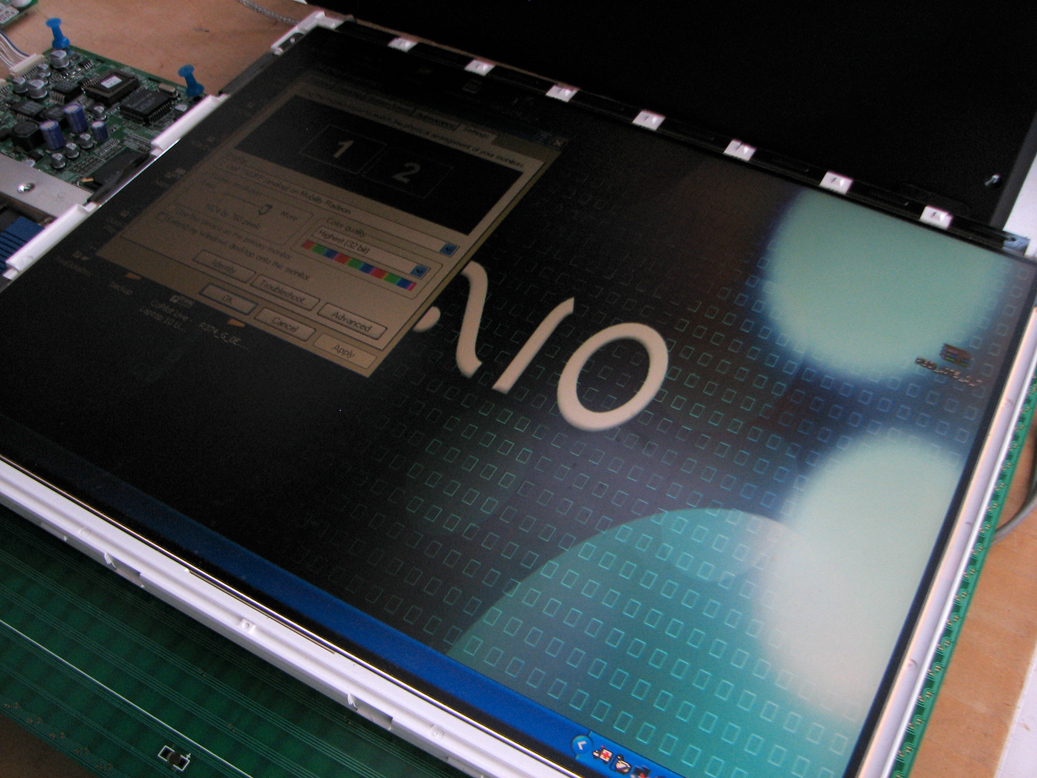
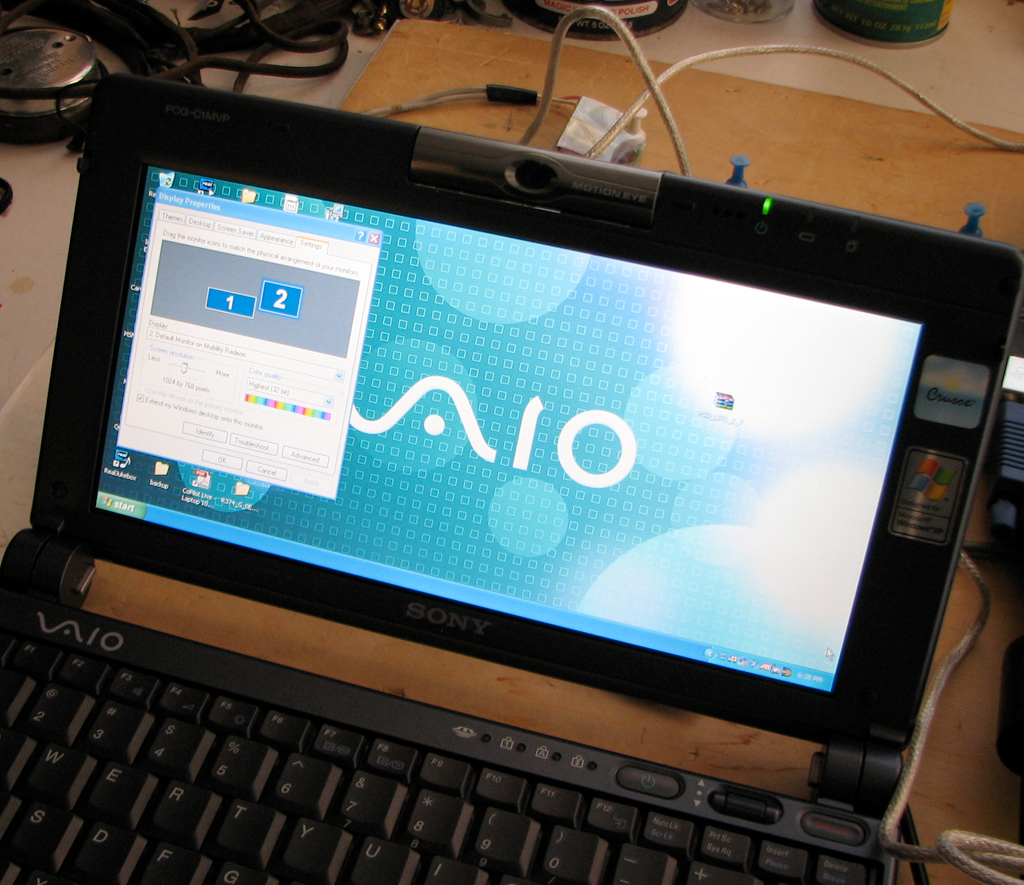
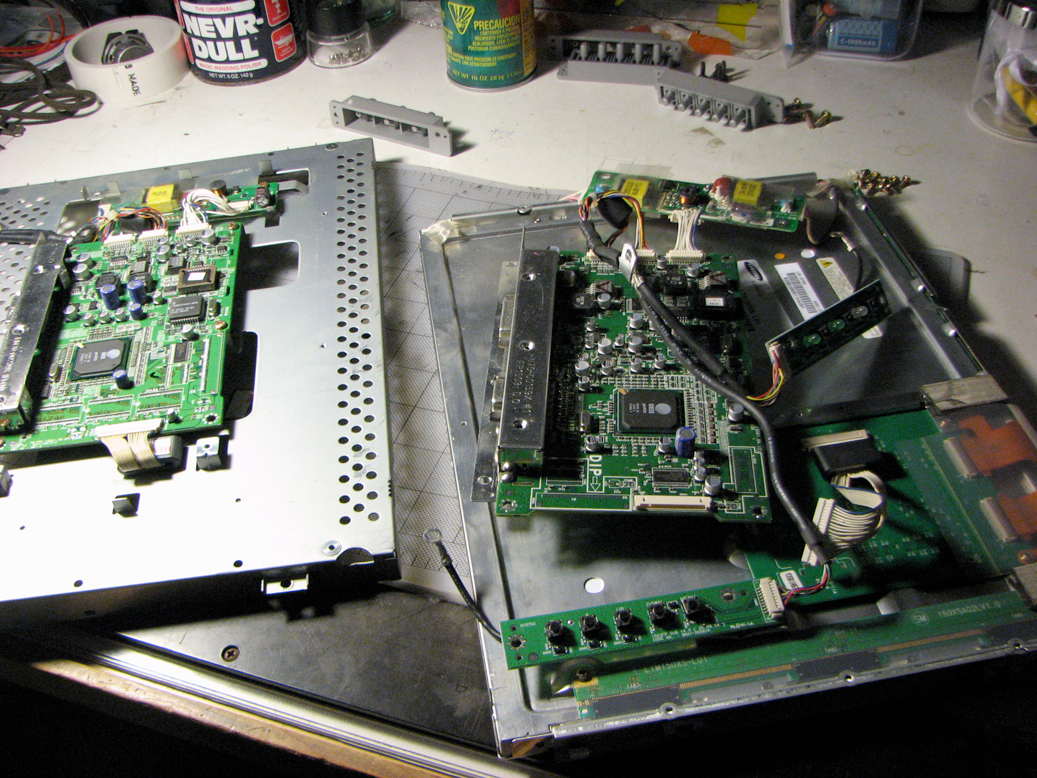
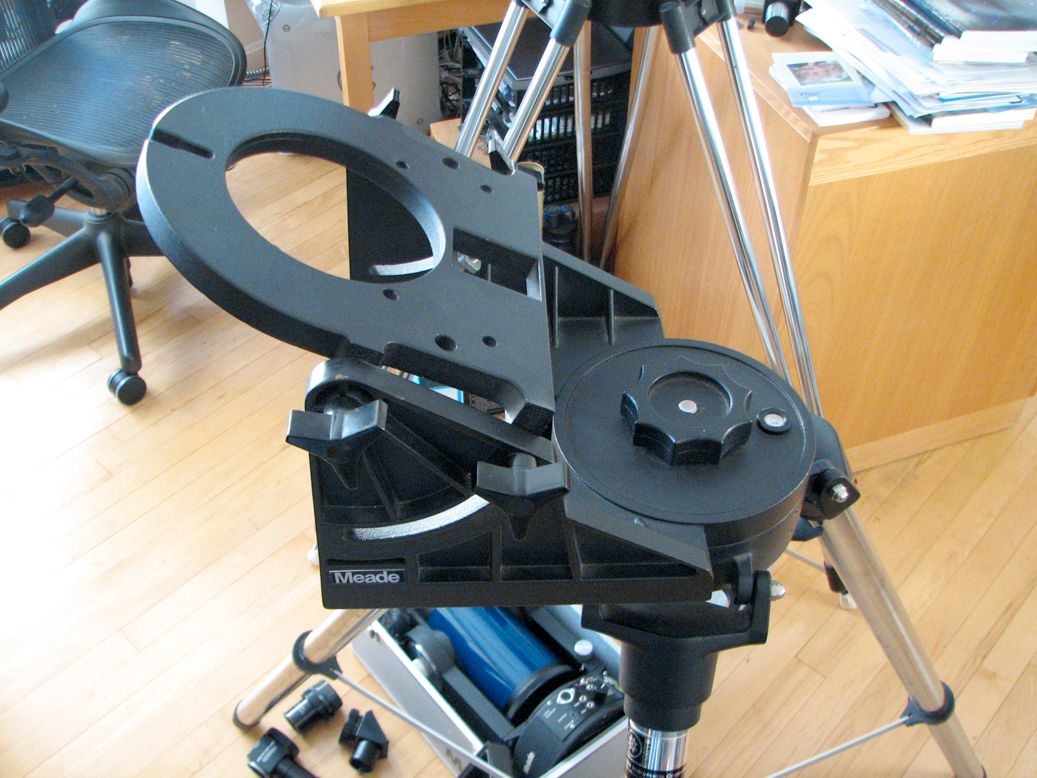
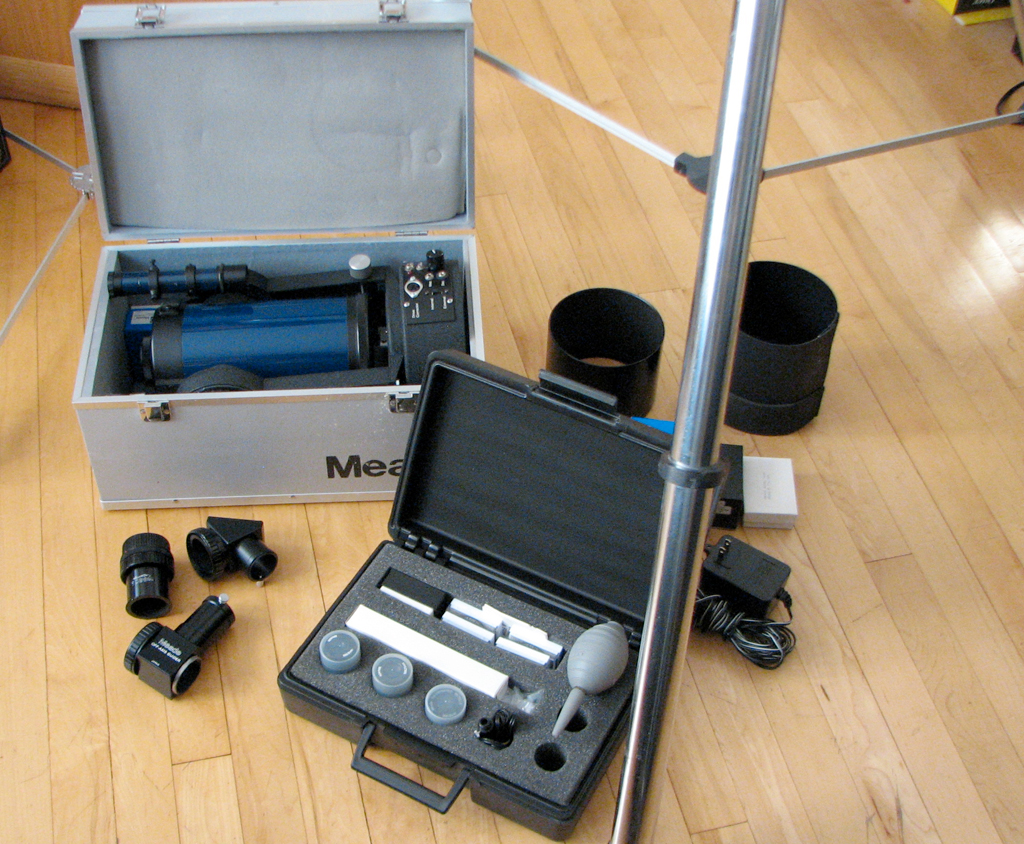
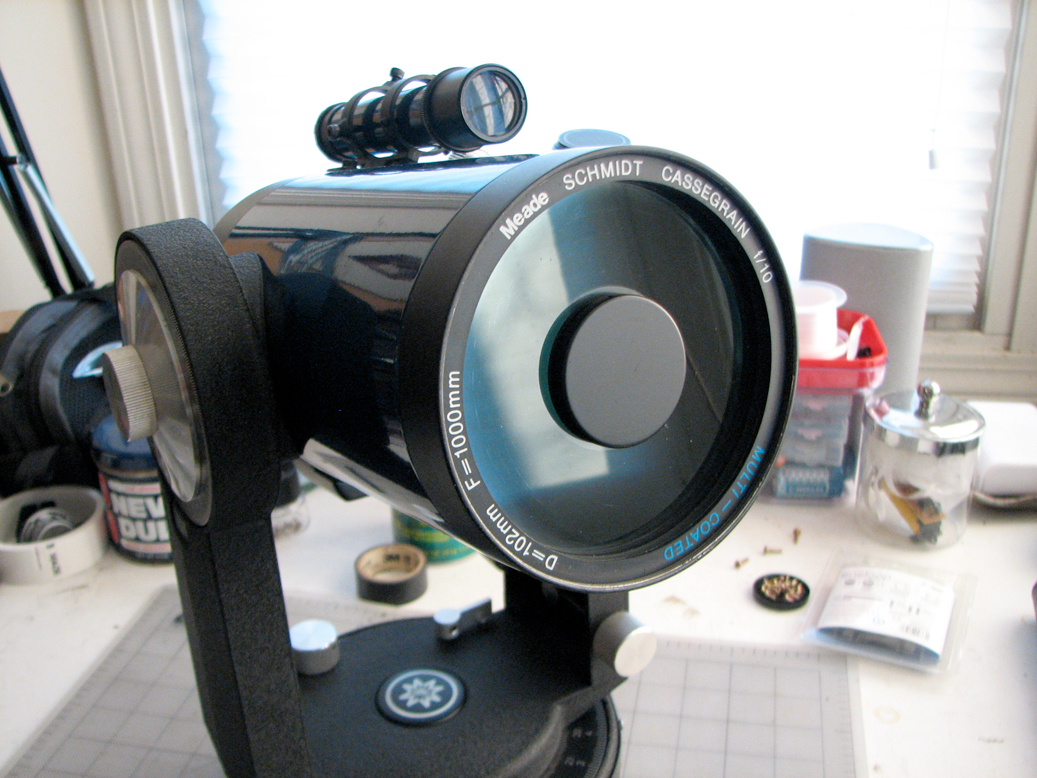
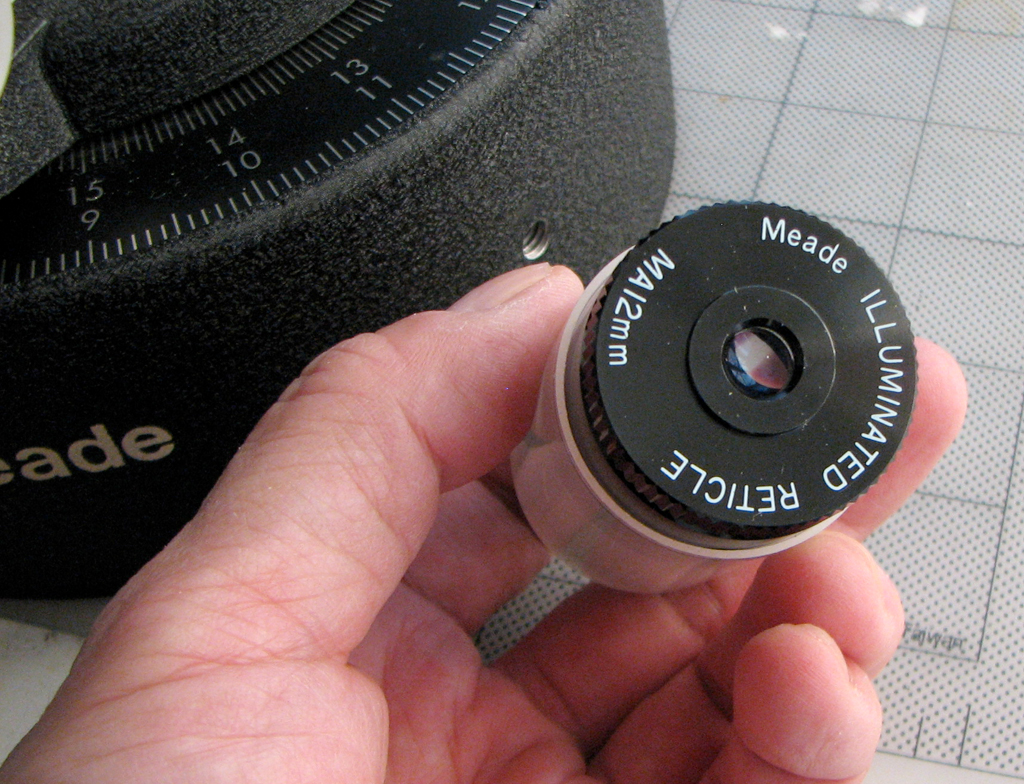
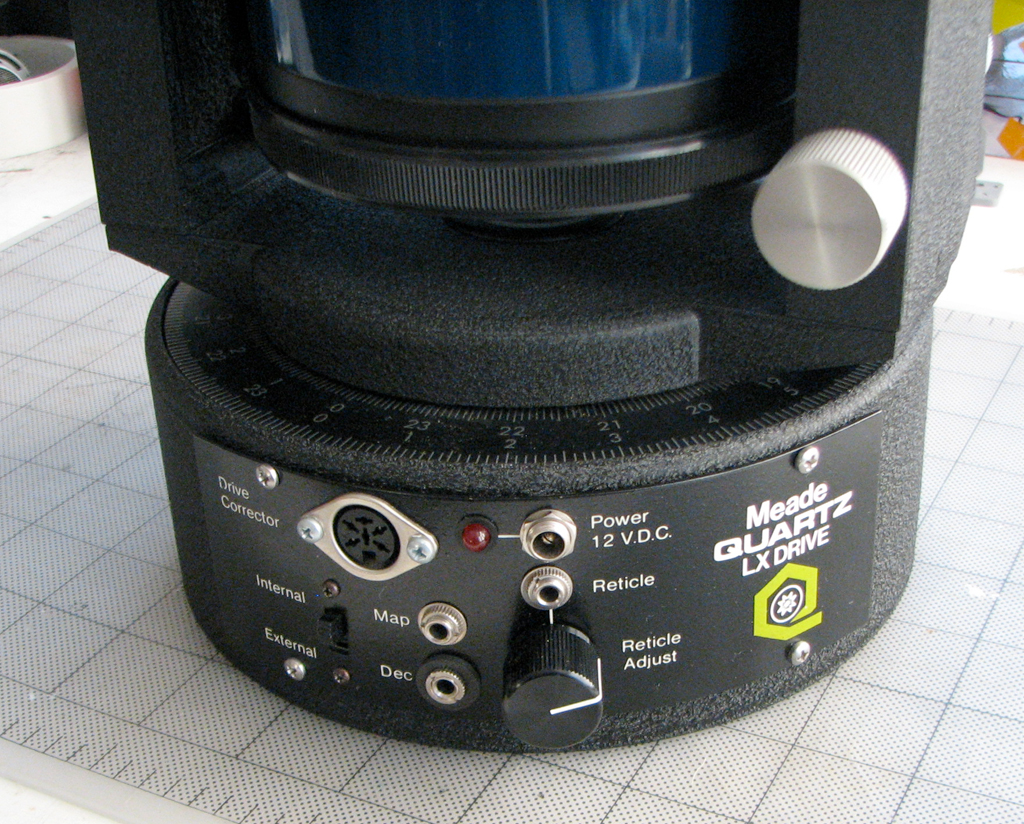
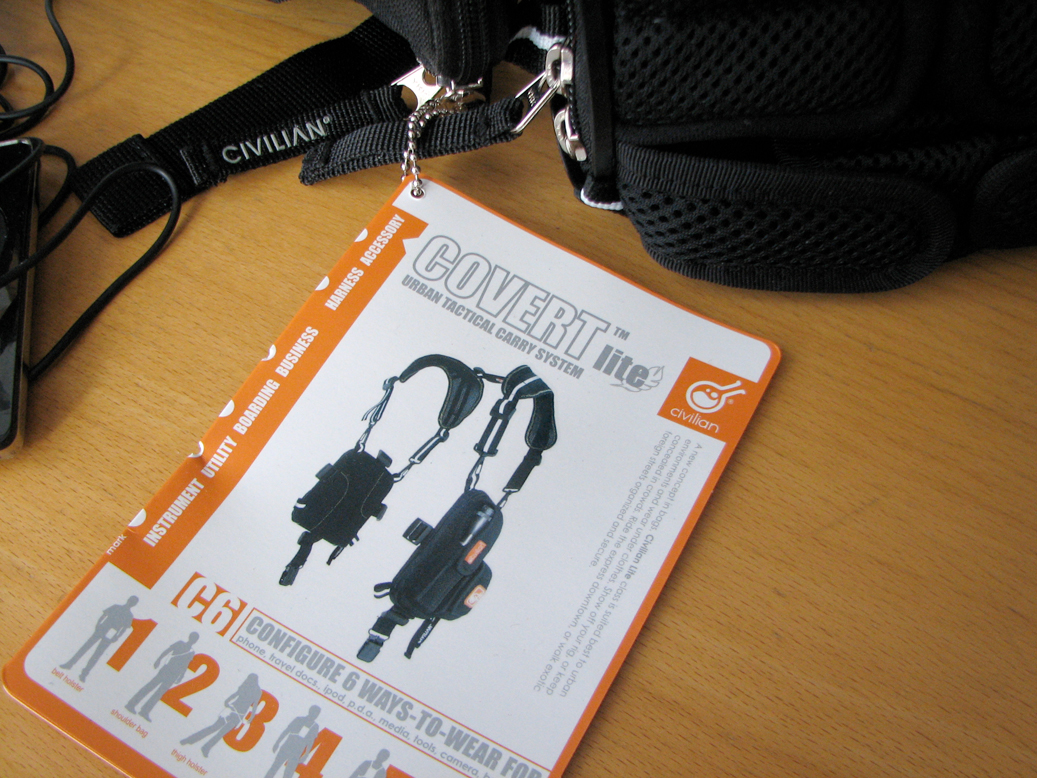
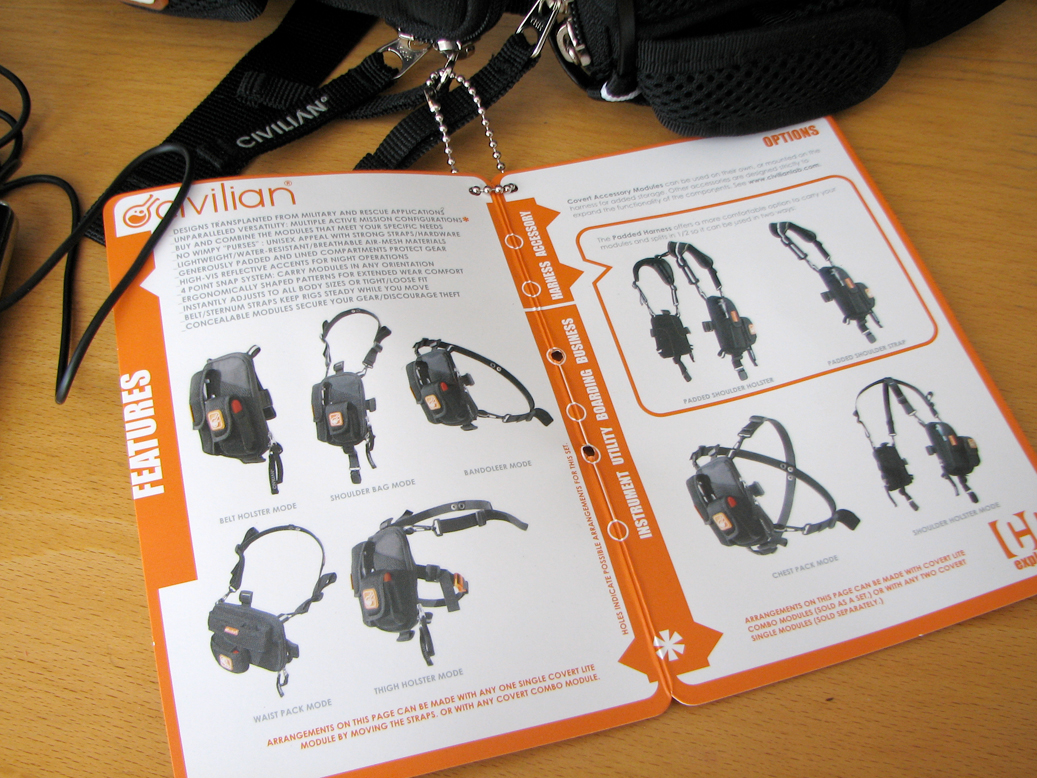
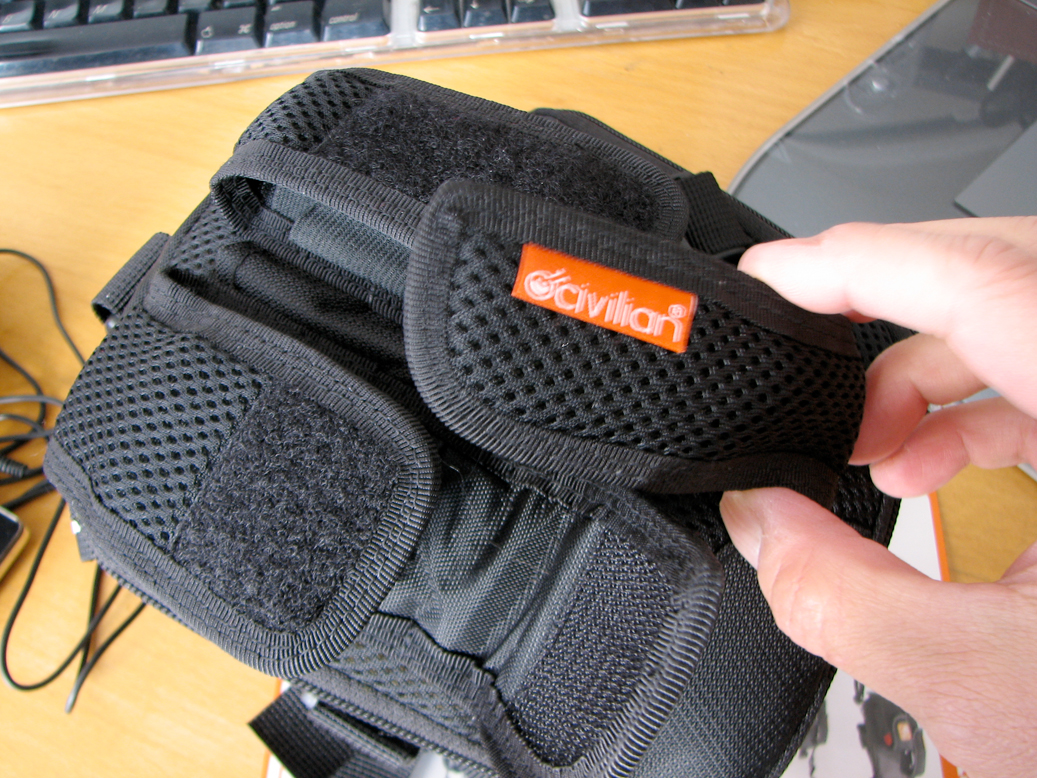
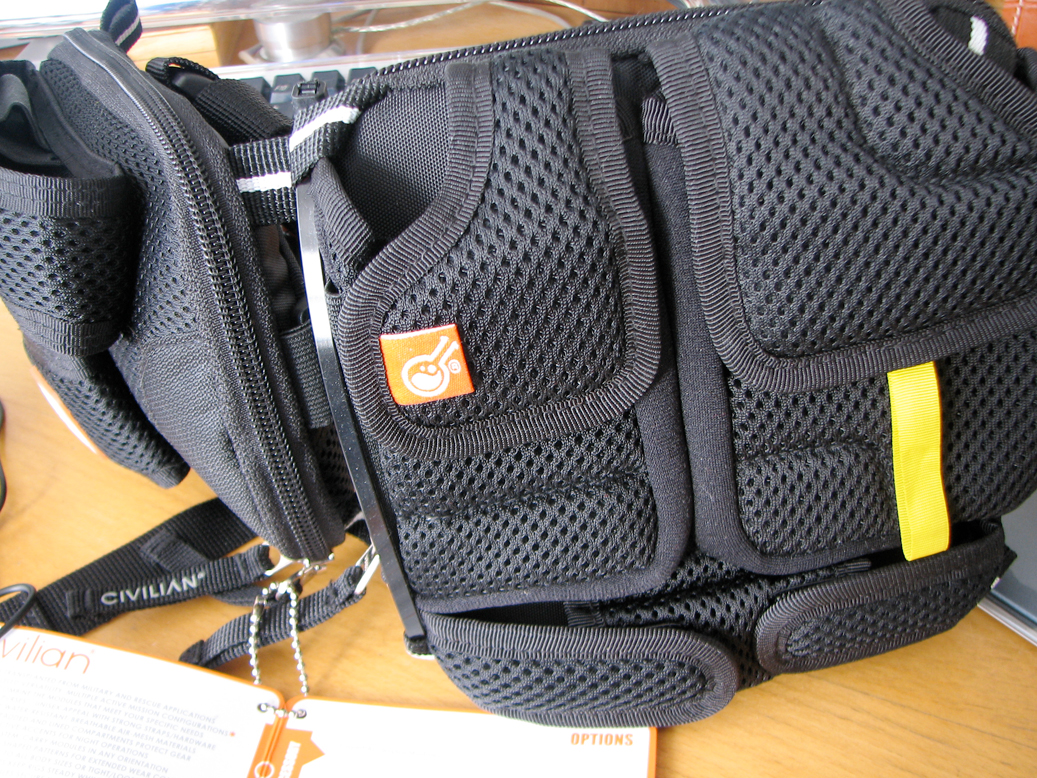
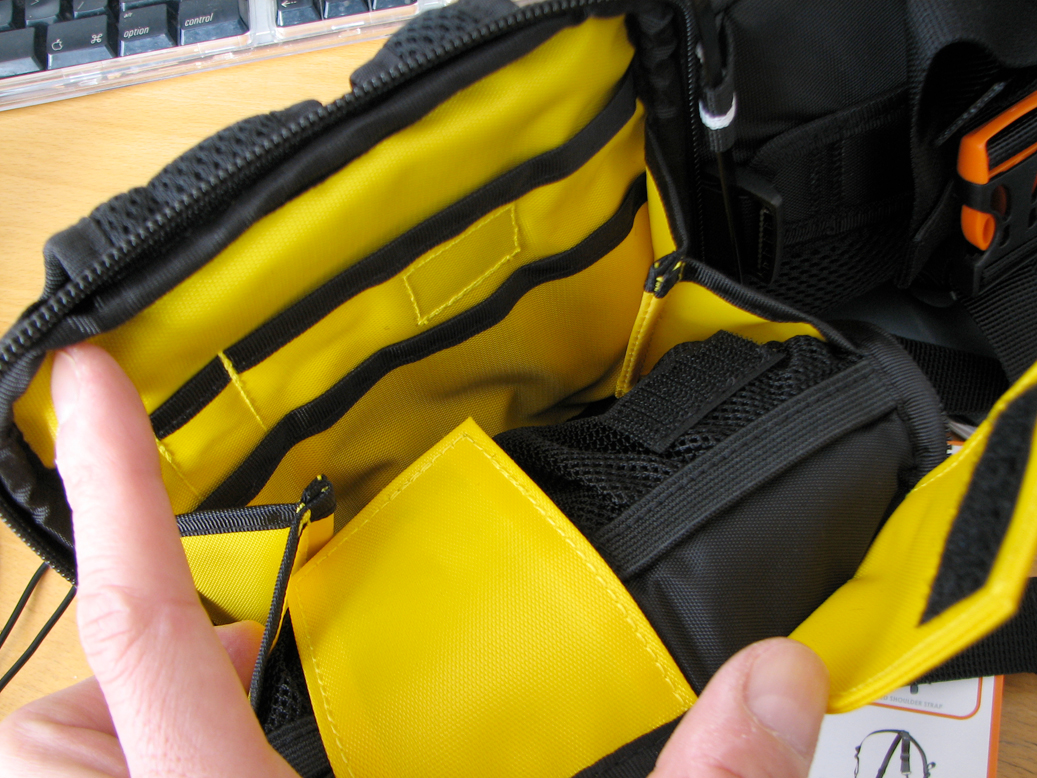
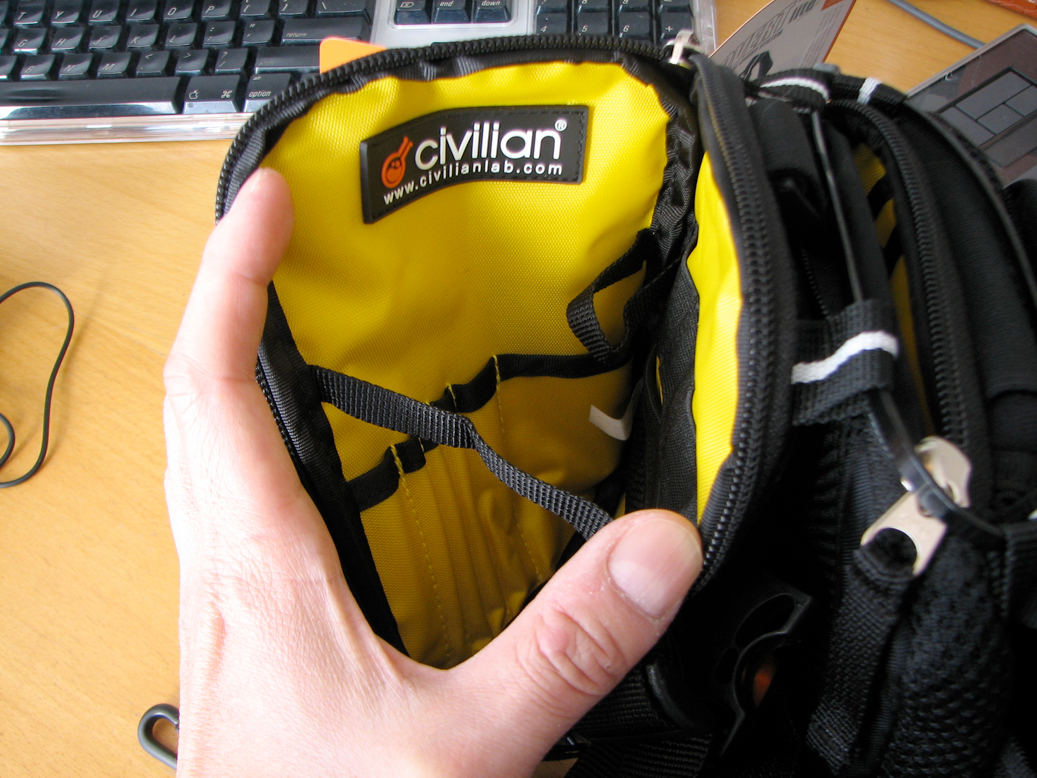
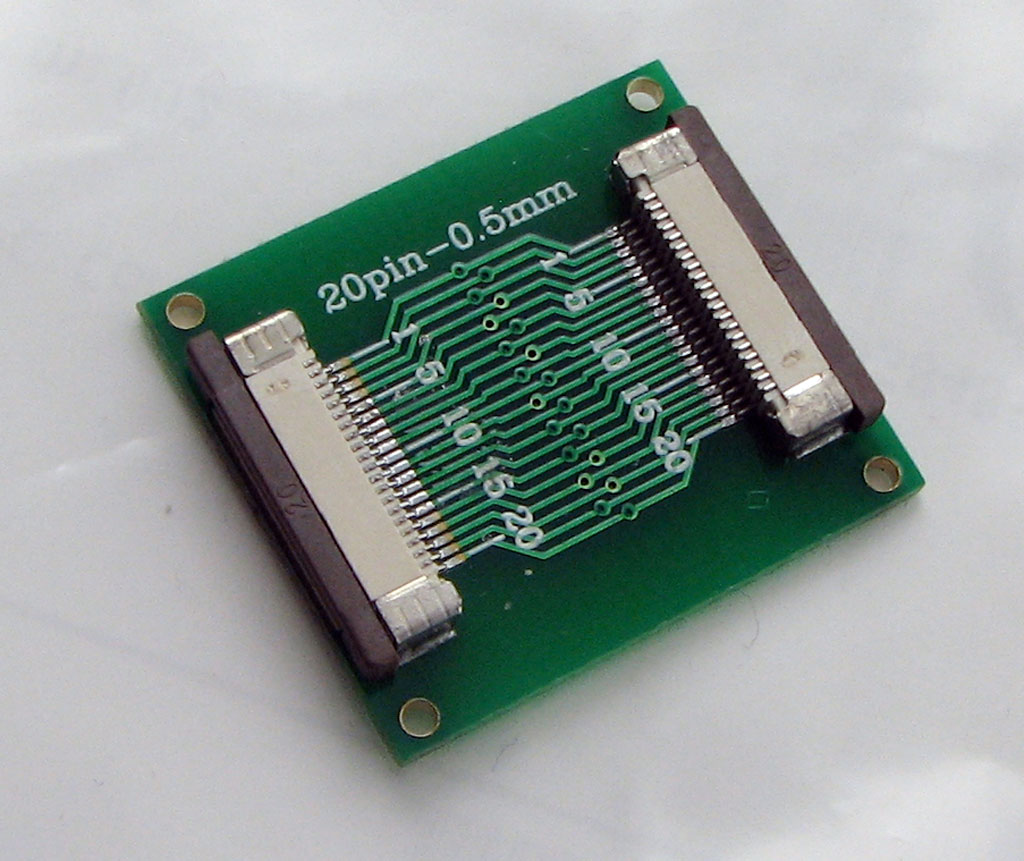
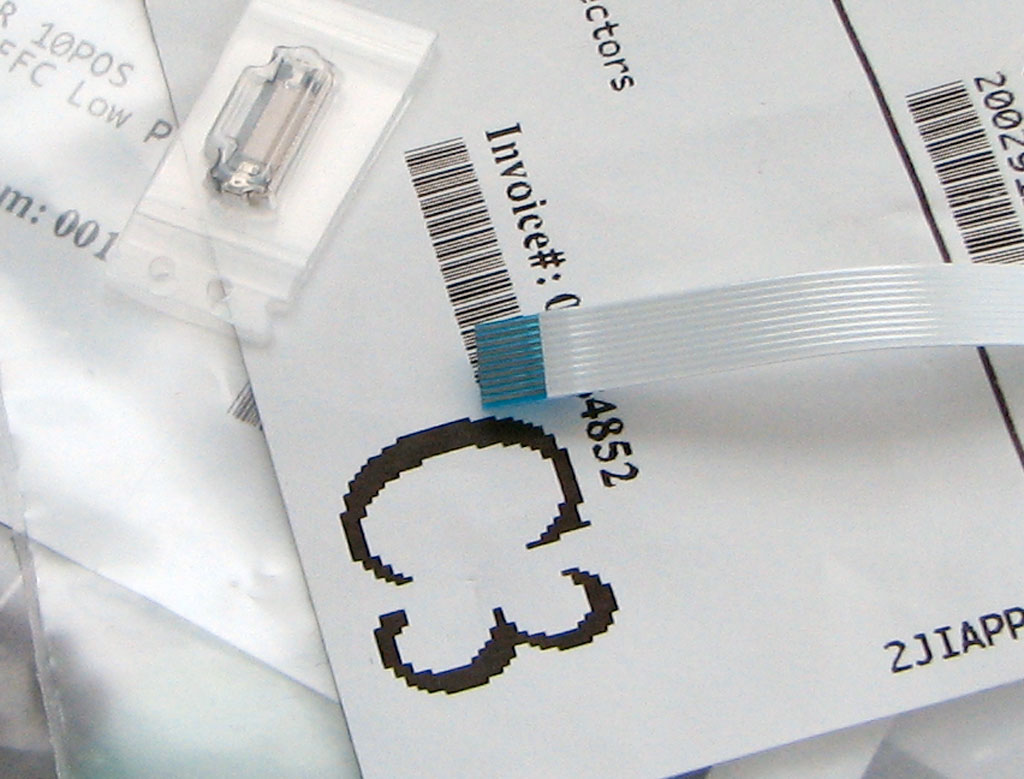
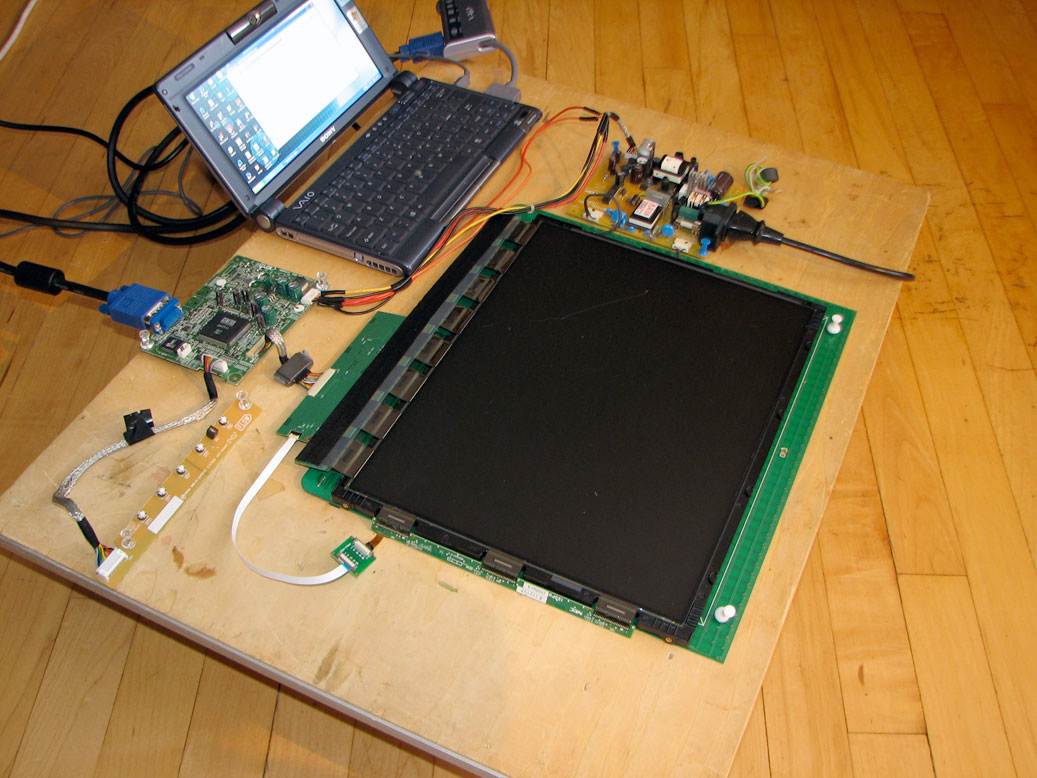
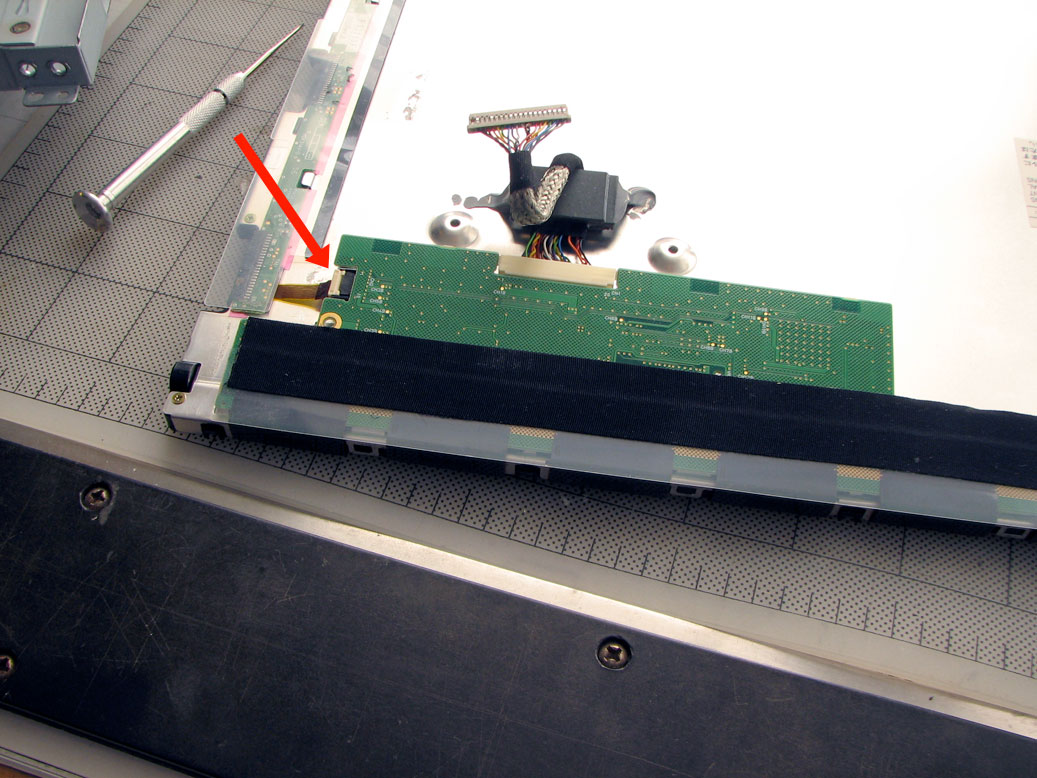
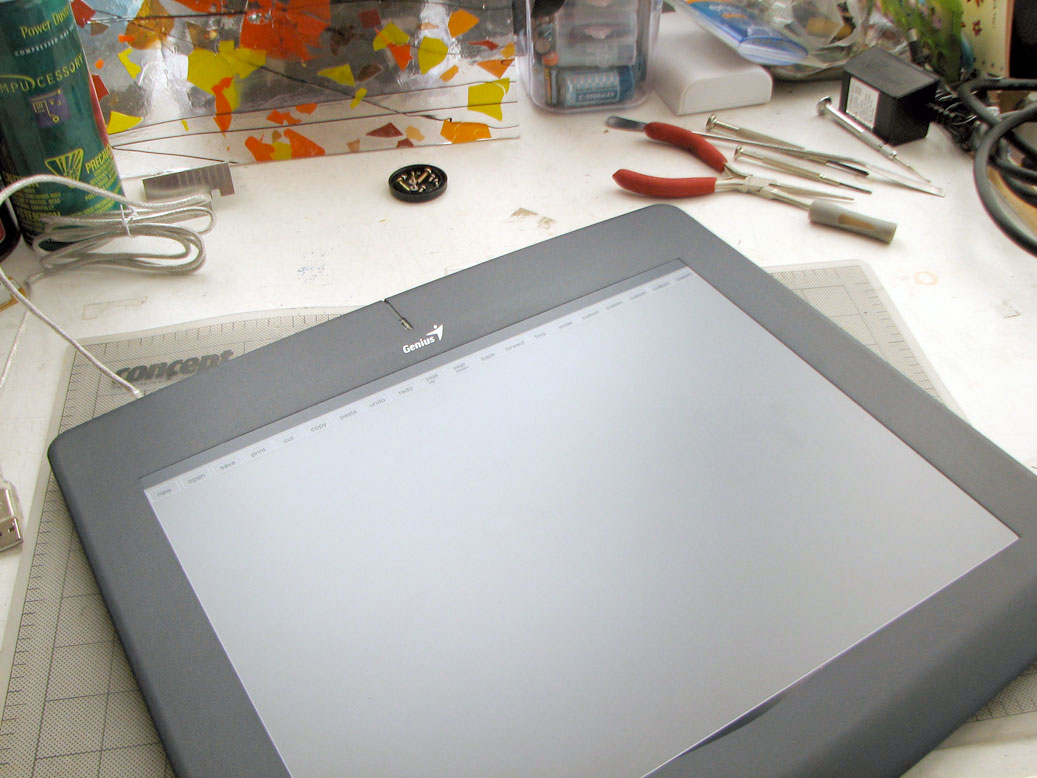
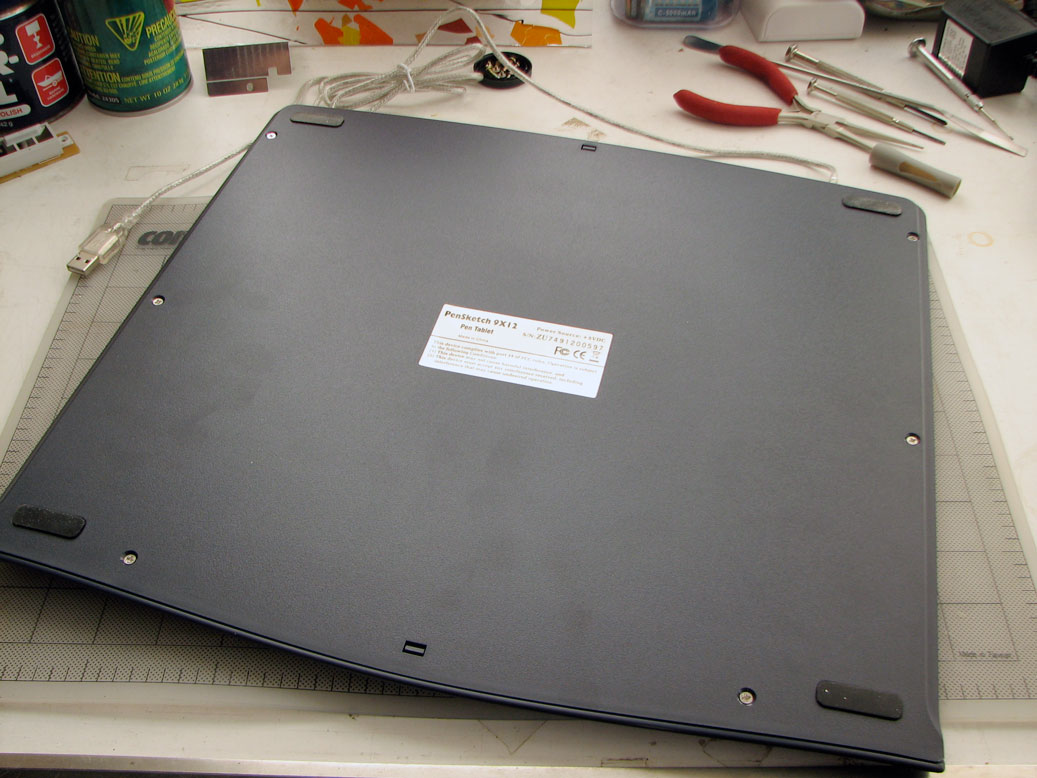
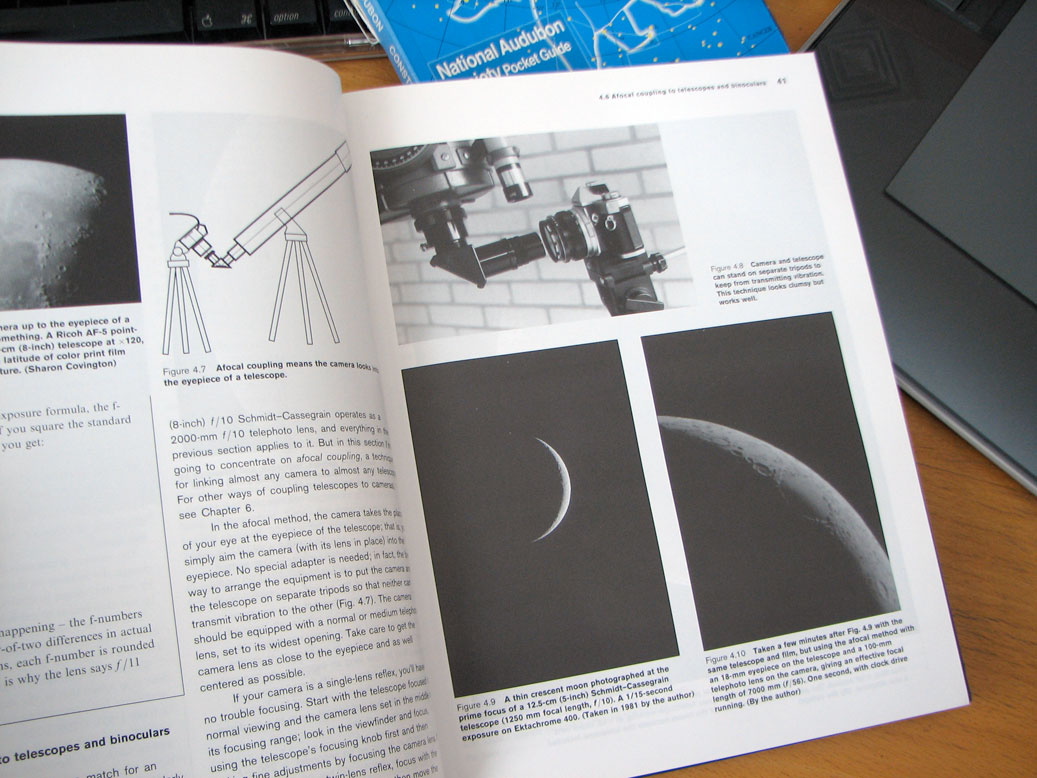
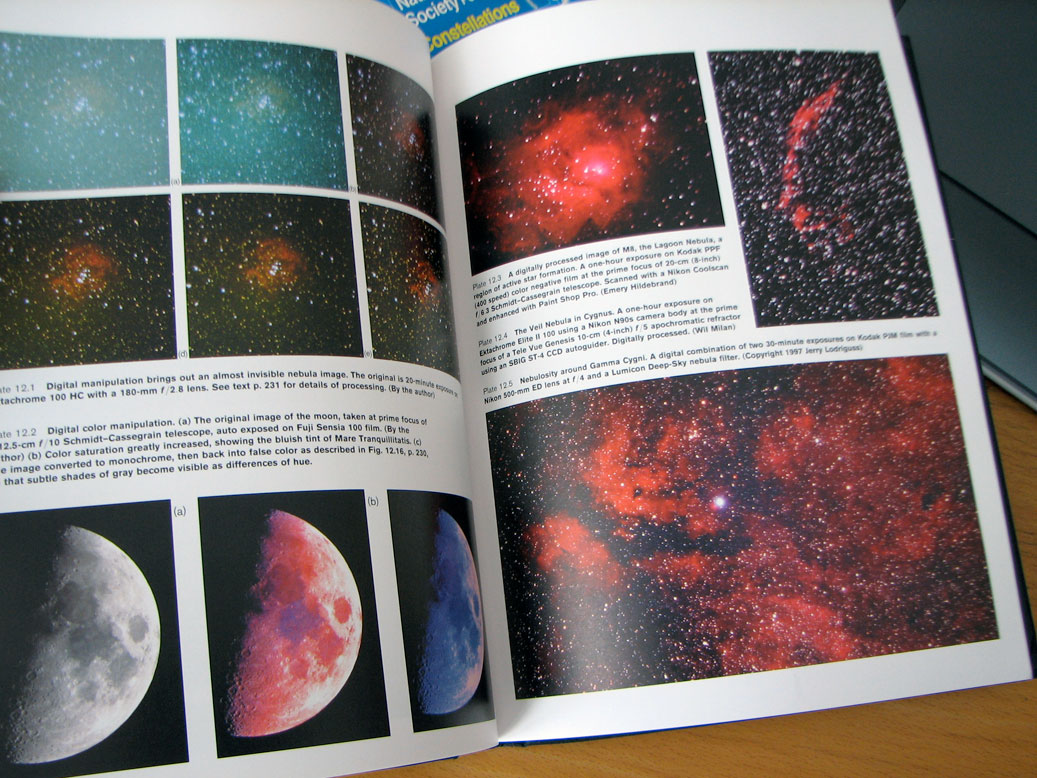
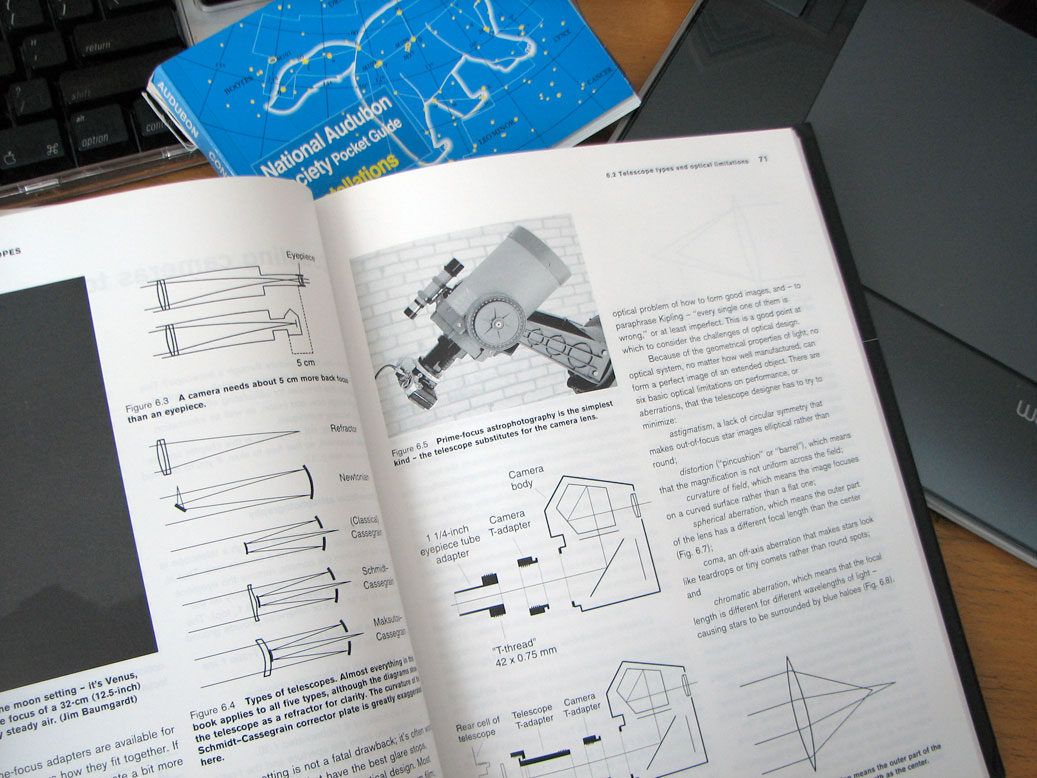
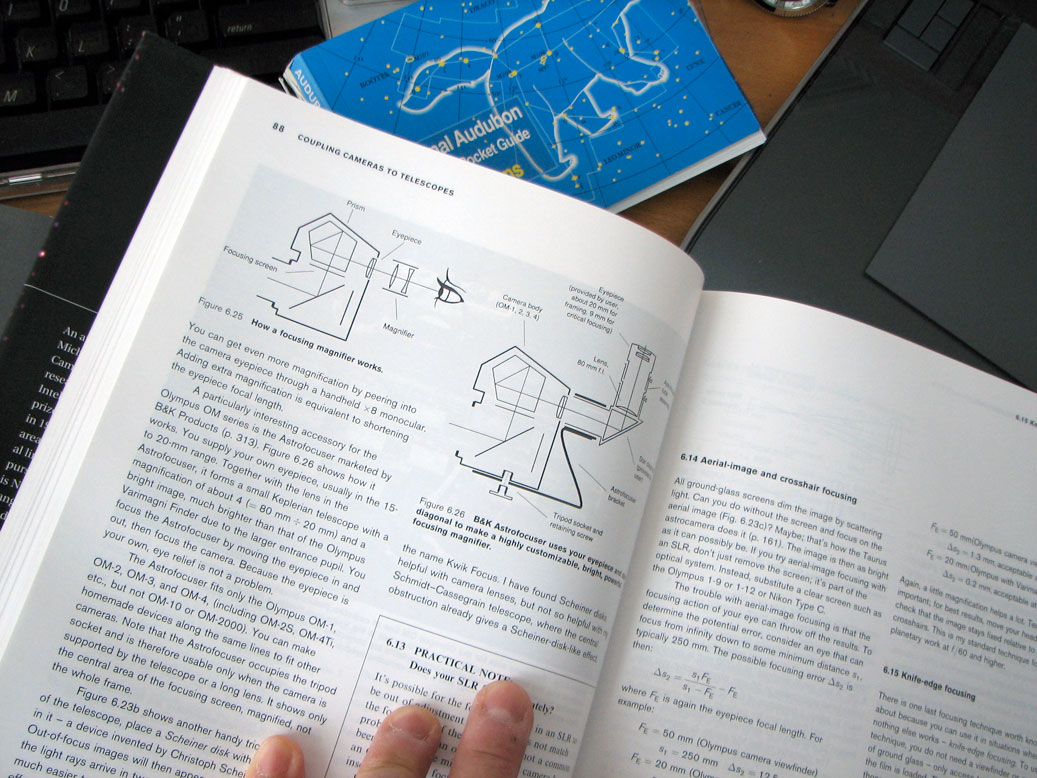
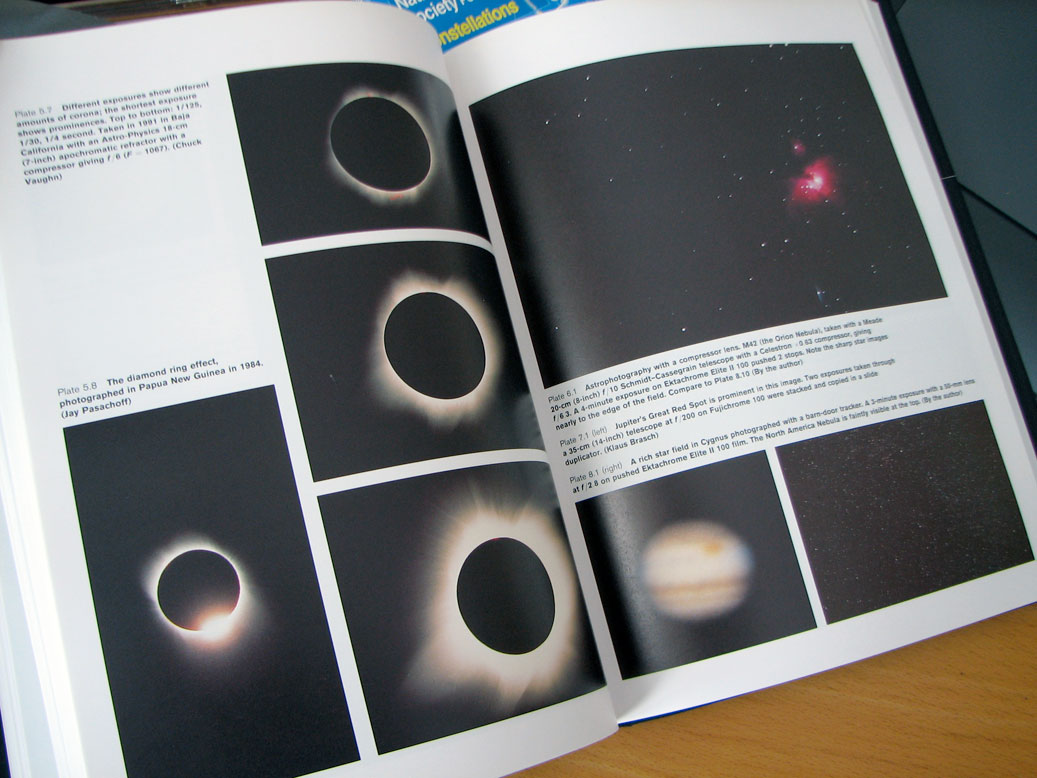
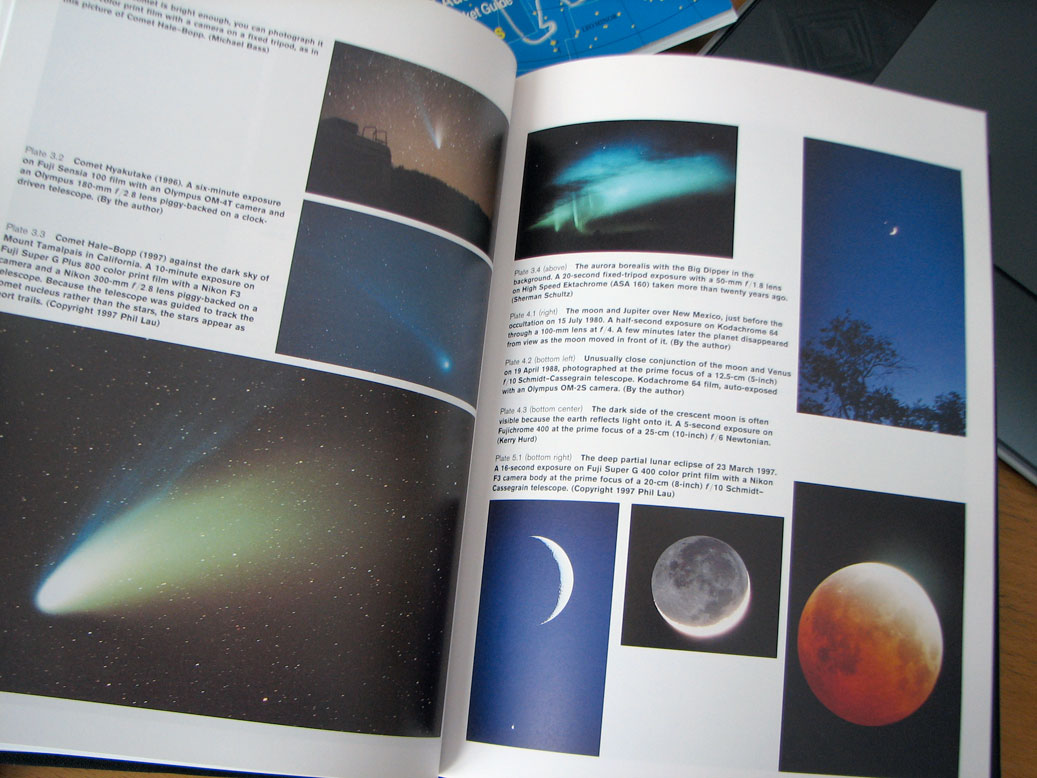
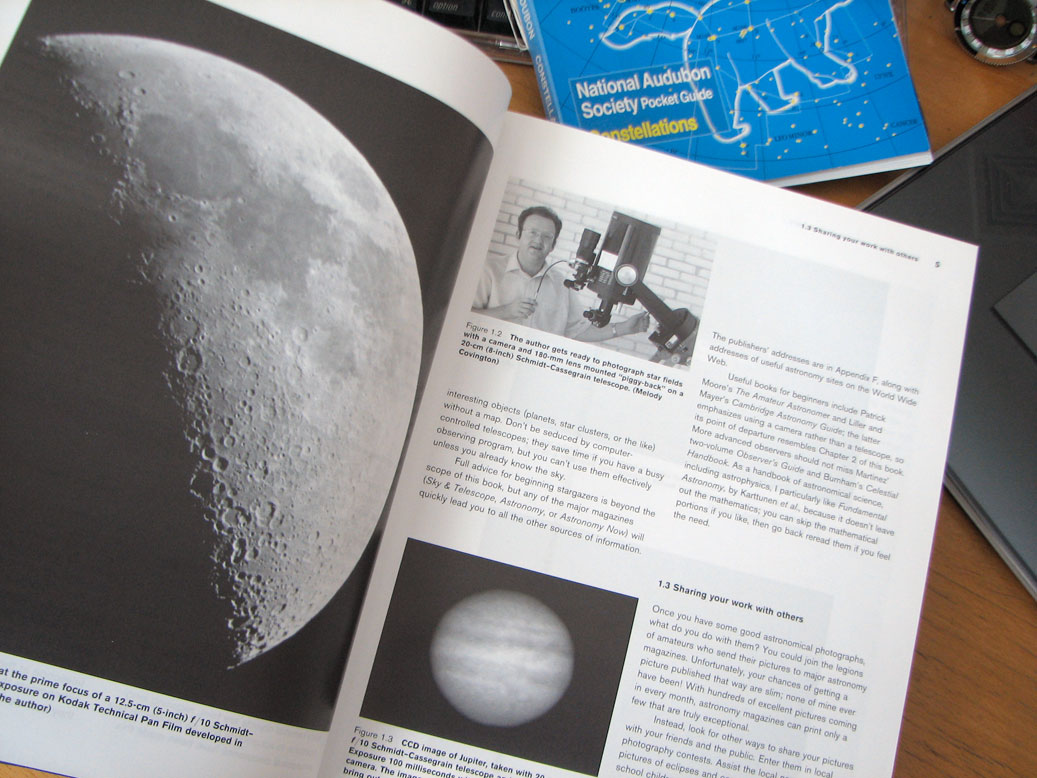
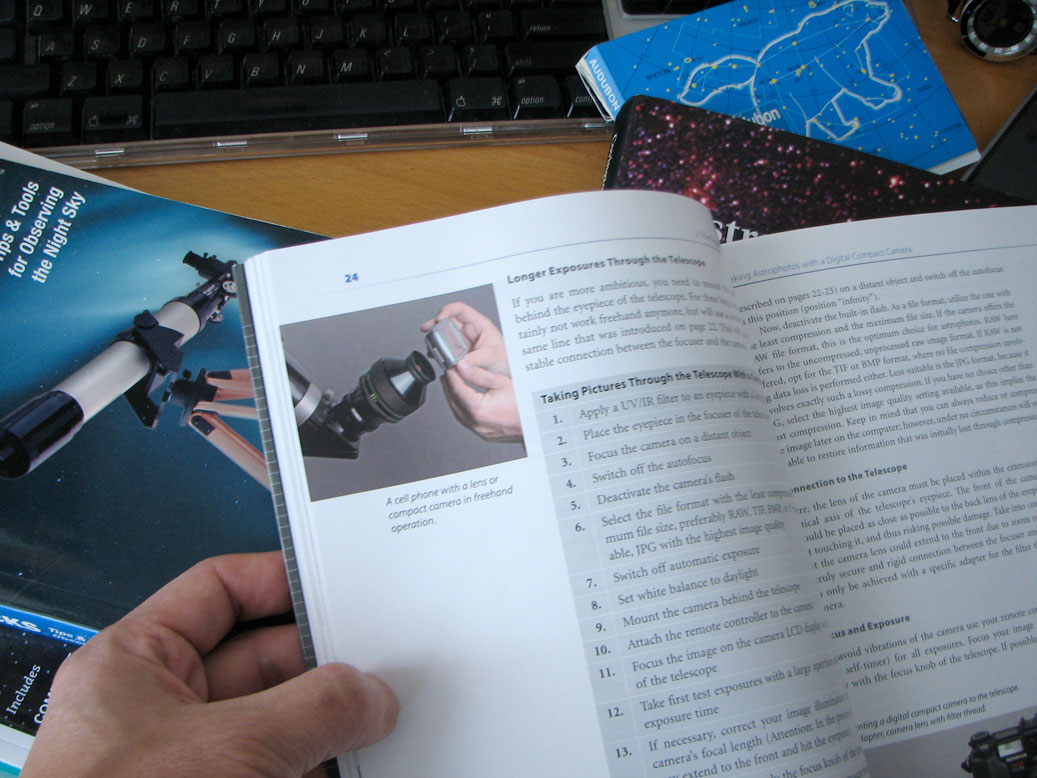
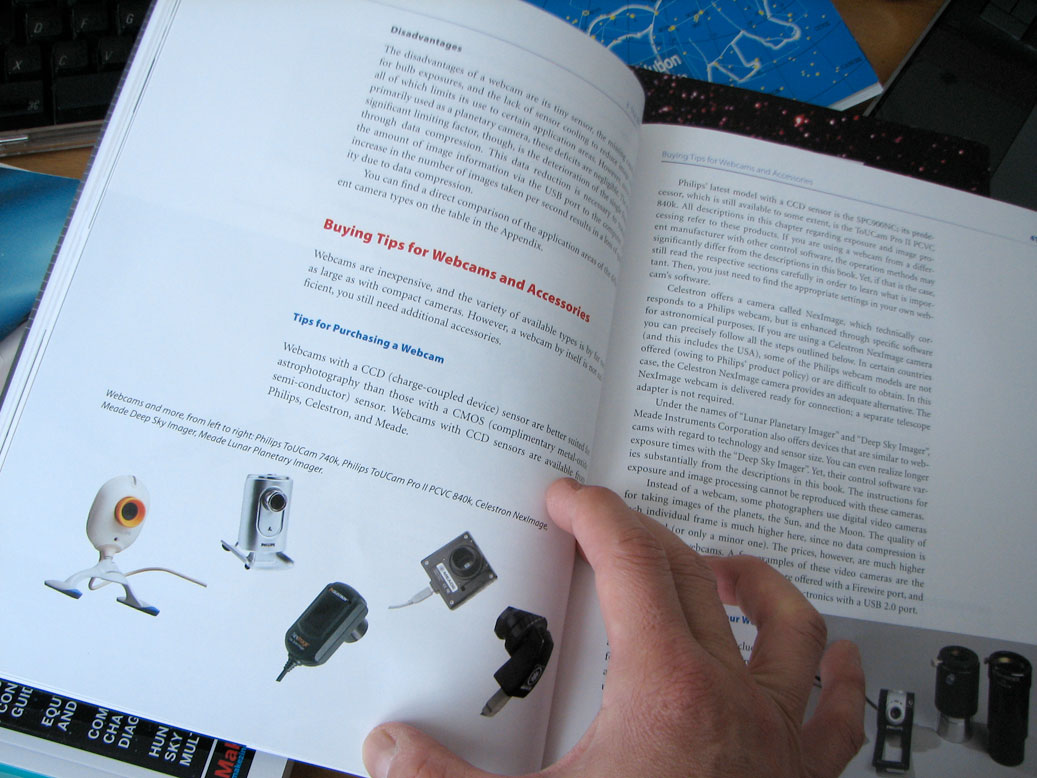
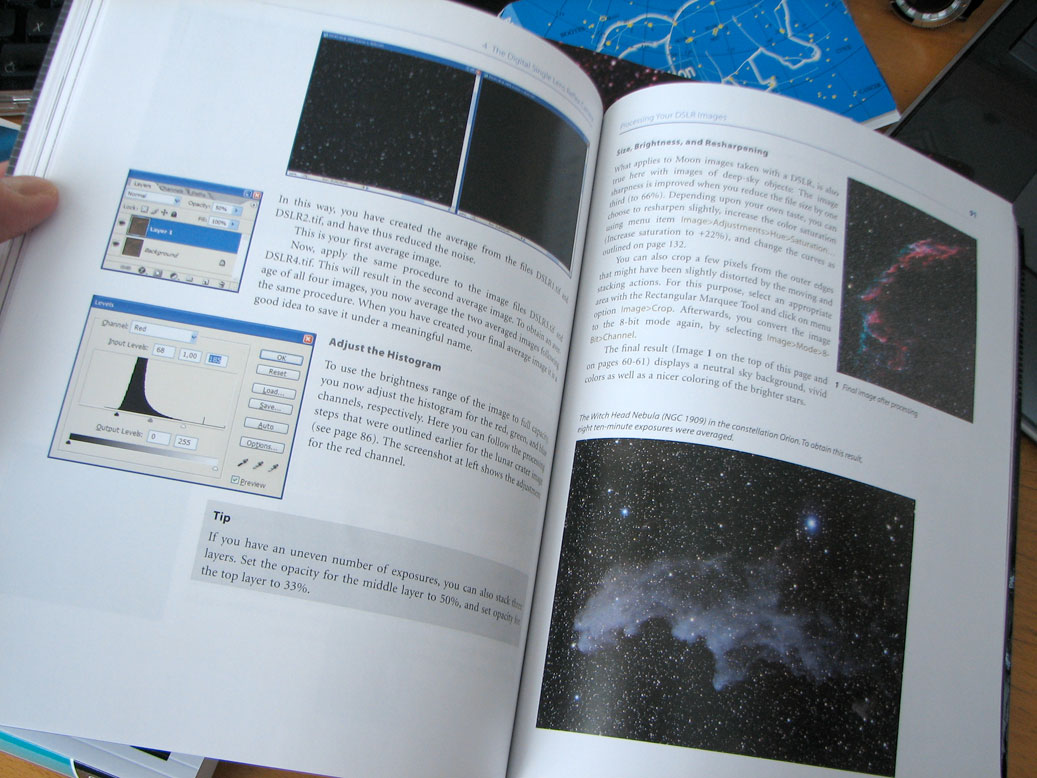
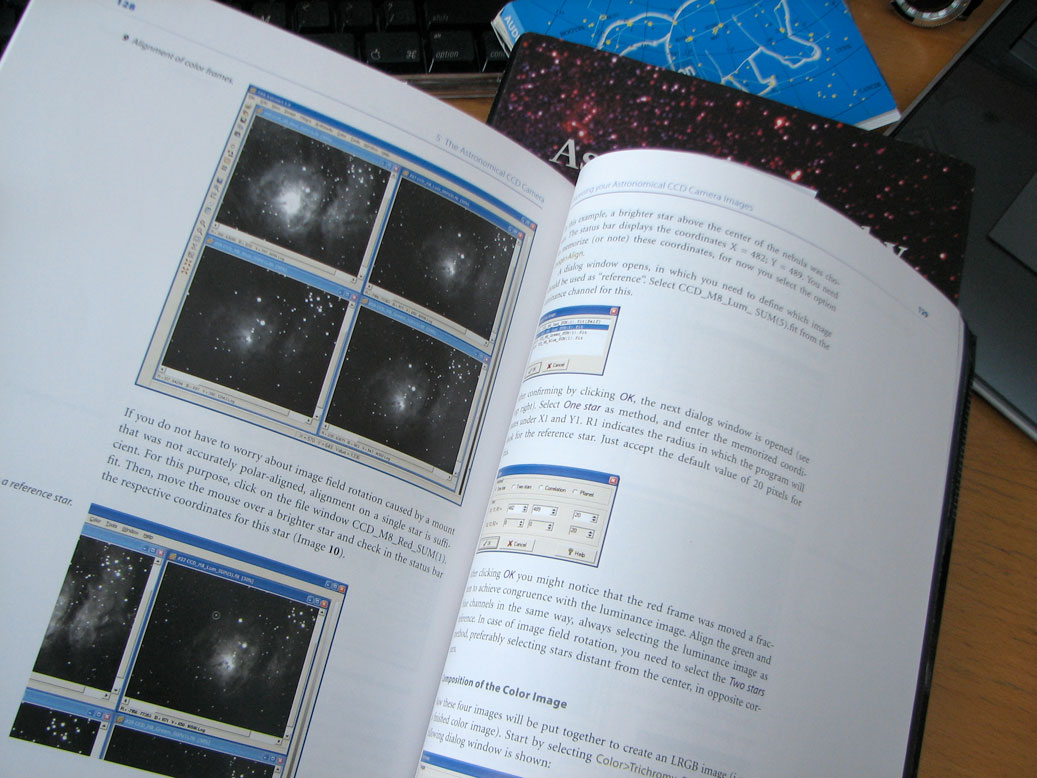
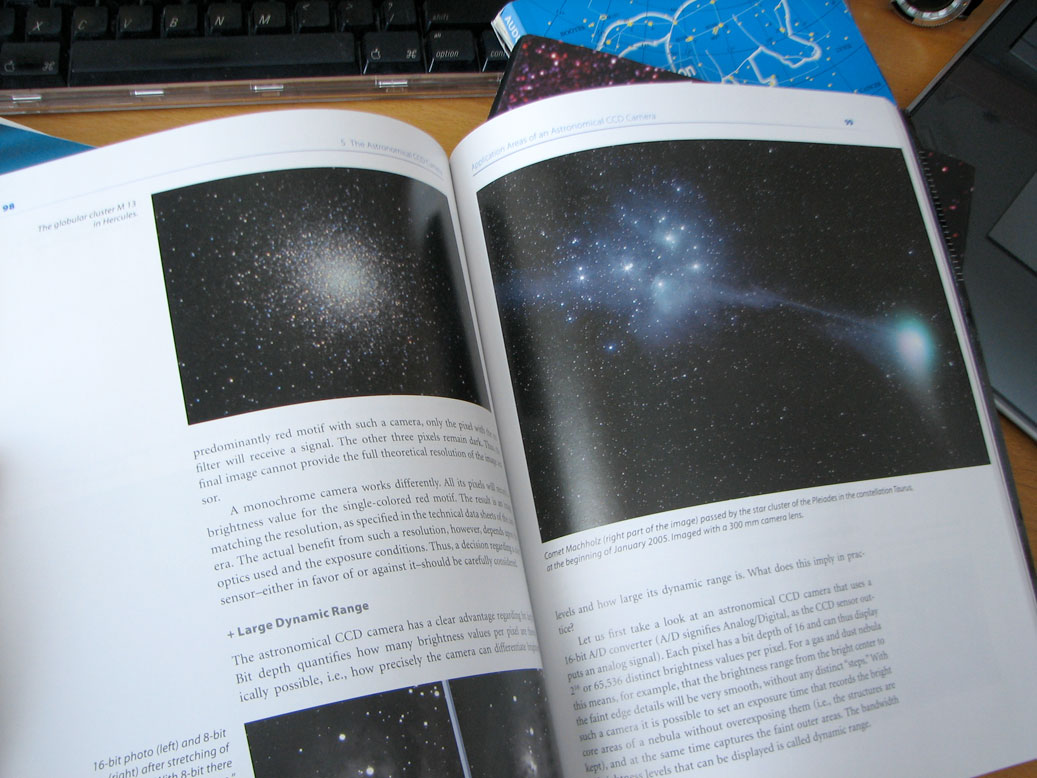
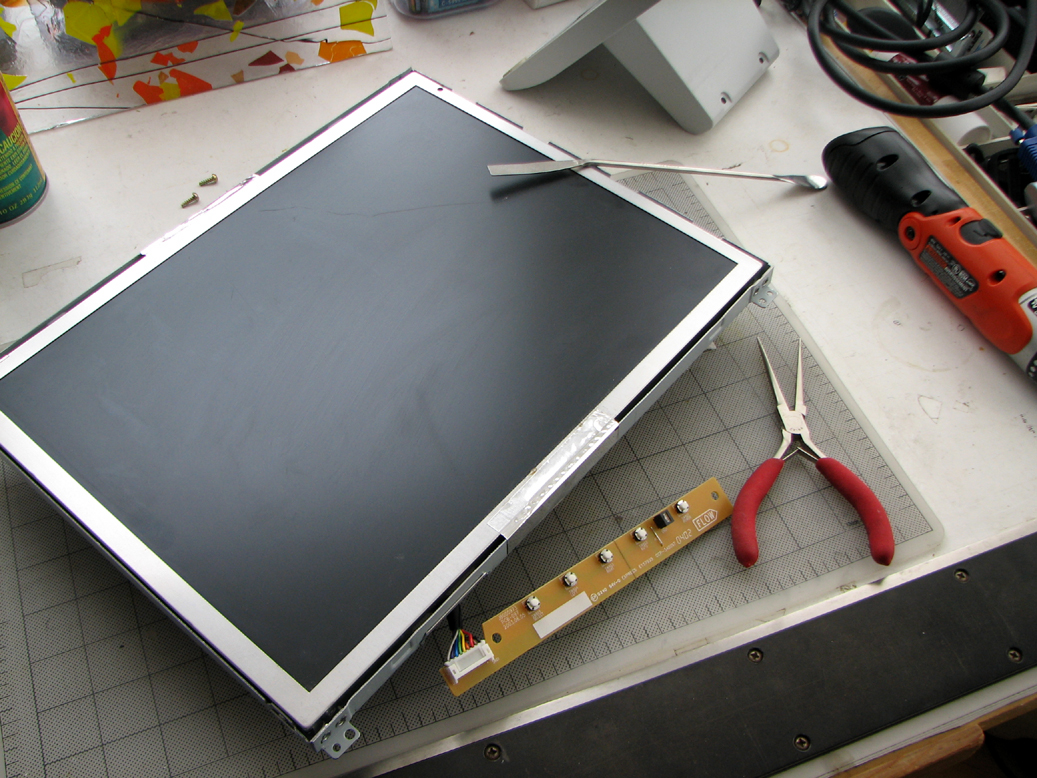
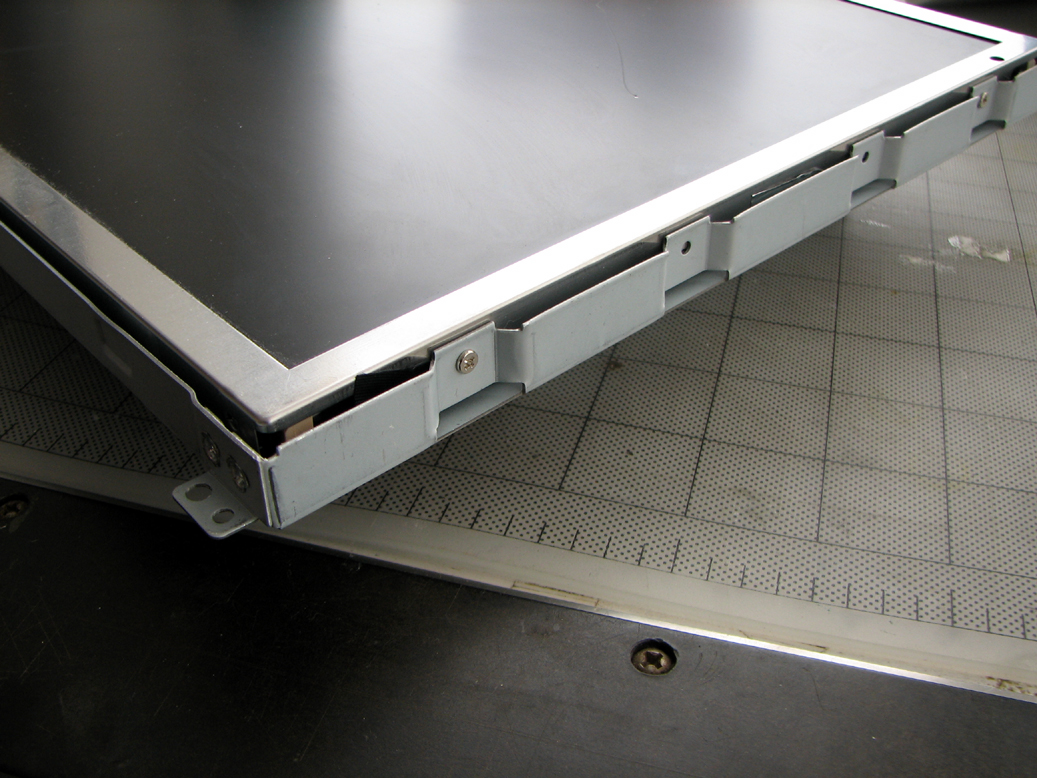
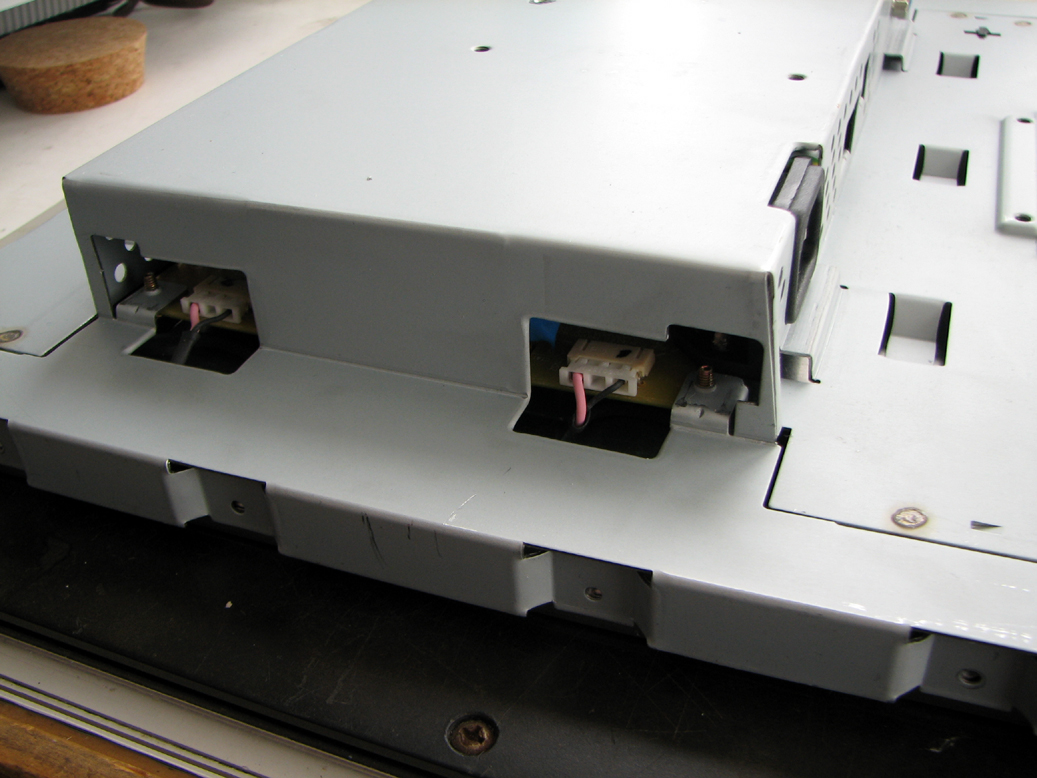
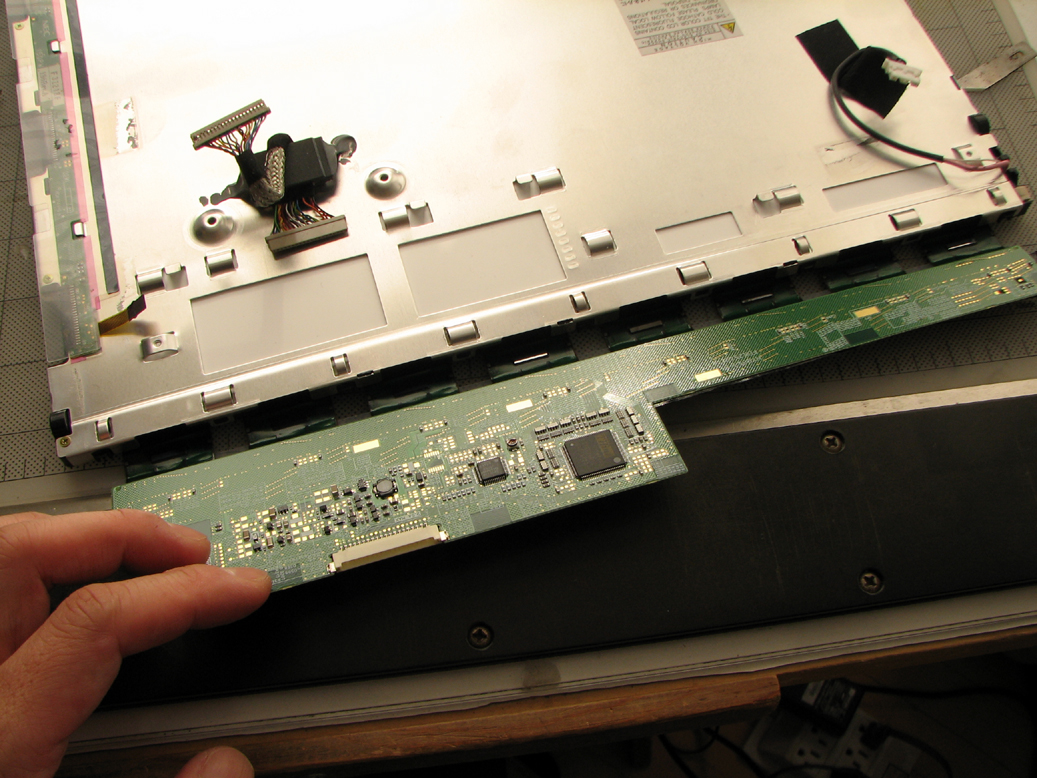