
| TODAY |
| 2009 Reviews |
| 2008 Reviews |
| 2007 Reviews |
| 2006 Reviews |
| 2005 Reviews |
|
| Other Photographers
|
| Contact Us |

RainyDayMagazine's content can now be licensed for your print magazine or web site. Please contact us directly here. If you want to see something reviewed, then drop us a note with a link and we'll be happy to take a look. NOTE: Click here to read more about our approach to product reviews. |
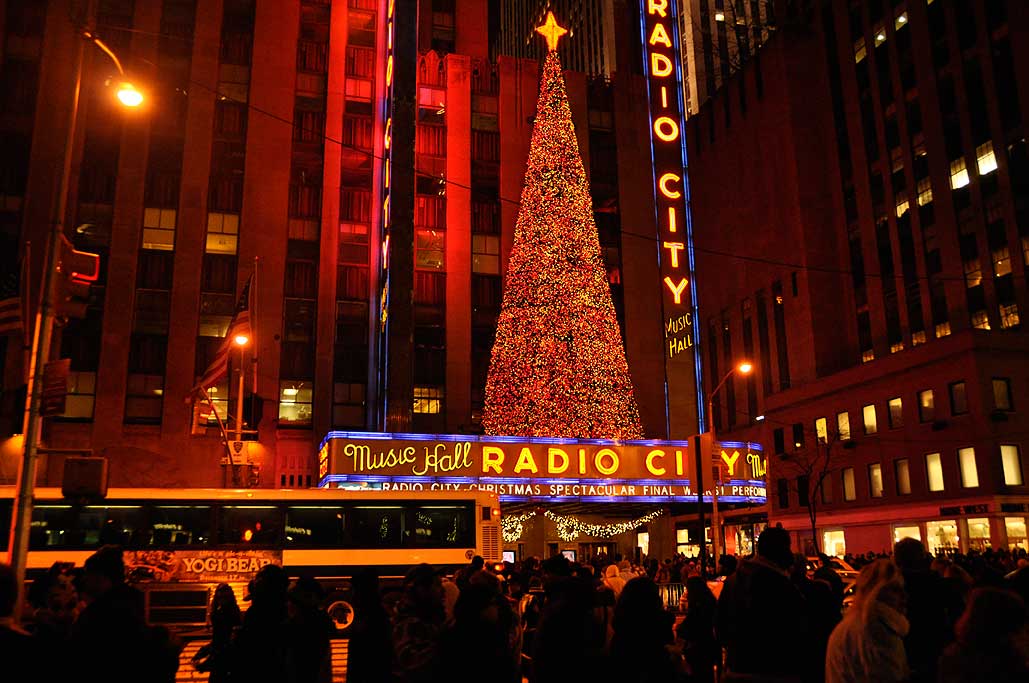
| Dec 20, 2010- Christmas in NYC |
Some friends were in town from Bermuda, so we took the LimoLiner to NYC this weekend to visit with them and with some family. We don't mind driving, but the weather forecast convinced us to leave the driving to someone else. The trip from Back Bay Hilton in Boston to the Hilton in NYC usually takes about four hours door to door. This time we took the 1PM from Boston and arrived in NYC around 5:30. The problem with this arrival time is the traffic in NYC is pretty bad. The bus driver had to make some pretty heroic maneuvers to get the giant bus in and out of that traffic! It added an extra 40 minutes to the trip, but it was still worth it once we stepped off the bus and saw the lights at night.
Gotham is magical this time of the year. The plazas in front of the buildings were all decorated. The trees were wrapped in lights. Shoppers, tourists, and street vendors were all out and about. NYC is busy all the time, but it was CRAZY this weekend. Maybe because it was... [more]-Christmas in NYC
|
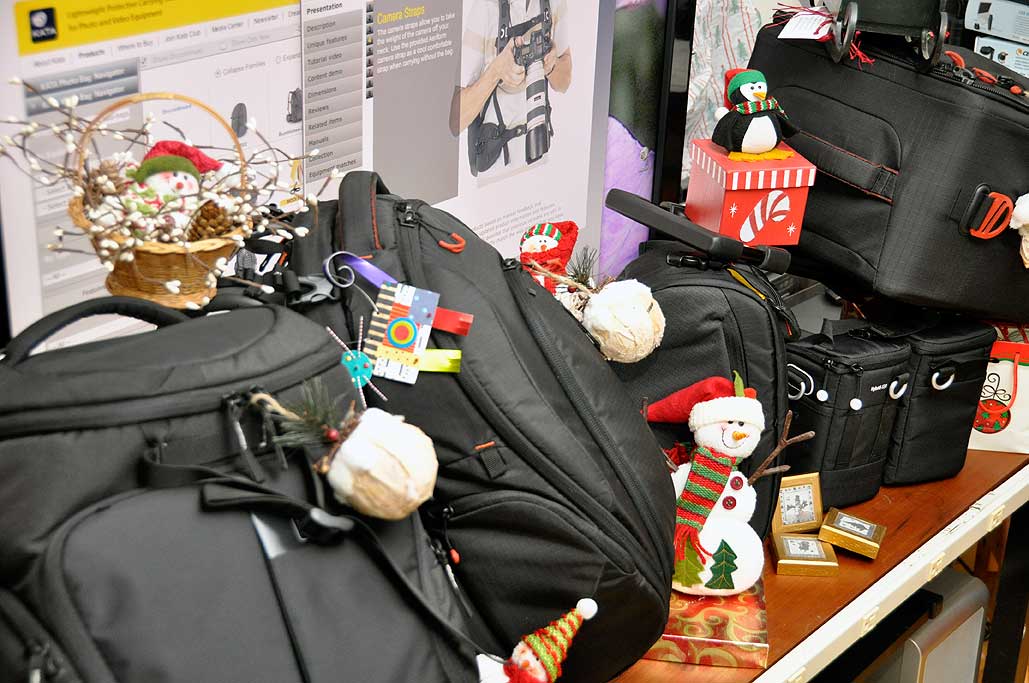
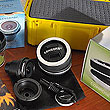
| Dec 14, 2010- Rainy Day Gift Guide: Photo Bags... |
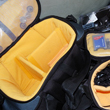
How does a company improve their products when they are already the best (well, we think they are the best) in their category? They can try to make it more versatile, maybe more durable, and perhaps even more comfortable to use. We have been using Kata bags to carry our camera gear for over five years. All during this time, we have been impressed by Kata's continual drive to improve and innovate in the area of photo-gear protection.
Our staff has reviewed a lot of camera bags over the years, but we have mostly stopped reviewing bags from other makers. It is not that no one else has good camera bags, it's that we think Kata makes the best ones out there. Kata's updated line of camera bags has once again raised the bar:
Kata has managed to reduce the weight of the foam padding used in these new bags without compromising the... [more]-Holiday Gift Guide: Photo Bags
|
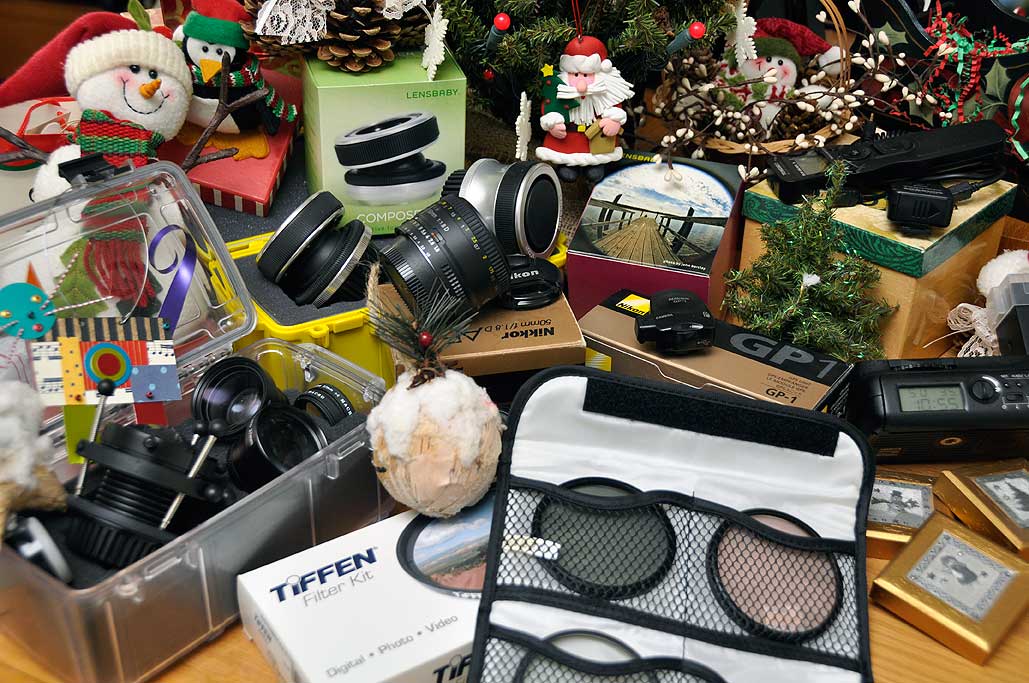
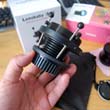
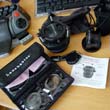
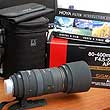
| Dec 9, 2010- Rainy Day Gift Guide: Photo Gear... |
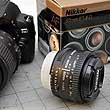
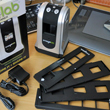
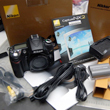
This year we had a chance to play with a bunch of accessories for the Nikon D90
For the creative types on your list looking to get beyond shooting with traditional lenses, the Lensbaby 3G
|
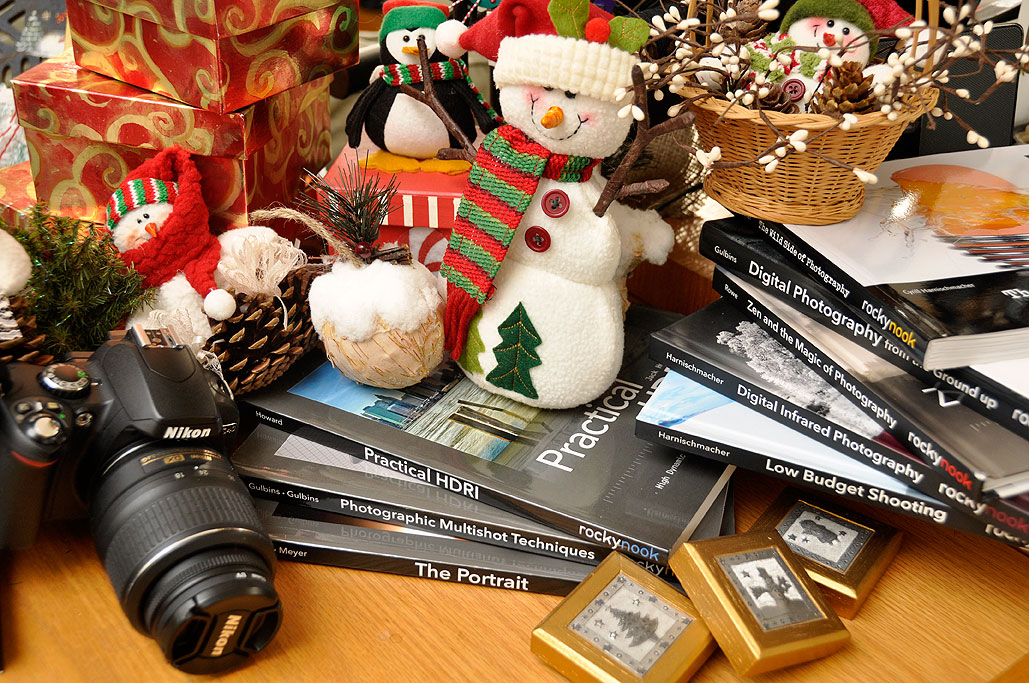
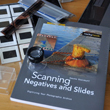
| Dec 2, 2010- Rainy Day Gift Guide: Books... |
It is the start of the Holiday shopping season and we are back with our series of RainyDay Gift Guides. The first one is both the easiest and the hardest to do. It is easy because we come across so many good books every year. It is hard because we also want to mention books from previous years which we think would make awesome gifts. This year we've decide to recommend a blend. Some on the list we've mentioned before, but others are new for this year. Like all of past our suggestions, we've looked at all of our suggestions first hand. Also know this...they wouldn't be on our list if we wouldn't want them under our tree :-)
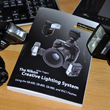
For the photographer on your gift list, getting a good how-to book can be even better than getting a new lens. Whether it be mastering their Nikon D90
|
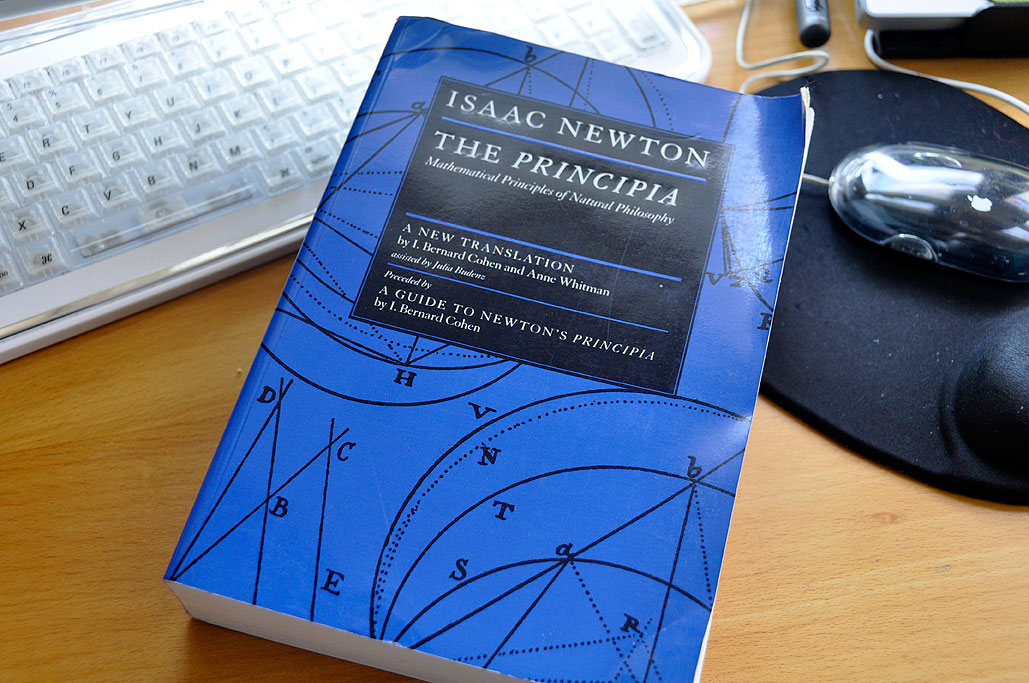
| Nov 19, 2010- Scientific Revolution... |
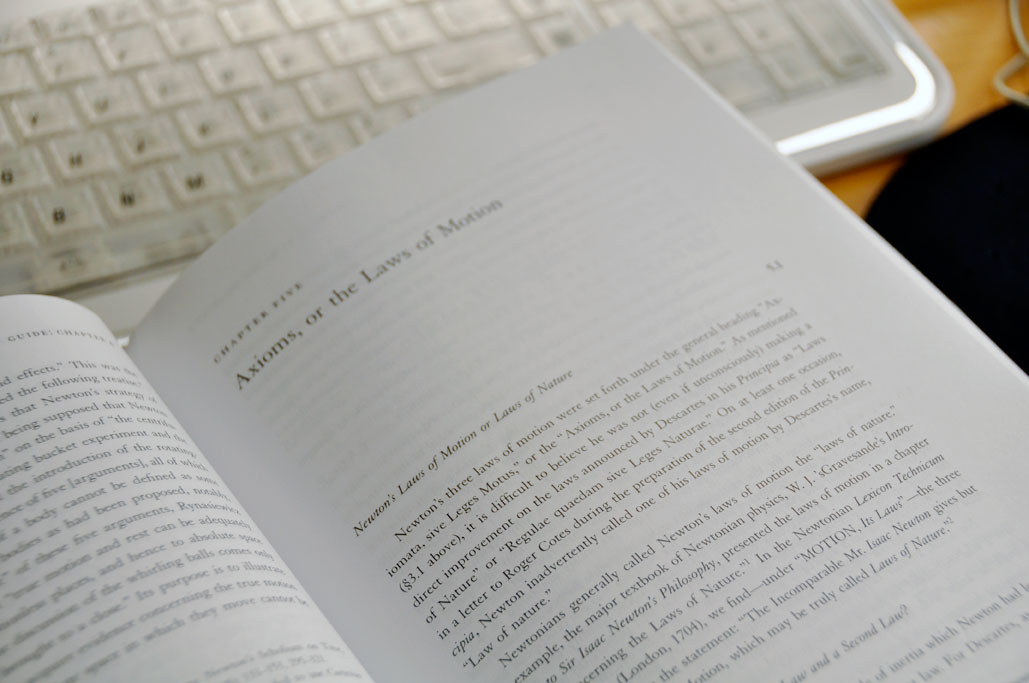
Sir Isaac Newton's Philosophiae Naturalis Principia Mathematica ("Mathematical Principles of Natural Philosophy"), popularly known as the Principia, is considered one of the most important works in the history of science. The Principia, wherein Newton formulated the three laws of motion and the law of universal gravitation, is the basis of modern physics and astronomy. Albert Einstein declared Principia to be "perhaps the greatest intellectual stride that it has ever been granted to any man to make." Our personal copy is a bit dog-eared because we think it makes for great bed-time reading.
Two hundred and fifty copies of the Principia were printed in 1687. Some of those first editions survived to today. Newton's personal copy (along with his notes for changes to the second edition) can be seen in the Wren Library of Trinity College, Cambridge UK. In January of 2010, Boston College acquire a first edition of the Principia. It is currently on display in the Burns Library at BC. We contacted the folks at the Burns Library and they were gracious enough to... [more]-Burns Library:Scientific Revolution Exhibit
|
| Nov 15, 2010- MFA: Museum Tech ... |
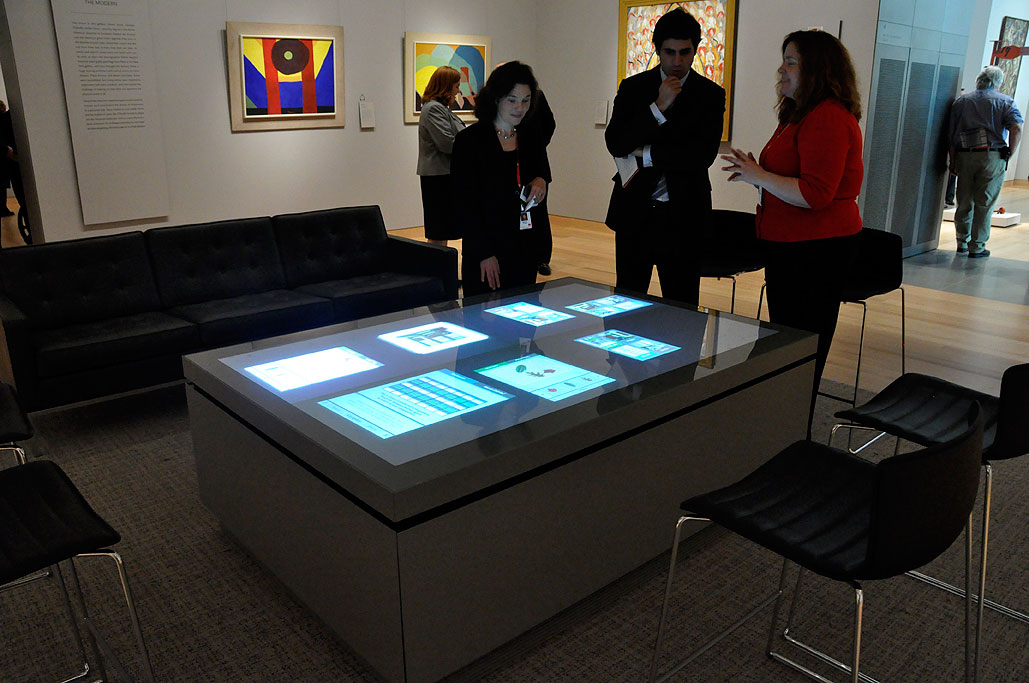
The MFA will open their new Art of the Americas wing to the public on November 20. RainyDayMagazine got a preview of the new wing last Friday. The building, the galleries, and the art were all spectacular. With Malcom Rogers at the helm of a world-class team, we would have expected nothing less.
We were pleasantly surprised by all the technology sprinkled through out the new wing. The most impressive was the multi-touch table on the forth floor. It was just THERE. Some noticed it, others just walked right on by. We, of course, zero-ed in on it as soon as we saw it. We were not able to get much info on the specs regarding the technology inside the box. The multi-touch technology appears to be... [more]-MFA: Museum Tech
|
| Nov 12,2010- MFA's New Gallery FirstLook... |
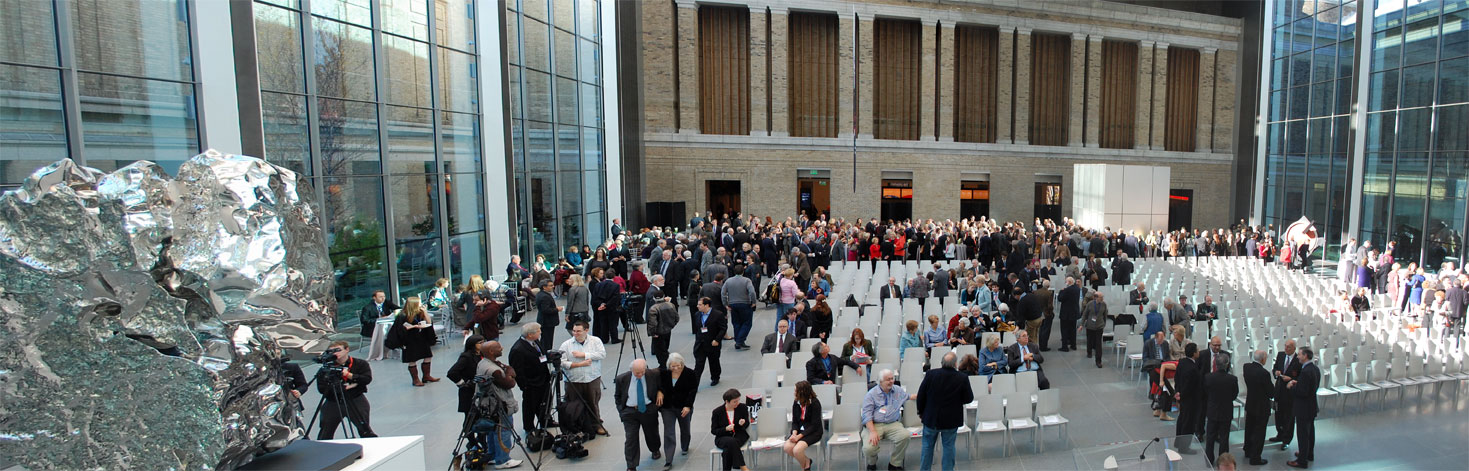
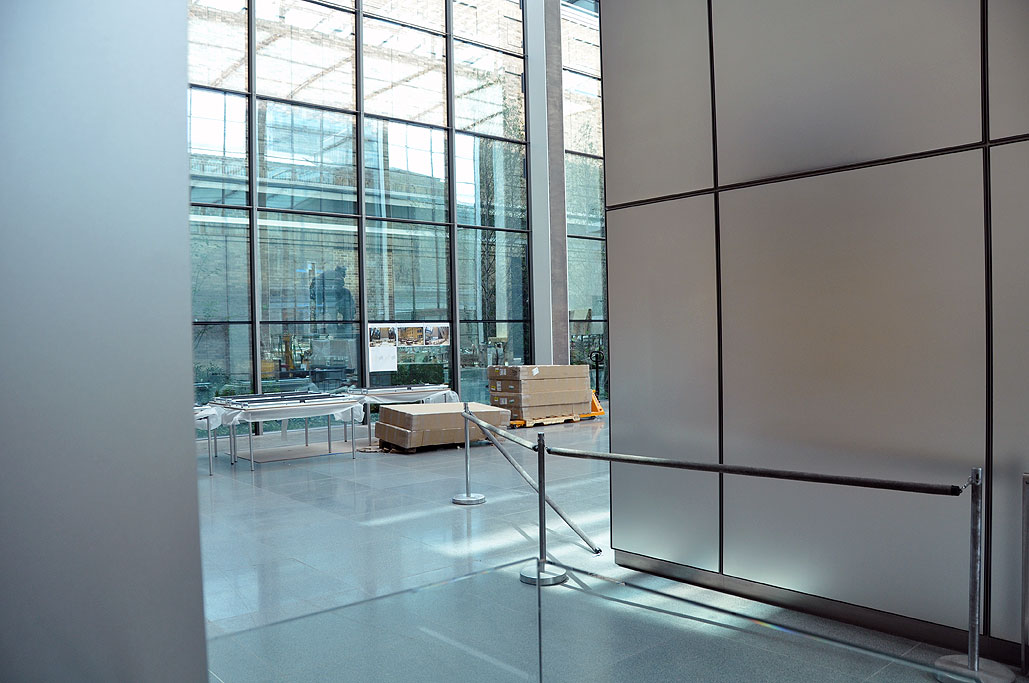
The new wing of the MFA opens to the general public on Saturday November 20, but today RainyDayMagazine, along with a few hundred other folks, got a FirstLook at this beautiful addition to the Museum. The new wing will take a hemispheric perspective on Art of the Americas, showcasing more than 5,000 works of art produced in North, Central, and South America over the course of three millennia. Art in all media will be arranged chronologically on four floors. The wing's 53 brand-new galleries will include nine beautiful period rooms and four Behind the Scenes galleries.
The dedication ceremony for the Ruth and Carl J. Shapiro Family Courtyard was at 10AM. The courtyard is a grand space which connects the original building of the MFA with its brand new wing. We arrived early enough to get a good seat, chat up some of the local luminaries, and get bite to eat before the speeches. Getting there early gave us a chance to look around before it got too crowded. We tried to get some interior shots, but the space was just too big for us to get decent architectural shots without any distortion. So on this rare occassion, we have decided to... [more]-MFA: Art of the Americas Wing FirstLook
|
| Nov 11,2010- MFA's New Gallery... |
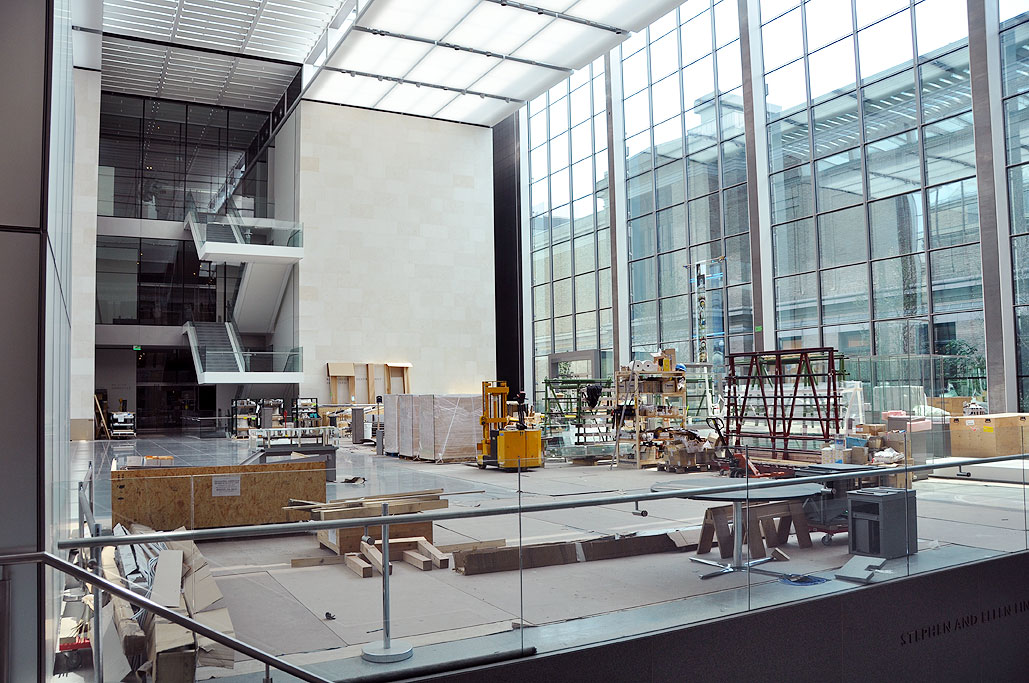
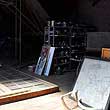
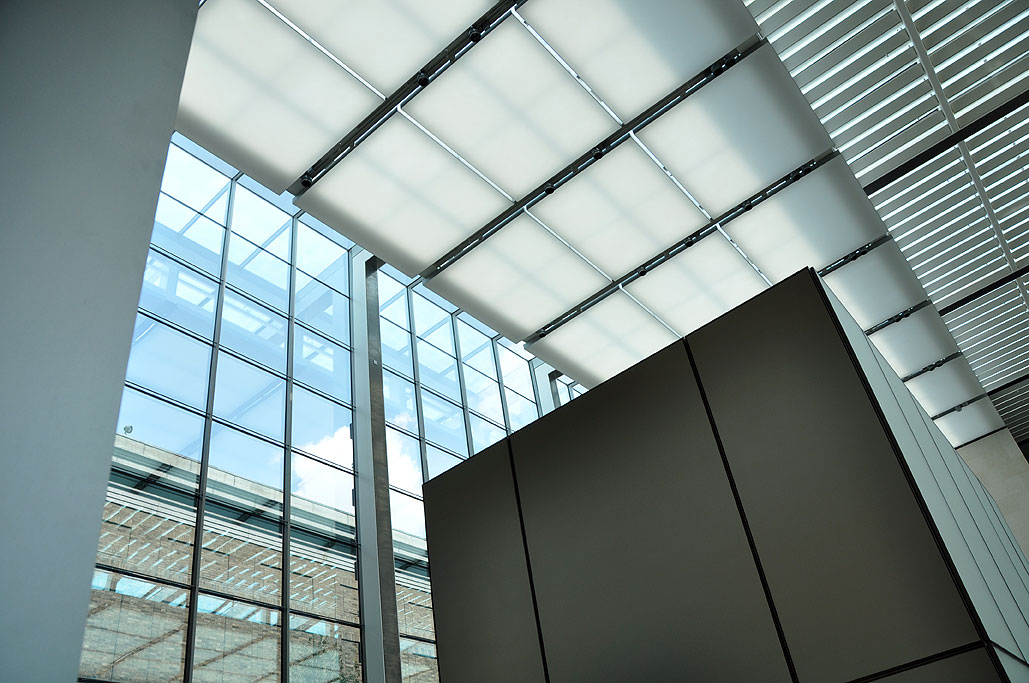
In 2005, the MFA broke ground for its new Art of the Americas wing. This $345 million project was in the final phase of construction when we took these photos in August. Tomorrow, the MFA will have a dedication ceremony to mark the completion of this new wing. RainyDayMagazine will be there to bring you a FirstLook at this beautiful new space.
This ambitious project was designed by Foster+Partners (London). The new wing will have four floors and 53 new galleries. The entrance to the galleries will be through the Shapiro Family Courtyard, an airy light-filled glass-encased space. The hope is that the Courtyard will become a... [more]-MFA: Art of the Americas Wing
|
| Nov 1,2010- The Clam Box... |
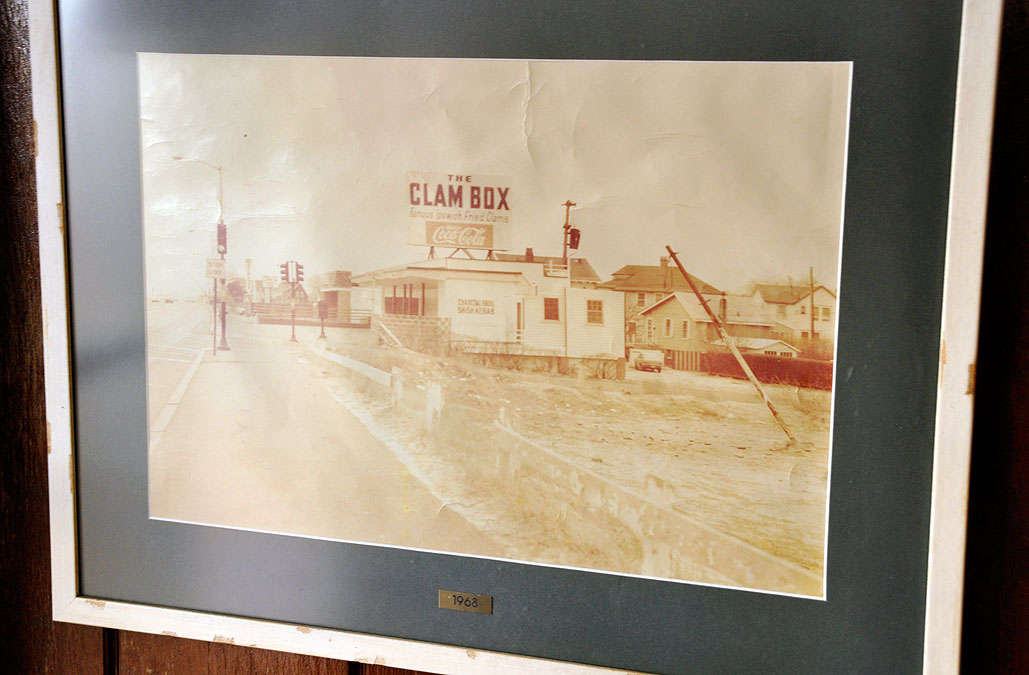
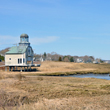
Sunday was the last day The Clam Box was open for this year. One of our editors grew up in Quincy and has been going to The Clam Box since she could ride a bike. The rest of us go back year after year because we all agree that they have the best fried seafood in Boston. We KNOW they definitely have the best fried onion rings.
Anyway, The Clam Box's last day of the season was October 31st. We had been meaning to stop by all week for one last plate of fried clams and onion rings, but the chance hadn't occurred until the very last moment. Luckily for us, Sunday afternoon was a perfect day for both a walk along Wollaston Beach and for a final taste of the quintessential Summer food... [more]-The Clam Box
|
| Oct 11,2010 - Columbus Day Weekend... |
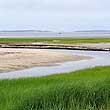
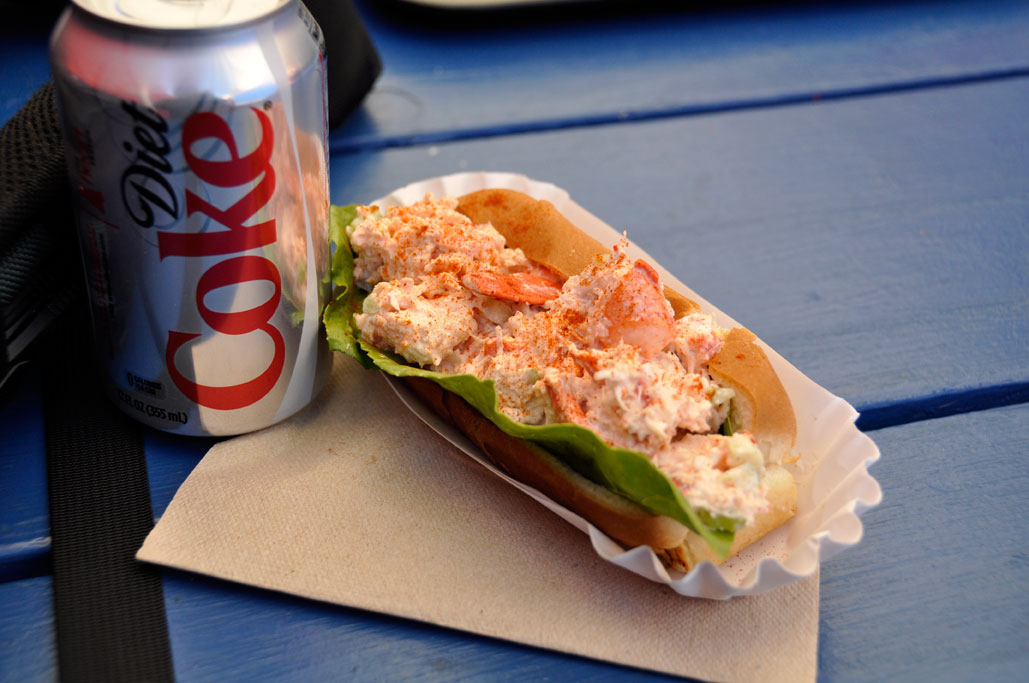
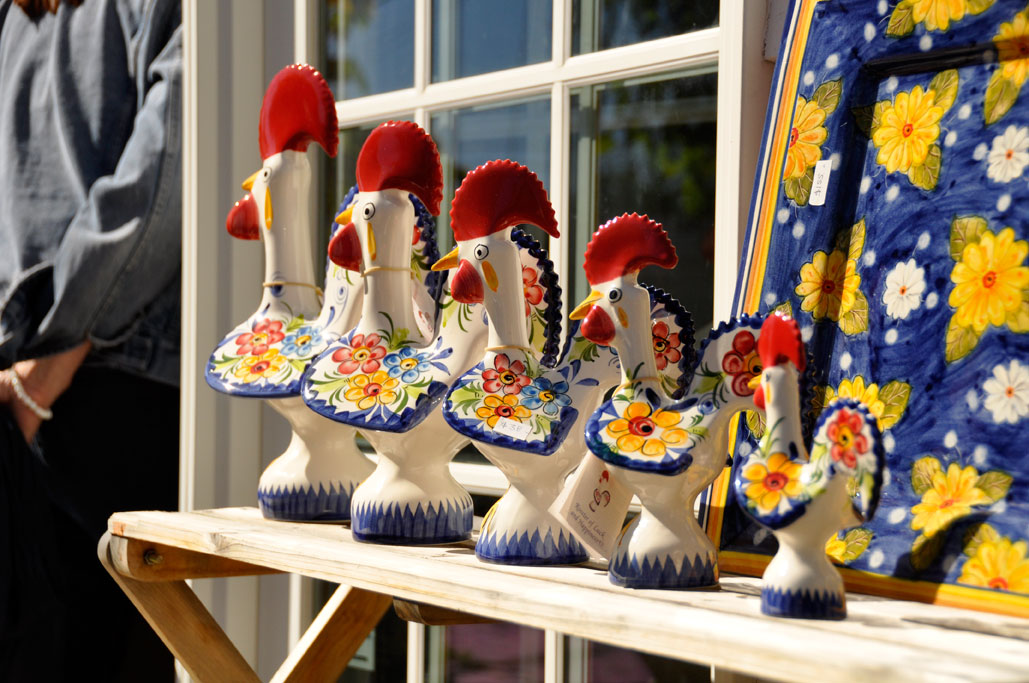
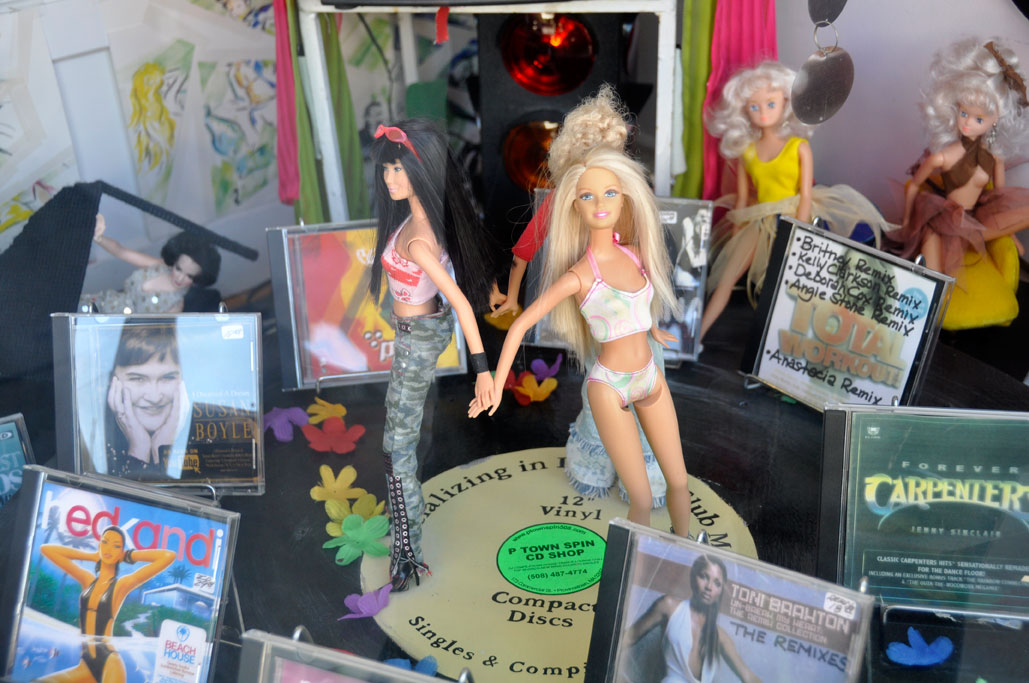
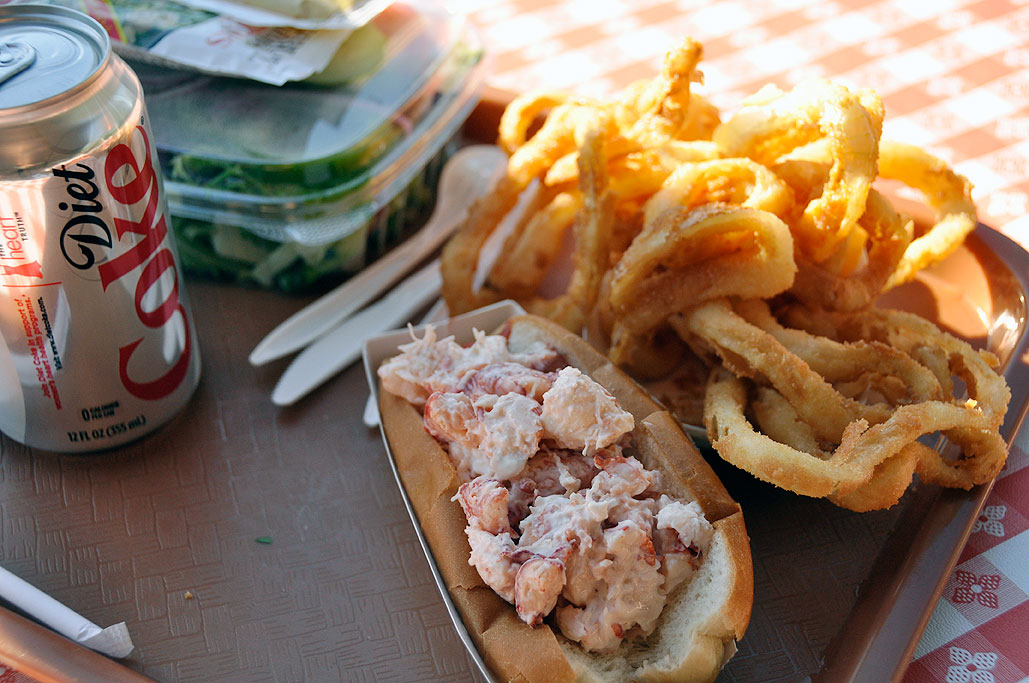
Food and relaxation are the two most important goals of our annual Columbus Day Weekend retreat. We used to head up to Maine to Ogunquit, Wells, or Monhegan Island. However, for the past few years, the group has been driving to our friends' place in Provincetown. The trip to the Cape is much shorter than the trek up to Maine. We left Boston at 2PM, and even with the holiday traffic, were able to make it out to Provincetown in less than three hours.
While other tourist destinations start to wind down after Labor Day, most of the shops and restaurants in Provincetown don't close until after Columbus Day. There were plenty of options for eating, shopping, and entertainment. One of the traditions with our Maine trips was the search for the weekend's best lobster roll. Fortunately for us, we were able to continue the quest as lobster roll vendors on the Cape were just as plentiful as "down east." This year's winner was... [more]-Columbus Day Weekend
|
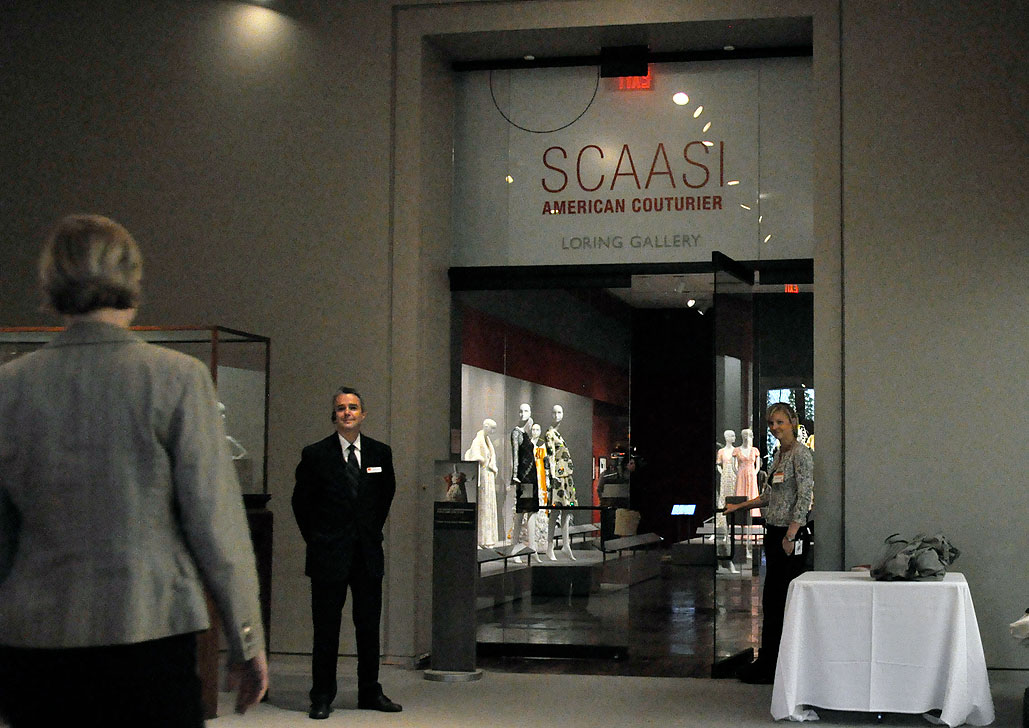
| Sep 24,2010 - MFA: Scaasi... |
Arnold Scaasi has been creating haute couture for the likes of Barbra Streisand, Elizabeth Taylor, Sophia Loren, Ivana Trump, and others for over fifty years. Women with means, those in the public eye, or ones on the world stage would often look to Scaasi to help them create their public images. Whether it be an elegant evening gown, a cocktail dress, or a tailored suit, Scaasi's custom-made clothing were powerful statements for women with personalities large enough to match.
At the beginning of August the MFA opened the first of their fashion-related exhibit (Avedon Fashion 1944-2000). On September 25th the second exhibit, Scaasi: American Couturier, opens to the public. "Scaasi is a fashion legend who has created some of the 20th century's most glamorous clothing," said Malcolm Rogers, Ann and Graham Gund Director of the MFA. "We are... [more]-MFA: Scaasi Exhibit
|
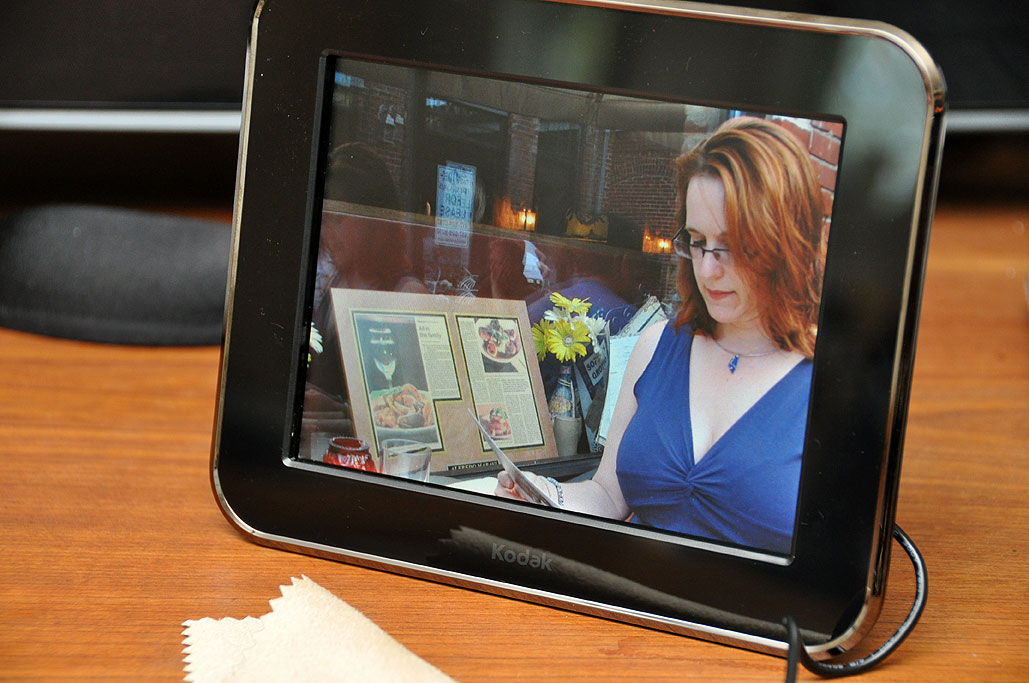
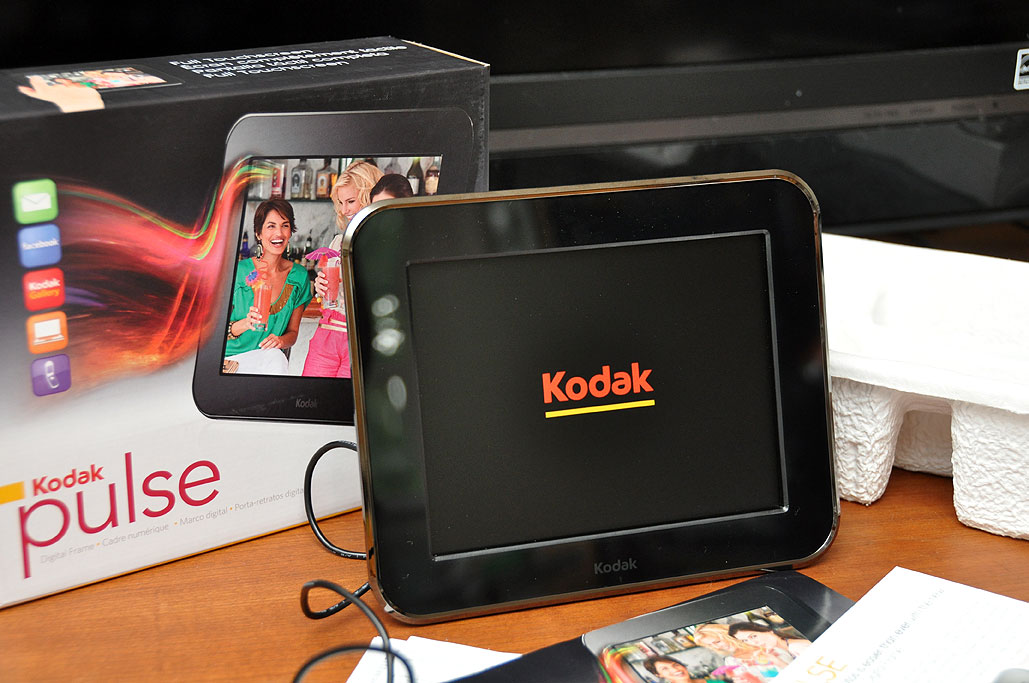
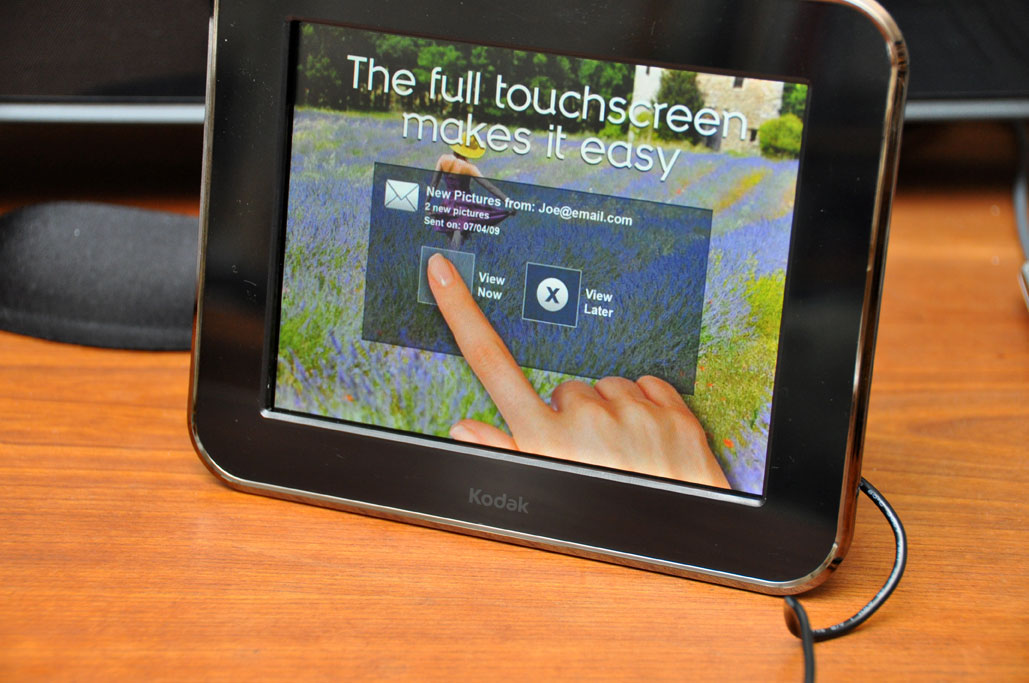
| Sep 22,2010 - Kodak Pulse InTheWild... |
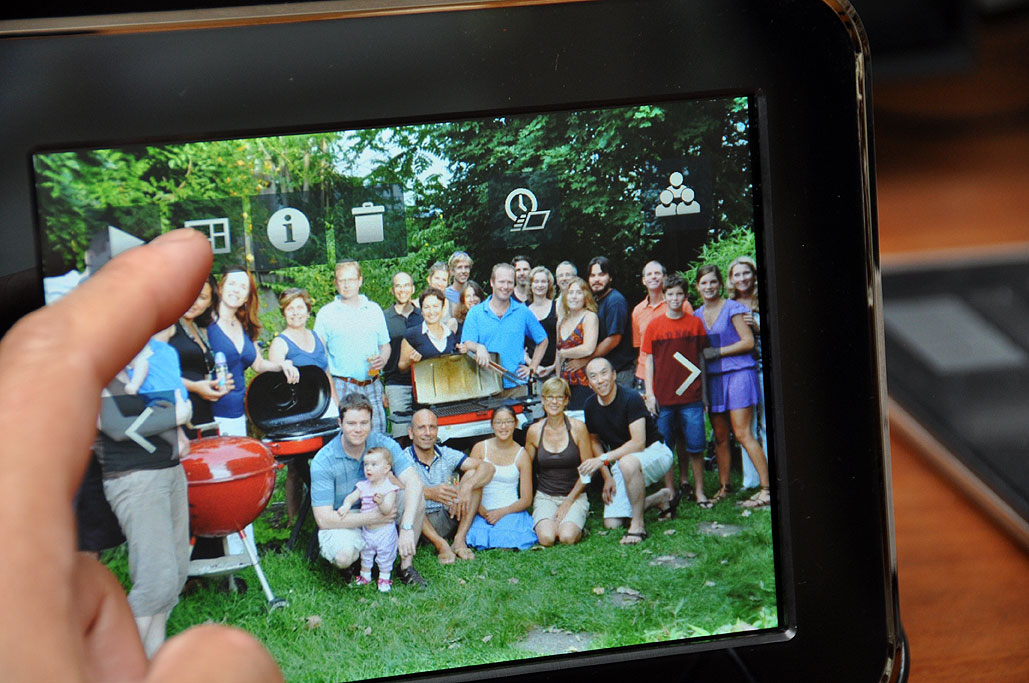
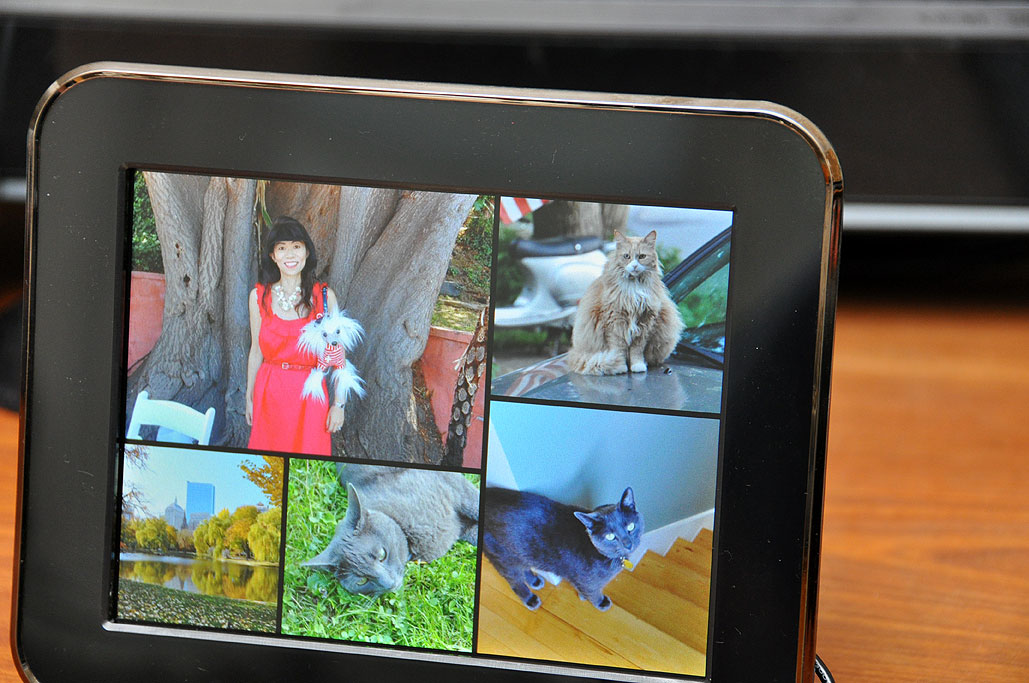
After a month of living with the Kodak Pulse, we can say it is the best photo frame we have in the office. That is saying a lot, as we really like both the Parrot and the Ceiva digital frames.
There are a few reasons why we like the Pulse so much. The usability folks at Kodak have done an excellent job making the Pulse simple to setup and a pleasure to use. The icons are easy to figure out. The context-sensitive touchscreen controls make navigating around really intuitive. We like the multi-photo display mode (first we have seen in any digital frame) and hope... [more]-Kodak Pulse:InTheWild
|
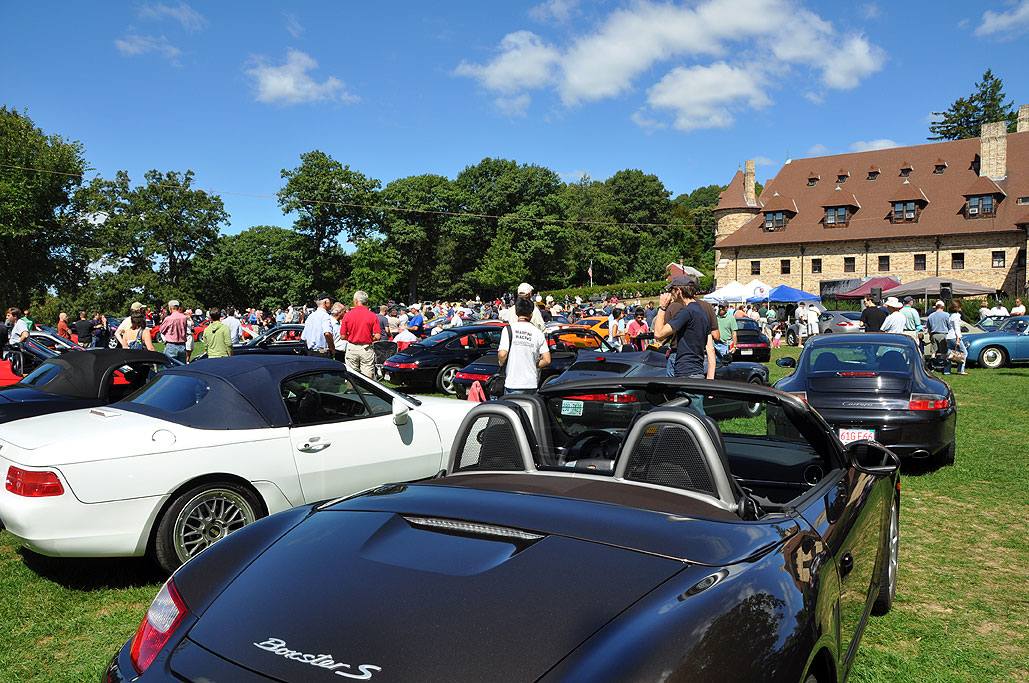
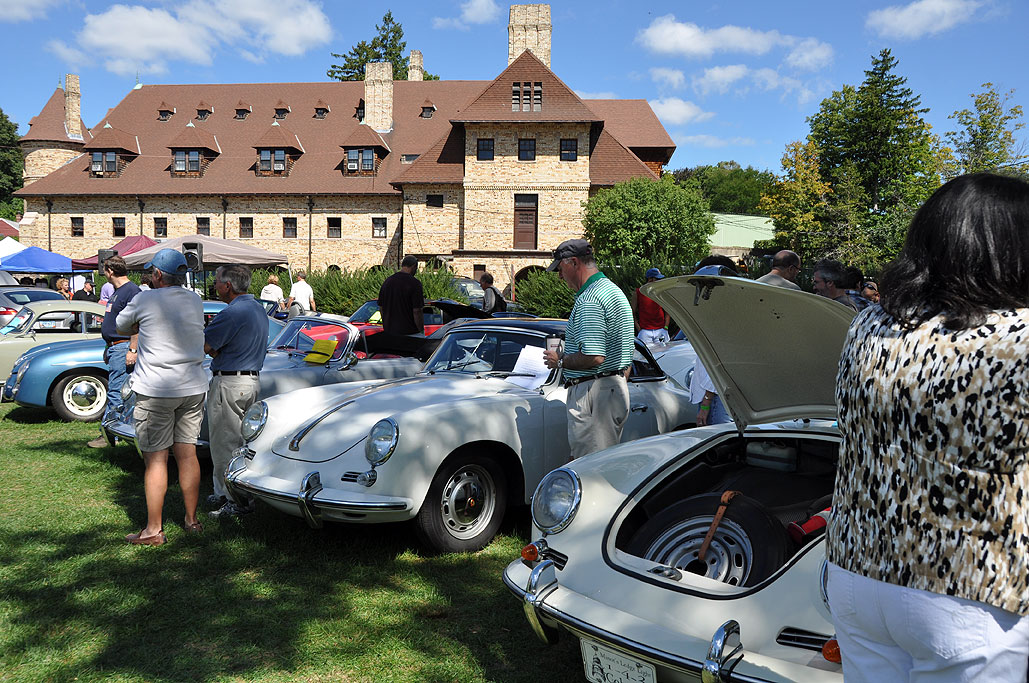
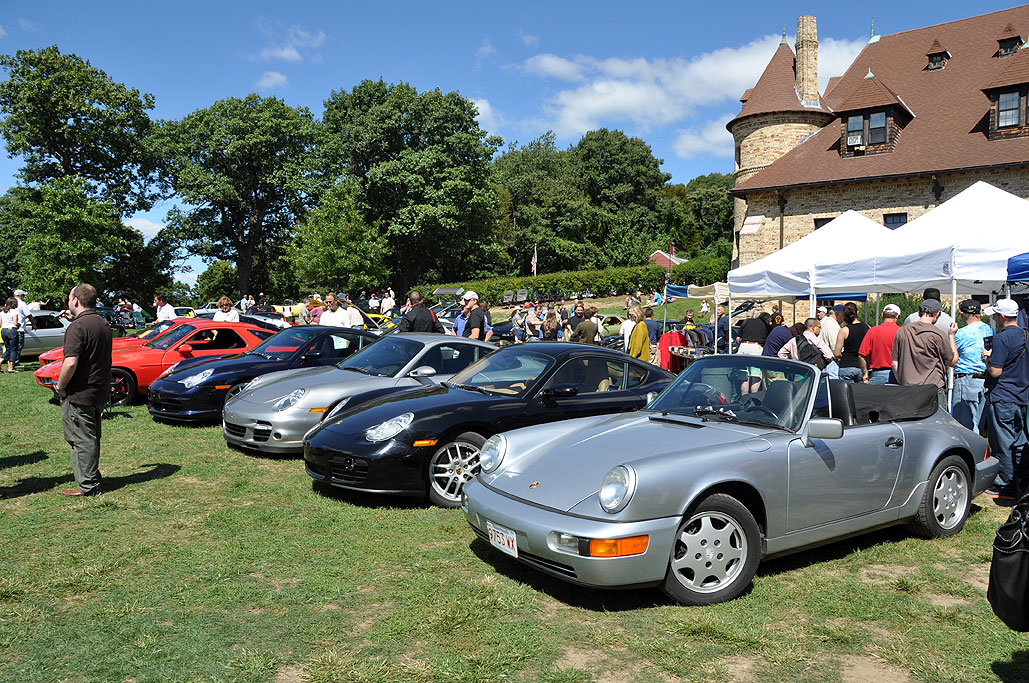
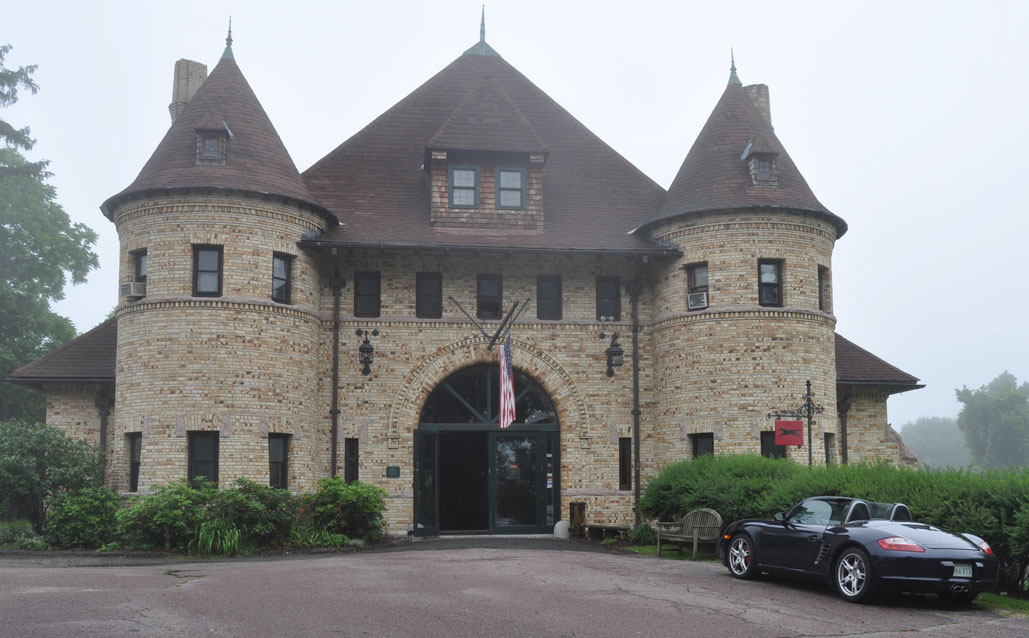
| Sep 17,2010 - PorscheFest 2010... |
Porsche is a world-famous brand and their customers are fiercely loyal to it. It is not because the cars are trouble-free. We would call them ...finicky. What's more, the parts are costly and can be hard to find, and the are repairs difficult to perform. So why the enduring popularity? Regardless of vintage, Porsche autos all have a similar look. Within any given model, there are no radical redesigns, abrupt u-turns, or strange departures year over year. This is obvious especially whenever there is a bunch of them in one place. Design cues from one model to another are clearly evident. Changes are subtle, evolutionary, and logical. This, above all else, may be the secret to Porsche's enduring brand loyalty...they LOOK like they are part of the same family. If you own one, you are part of the "family."
The Boston branch of the "Porsche family" gets together every year in September at the Larz Anderson Auto Museum for a lawn event called PorscheFest. We have been attending this fun gathering for the past few years. The crowd seems to be getting bigger and bigger each year. It may have been the... [more]-PorscheFest 2010
|
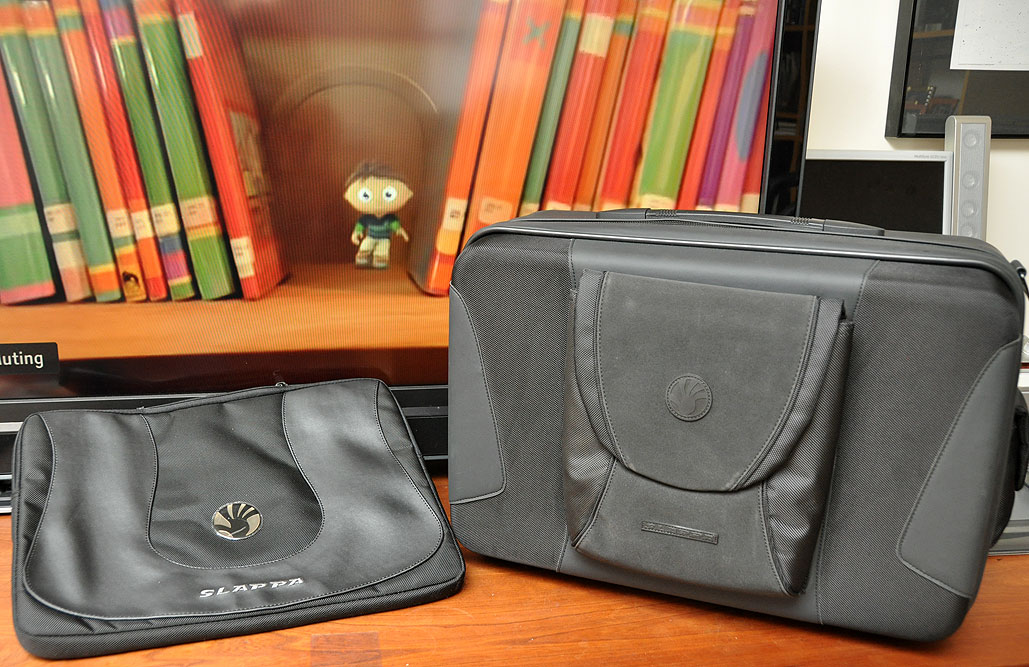
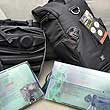
| Sep 14,2010 - Slappa PhotoLocker FirstLook... |
RainyDayPhotography readers know we are VERY particular when it comes to protecting our equipment. We take our gear on the road with us all the time...and some of the places we go don't really have roads. Kata and Pelican have proven themselves to us over the years. However, while we are particular, we are not closed-minded. We are always open to those who can bring fresh ideas to the market.
Slappa made a name for itself with iPod, CD, and laptop cases. They were able to raise above the others in a crowded and competitive space because of their unique designs, quality of materials, and superior protection afforded by their cases. We have had direct experiences with Slappa's cases and have found them to be worthy. So when we heard Slappa has expanded in to making camera cases and bags, we were... [more]-Slappa HardBody PhotoLocker: FirstLook
|
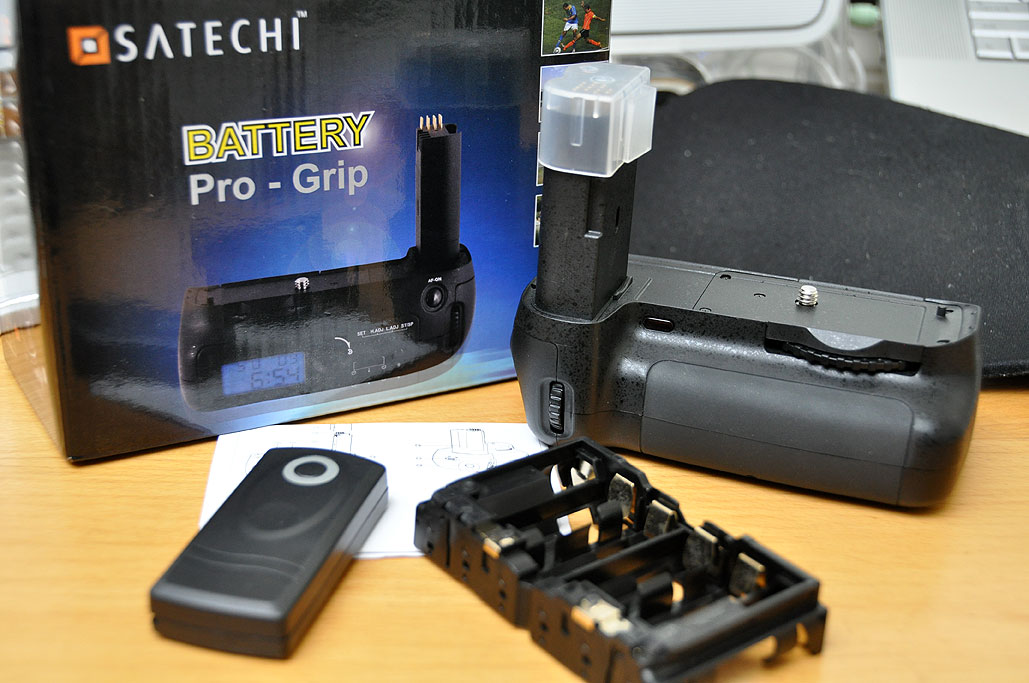
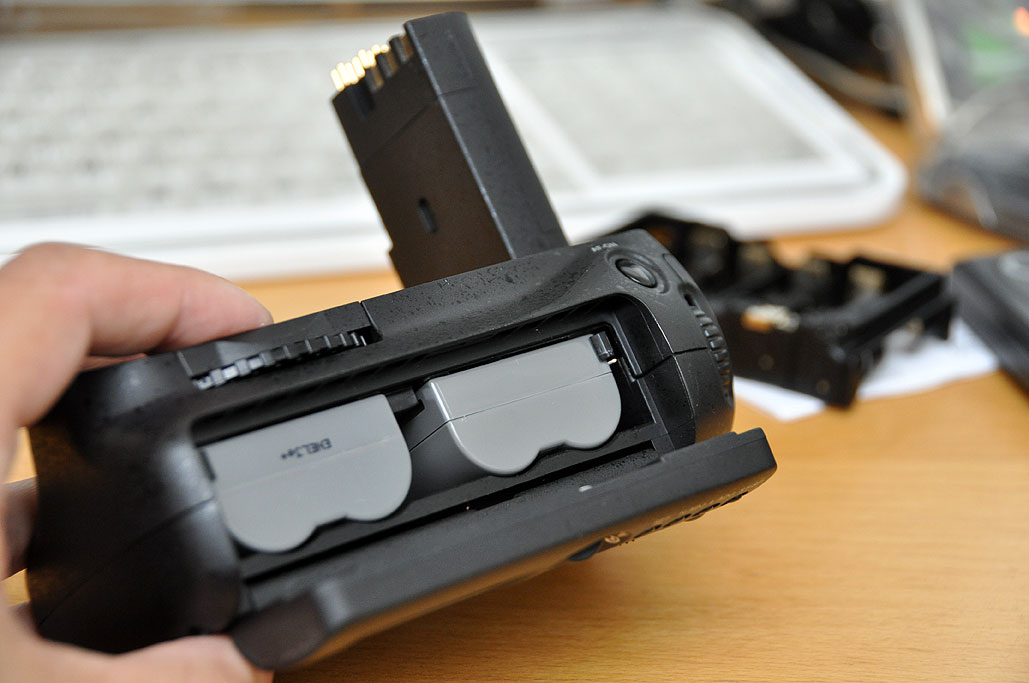
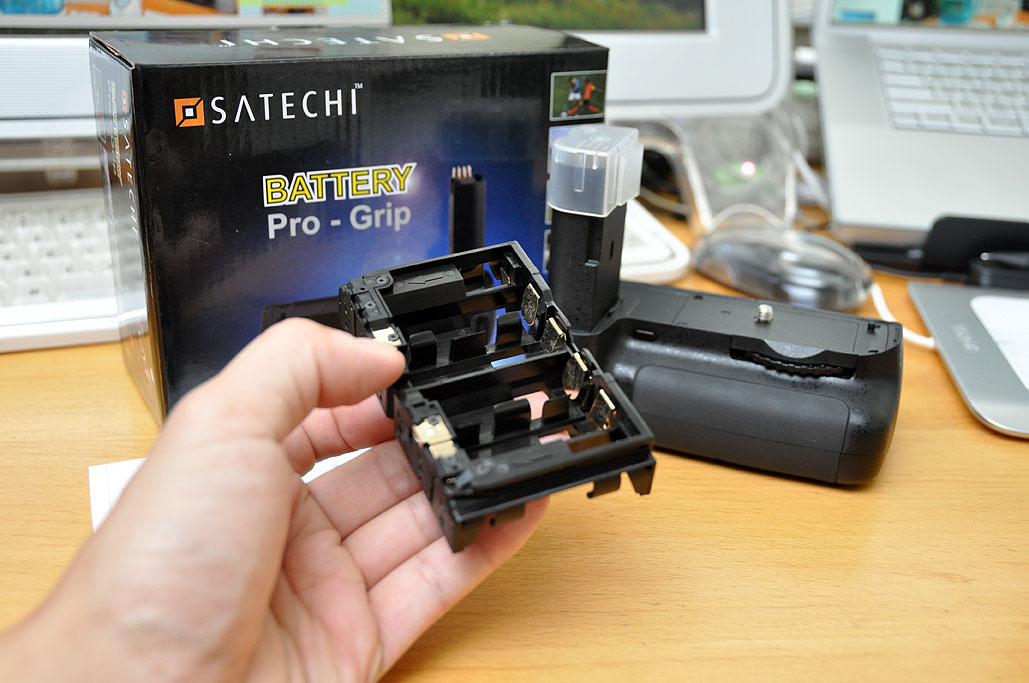
| Sep 13,2010 - Satechi ProGrip FirstLook... |
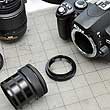
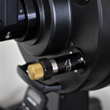
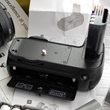
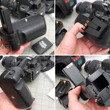
When we posted our FirstLook of the Yongnuo wireless timer a few weeks ago we got emails from a few readers who told us about Satechi Battery ProGrip. The emails almost got the "file for later review" treatment because we had already done a few reviews of third-party Nikon battery grips (D40, D90). However, one of the interns took a closer read and realized why we should always pay attention when our readers take the time write. Today, other RainyDayMagazine readers will see why we decided to review it.
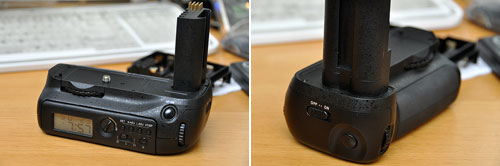
The Satechi unit for the Nikon D90 arrived in house last week. Like the Phottix Premium grip, the Satechi ProGrip grip can house two Nikon Li-ion batteries, comes with a 6AA battery cartridge, and a... [more]-Satechi ProGrip: FirstLook
|
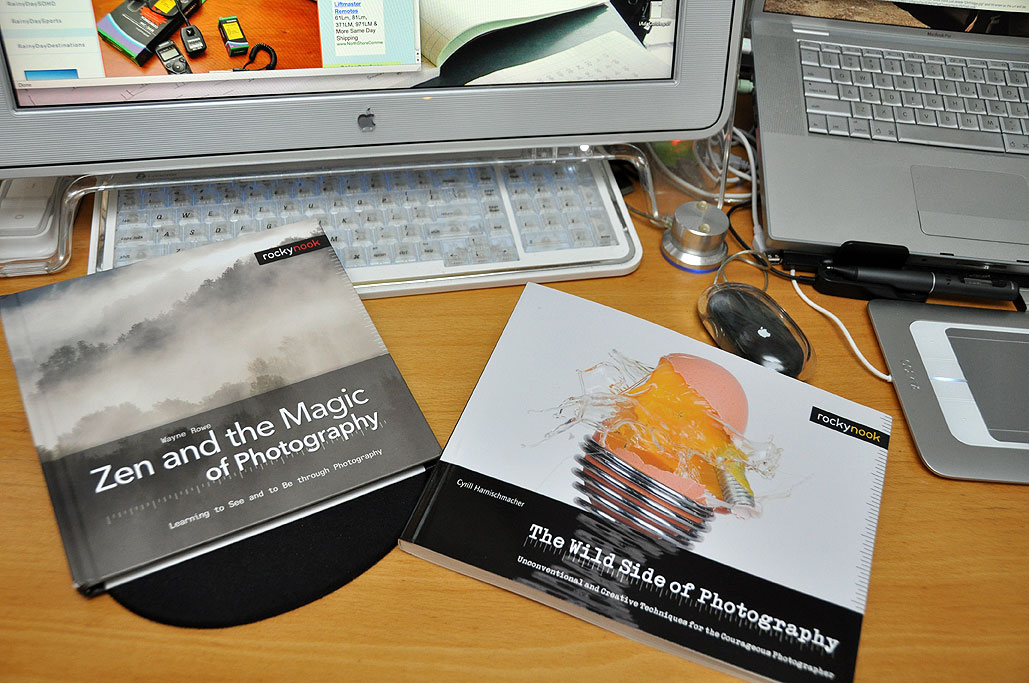
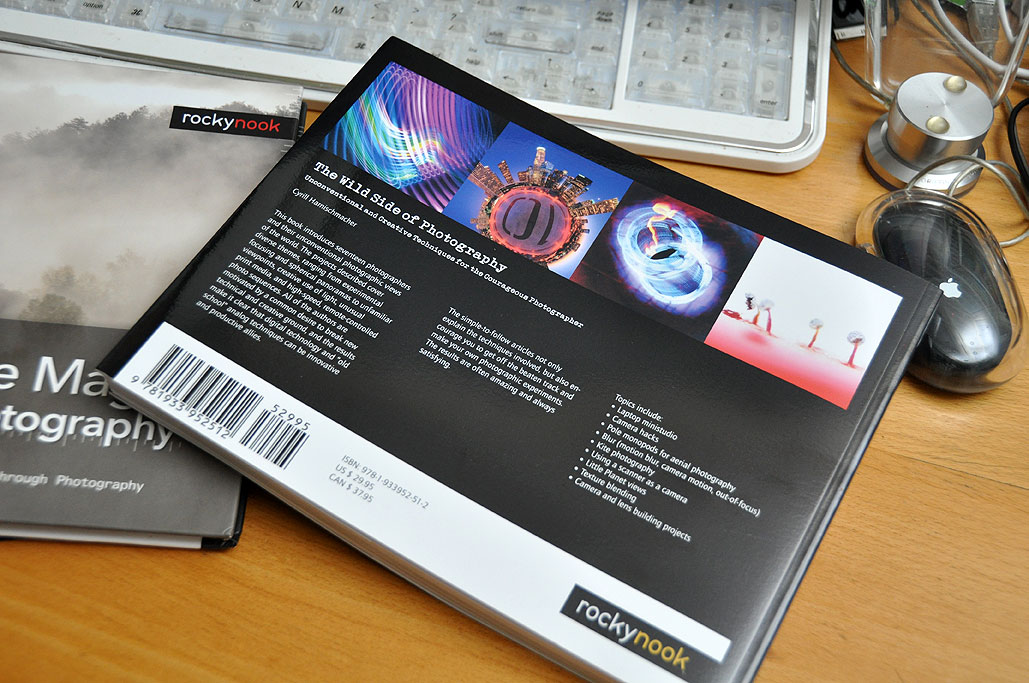
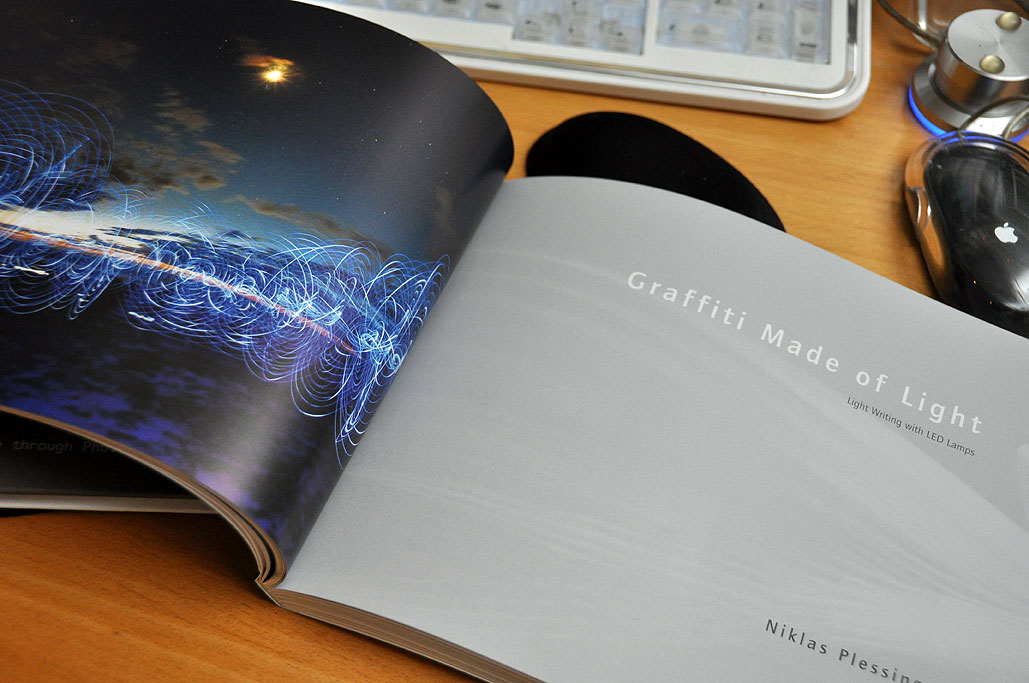
| Sep 3,2010 - Wild and Zen |
We are huge fans of photography books from Rocky Nook. The two we recently added to our ever-growing library of Rocky Nook photography books are The Wild side of Photography and Zen and the Magic of Photography. These books are pretty much at different ends of the creative spectrum.
The Wild side of Photography is a collection of different projects from seventeen different photographers, each with their own unique perspective on creativity. The book covers unusual themes such as experimental focusing, spherical panoramas, camera hacks, etc... If you want crazy, it is... [more]-RockyNook: Wild and Zen in photography
|
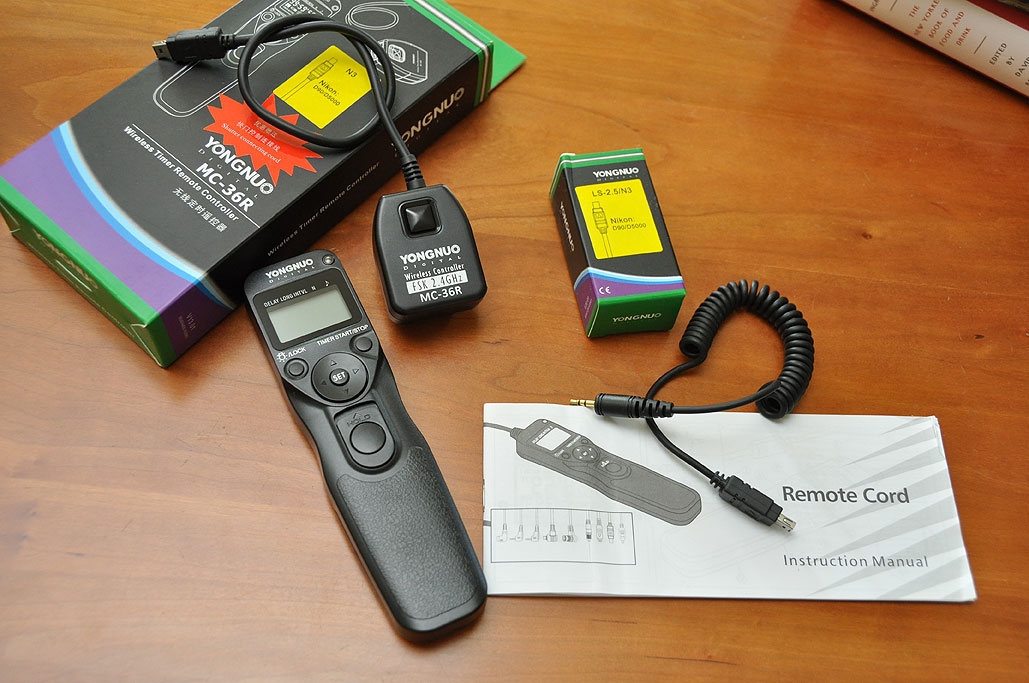
| Sep 2,2010 - Remote timer for Nikon D-90 |
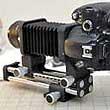
Time-lapse photography is an interesting way to capture certain types of events. The idea is simple: take a photo every so often to see the progress of something occurring too slowly to be observed in real-time. Time-lapse photography is also useful for capturing: images under very low light conditions; images of the night sky; or creating special effects.
The Nikon D90 camera has built-in timer functions, but its timing capabilities can be vastly extended with the use of an external timer. Nikon does offer a wired remote timer/controller (MC-DC1), but we find that remotes from many 3rd-party vendors offer more flexibility and setup options. A corded timer will work with a specific camera, but a wireless timer can work with... [more]-Nikon D90 wireless timer FirstLook
|
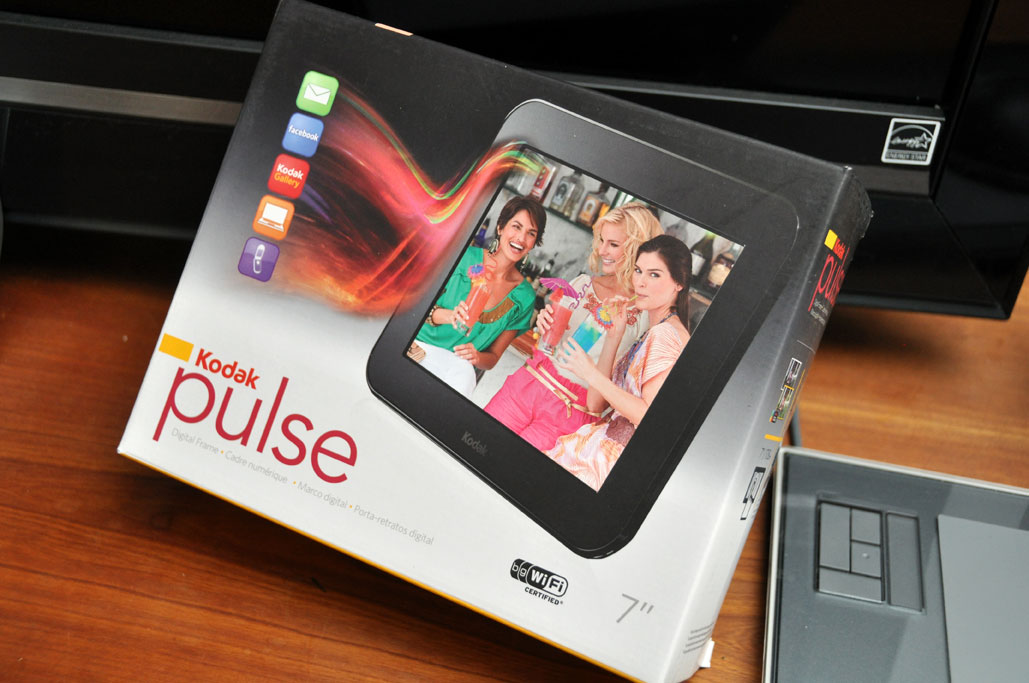
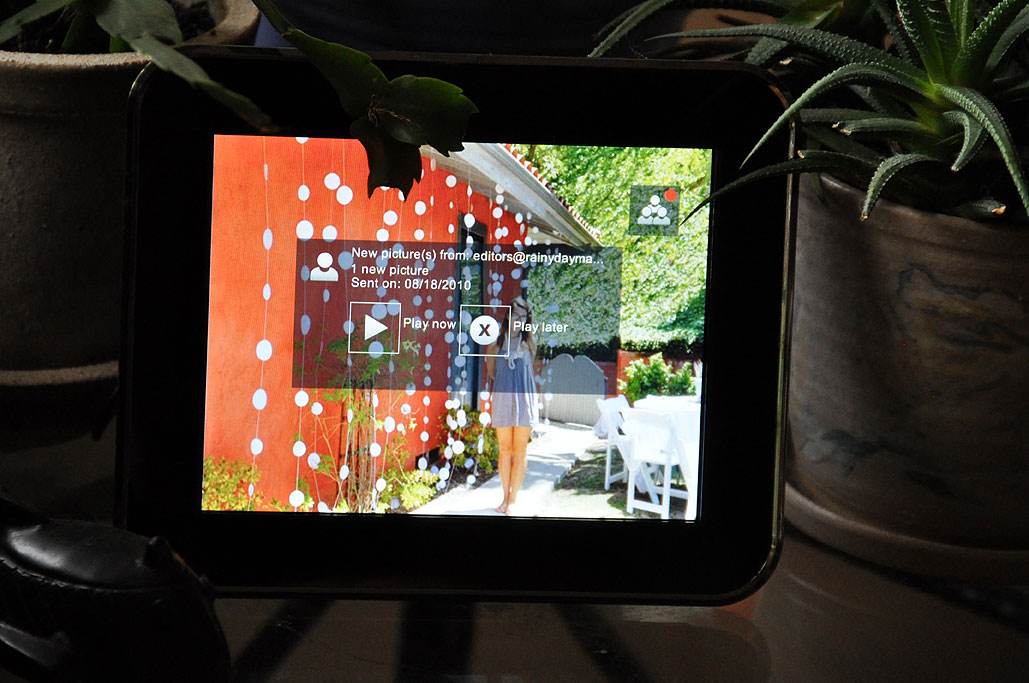
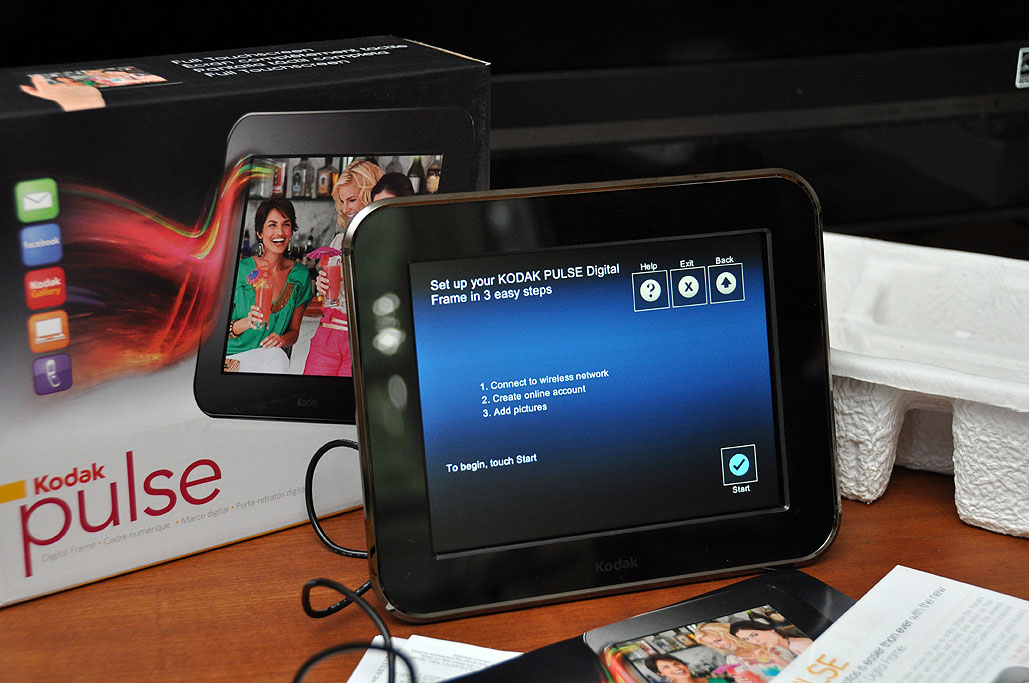
| Aug 20,2010 - Kodak Pulse Setup |
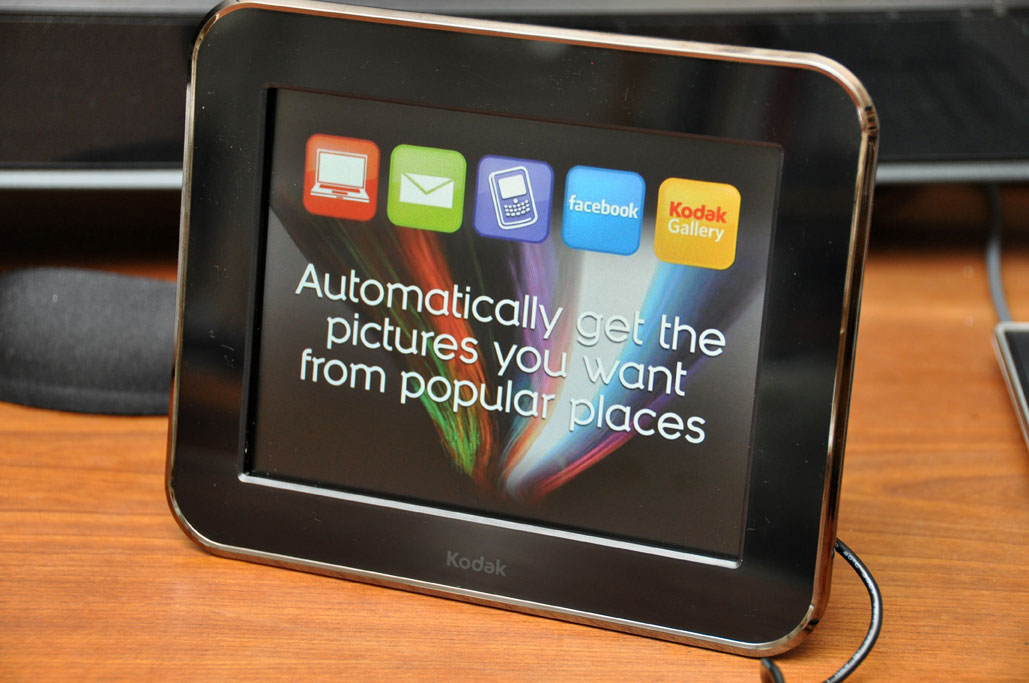
The Pulse, Kodak's latest digital photo frame, came onto the market in April. We took a FirstLook at the Pulse earlier in the week. The Pulse is the first digital photo frame which has everything we want in one package: high resolution display, touchscreen controls, card reader, WiFi connectivity, FREE email address. Many digital photo frames have the first four features covered well. In our opinion, the ability to receive images via email is a "must-have" feature for a digital photo frame. We certainly would not buy a another one without that capability. With an e-mail-enabled device, anyone can share pictures using cell phones, computers, WiFi-enabled cameras, etc...directly to the Pulse frame. Kodak further enhances the sharing experience by allowing the frame to be connected to anyone's Facebook and Kodak Gallery photo albums. The frame will automatically refresh when new images are added to the albums. How easy is that?
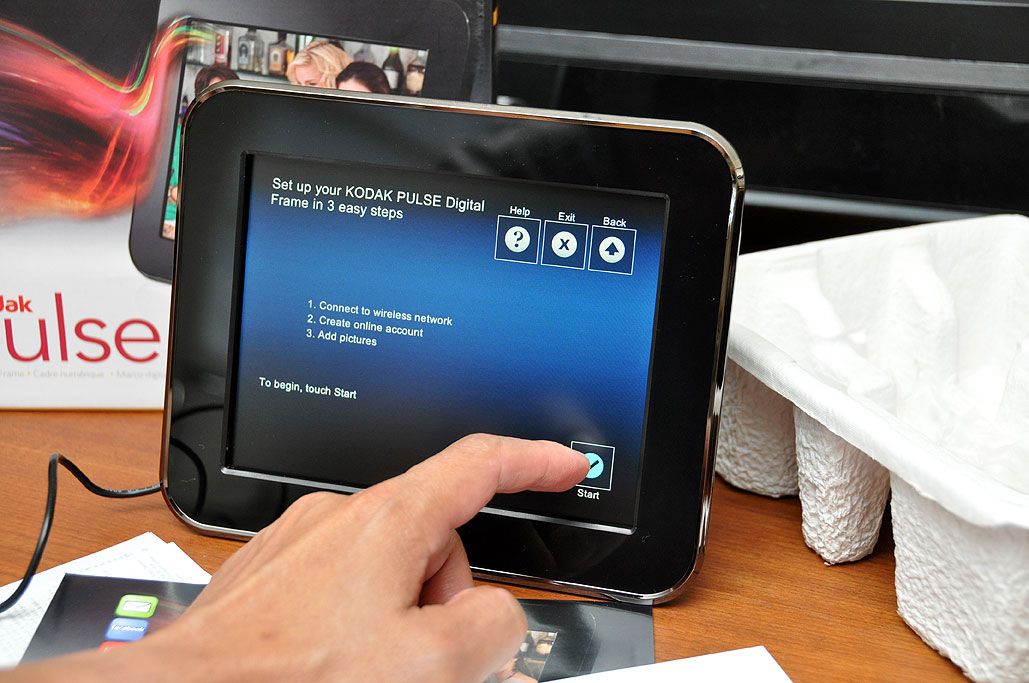
The frame may be used right out of the box if all one wants is to insert a memory card and display some photos. However, the power of the Pulse is the ability to connect to the Internet and be managed remotely. Thus, a WiFi Internet connection is needed to get the most out of this frame. Connecting the Kodak Pulse to our office's WiFi network was pretty quick. The on-screen wizard walked us through the steps in clear plain language. However, you will need to... [more]-Kodak Pulse Setup
|
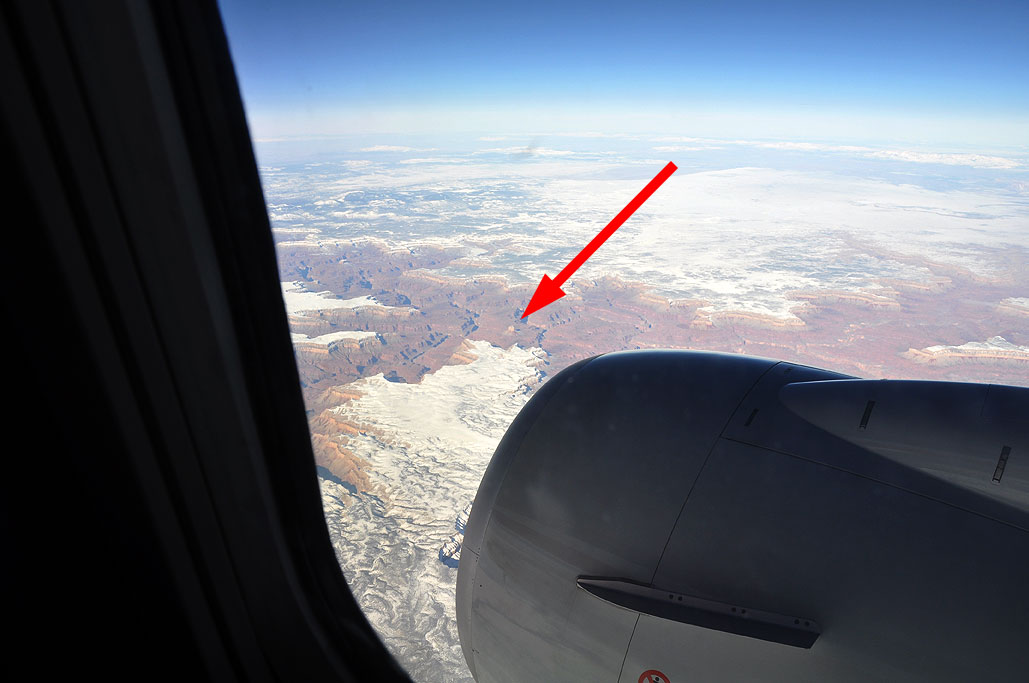
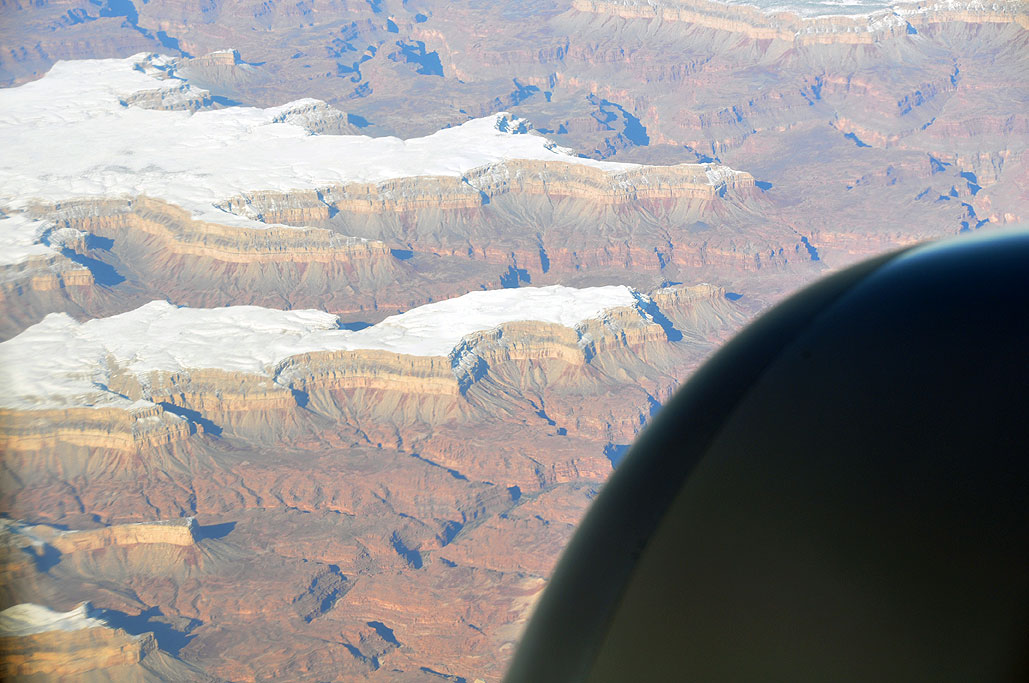
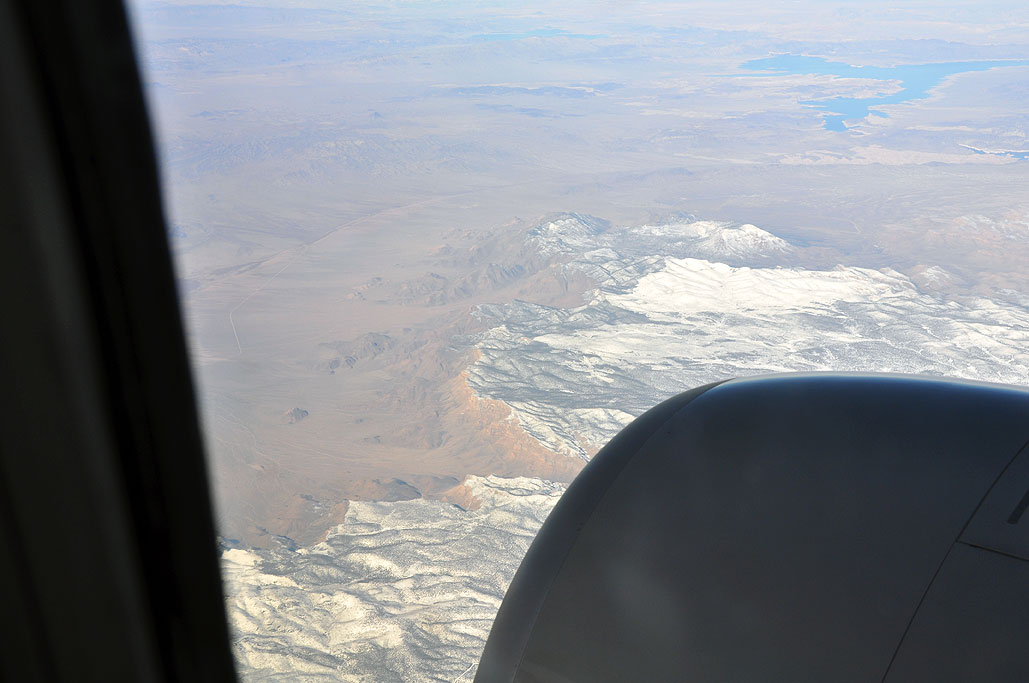
| Aug 19,2010 - View from 40,000 feet |
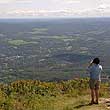
When we fly, we always try to get a window seat. We have never been to the Grand Canyon, but when we flew out to L.A. this past January, we had a window seat. The view from the plane was pretty spectacular. Since it was Winter, snow was everywhere. It made for some interesting shots.
Looking down from 40,000 feet, it was cool to see the erosion and ridges sharply defined by the snow. We remembered Orographic lift from high school Earth Science and expected to see snow cover on the western side of the ridge. However, we saw snow on the eastern side, which confused us a little... [more]-View from 40,000 feet
|
| Aug 18,2010 - Kodak Pulse FirstLook |
Digital photo frames have been around for a while. The idea was great, but unfortunately most executions have been lacking. The frames were either too expensive, have weak colors, or the process of updating photos was cumbersome. However, Kodak may have finally put all of the pieces together and created a digital photo frame that will be the standard by which others will be judged.
We have many different digital frames around the office. The ones we update the most often are the Ceiva units. The Ceiva photo frames are convenient to update because they have their own email address and can receive images via Email from anyone/anywhere (even if that someone was just in the office upstairs). When we posted the FirstUse report of the Ceiva frames, some readers commented that while the email feature is awesome, the frames required a Ceiva subscription to work and when if the subscription is allow to lapse, the frame would be useless. This is certainly a valid point. Ceiva's current buisness model may change when a strong competitor enters the market with a similar product which... [more]-Kodak Pulse FirstLook
|
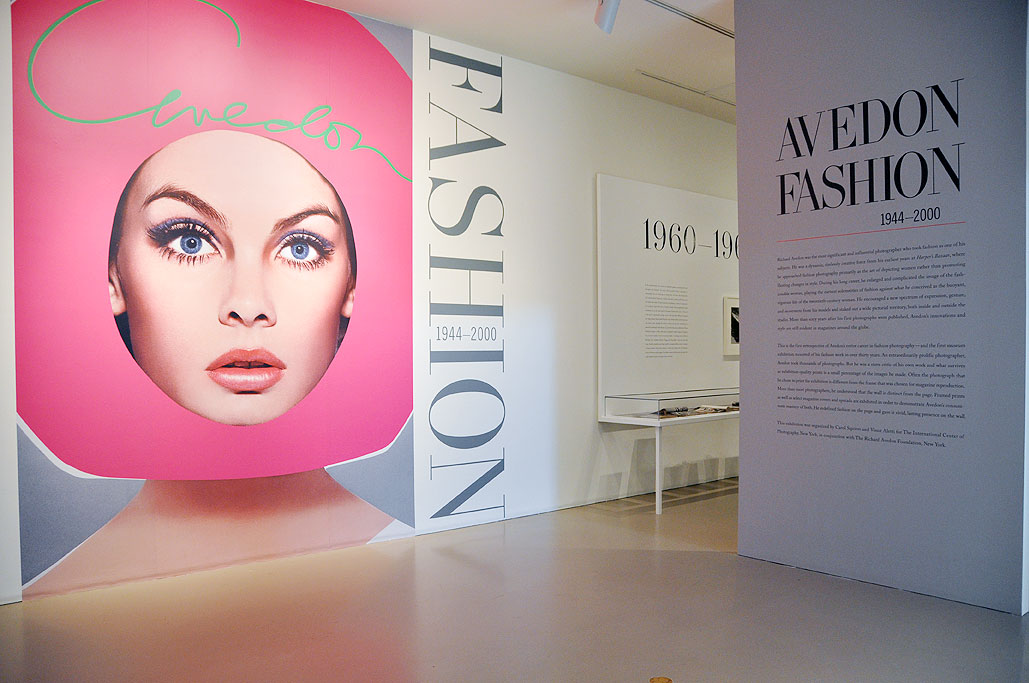
| Aug 9,2010 - MFA:Avedon Fashion |
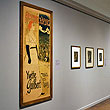
For six decades, Richard Avedon (1923-2004) brought fashion to life in the pages of Vogue and Harper's Bazaar. His photos may have started out as advertisement for Dior, Chanel, or Versace, but they ended up as art. The images created by Avedon were fresh, energetic, and forever transformed fashion photography.
Avedon Fashion 1944-2000 debuted in 2009 at the International Center of Photography (ICP) in New York, then Detroit and West Palm Beach. The MFA, in partnership with the ICP and The Richard Avedon Foundation, has now brought this traveling exhibition to Boston. This major retrospective focuses on Avedon's work in and contributions to fashion photography. Images are grouped by decades and presented to show his... [more]-MFA: Avedon Fashion
|
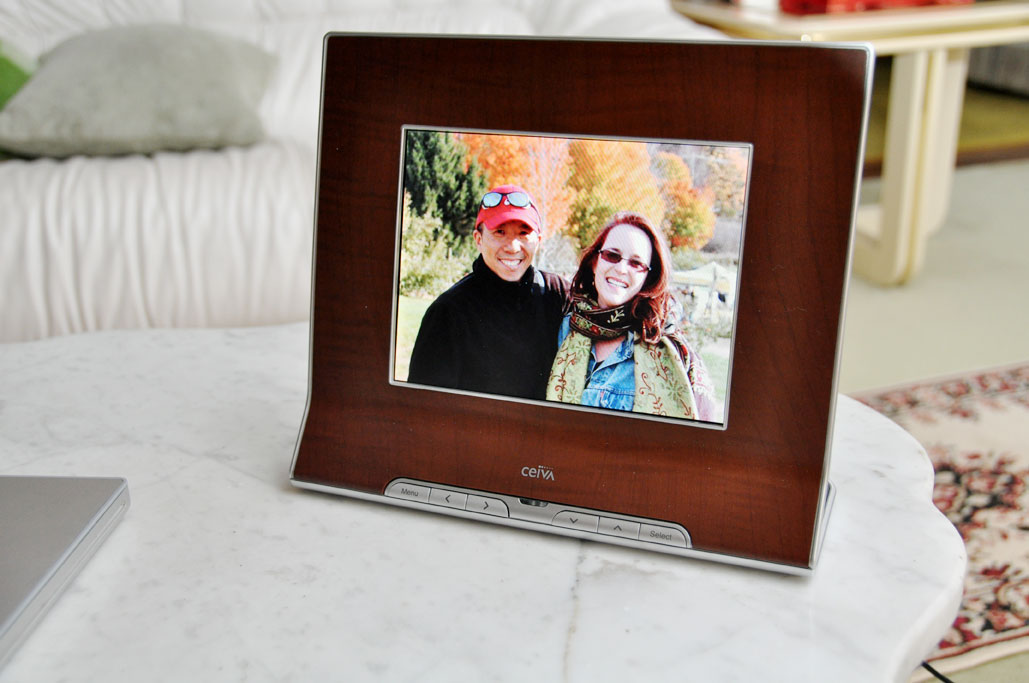
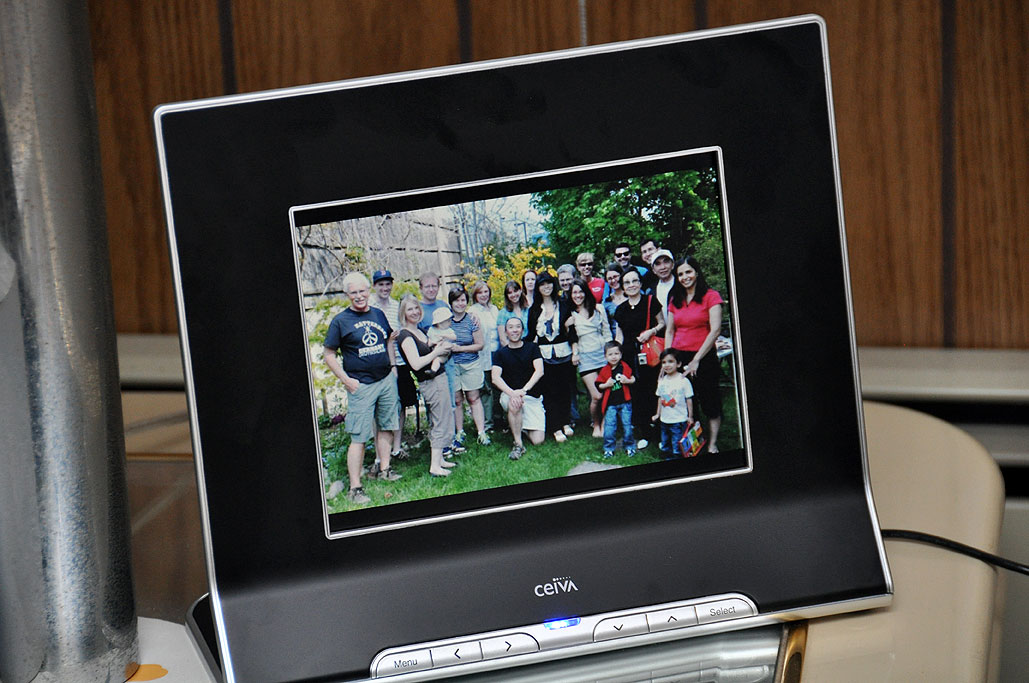
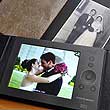
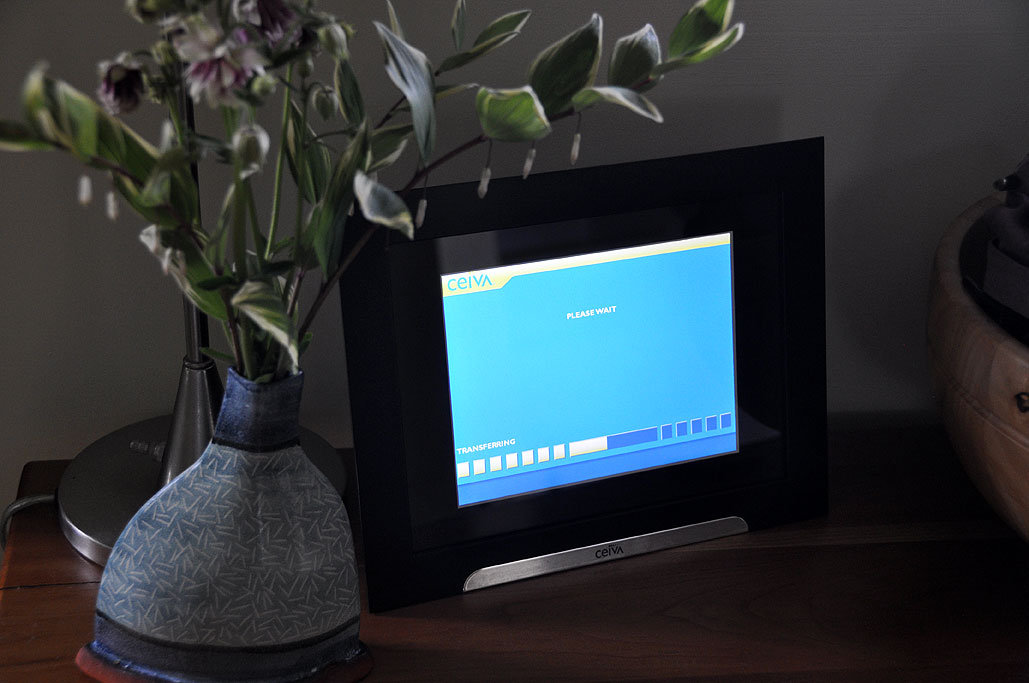
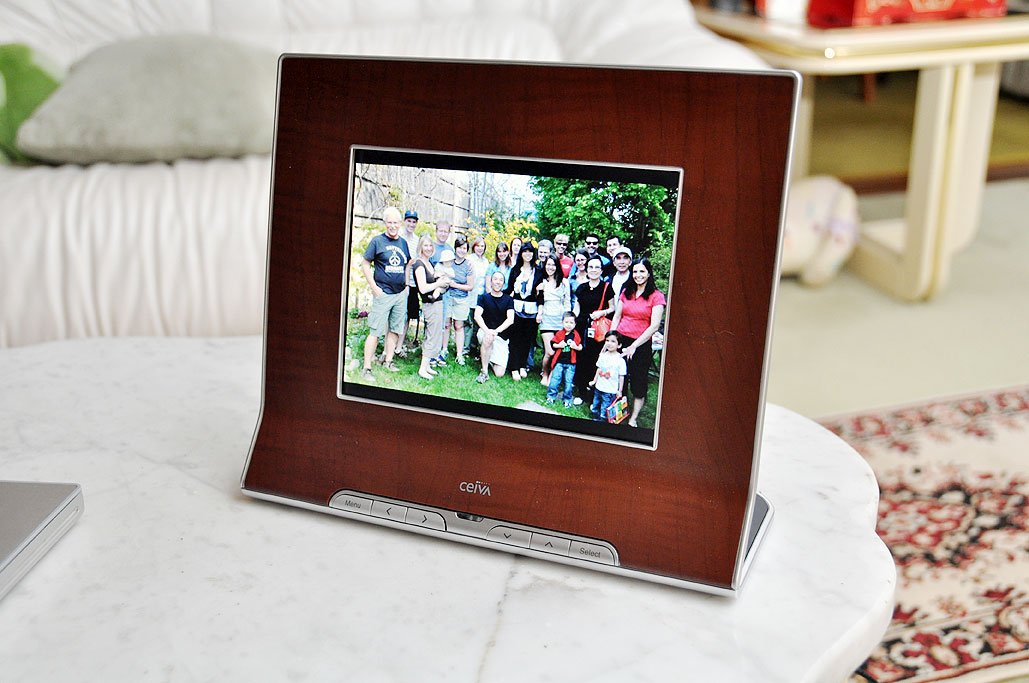
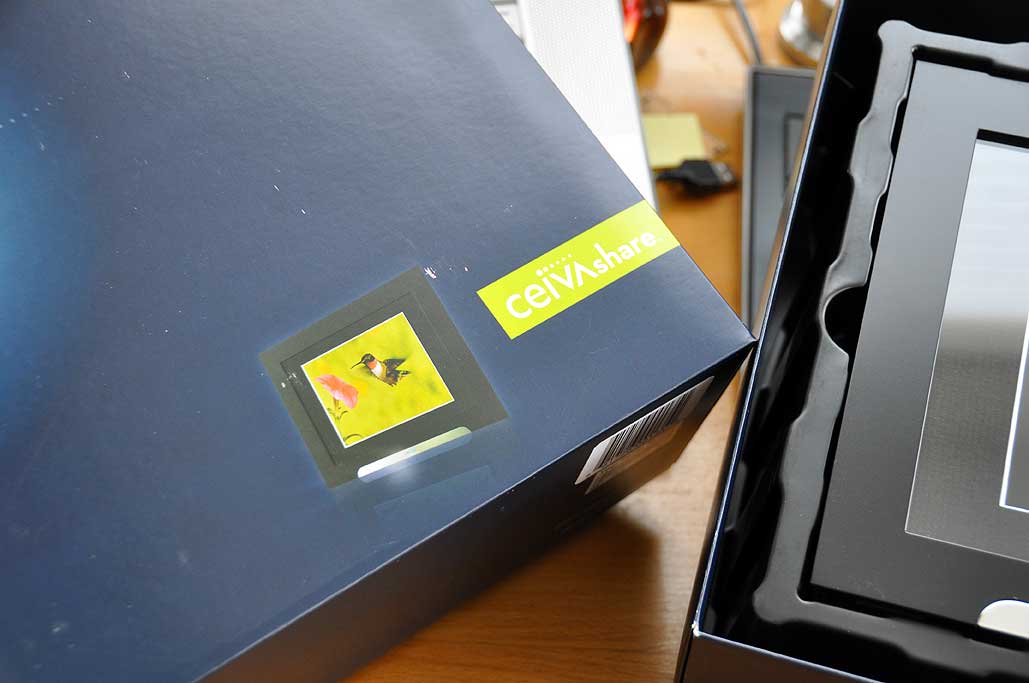
| Aug 6,2010 - Ceiva InTheWild |
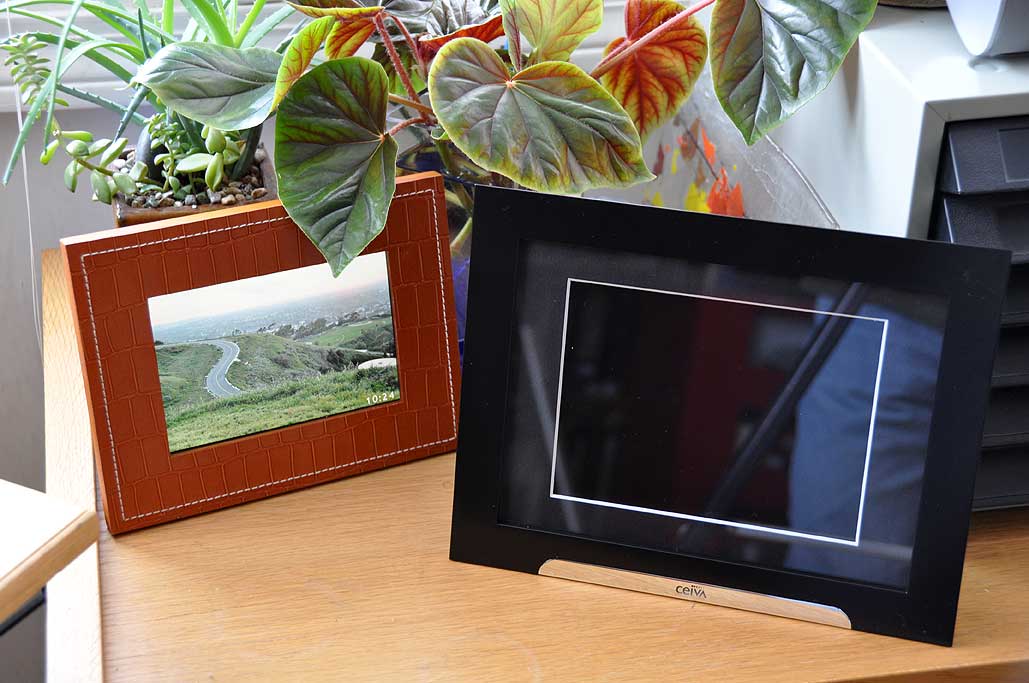
In May, we did a FirstLook and FirstUse of a few digital photo frames from Ceiva. We have both the CeivaShare and CeivaPro models. The CeivaShare frame is in our office in Boston and the CeivaPro was sent to one of the editors' parents in New York. After using them for a month, we felt we were ready to file the InTheWild report. After three months, we are happy to report that the initial enthusiasm with the Ceiva frames has not diminish in any way. In fact, one of the guests at FirstGrill 2010 told us she purchased one for her dad after seeing ours.
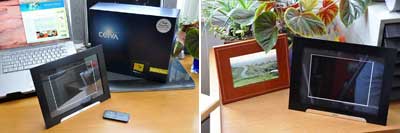
Displaying photos using digital photo frames are better than using a traditional frame in many ways. In the image above, the room was brightly lit. The print hanging on the wall is difficult to see, but the... [more]-Ceiva InTheWild
|
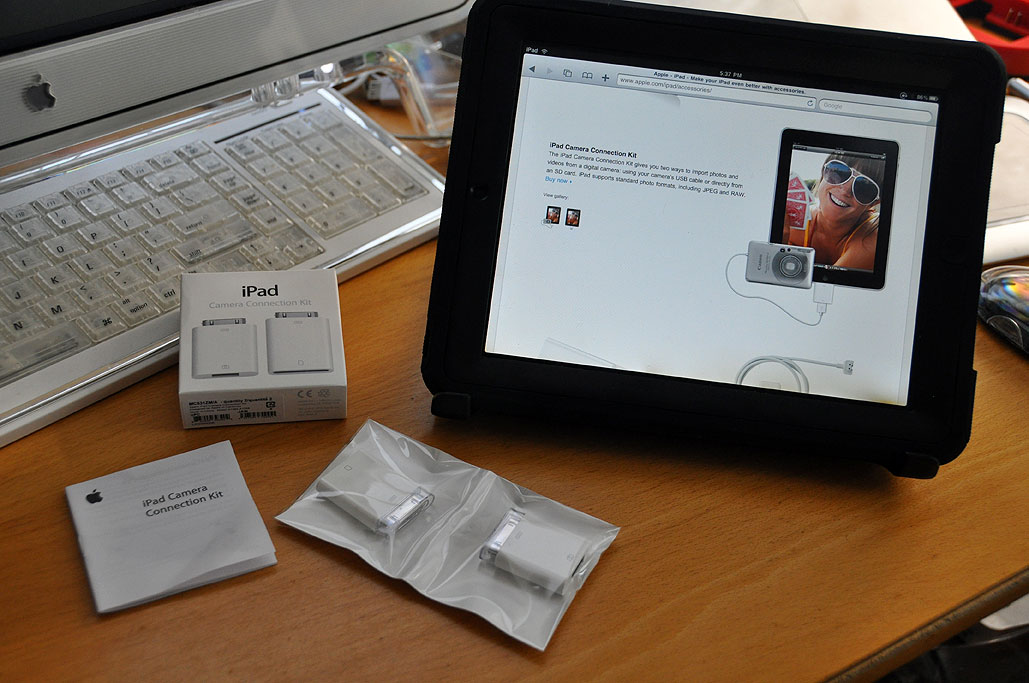
| Aug 4,2010 - iPad connection kit |
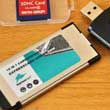
We have been using the iPad since the day it was available. It has been no secret that we think it is a game changer. However, it does not mean we think the iPad is perfect. There are things we wish Apple had done differently, made better, or included. One of the things we wish Apple had included is a standard USB port or an SD card reader. When in the field, were hoping we would be able to use the iPad as a digital lightbox. The iPad's size, weight, and long battery life would have made it a perfect tool for quickly checking the quality of an image without having to lug around a laptop. However, there are no built-in mechanism for attaching a camera to or insert a CF card into the iPad. The only way to "talk" to the iPad is via the optional Camera Connection Kit accessory.
Since the kit is optional, the least Apple could have done was make the Camera Connection Kit more widely stocked at launch time. After waiting months for the kit to become available, we were finally told that we needed to order it through the online store. When we did order it, the wait was another six weeks. How difficult could it be to... [more]- iPad connection kit: FirstLook
|
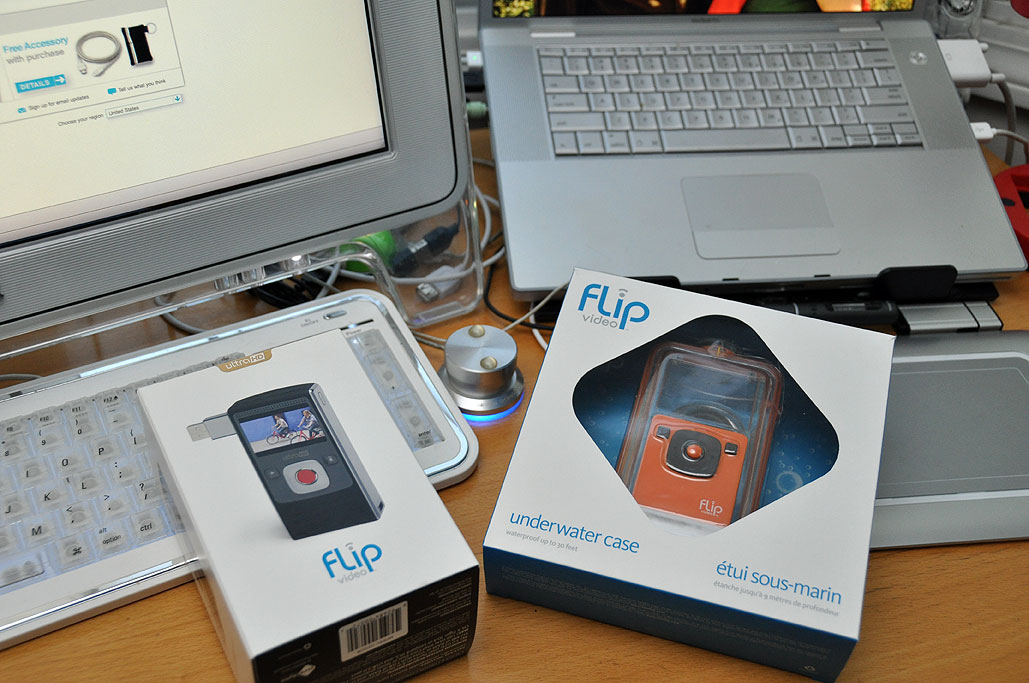
| July 6,2010 - Flip UltraHD ... |
Summer: beach, barbeque, swimming. These are activities in which many of us will be partaking over the next few months. Capturing the fun in pictures and videos have just been made easier by Flip with their new UltraHD camcorder and underwater case.
We were one of the first reviewers of PureDigital's One Time Use camcorder back in 2006. The One-Time-Use concept was an interesting business idea. The concern at the time was, would the average consumer be savvy enough to deal with digital video on their computer? As it turns out, the answer was a huge "YES." So, Pure Digital started making more sophisticated models and selling direct to the end-user. The Flip was their break-through product and a winner for... [more] -Flip UltraHD
|
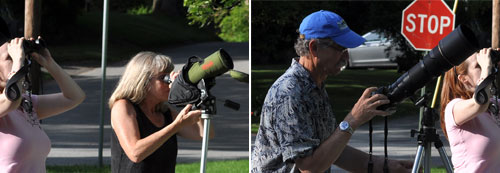
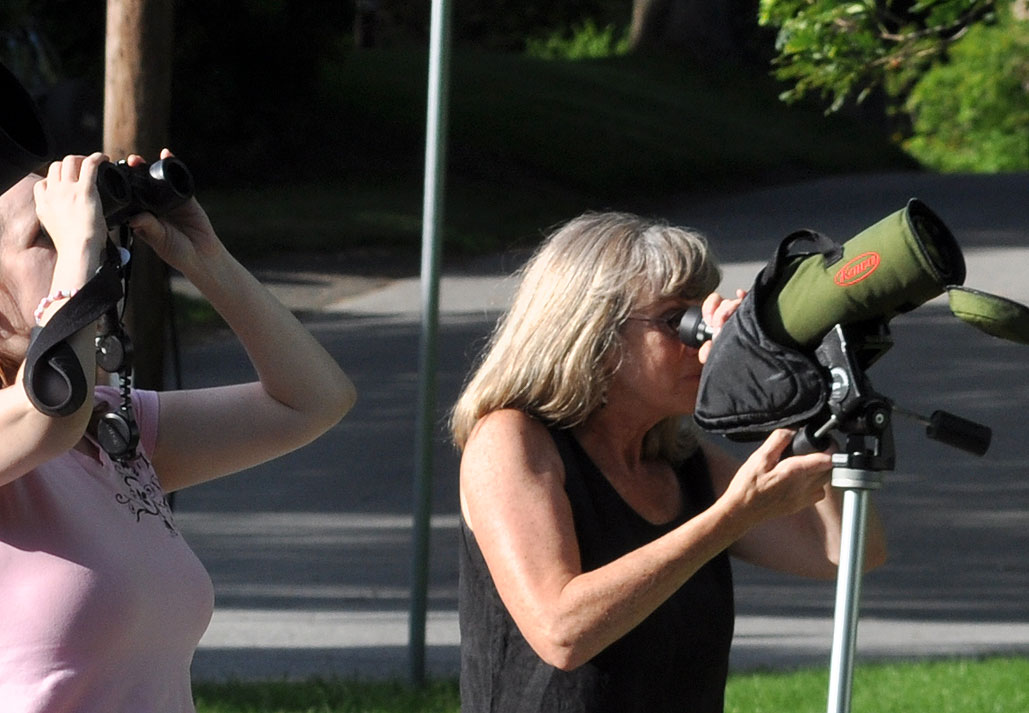
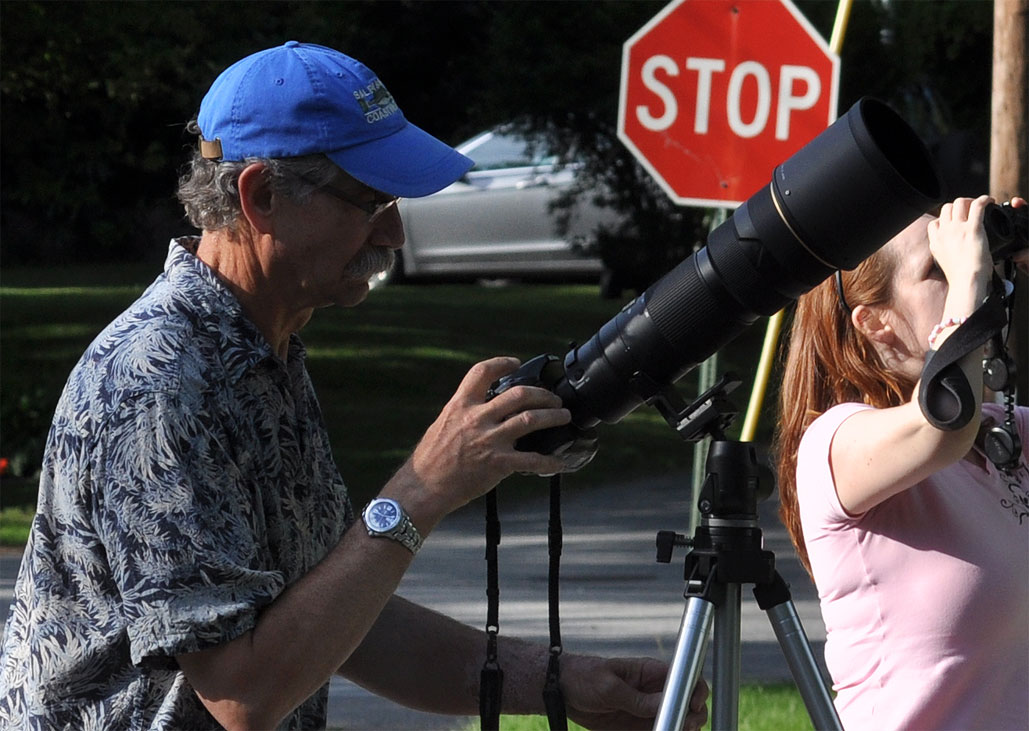
| June 23,2010 - Bird watching ... |
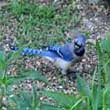
Bird watching is a great way to spend a day. It is also a great way to justify the purchase of those REALLY big telephoto and zoom lenses to the accounting department. Our friends Andrew and Candace told us about a heron rookery out on an island just off Manchester-by-the-Sea and asked if we would care to join them in checking it out. Looking for any excuse to get out of the office, we didn't have to be asked twice.
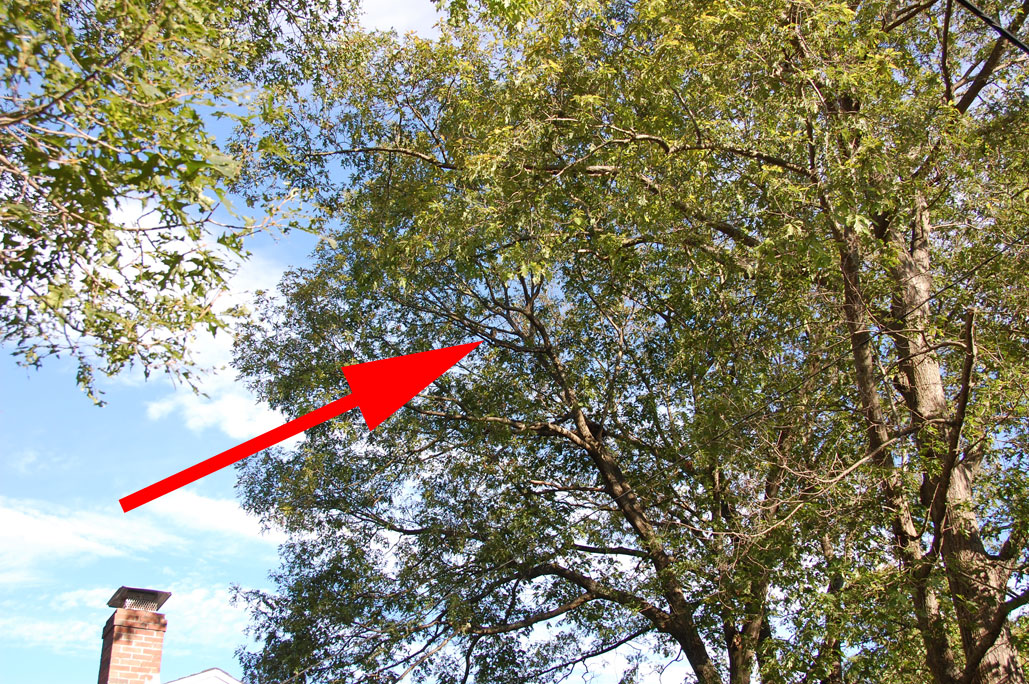
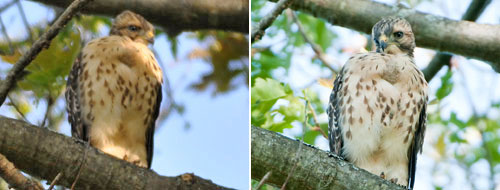
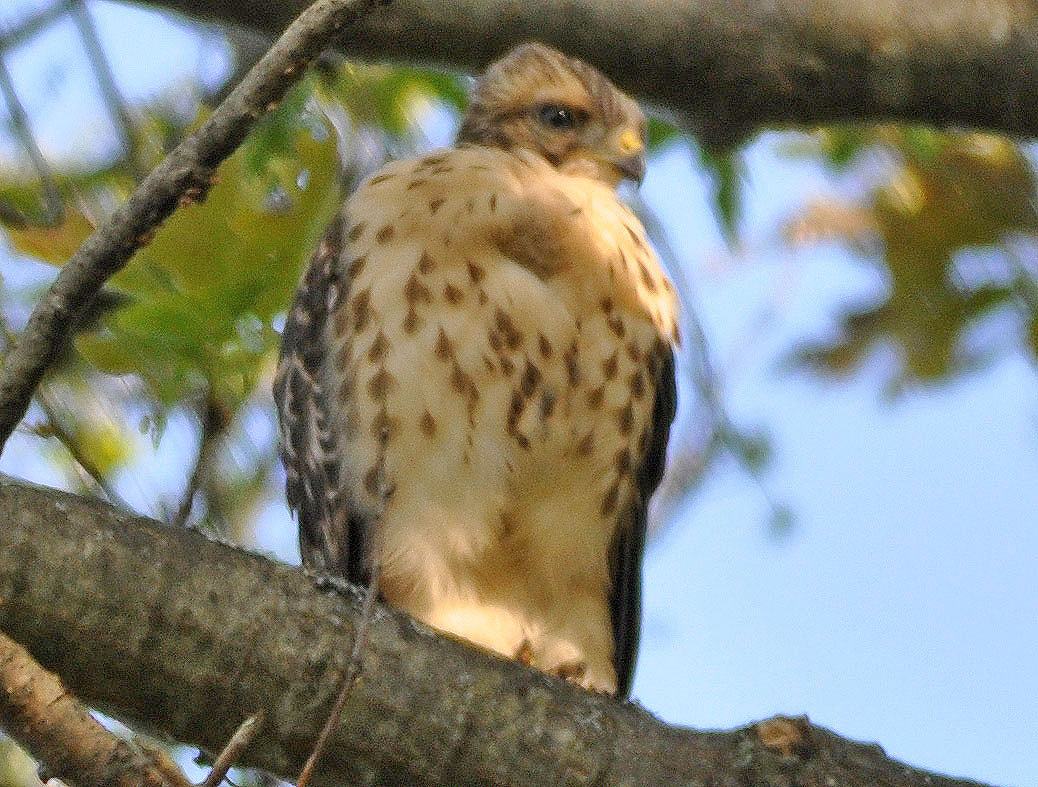
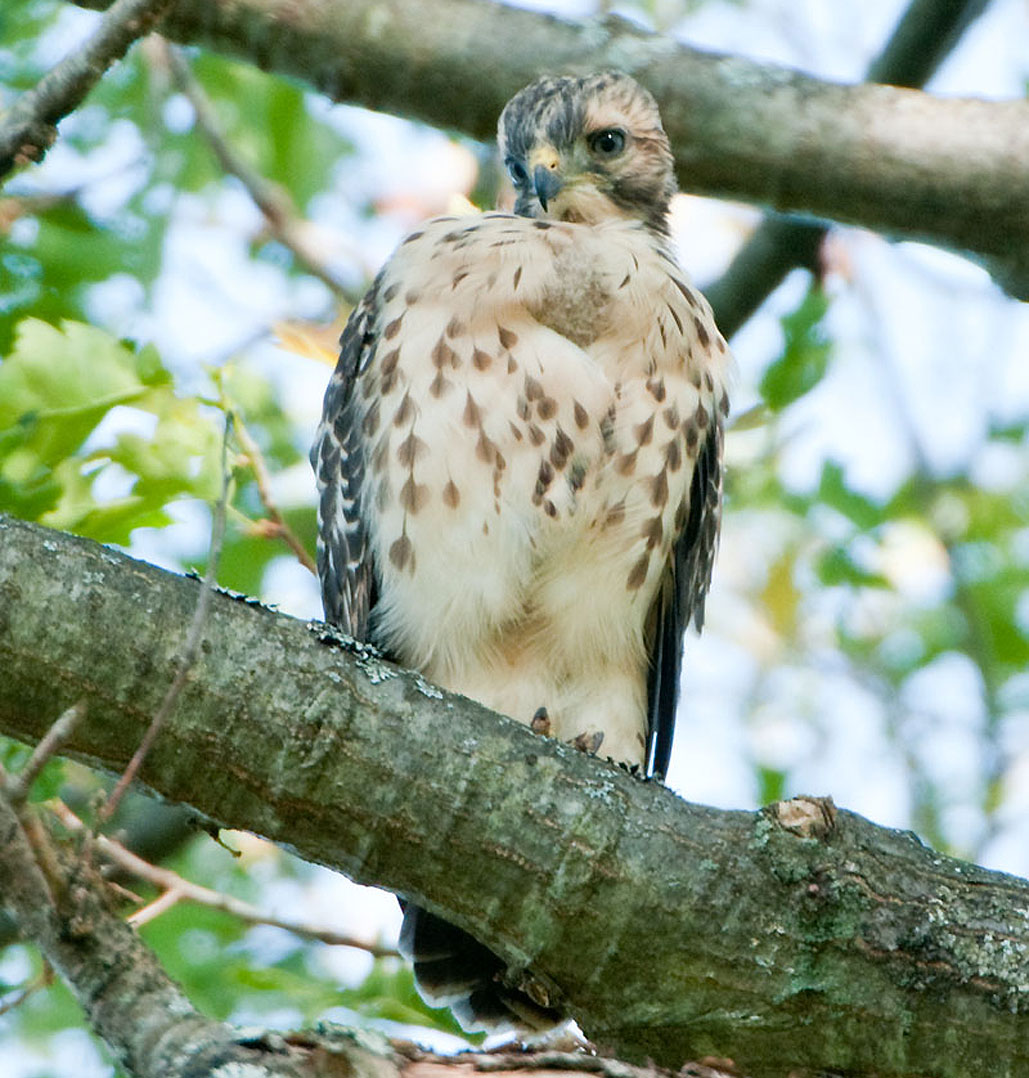
On the way to the rookery, we stopped off in Hamilton to get a peek at some hawk hatchlings which were big enough to venture from the nest, but had not yet taken flight. It was a good opportunity to practice with our equipment, try a few body/lens combinations, and see if we needed the TrekPod or not.
The image of the hawk on the left was taken with a D90 and the Sigma 80-400mm lens without the aid of a tripod. The one on the right was taken by Andy using his D700 and the Nikon 200-400mm on a tripod. The difference was pretty striking once we had a chance to take a closer look at the... [more] -Bird watching
|
| June 16,2010 - Brooklyn Bridge... |
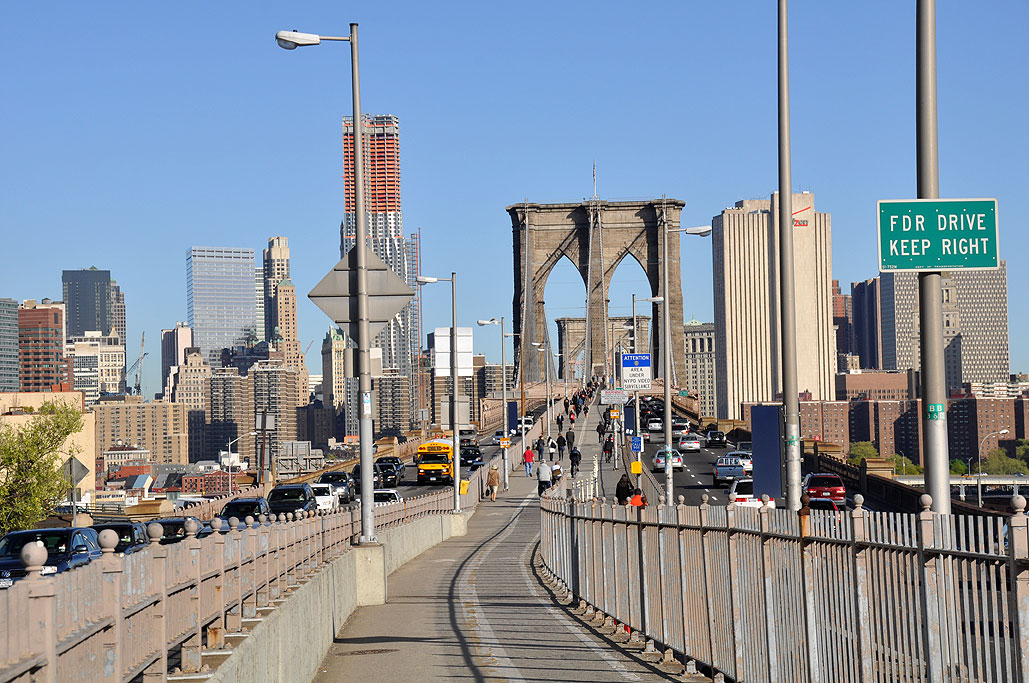
NYC is known for its skylines, landmarks, and tourist destinations. We are often in the city on business, and so we do not often taken advantage of the opportunities to the sights. In the past, readers have suggested it would be interesting for us to do a series on some points of NYC interest. We gave the request some thought and decided we will, on each trip down, take some time out and visit one POI.
One of NYC's most famous icon is the Brooklyn Bridge. The bridge connects the lower part of Long Island with the Financial District at the Southern tip of Manhattan. The Brooklyn Bridge is one of the oldest suspension bridges in the United States. Completed in 1883, it spans the East River. At 5,989 feet (1825 m), it was the longest suspension bridge in the... [more] -Brooklyn Bridge
|
| June 14,2010 - Corvette Day ... |
Yesterday was Corvette Day at the Larz Anderson Auto Museum in Brookline. We had a full plate on Sunday, but managed to make a quick stop in the morning to check out the line up. We had an occassion to ride in a recent model Corvette when we were last in Texas on business. Our friend Mike showed us what the modern 'Vette could do on an open stretch of the Dallas highway. We were duly impressed and it renewed our interest in this American motoring icon. One of the best ways to follow up on that interest was to attend the LAAM's excellent lawn events. This Sunday, we had the perfect opportunity to do just that.
Quite a few Corvette enthusiasts had already registered their cars for the show and were doing some clean up and detailing when we arrived on the museum grounds. We wandered around and chatted with some of the owners about their vehicle. Most of them were local to the area, but a few of them were... [more] -LAAM: Corvette Day
|
| June 08,2010 - Vanderbilt Museum ... |
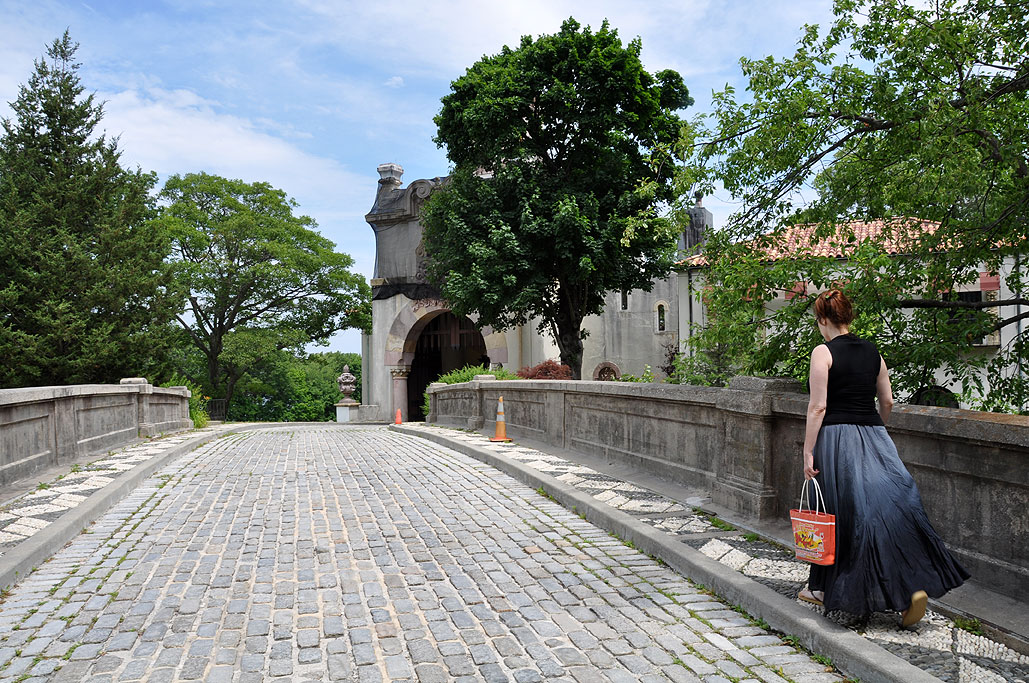
We were down in NYC last weekend for the World Science Festival. The 90º temperature in the city had us looking for cooler diversions on Saturday. After a bit of searching, we came up with the Vanderbilt Museum in Centerport, Long Island. It was less than an hour's drive from NYC, and 43 acres of rolling hills was a nice escape from the "concrete jungle."
This museum was built by Willian K. Vanderbilt II on his Eagle's Nest Estate. The 24-room Spanish-Revival mansion was built in three stages off and on from 1900s to 1930s. We did not have time to take the house tour or see all of the grounds on this visit, but managed to hit many of the museums and some of the gardens.
As a person of means, William Vanderbilt II (he was the great-grandson of Cornelius Vanderbilt) fed his curiousity of natural history by mounting specimen-collecting voyages to the Galapagos and other exotic destinations. He opened his personal museum to the public in 1922. The photos here are just a small sample of the artifacts from his extensive travels and expeditions. On display were an impressive and varied array of... [more] -Vanderbilt Museum
|
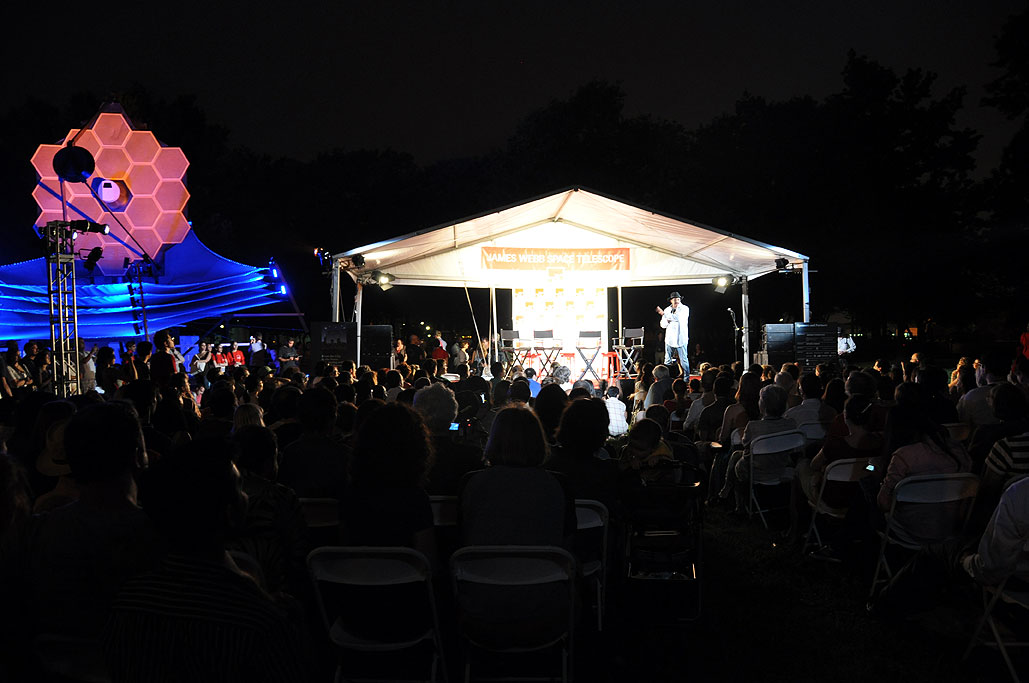
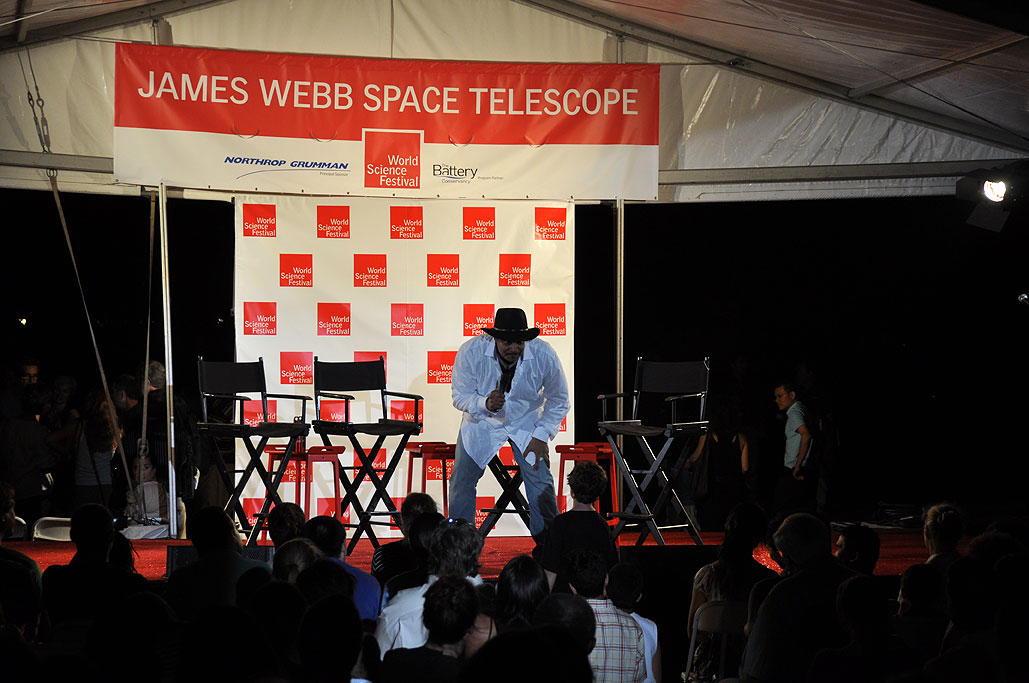
| June 07,2010 - World Science Festival... |
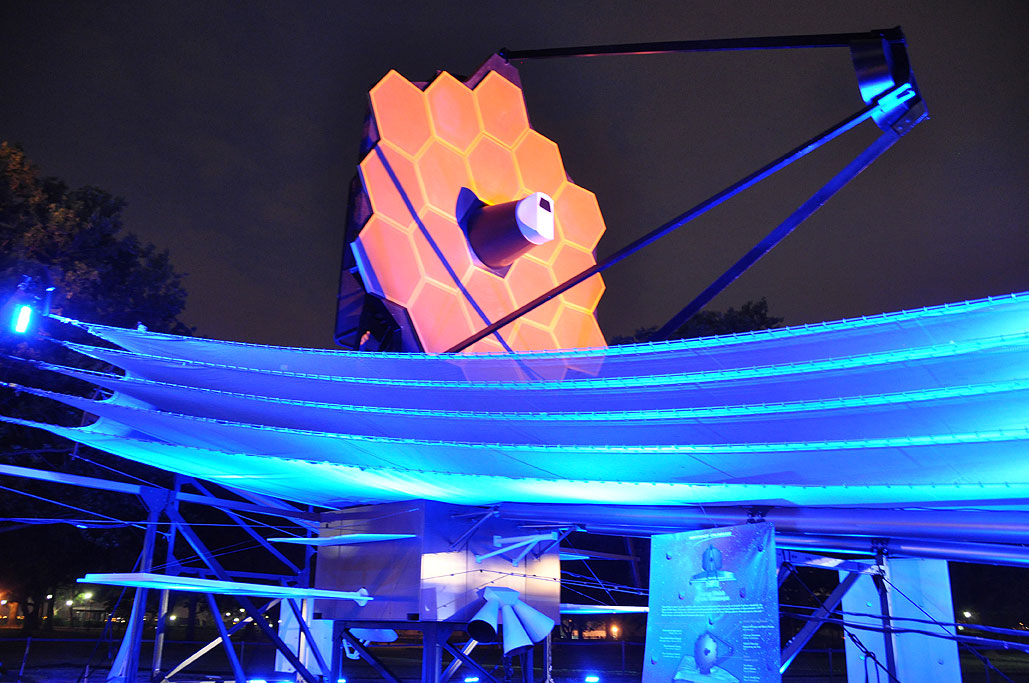
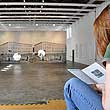
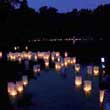
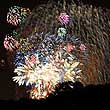
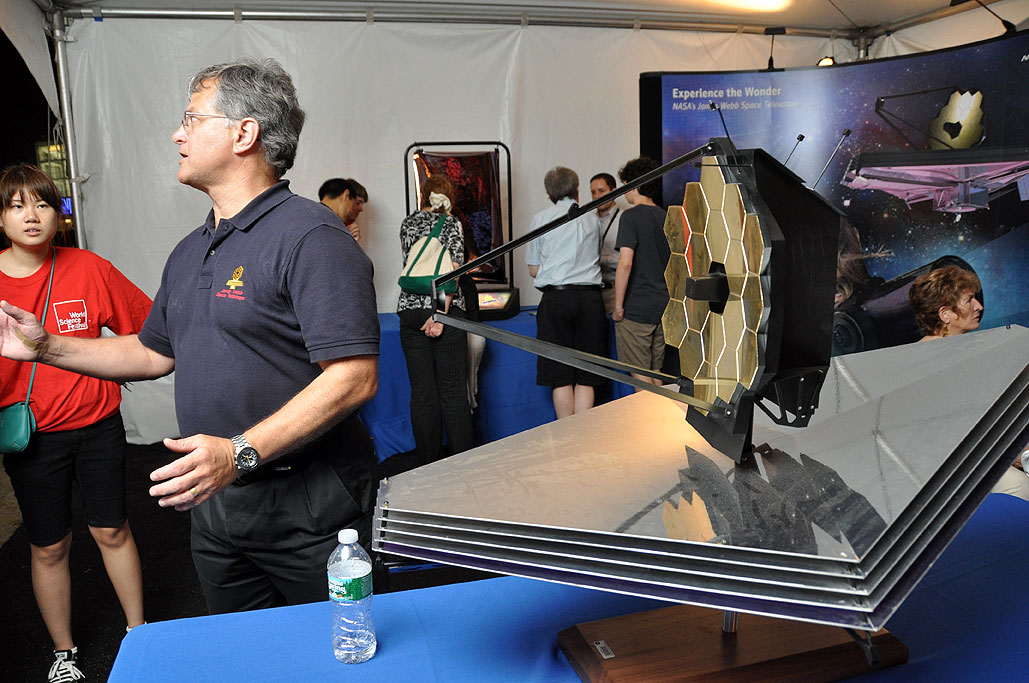
A full-scale model of the world’s most powerful space telescope was in New York City last week as part of the World Science Festival. NASA’s James Webb Space Telescope, when launched in 2014, will allow scientists to "see" the very first galaxies formed in the Universe and discover hidden worlds around distant stars. For the past six days, a full-scale model of this successor to the Hubble Space Telescope was on public view in Battery Park, on the tip of Manhattan. It was as close to a first-hand look at the telescope as most people will ever get, so on Friday we drove down for a gander.
In addition, we drove down because we didn't want to miss the “From the City to the Stars” party. The anchor of the event was the spectacularly lit Webb telescope model. Leading scientists were on hand to talk to everyone about the design of the telescope, the challenges, and the anticipated discoveries. The James Webb Space Telescope is the next-generation space observatory, exploring deep space phenomena from distant galaxies to nearby planets and stars. The telescope will give scientists clues about the... [more] -World Science Festival 2010
|
| June 03,2010 - Hang&Level FirstUse ... |
When we brought a 46" screen in to the office, we realized the logical place to put it was on the wall. The only suitable wall already had a bunch of frames on it. Relocating the frames would not be a difficult DIY project, but re-aligning them would be a chore. Getting the frames just so had always been a lot of trial and error. Fortunately, we got a Hang&Level picture hanger a few months back, and this is the perfect opportunity to give it a FirstUse test.
To properly hang a group of frames, we used to measure, mark, nail, and readjust the frames many times before we were satisfied with how they looked. The issue was two-fold: the right spot for the nail was located behind the frame, so centering the frame and marking the spot was difficult. There was usually slack in the wire in the back of the frame, and that made aligning and spacing of the frames difficult.
The Hang & Level tool was invented to address these problems. The steps were simple and intuitive. The frame to be hung is placed on the tool. The frame/tool is placed against the wall. Once we were satisfied with the frame's placement, we removed the picture from the tool but... [more] -Hang&Level FirstUse
|
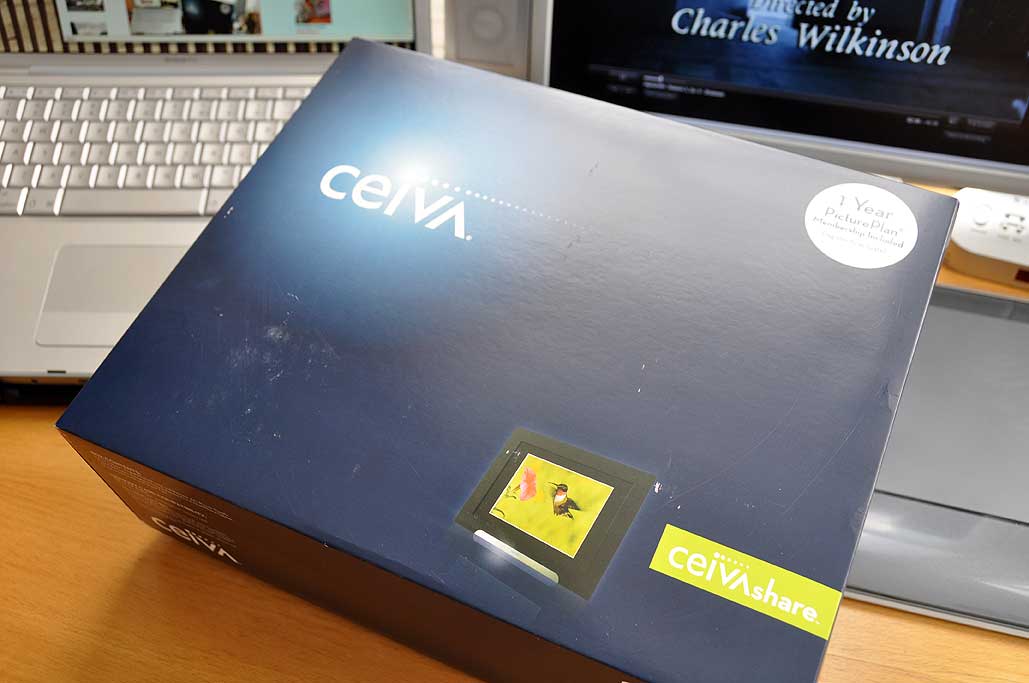
| May 5,2010- CeivaPro Digital Photo Frame... |
We have always been fans of the digital photo frame (DPF). Images look nicer than their printed counterparts because they are brighter even if their resolution is not as high. DPFs have and additional advantage in that they can display more than one image. Of course, the analog frames still have a few features not yet matched by the DPFs: they can be wall-mounted, do not require any power, and their size can be greater than 8x10. However, with the huge in-roads LCD TV has made into the home, those advantages may not exist in a few years.
Yesterday, we took a FirstLook at the CeivaPro Digital Photo Fram. Today, we are going to take a closer look at the PicturePlan service that separates the Ceiva apart from all the other digital photo frames in the market. Both the CeivaPro and CeivaShare frames require the Cieva PicturePlan service to work. The frames are not functional without an active account. This may rub some people the wrong way, but if one sees the frame as a service rather than a... [more] -CeivaPro Digital Photo Frame
|
| May 4,2010- CeivaPro Digital Photo Frame... |
Mother's Day is this weekend. A call, a card, or a nice flower arrangement for mom are the typical gifts for this occassion. In recent years, digital photo frames have been a big seller for this event. However, some are realizing that some moms just were not all that into all of the steps needed (hooking up the USB cable, organizing the images, uploading them from the computer) to get images into these devices. The folks at Ceiva, those clever cats, have always known this. Their ten-year-old business is not just about the selling of digital photo frames. They provide a convenient, easy to use, end-to-end photo sharing capability. No other digital frame company offers both the frame and a service like this. The early Ceivas service did allow folks to send images to "mom" remotely, but it had limitations: low resolution; restrictive placement options; bulky frames. Their latest offering, however, is fully "mom-friendly," assuming mom has... [more] -CeivaPro Digital Photo Frame
|


| March 23,2010 |
Digital photo frames (DPFs) are one of those items which seems like an obvious "killer app" when they first came on the market. We were early adopters but were disappointed with both the image quality and ease-of-use. So much so that we decided that we would not review any until they had 24bit color, displays that were bigger then 3"x5", and a better user interface. It was several more years before we found one which satisfied all of those requirement.
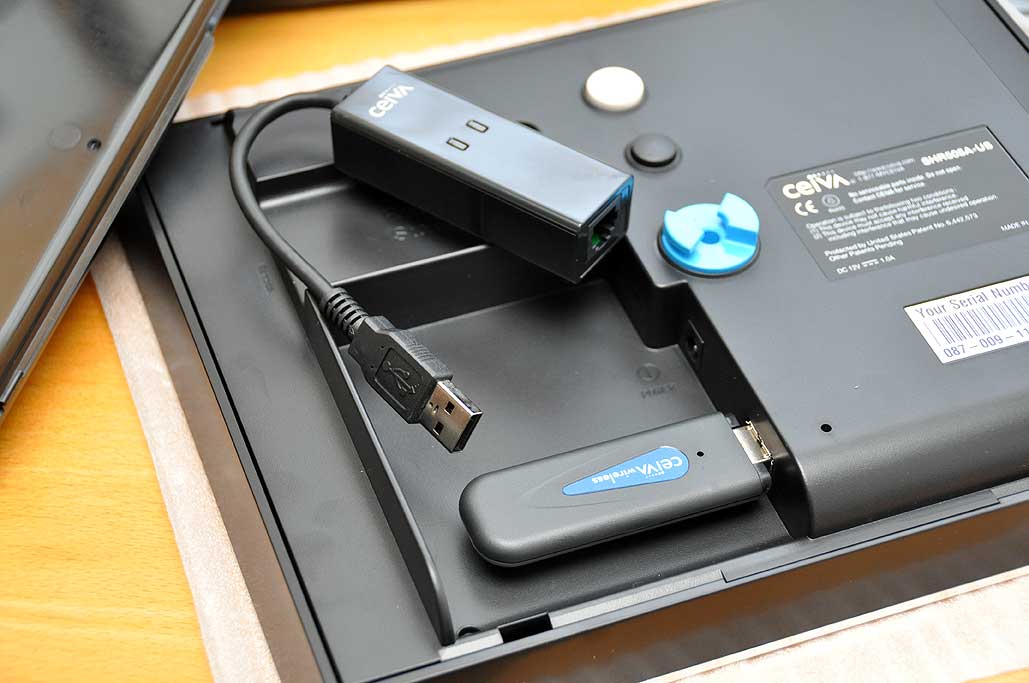
Ceiva started making digital photo frames in 2000. For the past 10 years, they have continued to invent, refine, and redefine the capabilities of DPFs. The main difference between Ceiva and all of the other makers is that Ceiva's approach is from the "how do the images get into the frame" standpoint. When they started, the phone line was the only viable option. Today, CeivaShare will support all of the obvious routes: phone, Broadband, WiFi. In this write-up, we'll take a look at the frame itself. In the next article, we'll do the setup and show how it all works.
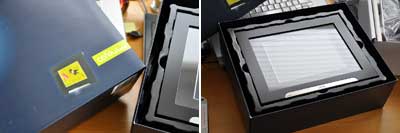
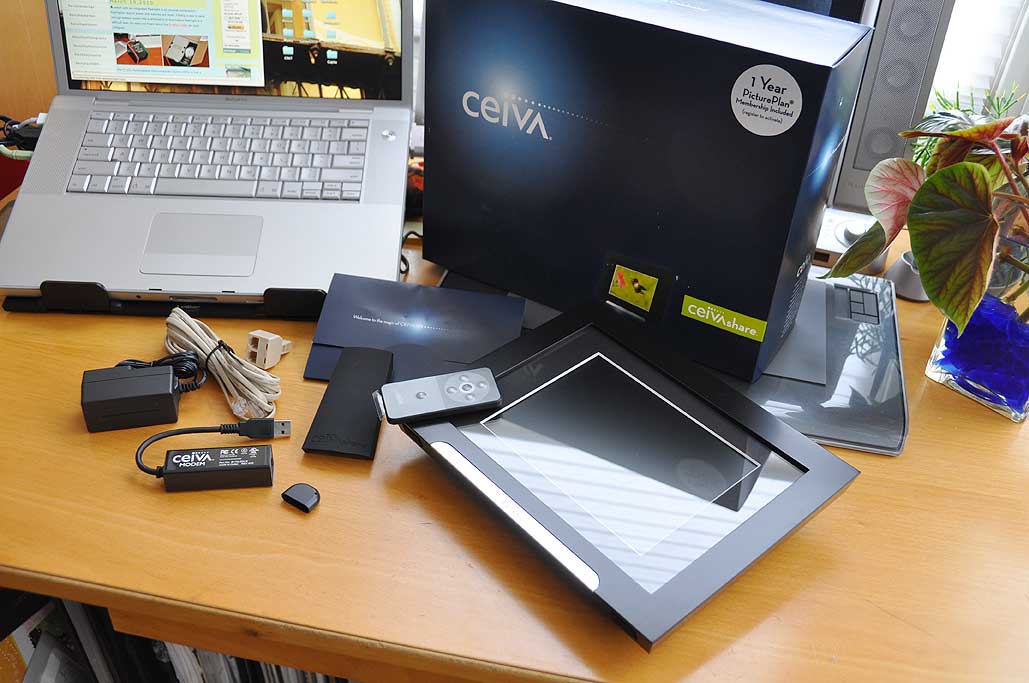
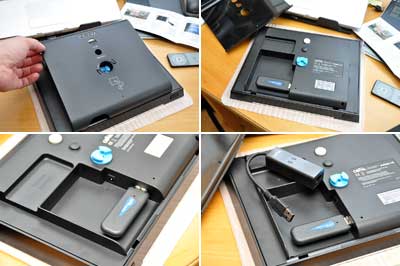
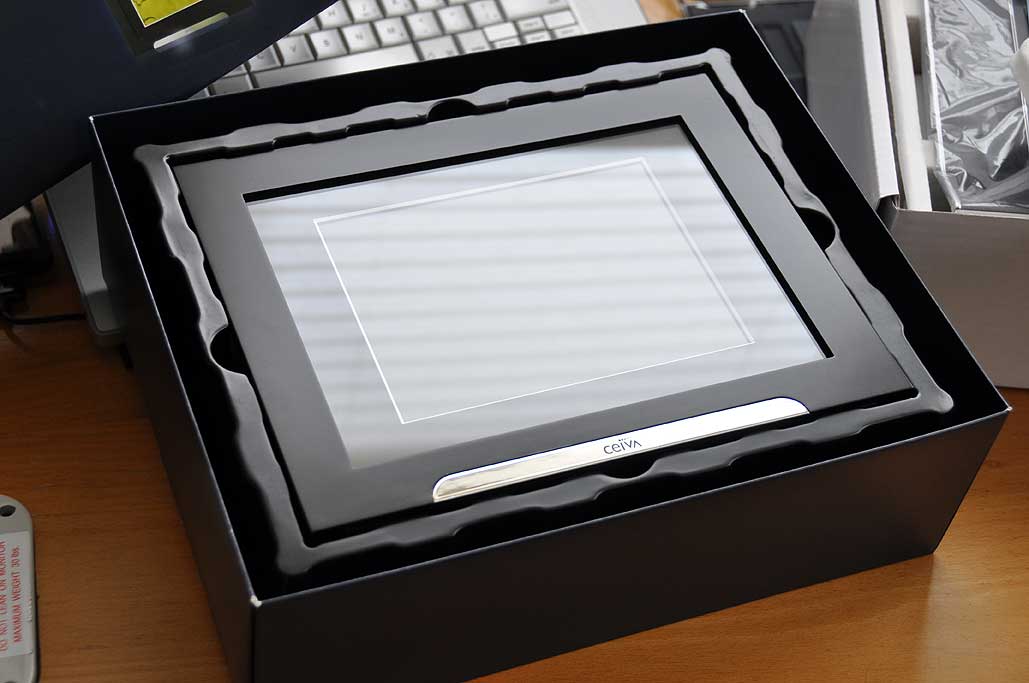
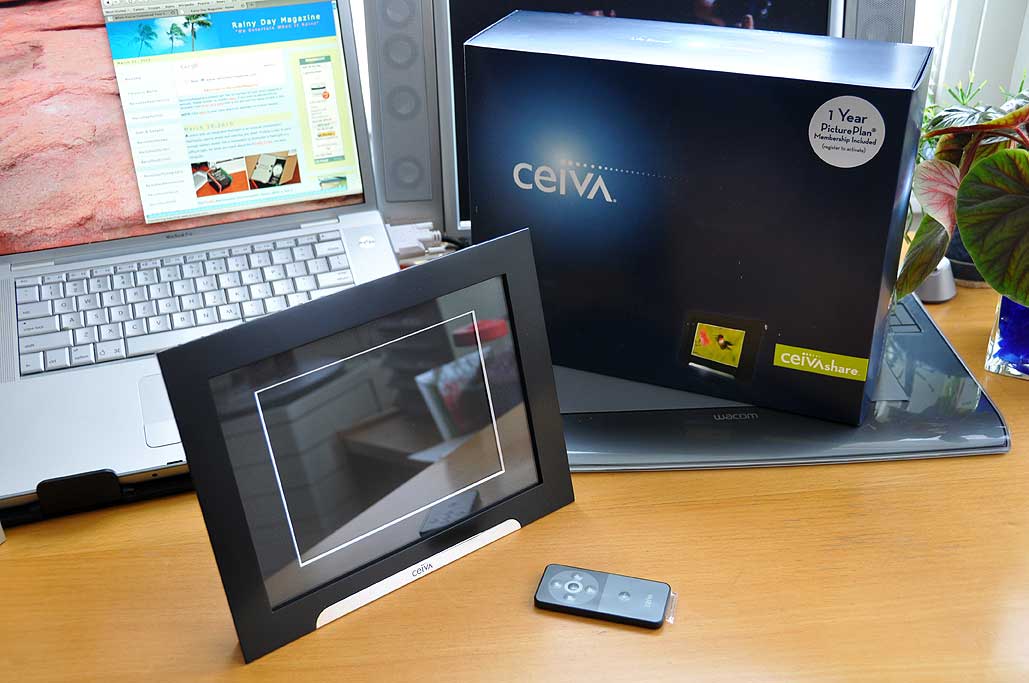
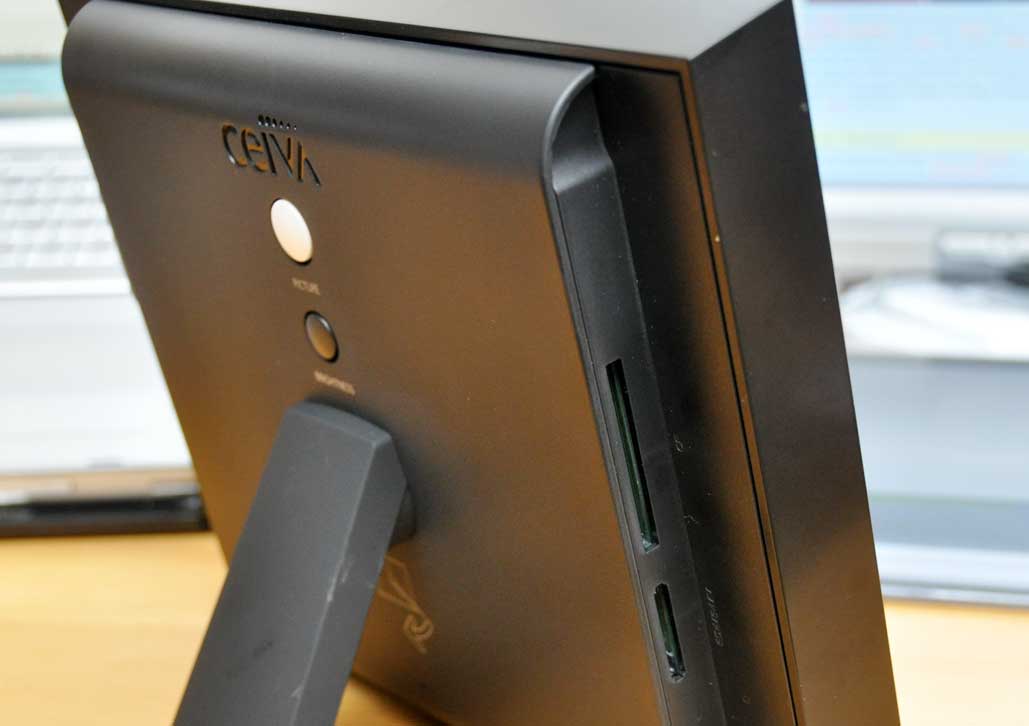
The CeivaShare Digital Photo Frame is 8"x10" overall. It is matted in the same manner as a typical high-end frame. Under the mat is a 4.5"x6.25" (8" diagonal) LCD display. The package also contains a remote, an AC power supply, and various connectors/adapters. The thing that we expected to see but didn't was a software CD. It was not there because no software or drivers are needed.
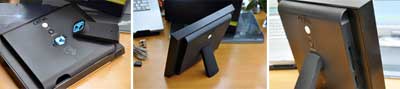
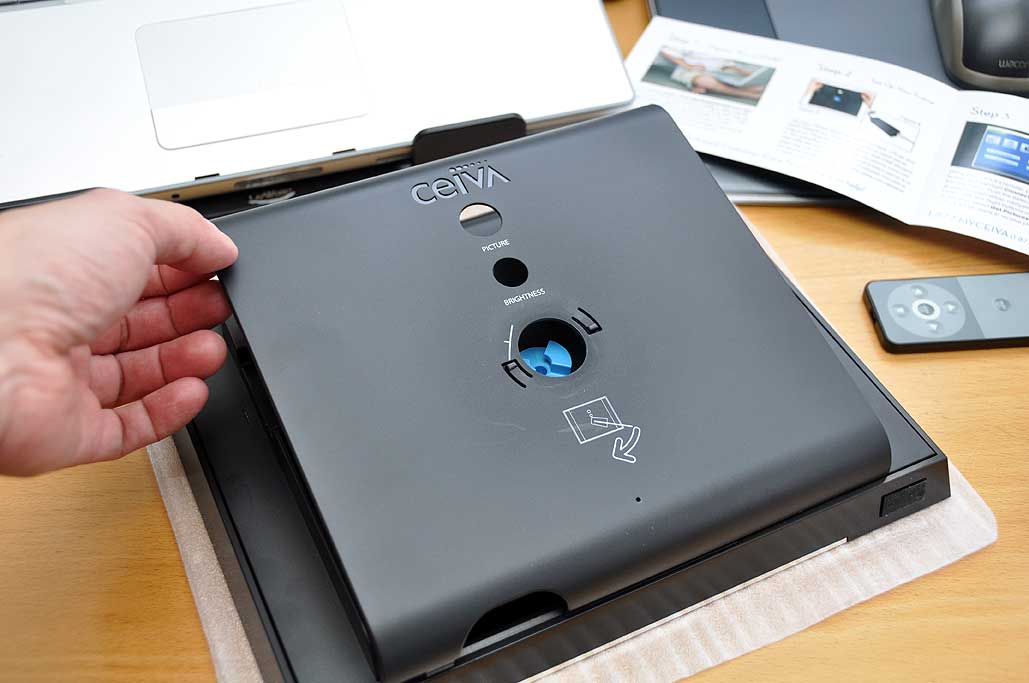
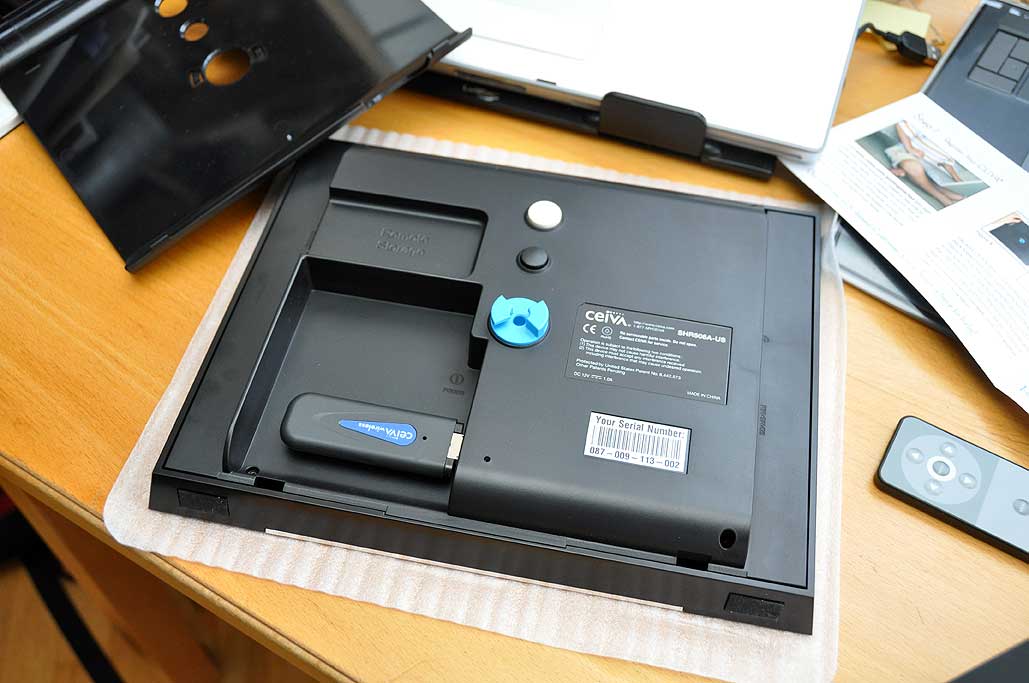
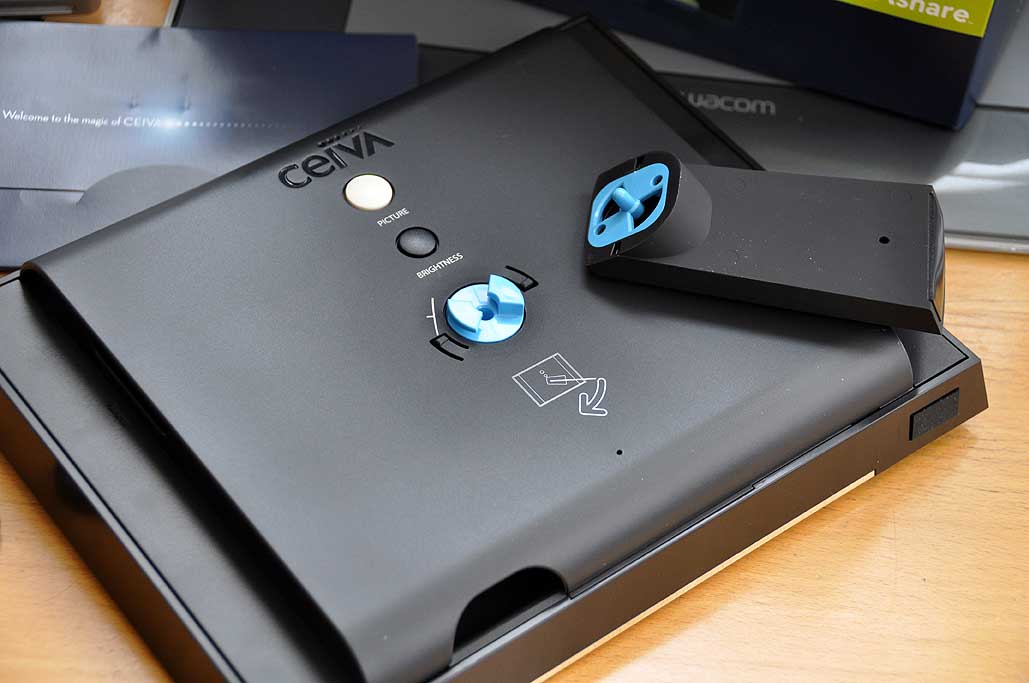
The CeivaShare's design is very clean. Its appearance from the front is like any high-quality photo frame. The controls and the ports are in the back and the sides of the unit. The CF and SD slots are on the left side and the remote holder on the right. Lifting the back coverreveals the AC and USB ports are hidden underneath.
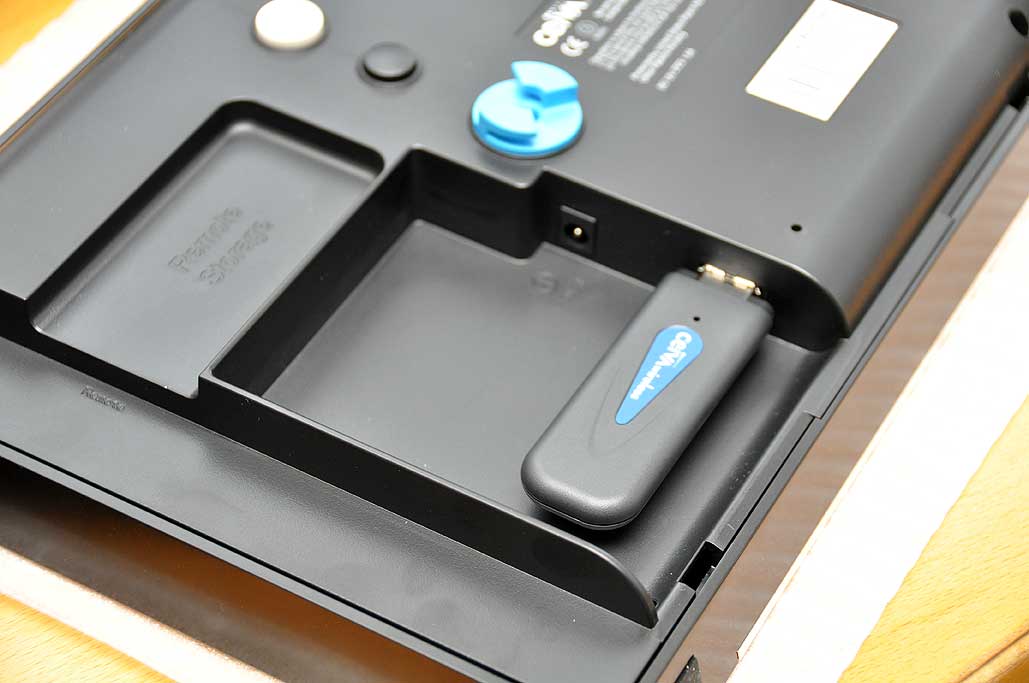
The unit came with the WiFi adapter already installed. For those who don't have WiFi but still have POTS service, the accessories packet includes a phone line modem with a USB connector. There is also a twist on connector for the frame stand in the back of the unit. The stand is not adjustable, but the view angle appears to be well chosen.
We really like the look of this CeivaShare digital frame and are eager to see how the quality of the display compares to that of the Parrot. We are also eager to check out the photo sharing and other capabilities of the Ceiva PicturePlan. [Permalink] -CeivaShare FirstLook
|
| March 10,2010 |
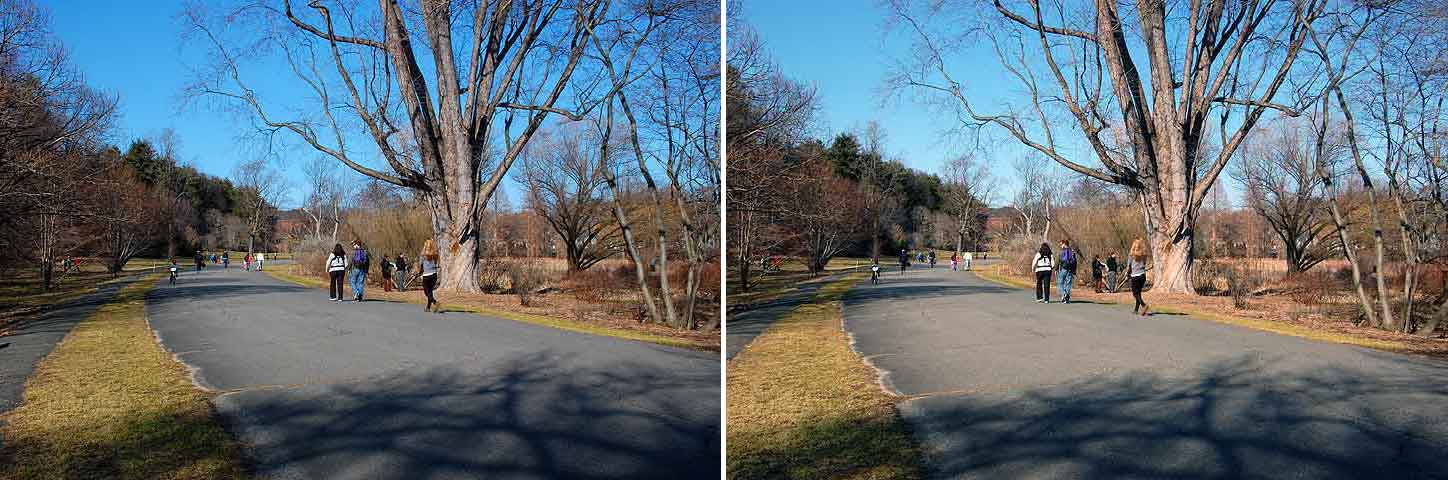
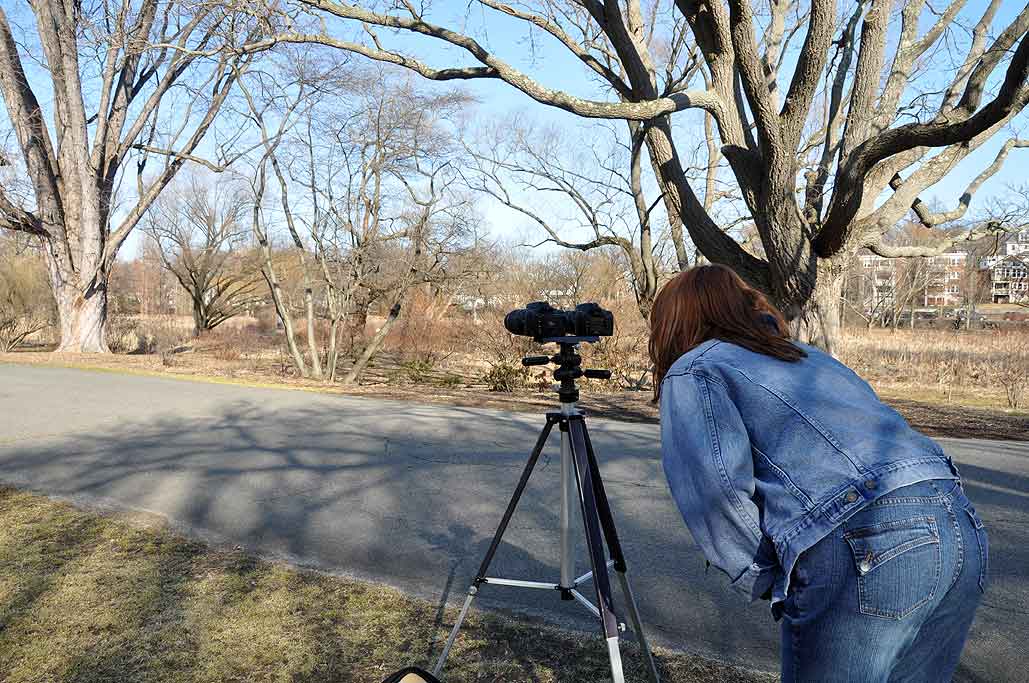
The beautiful weather of the past few days gave us just the excuse we needed to go outside and play with the 3D Nikon rig. We got a few sets of stereo images of folks enjoying the day at the Arnold Arboretum.
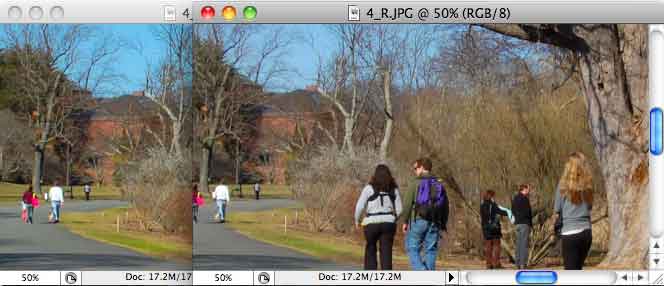
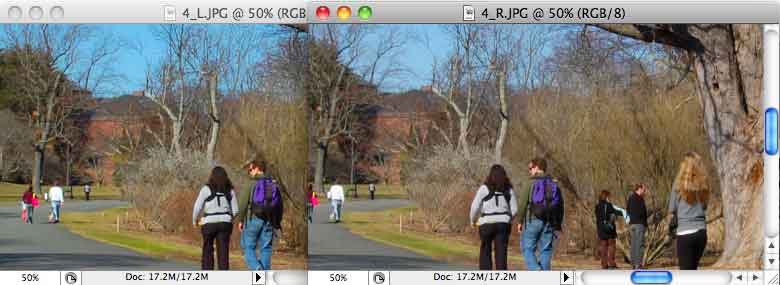
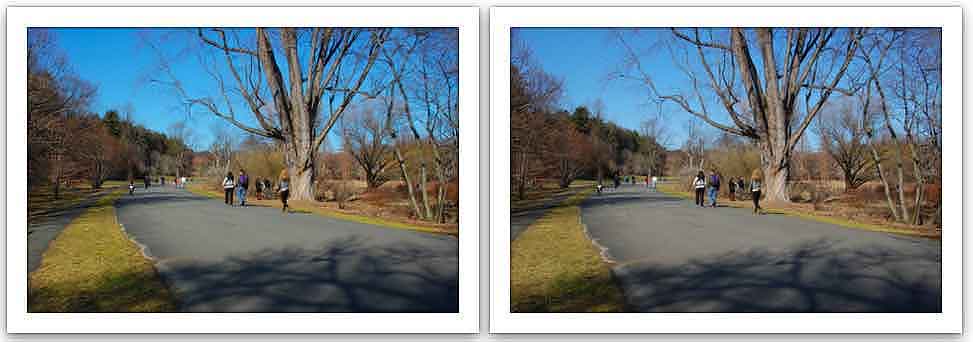
Setting up was easy, and getting the zoom factor to match was not difficult. However, matching the exposure of the two cameras was harder than expected. We didn't think it would be so, but the difference might have been because of the VR vs non-VR 18-55mm lenses on the cameras. At F22, the camera with the VR lens (left) took the shot at 1/30 sec, but the non-VR lens (right) required 1/15 sec. The sharpness was similar enough, but some color differences were clearly visible. Fortunately, biological systems (i.e., us) have evolved a high tolerance for mismatched contrast when it comes to achieving fusion of stereo images.
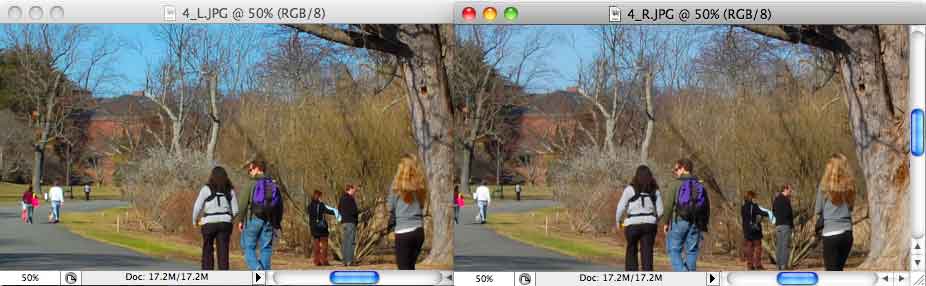
Now that we have some stereo images to play with, we are going to experiment with some techniques for seeing the 3D effect. Presenting a separate image to each eye can be difficult, especially without the aid of specialized glasses/viewer. The brain will try to merge the two images, but only if certain conditions are met. One of our goals is to achieve 3D effect just by looking at them on the computer screen without the use of a viewer.
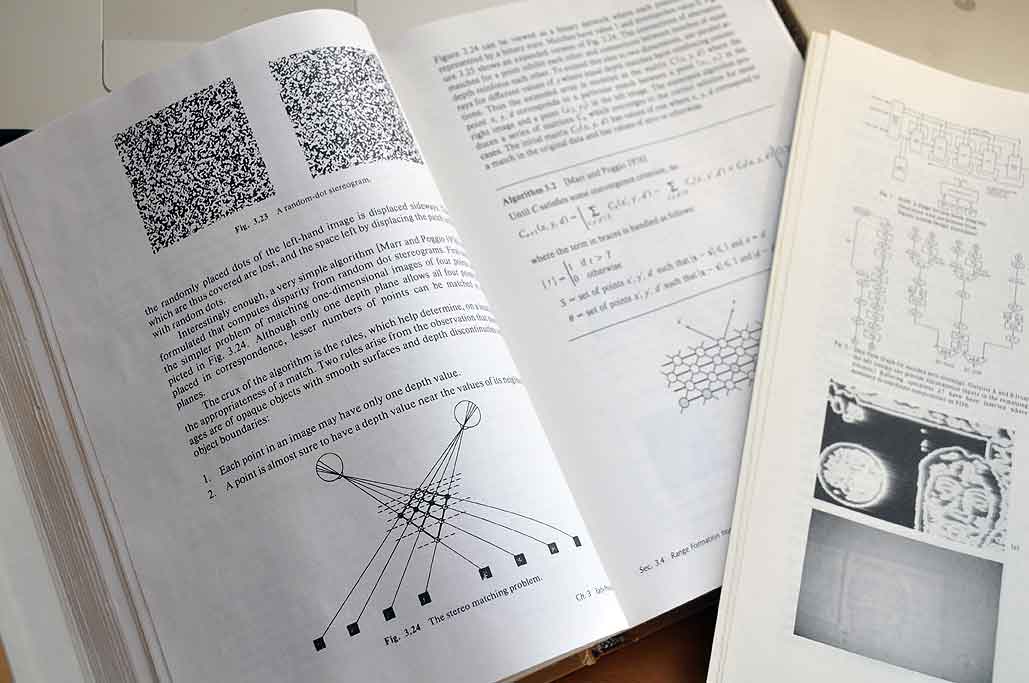
One way to do that is to use the same technique for seeing those "magic eye" images that were popular back in the late 90s. There are many sites on the web devoted to those images. Most of them have a blurb describing how to "see" the 3D effect. The biological computation basis for the technique was well described by Marr and Poggio back in the mid to late 70s.
Our approach is this:
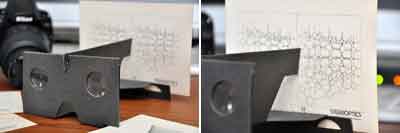
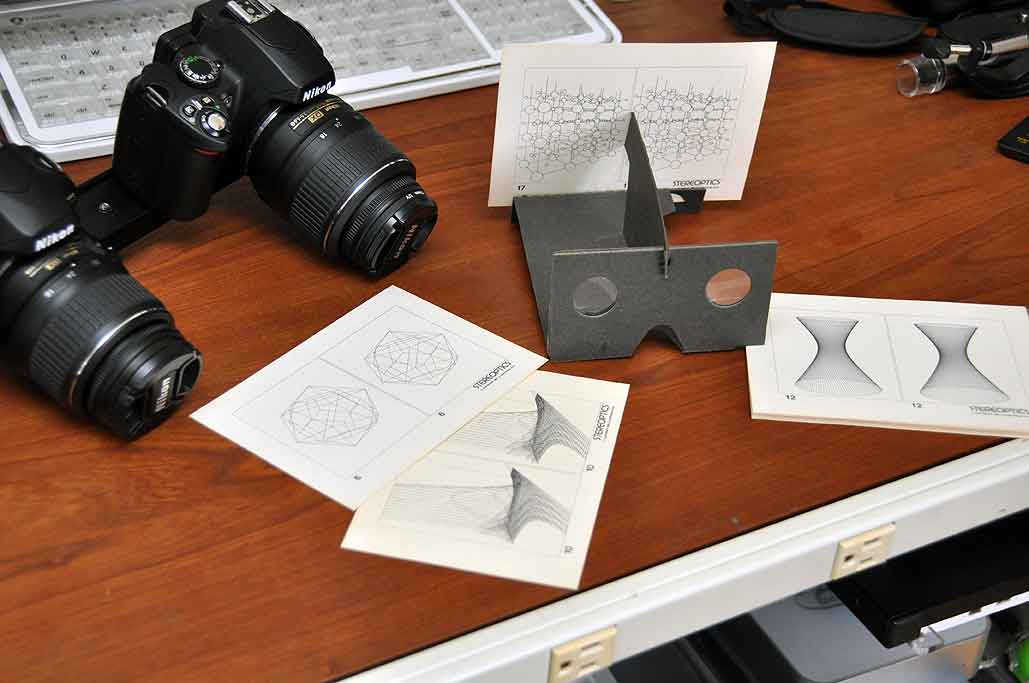
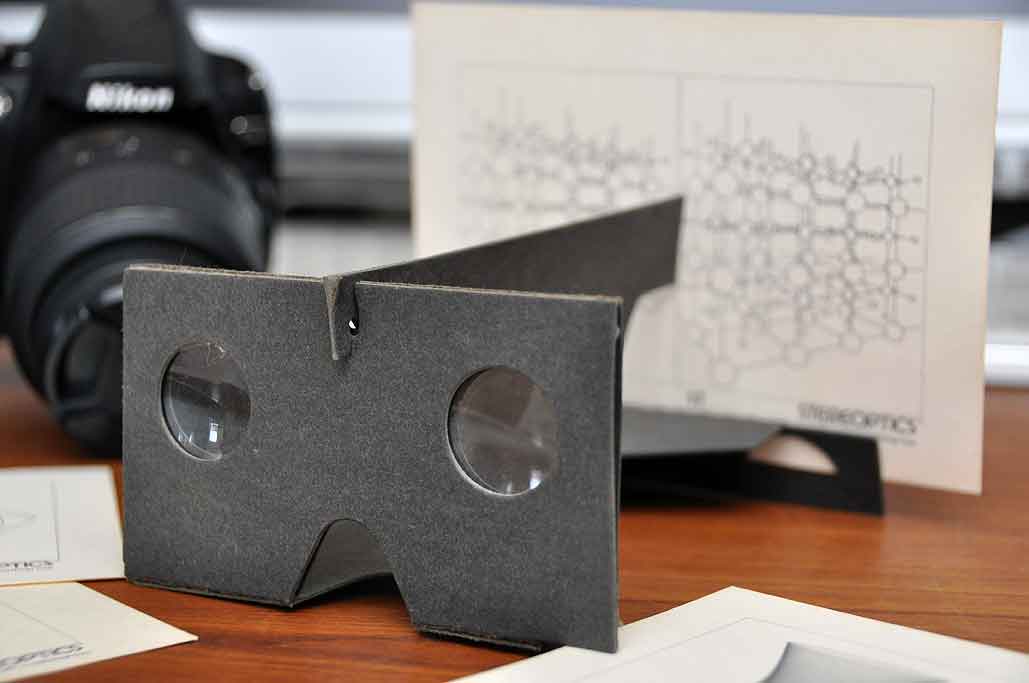
Some of our interns were not able to make the images merge no matter how long they stared at the screen. Fortunately, there are other ways to aid the brain in seeing the 3D effect. One such method is with the use of a stereoscope viewer. It is "old-school" but a well-tested. We will even try making one based on a unit we picked up many years ago.
We acquired this viewer many years ago during a visit to the MIT Tech Museum. It is made out of cardboard and should be perfect for our purposes. We will print out some of the images and see how we can get the 3D effect using this simple unit.
|
| March 9,2010 |
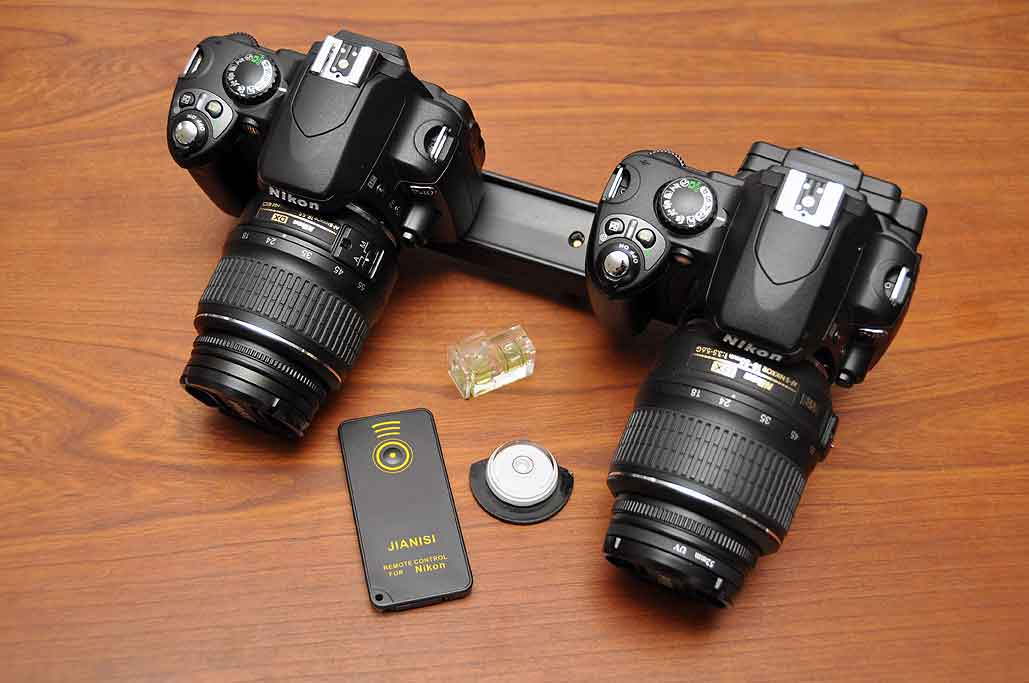
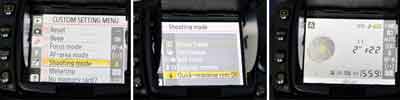
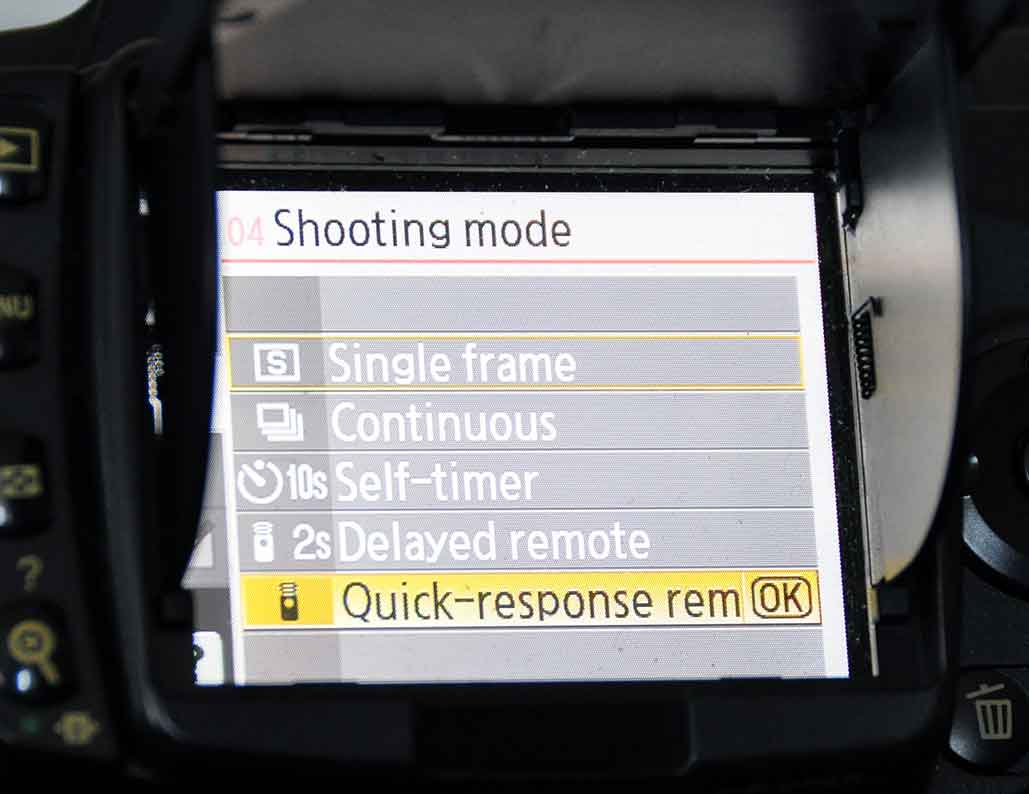
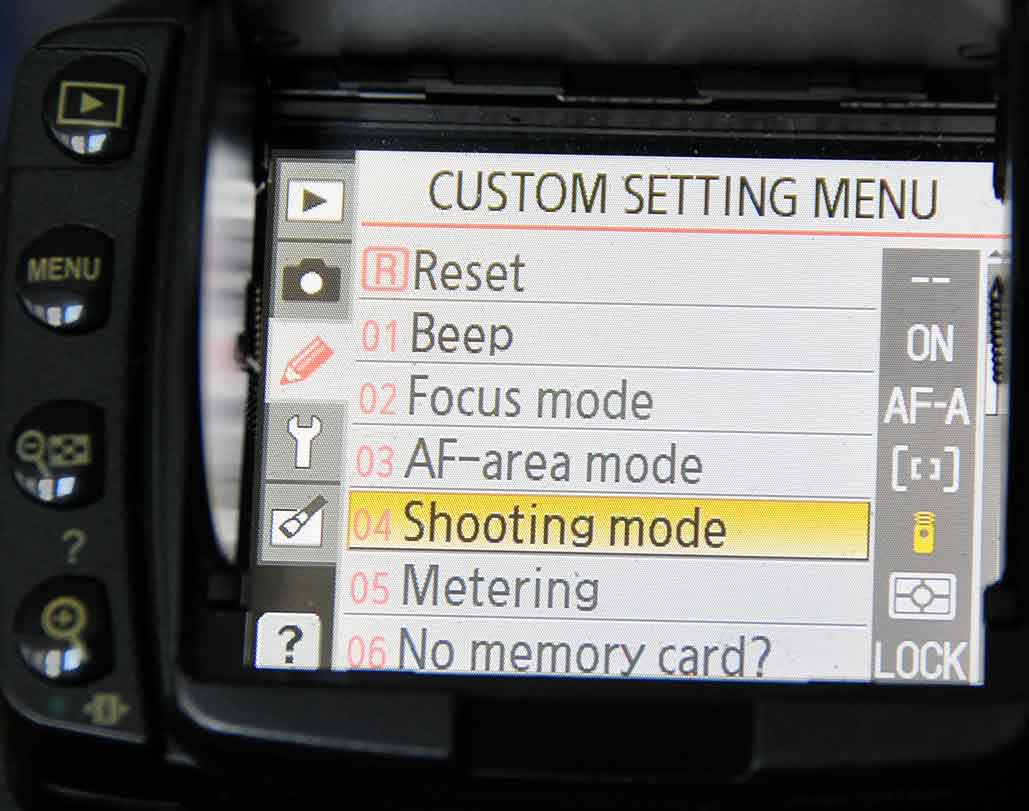
Yesterday's article generated a few interesting questions from readers. Many were wondering how we planned to trigger the two cameras. A few readers suggested elaborate rigs with dual-plungers. We had a much simplier solution: the remote trigger. The D40 has five different shooting modes. The "quick response" remote trigger is the one we are going to use for this application.
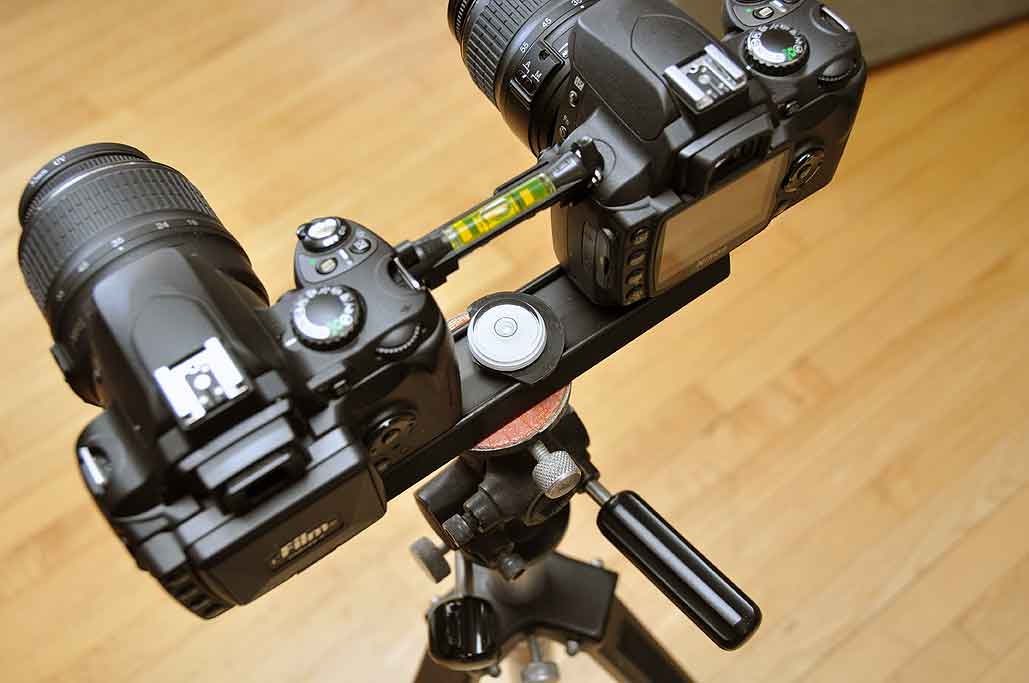
Some were asking how we were going to make sure that everything would be level. We thought about line-levels and bubble levels. In the practice runs, we found that the simple circular bubble was the easiest to use. We planned to bring both with us to see how they performed out in the field.
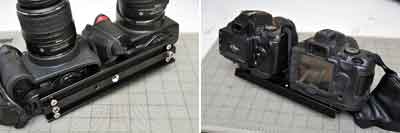
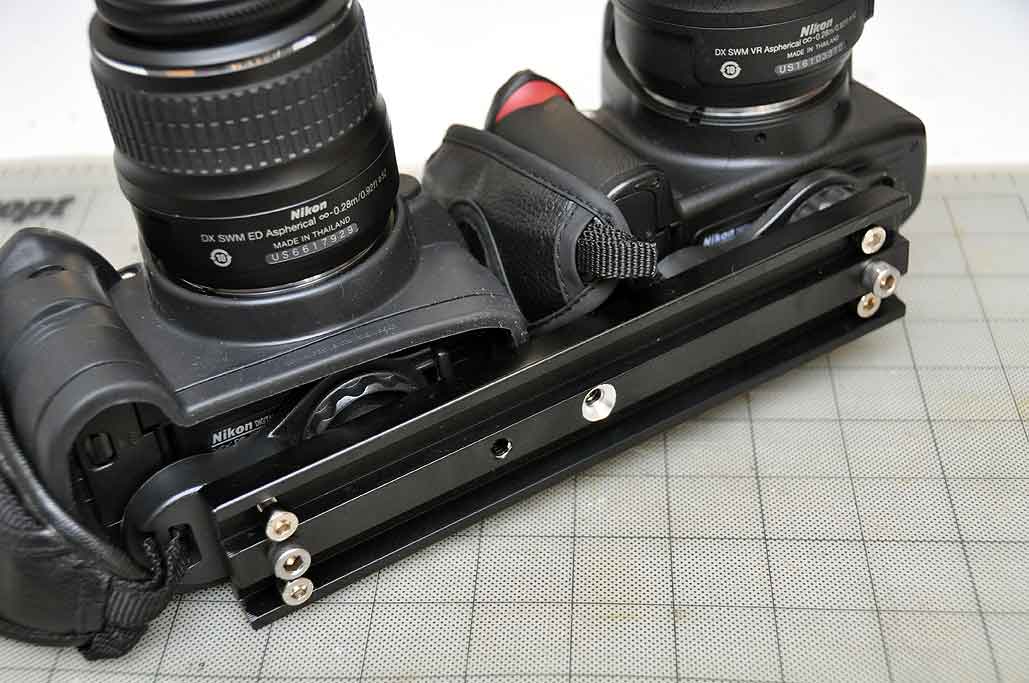
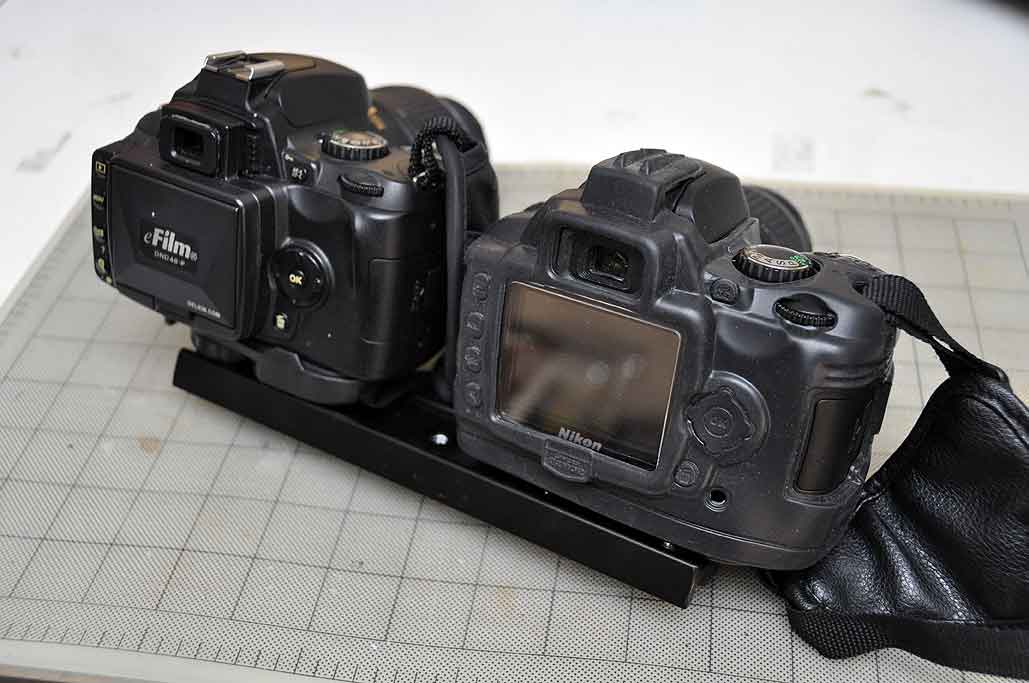
In reviewing the 3-D setup, our resident expert indicated that the configuration was problematic because one of the D40 cameras had on the Camera Armor and a different grip. The protective skin and the grip raised the camera off the mount a little bit differently than the other D40. The difference in height would create a slight offset which would throw off the pairing.
We used aperture-priority and had the camera set at F22 for the deepest depth-of-field possible. This is important because while the eye can only focus on a specific point at any given time, it will want to roam around the entire stereo image. The more out of focus the images are, the greater the problems the brain will have in trying to merge them (result:= headaches).
Now that we had acquired these high resolution image pairs, it was time to see if we could use them to create the 3-D effect. The basic principle behind seeing depth is to present a slightly different image to each eye. The "difference" is used by the brain to compute the depth information.
One of our editors said it is possible to see stereoscopic images on the computer screen without the use of specialized viewers. He said it was the same technique used to view those random-dot stereograms. It takes a little practice to get the technique down, but once mastered, will free the user from having to wear those silly glasses. The only side-effect is a headache if the user can't make the images merge properly...a small price to pay for this little mind-hack! We'll show you how in the next part of this series. [Permalink] -3D Nikon Rig FirstUse
|
| March 8,2010 |
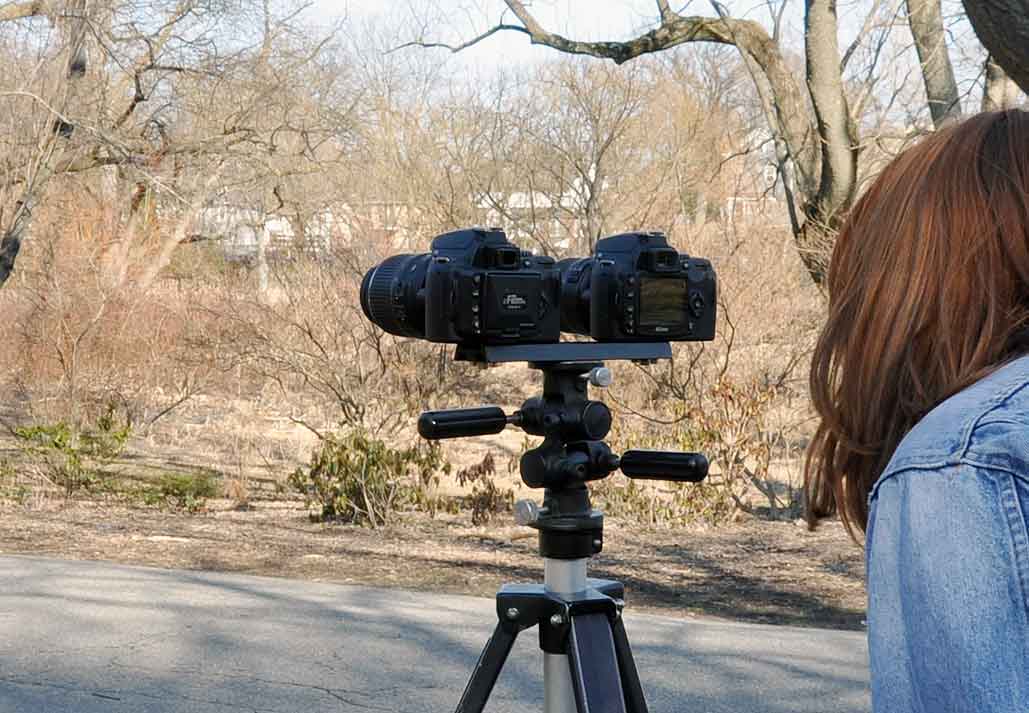
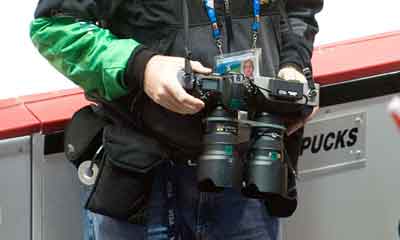
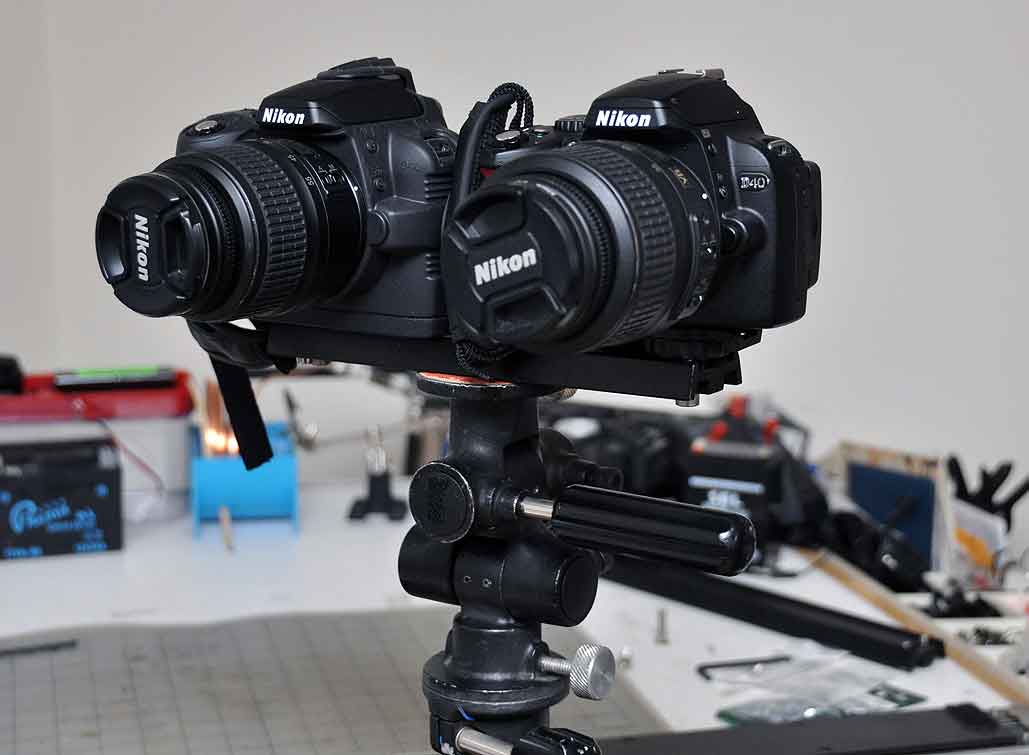
The photo below was taken by Russ Beinder during the 2010 Winter Olympics of Sports Illustrated photographer David Klutho's stereoscopic Nikon D700. Judging by the inverted configuration, the camera on the right is the master and the one on the left is the slave. The cables and small black box on the bottom of the slave camera indicates a trigger-coupling between the two cameras. The two lenses appear to be bound by some kind of band. Its function is unclear. In any case, the rig looked pretty sweet.
One of our editors has an interest in stereoscopic imaging. He doesn't talk about it much, but rumor has it that he was one of the few who programmed a machine called the PIPE. The PIPE was one of two in the world, hand-built and housed in a "room without a window" for an unnamed agency in D.C. He is a little twitchy, so we don't ask him too many questions or sneak up on him...ever.
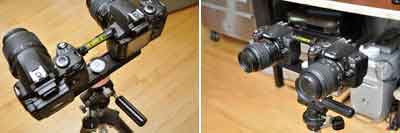
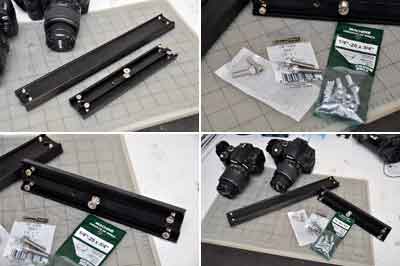
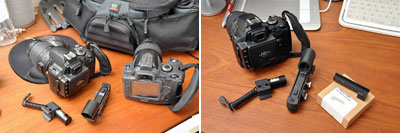
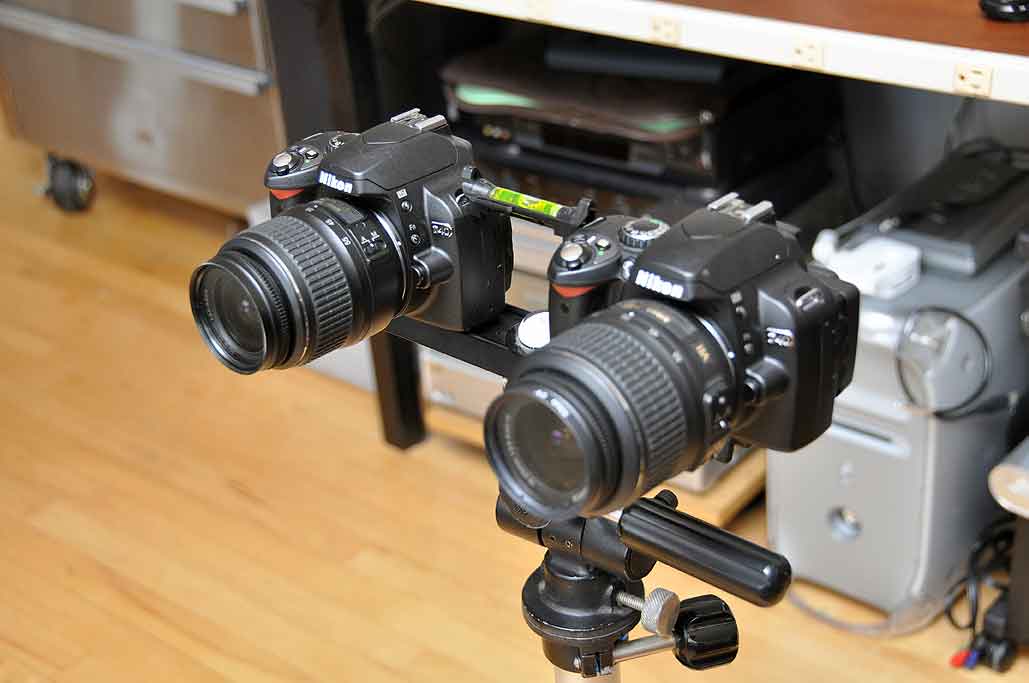
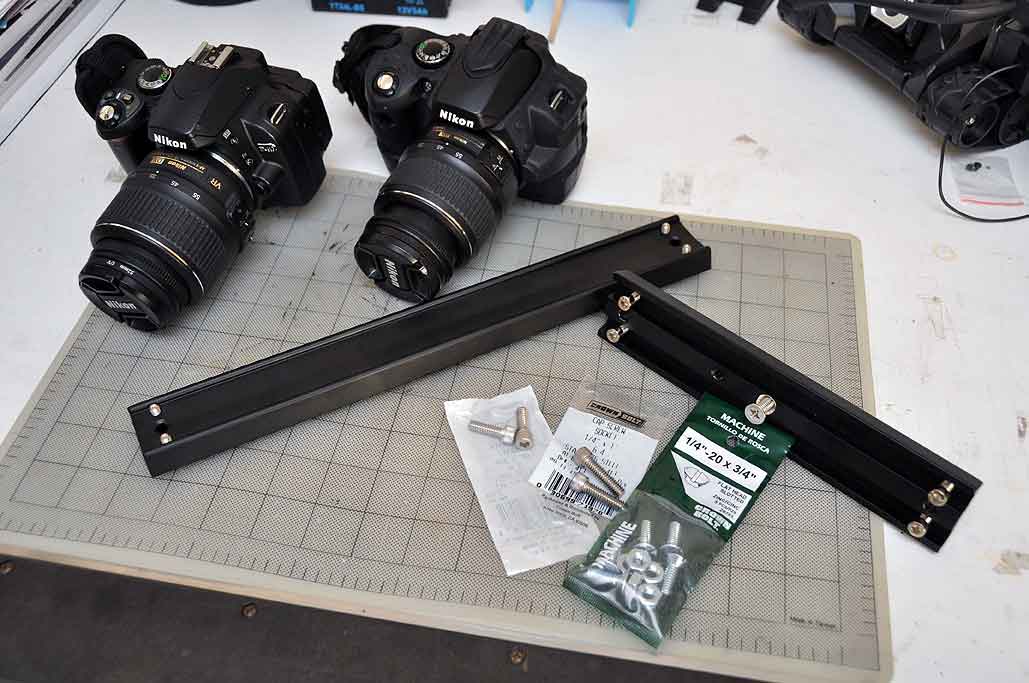
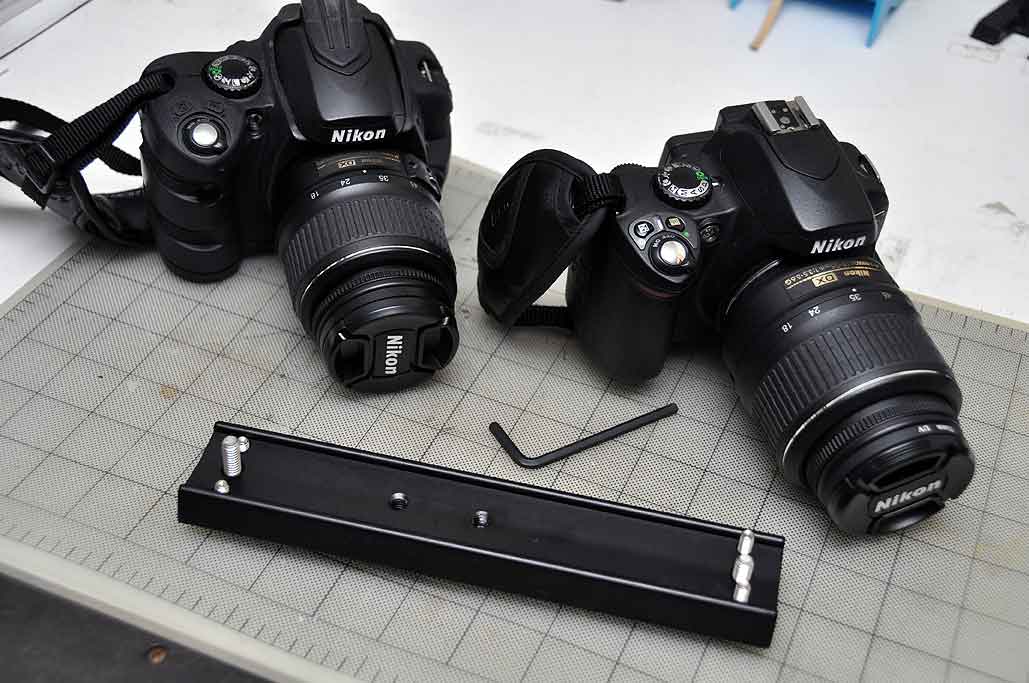
Anyway, he thought it should be possible to rig up something similar to Photographer Dave's with gear we already had in house: two Nikon D40s, mounting rails, screws. We obviously would not have any of the specialized triggering of Dave's rig, but we still would have enough to can play and experiment.
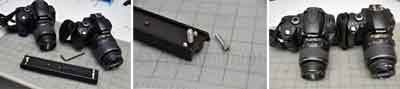
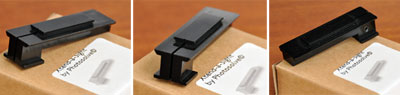
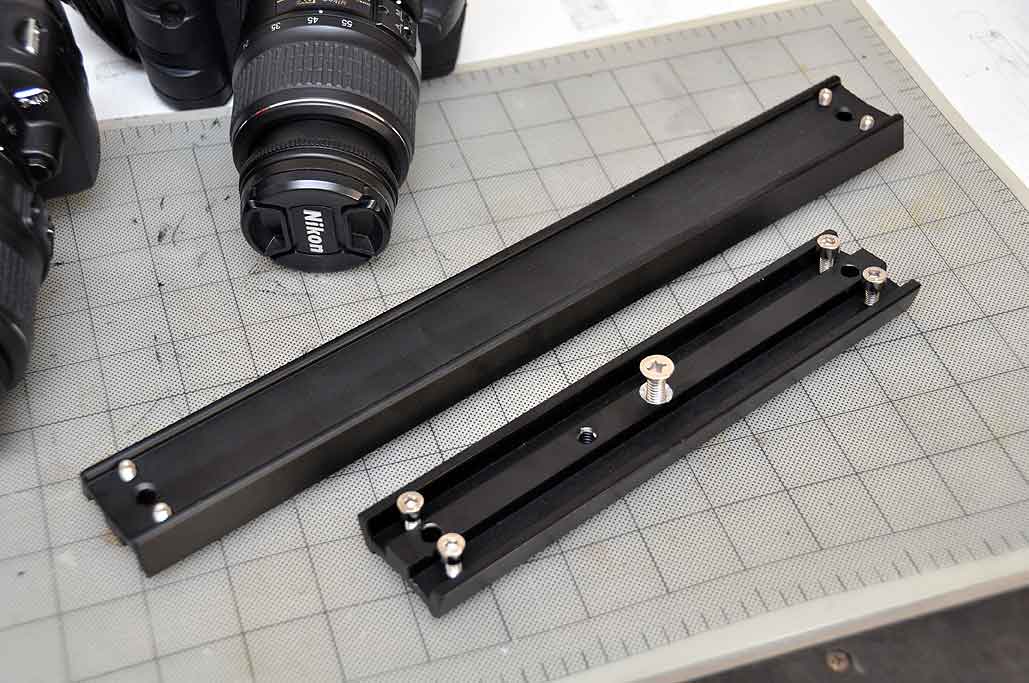
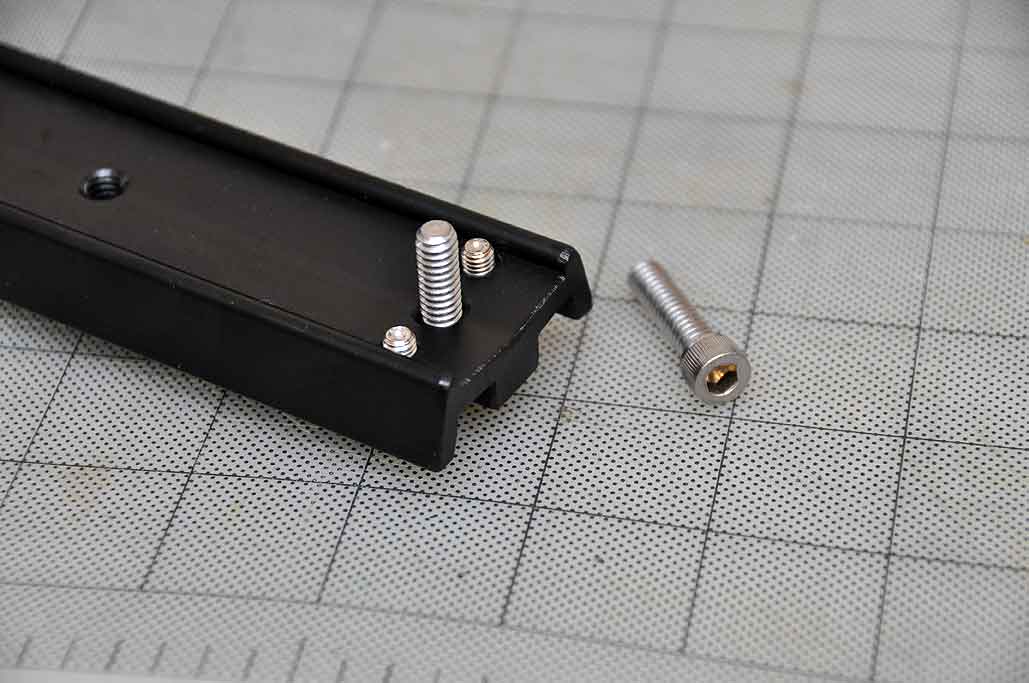
The telescope rail mount is a good choice for this project. We could have made one from a strip of aluminium. However, this one was already pre-drilled, threaded, and cost less than $15 from Orion. It was also stiff, nicely anodized, and just the right size.
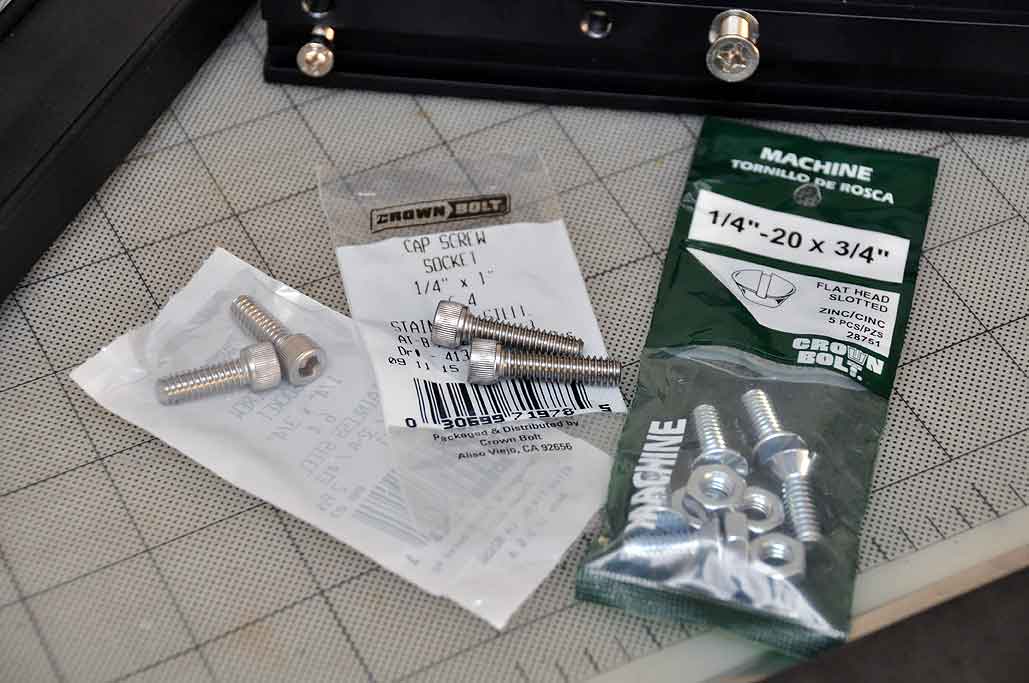
We picked up some 1/4" steel screws for attaching the cameras to the rail. We weren't certan what length screws we needed so we got both the 3/4" and the 1". Because of the difference in the grips we had on the cameras, the 3/4" worked better with one and the 1" worked better with the other.
OK. We found we could set up a rig, but how to synchronize everything? We don't know squat about stereo photography, but how hard can it be... really? Well, I think we are about to find out. [Permalink] -3D Nikon Rig
|
| January 26,2010 |
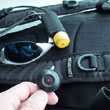
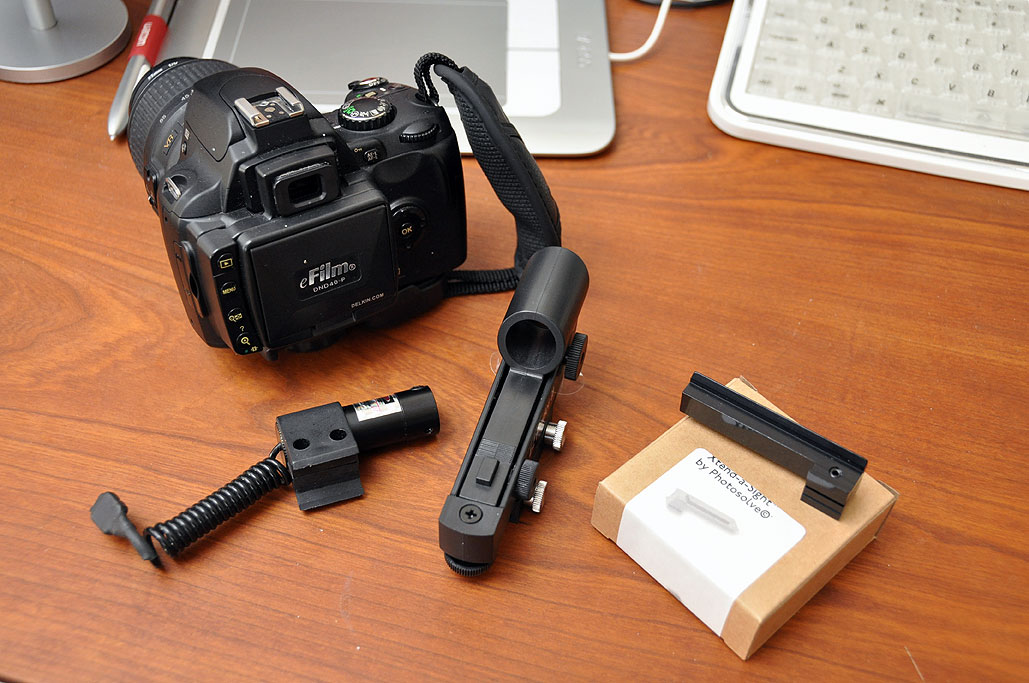
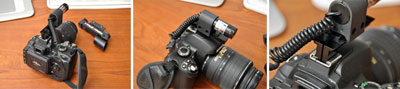
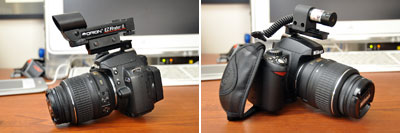
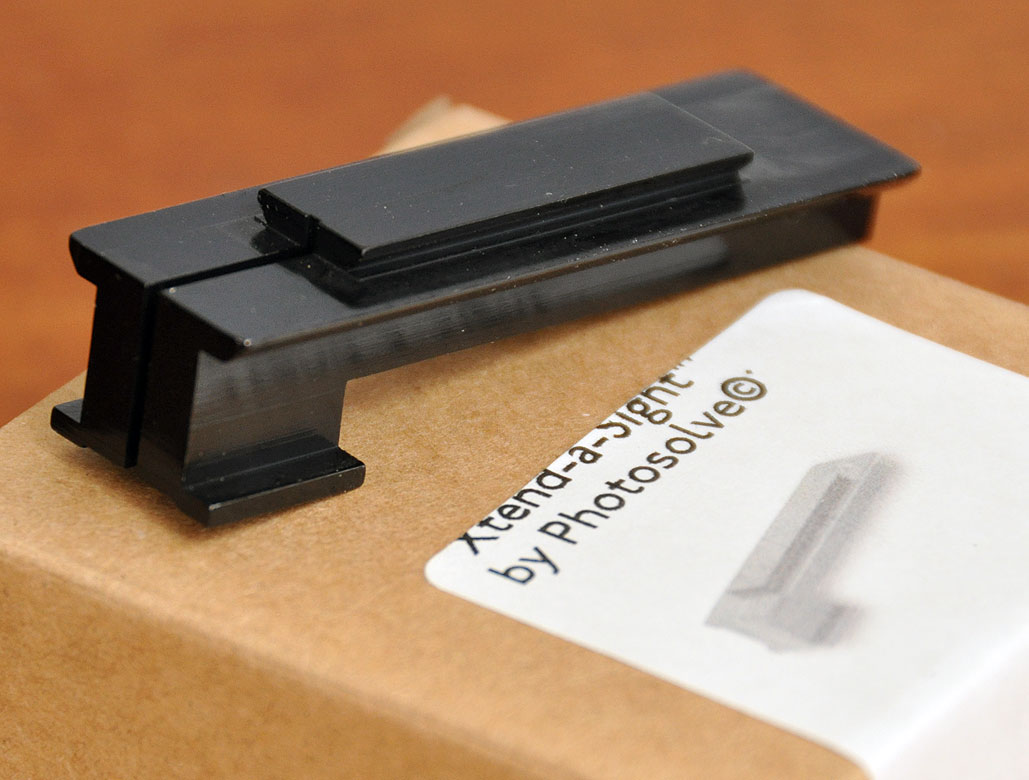
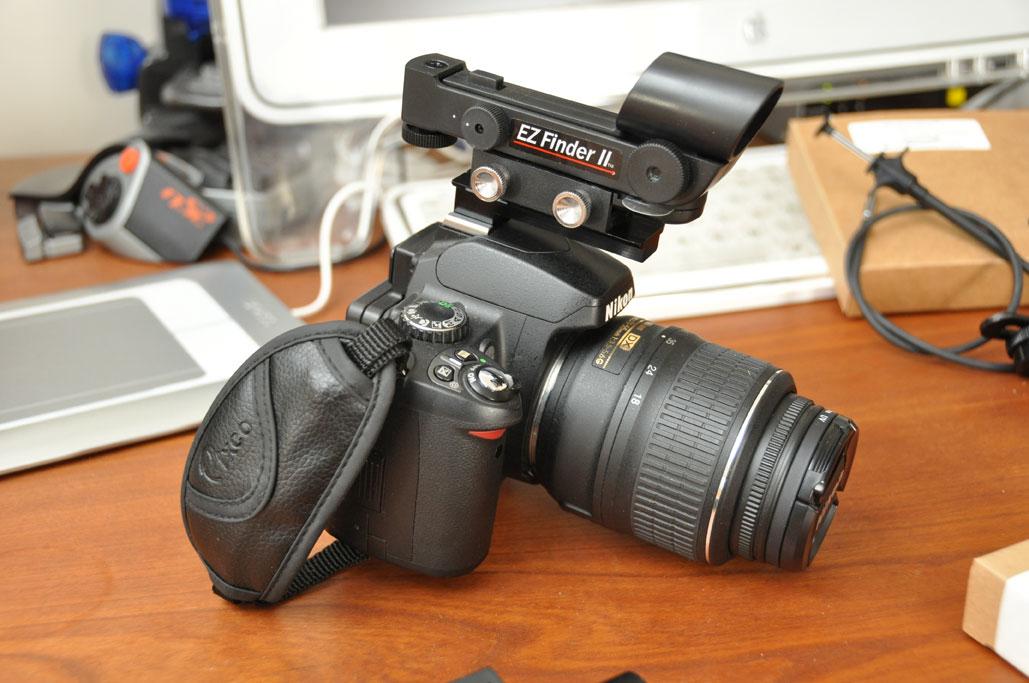
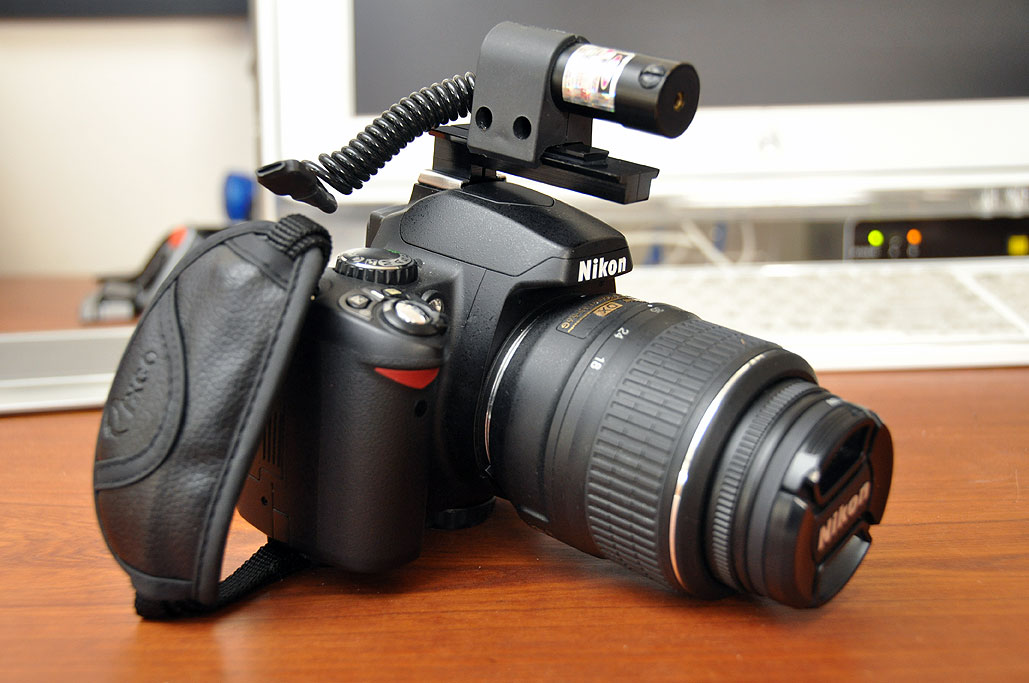
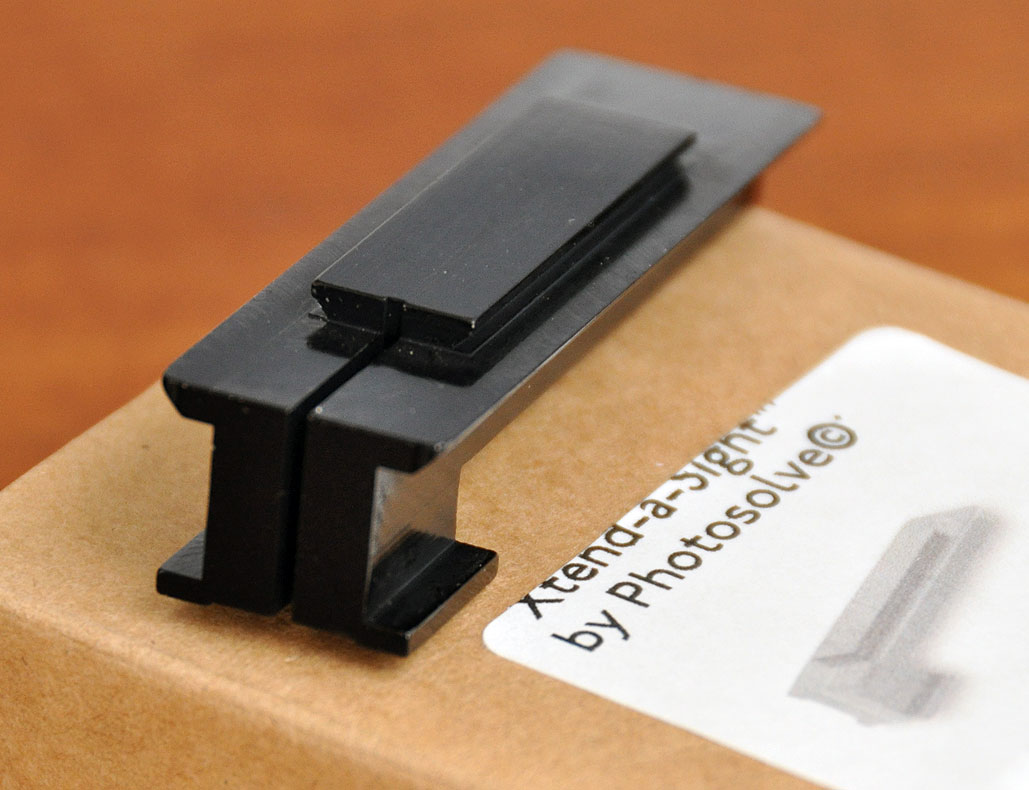
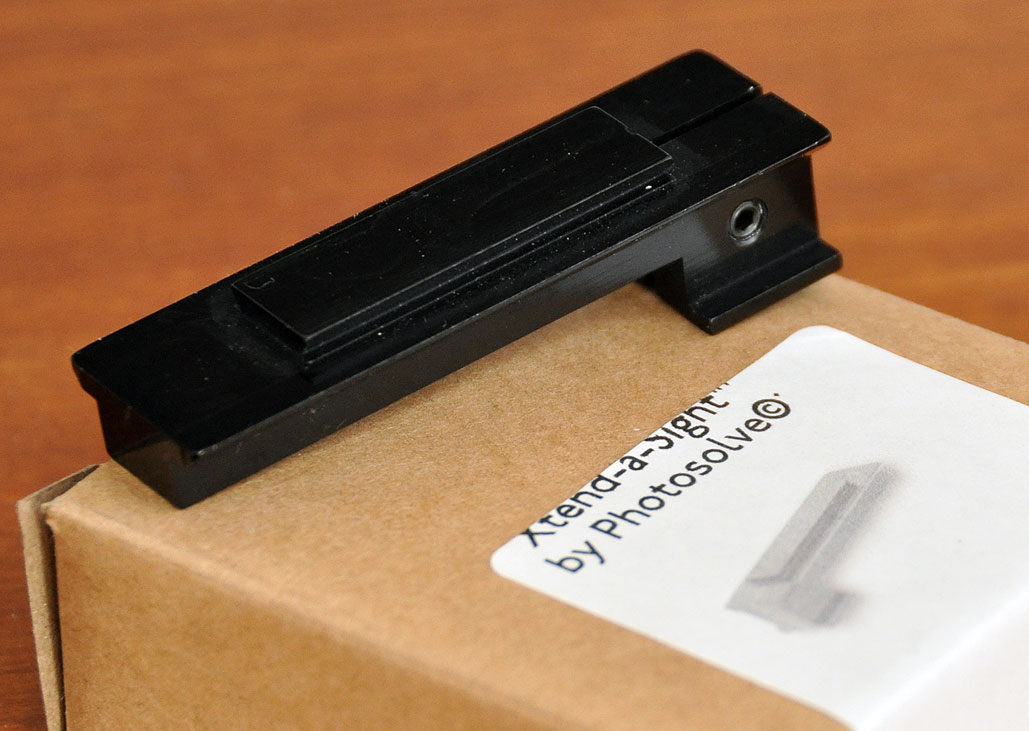
The Xtend-a-Sight™ is an adapter that slides into the hot shoe of a camera enabling the attachment of red dot sights. Those sights are mostly used by hunters to track moving targets while keeping both eyes open. We have red dot sights on our telescopes, but as we are not hunters, it never occurred to us that it would be helpful to mount such a sight on a camera. However, once it was pointed out to us, we could appreciate the utility of such a pairing!
The adapter is milled out of aluminum and has a black anodized finish. There is a split at the end which fits into the hot shoe. A small hole has been tapped in the split end and fitted with a headless screw. This screw can be used to wedge open the split to solidly affix the adapter in the hot shoe. It would make sense to do that if attaching an expensive sight.
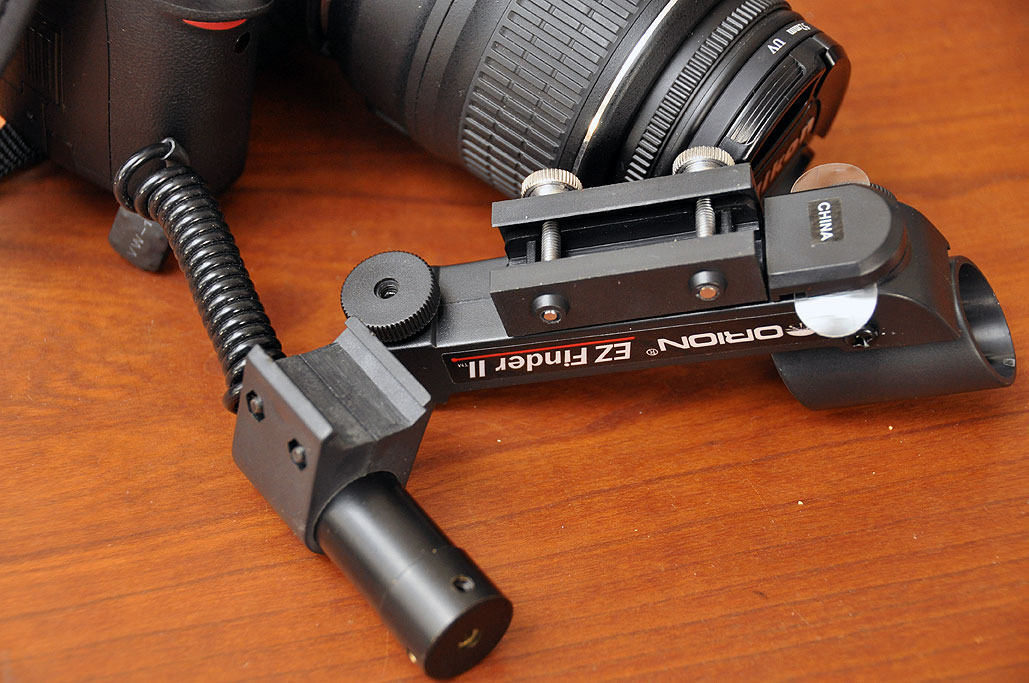
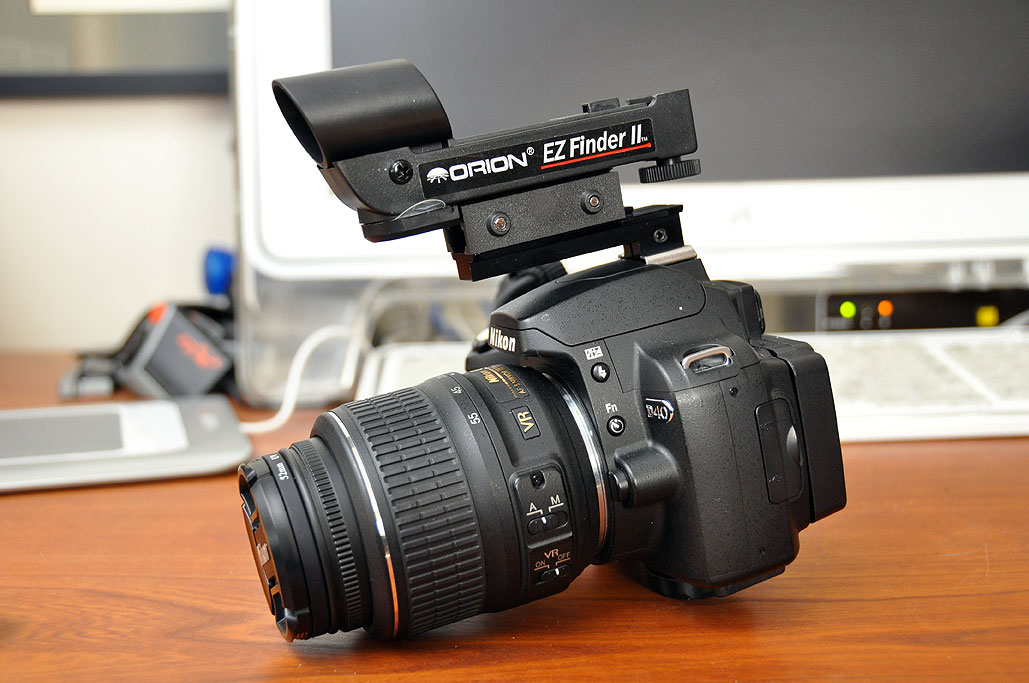
The adapter accommodates 3/8" and 7/8" standard Weaver mount found on most sights. These sights range in quality and price from basic models at around $10
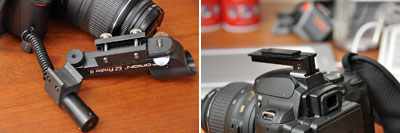
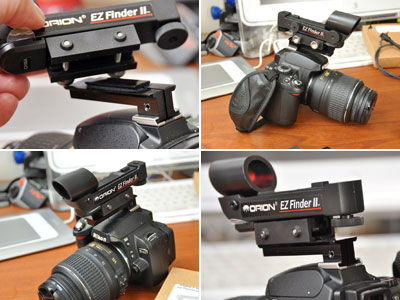
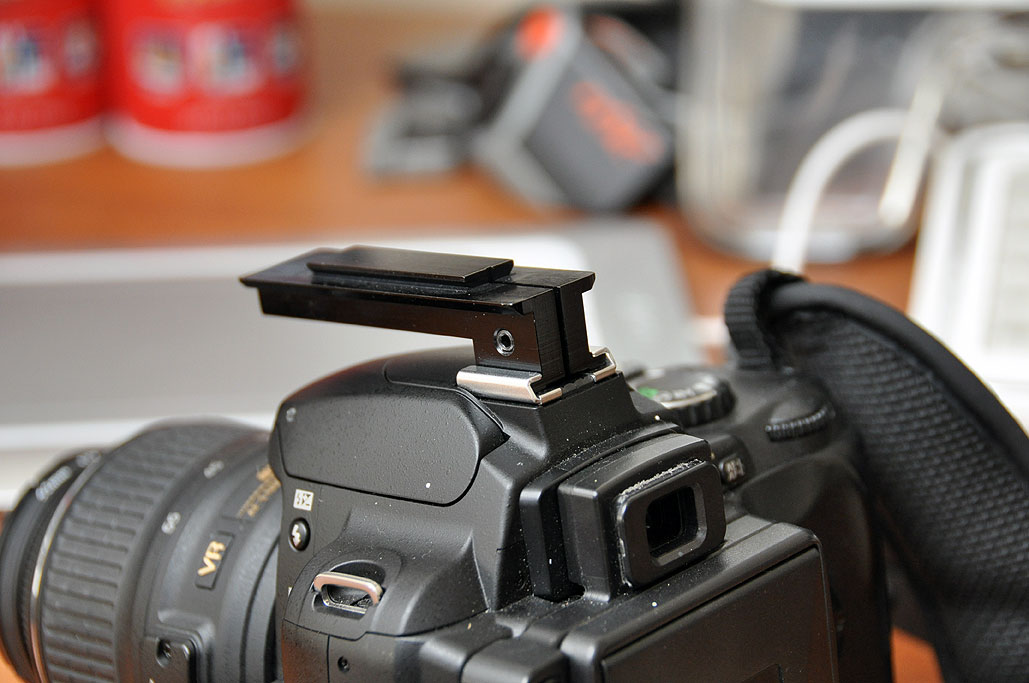
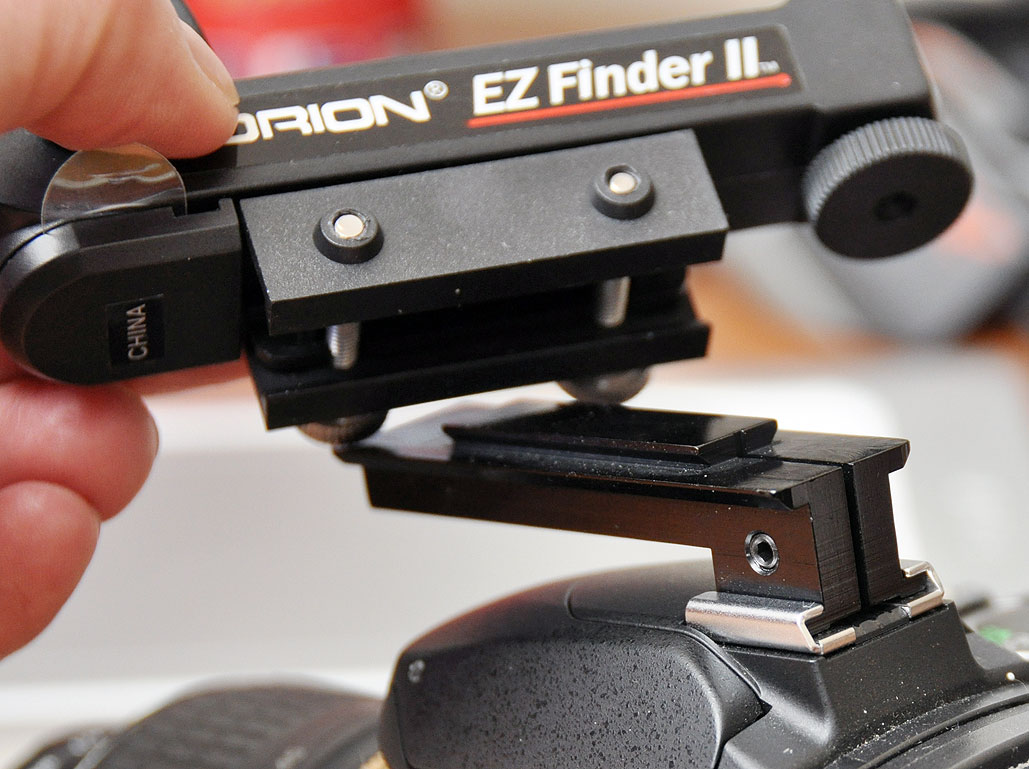
We have shown the adapter inserted with the overhang on top of the pop-up flash of the Nikon D40. However, the adapter could easily have been inserted the other way such that it would not have interfered with the flash. The red dot sight slides into the smaller rail and is fixed into place by tightening the two screws on the side of the finder mount.
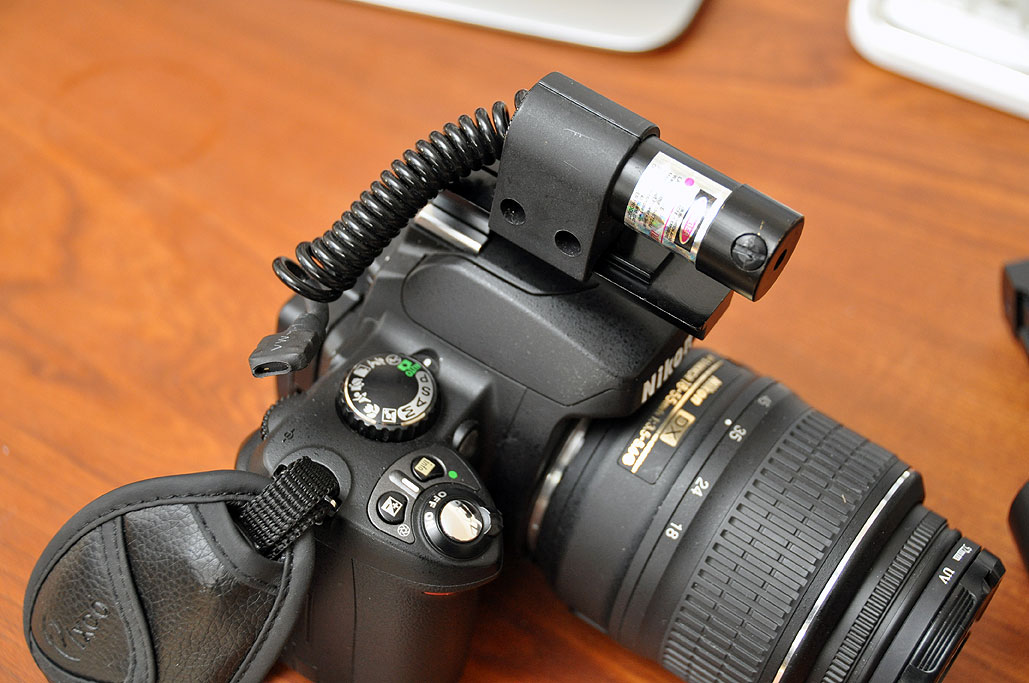
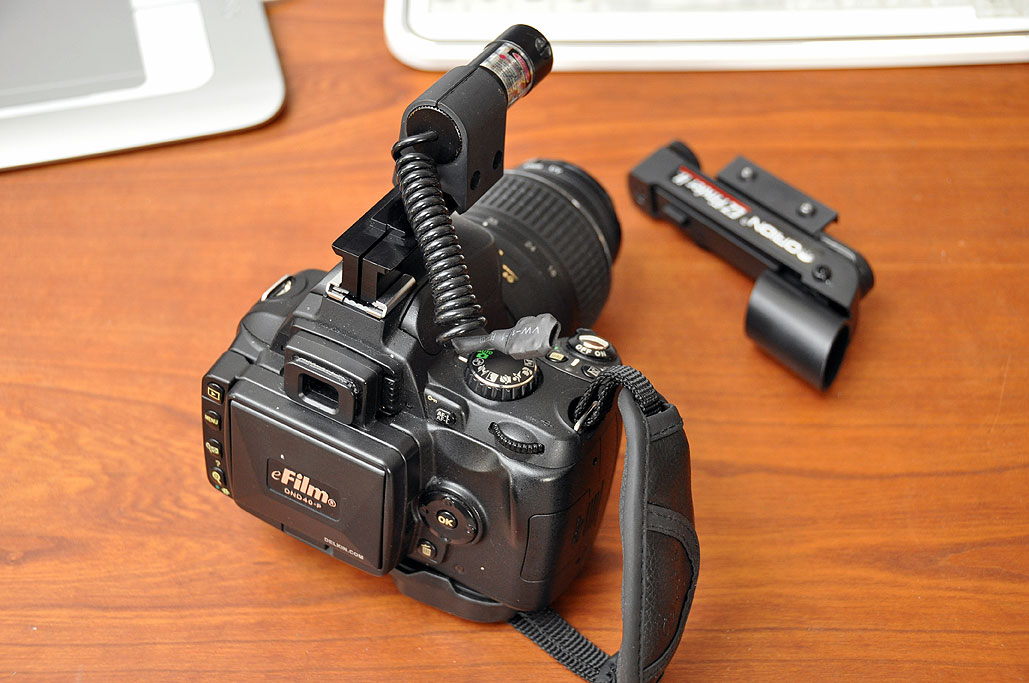
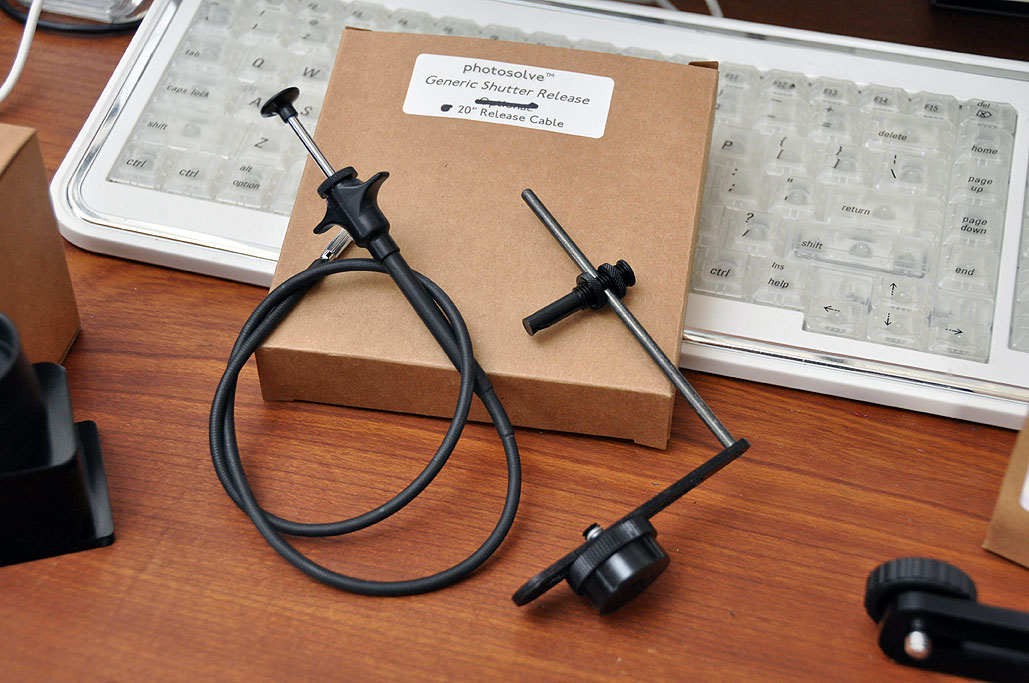
The laser sight attaches pretty much in the same way except it has a wider mount, so it sits on the larger part of the Xtend-a-sight adapter. To activate the laser, a contact switch must be pressed. The switch would probably be easier to trigger if it was somehow attached to the body of the camera. We'll fiddle with that to make it easier to operate with one hand.
We are not too certain of how we'll use a laser sight on a DSLR, but we think it will come in handy for low light or over-the-head free shooting situations. The only way to know is to take it out into the field and give it a try.
In our FirstUse report, we'll try using the two sights with different lenes and show some examples of action shots taken with and without the assistance of the red-dot and laser finders. [Permalink] -PhotoSolve XTendASight FirstLook
|
| January 25,2010 |
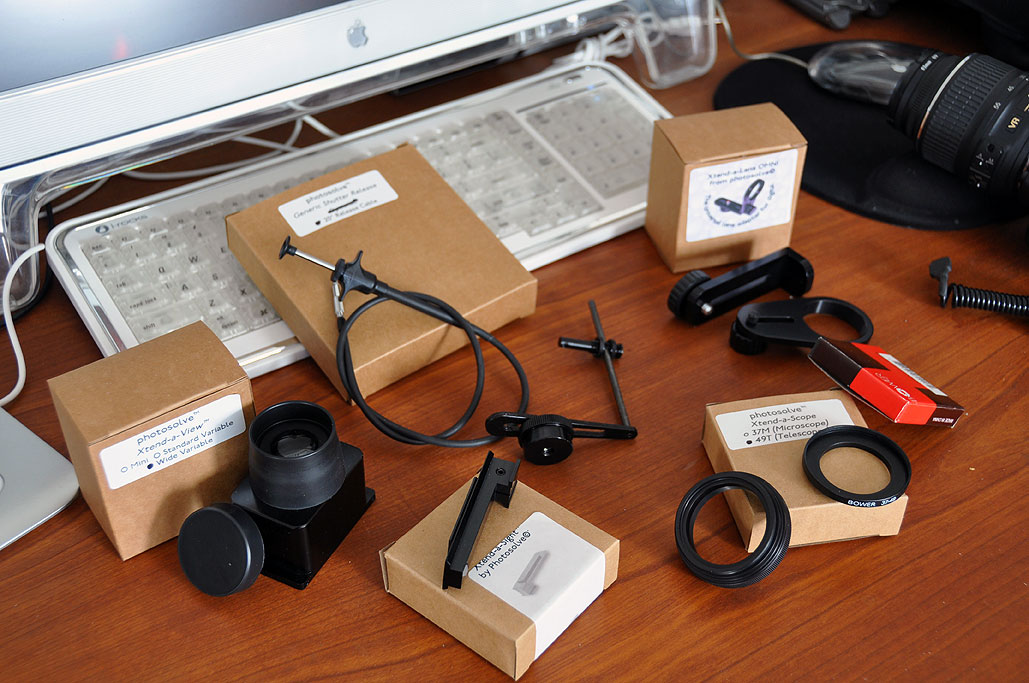
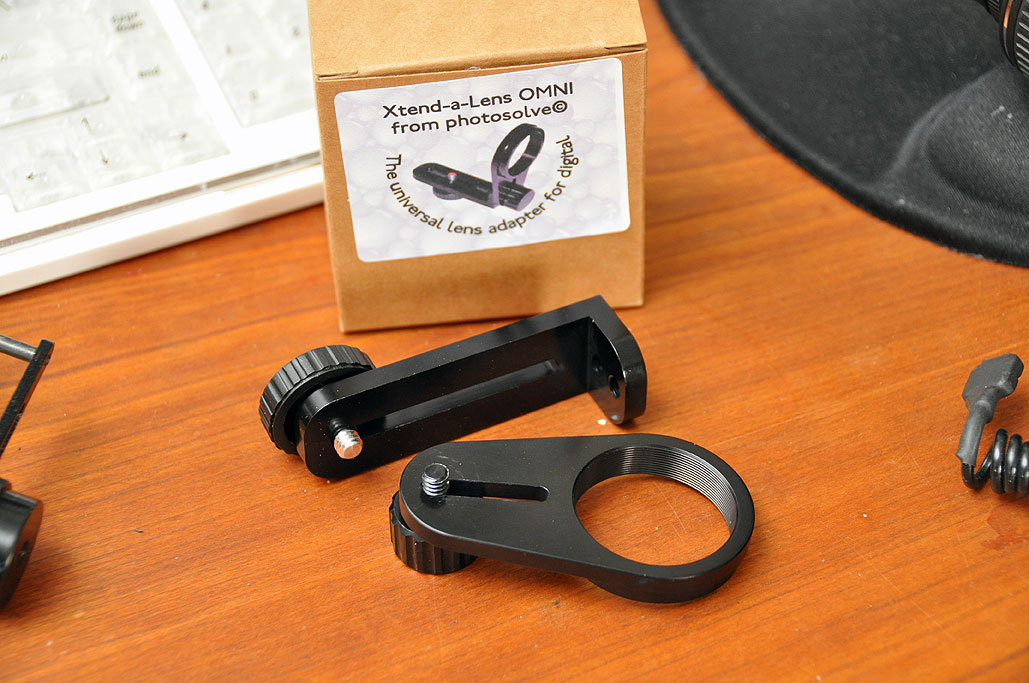
We are a little jaded when it comes to photo accessories. Don't get us wrong, we love the idea of them, we just don't come across many that we like. Most are gimicky, don't really do what they claim, and/or are cheaply constructed. The well-made ones are either too expensive or camera specific. So when we come across ones which do what they claim, are well made, and reasonably priced, we feel an obligation to spread the word.
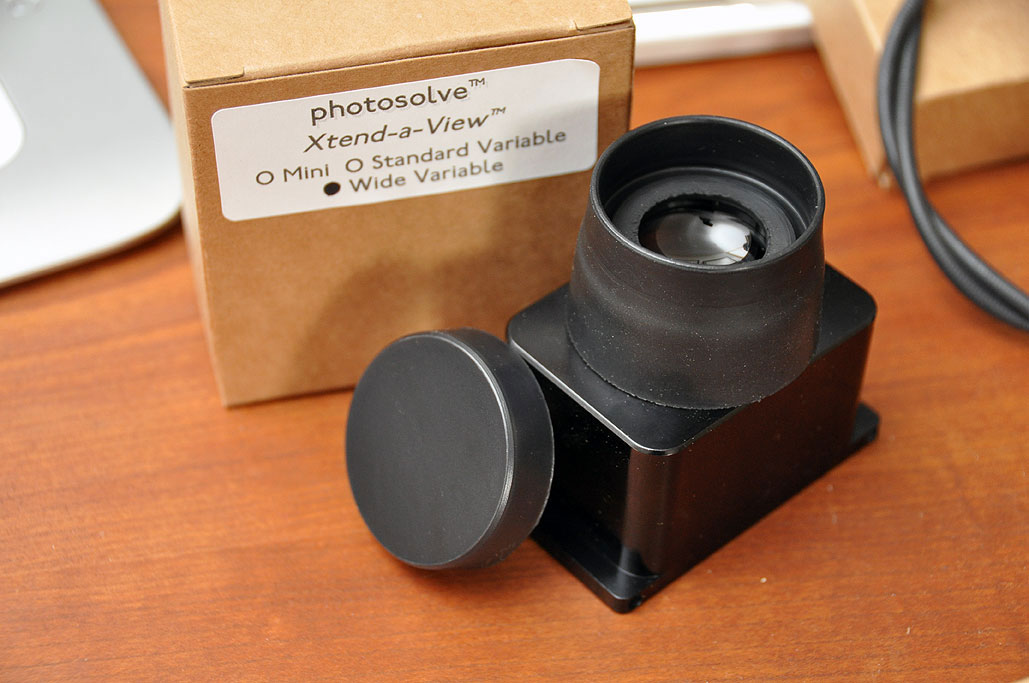
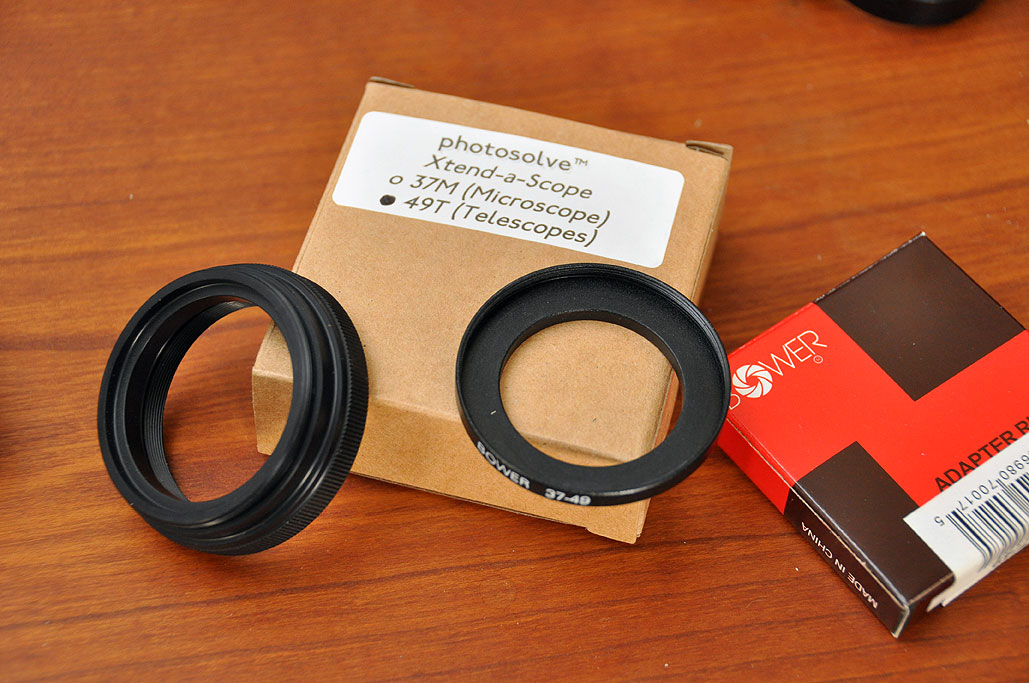
The above collection of digital camera accessories are from a company called PhotoSolve. We learned about them from one of our readers...thanks Jason! Jason told us about an interesting adapter which enabled him to mount a Red Dot sight (typically found attached to rifles and pistols, but in our case...a telescope) to the flash shoe of our camera. This allows one to track moving objects much more accurately than the LCD or the viewfinder.
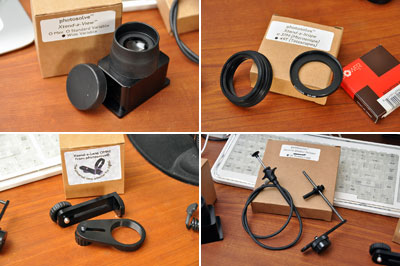
Along with the Xtend-a-Sight™ red-dot sight mounting adapter, we found a few other interesting items (Xtend-a-View, Xtend-a-scope, Xtend-a-lens, etc..) for DSLR and point-n-shoot cameras. When we first looked at the accessories online, we assumed they would be made of plastic, but they are actually machined out of aluminum. There is nothing wrong with plastic, but it does not have the same durability as aluminium.
Each item was designed to solve a specific problem. We will look at all the accessories, but as this adventure started with the Xtend-a-Sight™, we will take a look at it first. We didn't think such a simple gadget could have such an impact. However, the more we considered situations where we would use a red-dot or a laser sight, the more we realized how the Xtend-a-Sight™ adapter could improve our action photography! The FirstLook is coming tomorrow. The FirstUse report will be sometime near the end of February. [Permalink] -PhotoSolve Accessories
|
| January 8,2010 |
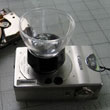
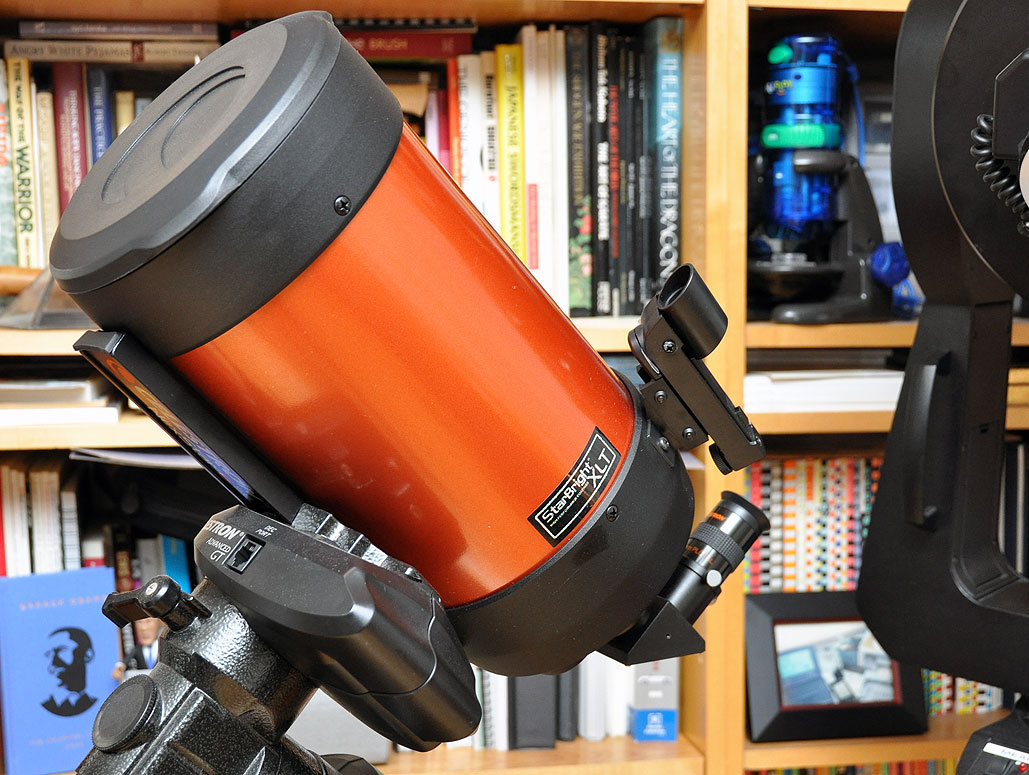
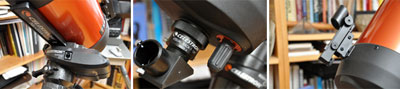
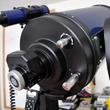
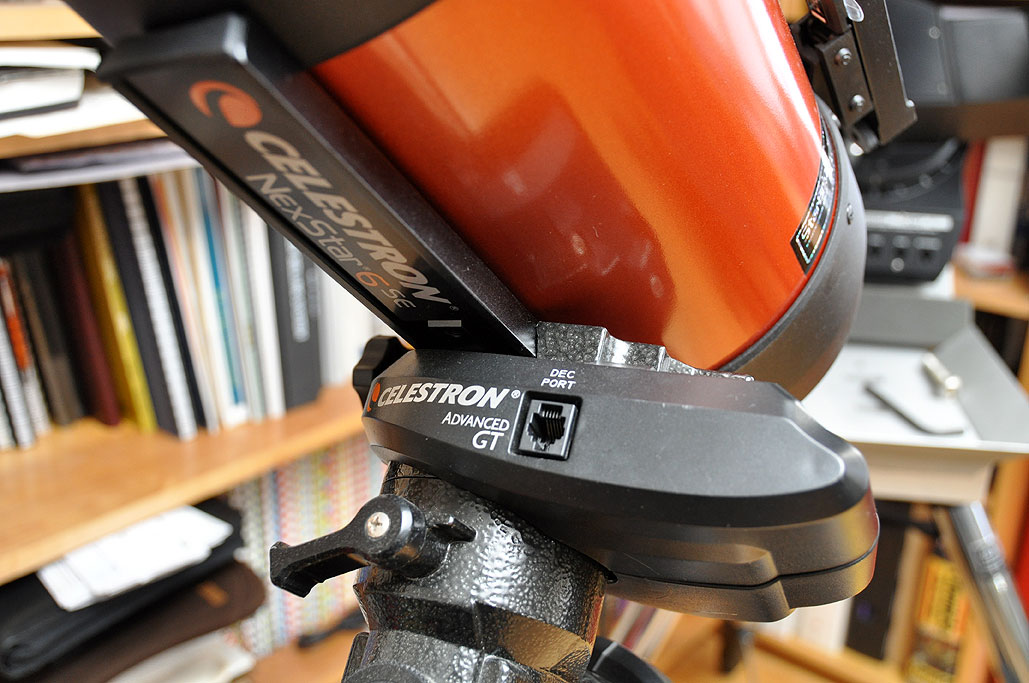
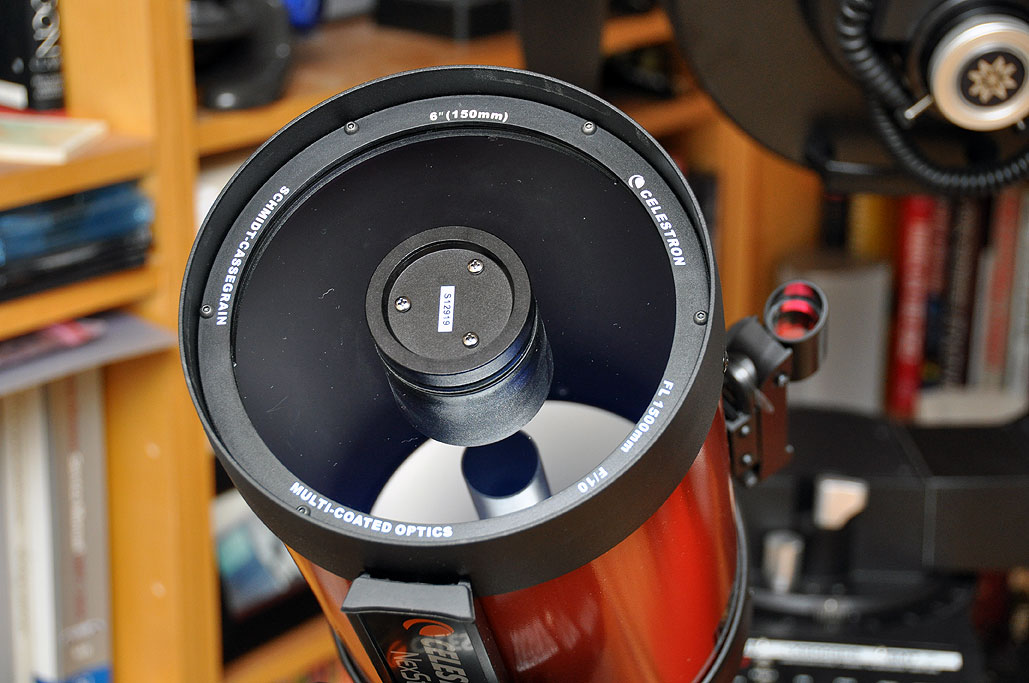
The heart of our portable Hyperstar imaging system is the Celestron C6 Optical Tube Assembly (OTA). We chose the Celestron C6 not just for its size and weight, but because it is the smallest OTA with Fastar capability. Fastar is a system invented by Celestron in the 1990s to quickly and easily convert their Schmidt-Cassegrain telescope (SCT) f/10 OTA into a very short focal length, fast f/2 imager. The system enables the SCT to gather light 25 times faster than the original optical configuration. Imaging at f/2 allows for very short exposures—30 seconds to 1 minute—for deep sky objects.
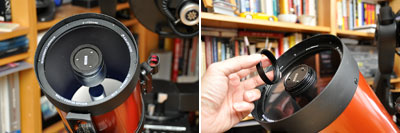
The Fastar system consists of two parts. The first is the secondary mirror cell assembly in the OTA. The second is a two-element lens that replaces the secondary. Fastar has an easily removable secondary mirror holder with an alignment pin. Taking out the secondary is very straightforward and we'll have more to say about the entire process in a future article.
Readers should note that Celestron discontinued the Fastar feature in 2005, but all Celestron EdgeHD OTAs are still made with Fastar cells. For those with a non-Fastar OTA, Starizona makes conversion kits to mount the HyperStar (Fastar) cell to older SCTs. If you are uncertain as to whether your OTA is HyperStar compatible, find out how to tell here.
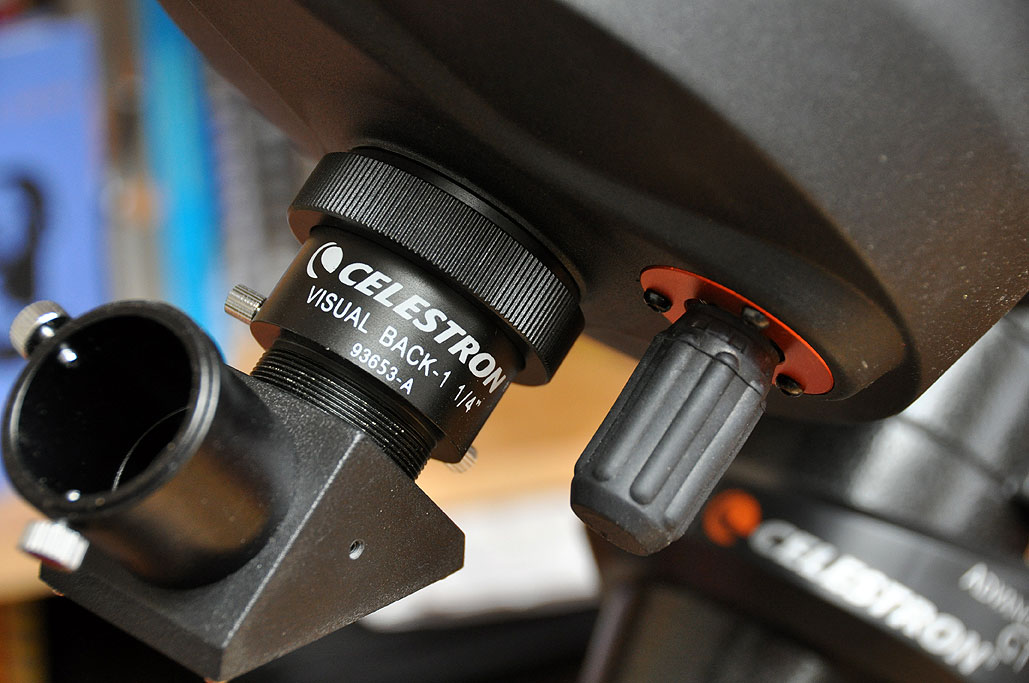
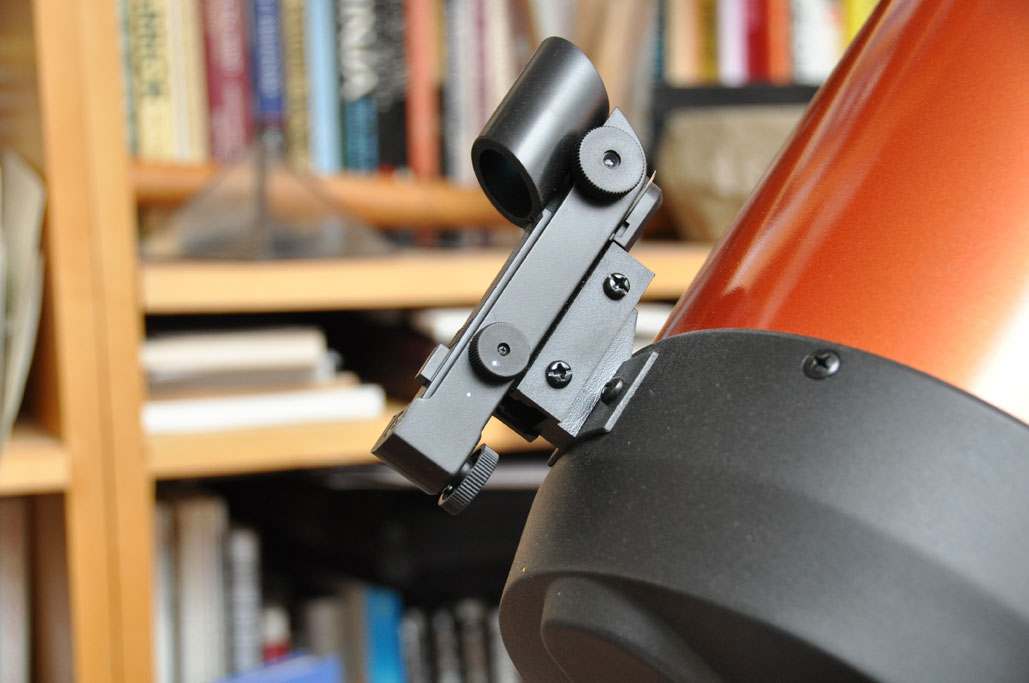
We acquired our Celestron C6 OTA from Steve E. via Astromart. It came with the standard 1.25" visual back, the 1.25" diagonal, a red dot finder and a Celestron E-Lux 25mm eyepiece. The OTA was a perfect fit on our CG-5 ASGT mount.
We hope readers have enjoyed this week's FirstLook at the various components (wedge, lens, CCD, scope) of our Portable DeepSky Imaging System (PDIS). Our goal is to assemble the componets in the next few week and do the FirstLight test before the end of Winter. Come and join us for it! [Permalink] -Celestron C6 OTAFirstLook
|
| January 7,2010 |
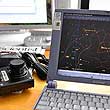
Quite a few questions came in asking for more details on the CDD imager we plan on using with our Hyperstar astrophotography setup. We had scheduled the write-up of the CCD camera for later next week, but due to the interest, we decided to move it up the queue.
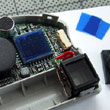
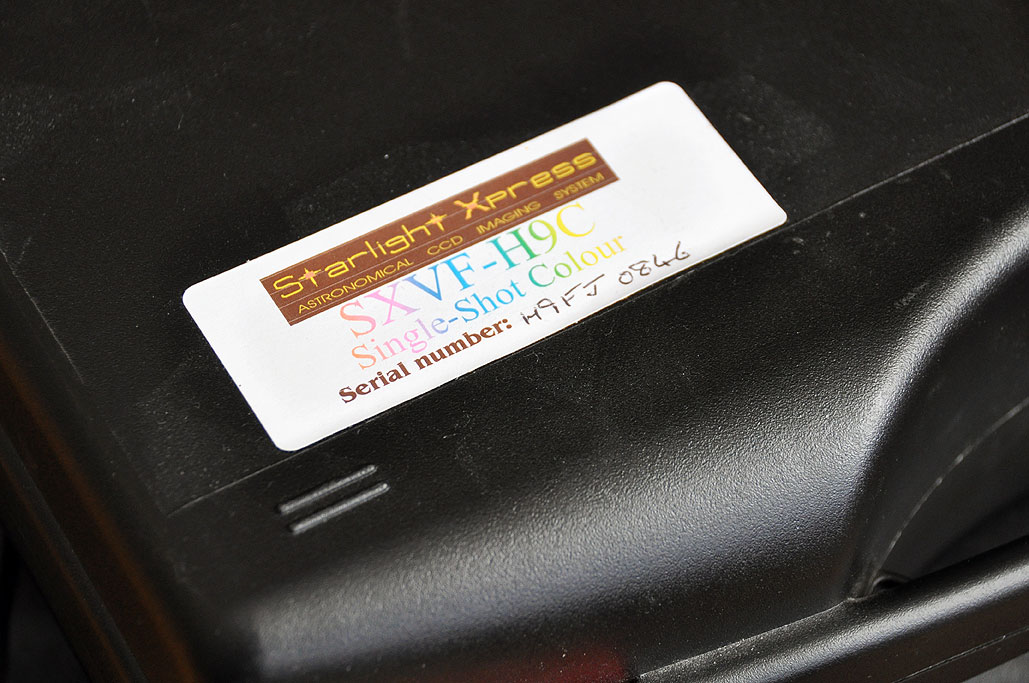
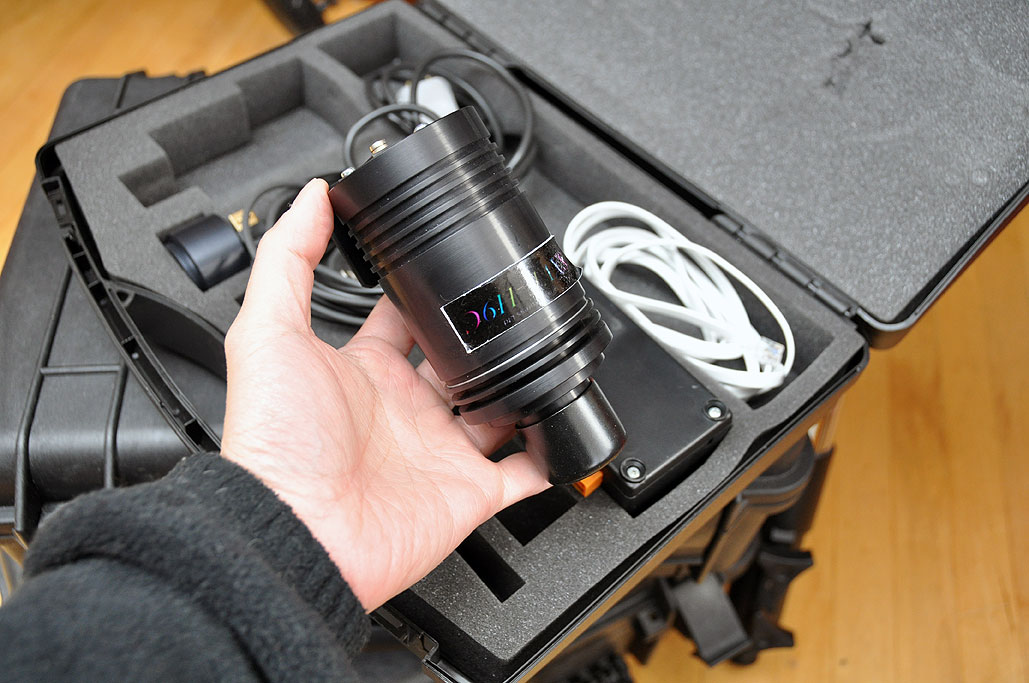
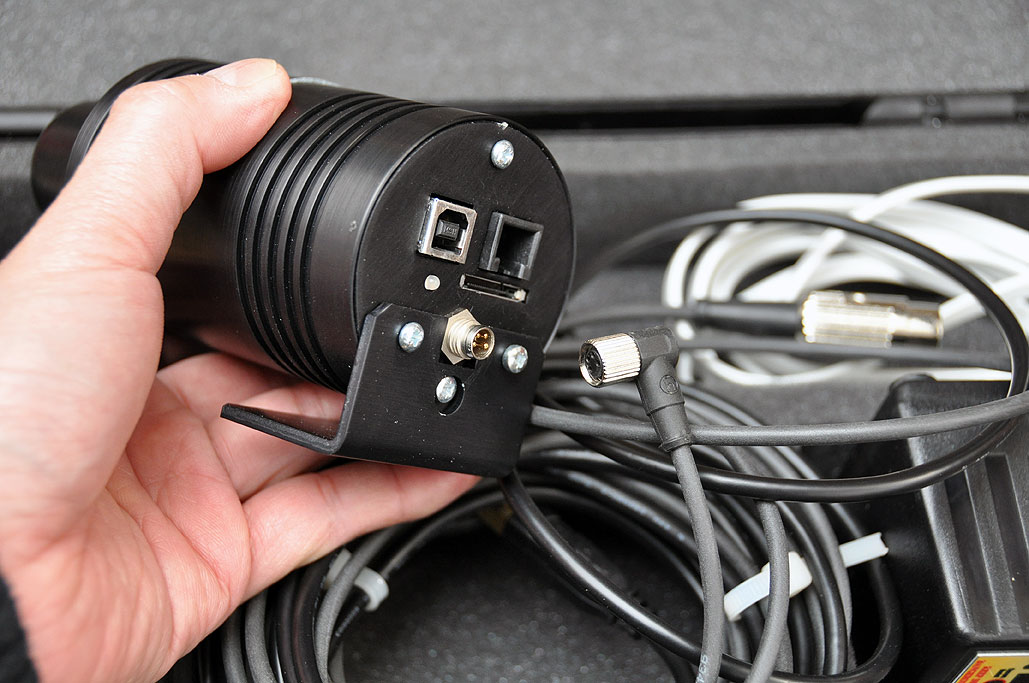
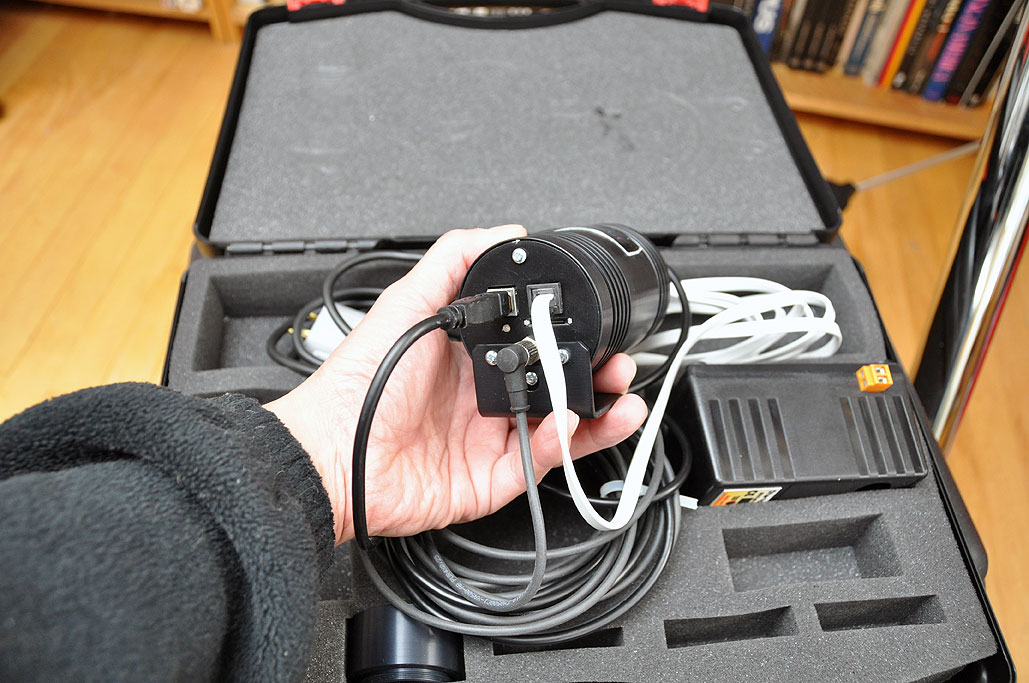
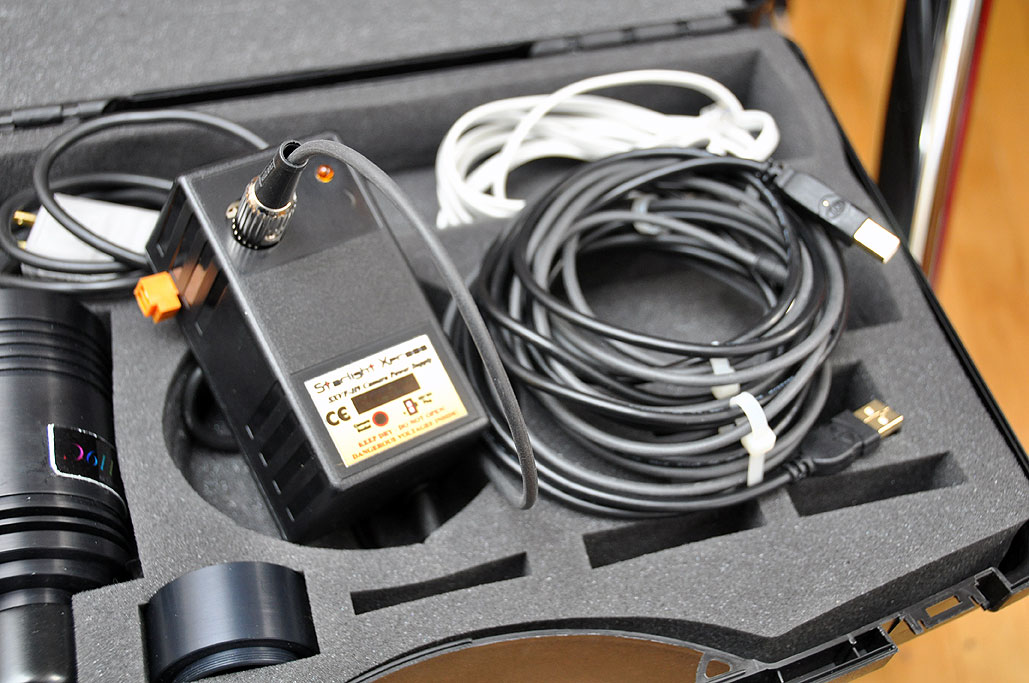
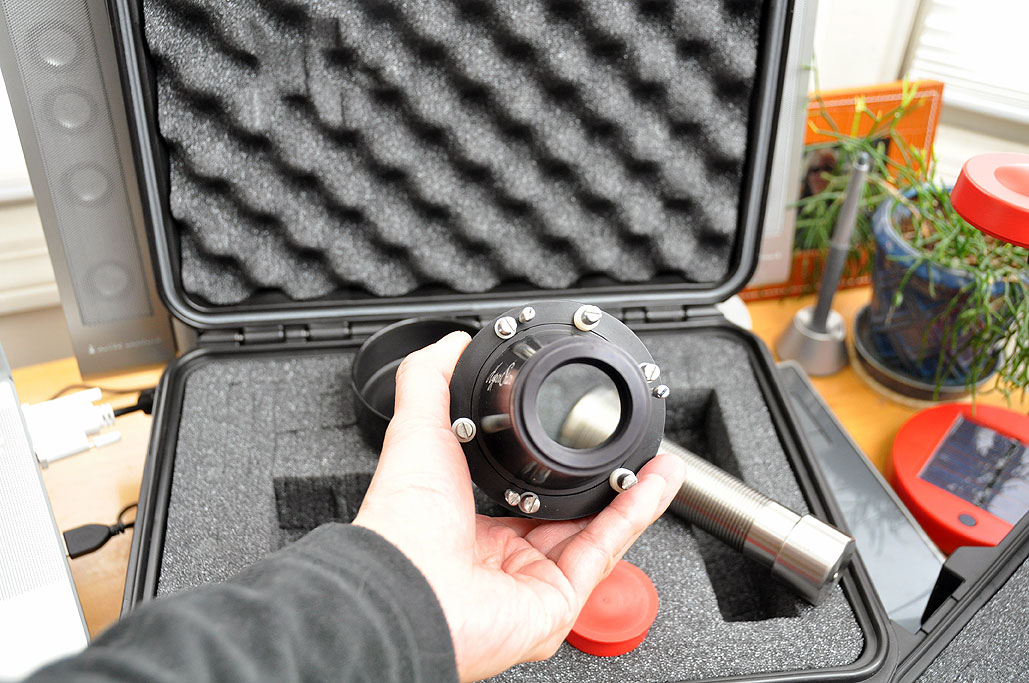
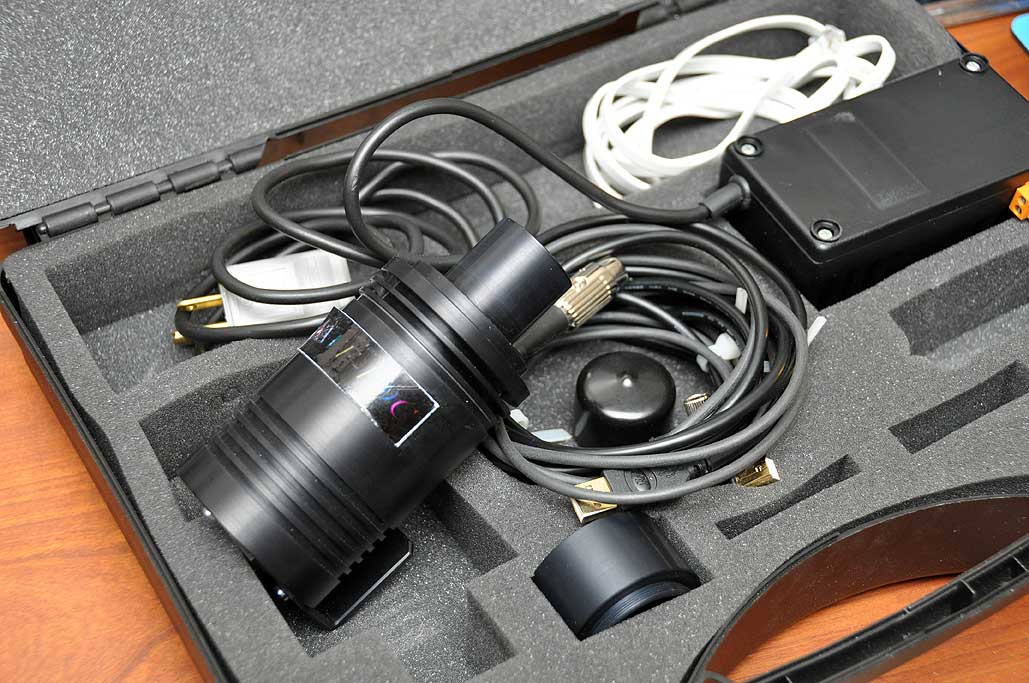
We will be using a Starlight Xpress H9C camerawith the C6 and M10 Hyperstars. We would have preferred to use our Nikon DSLR, but the body would have been an obstruction when mounted in front of the telescope. The Starlight camera's body is cylindrical and has a much lower profile than the DSLR. It is a perfect complement for the Hyperstar lens.
The H9C is not a typical digital camera. It is specially designed for astrophotography. Noise is a big problem for CCD sensors when light is low. Proper lighting is usually not a problem for daylight photography, but take a photo at night without a flash and you will quickly see what we mean. The dark areas in the image will not appear black, but speckled...that is dark signal noise, which can be difficult to distinguish from low luminousity stars. The Starlight Xpress camera's CCD sensor is designed to have very low dark signal noise, giving it a high signal-to-noise ratio.
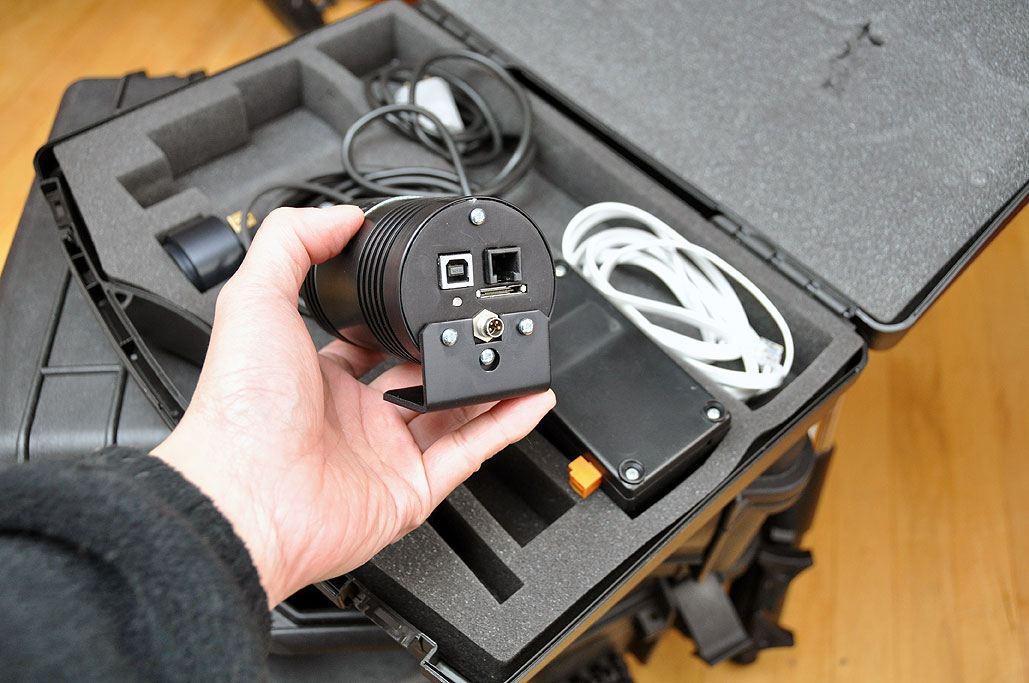
The H9C has a megapixel (1392 x 1040) CCD sensor in a 8.9 x 6.7mm array. The camera has a USB 2.0 interface, an auto-guider port, and two serial ports for accessory control. Check out the imager's full spectral and other characteristics here. Power is supplied to the camera via an external AC adapter. This helps keep the camera's weight to under 400 grams.
Our purchase of the Hyperstar lenses came with a choice of camera adapters. We requested the adapter for the H9C. When coupled, the Hyperstar and H9C is a cylindrical unit about 7" in length. The assembled weight will be around 800 grams (less than 2 lbs), which is important as we'll be attaching it to the telescope's glass corrector plate. In the final segment of this series, we'll show how to mount the Hyperstar/H9C assembly onto the Celestron C6 telescope. [Permalink] -Starlight Xpress CCD FirstLook |
| January 6,2010 |
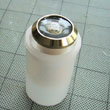
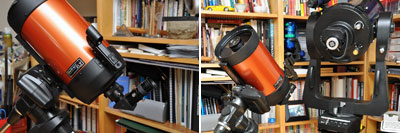
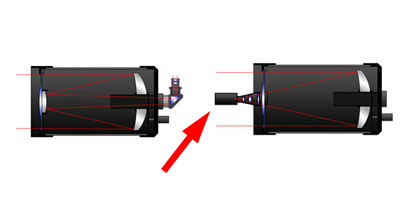
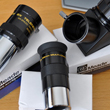
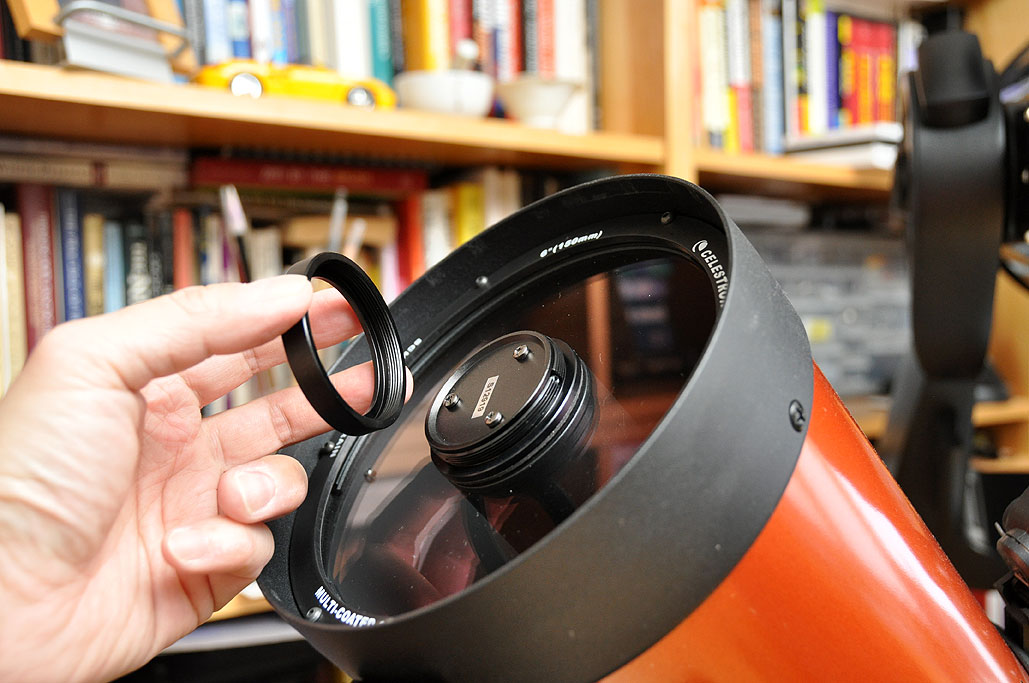
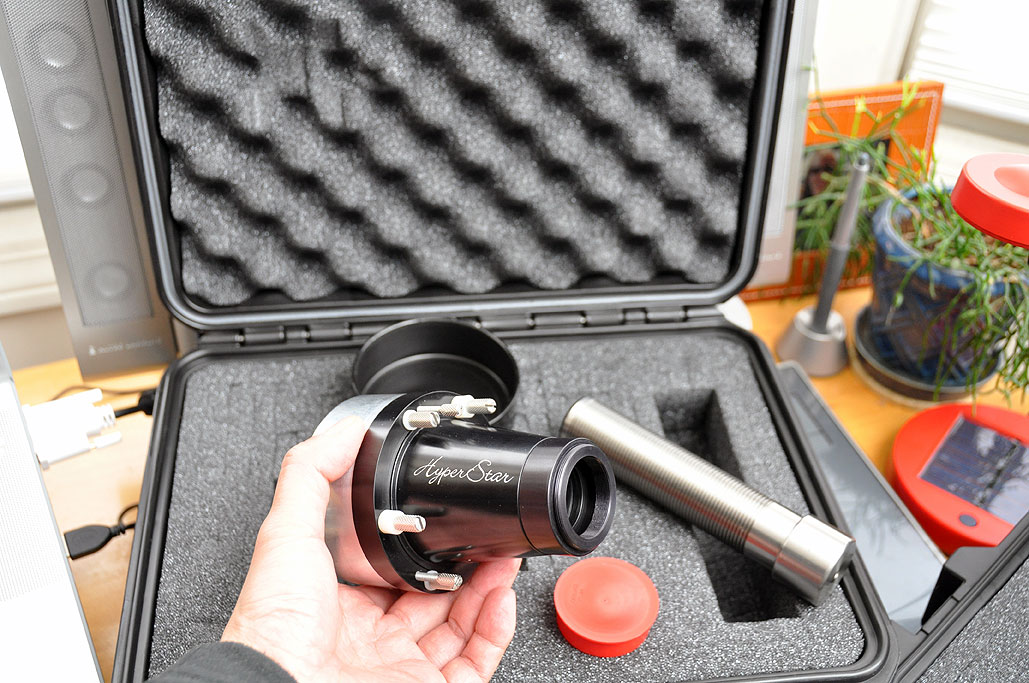
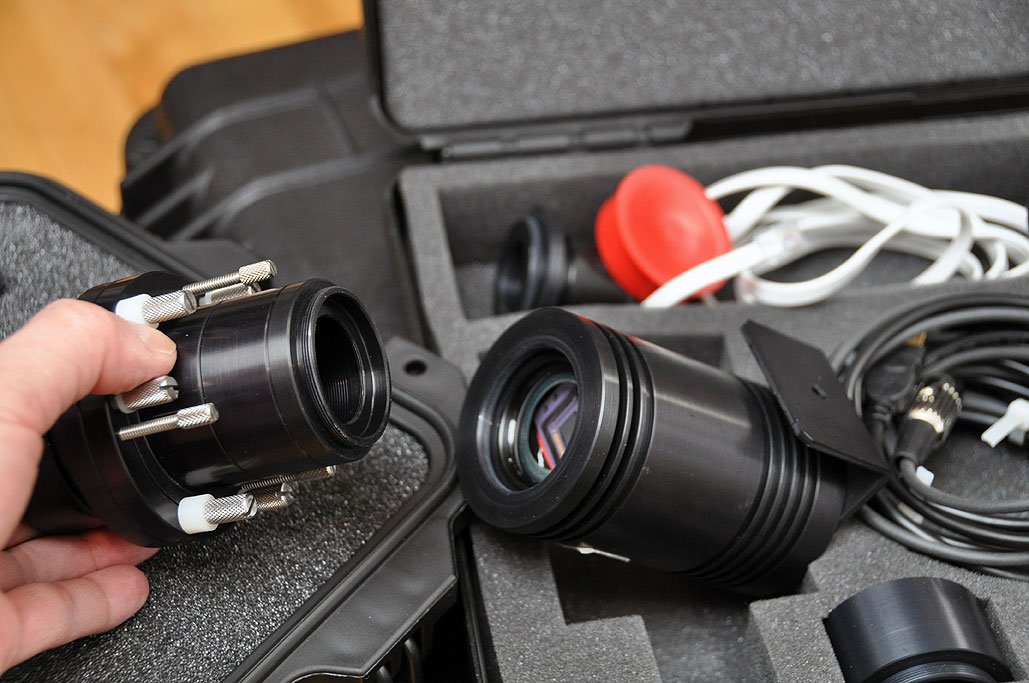
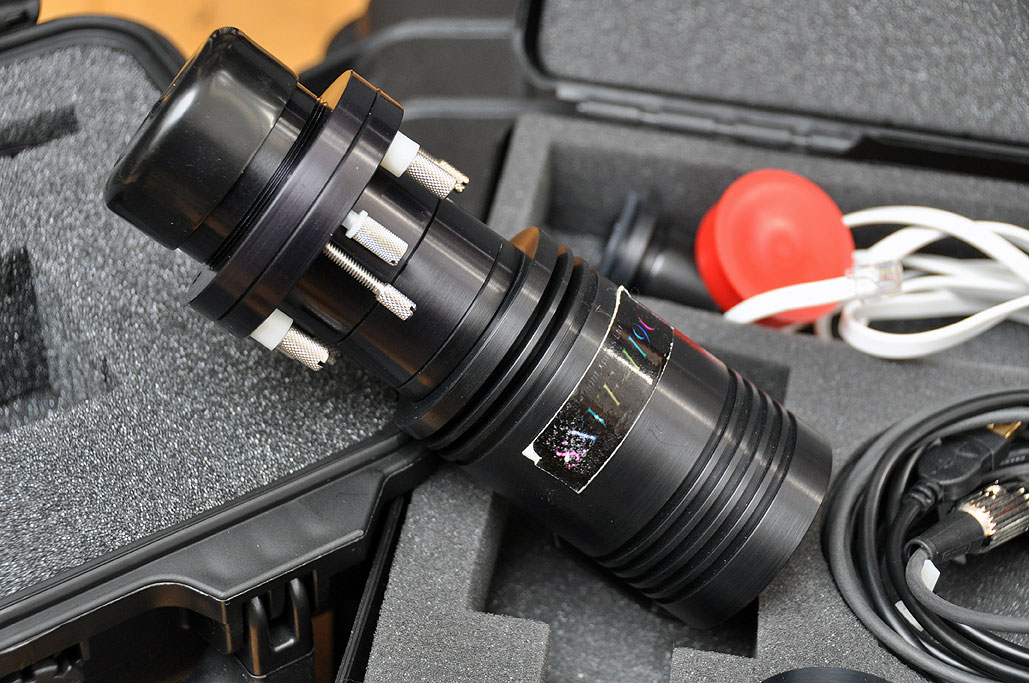
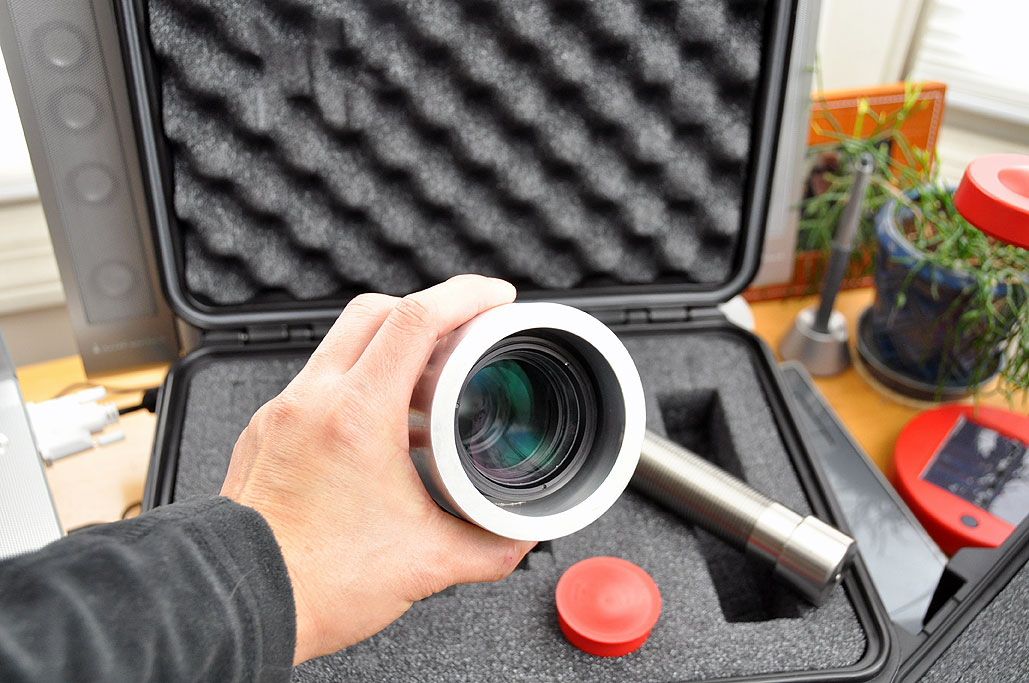
One of the first fields of study was the heavens. The movements of the sun, stars, and planets were recorded just by observation with the naked eye. The invention of the telescope extended our reach deep into the cosmos. Today, amateur astronomers have access to research-quality gear at relatively low prices. Some home-astronomy setups rival those of major university observatories. At the end of 2009, we acquired some new equipment for our astrophotography efforts. Today, we are going to take a FirstLook at something called the Hyperstar. The Hyperstar is a lens designed by the folks at Starizona that turns an f10 SCT scope into the heart of a superfast f2 imaging system.
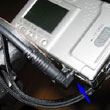
The Hyperstar lens (red arrow) takes the place of the secondary mirror in the optical path of the Schmidt-Cassegrain telescope (SCT). The lens "catches" the first bounce of the light reflected from the primary mirror and channels it to a camera. The light is much brighter at this stage, resulting in a significantly shorter exposure time (30x faster, from minutes to seconds).
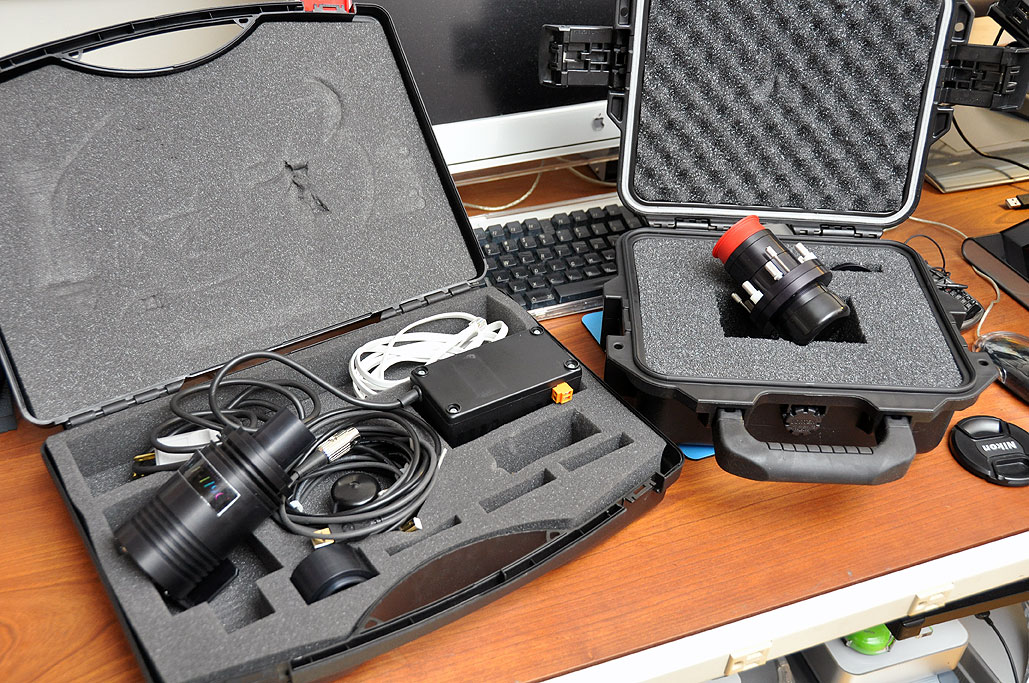
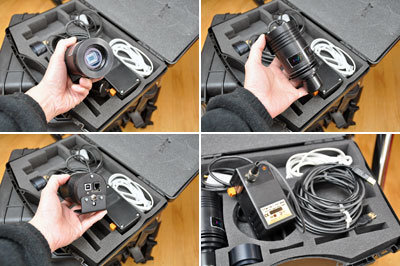
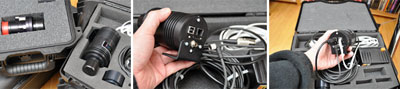
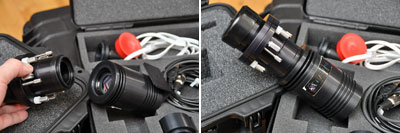
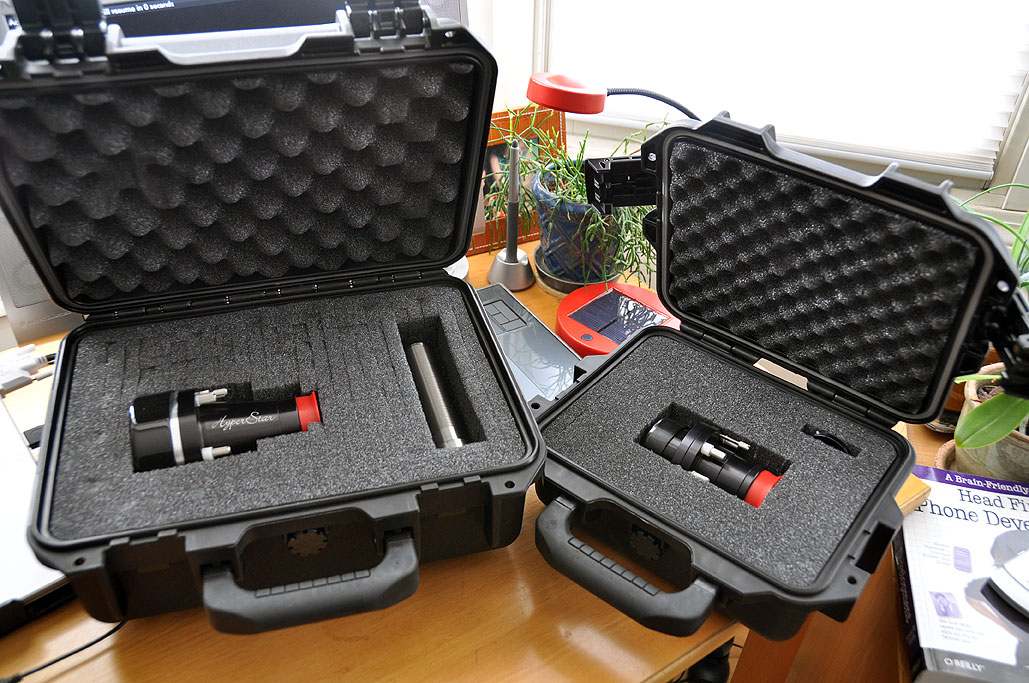
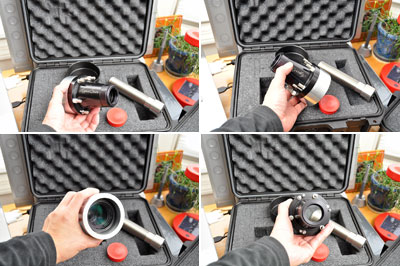
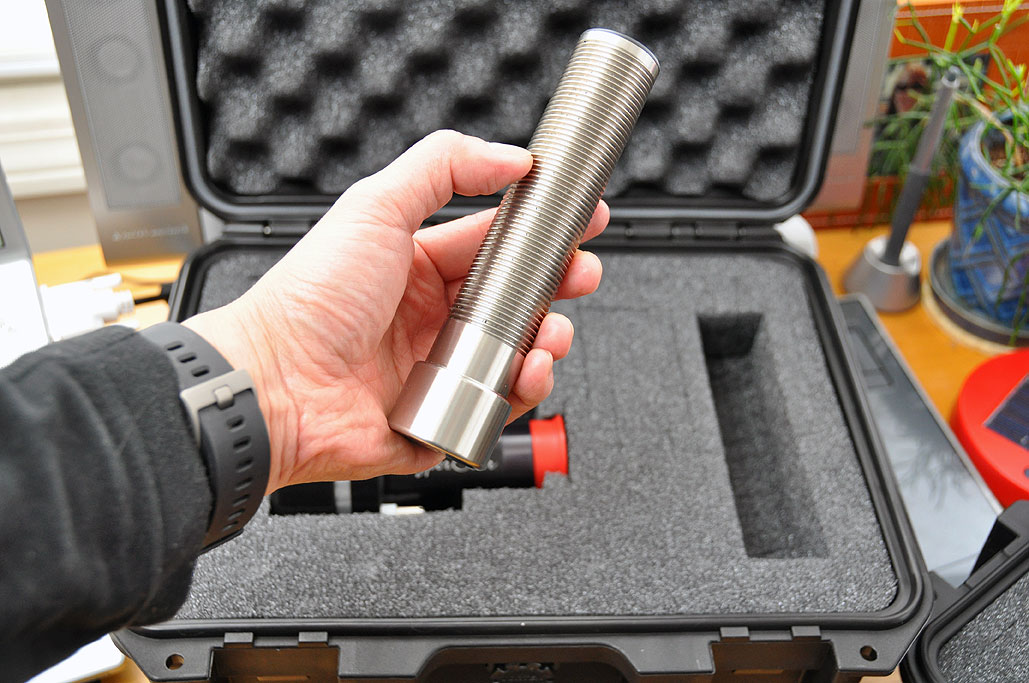
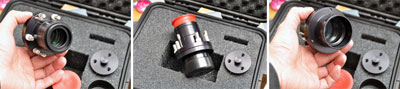
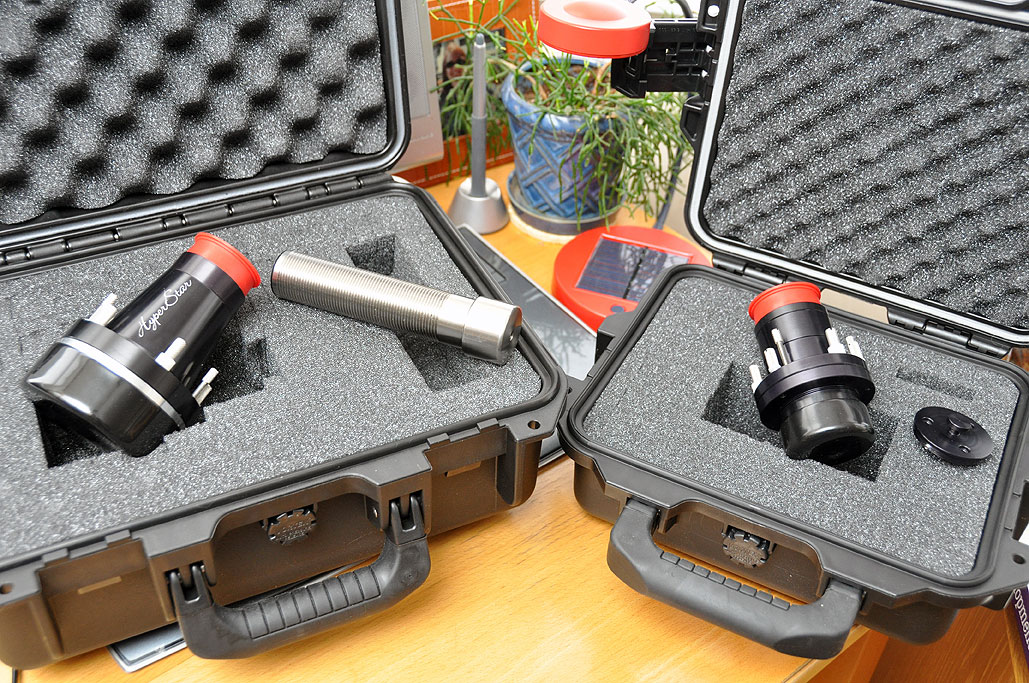
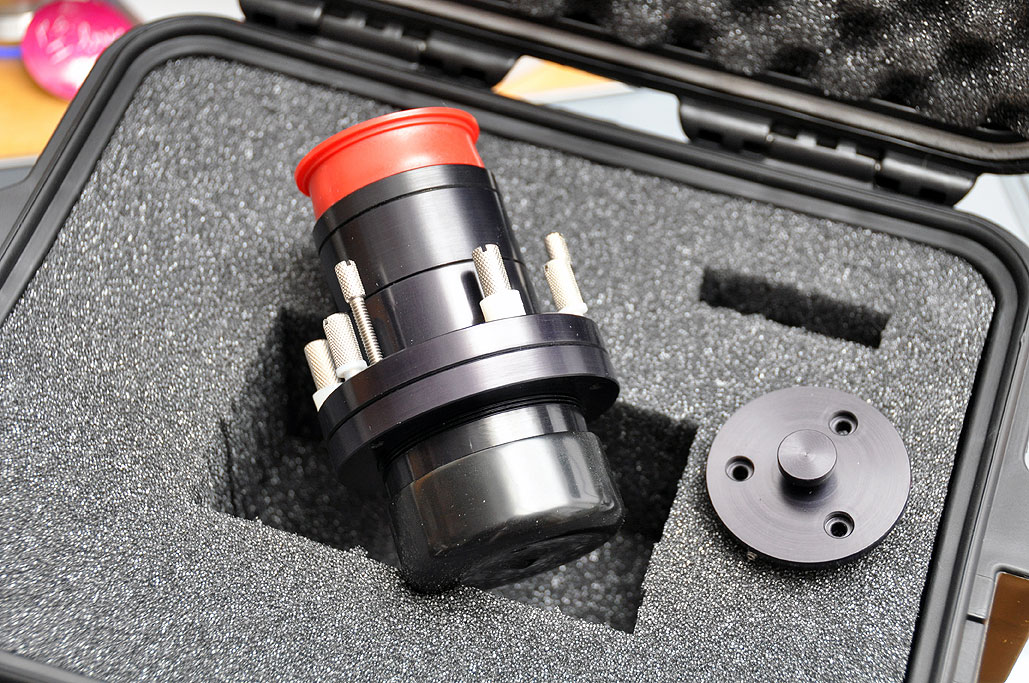
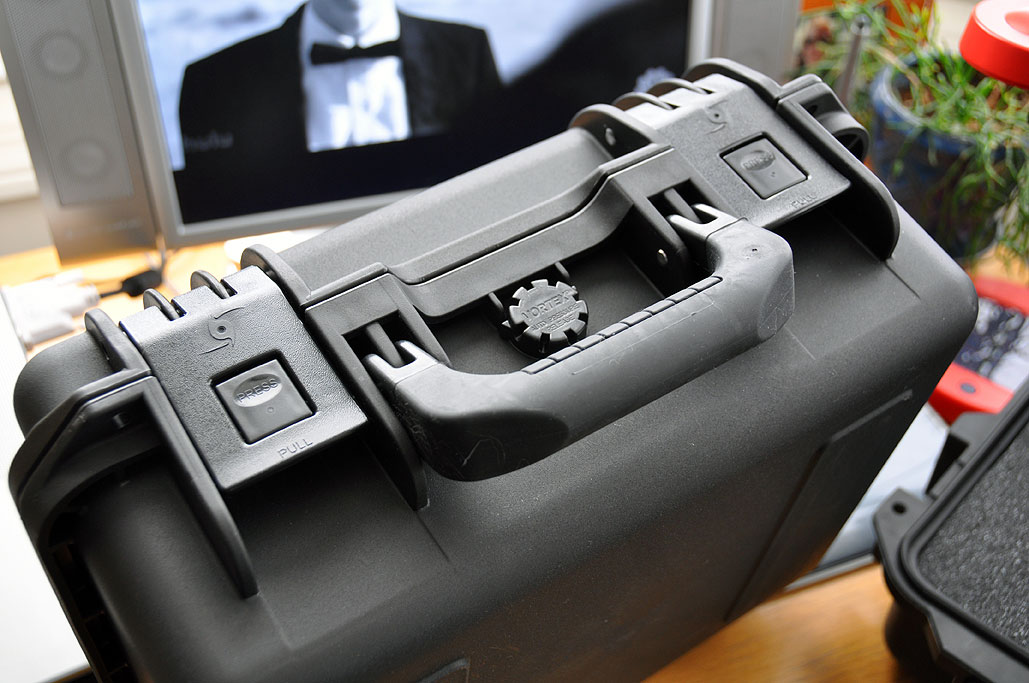
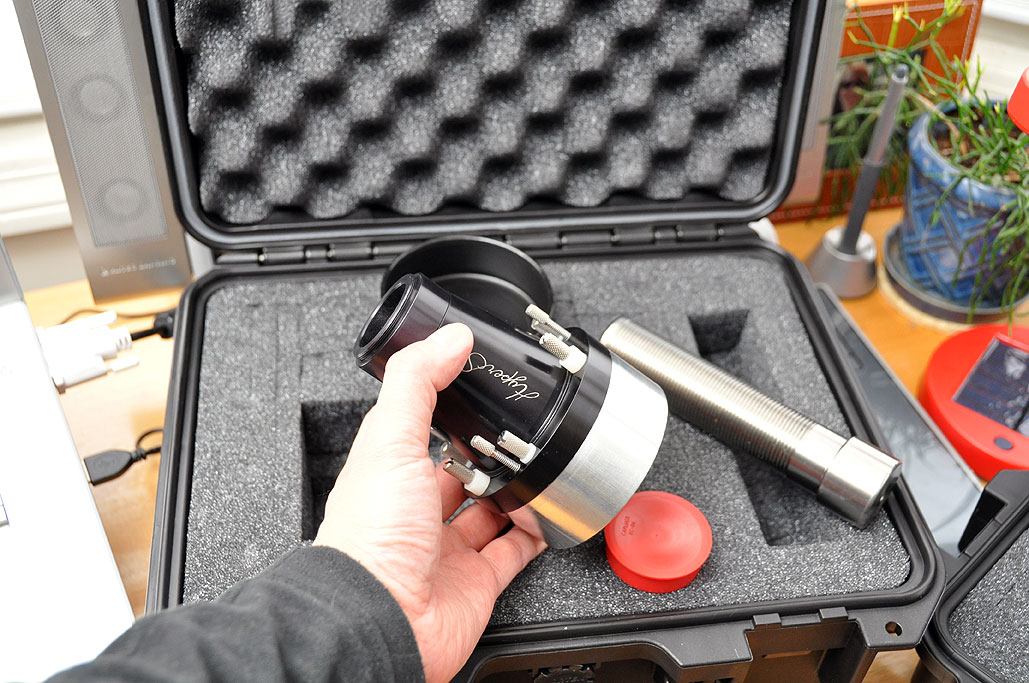
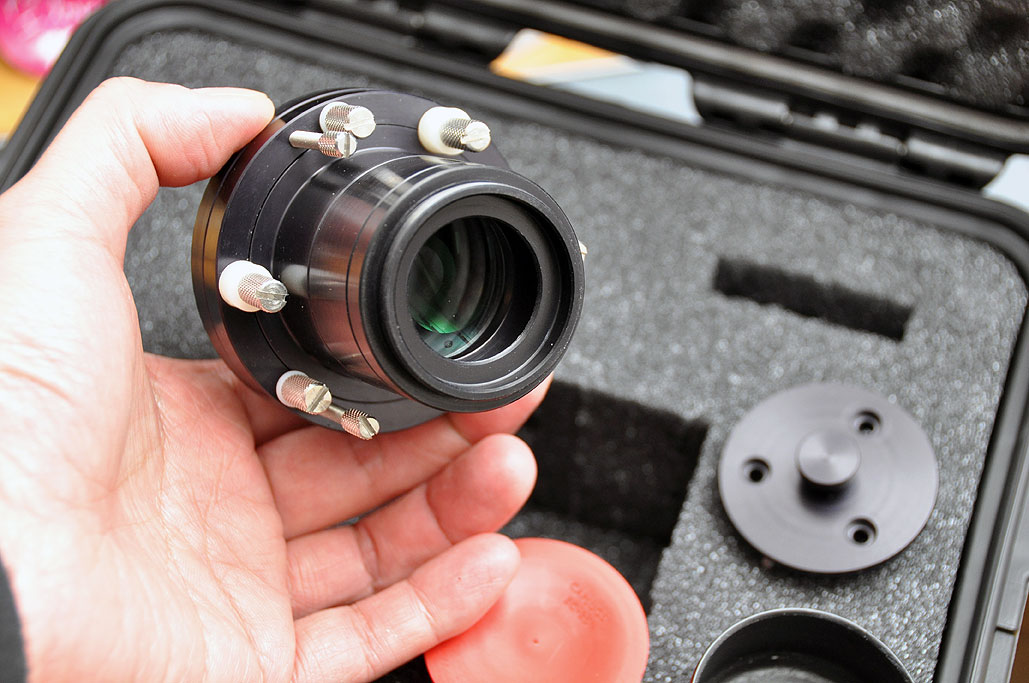
The M10 Hyperstar package from Starizona consists of: scope-specific lens, t-thread camera mount, mirror holder, and counterweight. All of it is protected by a padded Hardigg Storm case. The optics are multi-coated and the entire assembly is collimation-adjustable.
The C6 Hyperstar package is similar to the M10. The lens is smaller and as no counterweight was supplied, we assumed none will be needed. Included in the case was a disc with a knob in the middle. We could not find any instructions on the use of this disc, but reasoned that it must be related to the removal of the secondary mirror.
Note that not all makes of SCT have removable mirrors. Check here for scopes which are compatible with the Hyperstar. Two of our telescopes are compatible with the Hyperstar lens, the 10" Meade LX200 GPS and the 6" Celestron C6. Each Hyperstar lens fits a specific scope, so outfitting multiple scopes can get a bit pricey. We got lenses for both scopes because we wanted to have a portable system and a larger home setup.
The final expense is the CCD camera. The Hyperstars designed for larger scopes will work with a DSLR, but neither of our scopes is large enough because the body of the camera is too much of an obstruction. The CCD camera we will be using is a Starlight H9C which will work with both lenses.
Every once in a while a new piece of gear is created that extends ones ability to do more, see better, or understand deeper. We believe the Hyperstar lens is such a thing. We are eager to get ours set up with the 10" Meade LX200 and the portable Celestron C6. In our next installment, we'll go into more detail on the mounting of the Hyperstar lenses. In the meantime, if you want more info, head on over to the Starizona site for the basics on CCD imaging with the Hyperstar. [Permalink] -Hyperstar FirstLook |
|


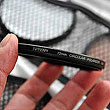
Featured Review* Lensbaby 3G
| ||
| RainyDayBuzz* | ||
|
||
| Photo Outings* | ||


