
| TODAY |
| Reviews |
| 2009 |
| 2008 |
| 2007 |
| 2006 |
| 2005 |
| Renovation |
|
| Contact Us |


RainyDayRenovations's content can now be licensed for your print magazine or web site. Please contact us directly here. If you want to see something reviewed, then drop us a note with a link and we'll be happy to take a look.
|
||||
|
||||
|
||||
Some readers wrote that they are having trouble seeing Comet Holmes where they live because of all the light pollution from street lamps and other urban light sources. Others were complaining that it gets really cold just standing around at night. We can't help with the first problem (bb gun... cough, laser...cough cough), but we can pass along this "how-to" to help readers stay warmer when performing their nocturnal heavenly observatory activities.
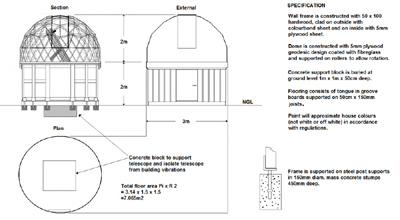
Barry Armstead of Australia built this wonderful observatory in his backyard from locally available parts and a keen eye on budget, usability, and practicality. This project will "WowUs" any day of the week! - Wan Chi Lau (permalink)
|
||||
|
||||
|
||||
|
||||
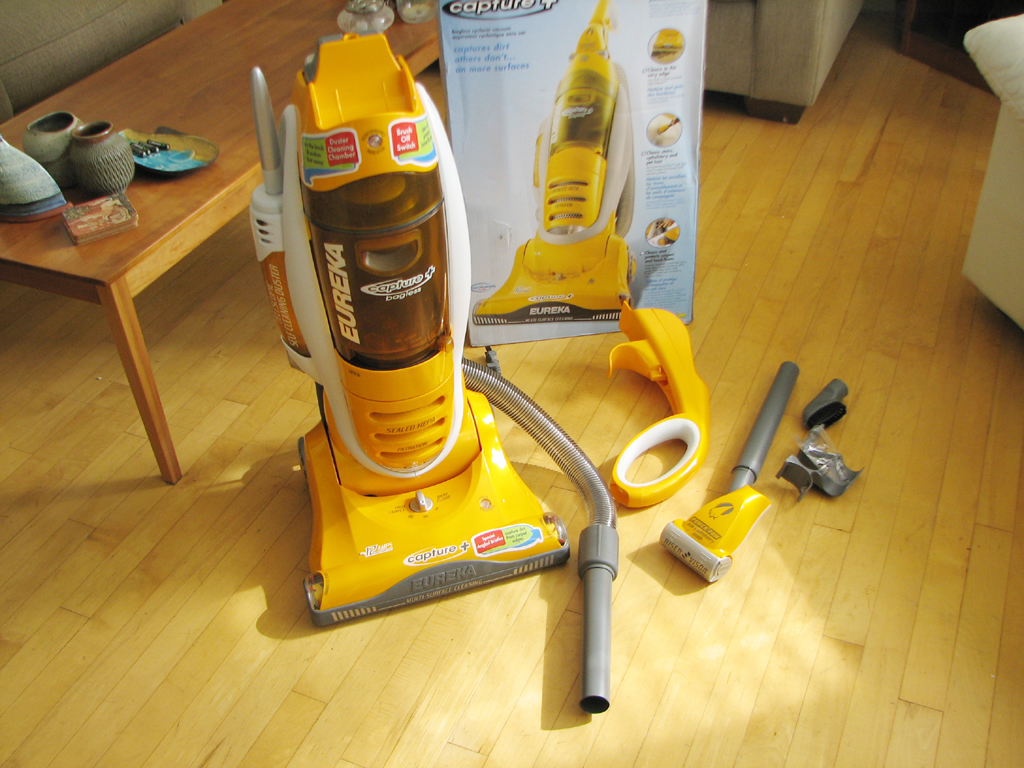
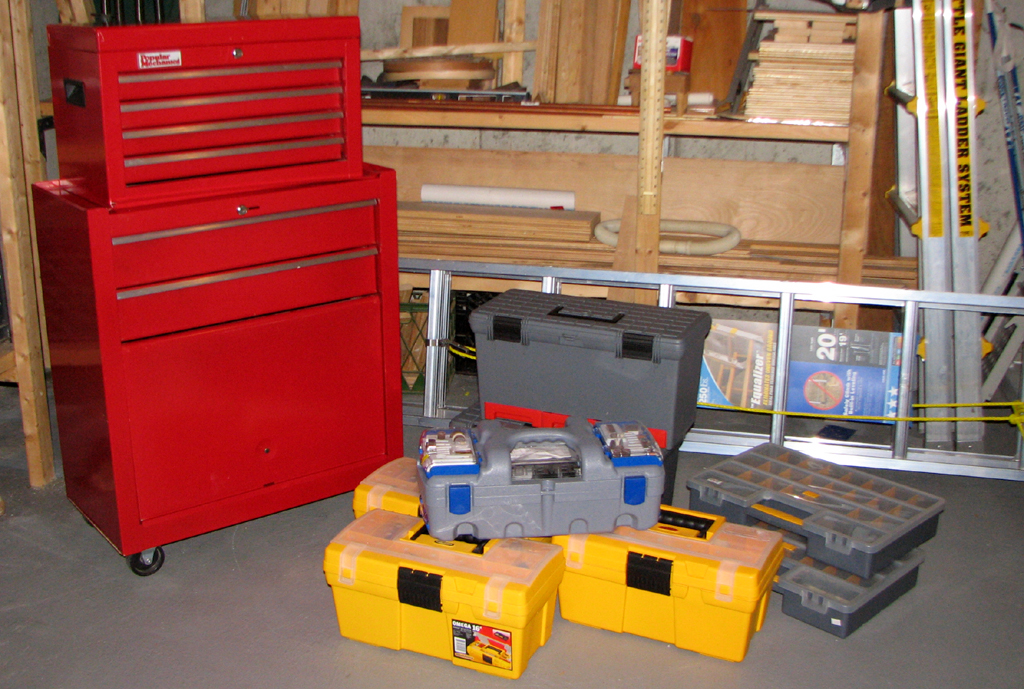
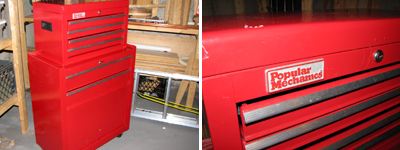
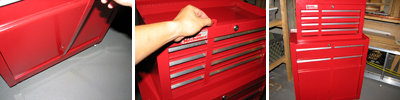
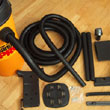
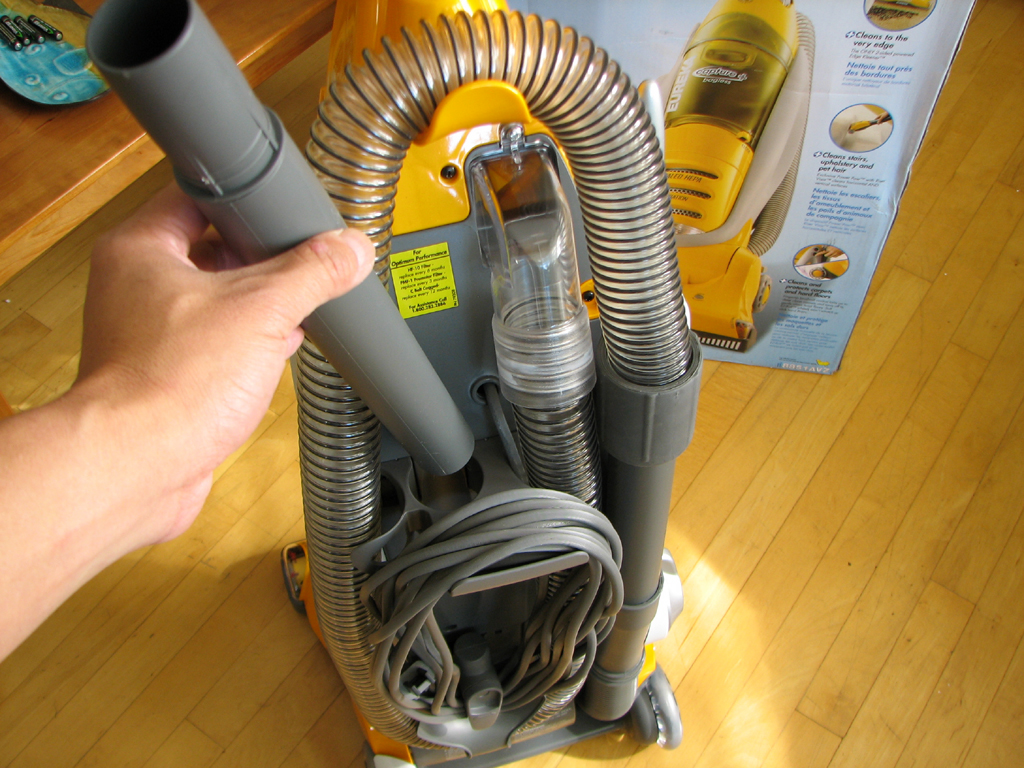
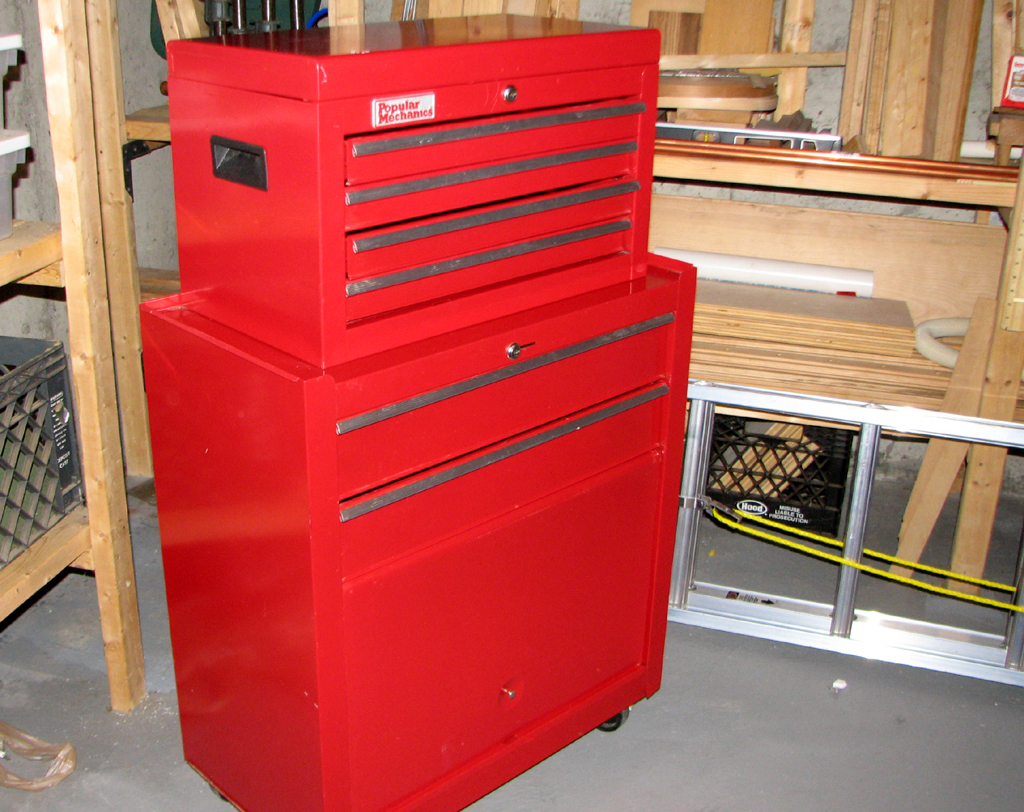
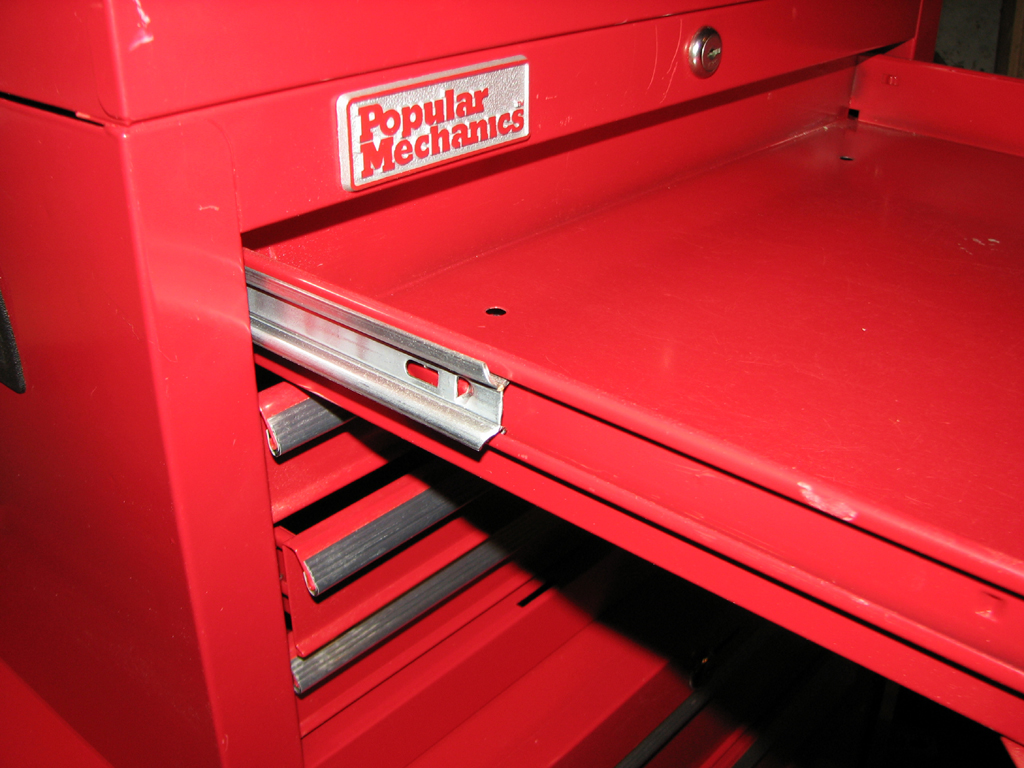
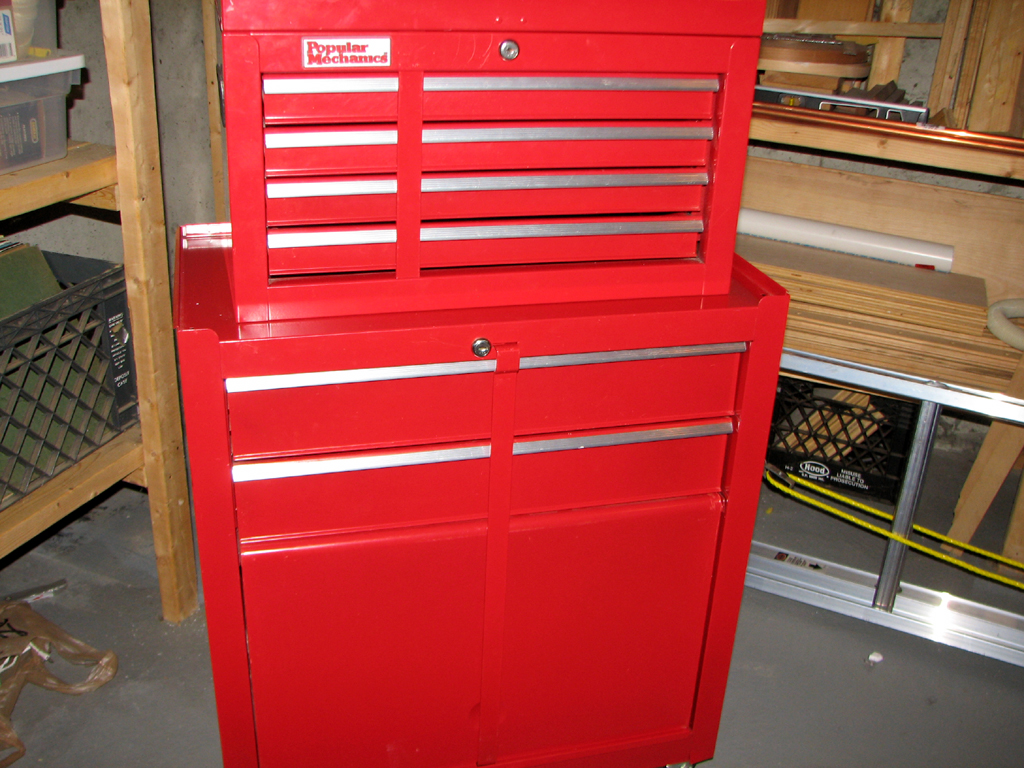
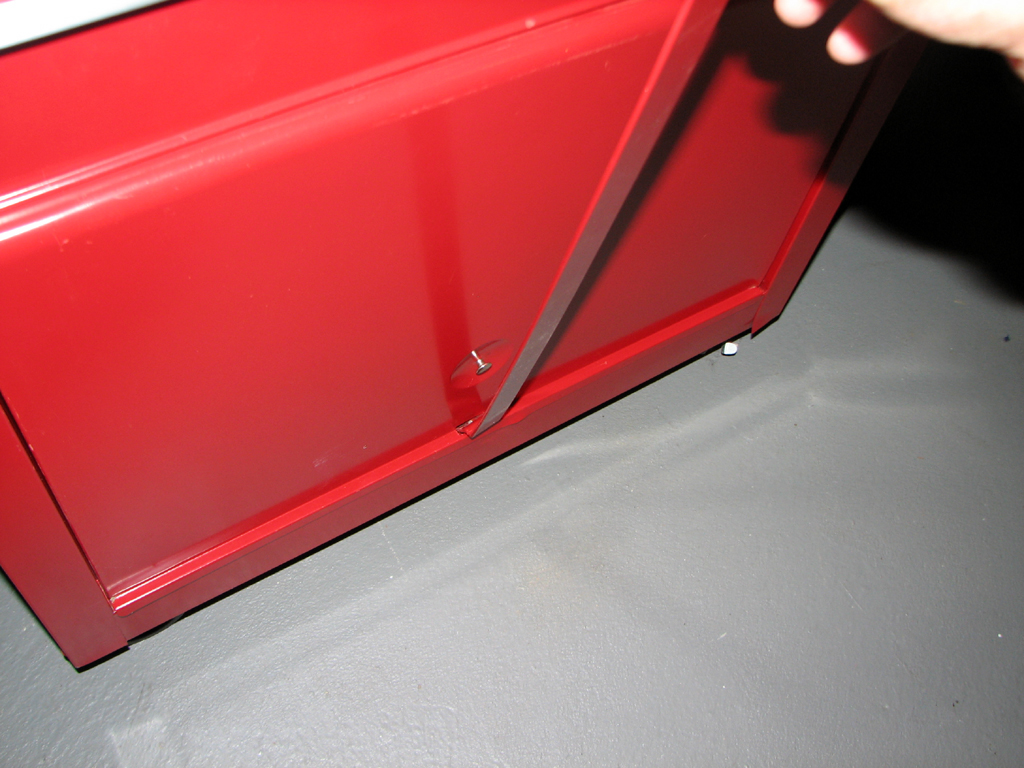
We went to Sears yesterday afternoon and checked out over a dozen different toolchests. Most were on sale because of the tax-free weekend here in Massachusetts. The least expensive one was $89 on sale (orig. $129). We didn't buy any because earlier on Sunday we found a toolchest on Craigslist, took a drive out to North Reading, and purchased it from Alastair for $50.
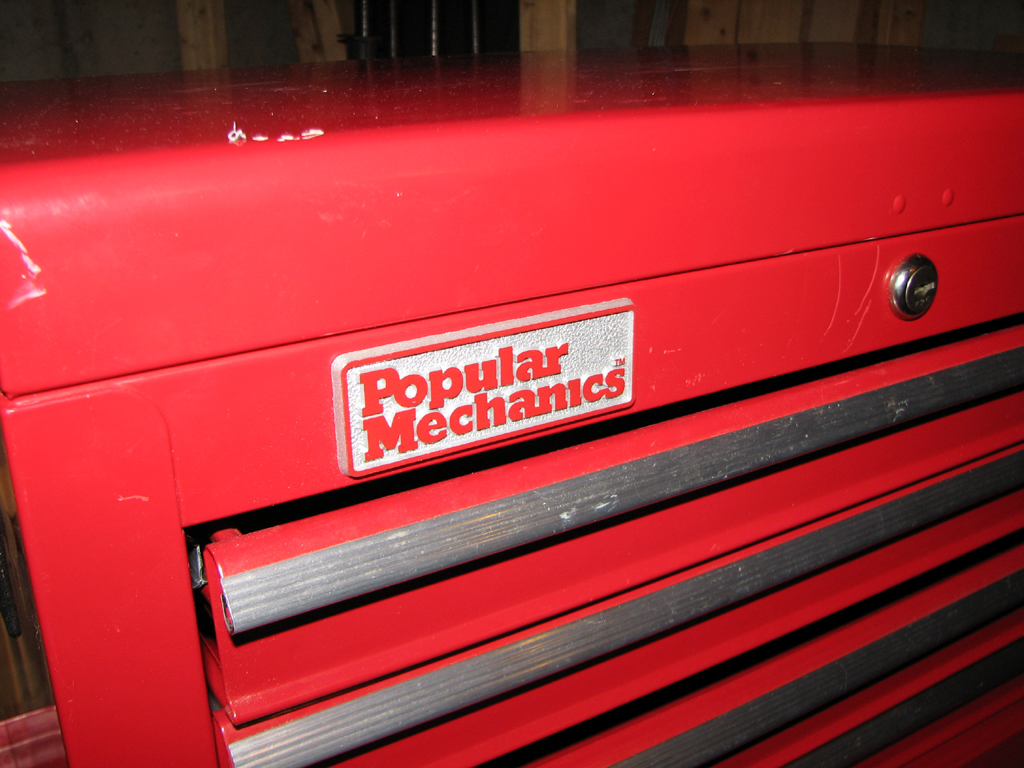
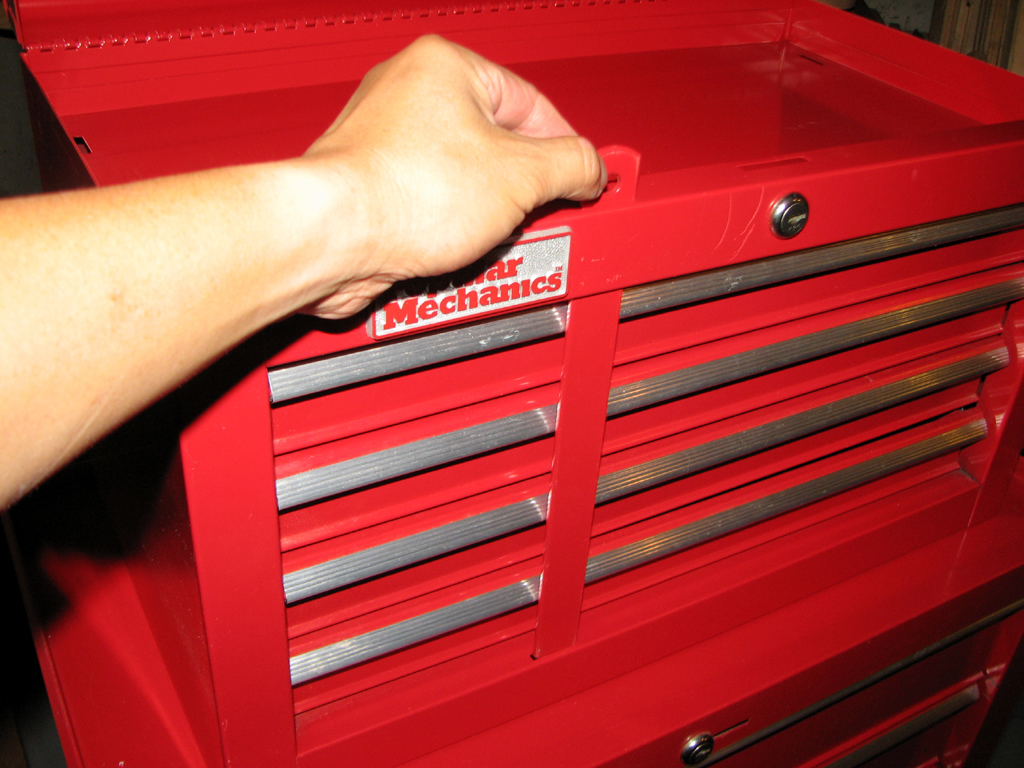
We have never heard of the Popular Mechanics line, but it appeared to be constructed well enough that we didn't see much risk in spending the $50. A quick Google search later showed Walmart had purchased the rights to use the PM name for a line of tools back in 1992. Walmart has since discontinued that line. The unit we purchased is in great condition. It has a few dings here and there, but nothing that would interfere with its operation. The drawers slide smoothly, the wheels roll well, and the baked red enamel finish cleaned up nicely with a quick wipe.
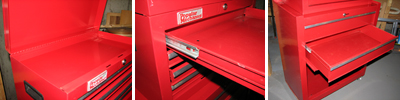
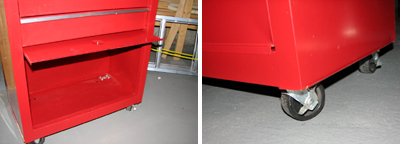
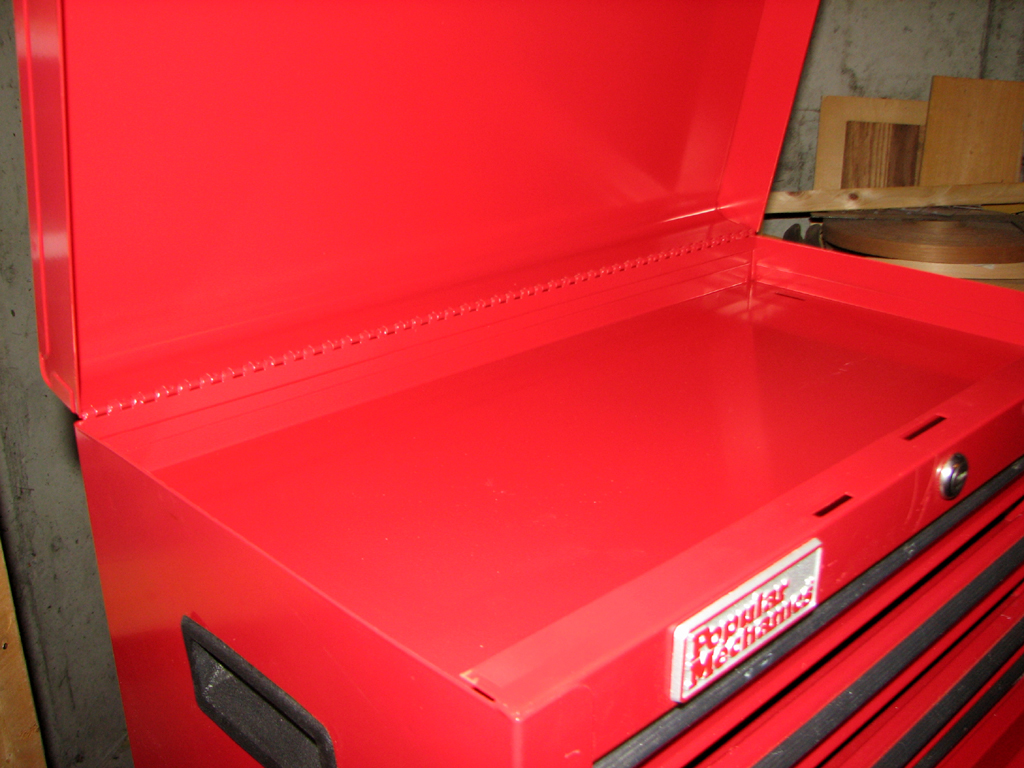
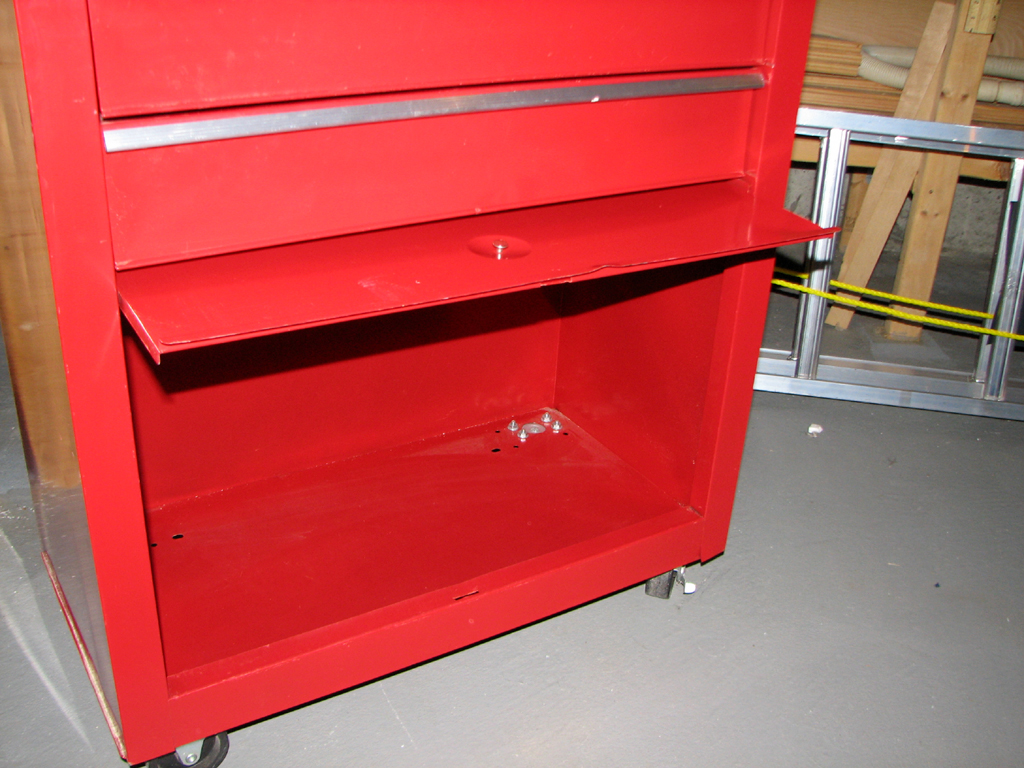
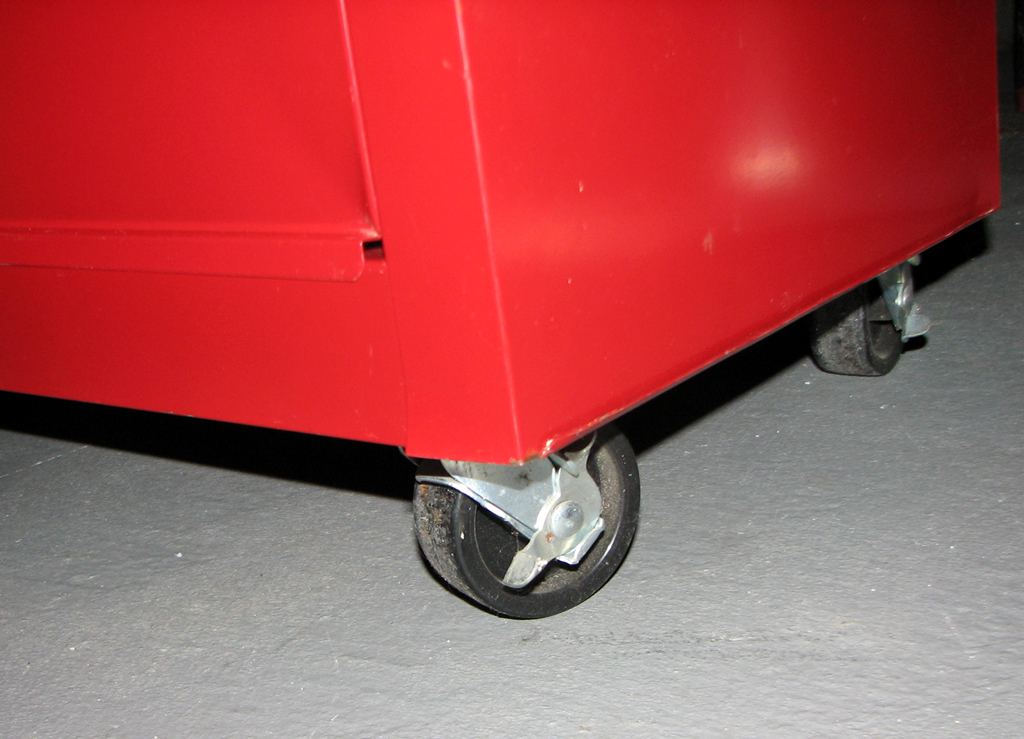
The top chest has a lid and four drawers. The bottom cabinet has two large drawers and a bulk storage area. The glides extend out when fully pulled to better support the drawers. Two of the wheels swivel and lock.
Both the top and bottom drawers can be secured using the locking bars. The top bar slips through an opening and is secured when the lid is locked. The bottom cabinet is locked by a longer bar which spans the front.
The unit is not professional grade: the thin sheet metal used for the drawers and sides will dent if you fling your tools at or into the tool chest. However, it has sufficient storage space for the tools needed by the average home mechanic. We definitely think this Popular Mechanics unit was a great purchase for the price :-) Even though Walmart does not sell this model anymore, a similar one may be had at Sears. You may not be as lucky as us, but check your local Craigslist... you never know! - Wan Chi Lau (permalink)
|
||||
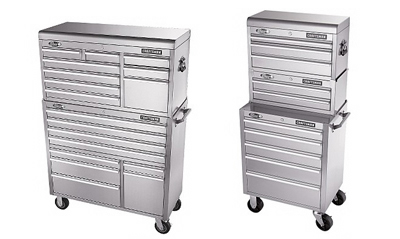
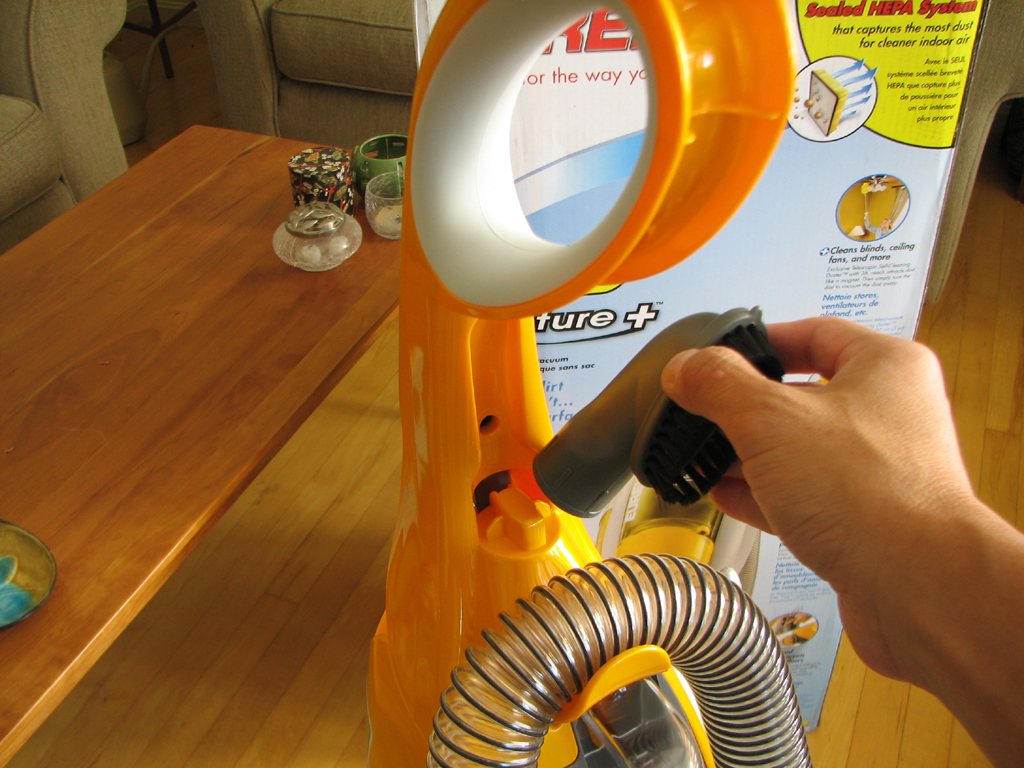
Many readers have asked us if we wouldn't mind doing a review or two on tool cabinets. Since we like to sort and store our tools in portable cases, we had been putting it off. Not because we weren't interested, but because we were too busy. We were, however, intrigued by some of the links sent to us, especially by the really nice-looking stainless steel cabinets.
Judging by the links we've received, there is a HUGE selection of tool cabinets out there. The price range from $150 for basic sheet metal chest to over $2000 for a heavy gauge, brushed stainless steel
After some discussion, we decided it would be interesting to do a review series on tool cabinets. We are going to look at four different price points ($50- $199, $200-499, $500-$999, $1000+), examine their features, and pick one which we think is the best value in its price range. We will also pick THE one which we think the best value overall (price, feature, looks). - Wan Chi Lau (permalink) |
||||
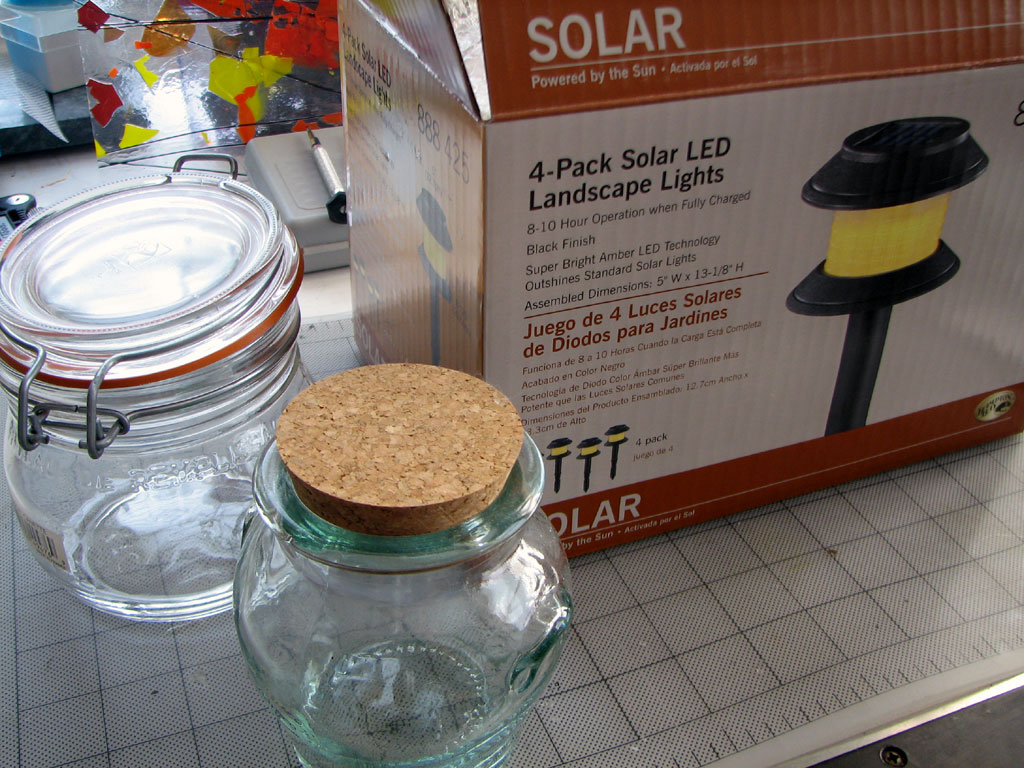
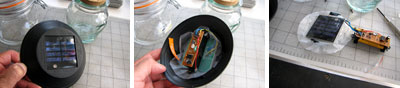
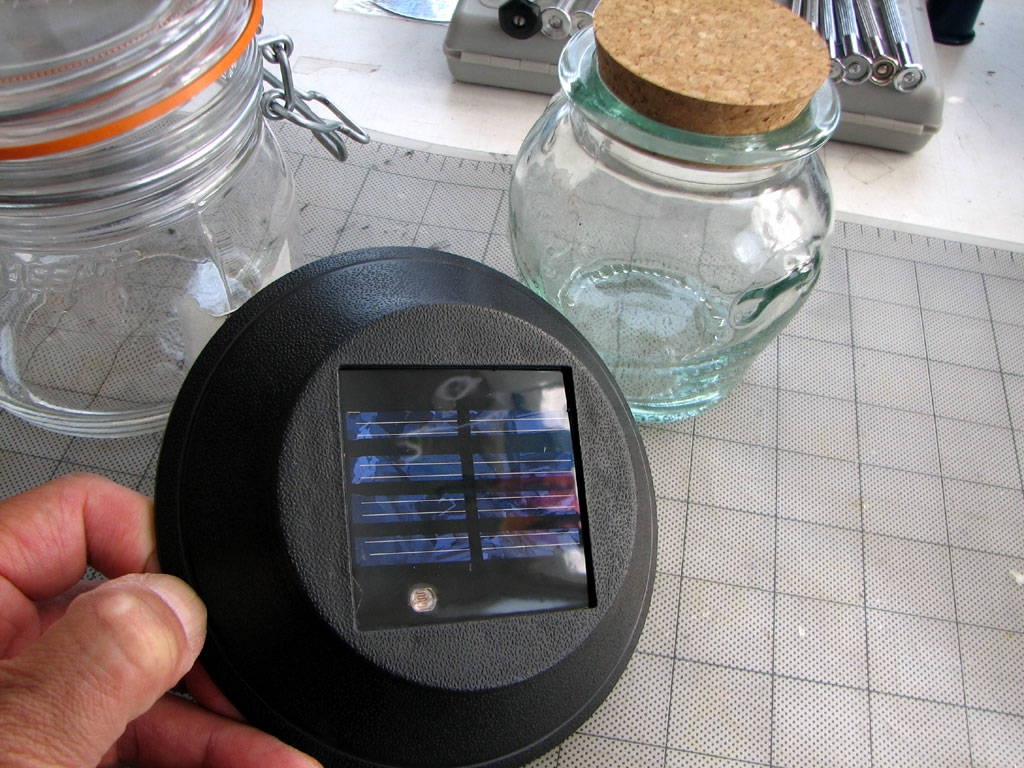
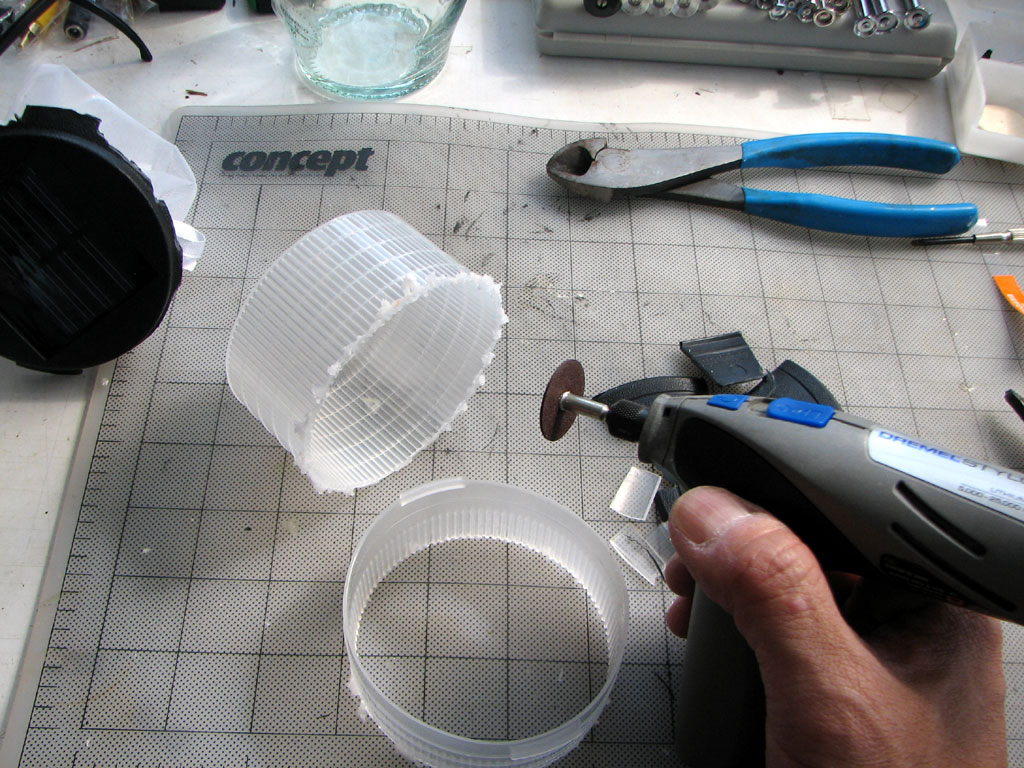
While wandering around the Home Depot yesterday, we came upon a sale of Solar-Powered Landscaping Lights. We remembered reading with interest an article about making "sunlight catchers" with the guts of these lights and some glass canning jars, so we picked up a box.
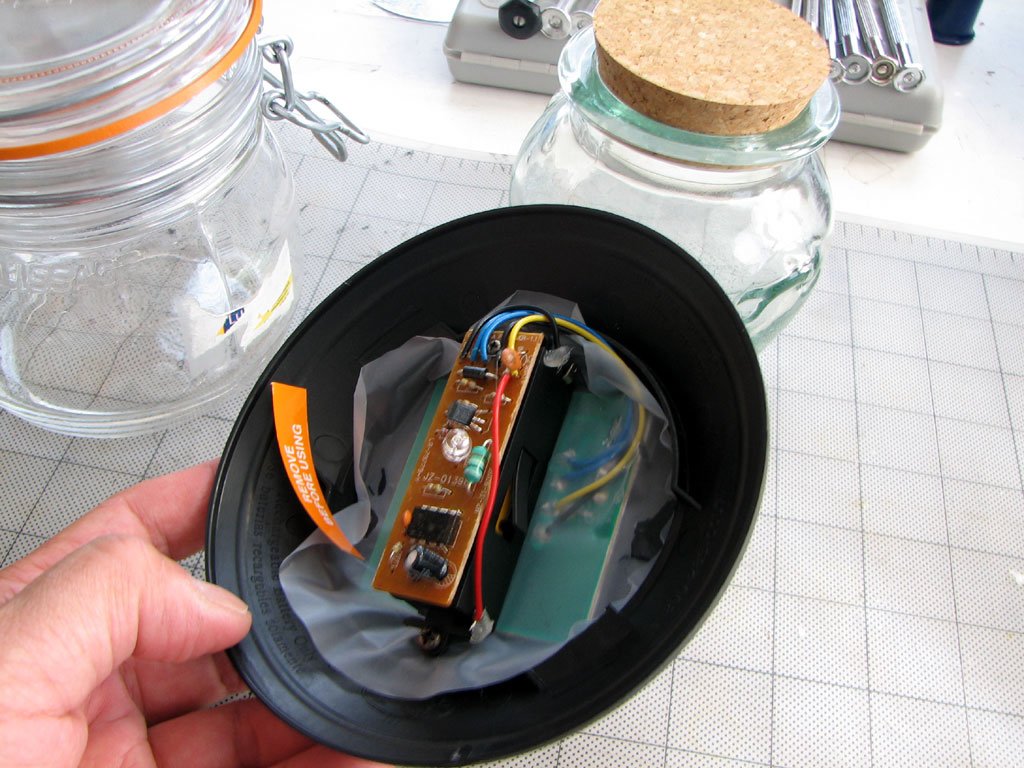
The project seemed pretty simple...the hardest part was finding jars which would fit the solar circuits. The circuit itself is very straight forward : a solar panel, an LED, and a rechargeable battery. There is an optical sensor which detects when it is dark and switches from charging the battery to powering the LED.
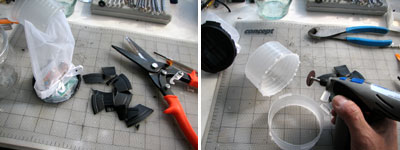
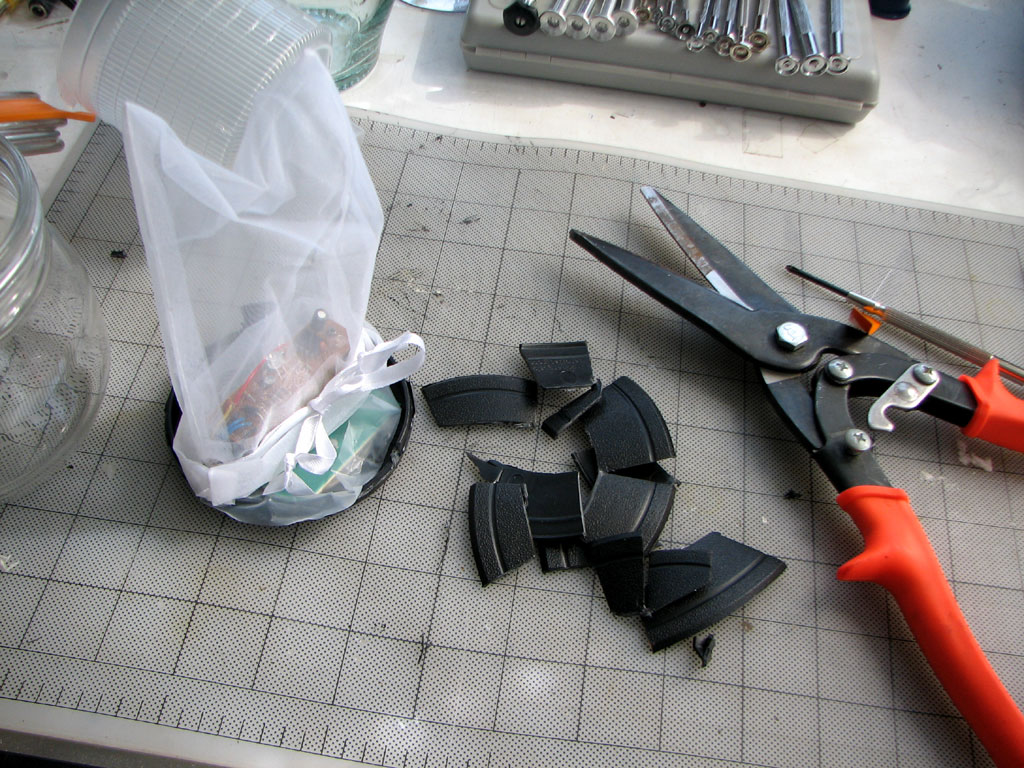
Depending on the type of container used, the cap may need some trimming. We used a pair of metal snips, but a Dremel works just as well for cutting things to the right size.
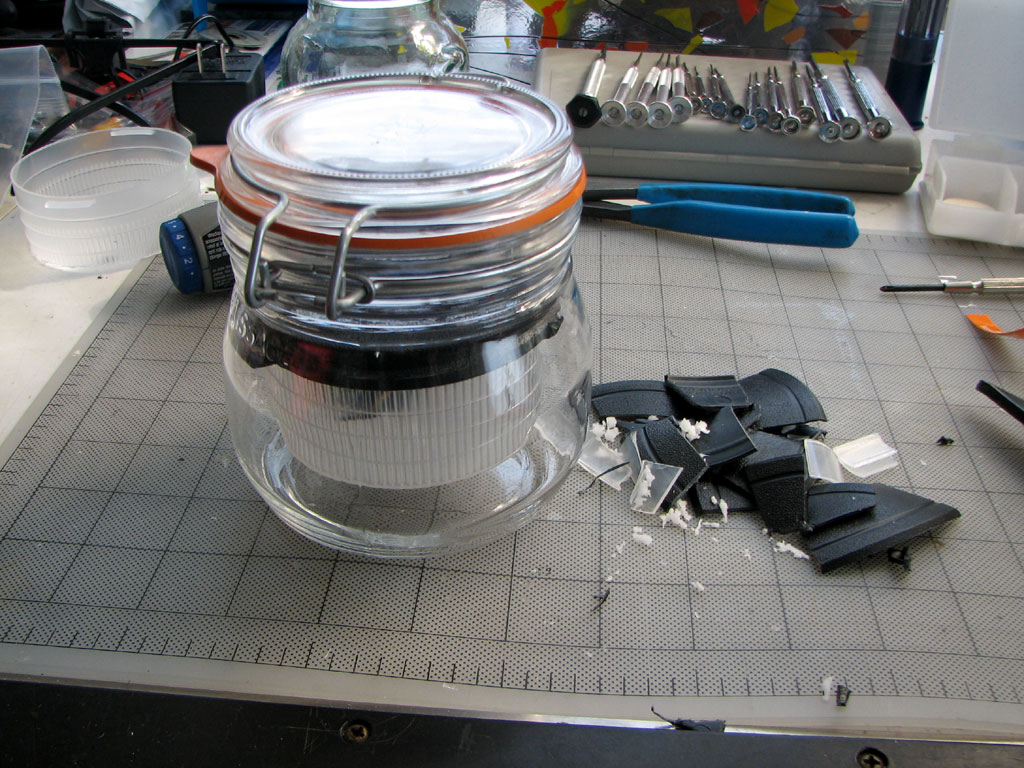
The glass canning jar we, um, borrowed, from the RainyDayKitchen was a bit too small for the solar panel housing, so we trimmed the housing to fit. We had to do a little altering to the defuser as well. Since there were four solar units in the package, we rounded up a few other containters to see how things would look in variously shaped jars. The assembled units were placed outside for the rest of the afternoon to catch some rays.
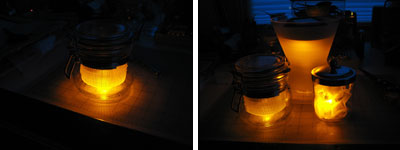
Everyone waited around for the sun to set. We were all eager to see if when lit, our sunlight catchers would be bright enough to be useful, or at least pretty. We were not disappointed! - Wan Chi Lau (permalink) |
||||
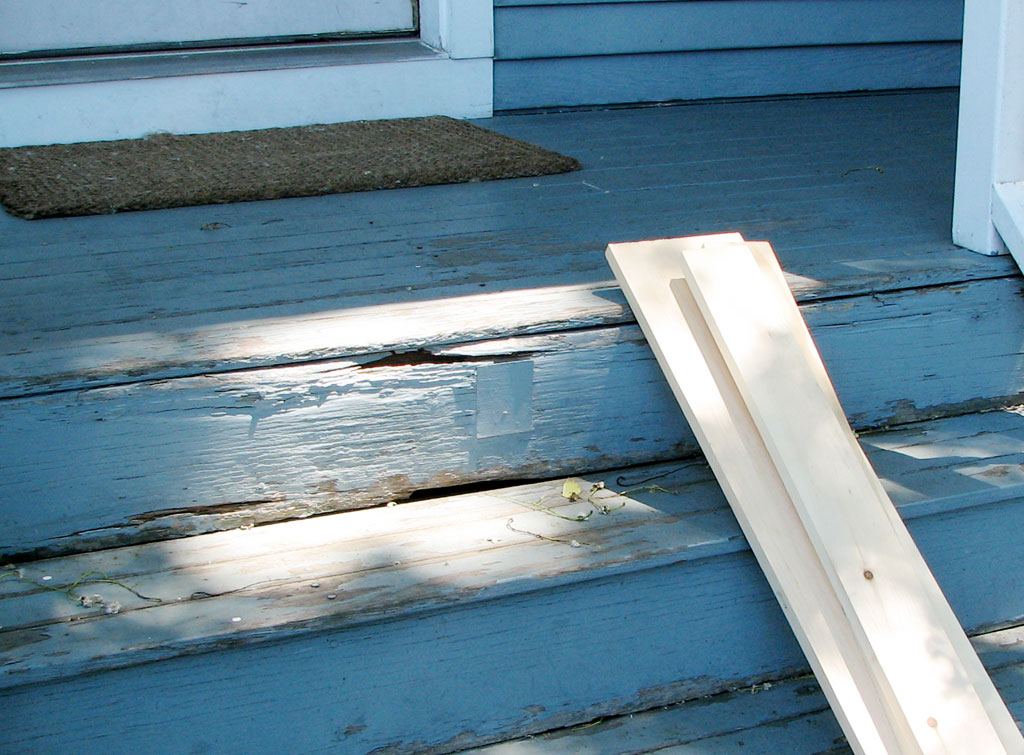
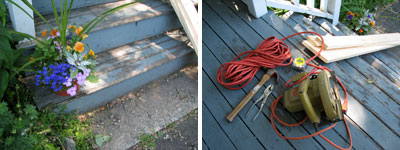
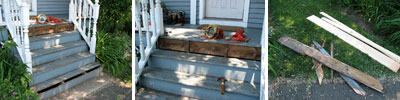
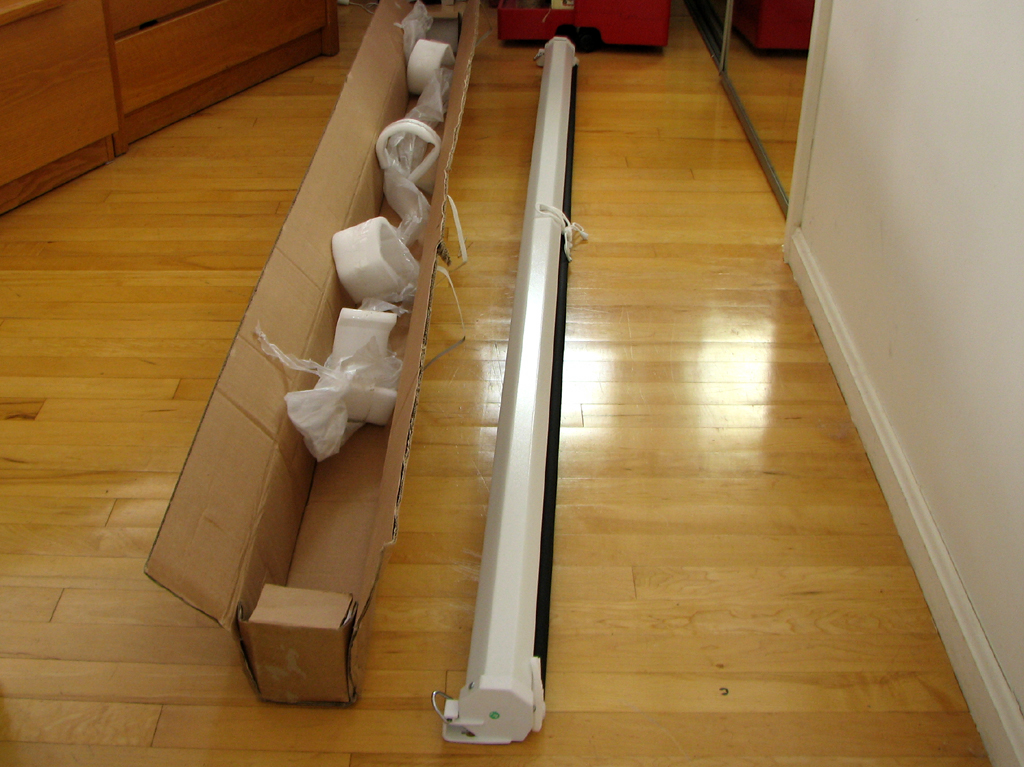
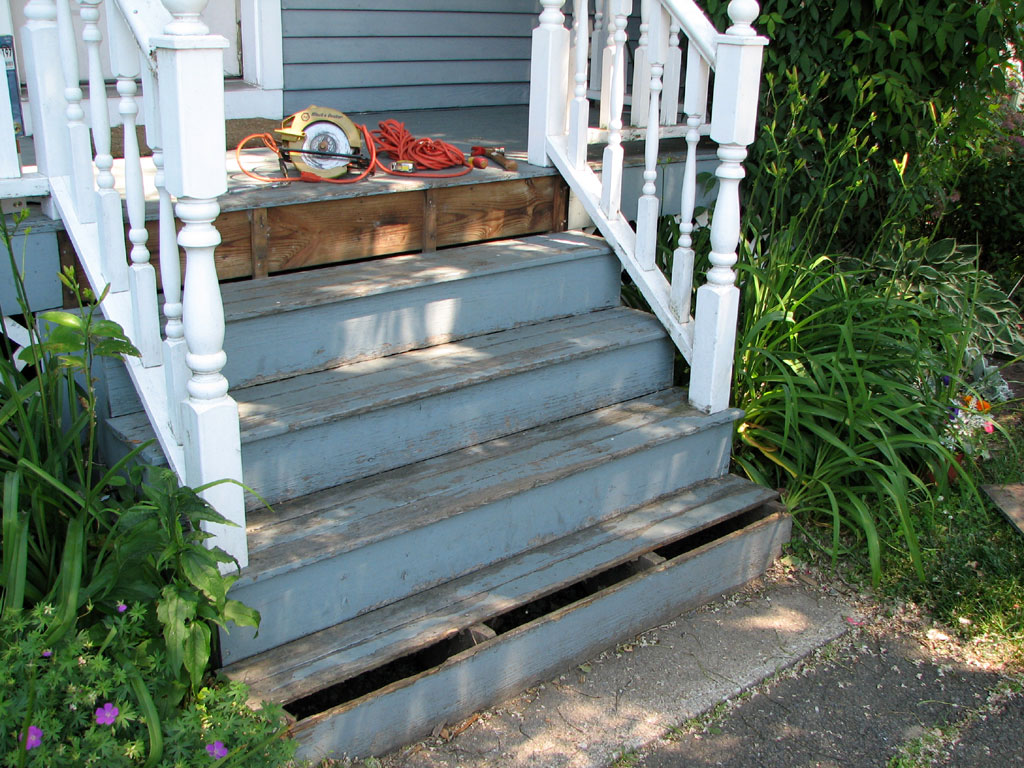
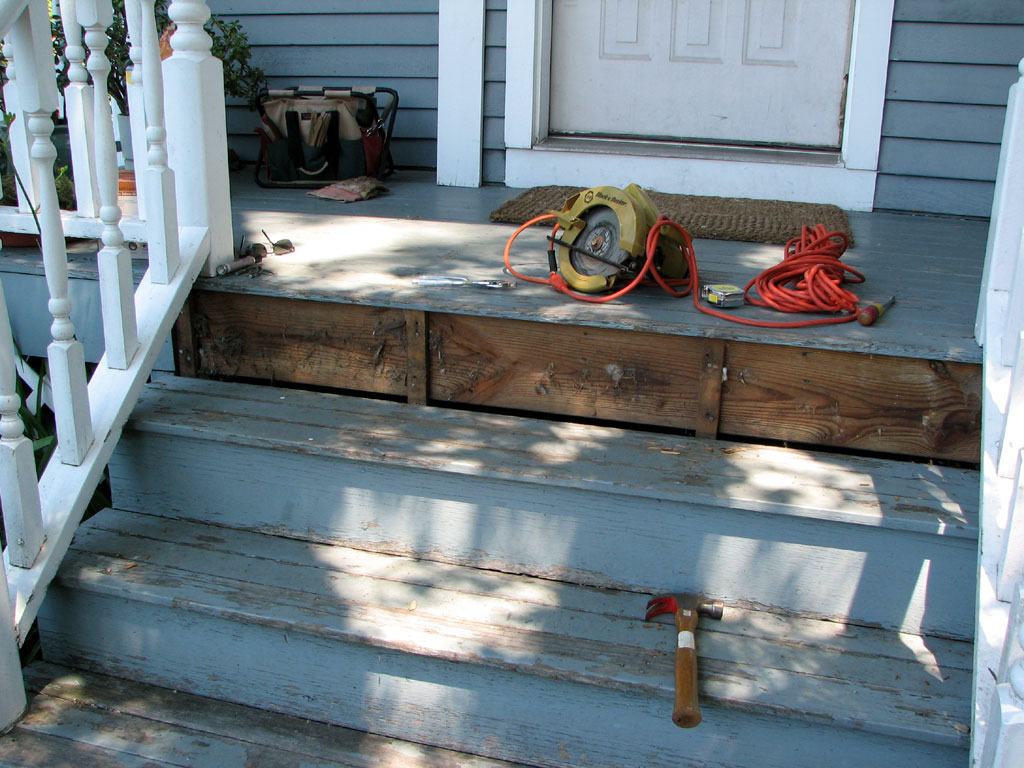
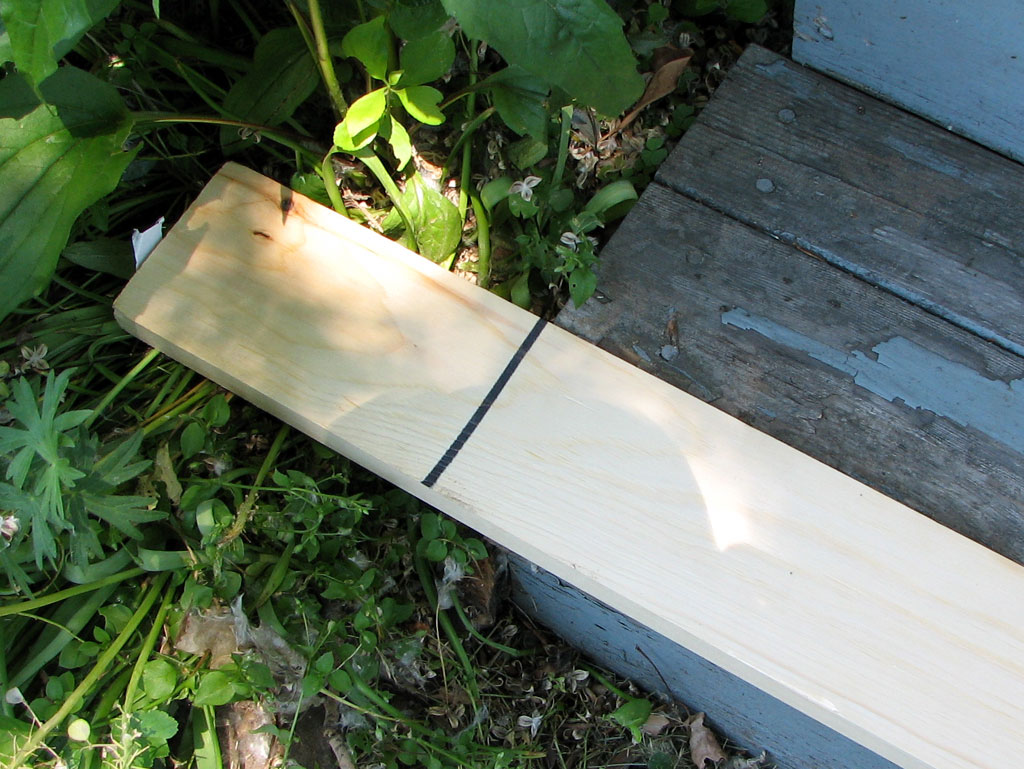
Some of the wood on the front steps needed to be replaced. We got a quote of $389.00 from the contractor last week for fixing the front steps, painting not included. Well, we knew that wasn't going to make it past the folks who sign the checks.
A quick look at the boards and it was clear not all of them needed to be replaced. We decided to replace just the ones which were rotten or loose and give everything a fresh coat of paint. It should be a pretty simple repair project... something perfect for a Sunday morning.
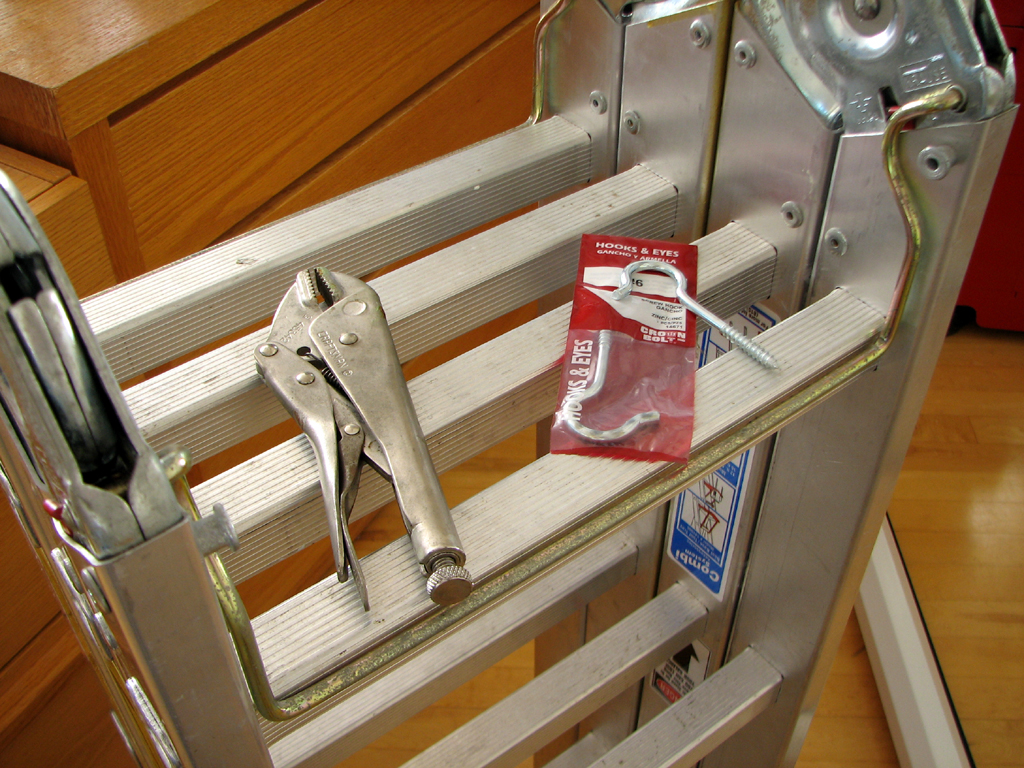
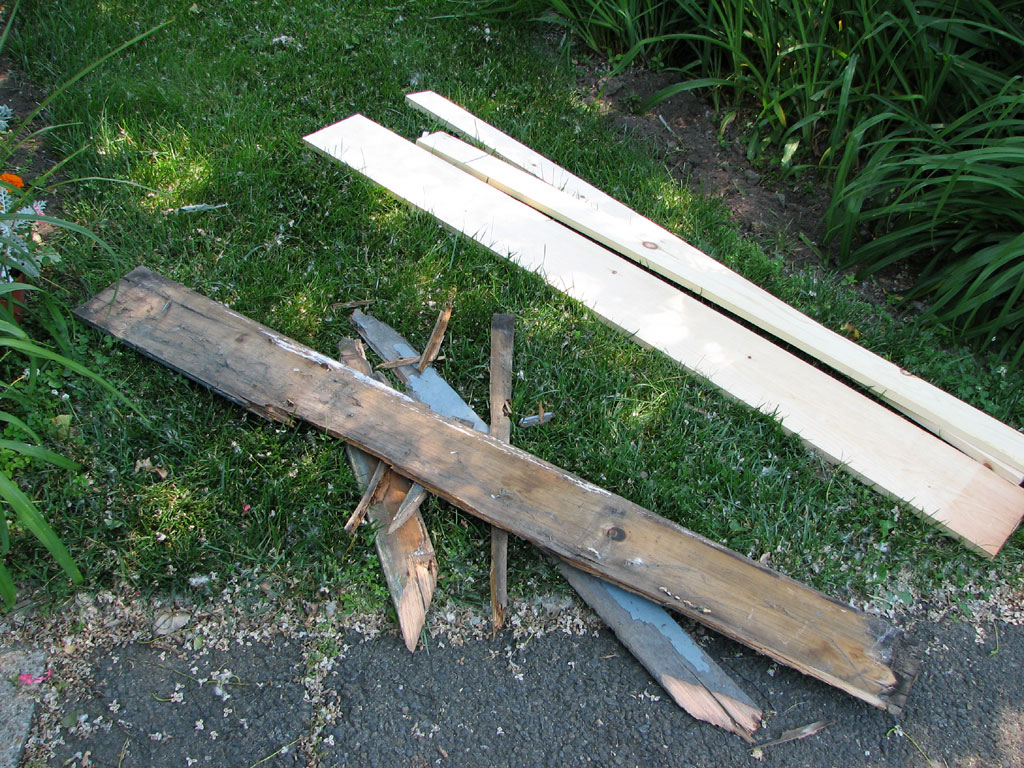
We gathered the tools from the RainyDayWorkshop, picked up the necessary boards at Home Depot, and got to work this morning.
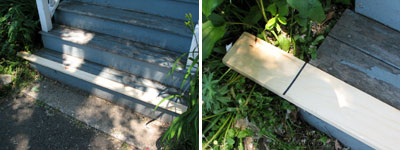
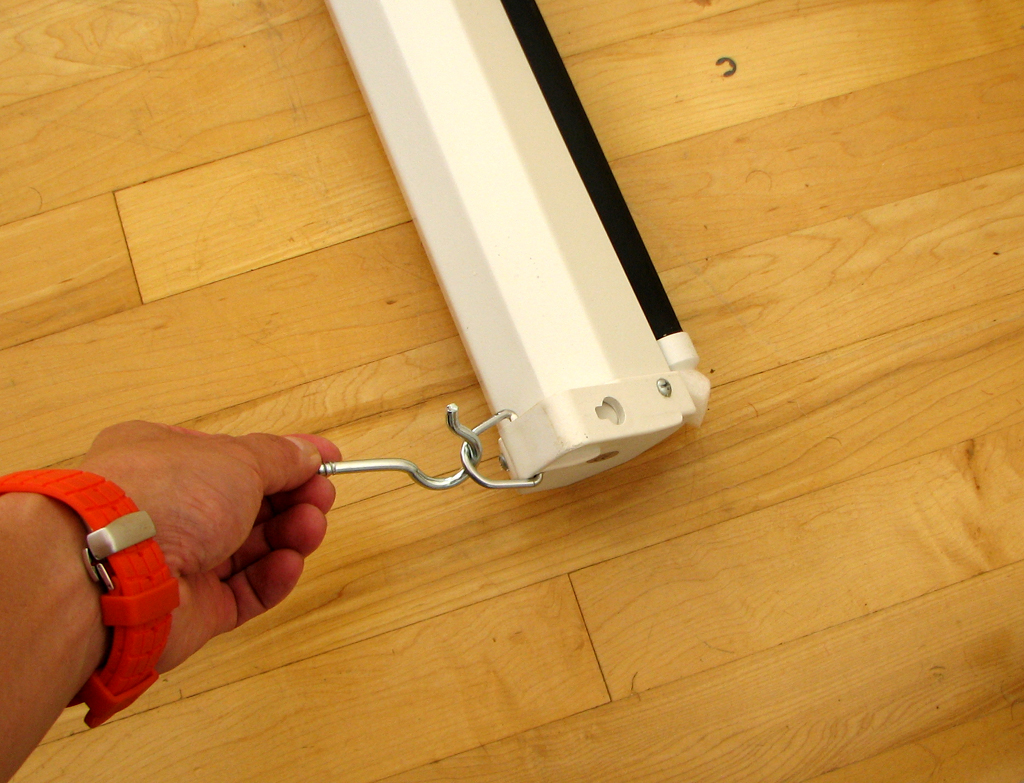
Getting the damaged boards off was not as simple as we first thought. While the boards were damaged, the nails were still holding fast. We finally decided to break up the boards and just yanked them out. That worked just fine... sometimes hitting things with a hammer IS what's needed.
The easiest way to make sure the cut is the right size is to mark it while it is in place. Make sure to check that the other end is flush with other planks, mark it, and cut it. It'll be perfect every time.
So, for about $20 and an hour or so of effort, we had the Front Porch Repair Project pretty much done. Of course, the steps still need to be scraped and painted. We'll wait until Monday when the interns are back before tackling that task :-) - Wan Chi Lau (permalink) |
||||
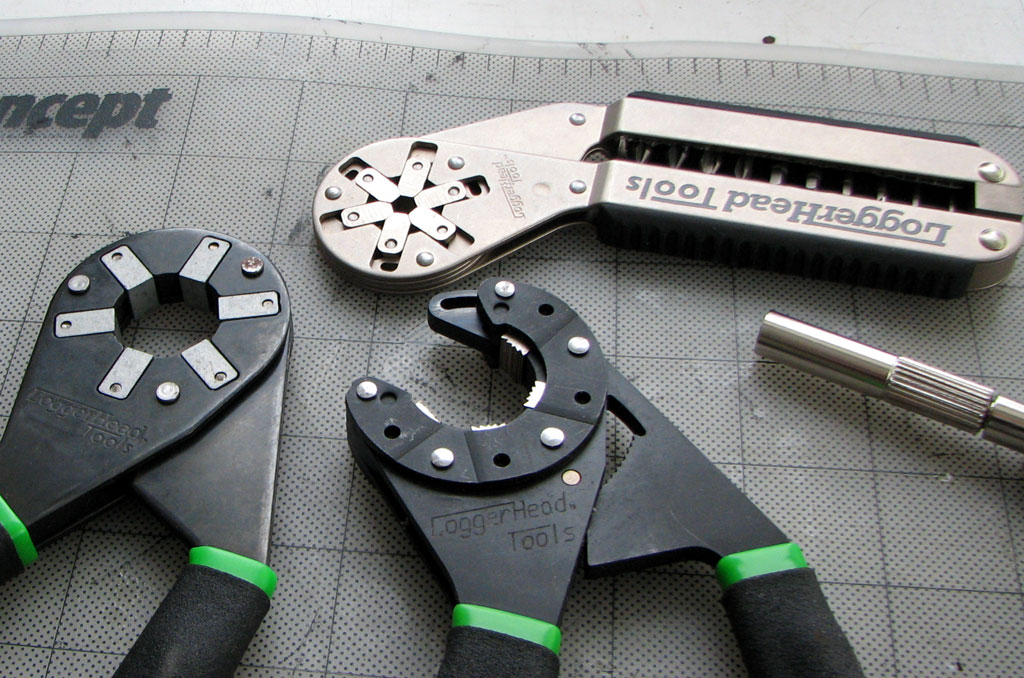
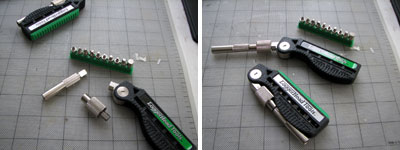
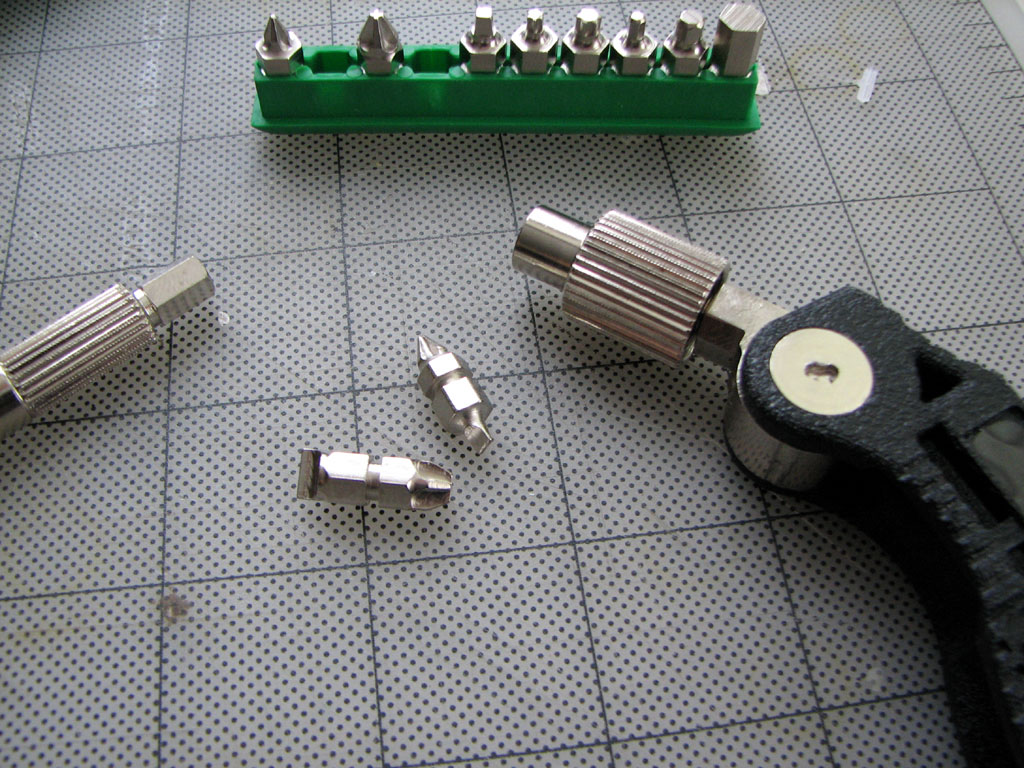
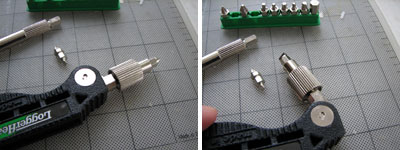
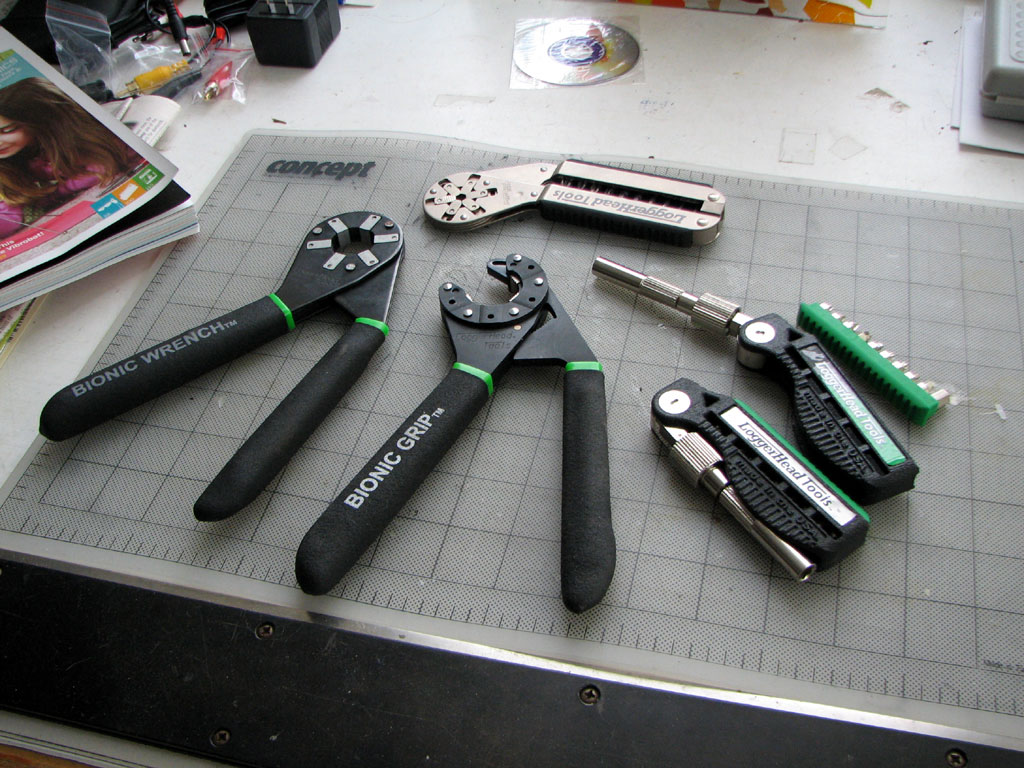
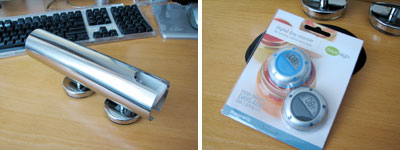
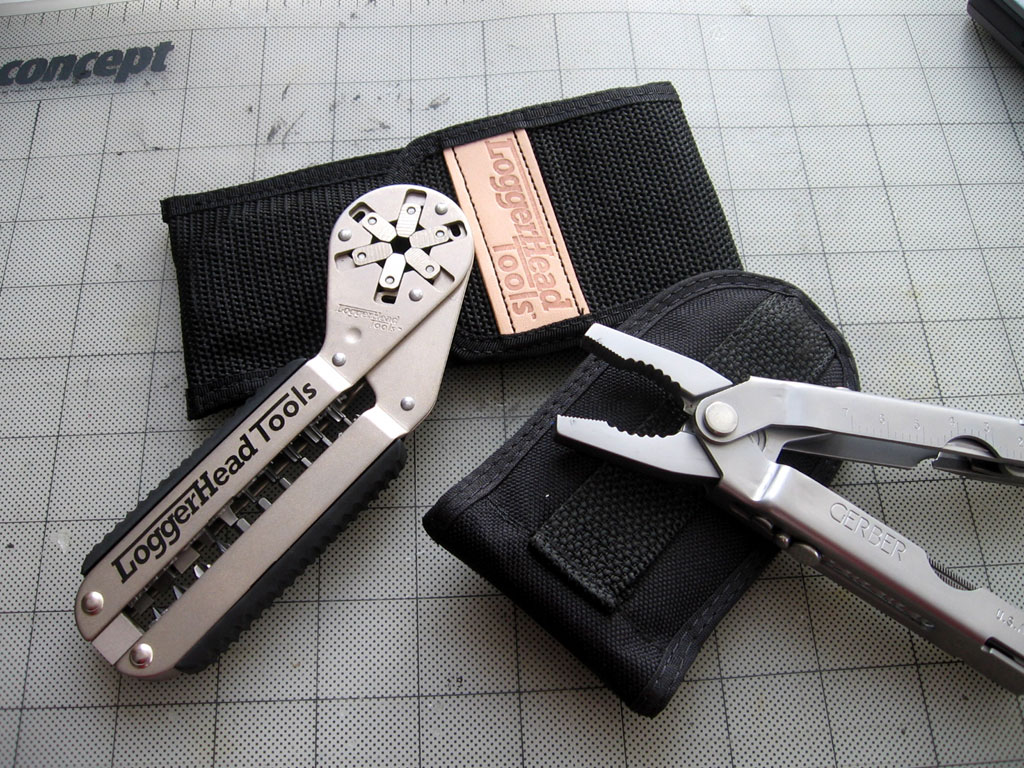
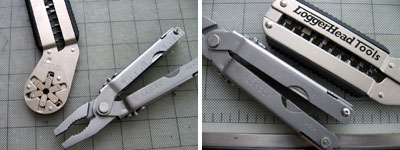
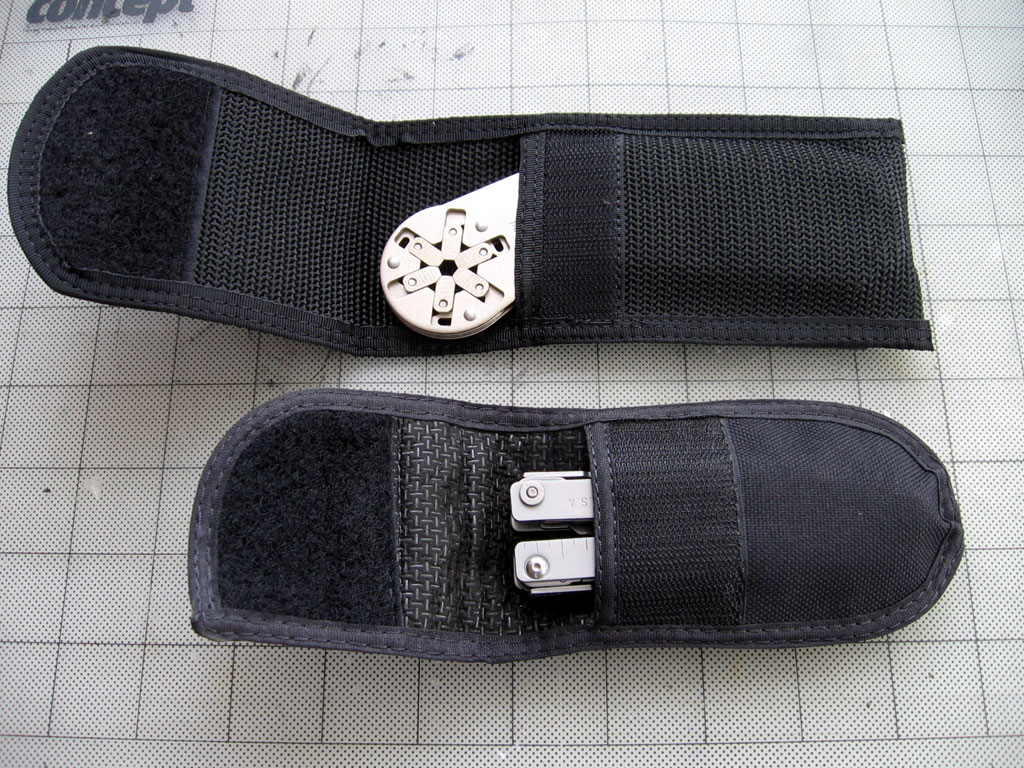
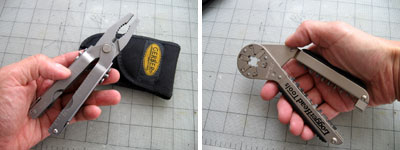
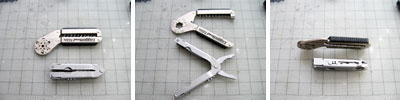
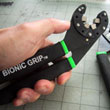
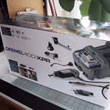
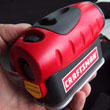
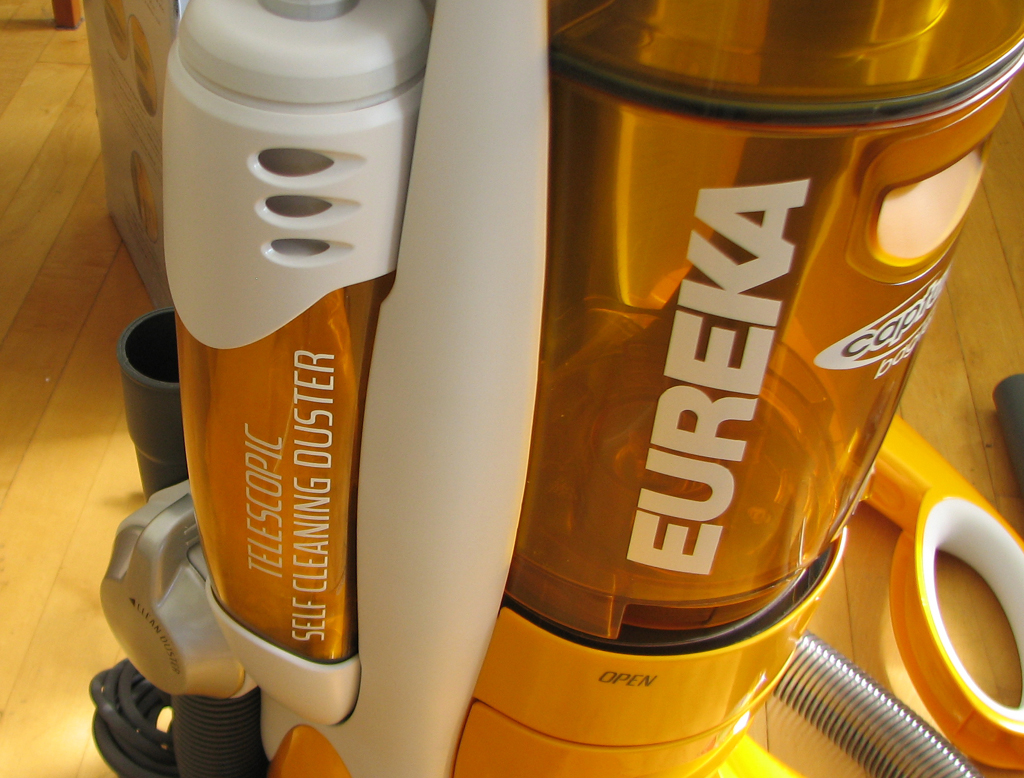
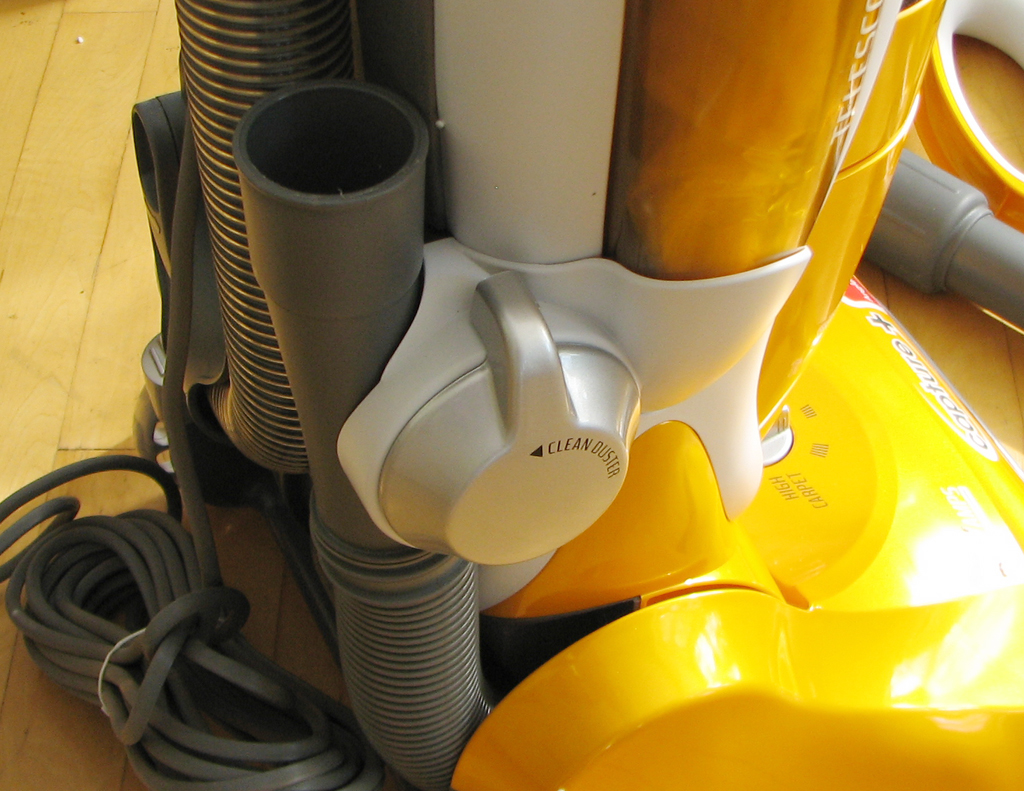
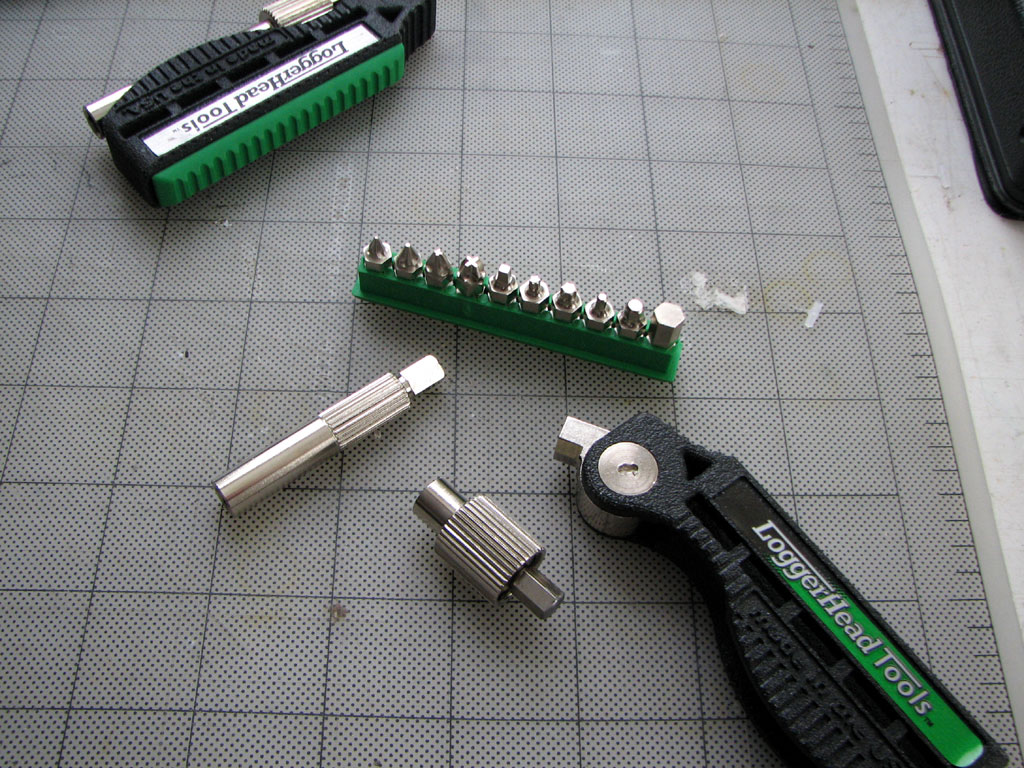
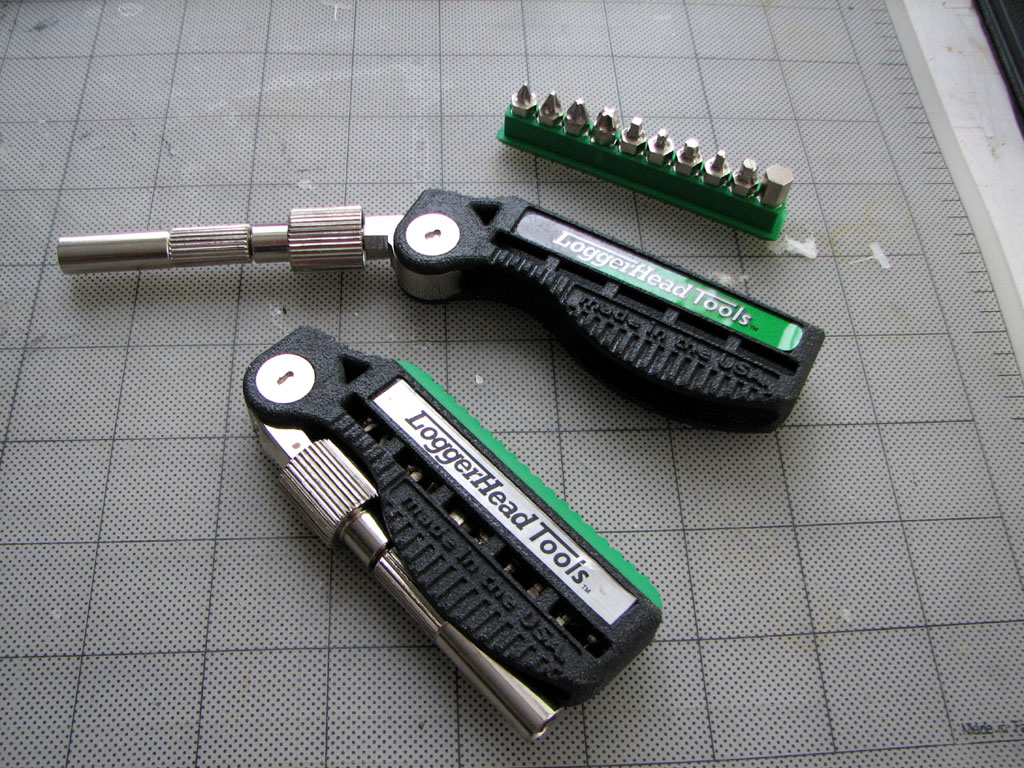
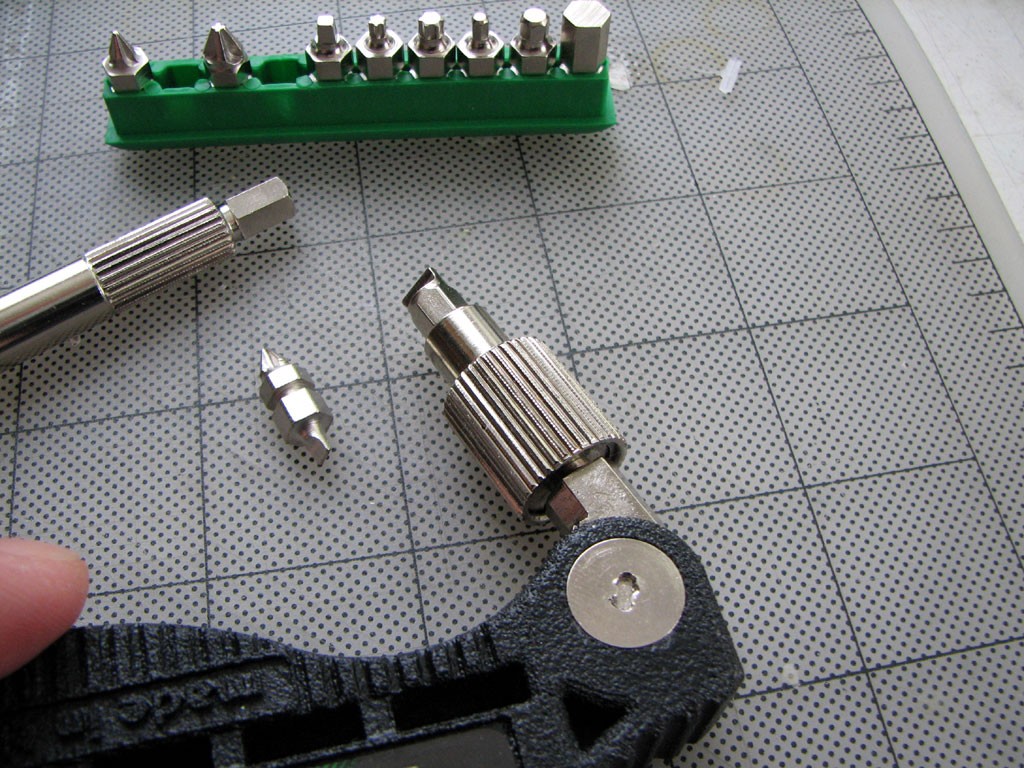
Which tool is unlike all the other tools? No, this isn't one of the SAT or IQ questions :-) If you said the "silver tube on the right", then you are correct. That little tube is the business end of the Bit Dr., a new offering from Loggerhead Tools.
We have been big fans of stuff from Loggerhead Tools ever since we checked out their Bionic Wrench. They have released a few different tools based on their patented six-sided grip. This new pocket-sized tool call the Bit Dr XR is Loggerhead Tools first venture outside of that design, but it is just as ingenious.
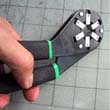
The Bit Dr. is composed of three main pieces and a collection of bits. The shafts are attached and held in place to each other by internal magnets, making adjusting the tool really simple. The Bit Dr also has a built-in racheting mechanism. We'll have a video of racheting mechanism in action in the FirstUse review. It shows much clearer what a clever a design it is.
There are two different heads on each bit. The magnets in the various drivers makes it a snap to change. The driver may be positioned at the most convenient angle for the task at hand.
We have had this Bit Dr. for a little while and it has come in handy quite a few times already. It is a great little tool to toss in the car's glove compartment or in the toolbox. You may find that it is the first item you reach for when you need to fasten or loosen something. Here is another RainyDayPuzzler for June: How many different driver heads are there on the Loggerhead Bit Dr? If you can count, you can win...either count carefully or go find the answer at the source (hint, hint). When you are done counting, send you answer to us with the subject line "I don't have that many fingers and toes". We'll pick a winner from the heap of correct answers this Friday and set you up with a Bit Dr RX of your very own.- Wan Chi Lau (permalink) |
||||
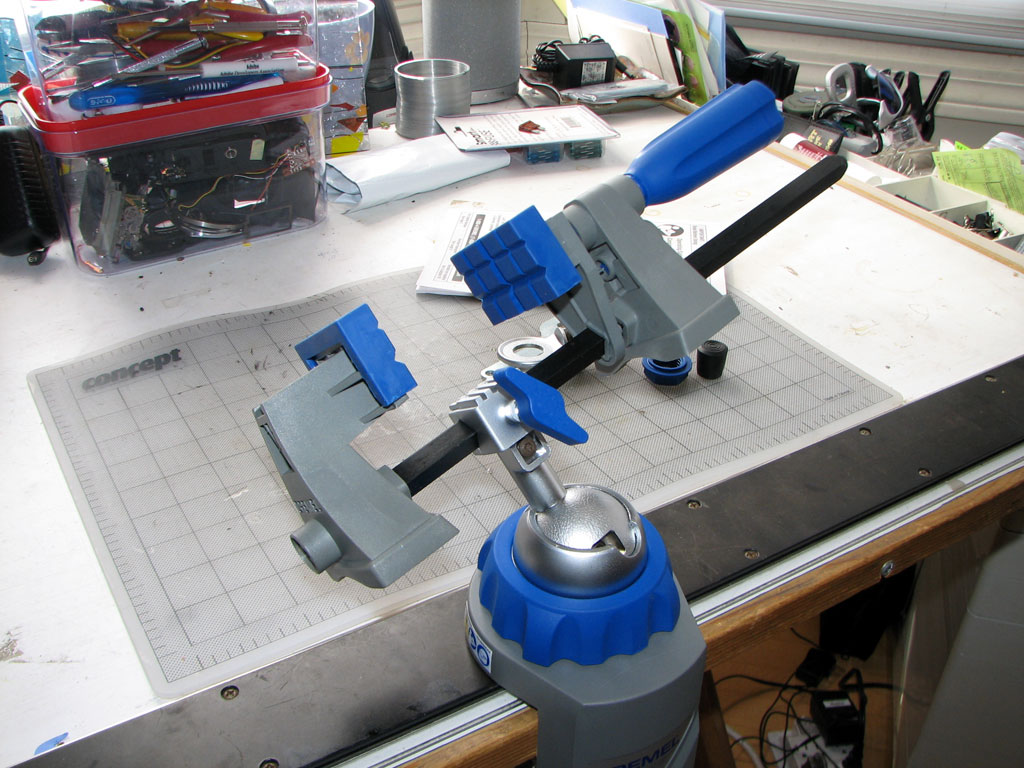
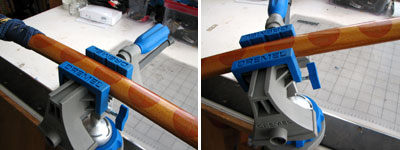
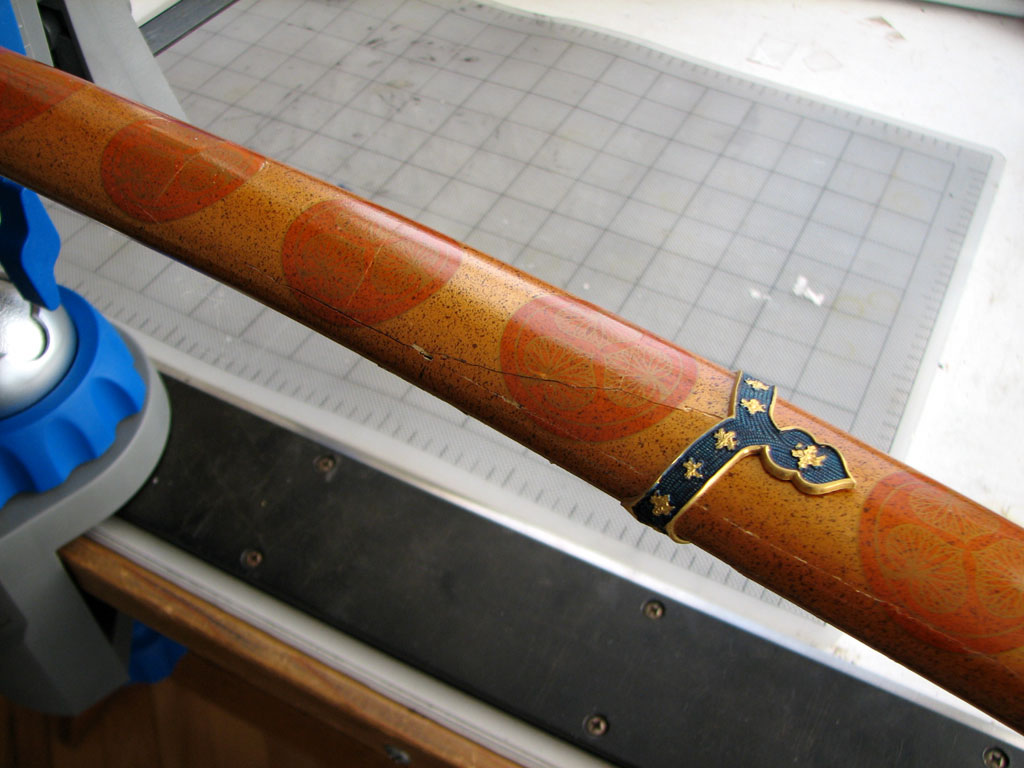
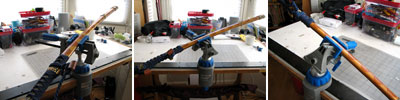
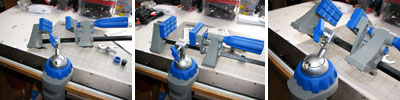
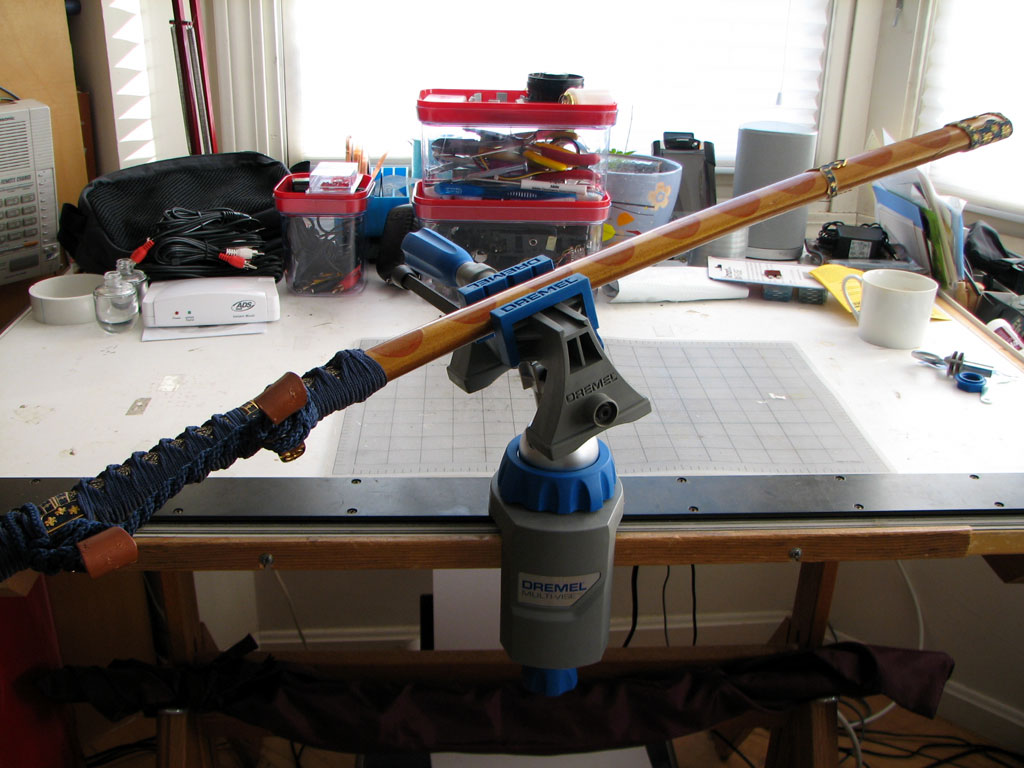
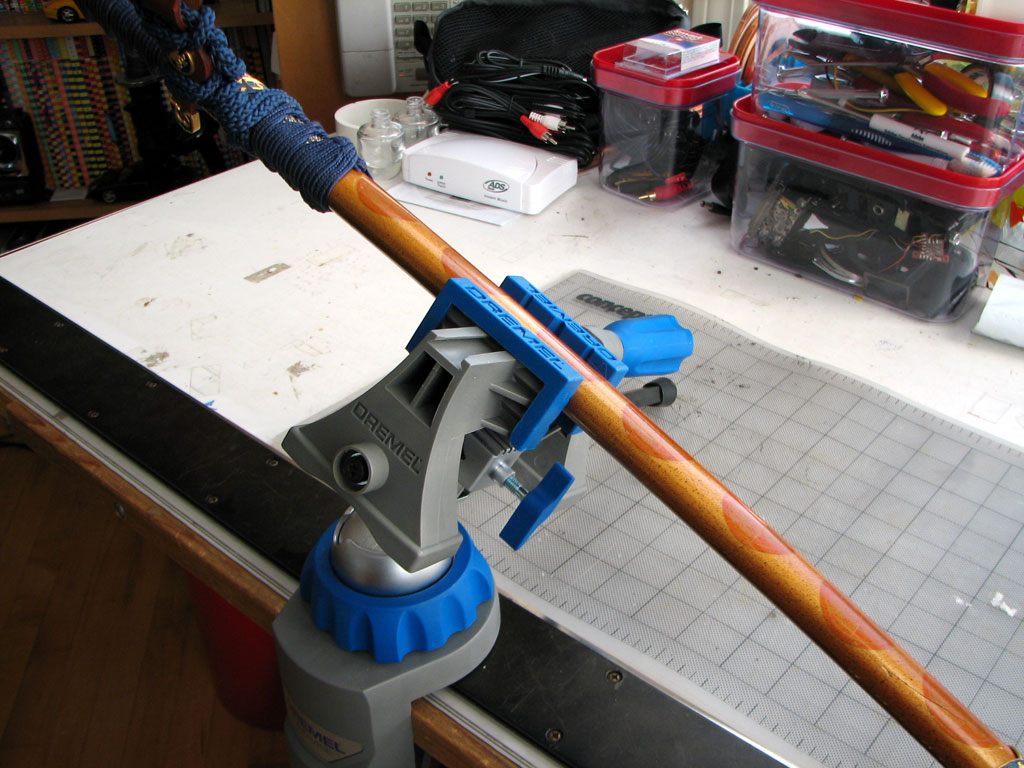
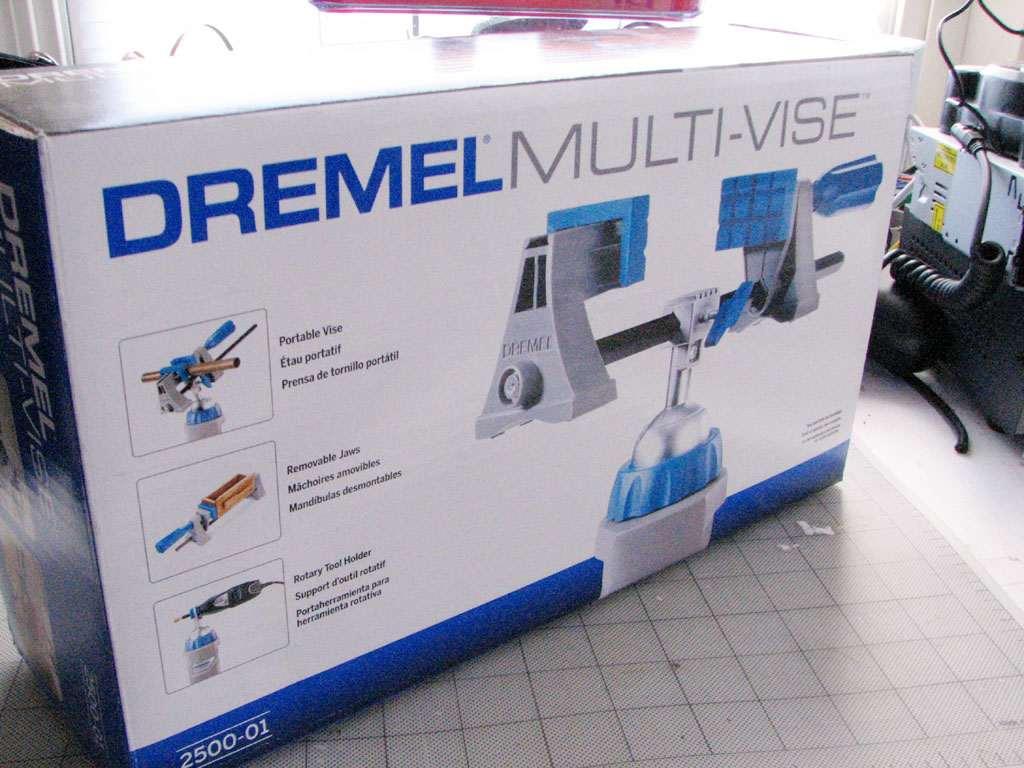
The Dremel MultiVise is perfect as a "third hand" in a lot of different DIY tasks. We had a cracked saya (scabbard) and needed a way to hold it while performing the repairs.
The Dremel MultiVise, with its rubber grips and adjustible hold position, was the perfect tool for the job. The rubber grips held the saya securely without marring the finish.
The adjustible angle enabled the piece to be held at the exact position for the repair. Check out the detailed FirstLook of the MultVise we did back in March for its other features.
Because we were able to have both hands free, we were able to apply the glue at precisely where it was needed without making things worse or making a mess.
Once the glue had been applied, we positioned the scabbard in an angle such that gravity closed the gap. When done, we were able to just leave the repaired piece in the MultiVise to dry... very convenient. - Wan Chi Lau (permalink) It is the start of another month...which means time for a new RainyDayPuzzler! June is the time when many of us finally get around to fixing some of the things we have to fix around our home and office. It is also the time we tend to review tools.
We have reviewed some of these tools from LoggerheadTools in the past. This month's puzzler is to figure out which we have NOT. If you are a frequent reader of RainyDayRenovation (hint, hint)... this should be easy. If not, then you may have to work a little harder. Anyway, if you know, send us an email with the subject "I can fix it with this" and the link to the new item(s) from LoggerheadTools. We'll pick from the pool of correct answers at the end of the month and send you one of the tools shown.- Wan Chi Lau (permalink)
|
||||
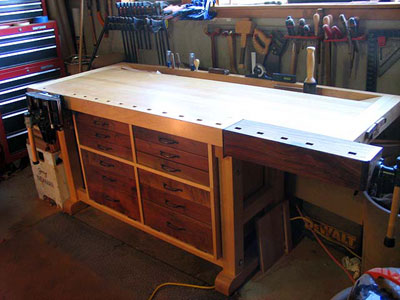
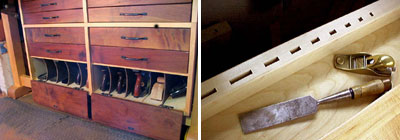
One of the great joys of woodworking is making stuff you can use. It is even better when one is good enough to make the tools to make woodworking more enjoyable. A solid workbench is an important tool for a woodworker. There are many good benches available for sale. A well made one can cost several hundreds to thousands of dollars. However, nothing compares to the satisfaction of making your own. If you have ever considered such a project, then you need to check out WorkbenchDesign.
The site is perfect reading for a rainy day. There is plenty of info on designs, materials, constructions, etc... We spent an entire evening looking around on the site. At the end, we were ready to drop everything and go start a workbench project! - Wan Chi Lau
|
||||
April 10,2007 |
||||
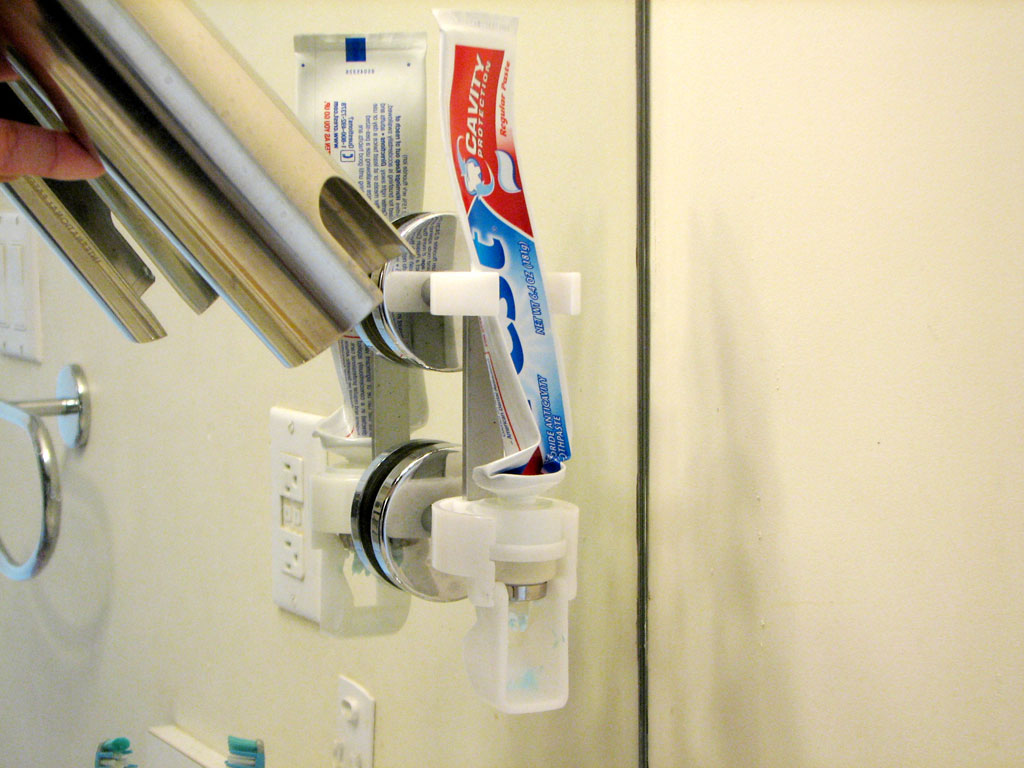
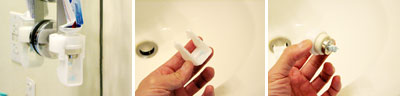
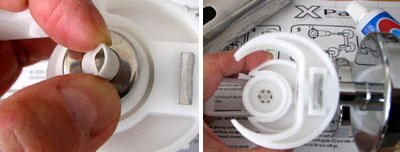
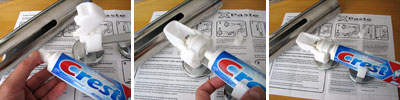
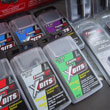
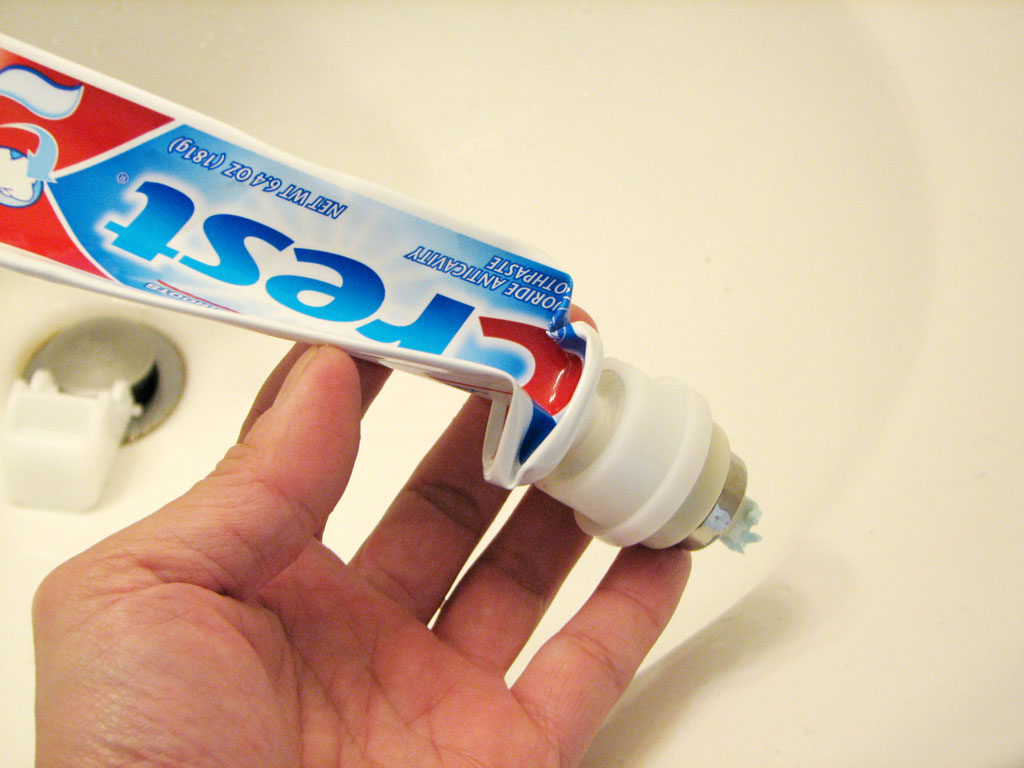
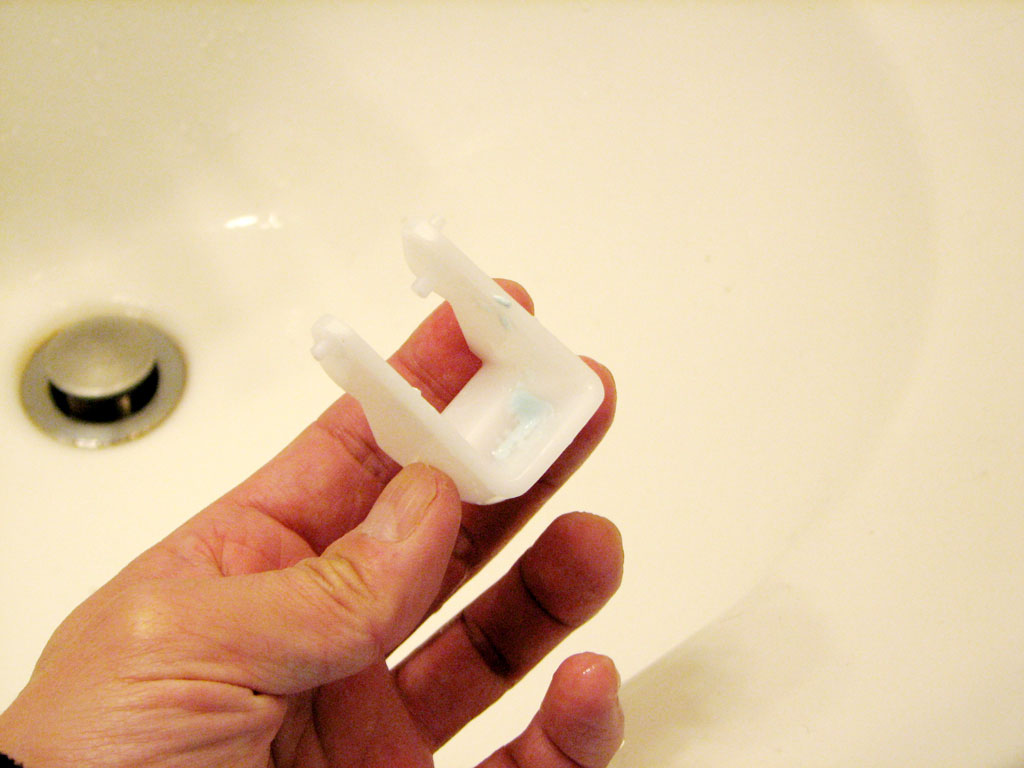
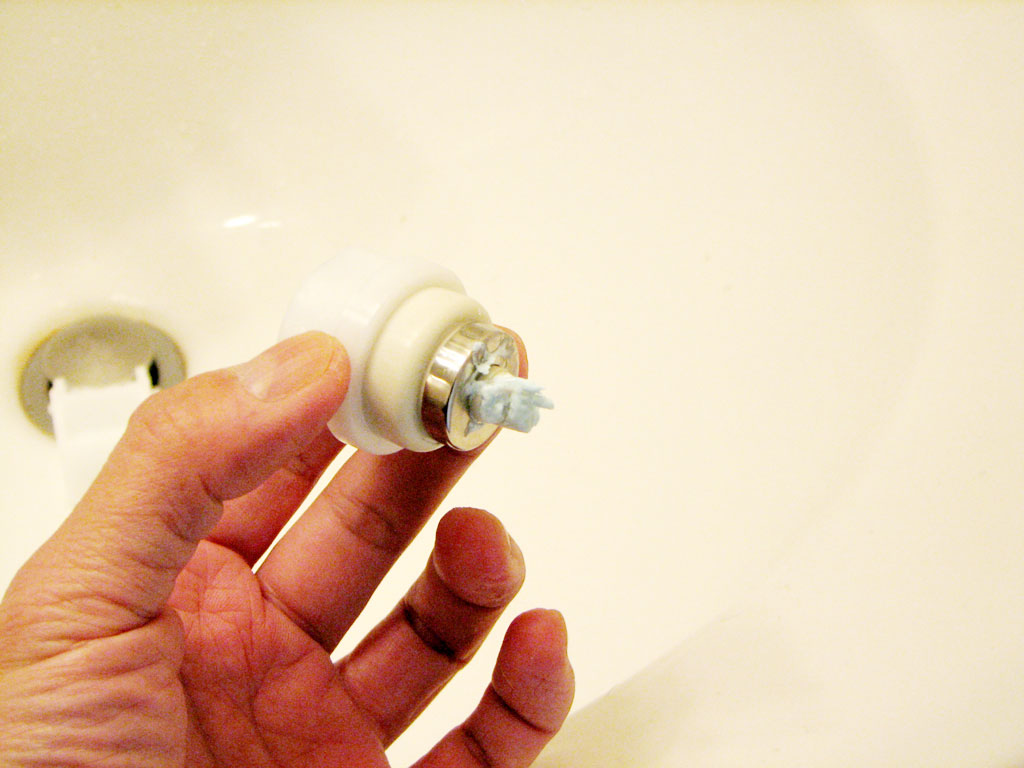
We were quite intriqued to see how the X-Paste dispenser would fare after a few weeks of use. It took exactly one month for us to empty the first tube. When we say "empty", we meant every last bit of toothpaste was extracted from the tube.
Here are close-up shots of the pump, level, and tip after four weeks of use. It was a lot cleaner than we would have thought, given the amount of use.
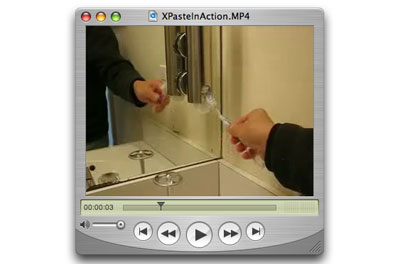
We were amazed with the pump's ability to get out all of the toothpaste out of the tube using such a simple design. There is not much that can go wrong with this device...which is exactly what good design is supposed to achieve. To see how the X-Paste works, check out the video from our FirstLook/FirstUse review back in March.
Our impressions of the X-Paste dispenser after four weeks of using it InTheWild is that it is a well-engineered product which exceeded our expectations. Get one and enjoy it. - Wan Chi Lau |
||||
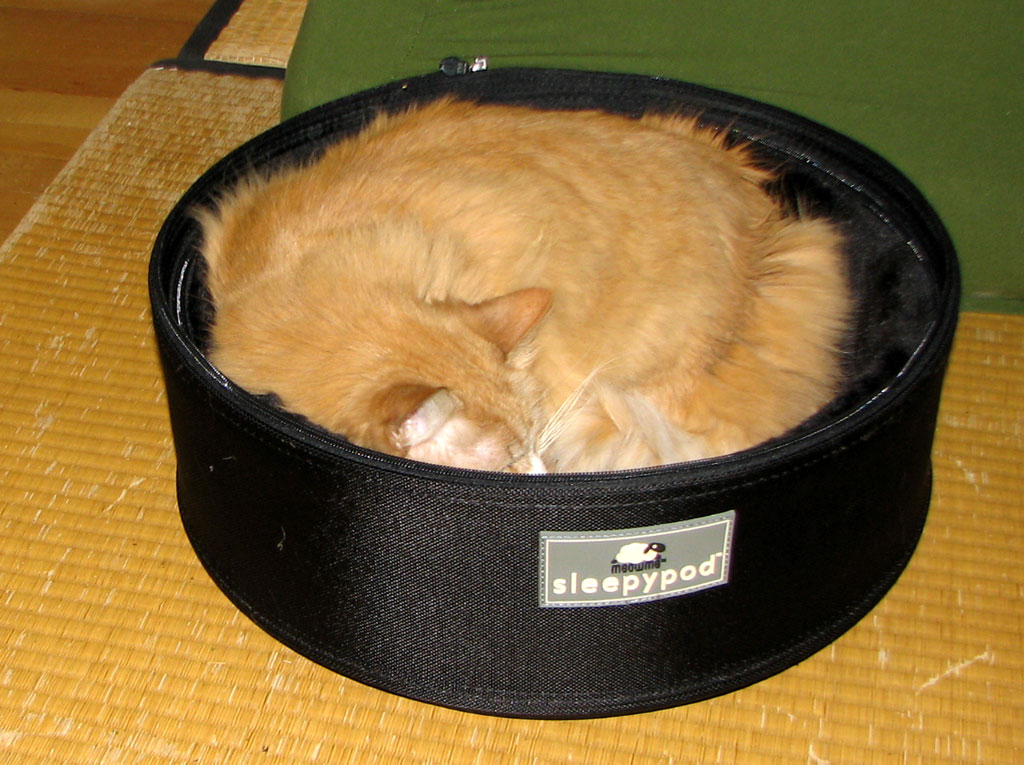
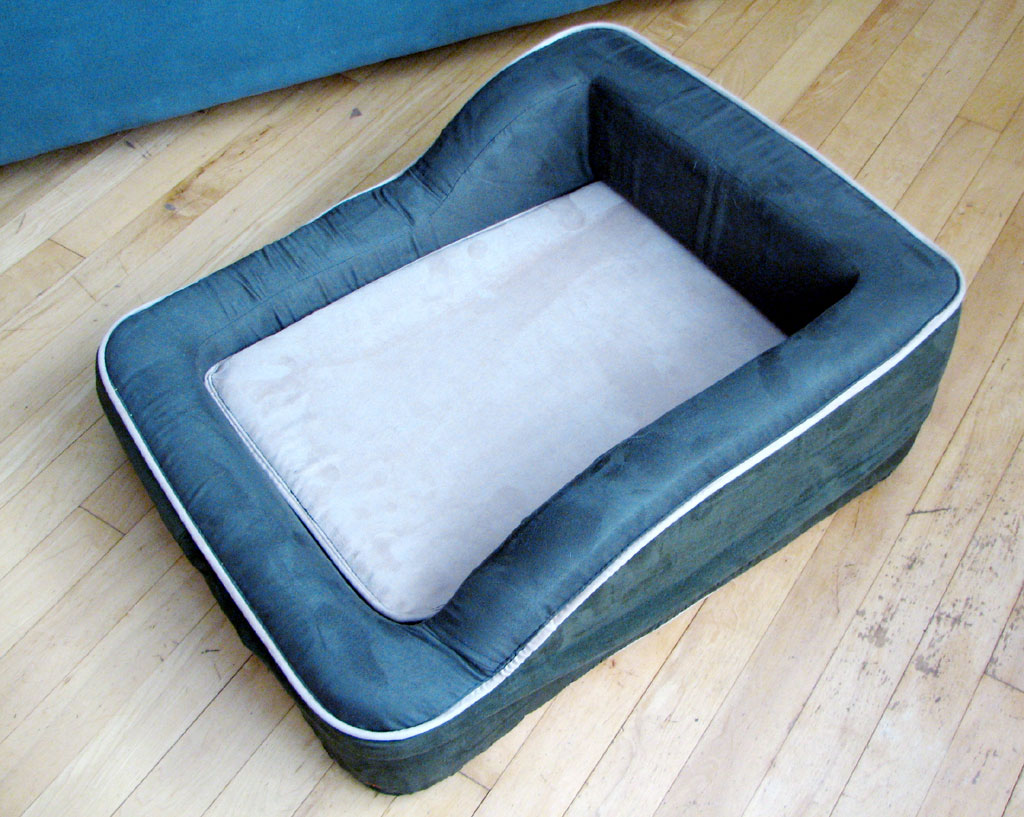
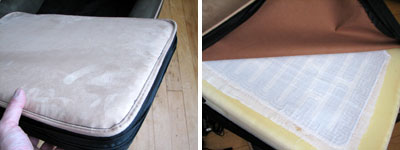
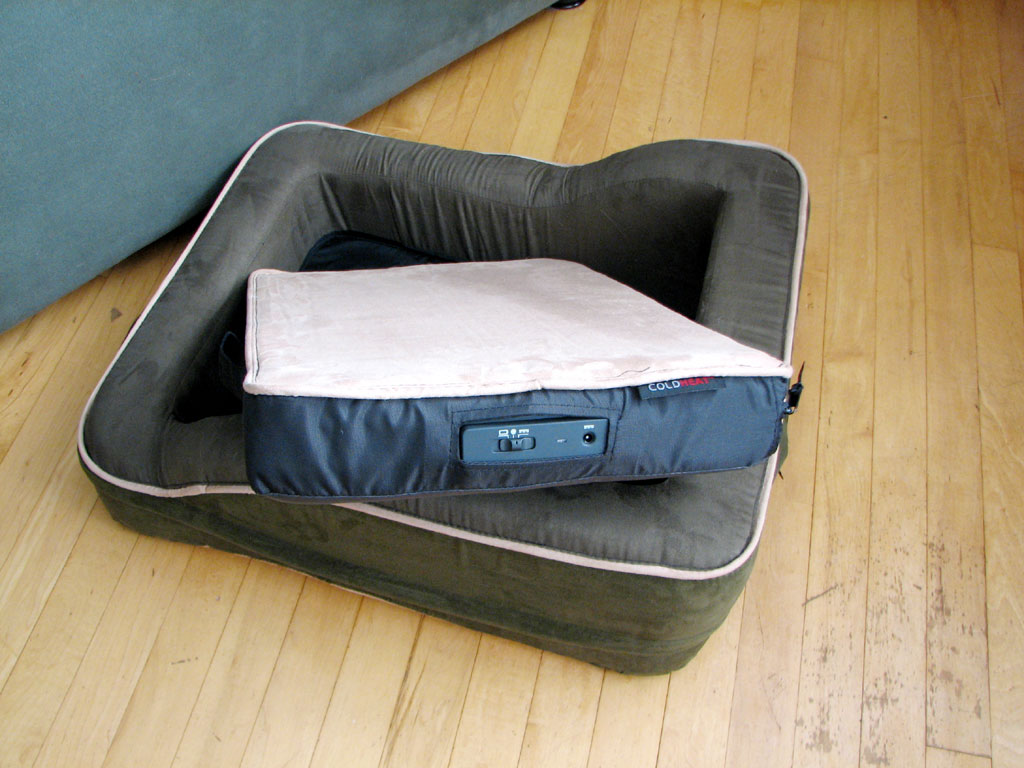
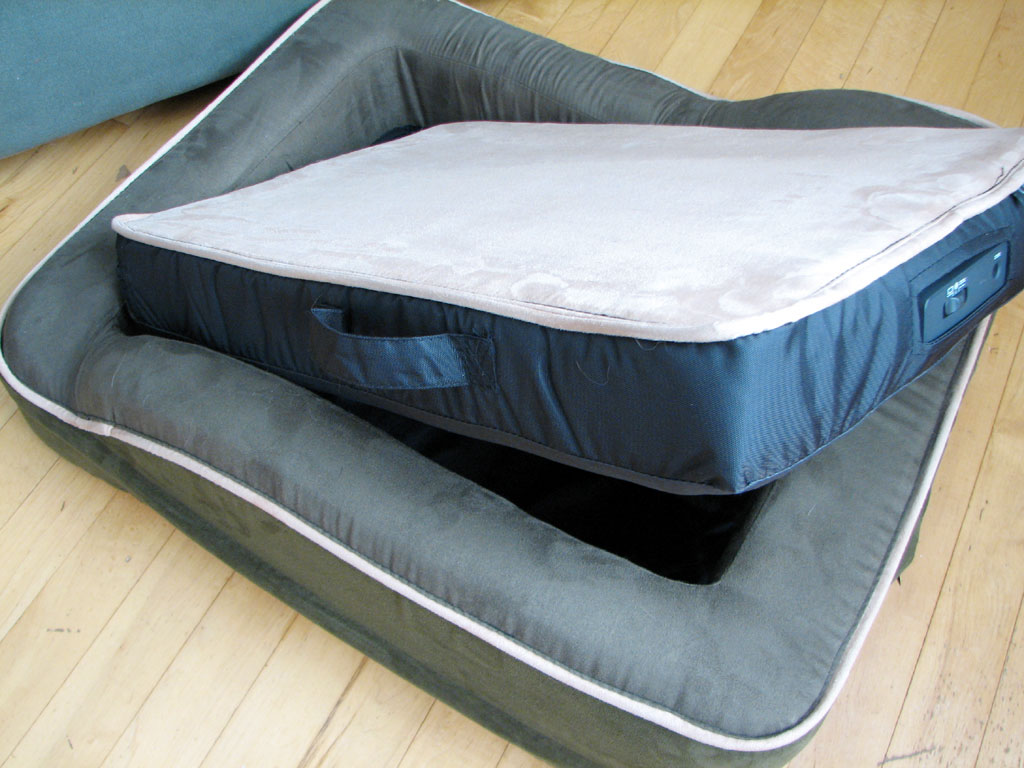
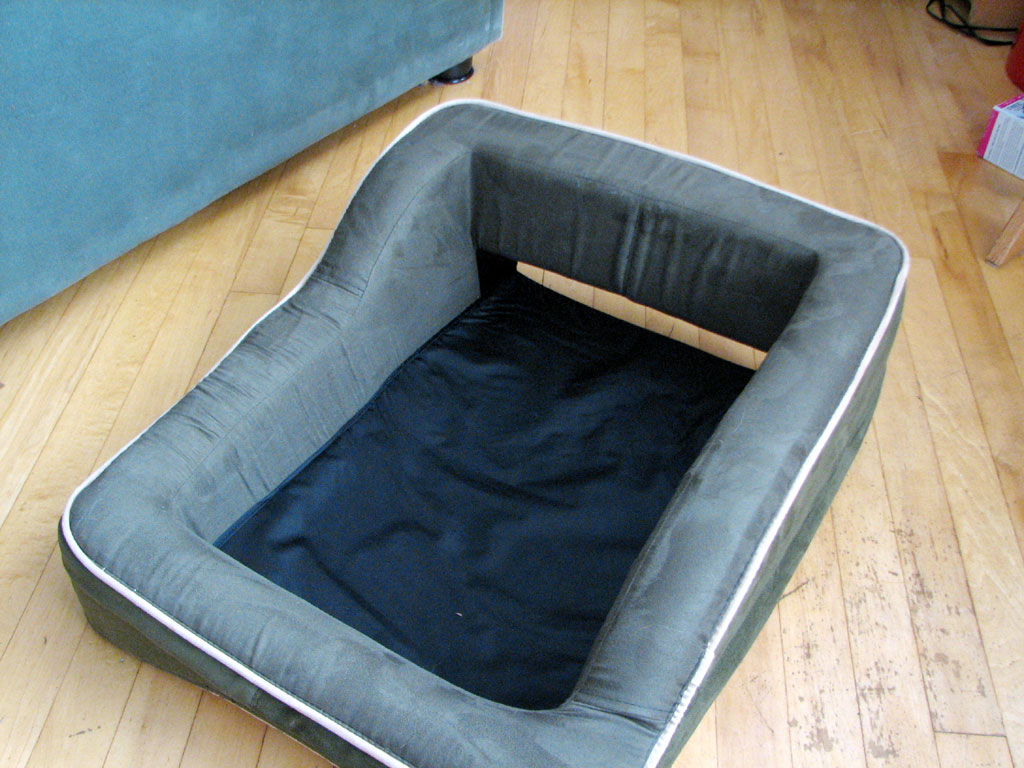
It has been a few months since the MeowMe SleepyPod showed up at the RainyDayMagazine office. Since its arrival, it has seen a lot of use, especially during morning and afternoon nap times. Many of you have asked us how the SleepyPod held up, so we thought Spring would be a good time for the InTheWild follow up.
While one of our furry interns likes the SleepyPod for its "play" value, the other likes it for its primary intended use...a cozy and protected napping spot.
A good test of the comfortable-ility of a napping spot is whether an intern abandons it when...another staff member...disturbs him/her (by perhaps sticking a finger in one of their ears) when he/she is all curled up in it. Clearly, with the SleepyPod, Buffy has decided that nothing is going to disturb her mid-morning nap. - Wan Chi Lau
|
||||
March 26,2007 |
||||
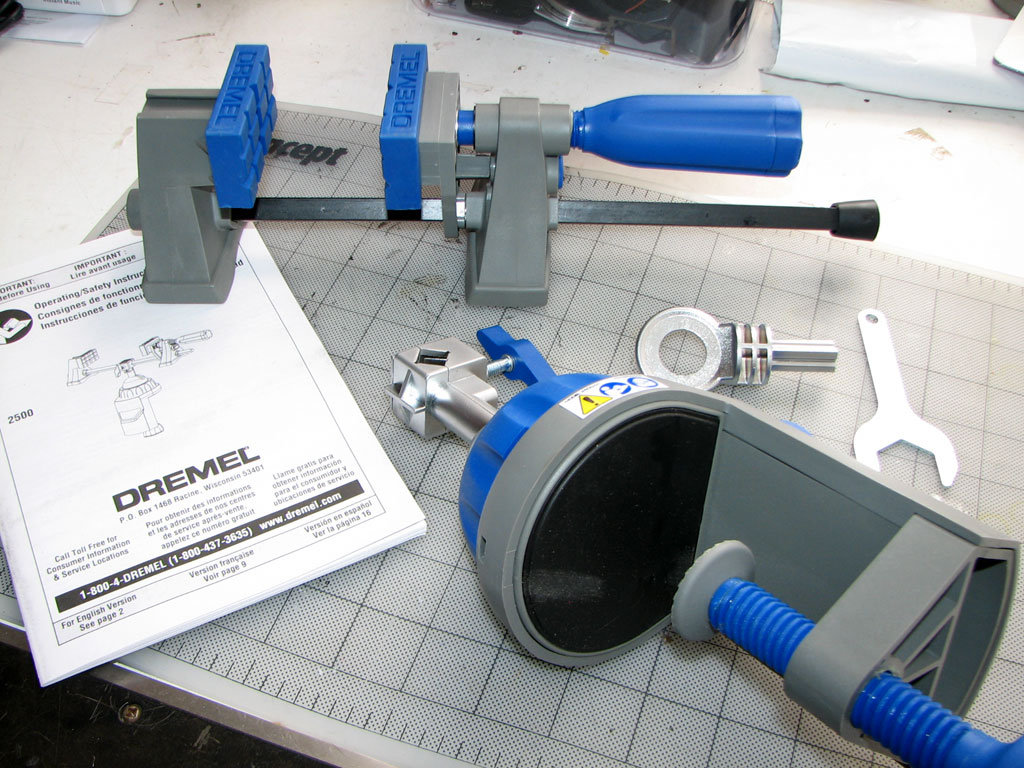
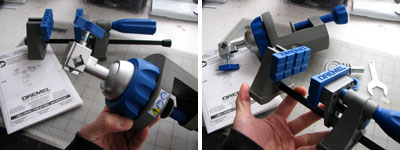
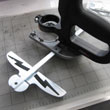
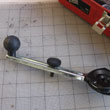
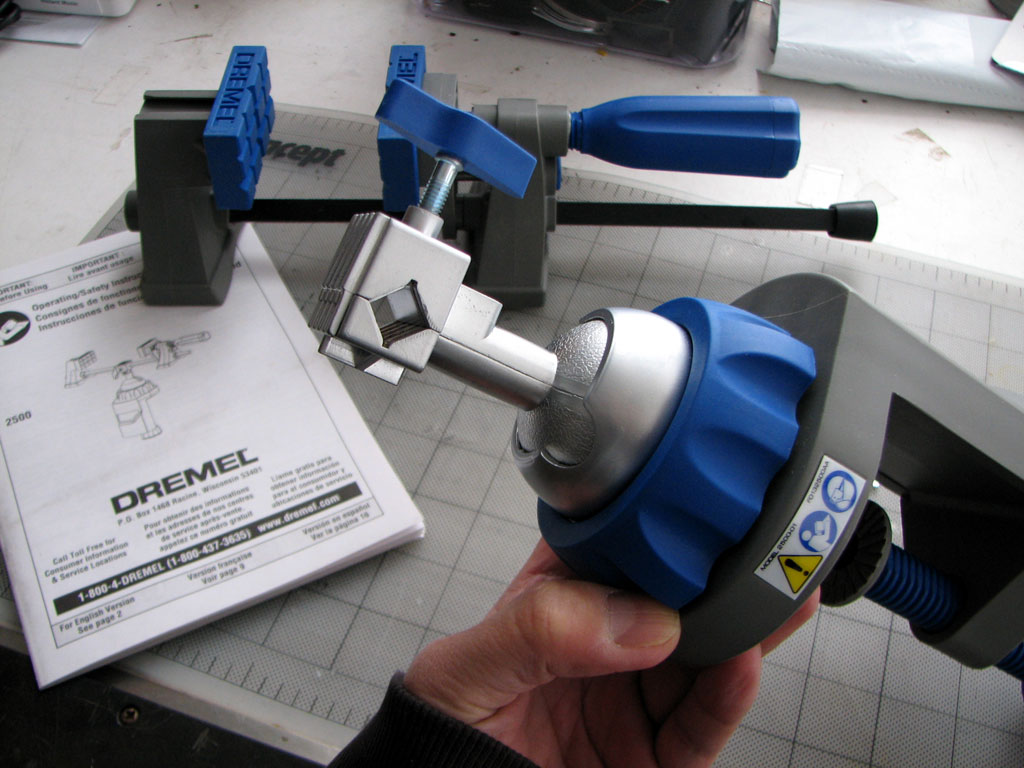
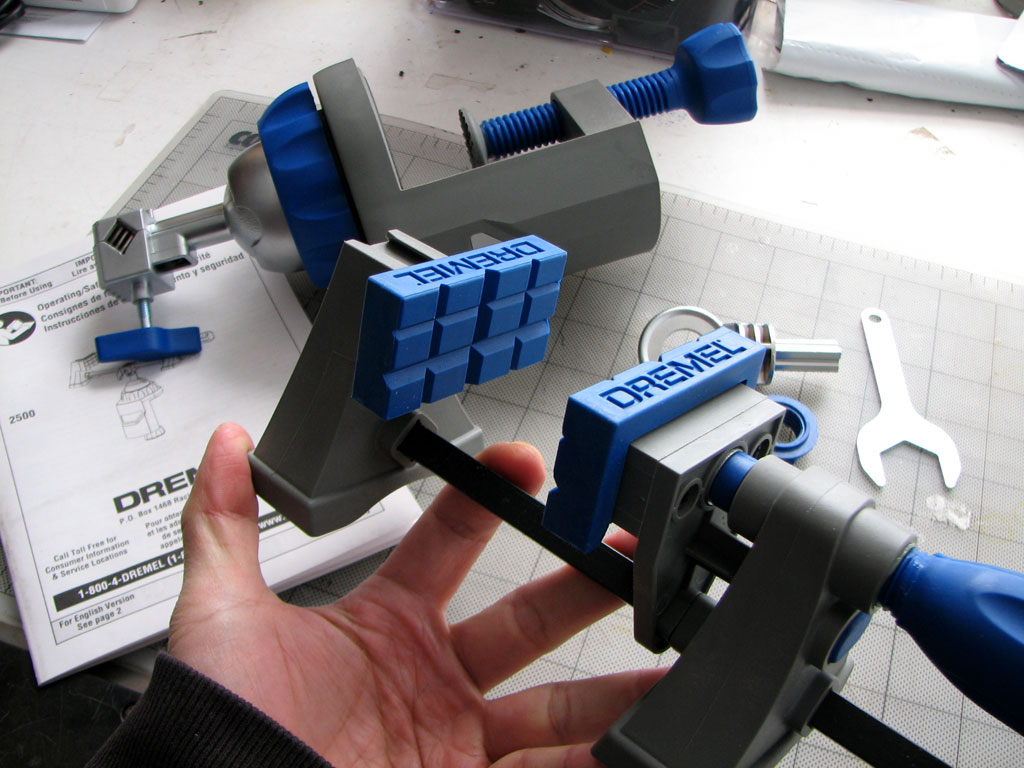
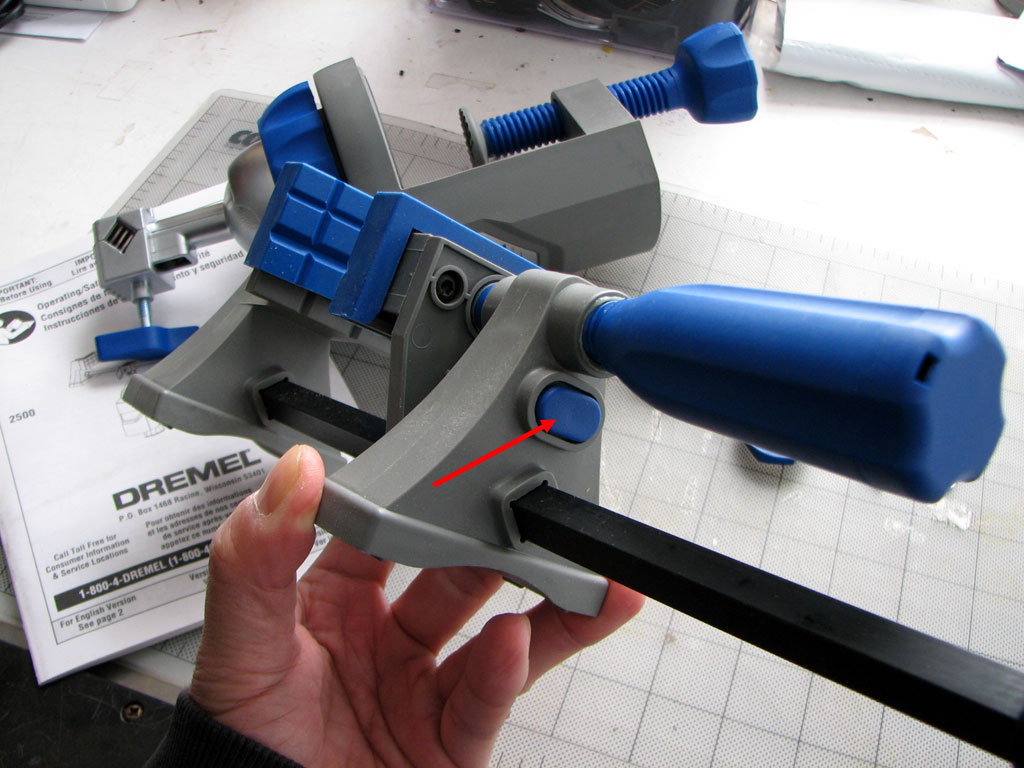
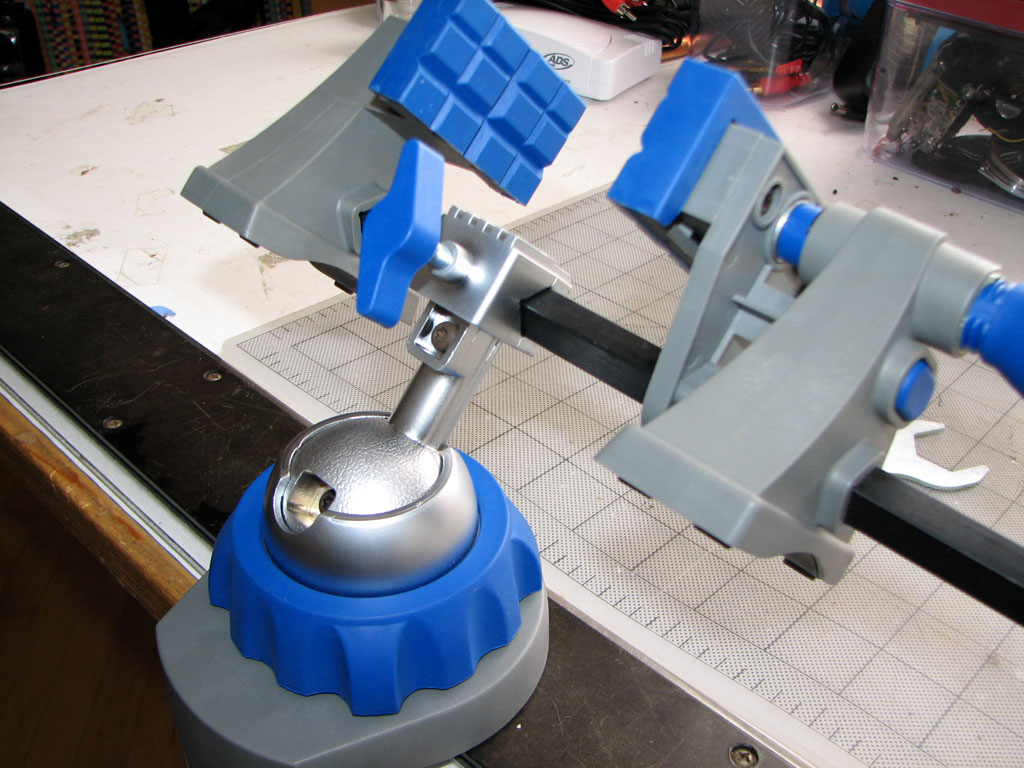
The folks at Dremel Tools have added a very handy accessory to their line with the MultiVise. This MultiVise is perfect for working with piece where a "third hand" would be handy.
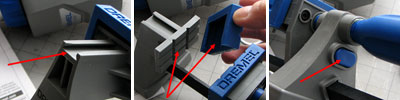
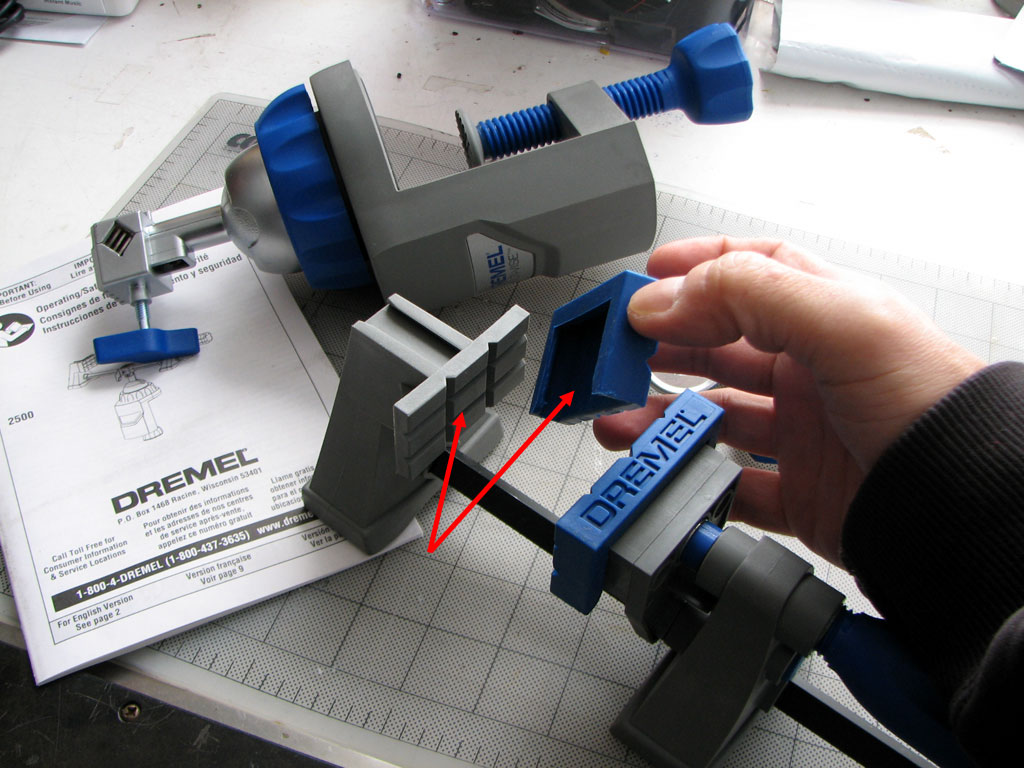
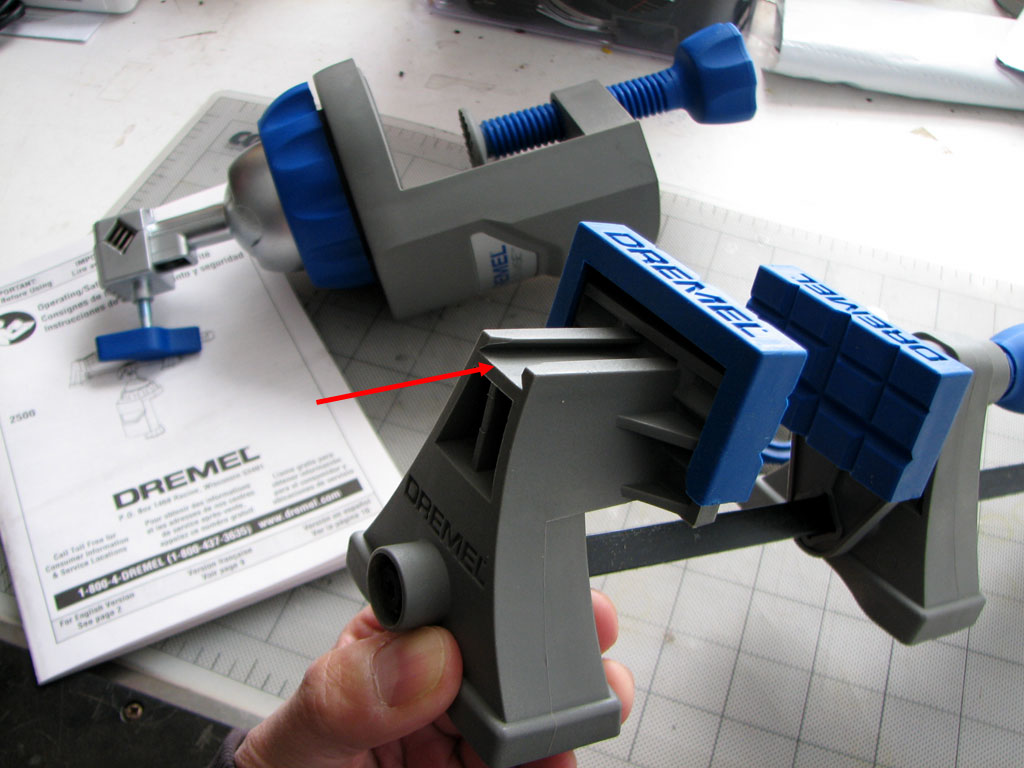
The ball joint and the clamp assembly are made with heavy-duty molded plastic and casted metal alloy. This very sturdy and well constructed vise is designed for hobby use and not for a production environment. The jaws slide to fit with the push of a button and the screw handle twists to tighten the grip on the work piece. The rubber pads are removable. We can see that it would not be difficult to make other slide-on grippers for this MultiVise.
The "dovetail" channel allows for various accessories such as a light, magnifier, and future attachments.
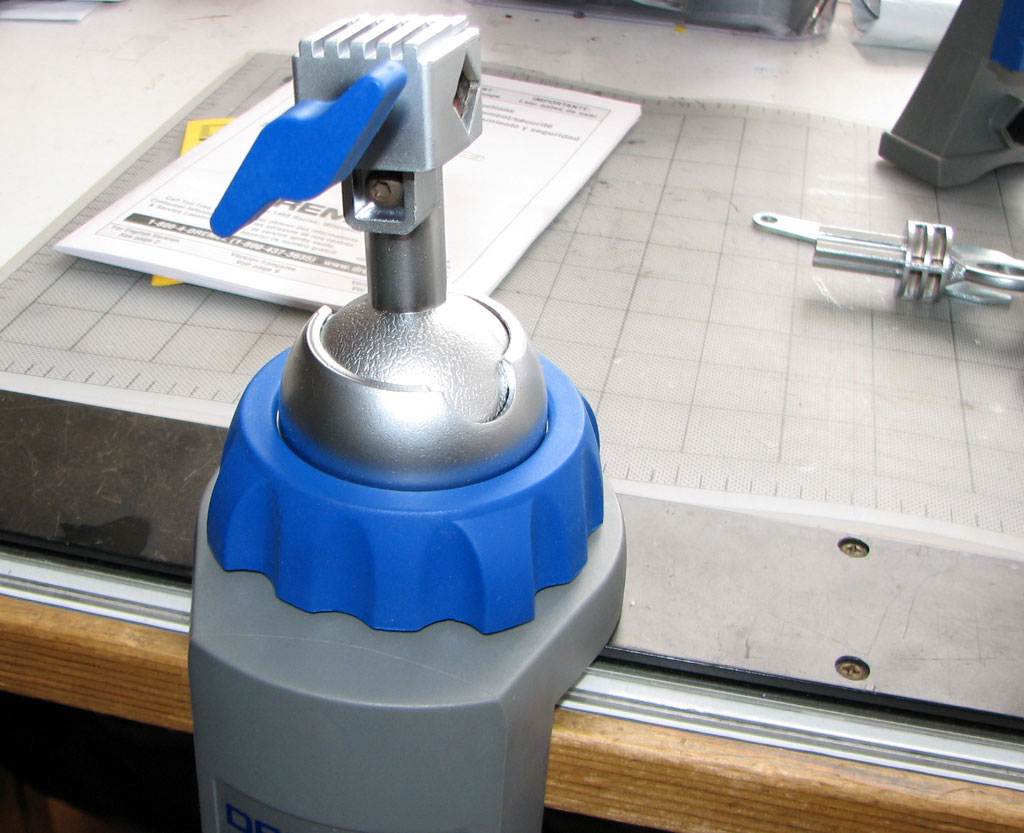
The swivel base assembly will grip onto a surface as thick as 2 1/2". Rotation and tilt angle adjustments may be done with a simple twist of the base nut. A notch in the socket will keep the stem from moving when at maximum side tilt.
Here are a few different viewes of the MultiVise assembled and in various tilt angles. We found the positions easy to set and quite solidly held. In our next look, we'll show how the MultiVise may be used as a Dremel tool holder. - Wan Chi Lau
|
||||
March 10,2007 |
||||
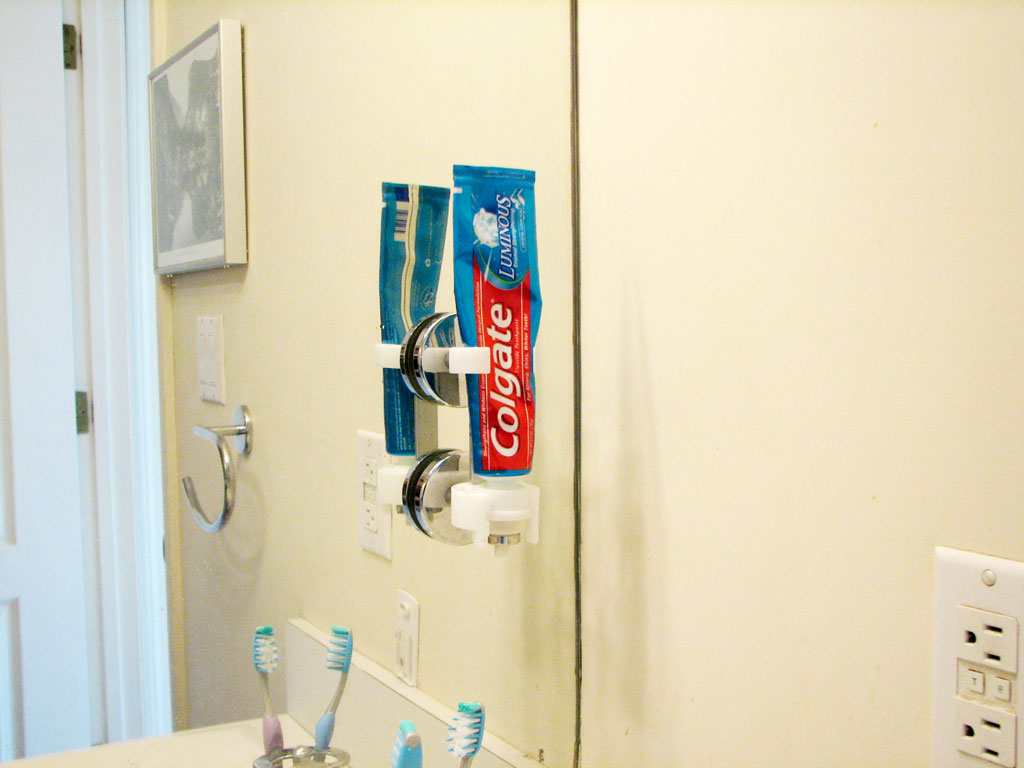
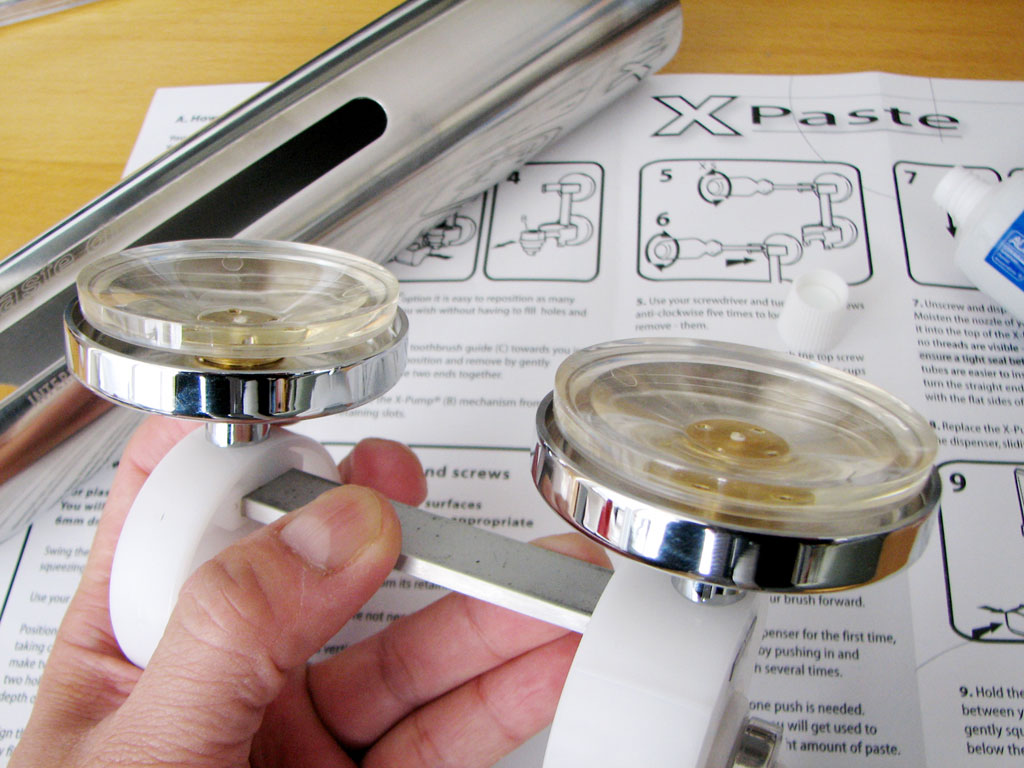
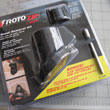
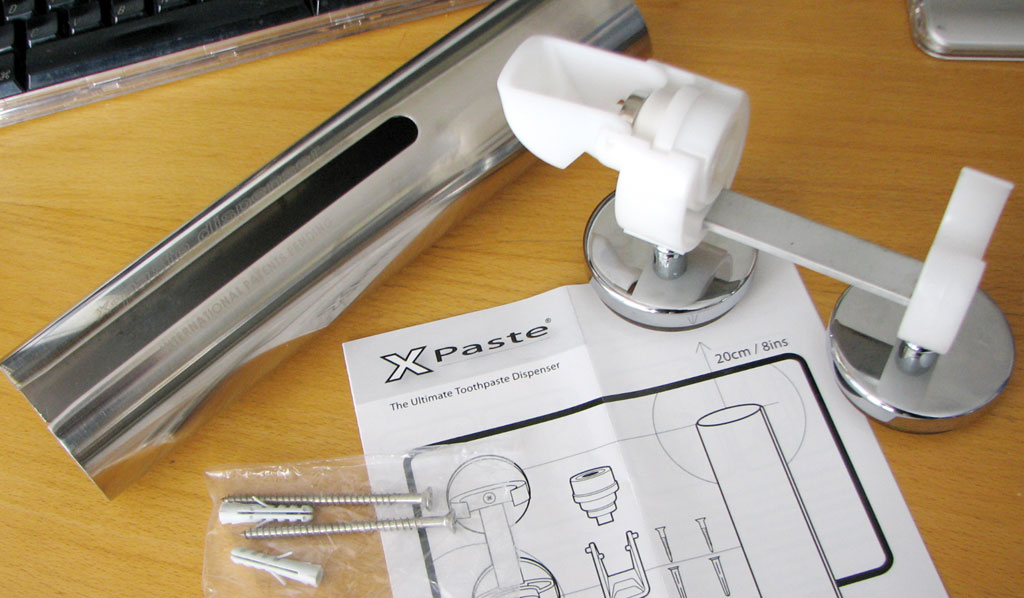
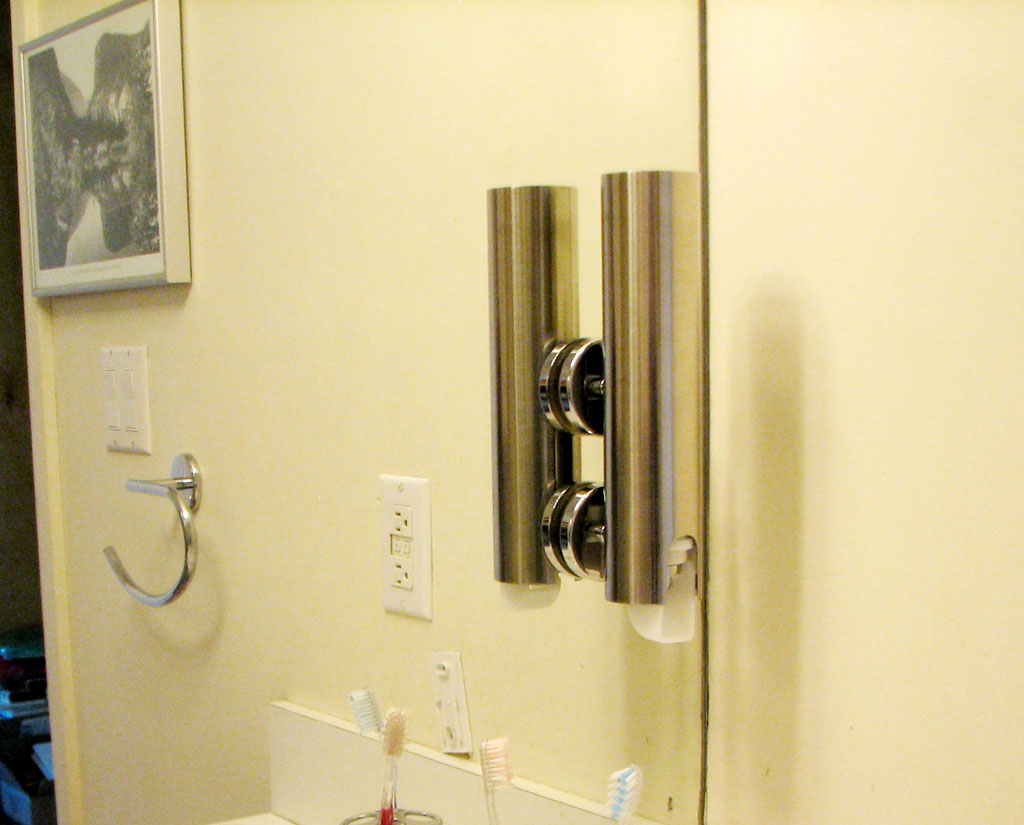
Squeezing toothpaste from the tube is now a thing of the past... if you have the XPaste dispenser. When some of our readers told about this device, we were a little skeptical as to its usefulness. However, enough of you out there asked us about it that we decided to check it out.
The XPaste dispenser consists of a stainless steel slide cover, a toothpaste holder, an integrated pump, and a suction mount. The dispenser is not powered by any electrical motor nor does it require batteries to operate. It is entirely mechanical.
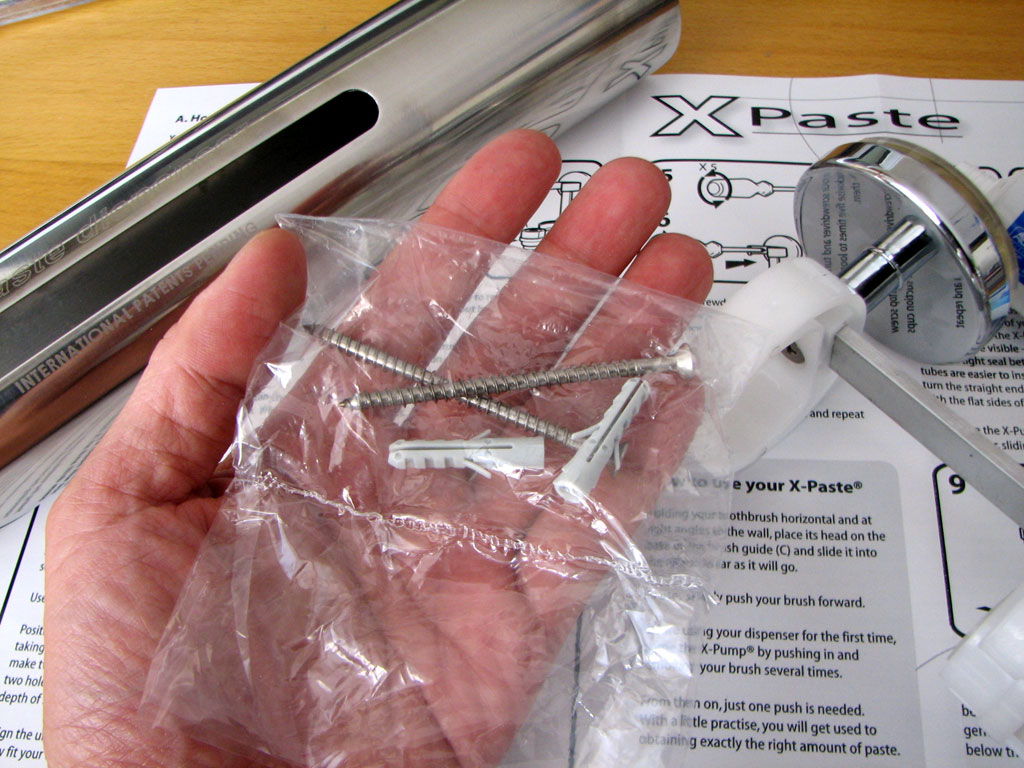
The XPaste dispenser may be mounted temporarily using the suction cups or permanently using screws. We opted for the suction cup method since we have a large mirror in our rest room.
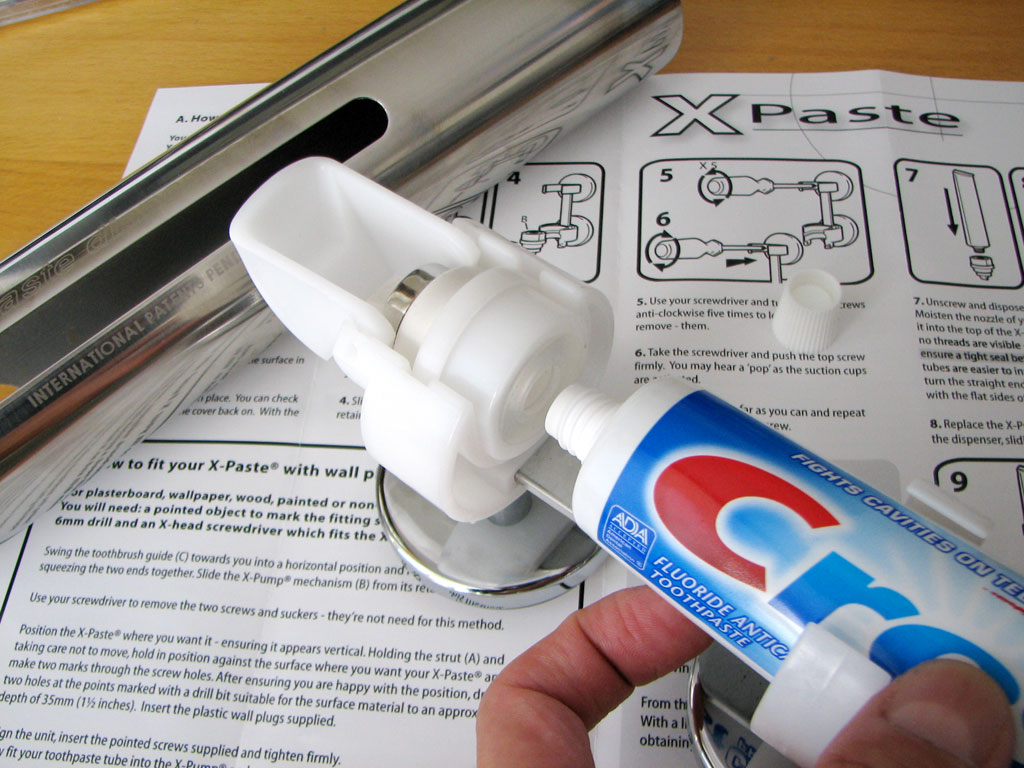
The dispenser cap can be removed and placed on the tube, but we found it was just as easy to push the tube into the cap and twist. We are eager to see if this device will indeed get all of the toothpaste out of the tube. BTW, after playing with it for a while, we still have no idea how it work... feel free to clue us in if you do :-)
Mounting the dispenser on the mirror was very easy. The suction cups are very high quality and grabbed on without any problem. The instruction did say the cups will not work on painted surfaces or across grout lines.
Now that we have had a chance to check the XPaste over, we are no longer skeptics. The XPaste dispenser does exactly what it claims... it dispenses exactly the desired amount of toothpaste with a push of the lever. It is true not everyone "needs" the XPaste dispenser, but we think everyone will LOVE it once they "have" it! - Wan Chi Lau
|
||||
March 6,2007(TechTuesday) |
||||
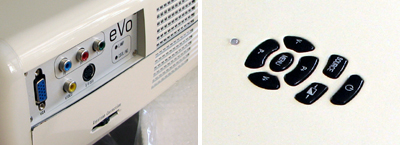
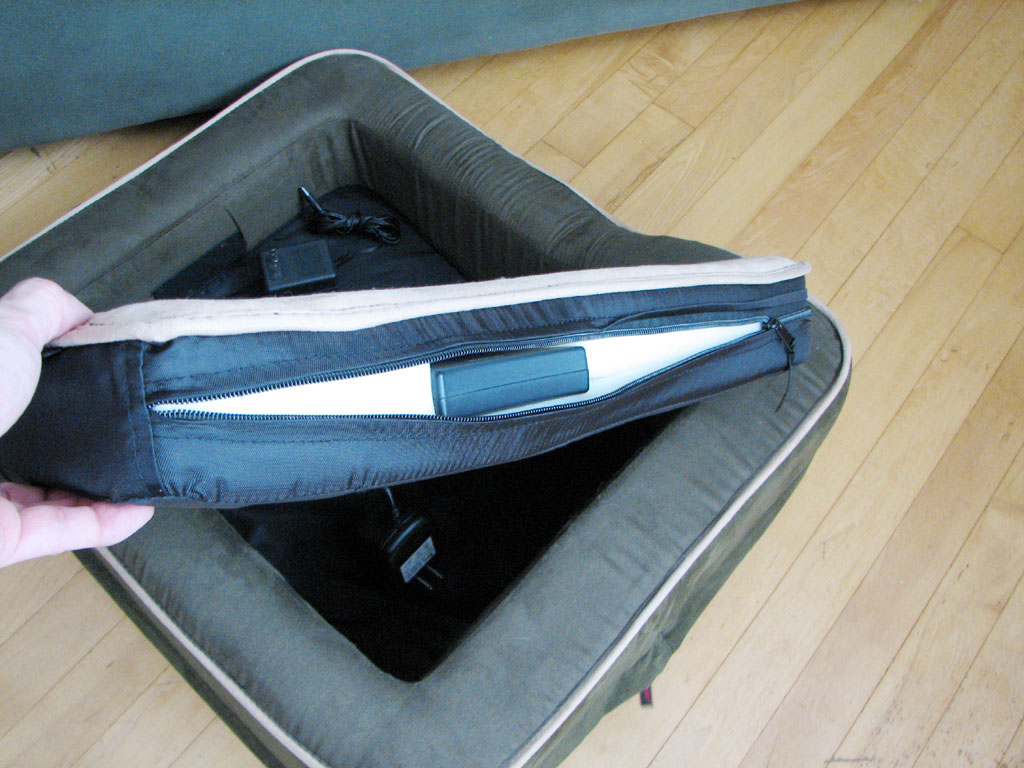
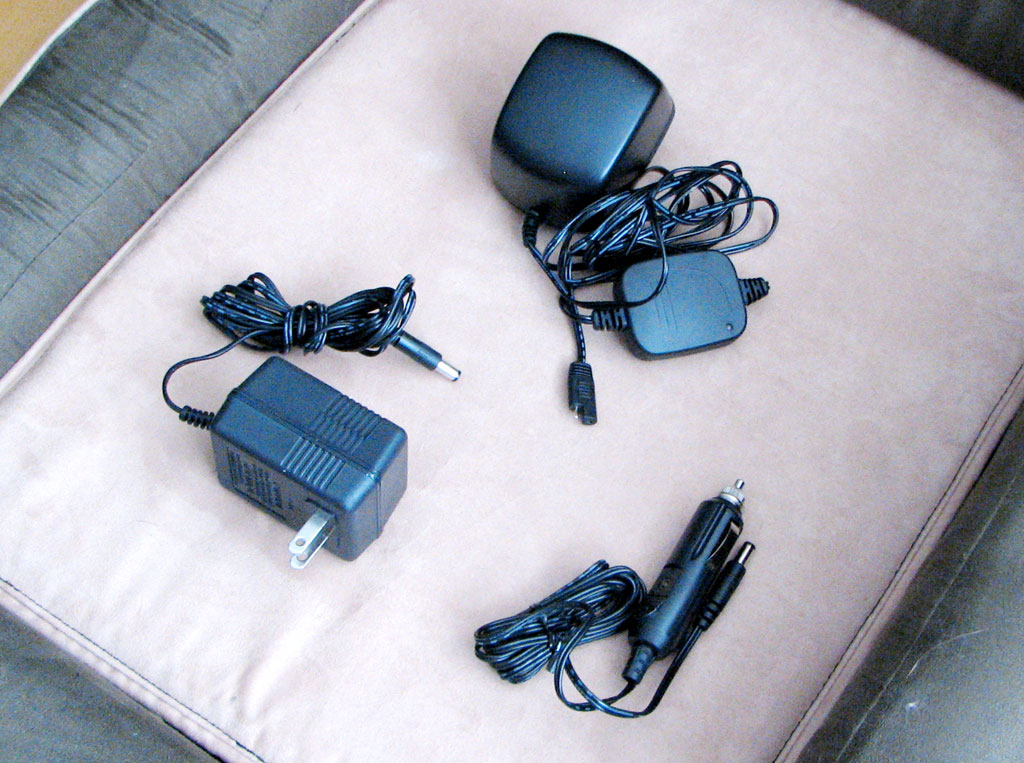
There is a constant flow of gear vying for space in our review schedule. Whenever we all take a few days off, things tend to get backed up quickly. This SpringBreak was no exception. We spent the morning sorting through the items and shooting a few quick shots to give you an idea of what we'll be covering this month.
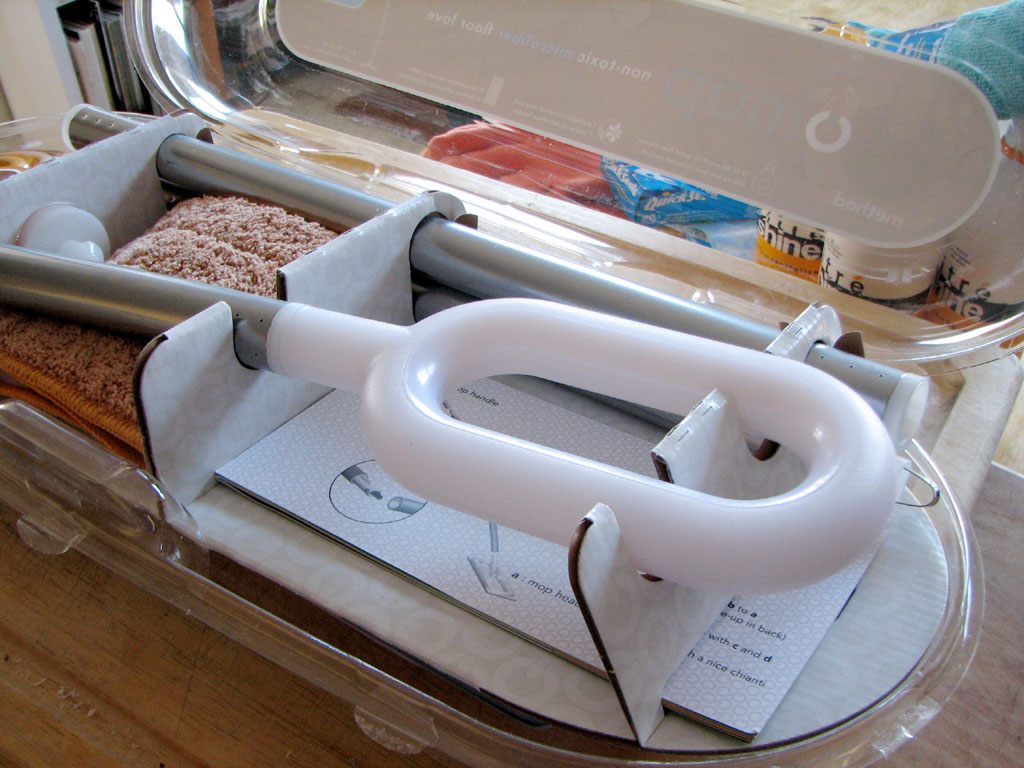
It is almost time to get ready for Spring Cleaning. The Method people have something new called the oMop. It can get the floors so clean that you'll literally be able to eat off it.
Don't know how many days ago that jar of sauce has been in the refrigerator? Now there is a timer which will track it for you. It is the DaysAgo counter. It can count up to 99 days...after which you can just send the jar to the folks over at FearFactor. - Wan Chi Lau
|
||||
March 5,2007 |
||||
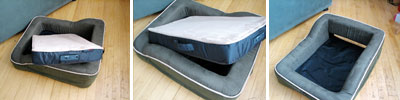
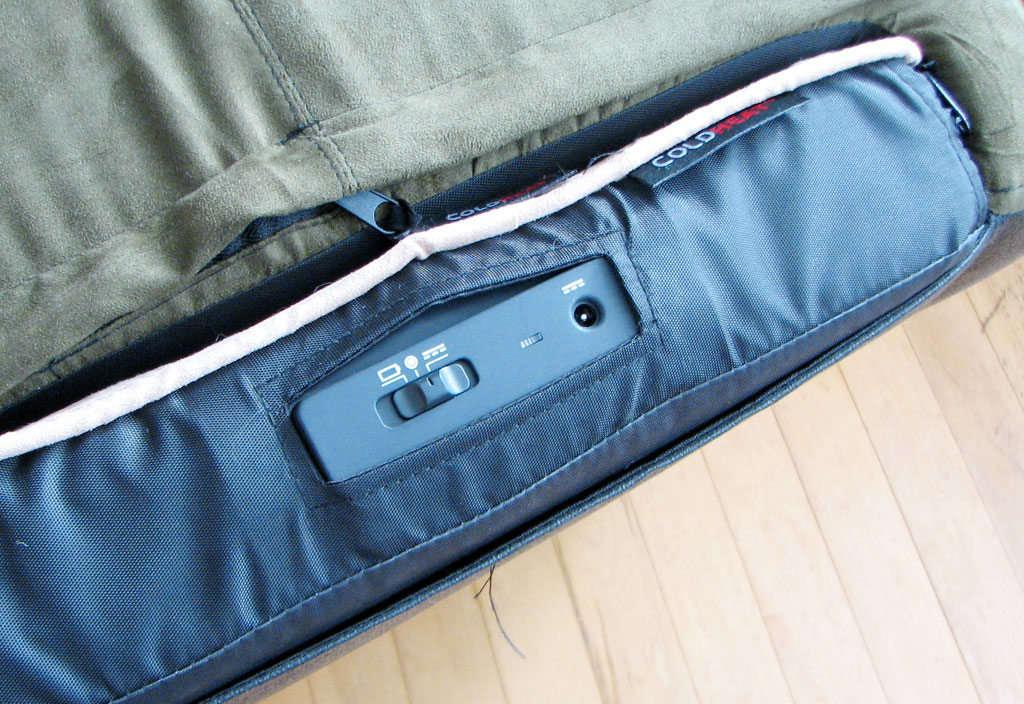
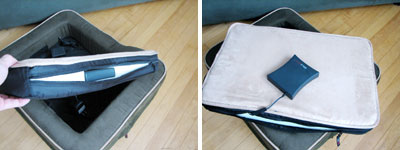
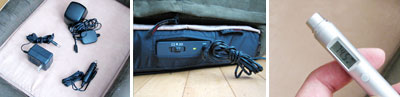
We have an iSight pointed at the ColdHeat cat bed. They love to hangout there because it is heated. Once in a while we would fire up iChat and see what they are up to. The interns are very attentive when we call in... that "look" is them saying "ah, it wasn't me :-)"
Buffy and Eliot have been running the office while we've been on SpringBreak. We don't have enough cameras to cover everywhere yet, so it'll be interesting to see the state of the office upon our return. - Wan Chi Lau
|
||||
|
||||
|


Featured Review*
| ||
| RainyDayBuzz* | ||
|
|
||
| GET GEAR* | ||
|
||


